Get More Natural Results with Frequency Separation
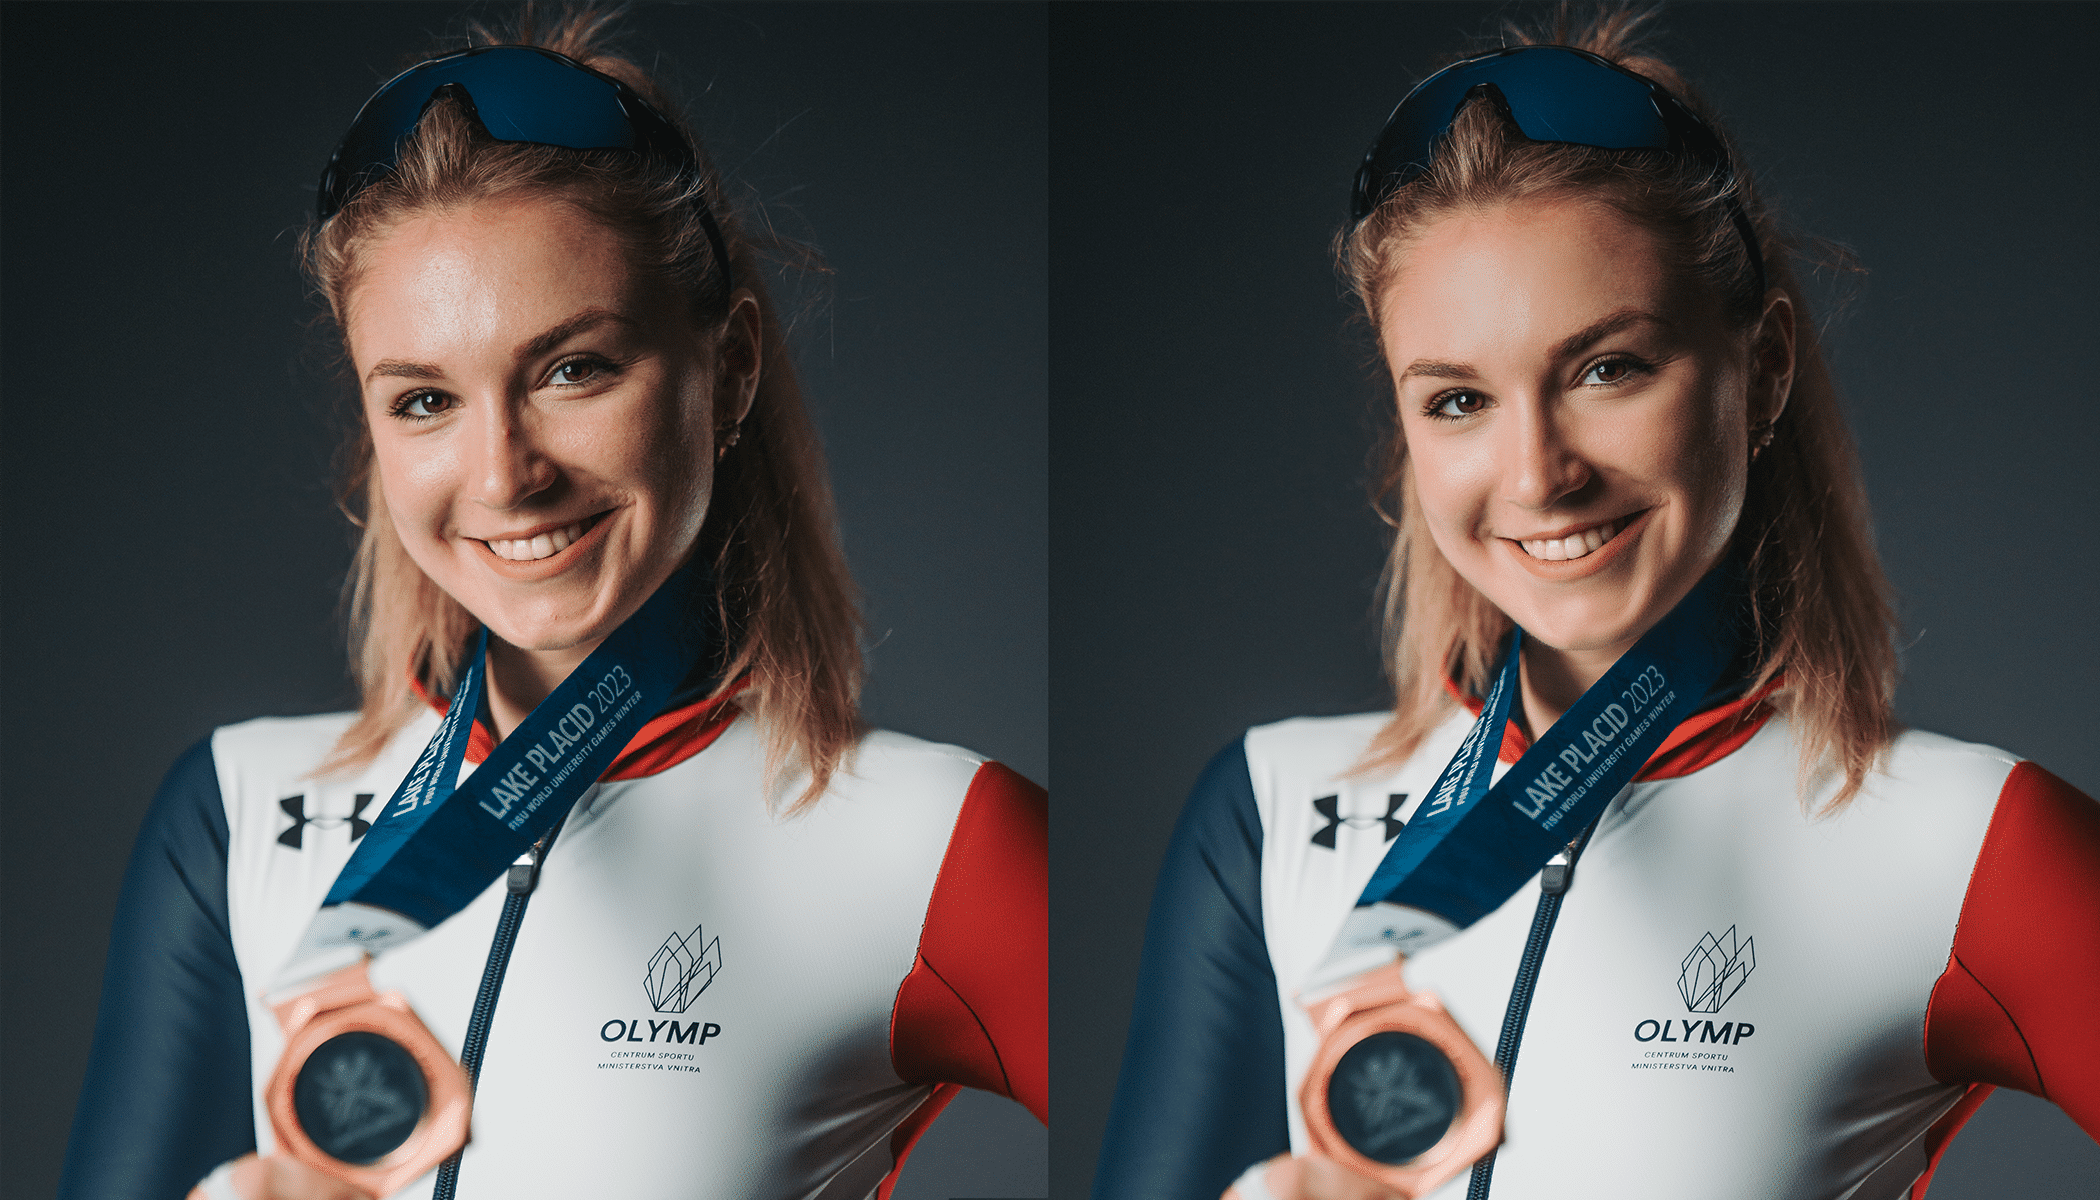
Retouching is no longer just removing skin blemishes. With increasingly advanced tools that use frequency separation, you can enhance portraits more easily and effectively than ever before. You can adjust skin tones without losing texture or diminish wrinkles without altering skin color.
You can find tools that utilize frequency separation in the Develop module of Zoner Photo Studio X.
- Smoothing Brush (U) blurs color in a given spot
- Structure Cloning modifies texture without affecting color
The concept of frequency separation is to separate tonality and color information (low frequencies) from details and texture (high frequencies) into two separate imaginary layers. This makes retouching more natural and less destructive to the photo.
More natural retouching with structure transfer
The complexion usually contains several shades of color, meaning that cloning one section of skin to another doesn’t look good. That’s why the Healing Brush (J) offers the option of Structure Cloning. This especially comes in handy when removing wrinkles and other skin imperfections.
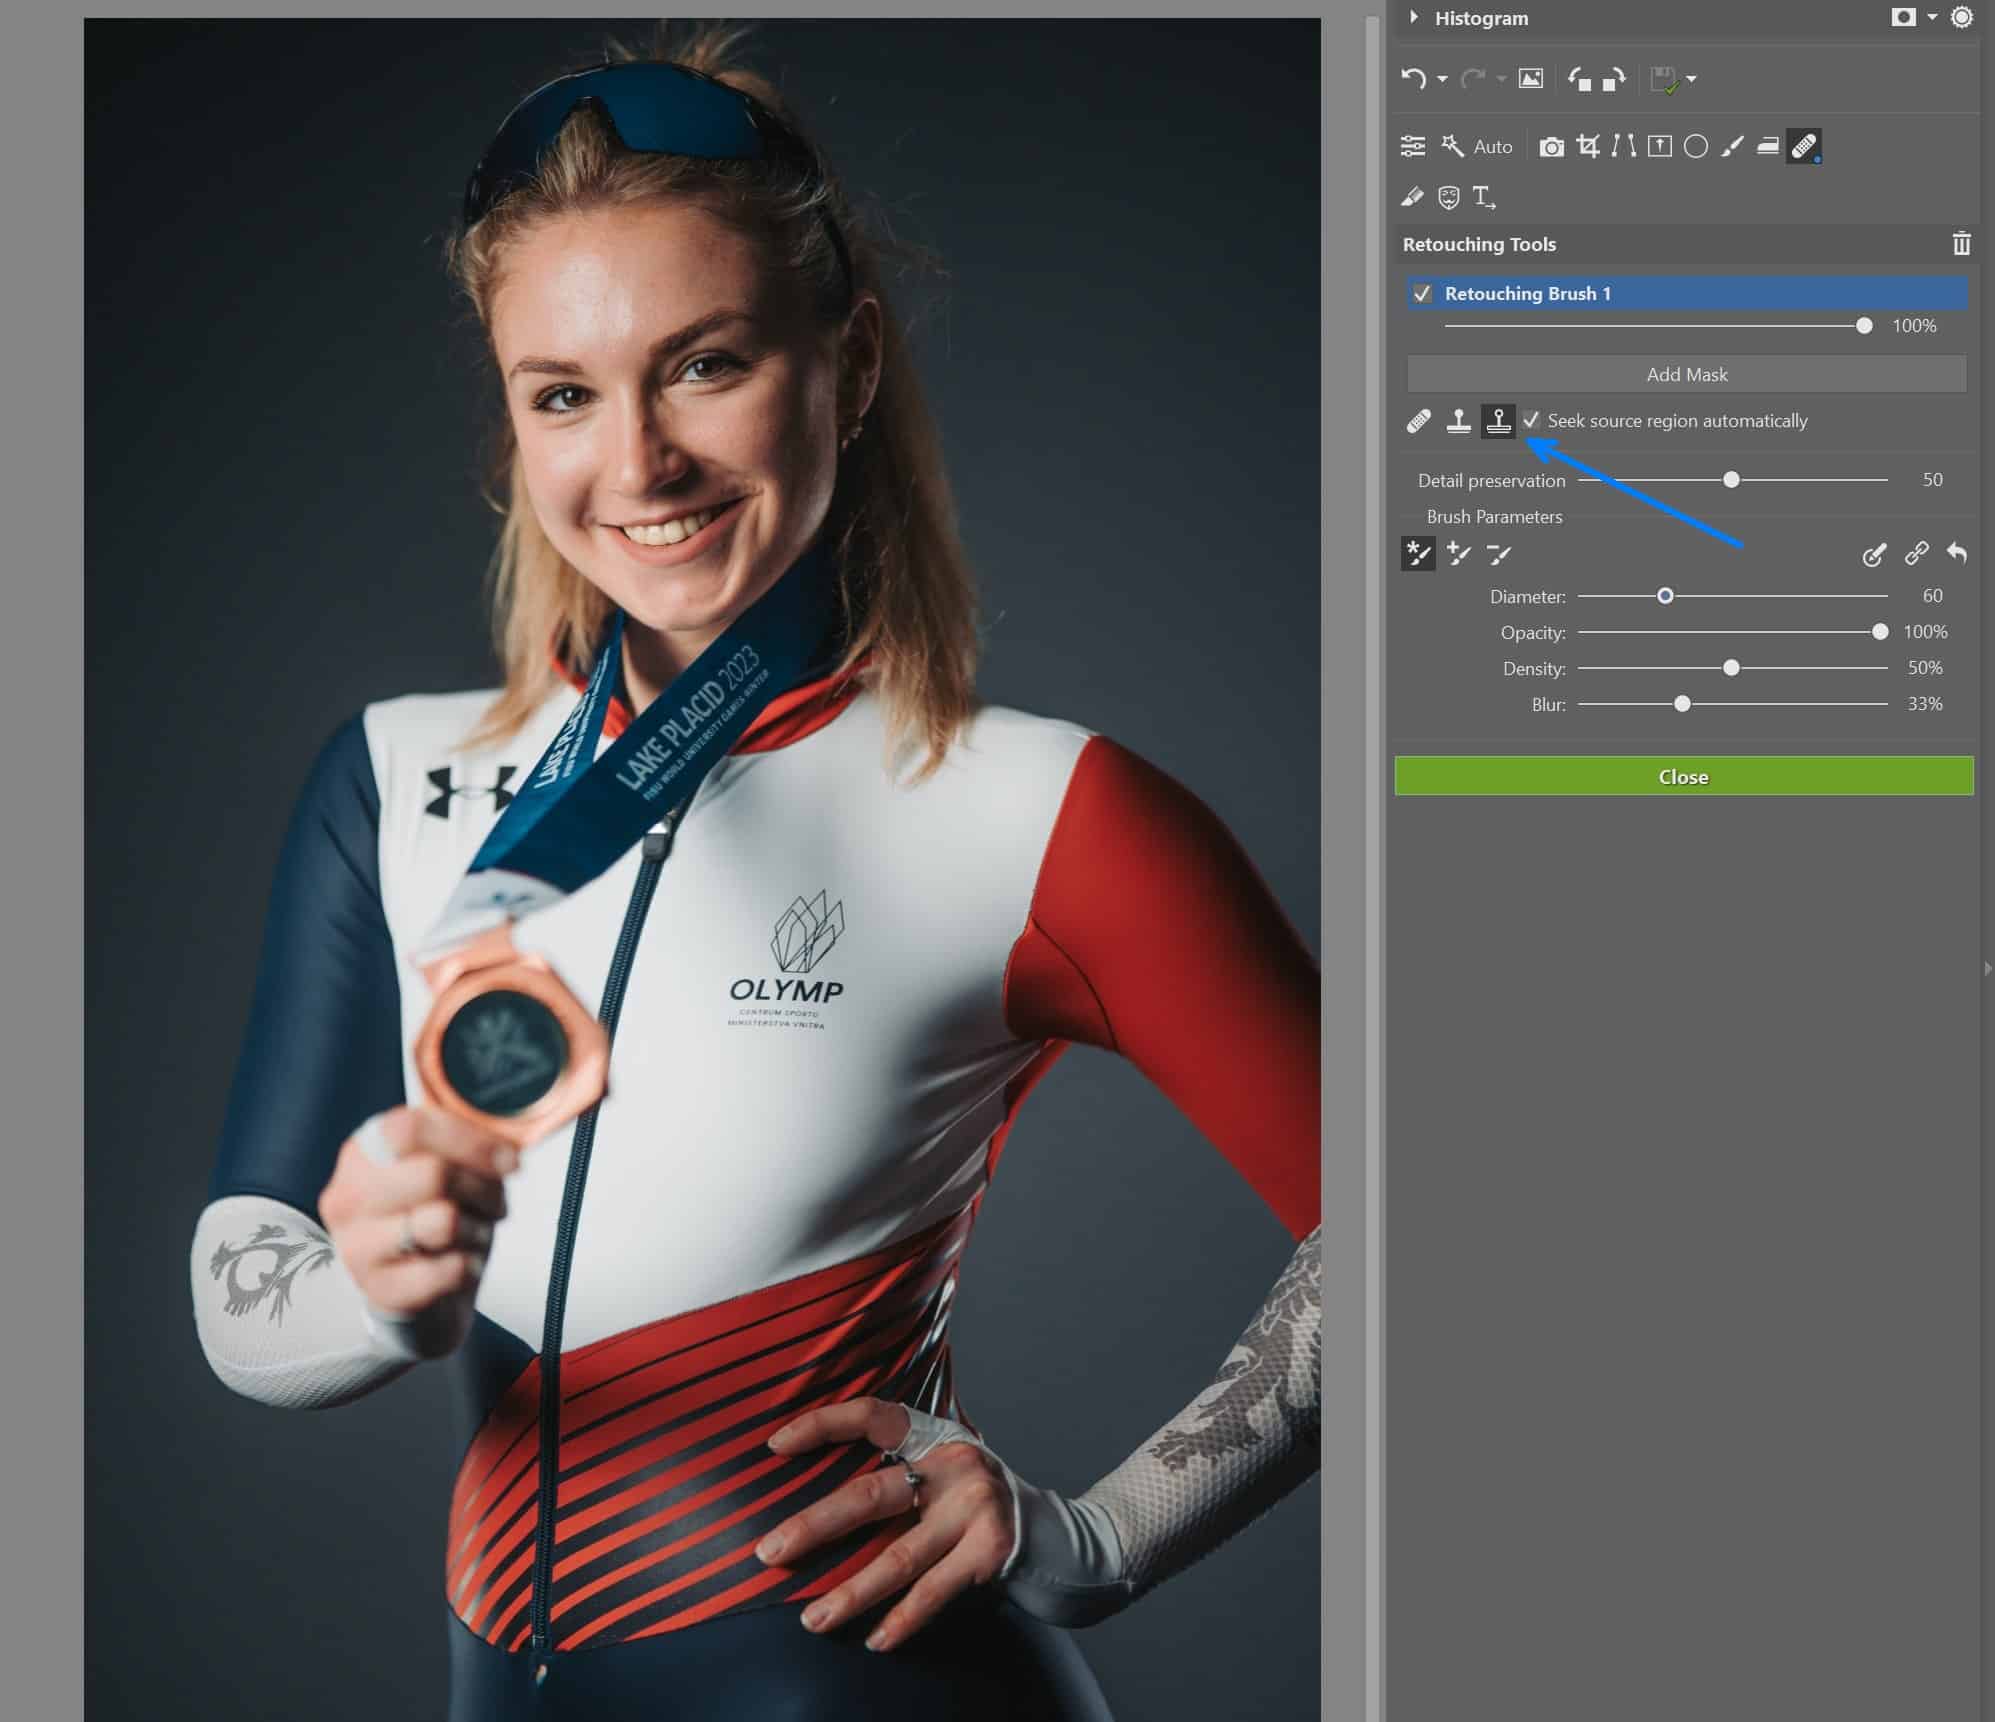
This function transfers only the skin structure from the source location. The skin tone remains the same as it was before cloning. For this reason, the adjustments look much more natural.
Structure Cloning works the same way as the Healing Brush. Hold Ctrl and click to select the source location which selects the structure. Or, you can click the image to select the source location automatically.
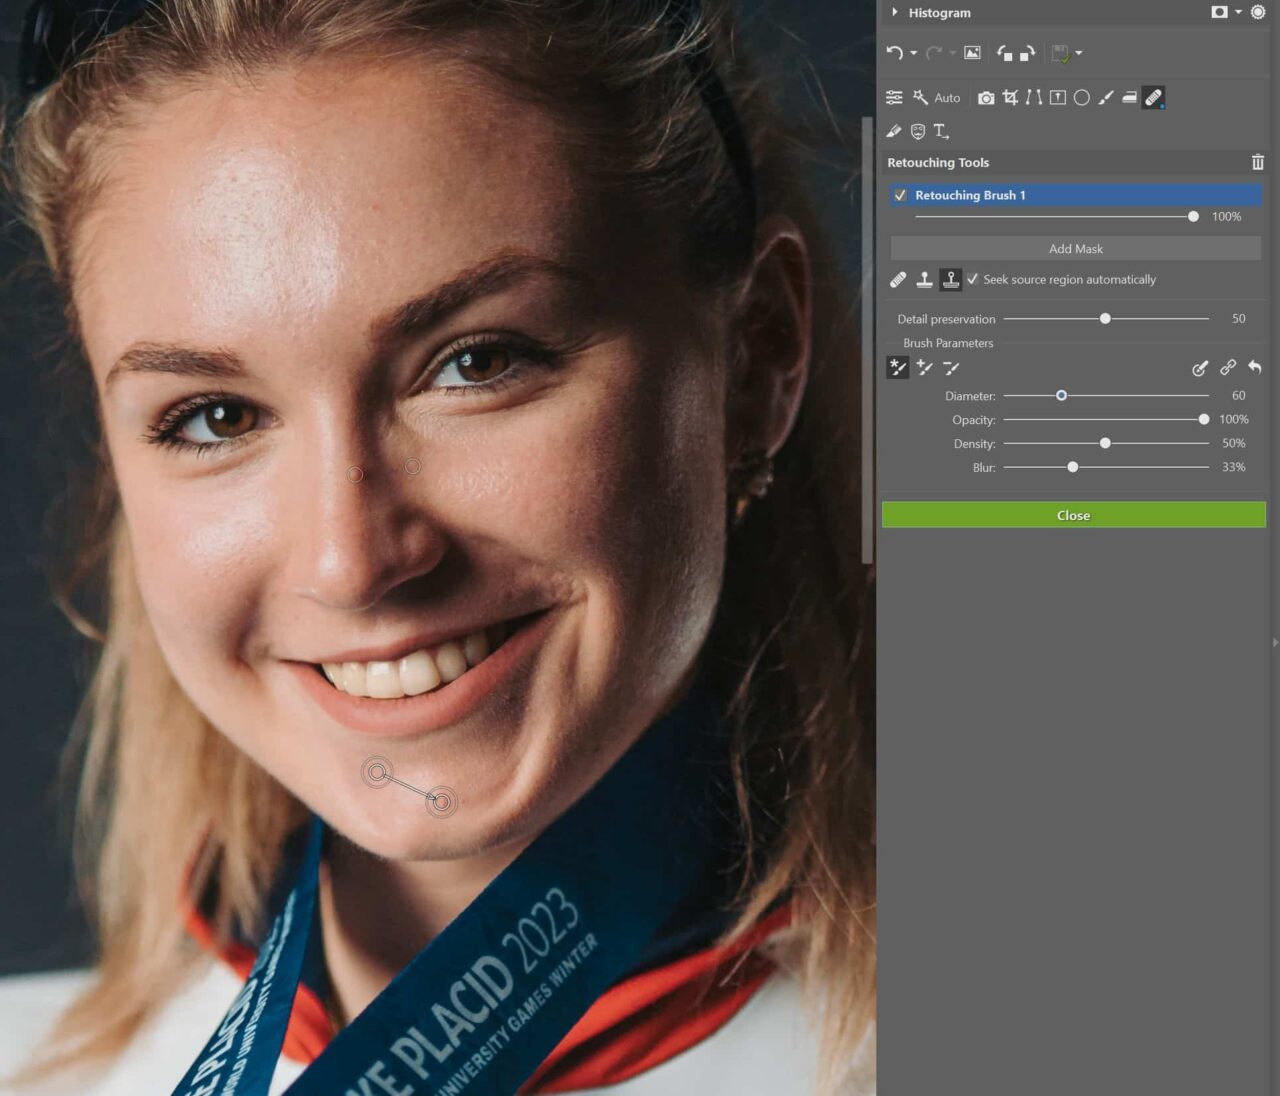
Then, click or drag to paint the area you want to adjust. If you find the source location doesn’t work, drag it to a different part of the image.
In addition to blemishes, you can also smooth out other objects, like wrinkled clothing.
Enhance retouching with skin smoothing
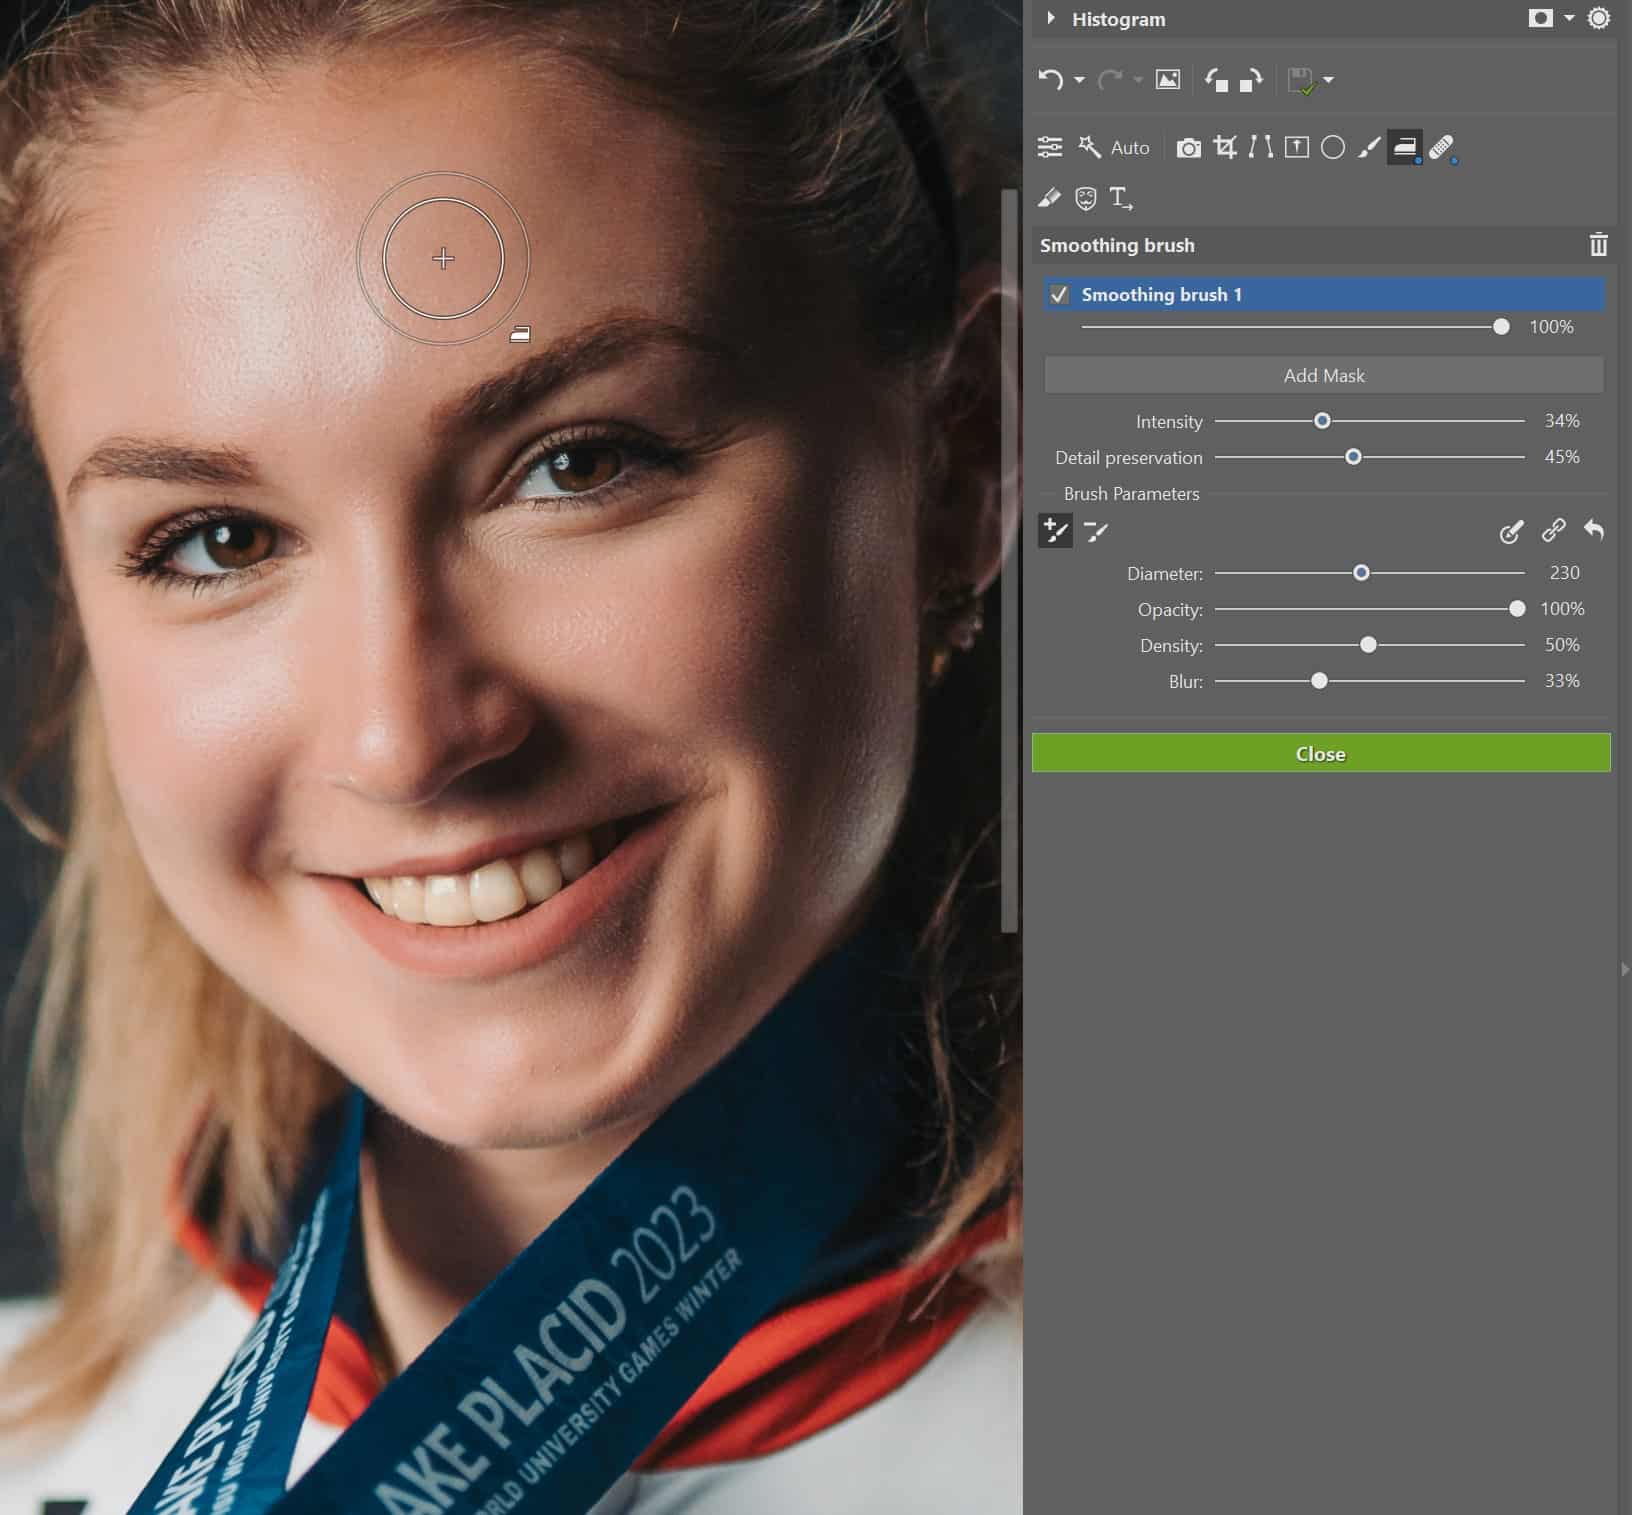
After removing larger blemishes, it’s a good idea to smooth out the skin. You can do this using Blur, but you’ll lose texture, and your model may end up looking like a wax figure. That’s why you should use the Smoothing Brush for a more natural smoothing effect.
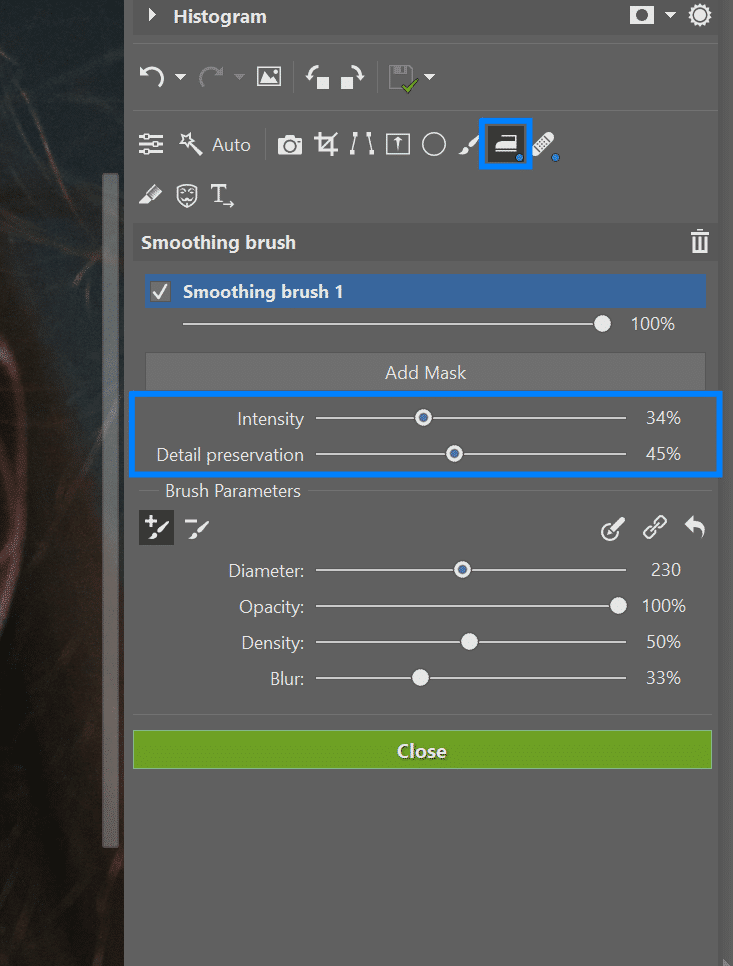
Use the Smoothing Brush to paint over the entire area of skin that you want to smooth out.
- Intensity determines how much you smooth the skin
- Detail preservation tells you how much of the original texture is visible
Masks for more advanced retouching
We don’t recommend that you do all the retouching at once, but rather split it into at least two masks.
- For the first mask, do overall softening of the entire complexion. Leave the sliders at lower values.
- Create the second mask by clicking Add Mask and use it to edit areas that need more localized adjustments, such as wrinkles around the eyes.
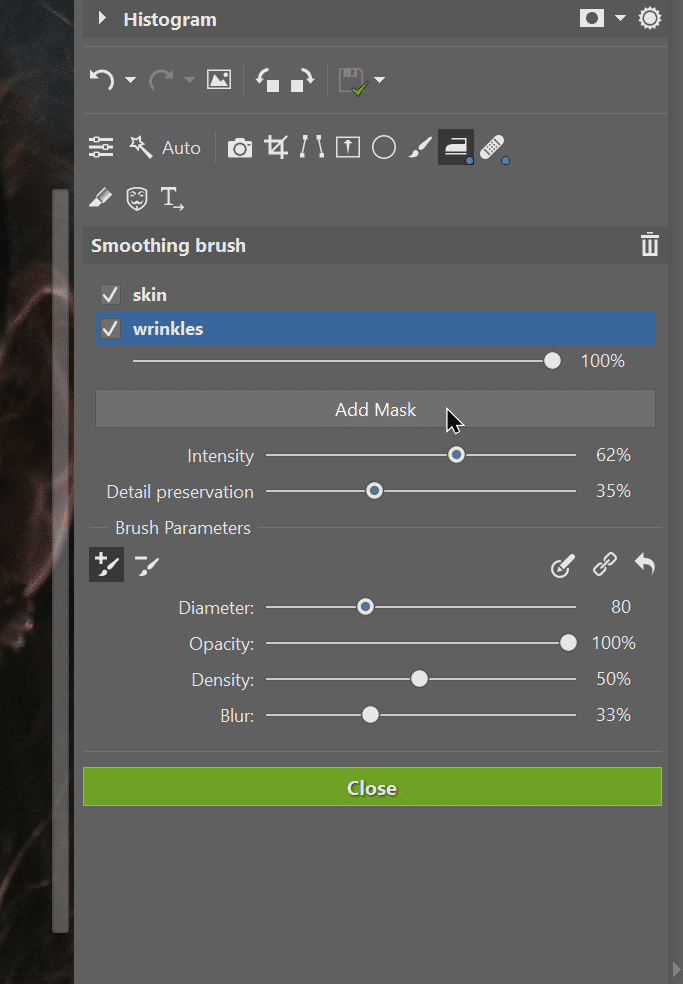

The more close-up the face is in the photo, the more you have to try to make sure it looks smooth while remaining as natural as possible at the same time. For full-body photos, you can get away with more general retouching, often using only one mask.
DO retouch, but DON’T overdo it
Everyone wants to look good in portraits, but there is a point where you need to draw the line. If your skin looks smoother than a mannequin in a store window, something is wrong. For a photo to be believable, the skin needs to have texture and not be just a perfectly blurred blob.
This is why it’s important to use the right tools and not overdo the intensity. Fortunately, functions based on frequency separation make this much easier. Try retouching your own photos. Download Zoner Photo Studio X free for 7 days to retouch your photos and keep them as natural-looking as possible.
There are no comments yet.