Unique Photo Editing with Solarization—The Sabattier Effect
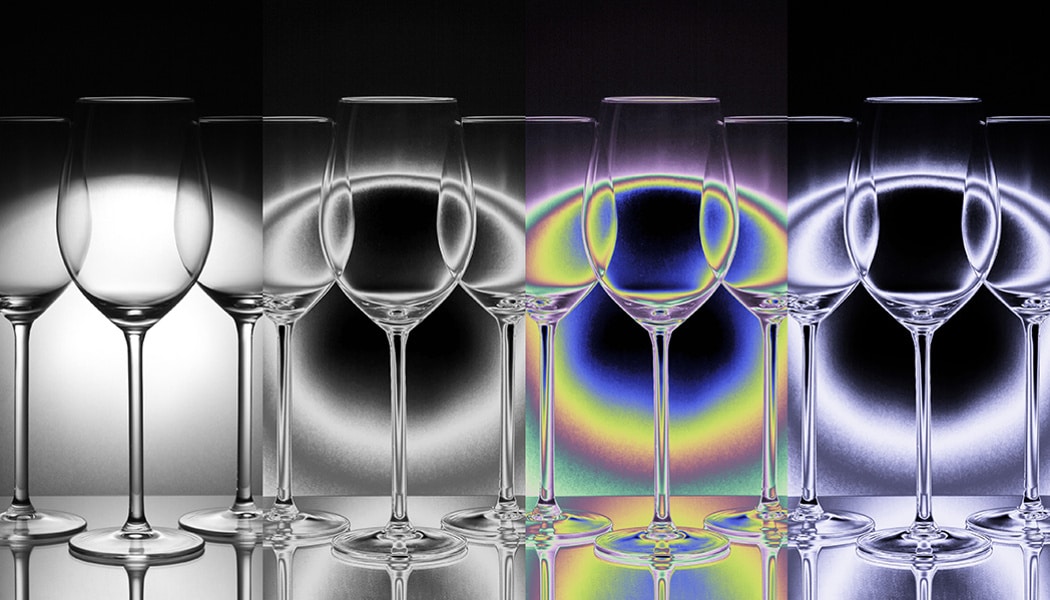
Photo editing in Zoner Studio is about more than just enhancing the details of your photo. It’s also a great opportunity to let your creativity shine. Give your New Year’s photos some pizzazz using the Sabattier Effect. This photo editing technique, also known as solarization, dates back to the era of film photography. It is one of the oldest and most unique photography effects.
Thanks to photo editing software, you now have complete control over what your photos can look like. You can add an entirely new dimension to this effect. Experiment with contrast and color to create unique memories for the end of the year.
I’ll demonstrate these adjustments in the Editor module of Zoner Studio. We’ll work with Curves (Shift+C) and Enhance Colors (Ctrl+1).
The Sabattier Effect
In film photography, the classic Sabattier Effect is accomplished with additional lighting during film development. The image is then reversed in tone—the lighter areas become darker and vice versa. A white band appears around the areas of high contrast.
The solarization effect can be replicated using the Tone Curve. The concept of the effect itself, tone reversal or the Sabattier Effect, requires desaturated (black and white) photography.
Basic curve settings for solarization
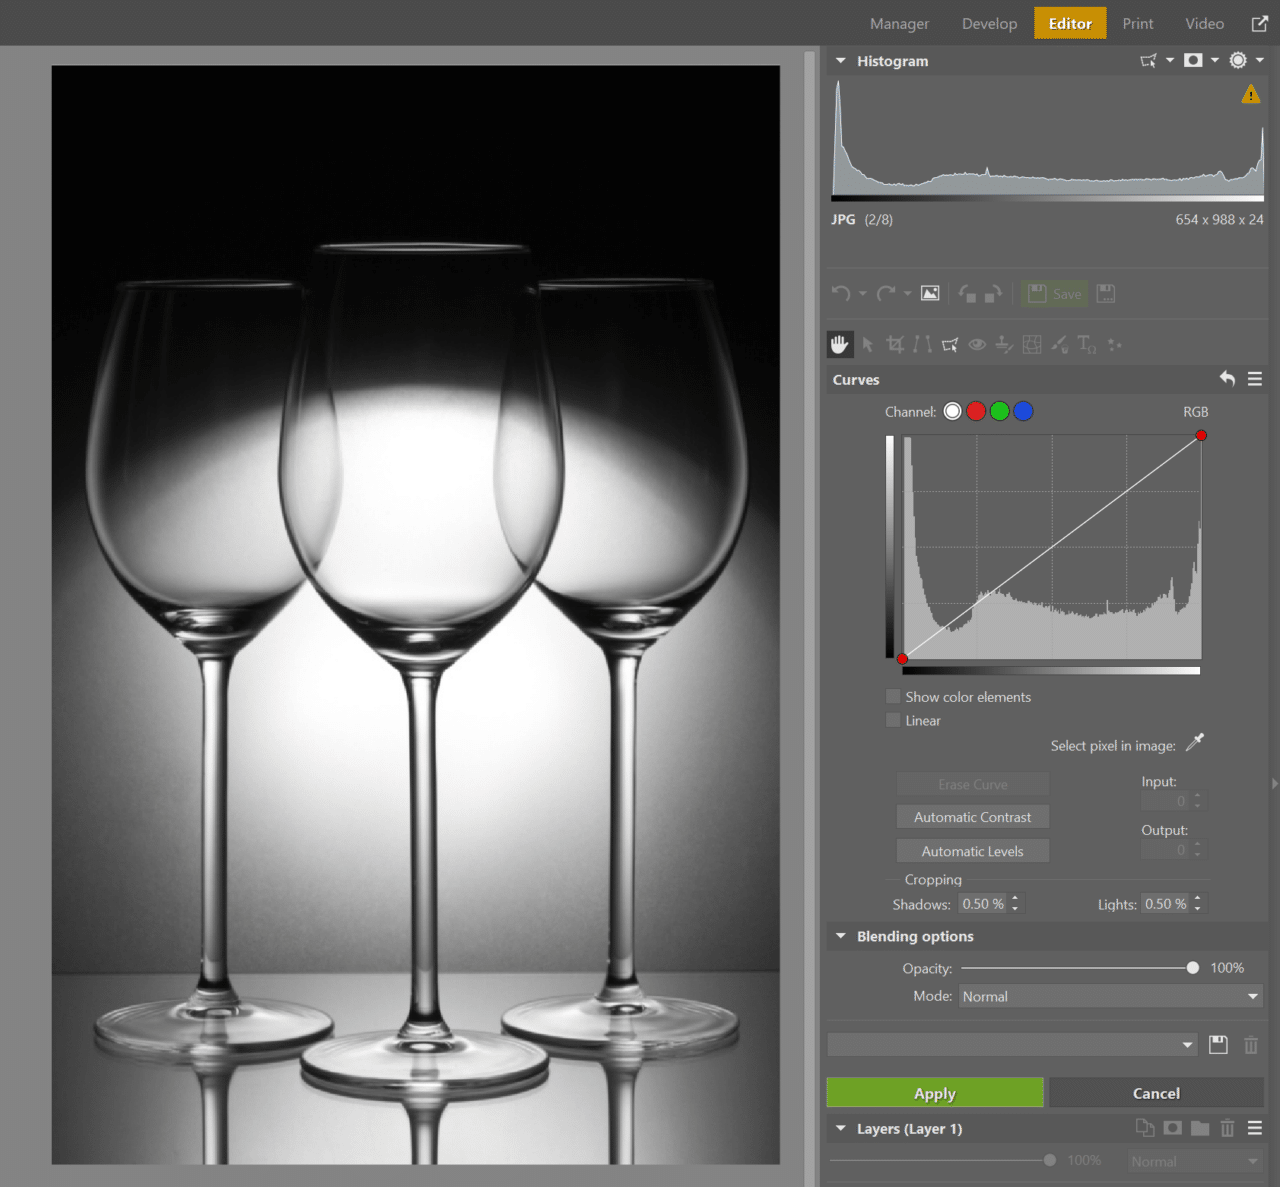
We’ll demonstrate the solarization effect on this black and white photo of wine glasses. You can use the same concept on more complex motifs.
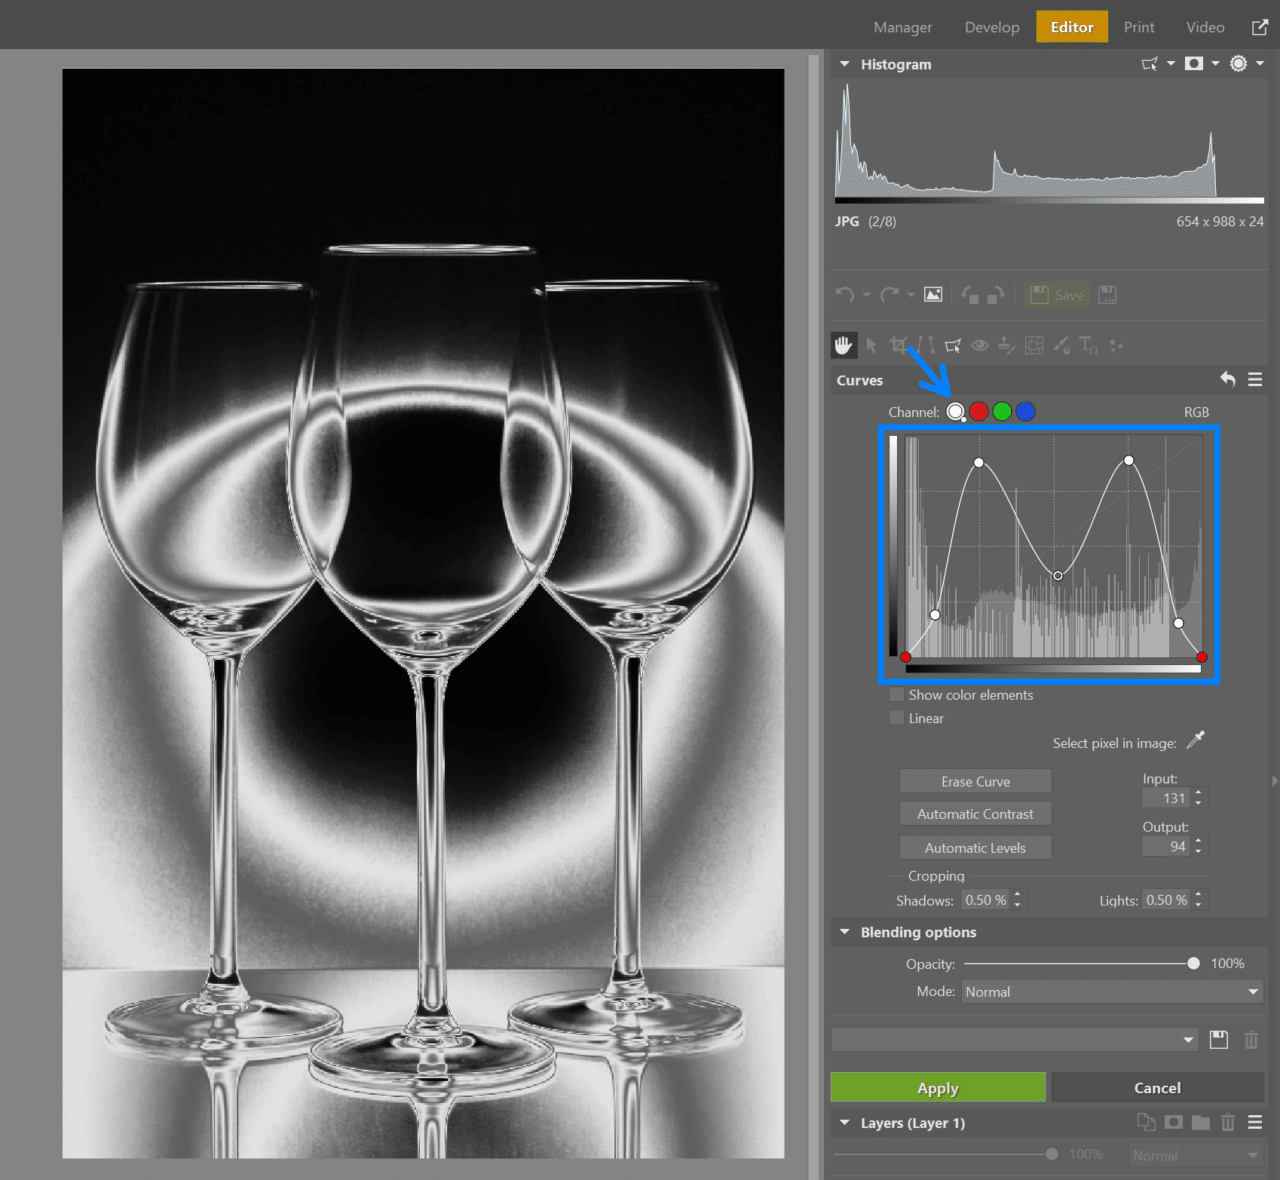
Open the photo in the Editor module and click Adjust->Curves (Shift+C). Choose the RGB channel (labeled with a white dot) and add five new points to the tone curve. Adjust their position according to the illustration image below.

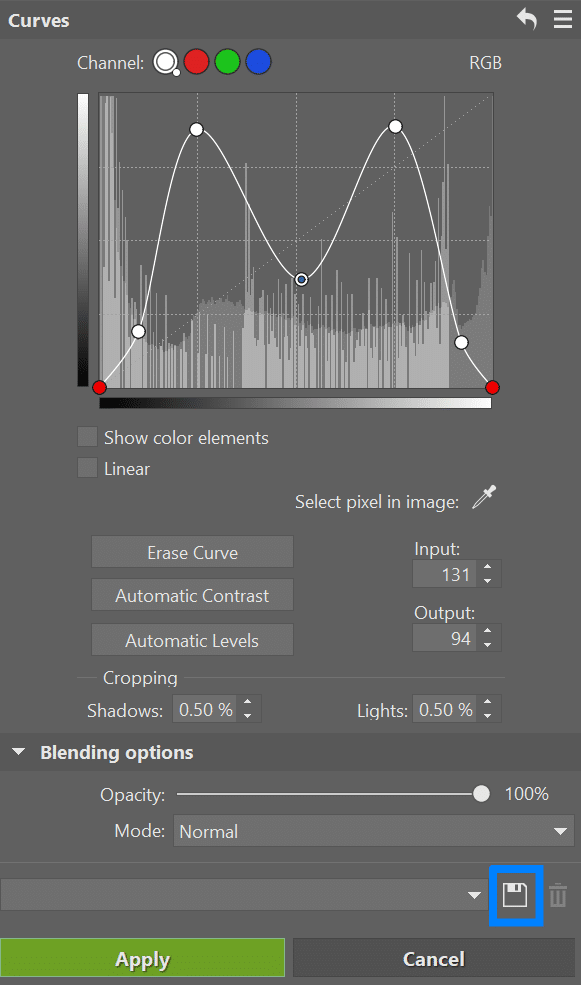
You can save the curve settings for the solarization effect as a preset.
To save, click Save Preset (disk icon) and name the curve Solarization. When editing other photos, you can then select it without needing to manually set the points on the curve.
Color toning black and white photos using curves
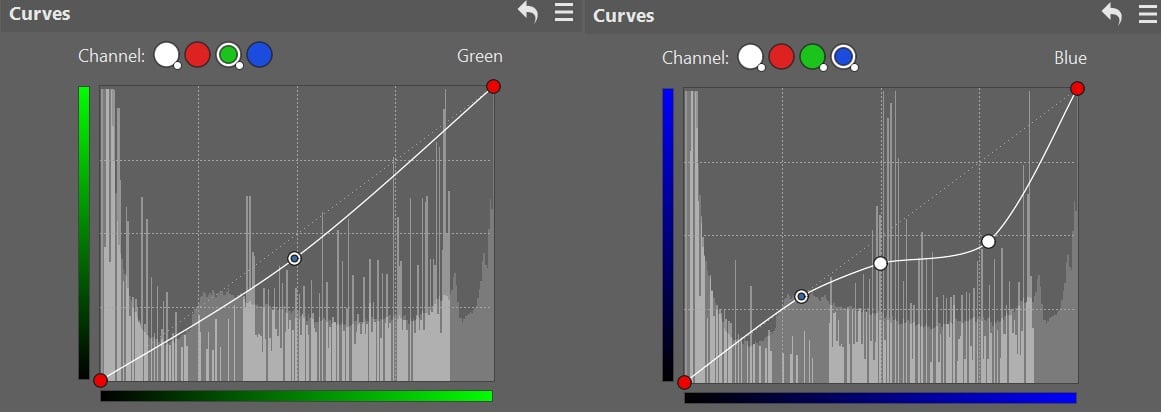
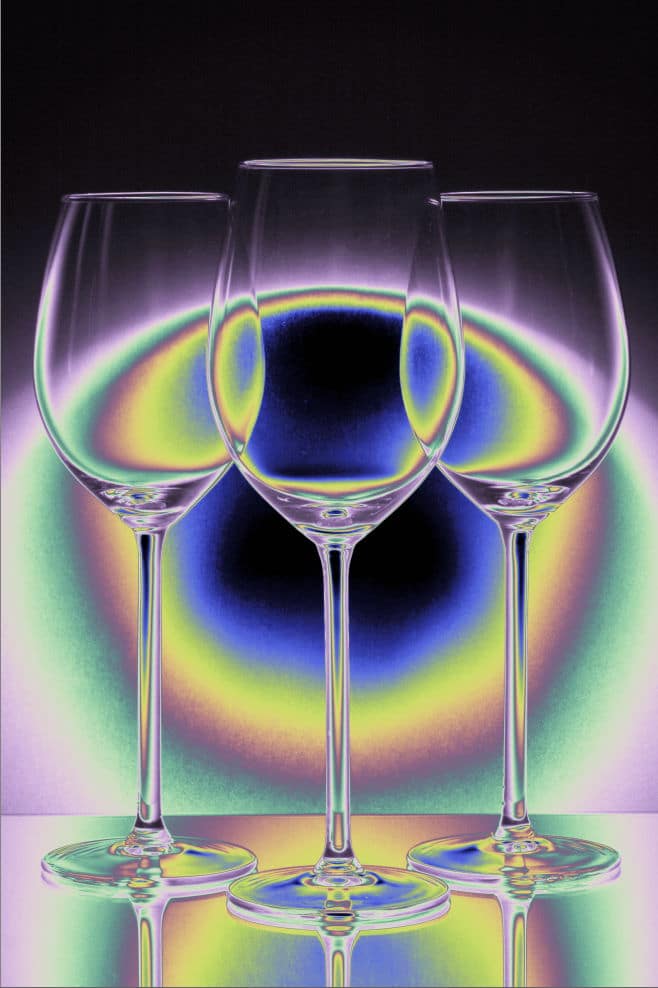
Even when editing black and white images, you can add color to the photos. One option is to work with the color channels in the curves. After you perform basic solarization by adjusting the composite channel (RGB), you can add color to the photo by adjusting the curves for each color channel.
In this demonstration photo, we made adjustments to the green and blue channels to achieve the desired effect.
Add color to images with the solarization effect using curves color channels.
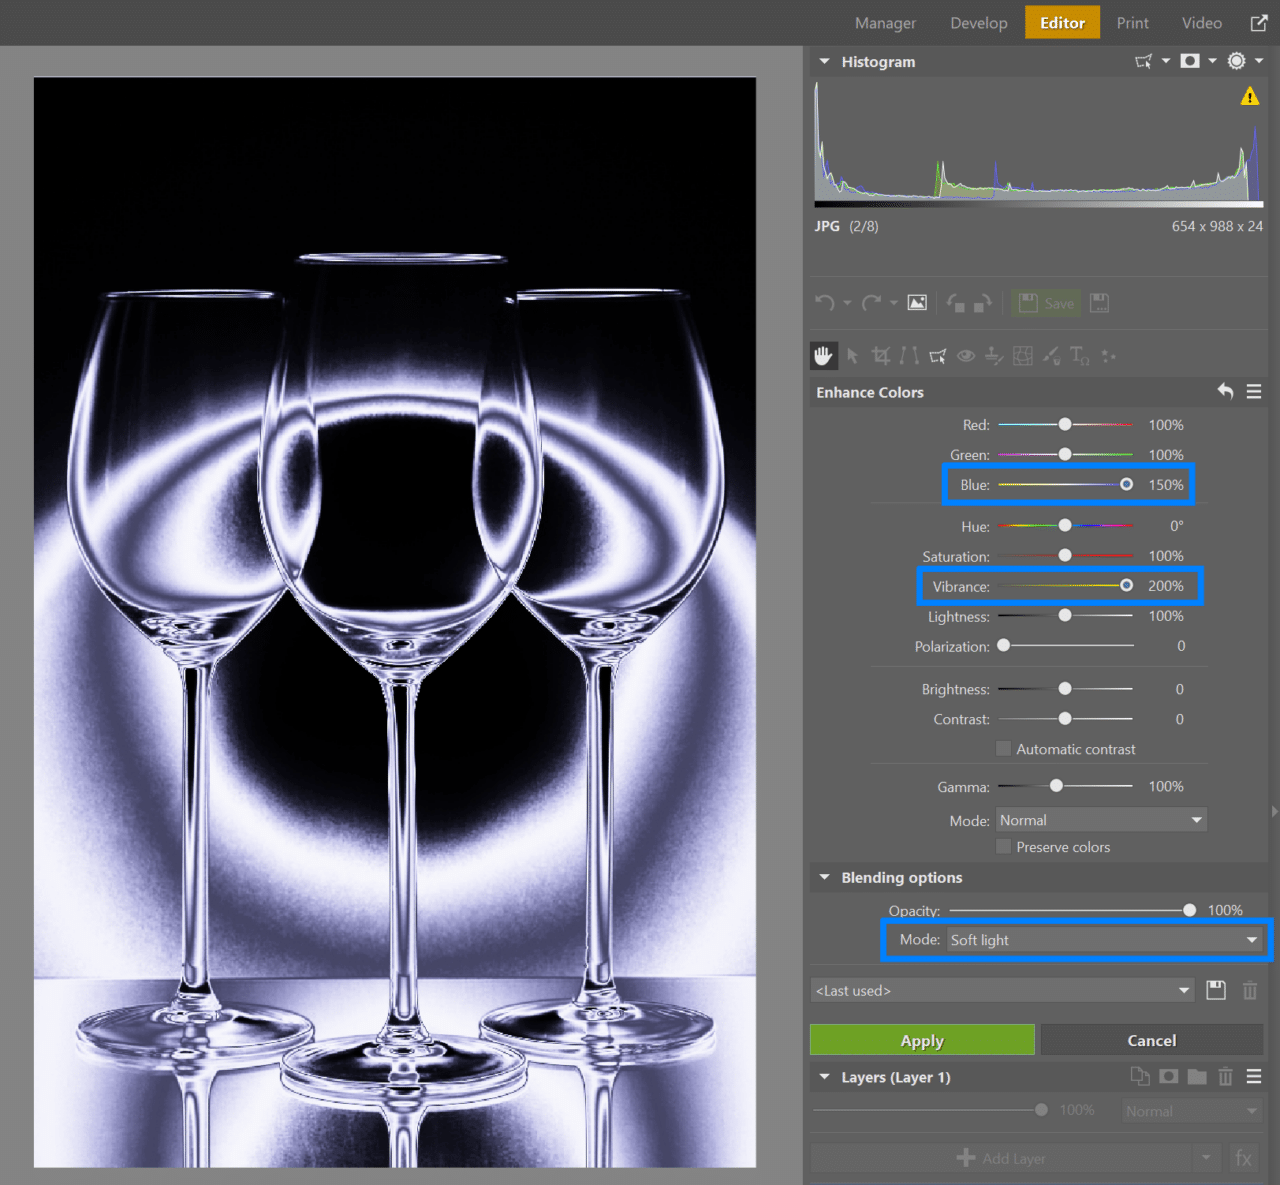
Color tone black and white photos using Enhance Colors
Another way to add color to black and white photos is by going to Adjust->Enhance Colors (Ctrl+1). In addition, if you set the blending mode to Soft light, you can give your photo eye-catching contrast.

Zoner Studio includes a variety of tools for working with color. Read more about these tools in our article Master the Tools That Will Get You Perfect Colors.
The Sabattier Effect generally works best on photos with simple backgrounds, like studio portraits, flowers, and product photography. Don’t be afraid to experiment. Even if the Sabattier Effect doesn’t suit your photo, at least you’ve mastered working with curves, which is one of the basic skills of digital photo editing. What better time to try something new than at the beginning of a new year?
Download Zoner Studio free for 7 days with support for all features. Try solarization on your own photos today!


There are no comments yet.