3D LUTs—What They Can Do and Where To Find Them
What are 3D LUTs? You may have come across them in your photo editing, used them for some time, or not at all. Many photographers offer custom 3D LUTs you can download for a fee, or even free. What can you do with 3D LUTs? What are their limitations? How can you make your own? Zoner Studio makes this a piece of cake.
Many mobile applications have offered color correction using LUTs for some time now. There is also a well-established system where universally usable LUT files are shared. The great thing is that these files can also be used in Zoner Photo Studio X.
What are LUTs
LUT stands for Look-up Table. A 1D LUT is a simple table that we could easily copy down on a piece of paper.
To use this 1D LUT, the computer reads our image pixel by pixel and finds a row in the table for each pixel based on its brightness level. On that row is a number with a new brightness level. Then, it “translates” the original brightness level to the new one. This process is similar to what happens when you work with Curves, only the process is saved in a table.

However, we are interested in the slightly more complex 3D LUT process, which works with colors too. In this case, the imaginary three-dimensional table looks for the position of each pixel’s values using red, green, and blue (R, G, B). At a certain point in the table, three new pixel color values immediately replace the previous ones.

Using 3D LUTs in Zoner Studio
In Zoner Studio, you can work with 3D LUTs in the Color Style section of the Develop module. We can either choose from one of the pre-installed LUTs, or install our own by pressing the “+” and selecting the LUT we want.

Use the Intensity slider to choose whether to use a 3D LUT at its original intensity or lower its effect.
3D LUTs contain a lot of information, divided into several file formats:
- One of the main file formats used has a .CUBE extension—The look-up table is a cube of colors
- The other format used is .3DL
- The third is .PNG. Don’t think of it as just an ordinary image. While .PNG is a common graphic format, the content is precisely defined to indicate the color cube broken down into individual slices which are arranged next to one another in an area.
3D LUT features
3D LUTs can contain any global adjustments related to an image’s brightness and color.
Changes to saturation? Piece of cake. Changes to the saturation of only certain colors? Boring. Changing the saturation of a color’s darker shades? The same lighter shade shifts in color and for other colors, nine other things happen? Even better.
In short, a single 3D LUT can store several adjustments that would otherwise require multiple steps, some of which would be very difficult to do in the Develop module.
Pros of 3D LUTs
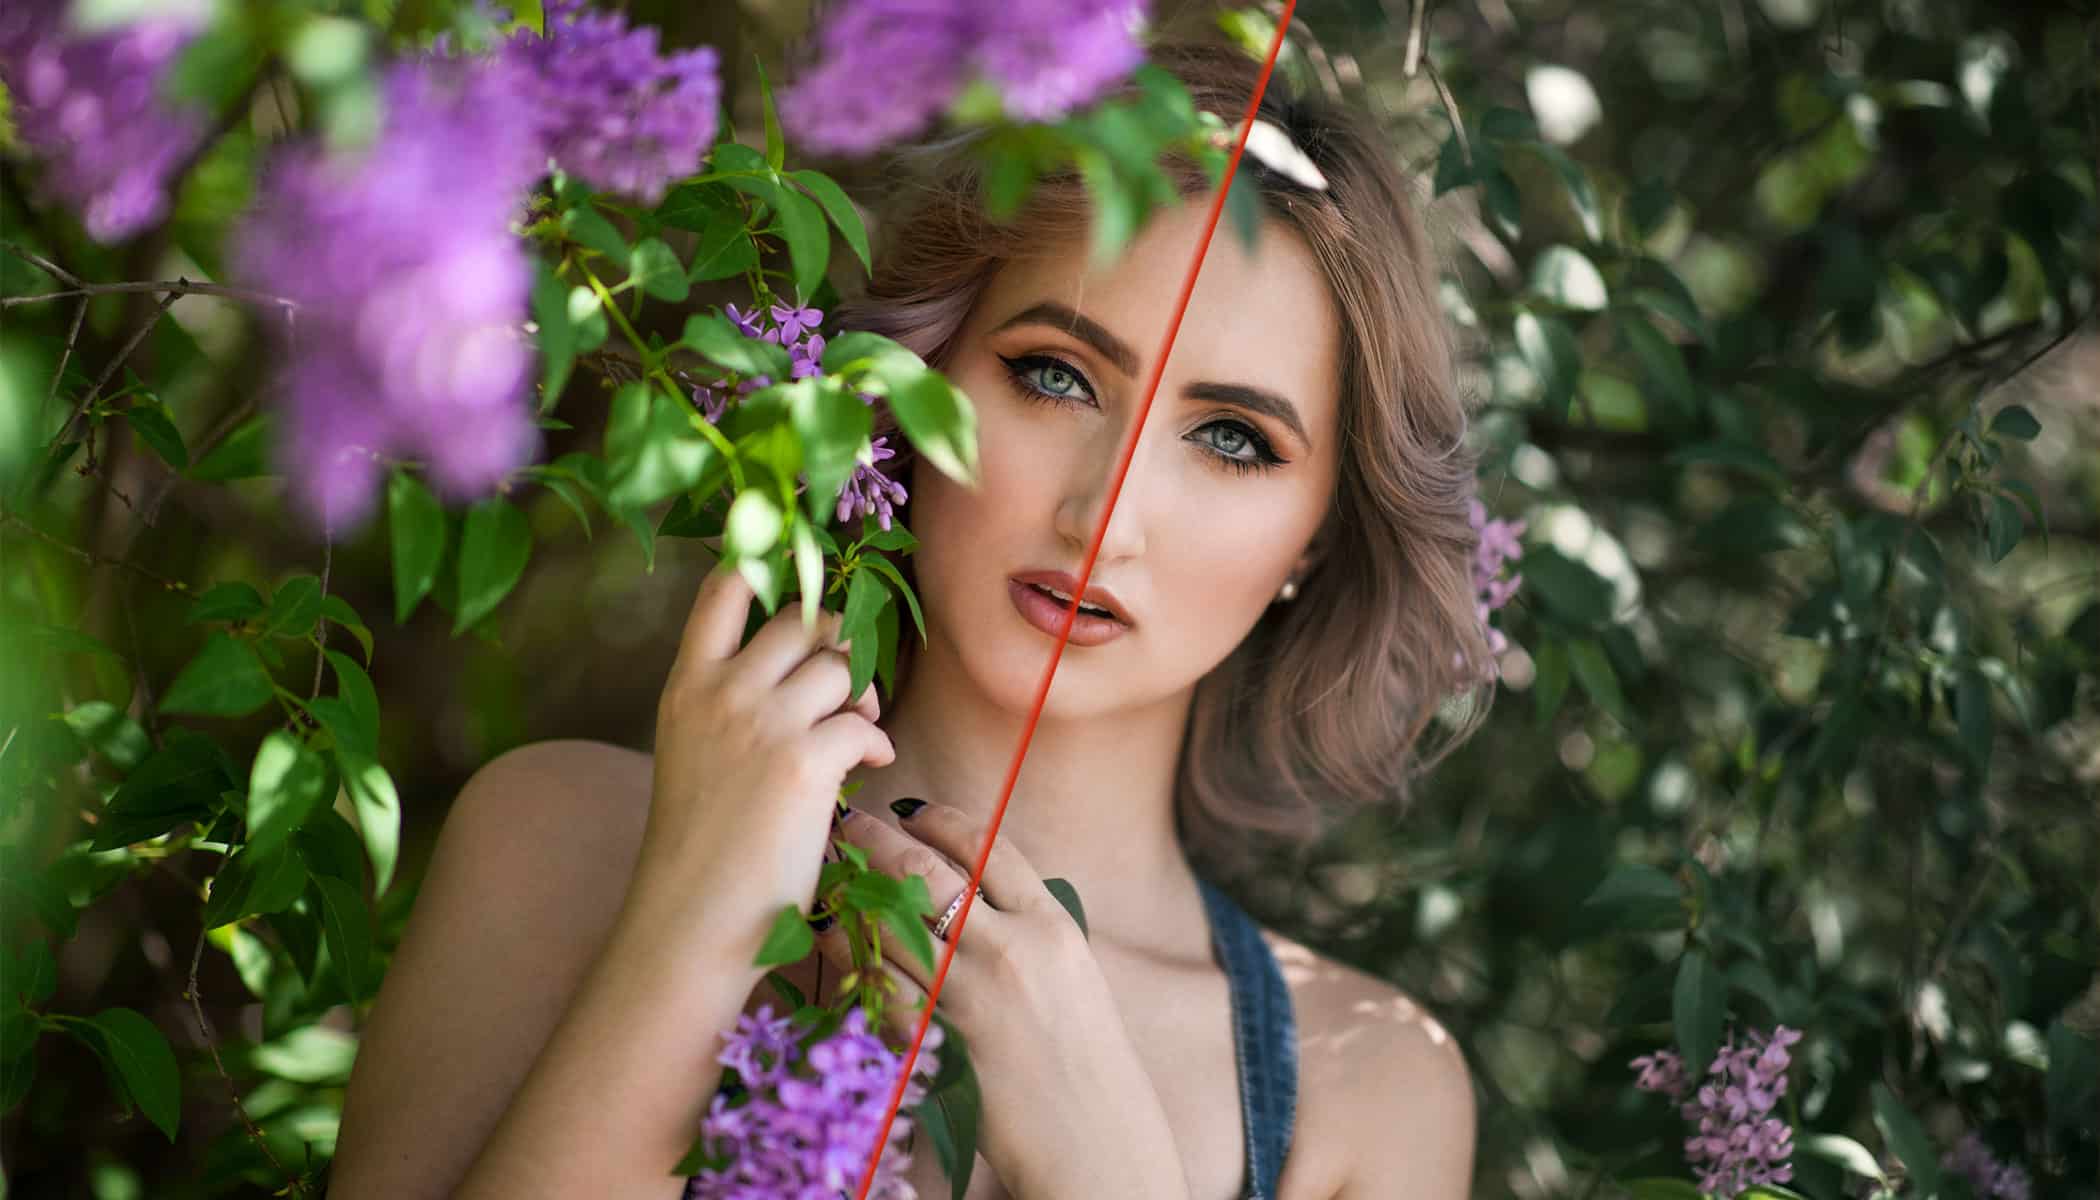
From the example above, we can easily apply many advanced adjustments using LUTs to unify the look and feel of a photo.
When applying LUTs, the sliders in the Develop module do not move at all. We still have a large amount of flexibility for further editing. For example, you won’t find a situation where after a LUT is applied, the Contrast slider is at its maximum strength and you can no longer work with it.
Cons of 3D LUTs
LUTs do not contain local adjustments, so forget increasing Sharpness or decreasing Clarity.
Unfortunately, you can’t pick and choose certain effects from LUTs. Either you use it as is, or you can lower its effect evenly using the Intensity slider. Then, you can still fine-tune the photo using other sliders in the Develop module.
Where to search for new LUTs
There are many websites with custom LUTs. We recommend FreshLUTs.com. Many LUTs are available for free, but you can also find paid ones that are usually sold by well-known photographers or videographers and contain their unique graphic style.
Creating your own LUTs
So far, we’ve covered using other people’s LUTs, but you can create LUTs yourself!
We’ll describe the process for creating custom LUTs in Zoner Studio. There are also specialized tools such as the 3D LUT Creator. This program is paid but has a user interface that allows you to deform the color space in a unique graphic away and perform other operations using look-up tables.

With Zoner Studio, the process is more straightforward. The idea is to use a special table in .PNG format as the foundation for creating your 3D LUTs. This table converts all colors to the same values. But if this table were used in this format, the result would be nothing. You need to use ordinary color adjustments and save this table in .PNG format to use it.
Let’s take a look at the entire process, step by step:
- First, you must get the table in .PNG format. Zoner Studio currently supports tables with a maximum size of 144x144x144, but you can use smaller ones. In practice, this is not a problem. The missing colors are calculated, which allows you to save computer memory. You can find smaller LUTs to download, such as the Hald8 (64x64x64) or Hald5 with 3D LUT Creator.
- Open the table in the Develop module of Zoner Studio, just like any other image. But how do you adjust its colors so the result makes sense? Any adjustments are hard to verify because the image is very technical and unreadable.
- It’s a good idea to first make color and brightness adjustments to one or more of the photos you wish to edit. Then, once your adjustments are complete, save them as a new preset to record the positions of all the sliders.
But be careful when creating presets. It’s okay to use color and brightness adjustments such as Exposure, Contrast, Saturation, Split Toning, Shift Primary Colors, and others. But avoid local adjustments and adjustments that affect pixels based on their surroundings. These could be Texture, Sharpness, Noise Reduction, and even adding vignetting or grain. These adjustments risk adding random color effects to the table.

You can apply adjustments not only using presets, but also by clicking Copy at the bottom of the right panel, or using CTRL+C. This copies the adjustments. After opening the table image, click Paste or CTRL+V.

- Apply the preset you have created to the downloaded PNG file.
- After applying the preset or adjustments to the source PNG file, all that’s left to do is Export to a new file. Click Export and choose the format—it must be PNG. Set the source image to Full quality including Develop module adjustments. The size and bit format (24 bits) must remain the same with no sharpening applied.

The resulting PNG can be used like any other 3D LUT online.
Download and share
Just like you can download 3D LUTs online, you can also upload them and make them available to others for use. If you create some unique color grading using your own 3D LUTs, don’t be afraid to show them off. Maybe yours will become famous too and used by photographers all over the world.
Download Zoner Studio free for 7 days and try using and creating 3D LUTs today!
There are no comments yet.