A Halloween Photoshoot with Man’s Best Friend
With fall’s arrival, social media is stocked full of photos with Halloween costumes, spooky masks, and themed photoshoots. A classic pet photoshoot is a great opportunity to showcase the vibrant fall scenery. However, there is a way to make something more out of this enchanting time and, at the same time, have a great time with your furry friend!
If you’re a dog owner, you’ve probably already tried getting several fall photos with your pet. But how do you add that extra something so your photo stands out from the other millions of fall photos on the internet? Try adding a bit of Halloween magic!
Start with reality and then use the power of illusion and Zoner Studio to add that extra something.
These are the ingredients for a magical Halloween shoot:
- 1 camera
- 1 dog
- 1 pumpkin
- 1 location with fall scenery
- 1 assistant for holding the pumpkin
- Dog’s favorite treats or toys
(*Number of dogs, pumpkins, assistants, and treats/ toys depends on your needs and availability.)

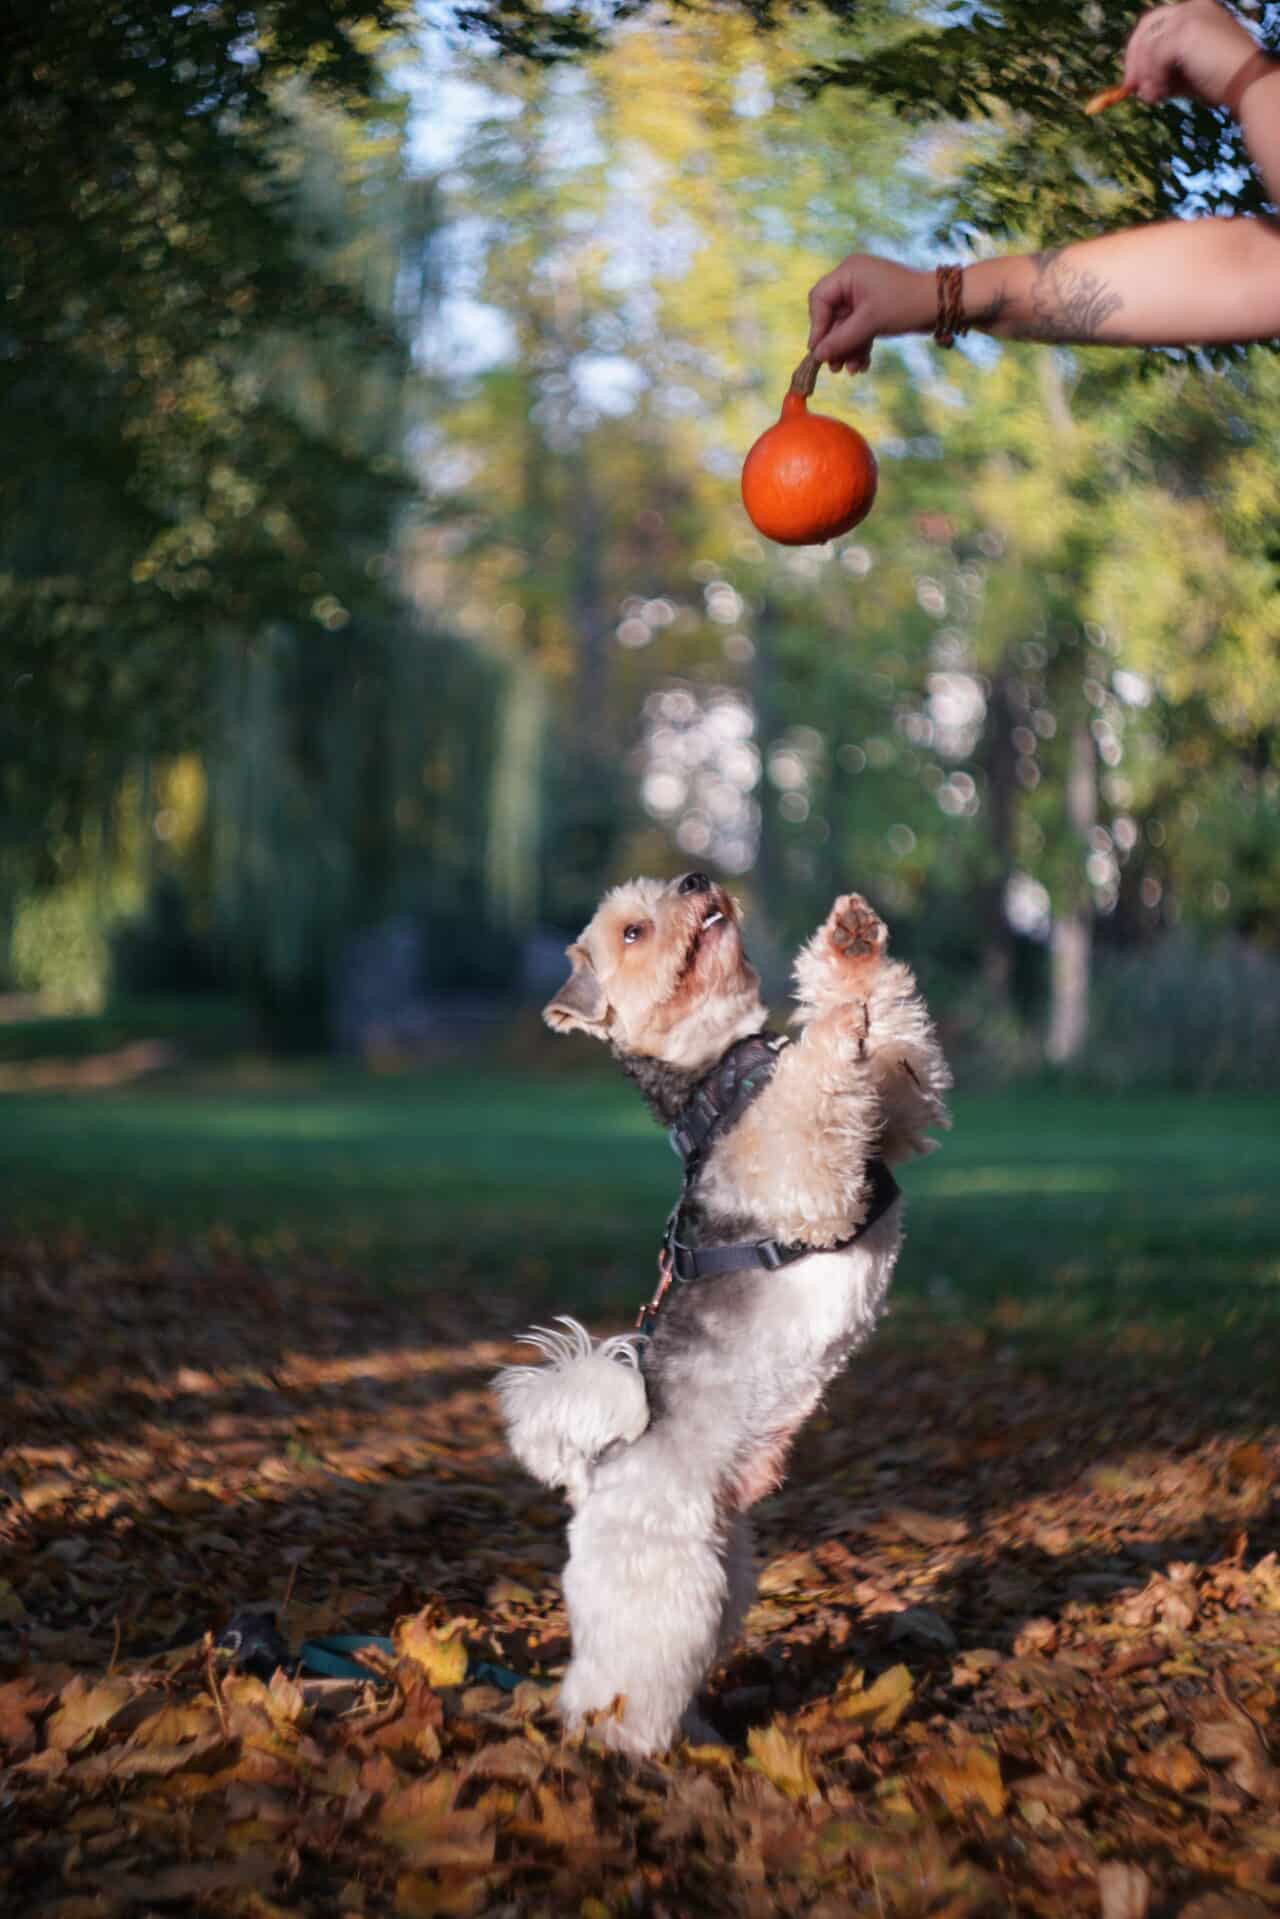
Once you have all your “ingredients” prepared, you can get started. Take your dog to the location of your choice. Next, have your assistant hold a pumpkin over the dog. The size of the pumpkin should correspond to the size of the dog. Your assistant can be holding a toy or treat to motivate the dog in their other hand. Once the assistant gives the dog the command to move toward the pumpkin, start shooting. For example, our command was “beg.” Feel free to use any command the dog is familiar with and likes.

You don’t have to find a forest filled with fall foliage. A few trees with some fallen leaves and the right angle will do. #influencersinthewild
In the Editor module, open the Retouching Tools menu. You’ll mainly be using the Clone Stamp (S) and Healing Brush (J). Leave the Opacity for both tools at 100%. Adjust the other settings as needed and start to conceal the assistant’s hands, the dog’s leash, or other undesired elements. Use the Ctrl key to select the area which you want to copy and then use to cover the retouched area.


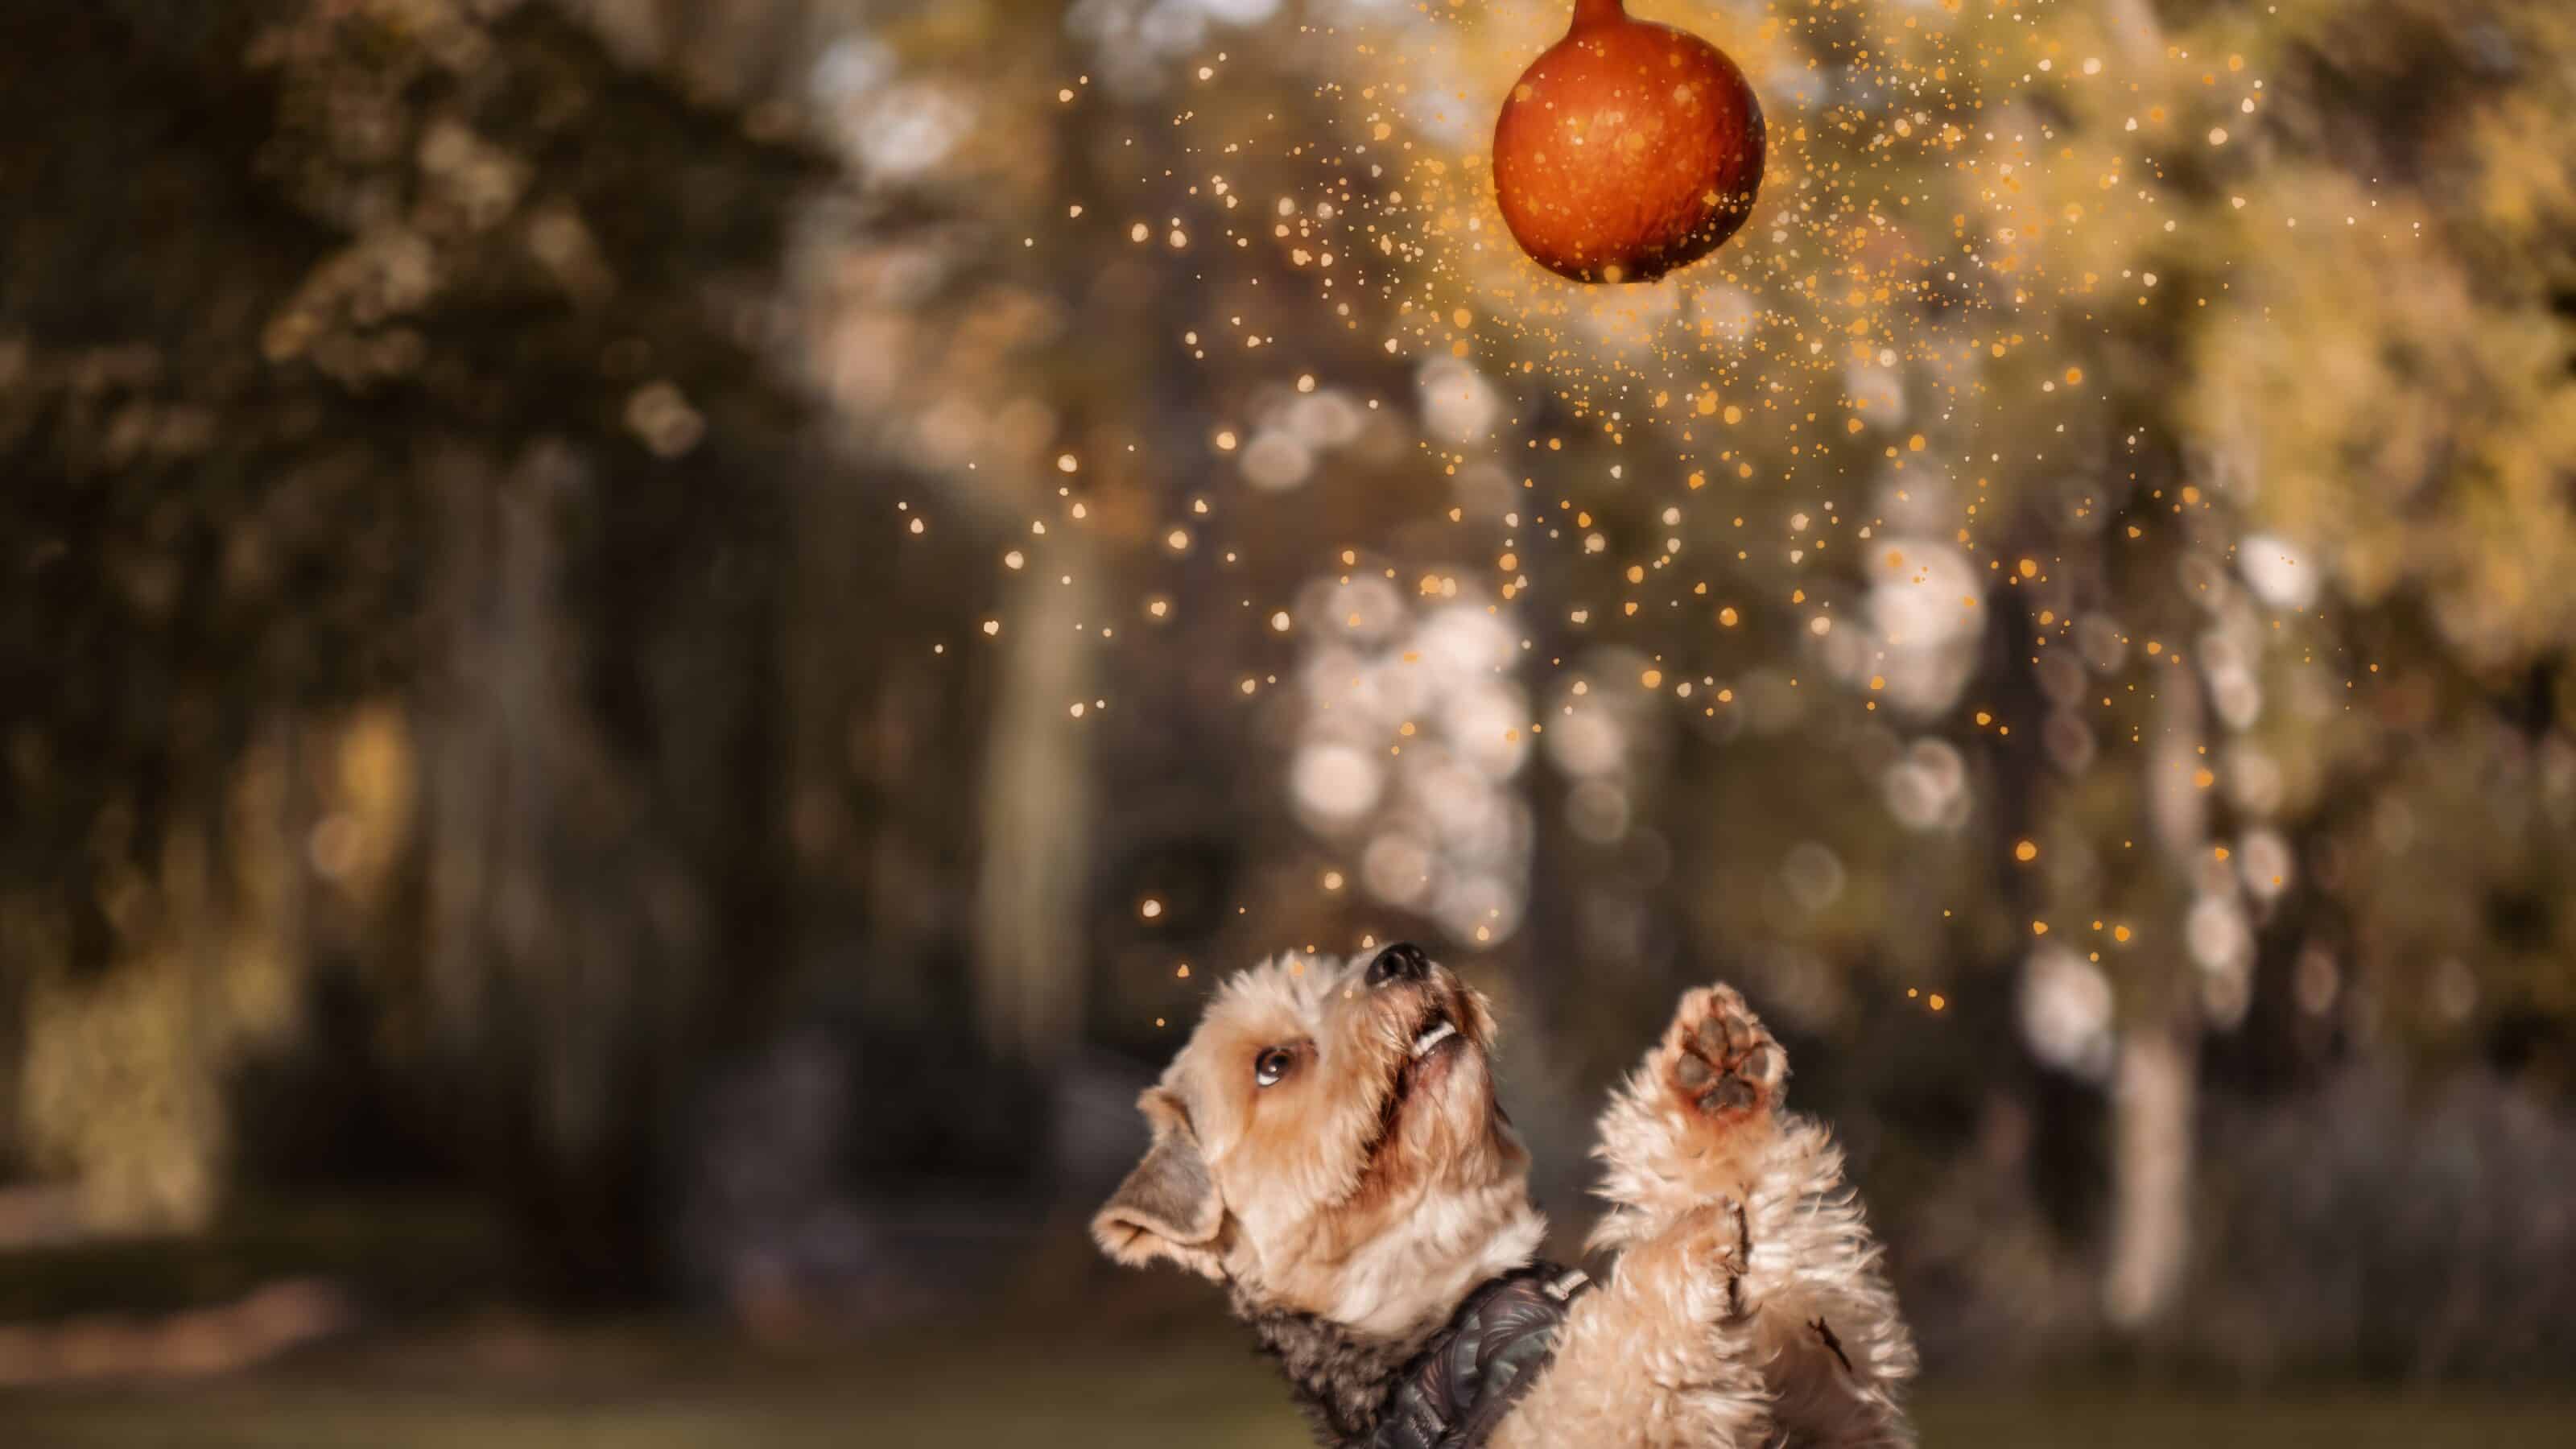
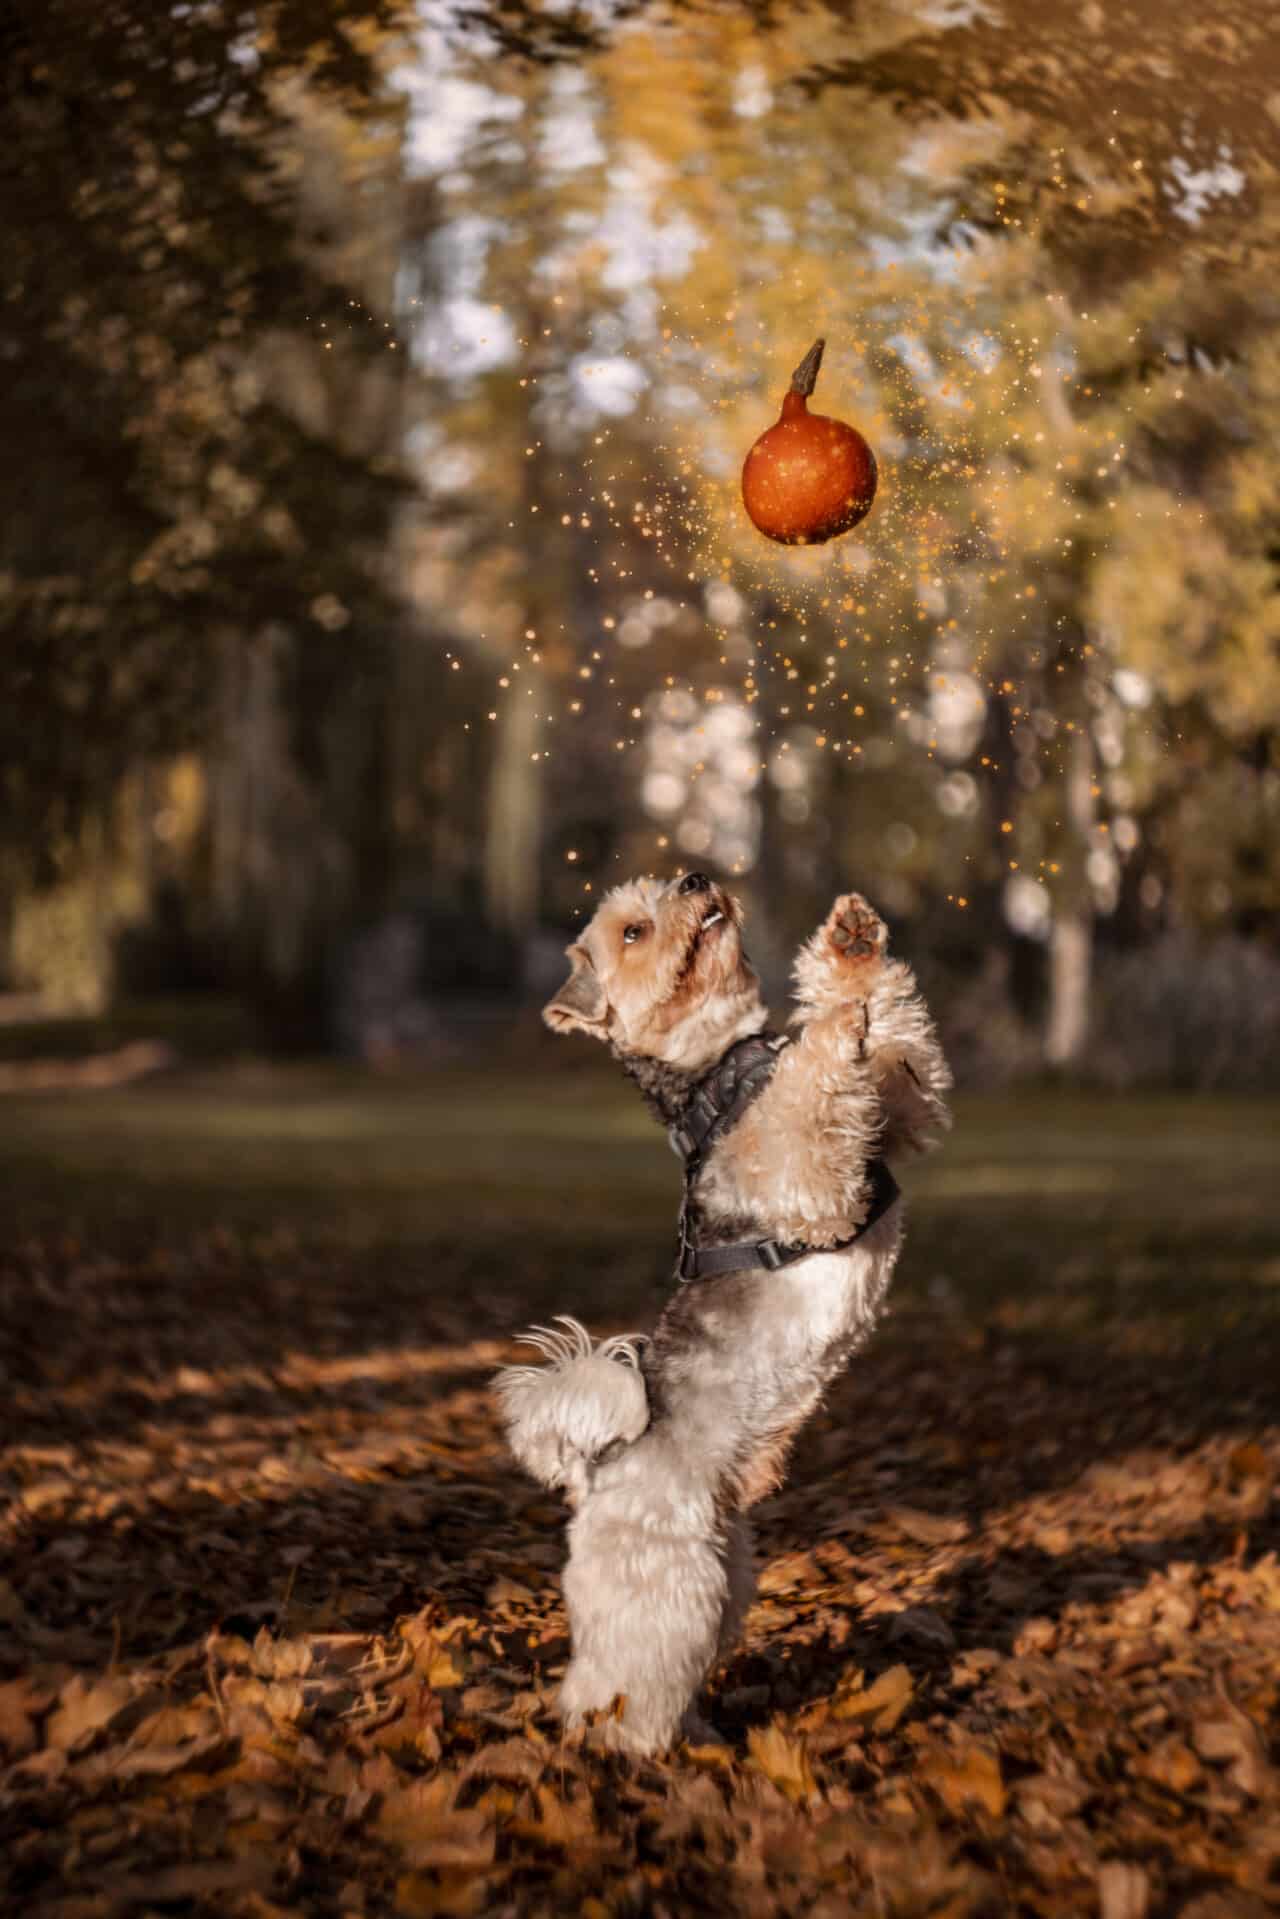
Once you have everything you want visible in your photo, move on to the next step — selecting the pumpkin. In the Selection Tools menu, choose the Magic Wand (W). Hold the Shift key to add other parts of the pumpkin. Contrastly, use Ctrl to remove anything unwanted in your selection. Use the Polygonal Lasso (N) to select or unselect any details the Magic Wand left out or included. Add your selected pumpkin to a new layer using the keyboard shortcuts Ctrl+C and Ctrl+V.


Add a new layer below the layer with the pumpkin. We’ll now add some sparkly glitter to this layer. To do so, we need the Drawing Tools menu and Brush (B). Leave Opacity at 100% and Blur at about 50%. However, just like the size and other brush parameters, make adjustments based on your personal preferences. You don’t have to stick to the same color spectrum as the demonstration photo, but just to give you an idea, I primarily used the colors #FFAA01 and #FEE99E. Add a few specks of glitter to the layer over the pumpkin for the effect to look more natural.

Next, use Effects Tools for the glitter. Select as many as possible, center the point at the center of the pumpkin, and adjust the criteria to suit your needs. Then, merge the layers and switch from the Editor to the Develop module.

All that’s left to do is tweak the photo’s colors in the Develop module. I recommend sticking to warmer tones of the fall color spectrum and muting the greens. Too much green can often give your photo a more summery feel, especially in sunny weather.
You’re all done! Head out right away for a nice fall stroll with your furry friend in search of the perfect place for your photoshoot. Or, at least start teaching your dog a trick that will work best for this photoshoot. We’ll leave that part to you. You can count on Zoner Studio to add the magic once your photoshoot is done.
There are no comments yet.