Add Transparent Text to your Photograph -Use the Editor Module and Layers

In this tutorial, we’ll show you how to add transparent text to your photo in a matter of a few simple steps. We’ll use the Editor module to work with layers in Zoner Photo Studio X. For those of you that haven’t yet worked with layers, you have nothing to worry about. It isn’t rocket science! We’ll show you the entire process in a few, easy-to-understand steps.
Placing transparent text over your photo is an effective tool for creating simple graphics. It works well for photo books, the title photograph for your photo albums on social media, or when creating greeting cards and other printed materials. In this tutorial, we’ll teach you how to make the text transparent.
Add a colored layer
First, choose the photograph you’d like to add text to and open it in the Editor module of Zoner Photo Studio X.
Next, add a new colored layer by clicking Place Colored Layer… in the Add Layer drop-down menu.
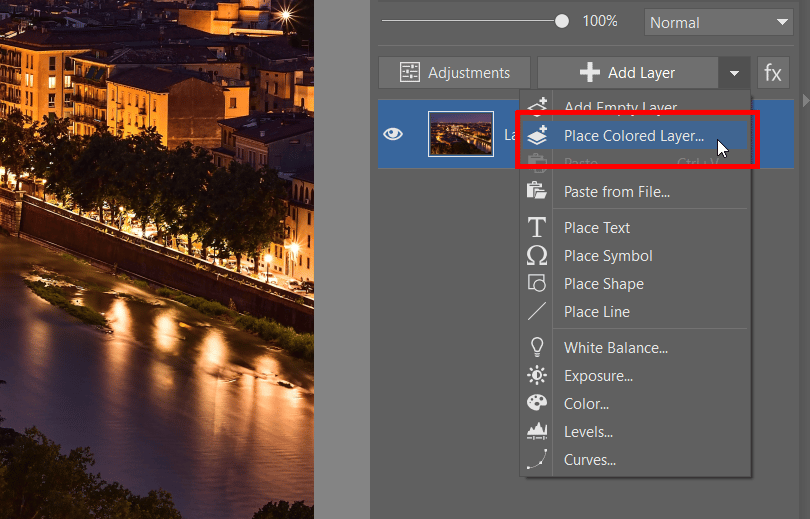
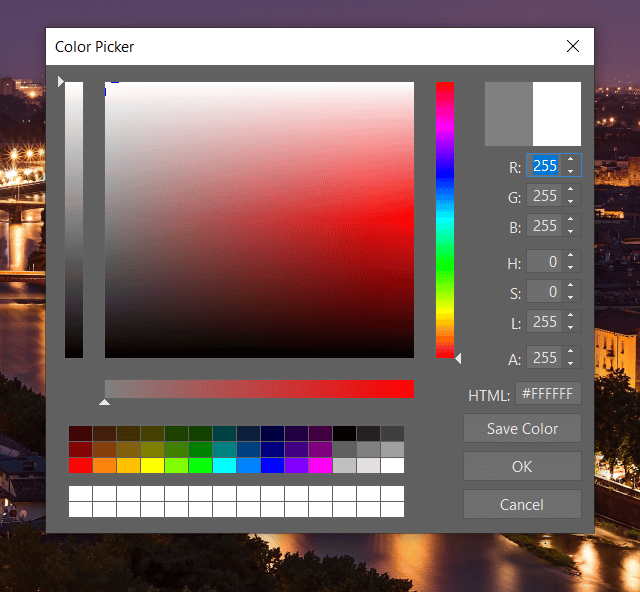
Choose the color you want in the window that opens. We chose white and confirmed by clicking OK.
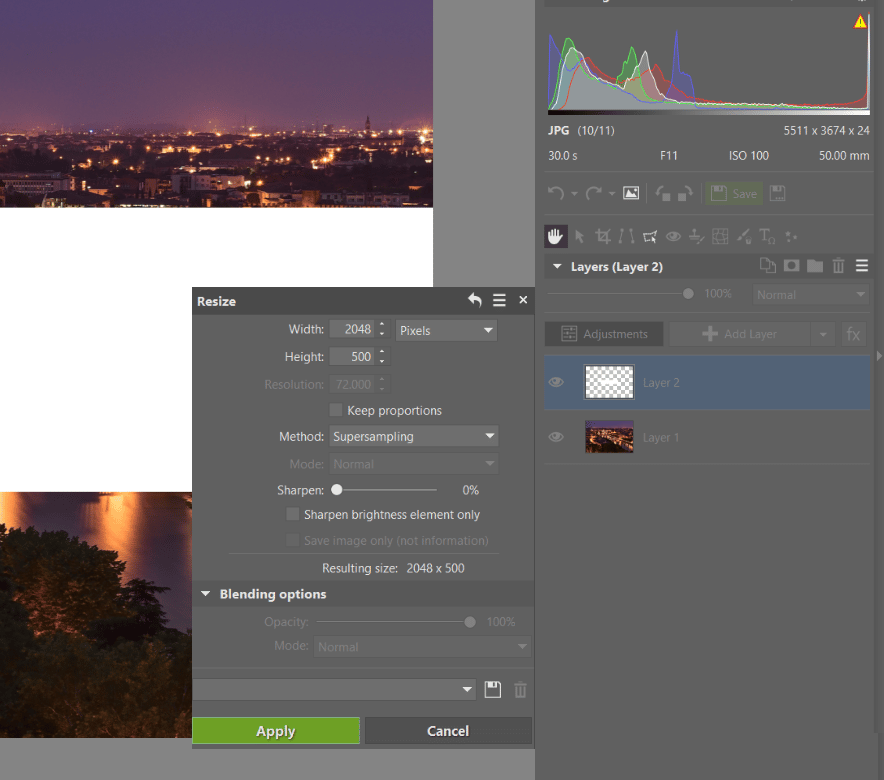
We rename the layer to make it easier to work with using the option Rename Layer. As the name “Stripe” indicates, we will use a stripe from the layer that will be placed in the center of the image. For this reason, we need to resize the layer. We select the “Stripe” layer and choose Resize Layer in the Adjustments menu. We can now input the dimensions we want.
You can also use the Move and Transform (V) tool. Resize the layer by dragging the corners. If you hold down the Ctrl key while resizing, the proportions are not maintained, allowing you to manipulate the layer’s size as much as you want.
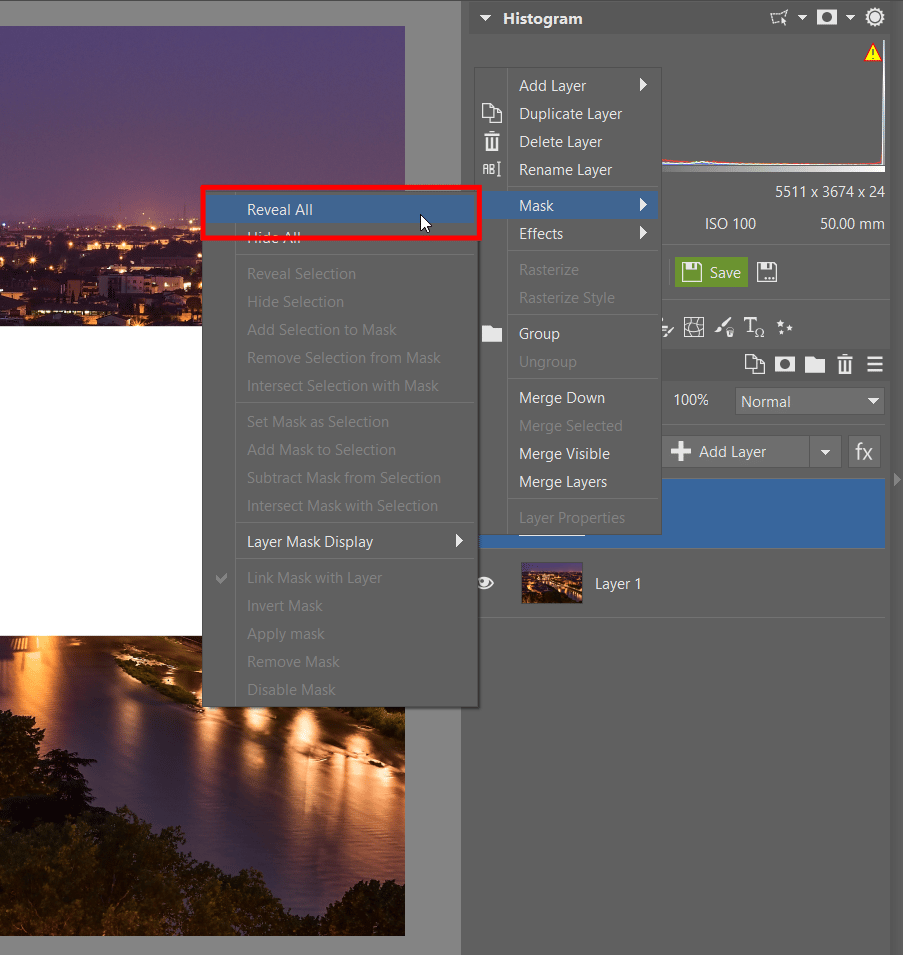
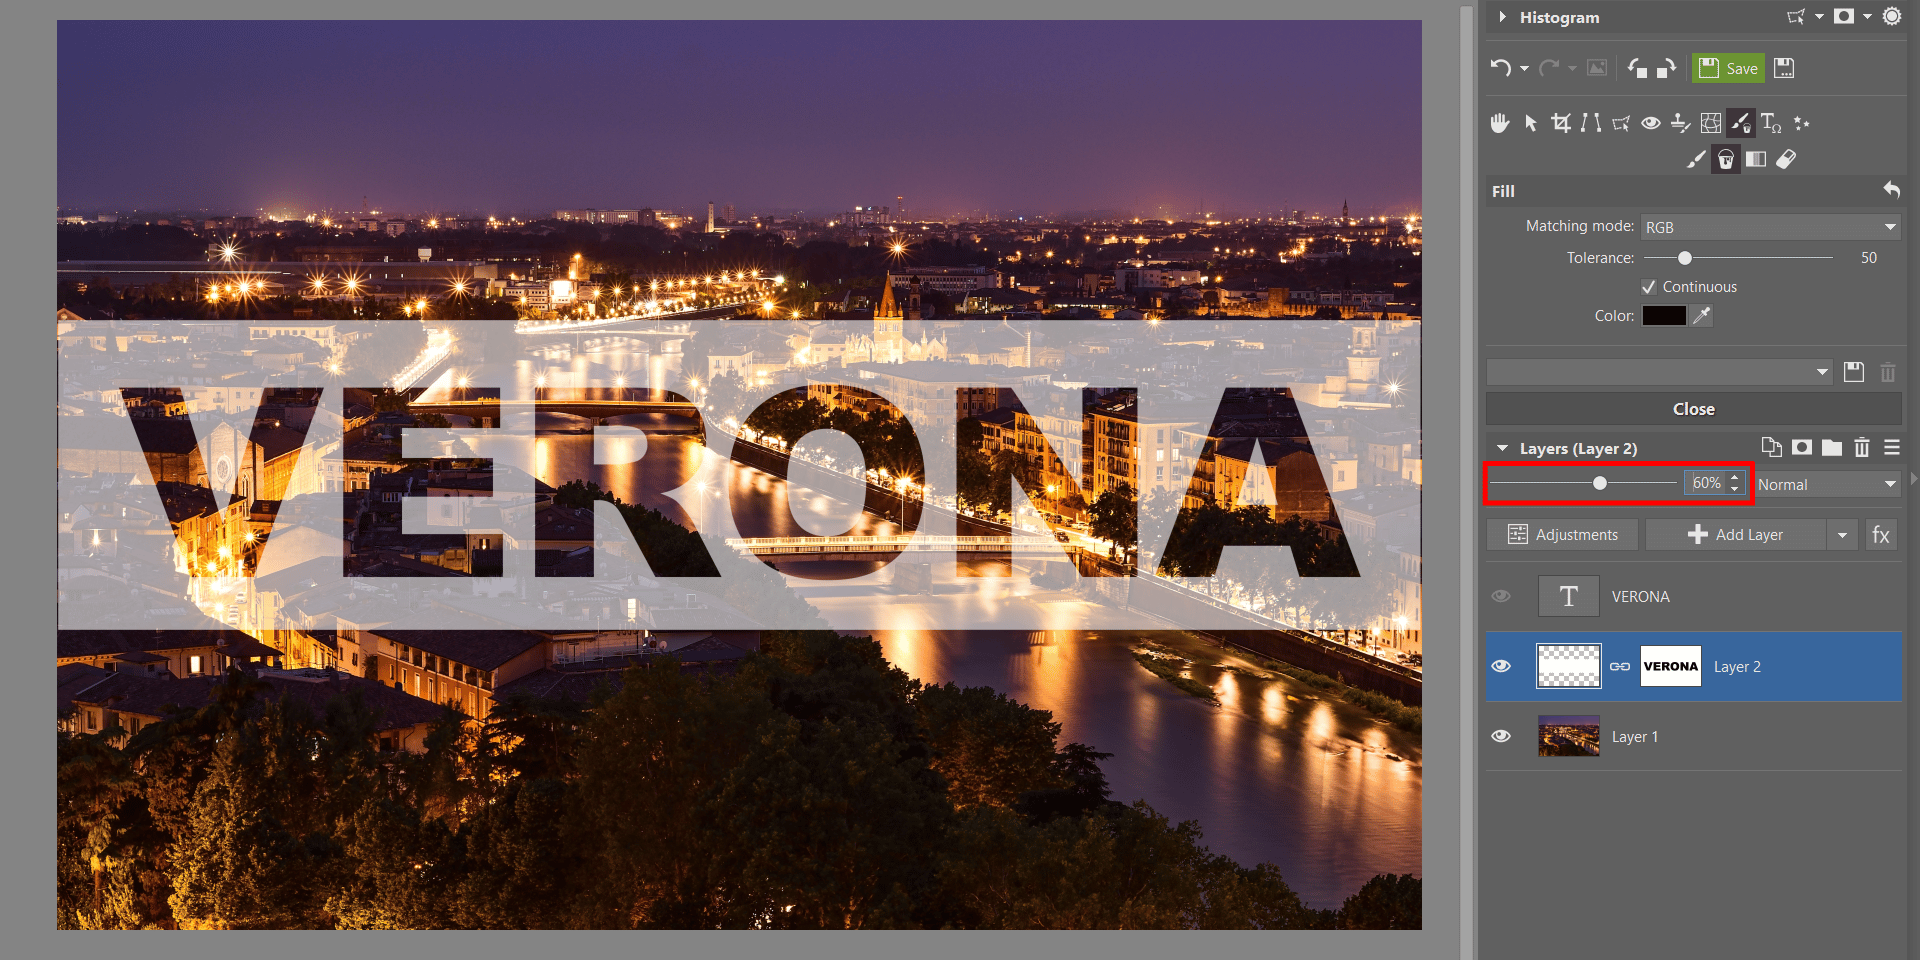
The size of the “Stripe” layer is set and now we need to add a mask to the layer so that we can mask the text. We do so by right clicking the “Stripe” layer and choosing Mask > Reveal All.
Add and edit the text layer
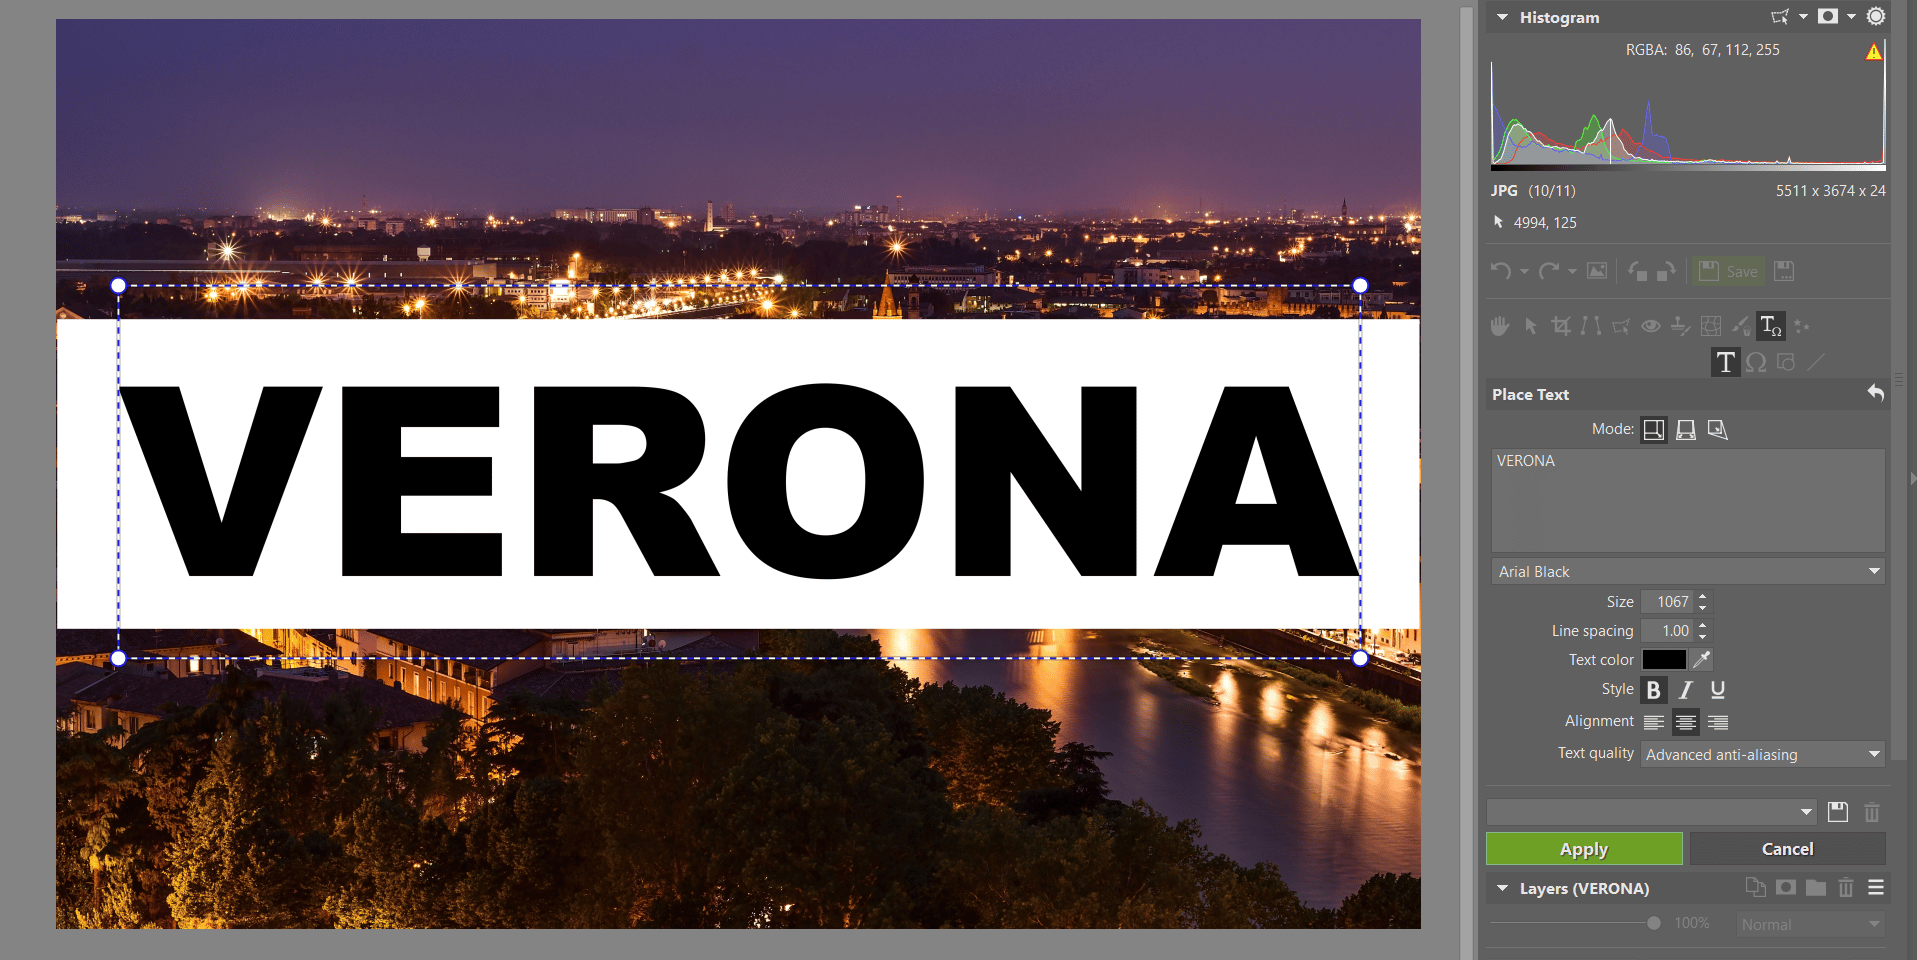
The mask is ready and we can now add the layer with text. Right click the “Stripe” layer and choose Add Layer > Place Text. The text will appear in the photograph. Using the Place Text settings, you can change the text settings and write what you want to be displayed in the photo. You can move the text around the layer using the cursor. When you are happy with the text, click the Apply button.
Now, select the text by pressing the Ctrl key and clicking the layer with text. You’ll know you’ve selected the right area when a box indicating selection appears around the text.
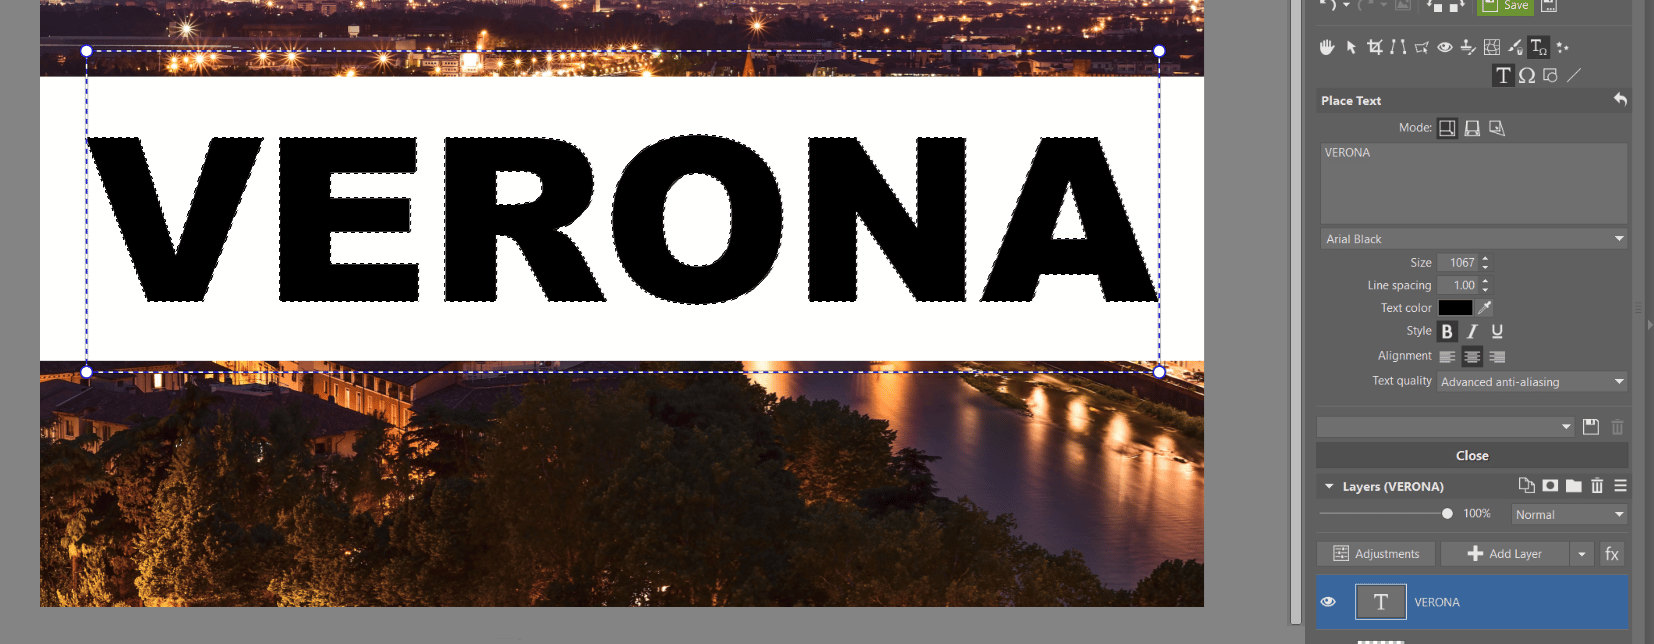
Use the eye icon next to the text layer to hide it so that you only see the selection box.
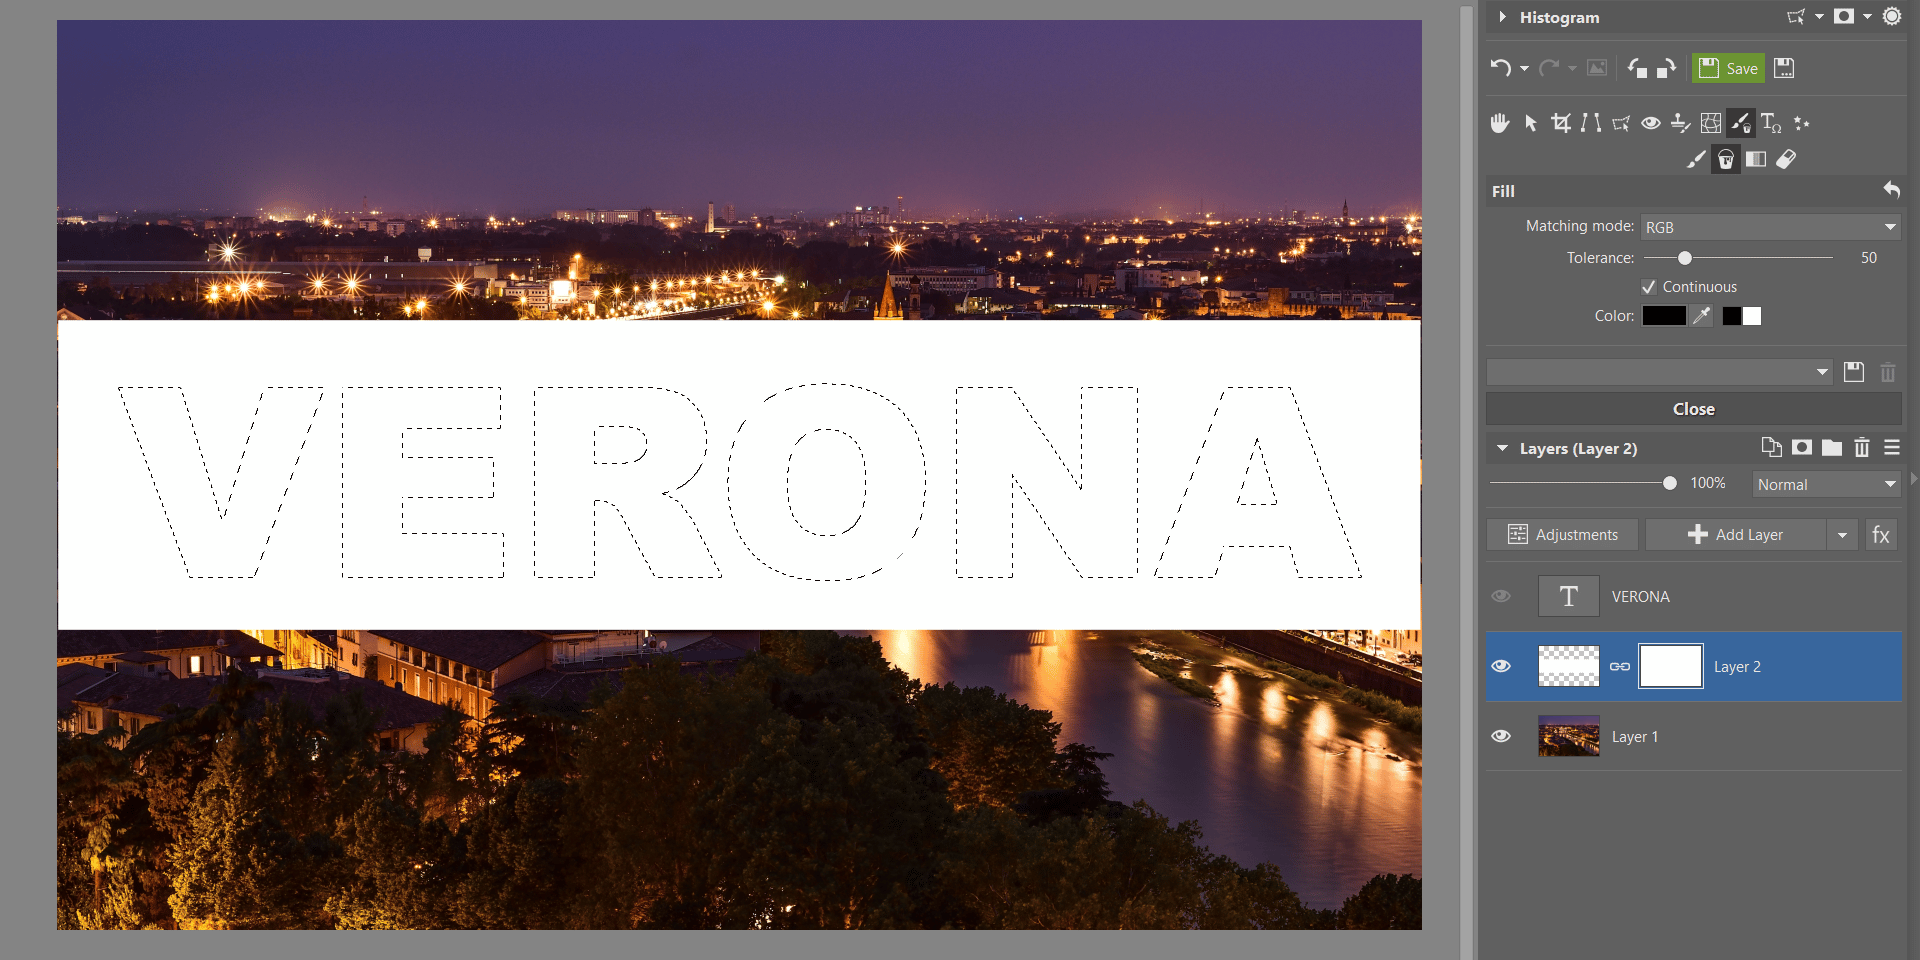
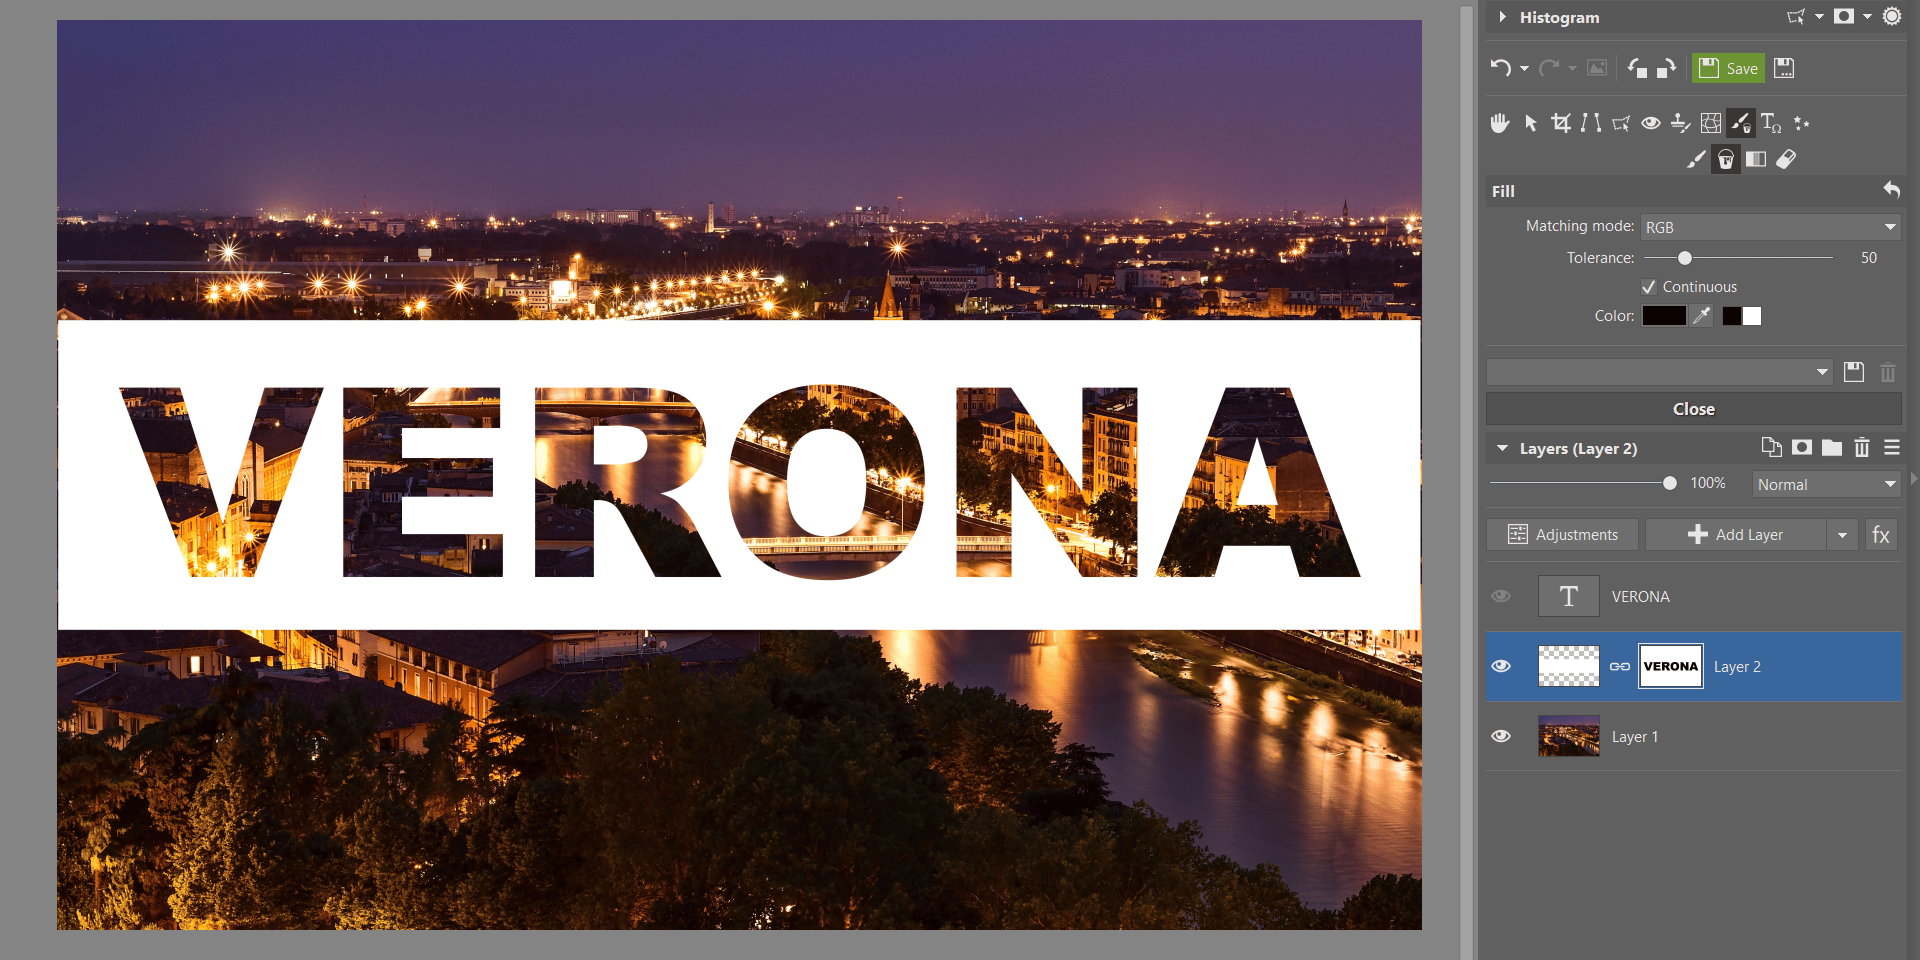
Next, click the masked “Stripe” layer and display the options for the Drawing Tools menu. Choose the Fill icon and select the color black which will fill the inside of the selected box. Since everything that is black in the mask is transparent (and everything white is displayed), then the inside of your text will become transparent. Now just use the Esc key to cancel the selection.
Final touches
Finally, you just need to delete the text layer using the Delete Layer option. You no longer need this layer. Use the Layer Opacity slider to set the desired amount of opacity for the “Stripe” layer. And we‘re all done!
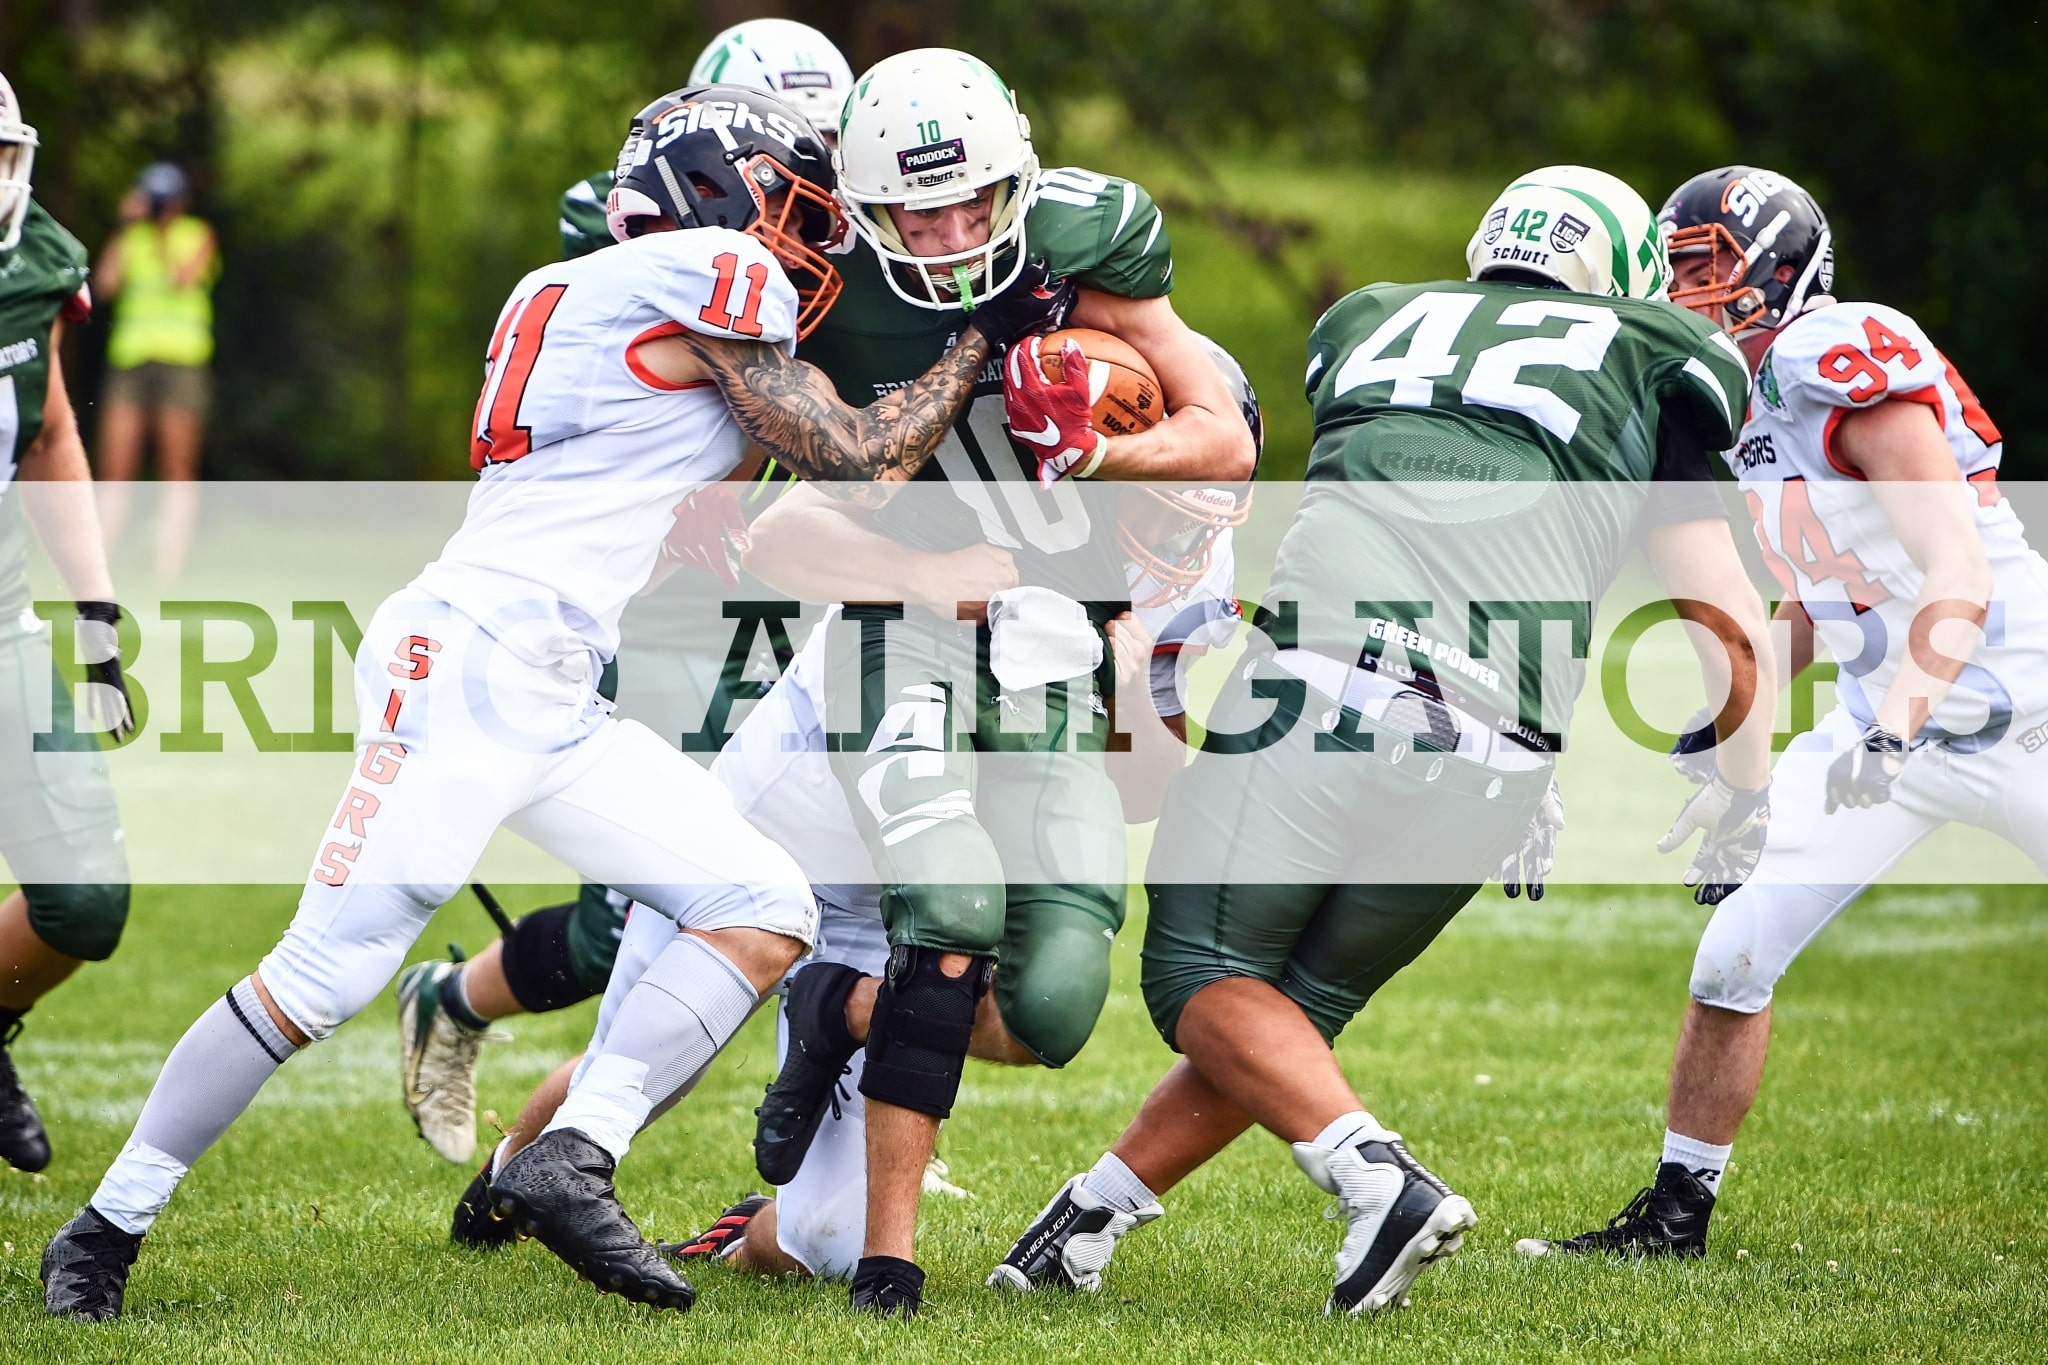
When you set off to apply this effect to some of your photos, it’s good to keep in mind that it doesn’t work well with very colorful images. The effect gets lost in these types of images. I originally wanted to base this tutorial on the photograph below in order to lure American football fans for the new season. However, as I myself can see, the image was less than ideal for this demonstration.
You’re always welcome to play around with various options of placement, colors, and shapes of masks. You can even try combining more text and so on. Let your imagination run free and see what you come up with. Have you tried out this effect? Show off your results in the comments.
Download Zoner Photo Studio X free for 7 days and try adding transparent text too!
There are no comments yet.