At-Home Underwater Portraits Using Only a Model, Aquarium, and Camera
Shooting underwater is a very unique experience. But many photographers never end up trying it because of how difficult it is. If you don’t want to risk sinking your equipment or even yourself, we have a tutorial for a simple underwater portrait that can be shot in your living room.
What will we need? First off, an aquarium. If you have an empty aquarium lying around the house, you’re halfway there. Of course, you also need a camera, a model, and ideally some kind of lighting. These things should be enough for the shoot.
How it’s done
Make sure your aquarium is clean. Be sure to clean it thoroughly and make sure there are no streaks in the glass. Fill it with warm water, as if you were filling a bath. The model will need to stay underwater for a few moments, so keep your model’s comfort in mind.
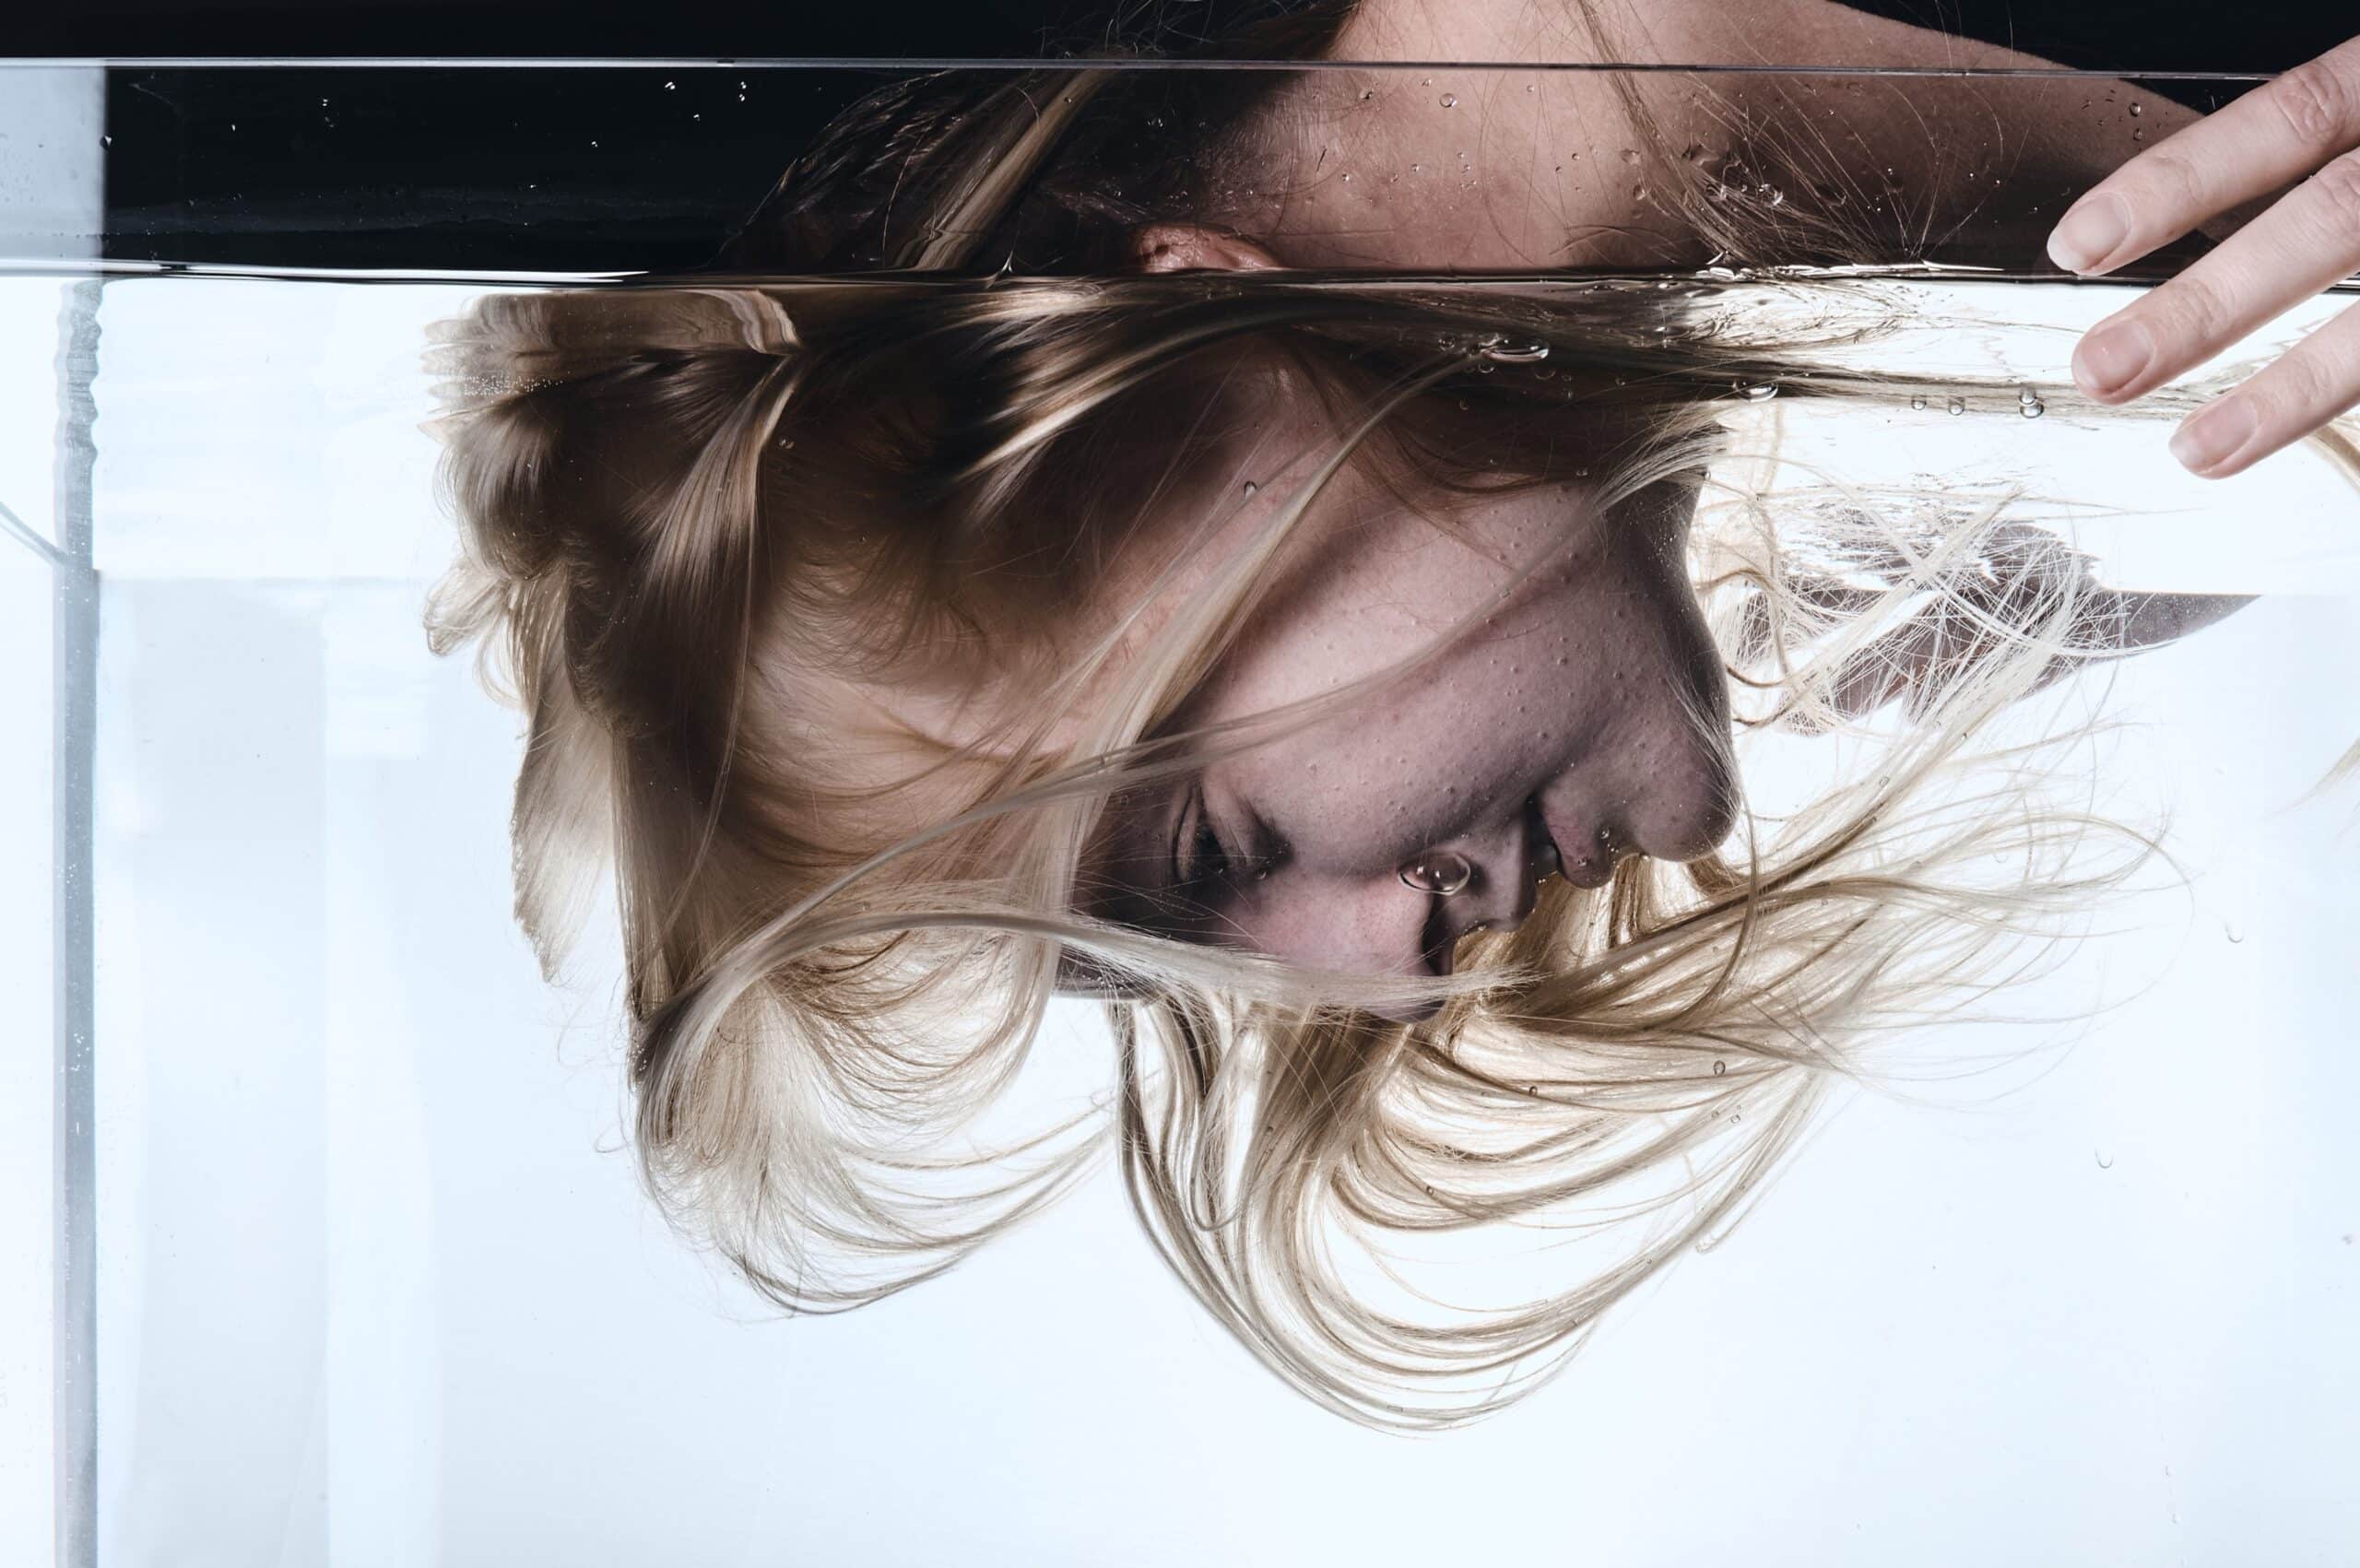
Choosing a model for the shoot
- Your model should not be afraid of water. They must have a positive relationship with water and aren’t afraid to open their eyes underwater. Also, they need to be able to hold their breath for an extended period.
- Your model shouldn’t wear any makeup. But if they must, then only waterproof makeup.
- It’s a plus if your model has long hair. Long hair spreads out beautifully and catches the light underwater.
In addition to an aquarium, get several towels ready because you’re definitely going to need them. Also, turn up the heat so your model isn’t cold after getting wet.
As far as camera equipment goes, we don’t recommend using a wide-angle lens. You want the maximum amount of focus to be on the subject’s face. You also don’t want any nearby distractions visible. You want just the model and the water visible. A 50mm lens is ideal.
However, you’re also going to want to try shooting from below so prepare a slightly wider lens as well. We used a 35mm lens. It very much depends on whether or not you are going to be under the aquarium too or if you’re just going to set up your camera there and use a photography application or remote shutter release.

Lighting
Lighting is not going to be easy. Not everyone has studio lighting at home. But that doesn’t matter, because everyone does have a window at home. You can easily use natural lighting and set up the entire scene near a window. But, you may need to help the lighting a bit. The model is going to submerge their face in the aquarium, so their face will be looking down where there is the least amount of light. You are going to need to reflect the light in some way. Ideally, use a light reflector which “sucks in” the light from the window and angles it towards the model.
If you don’t have a reflector, you can use a white sheet. White reflects a large amount of light and you can angle it to the right place. Or, you can use flash or other light you have at home that is meant for shooting photo or video.
If using a flash, watch out for glare on the glass. It is a bit more challenging to find the best light and placement. Trial and error will be needed to find the right setup.

TIP: Put your camera on a tripod. It will make everything much easier.

You can also put white or black fabric behind the aquarium or just leave what is there. It’s best to try all the available options and see which one is best. You can shine your lighting through the white fabric, replicating studio lighting.
Don’t be afraid to experiment
Try shooting from the side. Try different angles, experiment, and be sure to let your model catch their breath between dives.
One of the options is to put the aquarium on two chairs, crawl beneath it, and shoot the model from below.
As mentioned in the beginning, you have two options for shooting from below:
- Crawl beneath the aquarium with your camera, but be sure to use a wider lens. Also, be EXTREMELY careful that the aquarium doesn’t fall on you. With a large amount of water inside the aquarium, it could be dangerous. Don’t forget to put safety first.
- Put the camera below the aquarium and shoot remotely using an application or remote shutter release, if your camera allows. There are various applications depending on the type of camera. Find out which works best for you and your camera beforehand.

Try something different
There are many other ideas for different types of photography in addition to underwater portraits. For example, you can use various reflections from the glass or water. Don’t be afraid to get creative with your empty aquarium. For example, try spraying the walls of the aquarium with a spray bottle. Or, add some dye or ink to the water. The possibilities are endless.

Give it a try and show off your results
This type of shoot is fun, especially once you involve friends or the whole family. The resulting portraits can end up very captivating and unique. Put safety first, don’t let yourself get crushed by an aquarium full of water, and be sure not to let anyone drown! And have fun! If you want to show off your results, send them to us, or be sure to tag us. We can’t wait to see what you’ve come up with!
Thorsten Ruhle
I wanted to do a similar shoot and was considering using CO2 tablets to create rising bubbles. Have you tried that? Are these tablets safe for the model in the water?
Redakce
Using CO₂ tablets can create an interesting bubble effect, but caution is advised. While their use isn’t inherently dangerous, if they haven’t been tested for skin reactions, we recommend avoiding them or being very careful and testing the reaction beforehand.
Have a nice day!