Basic Adjustments for Livening up Dull Photos
Sometimes we come home with pictures that are boring, dull, and uninteresting at first glance. Don’t beat yourself up over these pictures. Sometimes all it takes is a few basic adjustments to save a picture from ending up in the trash. Read on to find out what they are.
In this article, we won’t be discussing photos that have content or composition. If there isn’t anything in the photo or the shot doesn’t make sense and is completely wrong in terms of content and technique, it probably belongs in the trash. No amount of editing can save this kind of photo.
What makes photos dull
This article is about the pictures that have good content and composition, but are dull and washed out, causing the subject and colors to get lost. They are not well-exposed and have nothing distinctive that grabs the viewer’s attention. It’s like shooting through a foggy lens. This is when the right editing can help save the photo.
Dull photos usually have:
- A lack of contrast
- Washed out colors
- A subject that gets lost
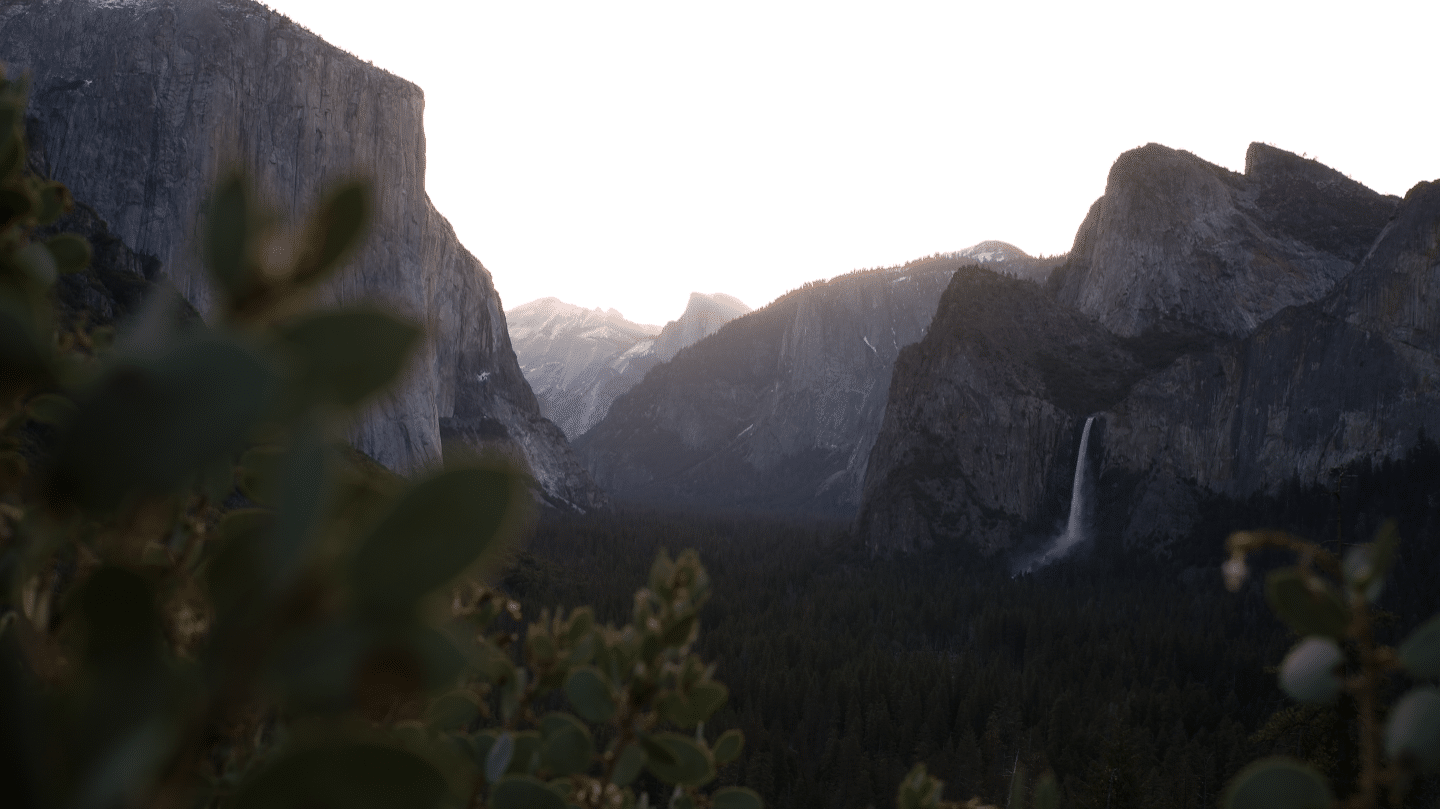
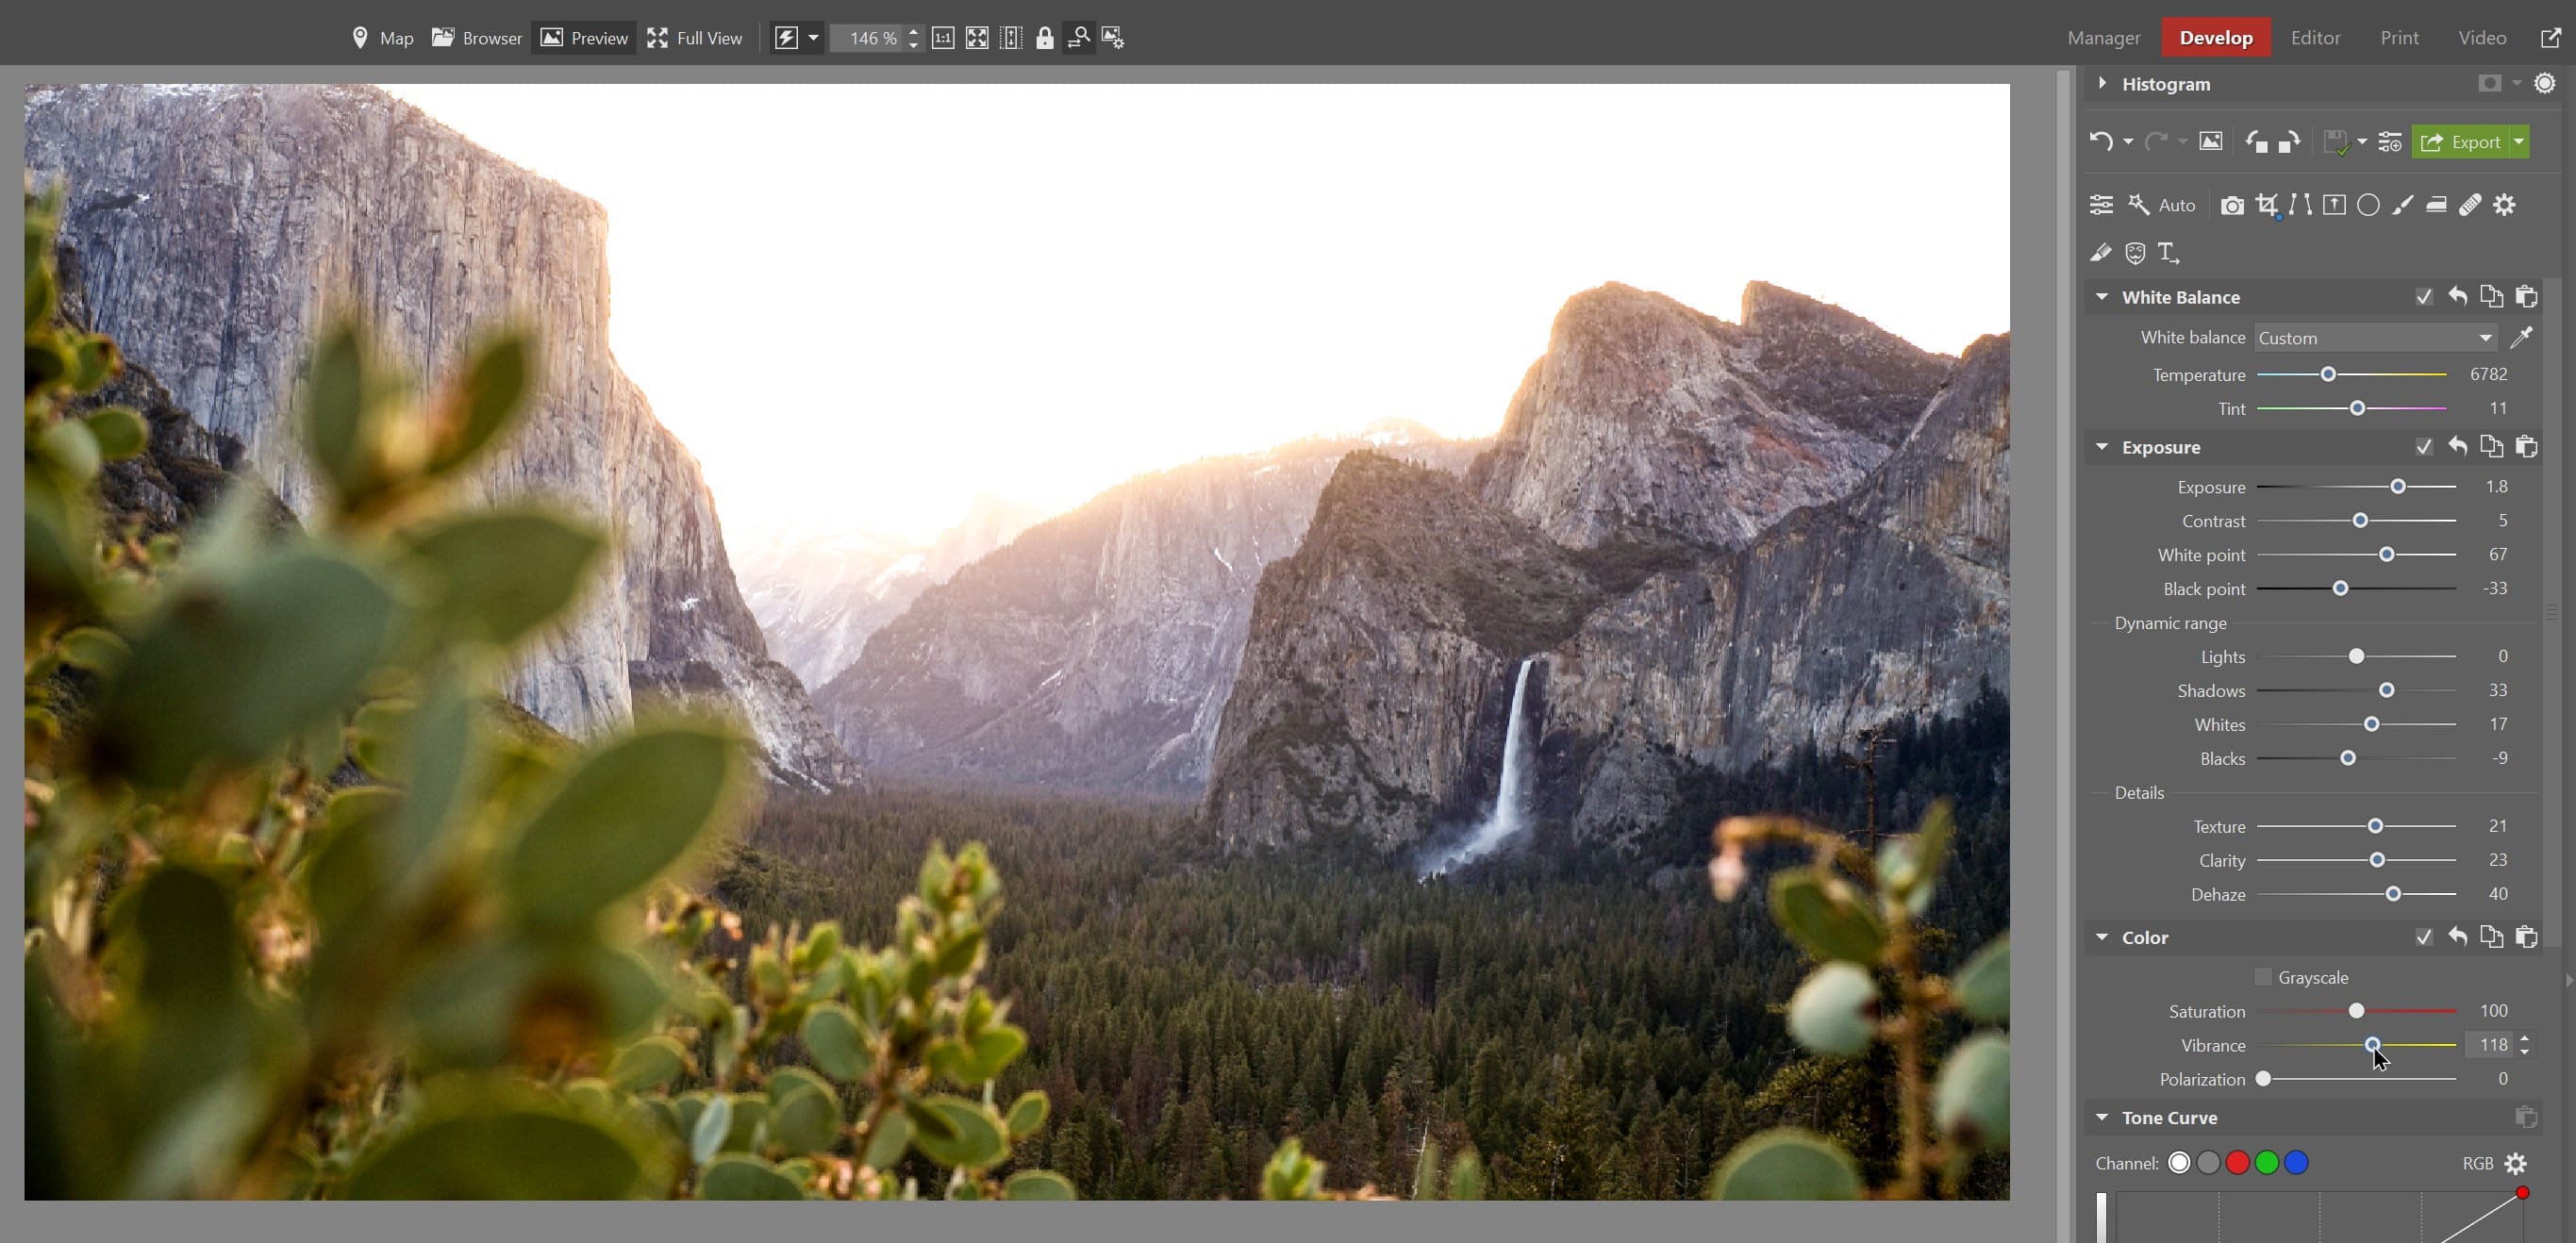
We’ll demonstrate these adjustments on the following landscape photo:
Exposure and contrast adjustments
In the photo, the foreground gets lost due to the photo being underexposed. First off, we brighten the whole photo by increasing Exposure by moving the slider to the right. This will give us a better idea of what we are working with.
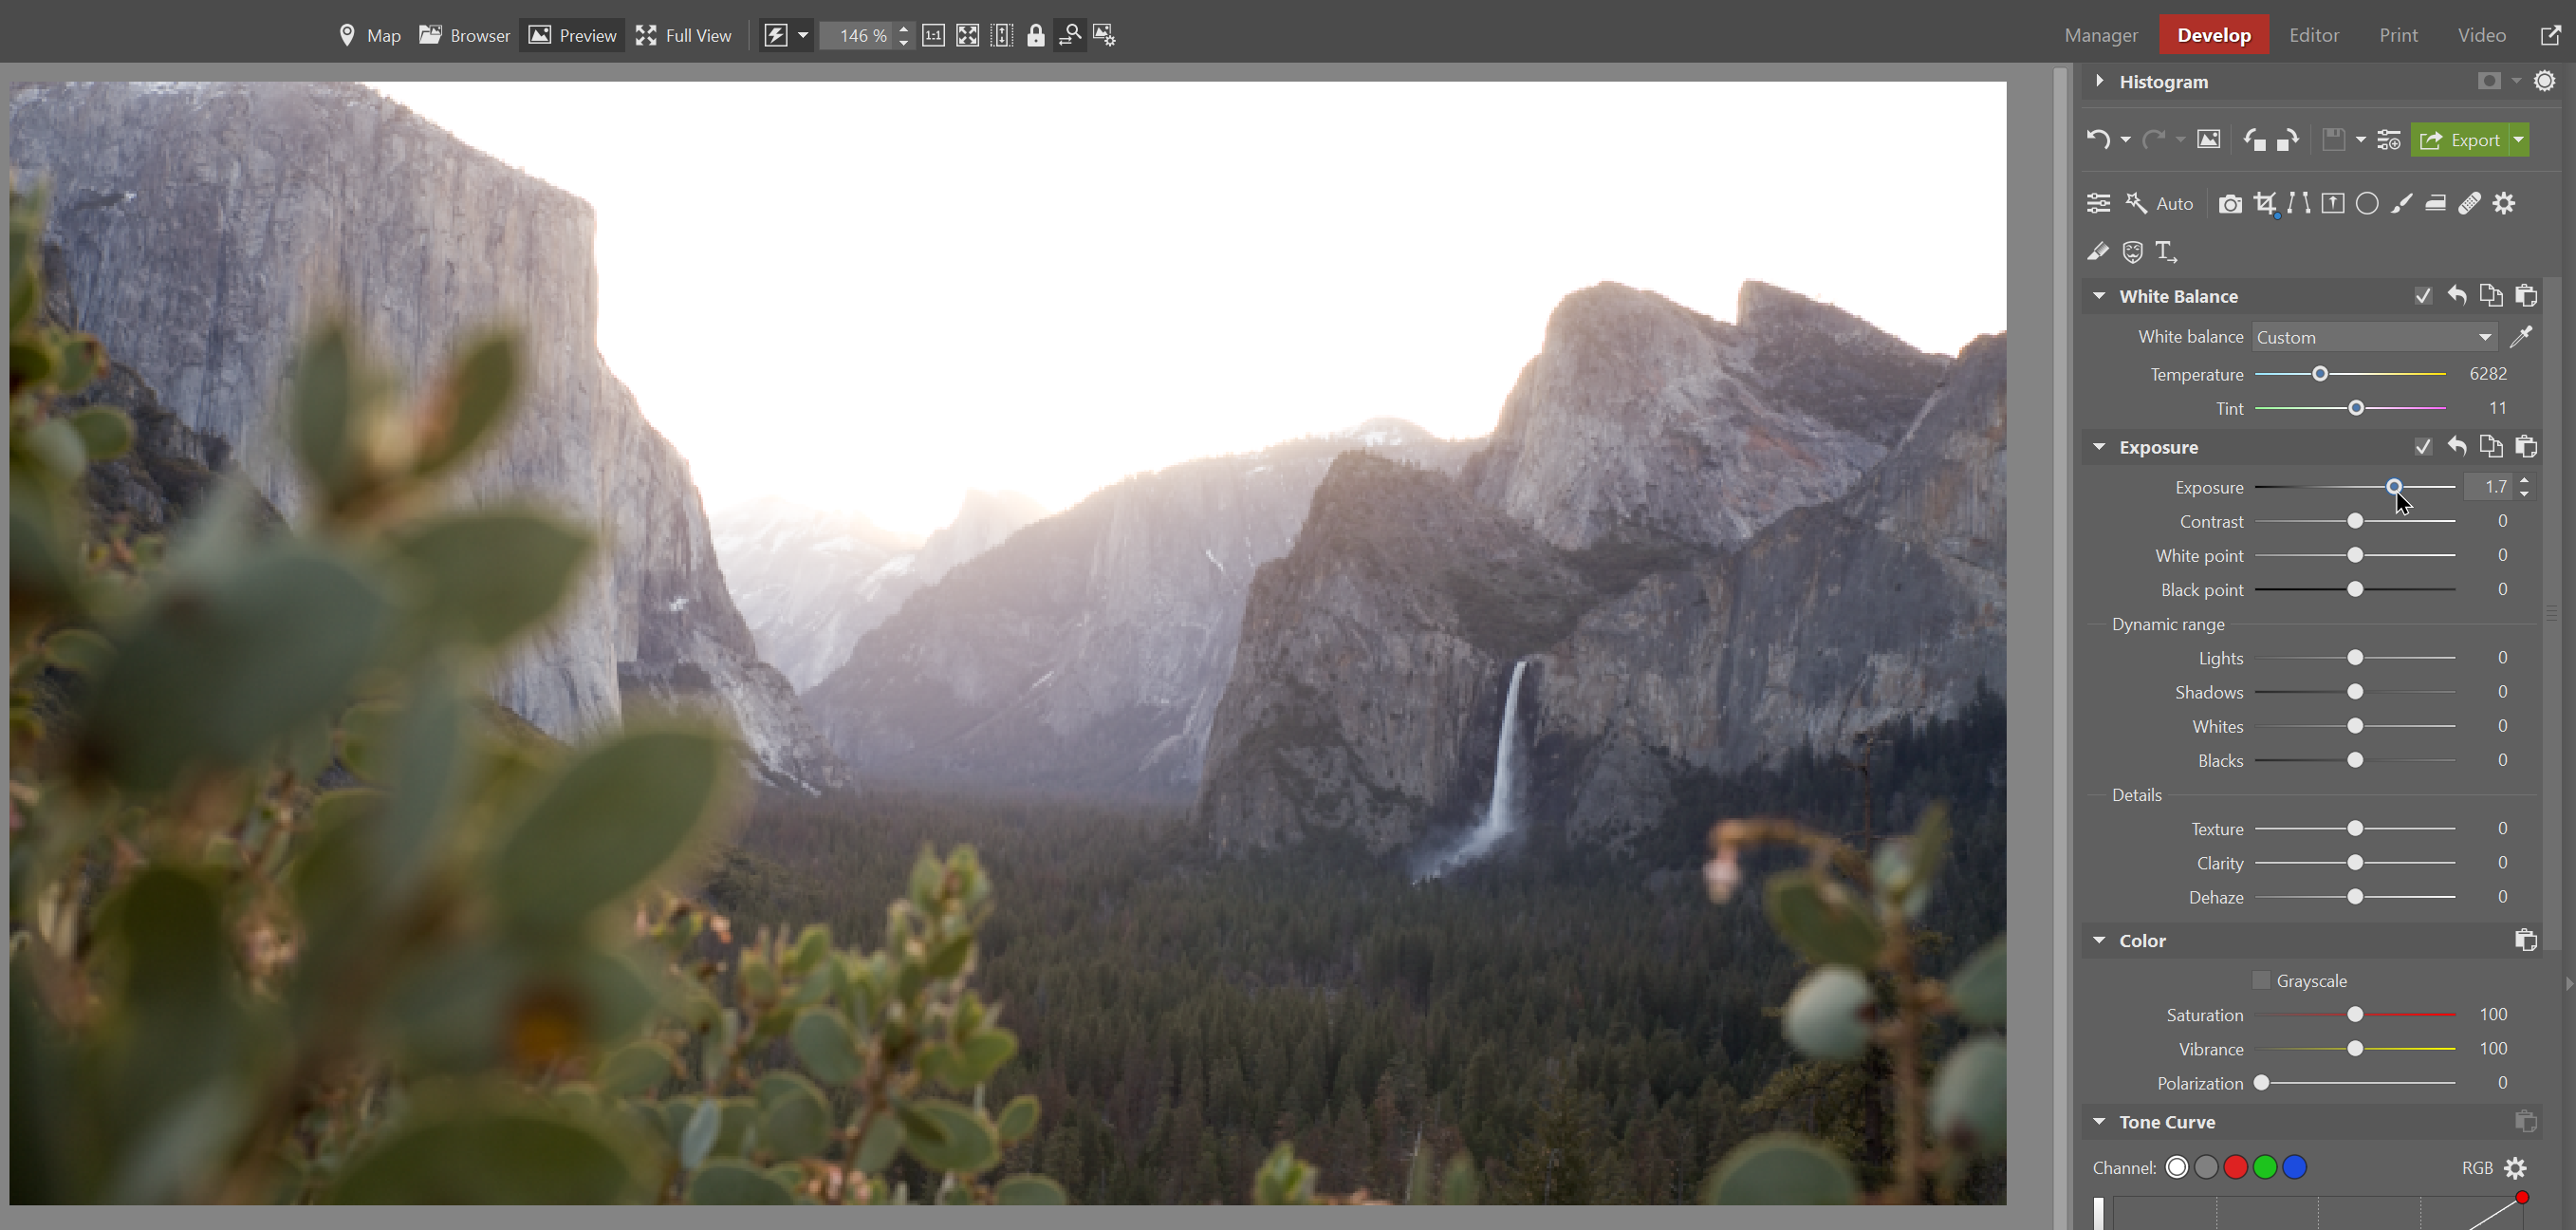
The next thing we do is remove the haze that formed due to the light mist in the air. The haze takes a lot of contrast away from the photo. We pull up the Dehaze slider. This adds some contrast to the photo, but it also darkens it a bit. So we go back to the Exposure slider and increase it some more.

Now it’s time to fix the overall contrast. Increase the Contrast slider only slightly, as any more would affect the colors of the whole photo. The main adjustments to contrast take place in the sliders for exposure and dynamic range.
The concept of contrast is the difference in brightness between the highlights and shadows. When this difference is big, we say the photo has high contrast. If we want higher contrast, the goal is to have both bright highlights and dark shadows in the photo.
We use the White point slider to brighten the light areas of the photo. We immediately notice how moving it to the right makes the entire photo pop. Moving the Black point slider in the opposite direction (to the left) darkens the shadows of the photo. These two sliders expand the range of brightness levels present in the photo. The result is a photo with greater contrast.
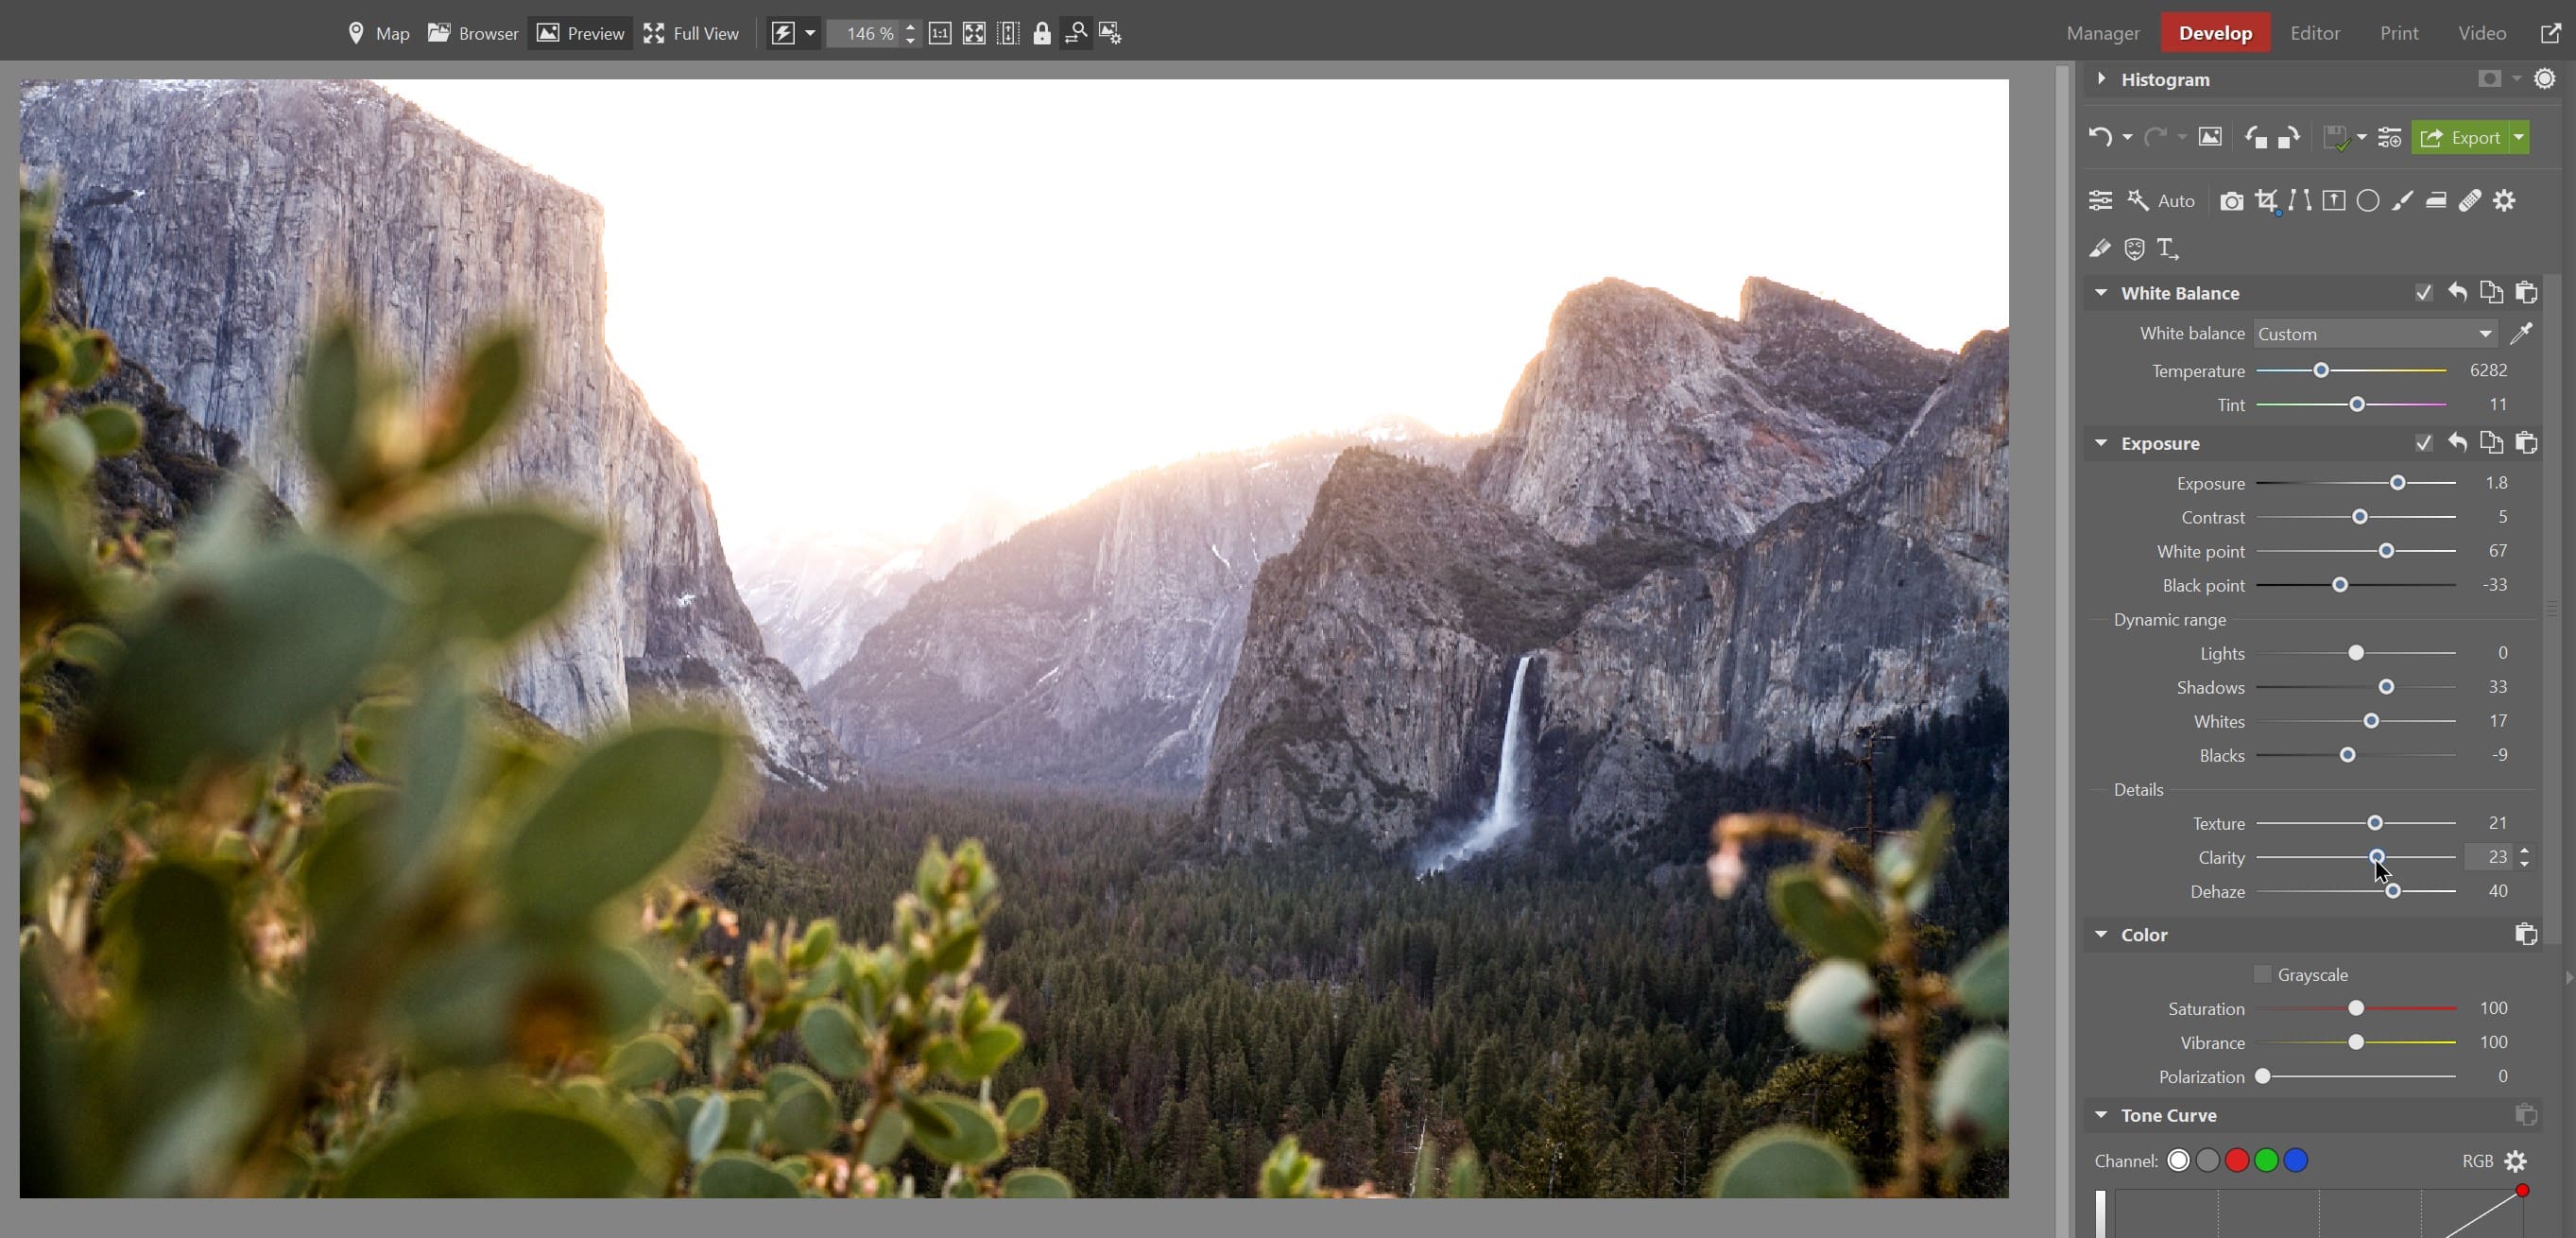
We will skip the Lights slider this time. We don’t need to emphasize the highlights of the photo any more because the photo already has enough highlights in the sky. We also don’t want to dim the highlights so the photo doesn’t lose contrast again. We increase the Shadows slider because the landscape is still covered in shadows. If we lose contrast, we go back and tweak the White point and Black point sliders.
Use the White and Black sliders to affect how pure white and black are rendered in the photo. Typically, we want to emphasize both colors. We move White to the right and Black to the left. This adjustment also has a positive effect on contrast.
We wrap up contrast with adjustments to Texture and Clarity. Both functions enhance contrast at the edges of objects. Texture is used for the edges of smaller objects and Clarity for larger objects.
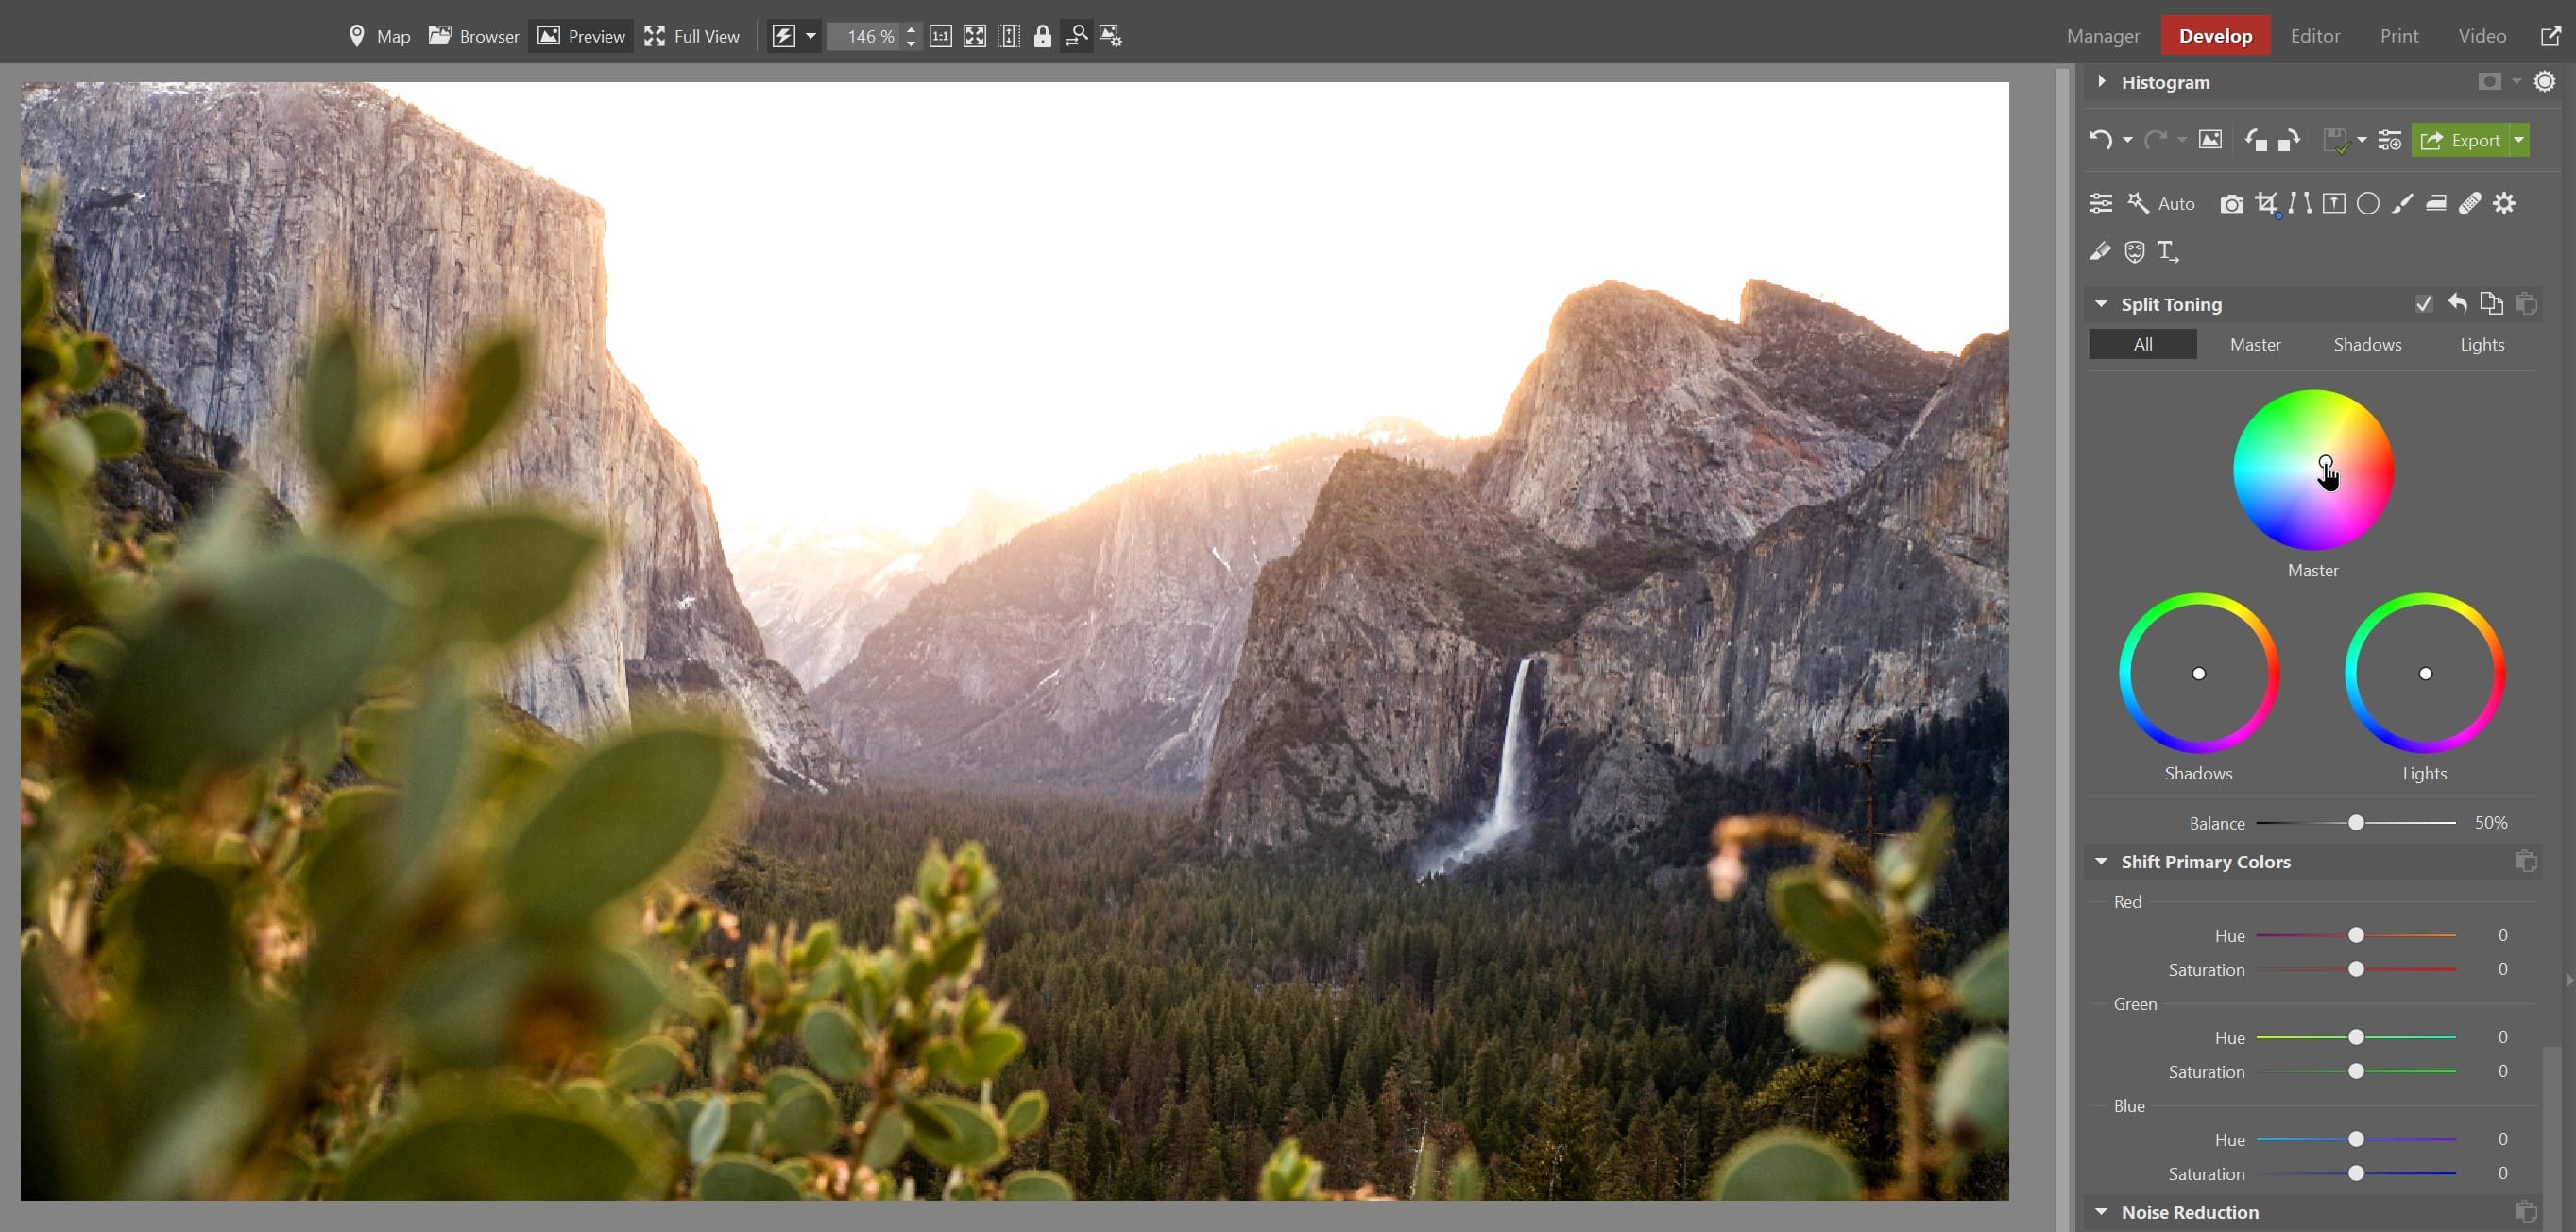
Bring out the colors
Color plays an important role in bringing your photos to life. Every color adjustment should begin with proper white balance. This is set using the Temperature slider. In our case, we move it to warmer shades of yellow. Sometimes photos are dull simply because they’re too blue or yellow. You can learn more about white balance in the article White Balance: Why It Matters, What to Do.
Another basic adjustment is Saturation and Vibrance. Saturation adjusts color saturation for the whole photo equally, while Vibrance affects the saturation of only those colors that aren’t as bright. For this reason, increasing Vibrance will be the perfect solution for our picture.
To bring out the warmer tones even more, I choose a slight orange tint in the Master wheel under Split Toning. This nicely brings out colors typical of the golden hour, when the photo was taken.
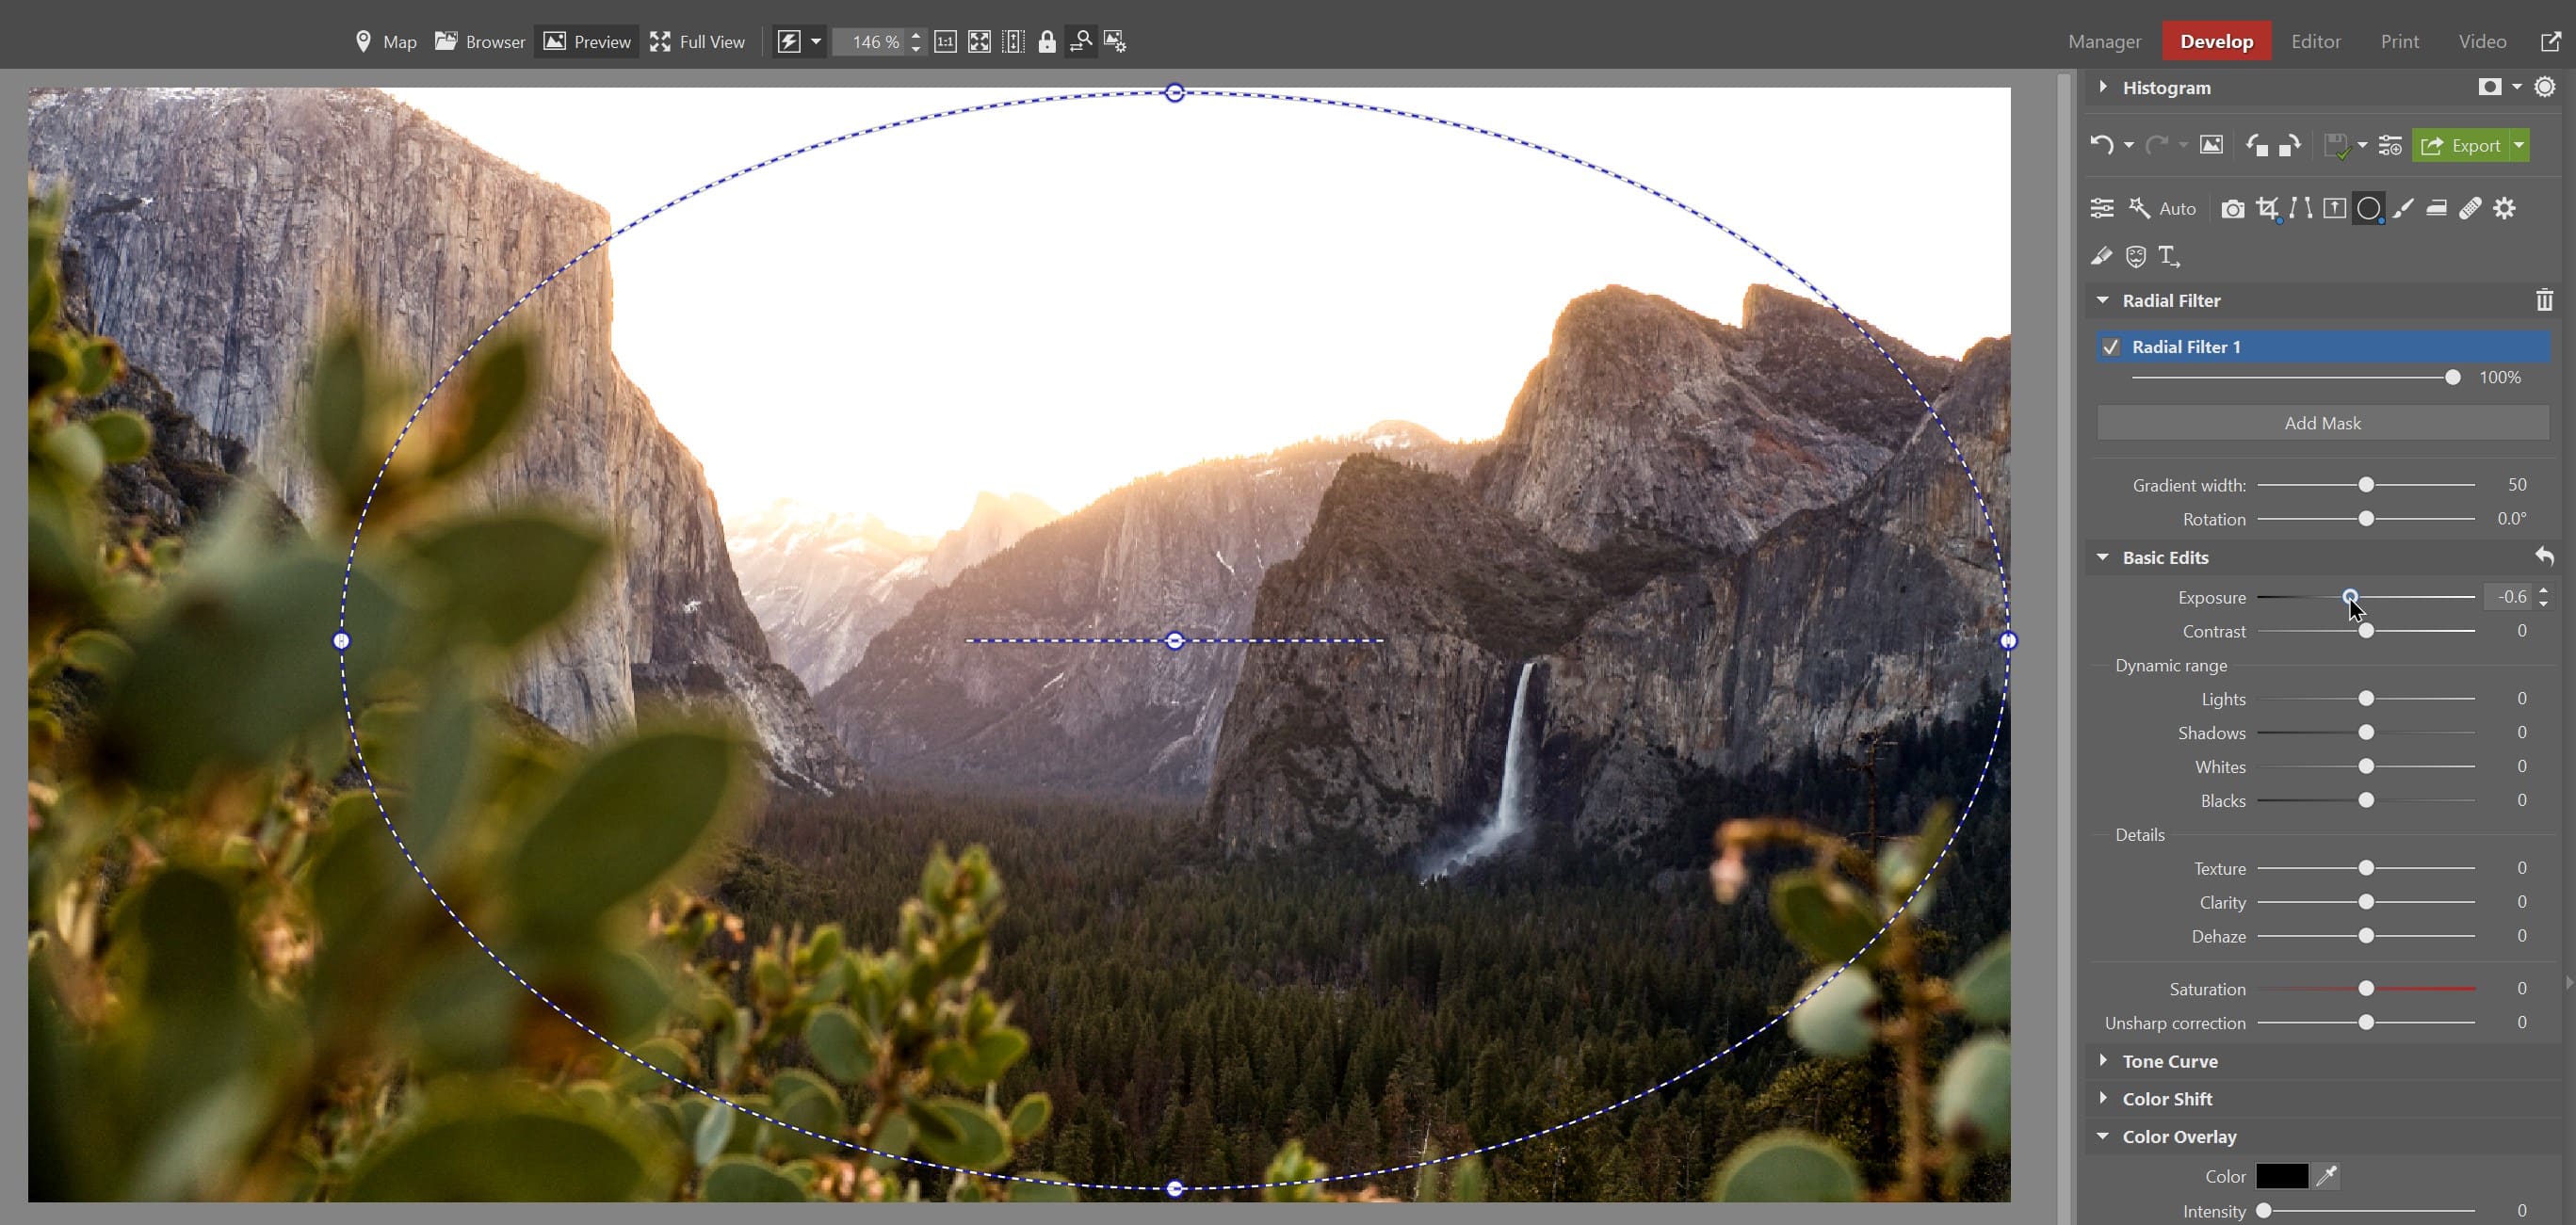
Highlight the main subject
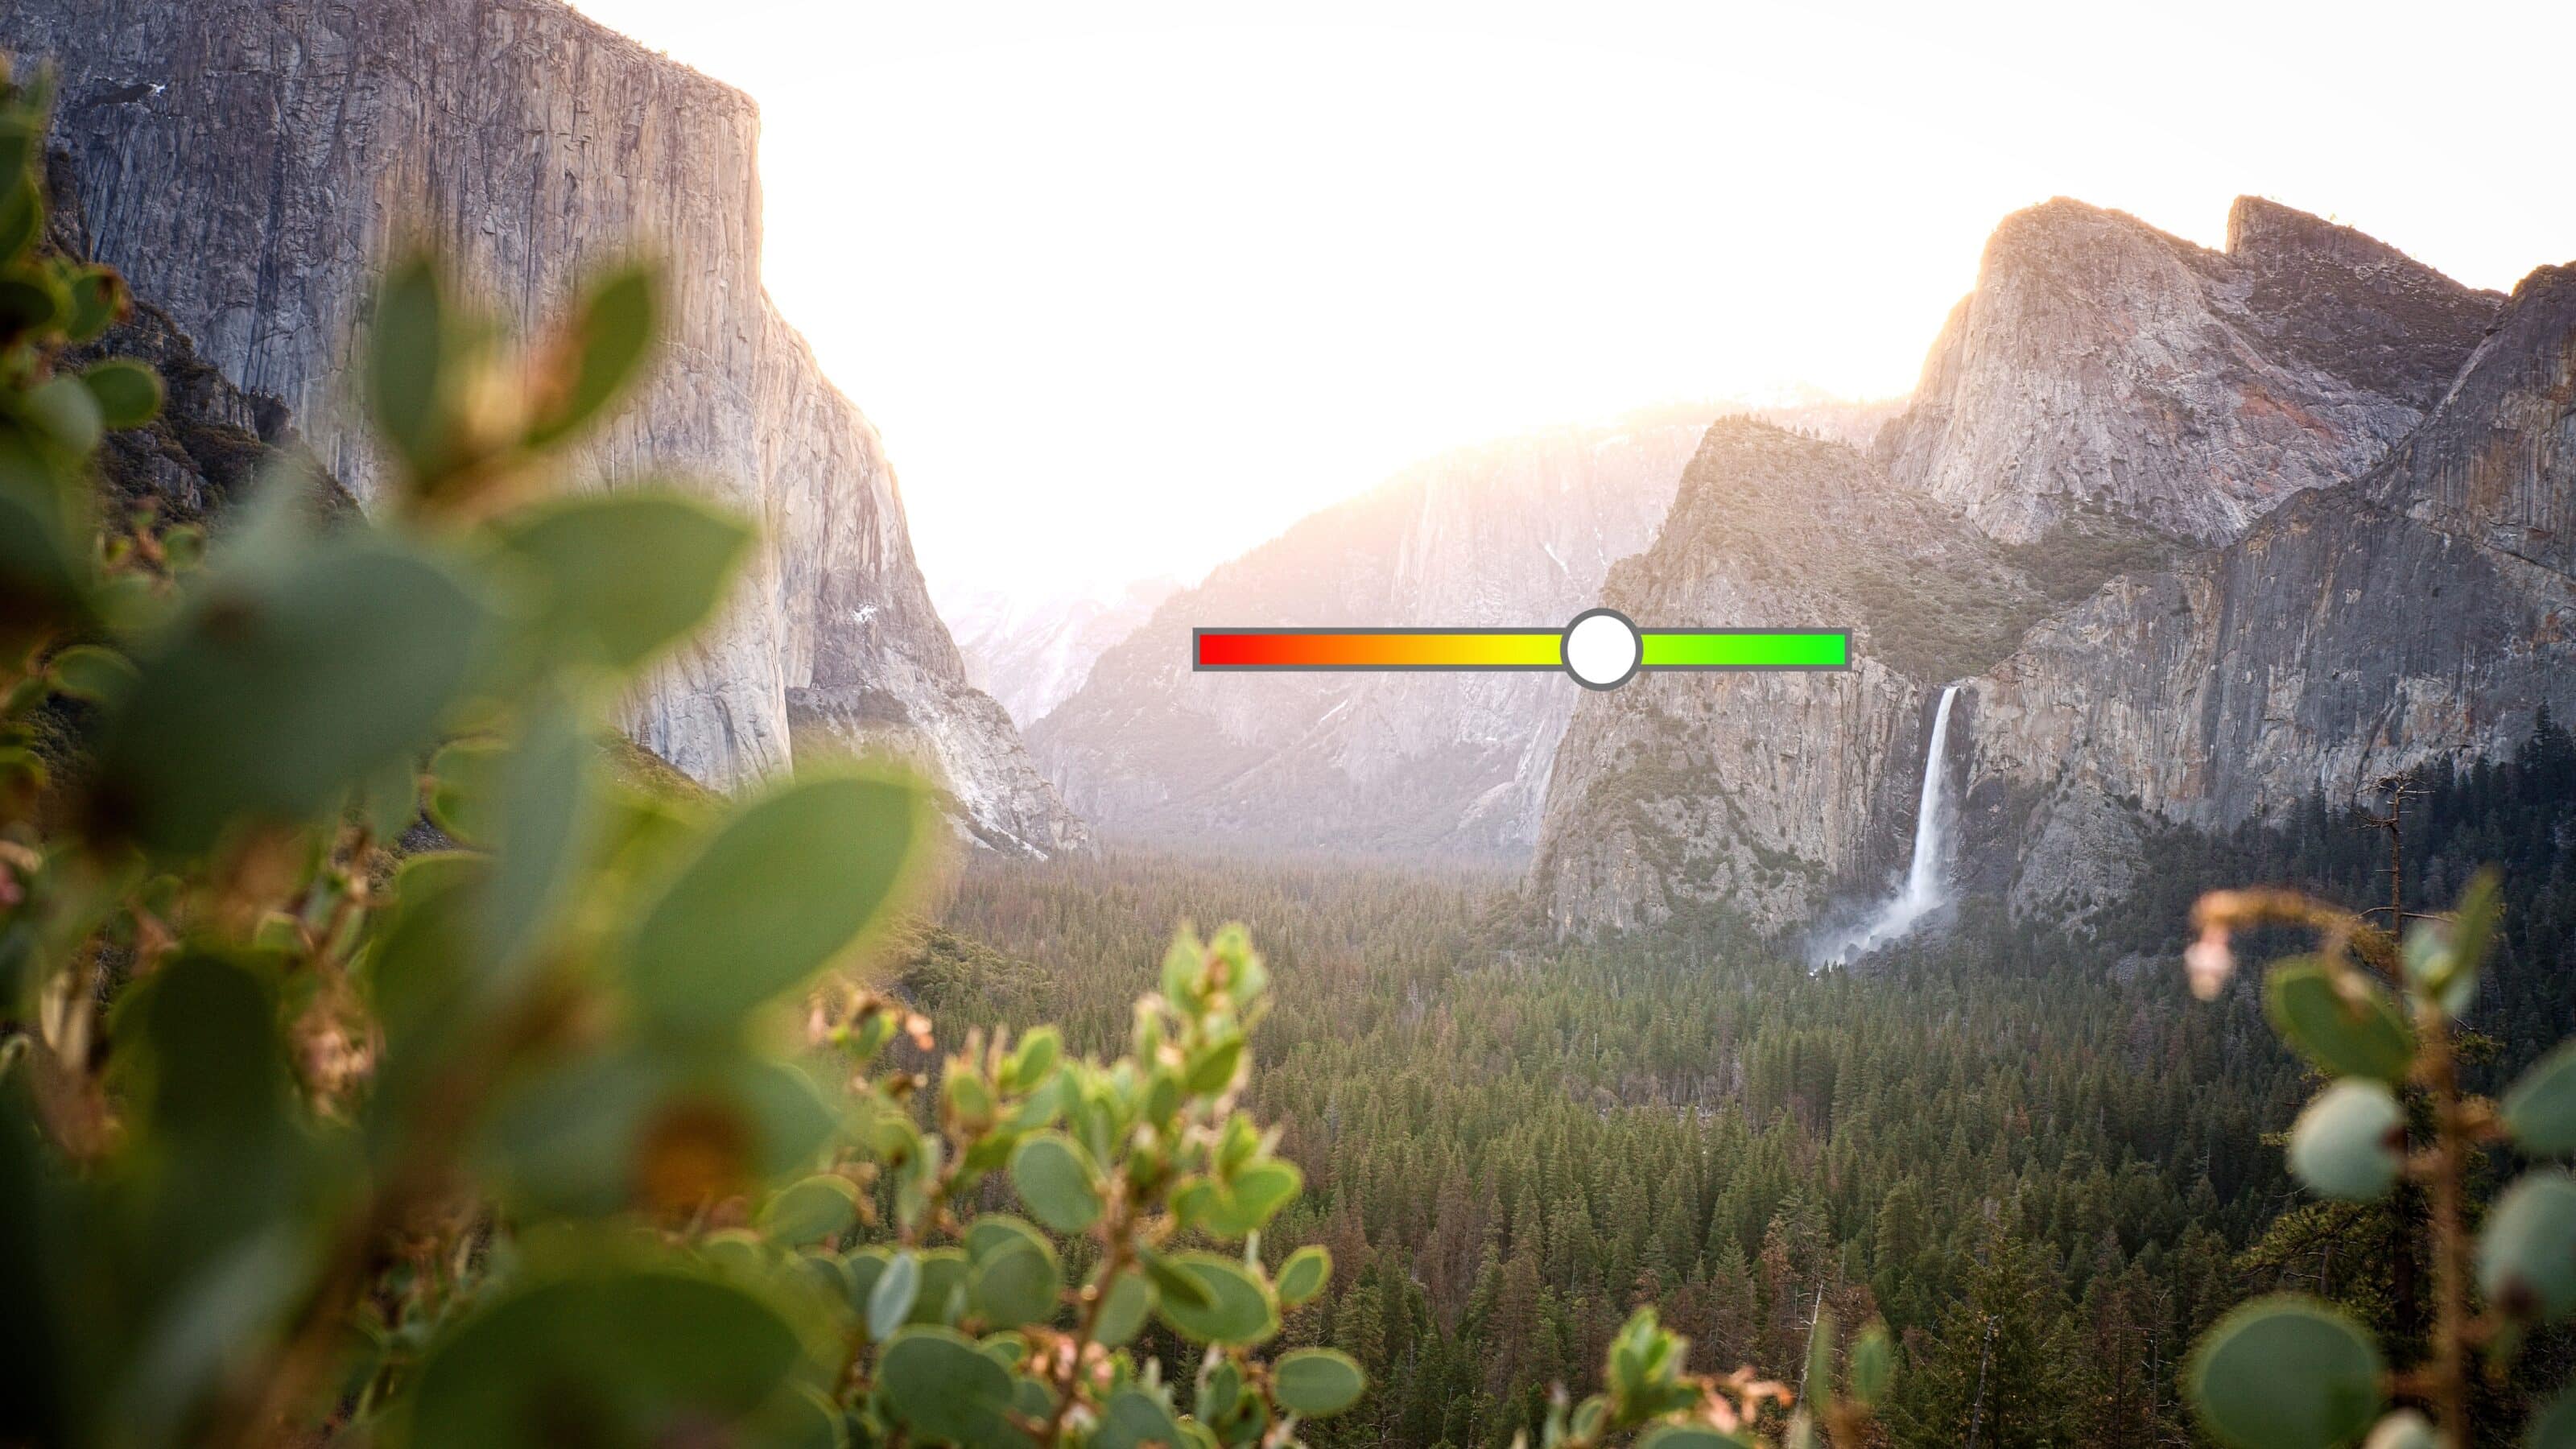
A main subject that doesn’t stand out is often the reason we deem a photo dull. We don’t know where to look. A simple trick for directing the viewer’s attention to the right place is to use the Radial Filter (R).
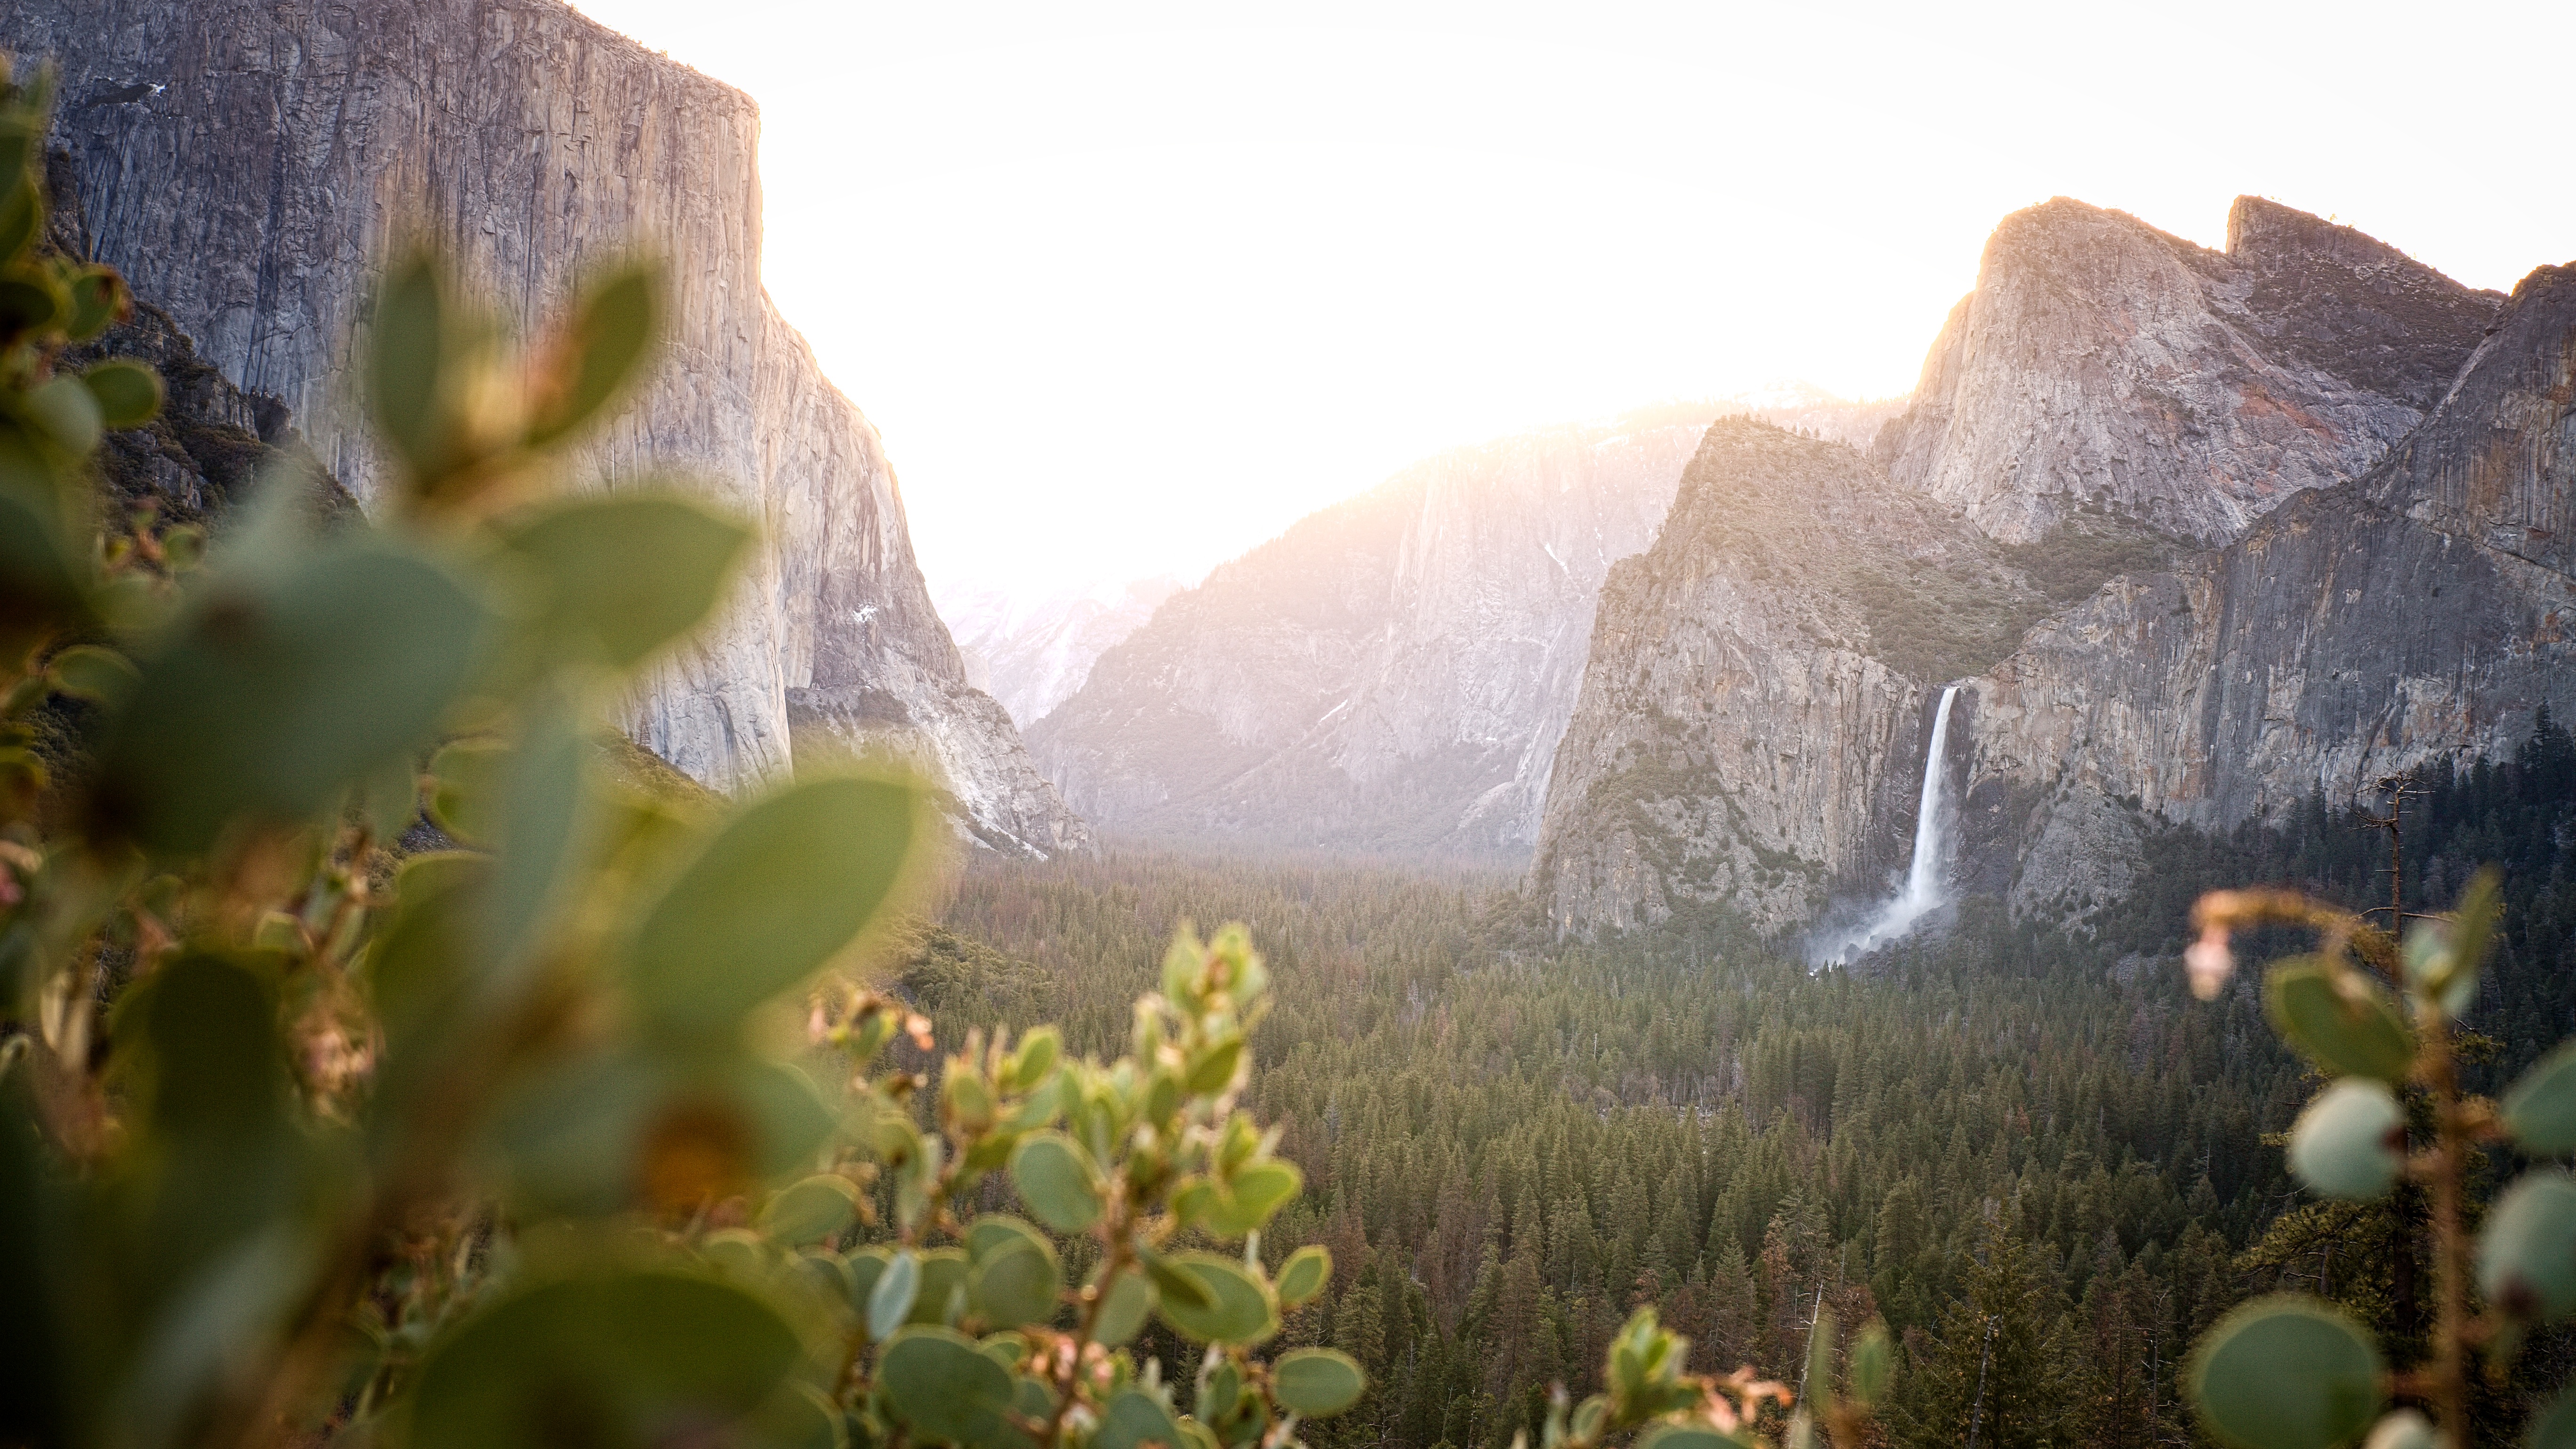
In our case, the main subject is the landscape and the cliff with the waterfall, which we are observing through the bushes. We select the Radial Filter (R) and stretch the filter over these places. We hover over the mask preview and click the Invert icon that appears. We set a high Gradient width and lower Exposure. This will bring the viewer‘s attention where it belongs.
Final bonus adjustment
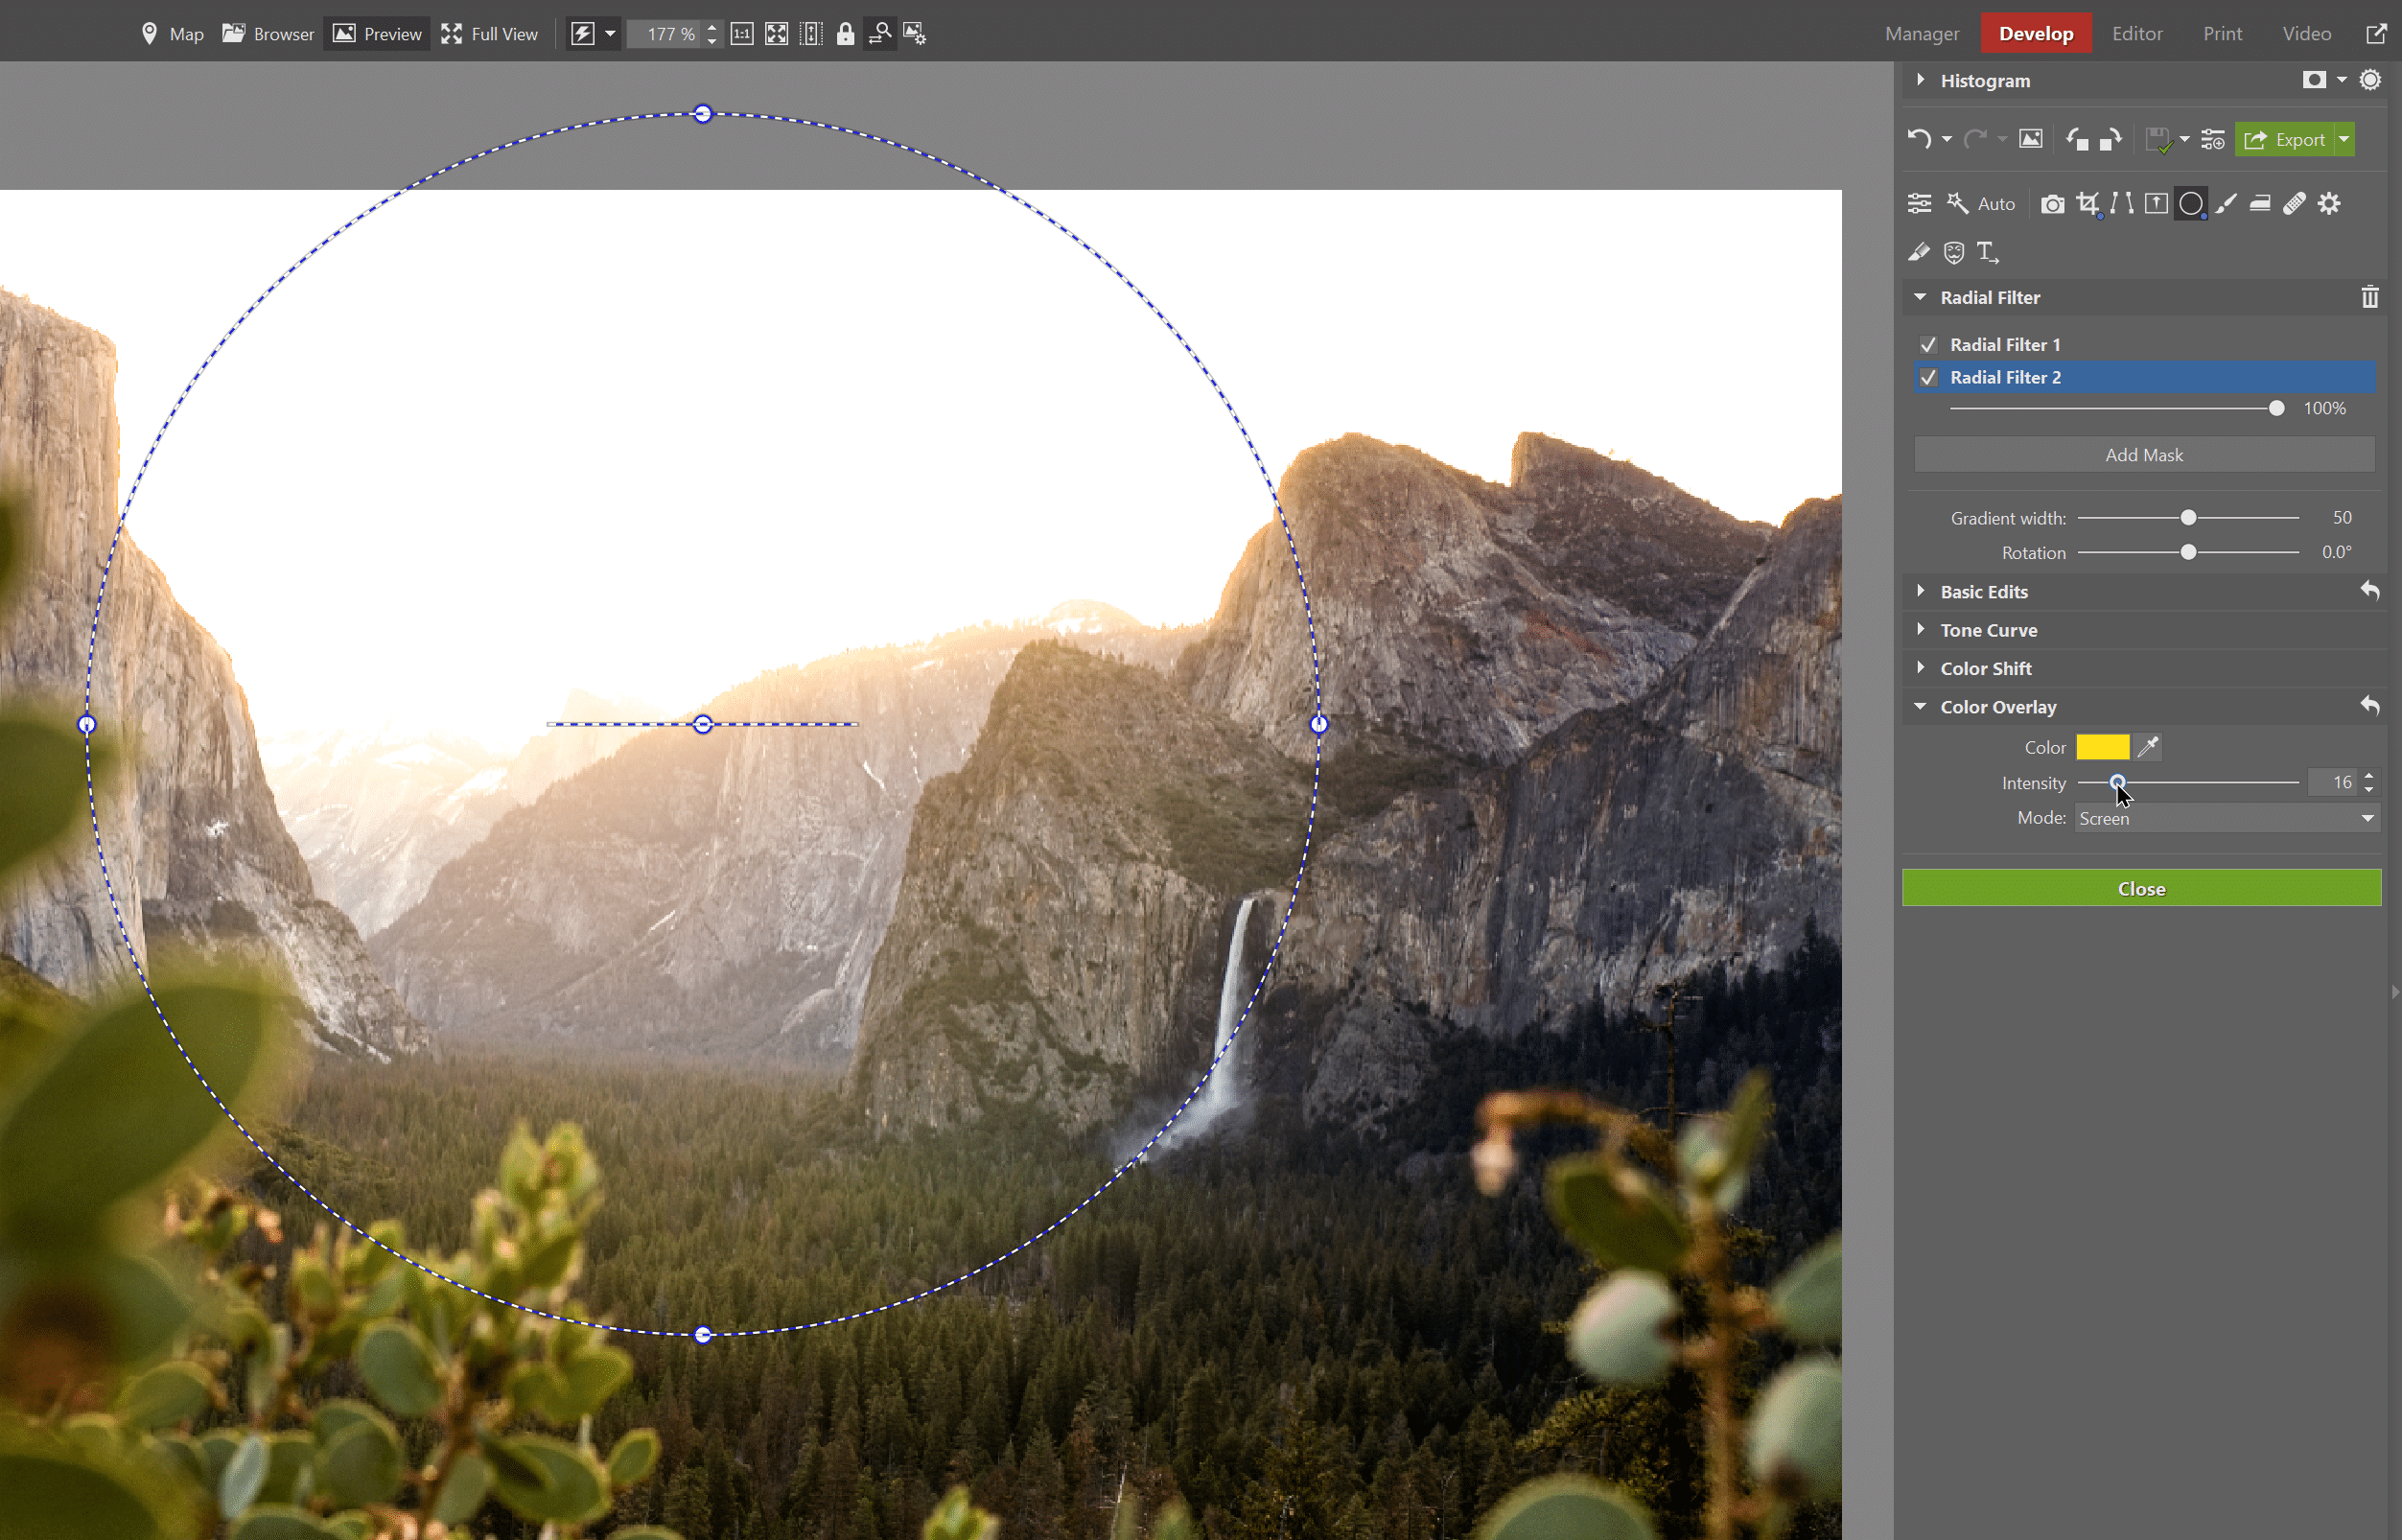
Now, we’ll show you one last tip for spicing up your photos using a simple special effect. We use the Radial Filter (R) again to mimic the setting (or rising) sun.
Stretch the second radial filter over the horizon, where the sun should be. Again, set a large Gradient width. Do not invert the mask this time. Slightly increase Exposure and scroll down to Color Overlay in the Radial Filter tools.
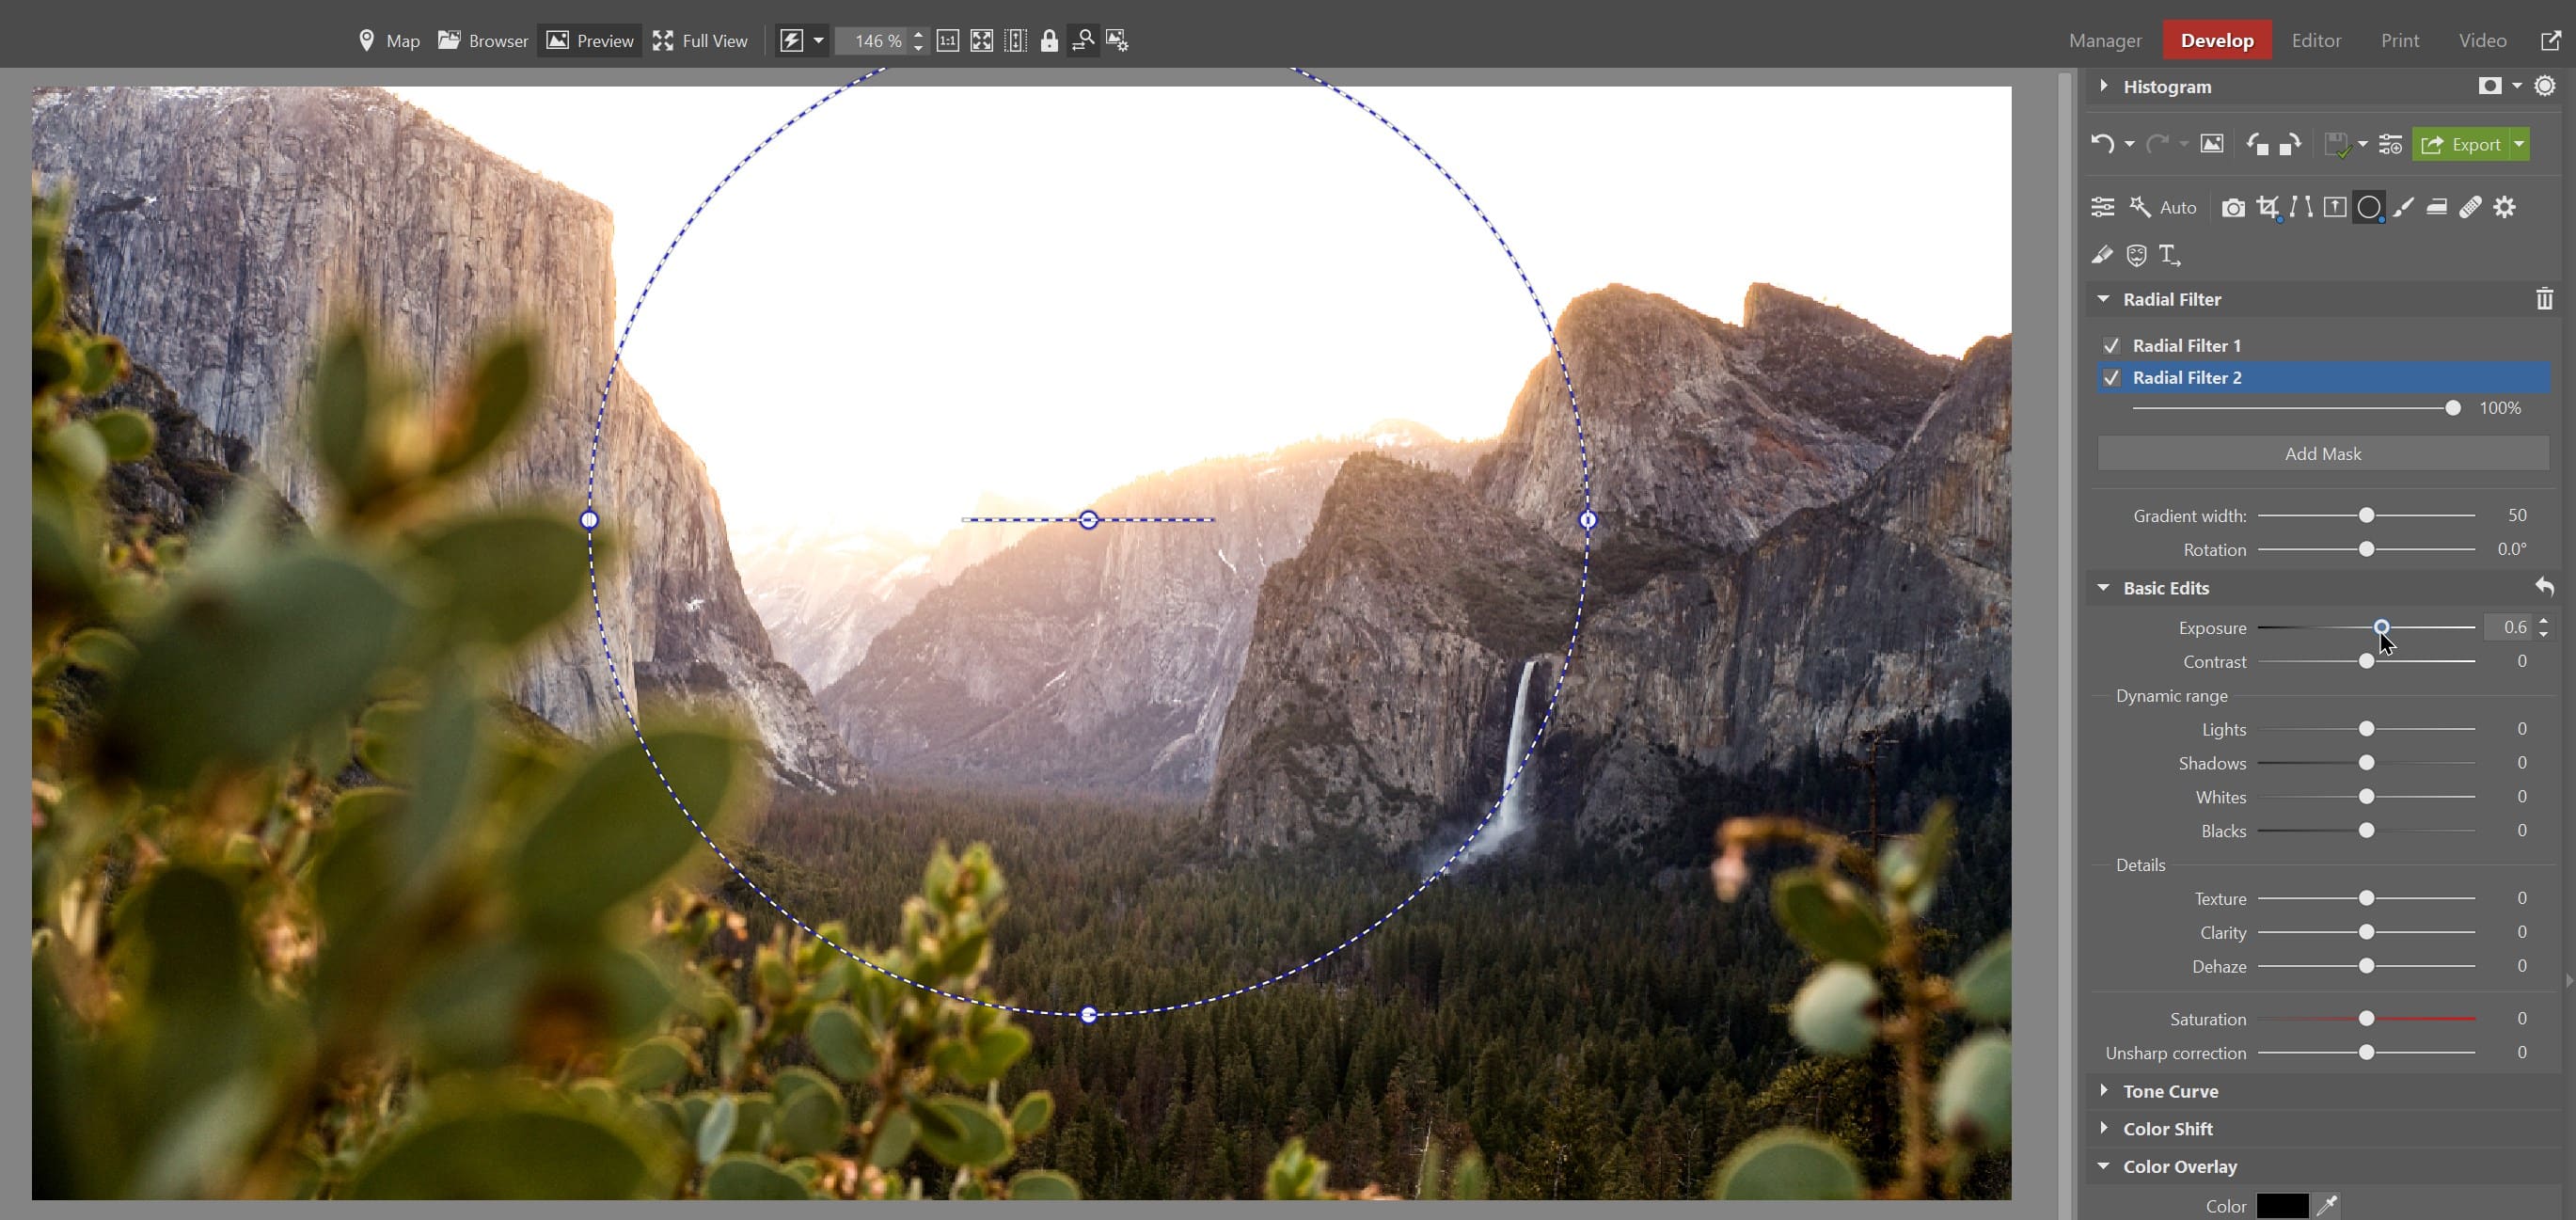
Click the color box and choose a nice golden shade the sun might have when it’s low on the horizon. Or, choose the right shade from the photo using the eyedropper. Once you have your color selected, click OK.

Next, increase Intensity and set Mode to Screen. The result will be a naturally bright sun above the horizon. Special effects like this are another nice way to spice up a dull photo.
Bring an end to boring photos
In the following photo, you can see how we were able to rescue a previously dull photo using Zoner Studio. Download Zoner Studio free for 7 days and give it a try yourself!

Edward Crispin
Thanks for your very informative articles Ien enjoy reading them and try to put some of thetips into practise Once again Thanks Ted