

Camera Backpacks—How to Choose the Right One
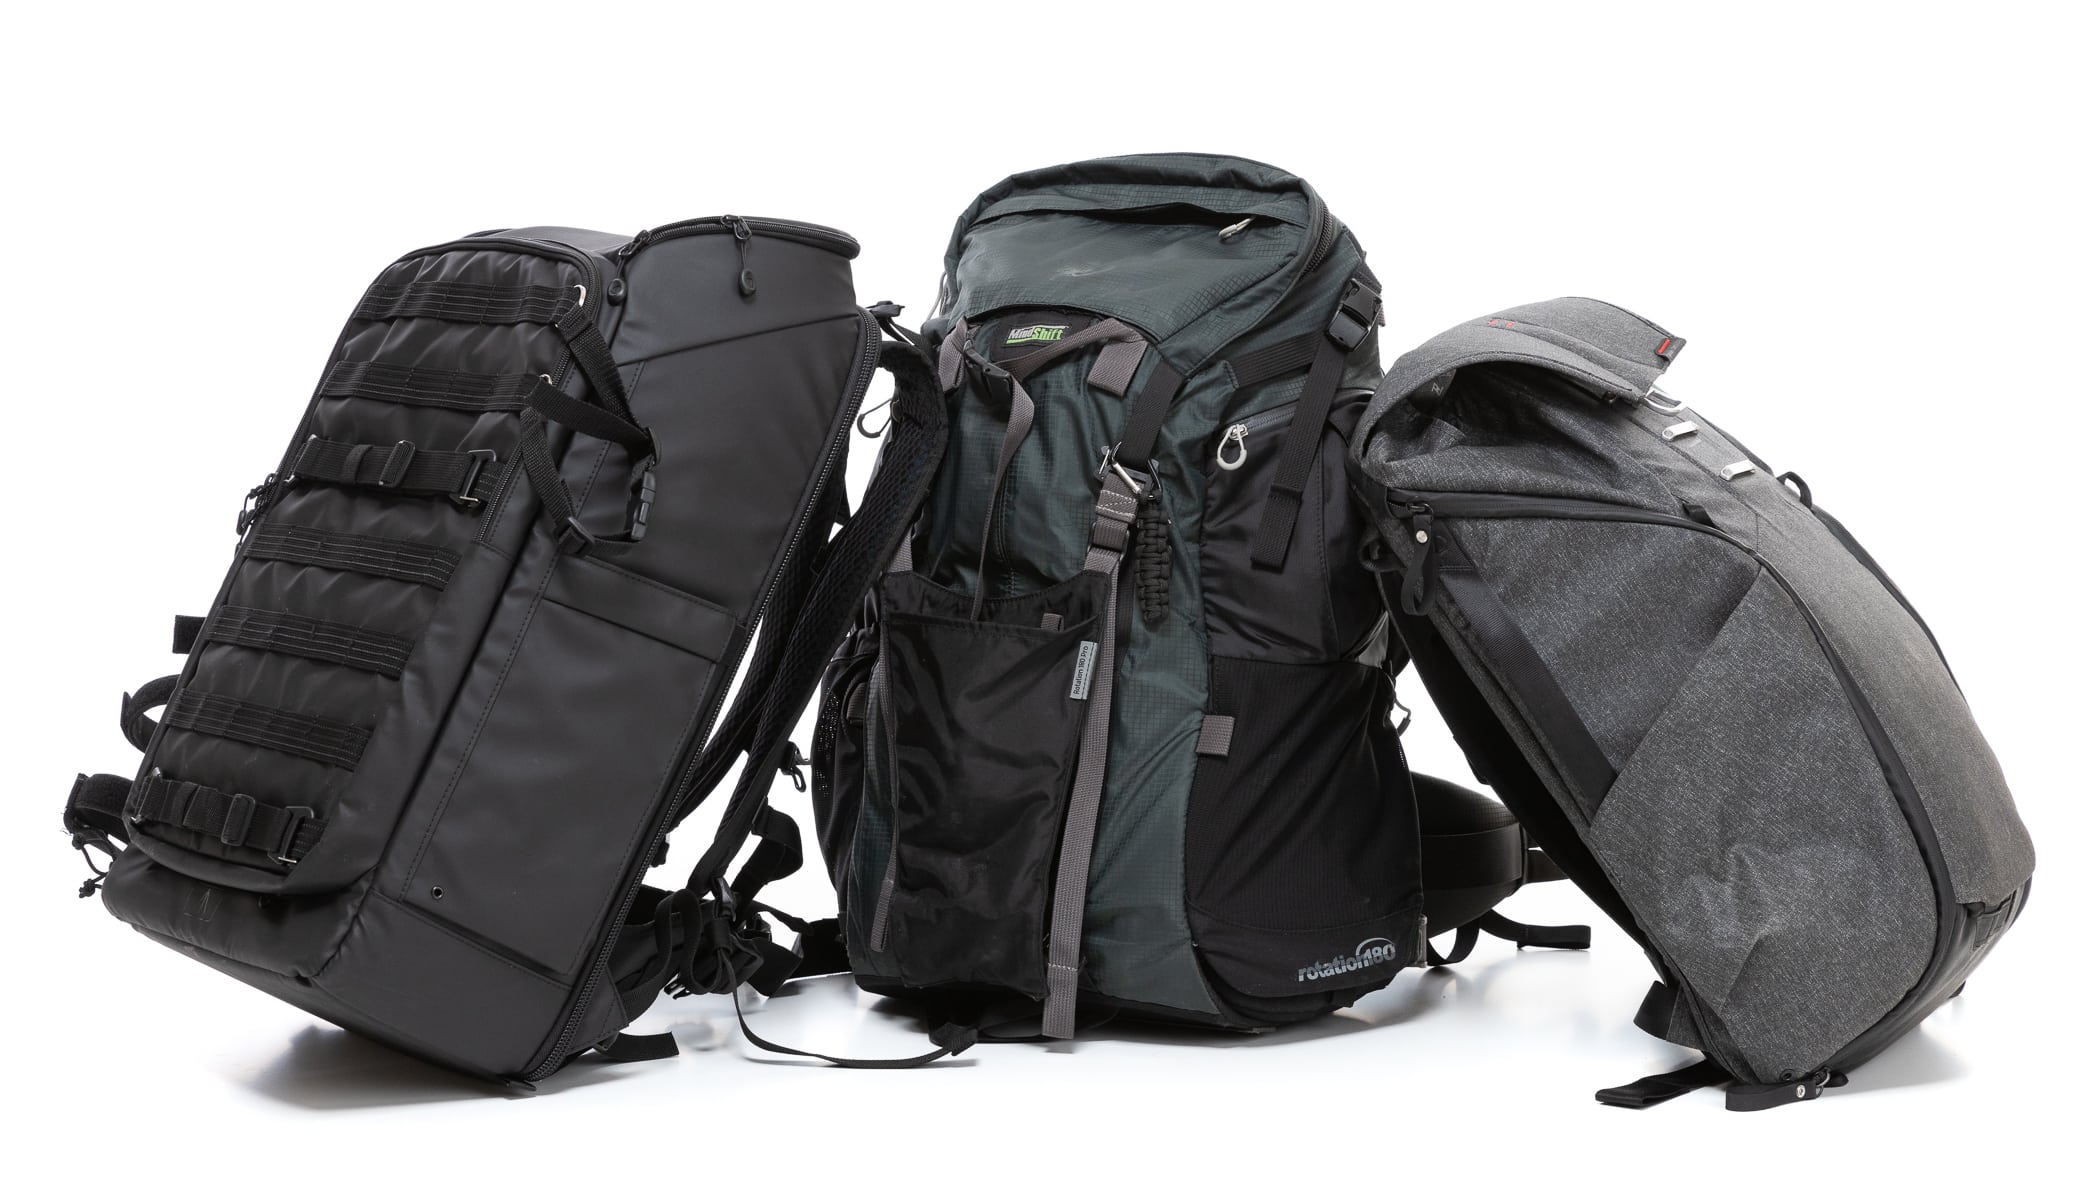
Choosing the right camera backpack involves more than looking at its capacity. You also need to consider factors such as how you access your gear, whether there’s room for a laptop, water bottle, or tripod, and, ultimately, how comfortable the straps are after a full day of shooting. Using three camera backpacks I’ve carried for years, I’ll show you what to look for when choosing a camera backpack that fits your gear and shooting style.
In this article, you’ll learn:
- What types of gear access camera backpacks offer.
- How to choose the right backpack size based on your amount of gear.
- Where to store laptops, water, or a tripod.
- What to look for in shoulder straps and a hip belt for comfortable carrying.
- Why a rain cover is worth having and how well backpacks hold up in the rain.
While a smartphone with three lenses can easily fit in your pocket, things get tricky when you’re carrying a larger camera. One of the most practical options for transporting all your gear is a camera backpack. It works well for both the city and travel, and modern models offer plenty of useful features. Let’s take a look at the factors that matter most.
Over the course of my photography career, I’ve gone through at least six camera backpacks. I still own and regularly use three of them for different purposes, so I’ll use them to illustrate the points below. Specifically, they are:
- Tenba Axis 32L (version 1)
- Peak Design Everyday Backpack (version 1)
- Think Tank MindShift Rotation 360° 38L Pro

I realize that these examples are higher-end products, but you can usually find cheaper alternatives that offer everything you need.
Access to gear
The first thing to consider is how you access your gear.
I really like side access. You sling the backpack over one shoulder, unzip the side, and reach your gear without having to put the backpack down. It’s quick and easy, and it’ll come in handy in rugged terrain. Side openings come in different sizes and can be found either on both sides or just one, almost always on the left. The right side is usually reserved for a water bottle or tripod holder instead.

Rear access is also common. In this case, you need to lay the backpack face-down on the ground and open the entire back panel. The big advantage is that you can easily access everything inside.

An older design is the front-access style, where the backpack opens in a similar way, but from the side facing away from your back when you’re wearing it. It offers similar advantages, but one major drawback: you have to set the backpack down on the ground, so the opposite side ends up facing down—which means it’s also the side that can pick up dirt and leave marks on your clothing.
Then, there’s also top access. However, you’ll probably only use it for photography gear once you have enough equipment to fill the entire backpack. Otherwise, the top section is usually reserved for hiking gear, while the electronics at the bottom are separated from it and therefore inaccessible.

The Think Tank Rotation model takes a completely different approach, which I’ll call “rotating” access. Part of the backpack wraps around your body like a giant fanny pack with your electronics stored inside, but the storage capacity is limited. In my model, there’s enough room for one camera body and two lenses.

Size of the gear compartment
The capacity you need depends on the size of your gear. It’s very common to find a series of nearly identical backpacks that differ only in size.
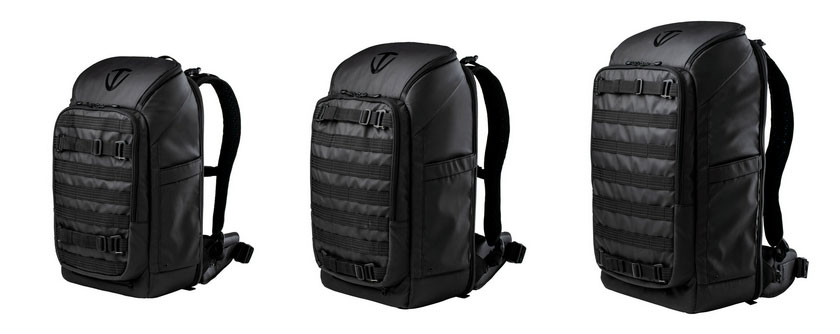
If you’re traveling by airplane with your camera gear, it’s important to keep carry-on baggage limits in mind and avoid choosing a backpack that’s too large.
You can customize the inside to suit your needs. Velcro dividers are included, and you can purchase or make additional ones. My DIY solution consists of plastic discs wrapped in Mirelon and covered in a layer of fabric.

Space for additional gear
Many photography bags seem to assume you won’t be carrying anything besides your camera. But what if you need to pack a jacket or snack? Some backpacks are configurable, so you can adjust them as needed for each trip. Others have strictly separate sections for camera gear and other items. While this is a bit safer, it can also become a potential problem down the road if you unexpectedly add another lens to your collection.
Laptop compartment
The dedicated laptop compartment is also useful for paper documents or larger flat items. Modern backpacks almost always have one, but my older Think Tank doesn’t (current versions do). So if you’re buying a secondhand backpack and need a laptop compartment, be sure to check for it.

Tripod and water holders
This is where things can get complicated. You need to find room for both a tripod and a water bottle without sacrificing side access. My three backpacks are great examples of different options manufacturers use.
Some manufacturers place the tripod holder right in the middle of the backpack, as far away from your back as possible. However, this shifts the center of gravity in an unergonomic way, and you can’t put the backpack down with that side facing up. If possible, it’s better to carry the tripod on the side.

Due to its rotating system, the Think Tank has only one side pocket, but it’s the only one that can accommodate a hydration pack. The hydration pack sits inside the backpack but is separated from everything else. Unfortunately, the space for the tripod is a bit too far away from your back.

While Peak Design doesn’t have a dedicated space for a hydration pack, it does have two huge exterior pockets, one on each side, that can easily hold a 1.5-liter bottle as well as a tripod.

The Tenba has only one pocket and a side opening on the other side, which is covered by straps compatible with the MOLLE system. You can find various drink holders to attach here, but the space only fits a one-liter bottle.

Additional pockets
Having plenty of pockets is very useful, and there’s no such thing as too many. Hidden compartments for storing AirTags to help track stolen items are also popular.
Once again, the examples showcase very different approaches. Think Tank has zippers scattered throughout the backpack, while the Tenba doesn’t rely heavily on separate compartments. Peak Design scores the most points here with a large number of pockets around the entire circumference of the backpack.

Weight and comfort
A lightweight backpack is tempting, but what’s more important is how well it fits you and distributes the weight of your gear. Backpacks specially designed for hiking have better shoulder straps and hip belts. They differ not only in the amount of padding but also in the range of adjustment options at different points.

The hip belt is another key difference. In city camera backpacks, it’s either missing entirely or just a token feature. In hiking backpacks, it’s much sturdier and actually does its job when you’re carrying heavier gear. If you sometimes need a hip belt but find it gets in the way at other times, look for a backpack with a detachable one.

Rain cover for bad weather
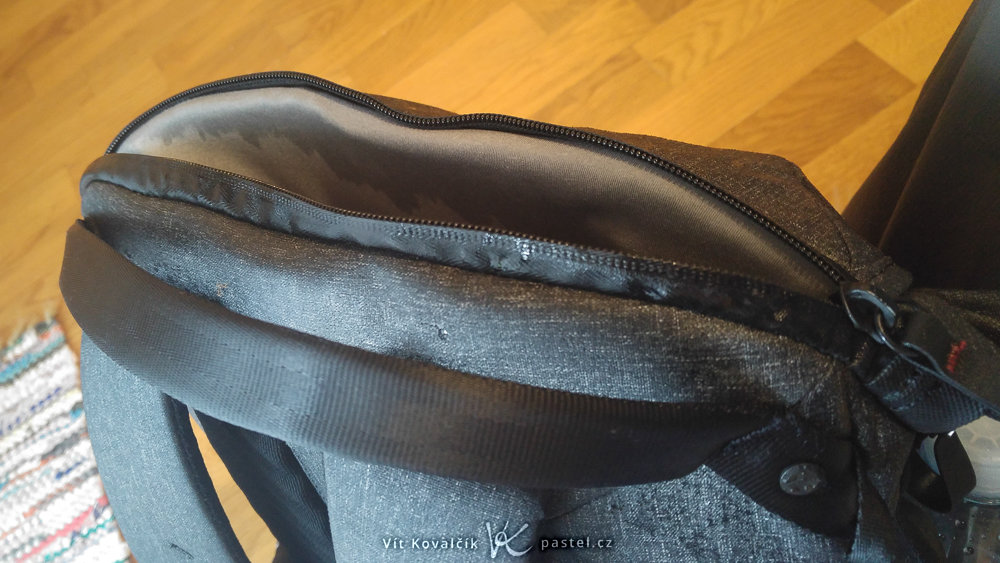
The higher-end models almost always come with a custom-fit rain cover that can be pulled out in inclement weather. Once you put it on, you don’t have to worry about your gear getting wet.

For example, I once spent a few hours in the mountains in moderate rain with a backpack that had rubber-sealed zippers but didn’t come with a rain cover. Moisture still seeped in through the openings. However, this was a fairly extreme case, and I didn’t have to worry about my camera gear. So under normal conditions, it probably wouldn’t be a major problem.
Is there such a thing as the perfect backpack?
Generally speaking, no. There are simply too many competing requirements. But if you carefully consider what you need, you might be able to find the perfect companion for your specific situation—one you can trust with your hard-earned gear.
FAQs
What type of access is most practical for a camera backpack?
Side access is the fastest, allowing you to reach your camera without taking the backpack off. Rear access gives you better access to the entire inside, but you have to put the backpack down on the ground. A rotating system combines both, but has a smaller capacity.
What size backpack should you choose?
Choose a size based on the amount of gear you actually carry, rather than what you might need in the future. If you fly, keep carry-on luggage limits in mind. That’s why popular models are often available in several different sizes.
How can you carry your tripod in a camera backpack?
Most often, the tripod is carried on the side of the backpack in a dedicated pocket or leg holder. Placing it in the center of the back saves space, but shifts the center of gravity and makes it impossible to set the backpack down with that side facing up.
What should you look for in shoulder straps and hip belt?
Hiking backpacks usually have sturdier, padded shoulder straps and a functional hip belt that effectively takes some of the weight off your shoulders. City camera backpacks tend to have simpler designs or leave out the hip belt entirely.
Is a rain cover necessary for a camera backpack?
If the backpack doesn’t have waterproof zippers or its own rain cover, moisture can seep in during prolonged rain, even if the construction is otherwise high-quality. A custom-fit rain cover is a sensible investment if you frequently take photos outdoors in unpredictable weather.

There are no comments yet.