Digital Cross-processing

Applying retro film effects to digital photography is becoming increasingly popular. We are flooded with images every day making it more difficult to grab our viewers’ attention. For this reason, photographers are choosing to take a detour back in time.
In the spirit of nostalgia, specialized filters have been introduced, making it possible to simulate the look of Polaroid pictures or pictures taken with a Lomo camera. Both effects have long been popular not only because of how they look but also because they are a blueprint of a specific coloring of photographic material in combination with a specific camera model. They are so popular that a strong community rallies around them to maintain the spirit of film and Polaroid photography.
Cross processing has its roots in film photography and is closely linked to the way film is developed. During the time of classic film photography, four types of film were typically available: color negatives, black and white negatives, color slides, and black and white slides. Negative film was the most commonly used, resulting in classic negatives that were later enlarged to photographs in a darkroom. In contrast, slides were used for instant presentation as slideshows projected on a screen.


The original image on the left; On the right, after digital cross processing
Both negatives and slides needed to be processed in a photo lab. Different processes and chemicals were used for each type of film. With negatives, the process was called C-41. With slides, the process was called E-6. Cross processing in film photography was as simple as swapping the chemicals and using the E-6 process for negatives and the C-41 process for slides. This technique results in uniquely-colored photographs with certain colors accentuated.
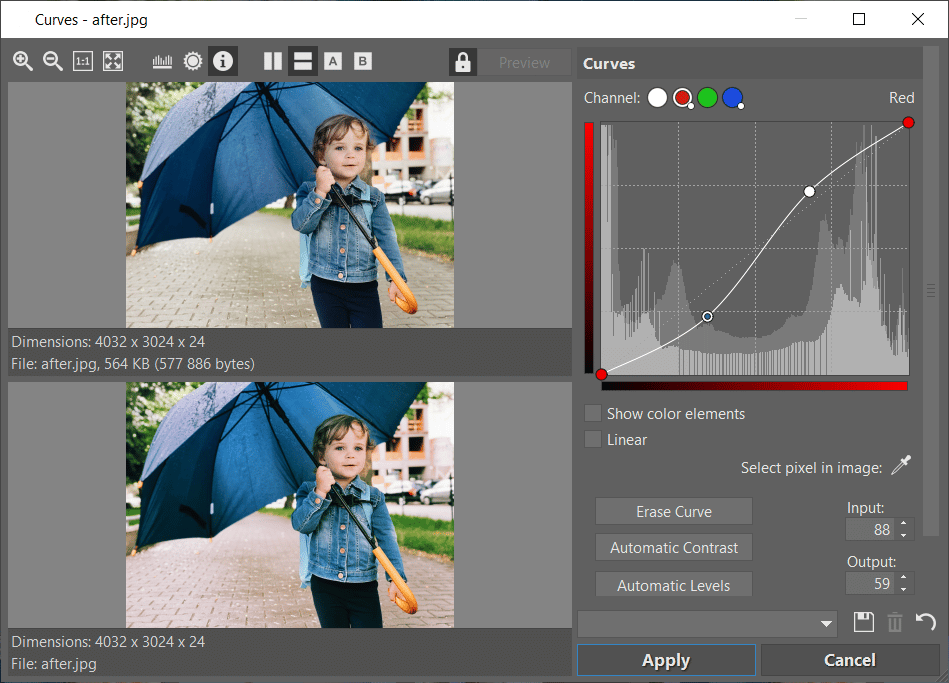
Cross-processing using Curves
With digital photography, simulating cross processing is relatively simple. You can use Curves to edit your photos, making it possible to work with individual color channels. The resulting image partially resembles Lomography, the experimental form of film and old-fashioned photography.
In Zoner Photo Studio X, you can find the Curves [Shift+C] tool in the Manager module under the Adjust menu. A window opens where you see the individual color channels on the right. Gradually click to bend the curve into an S shape to achieve the desired effect.
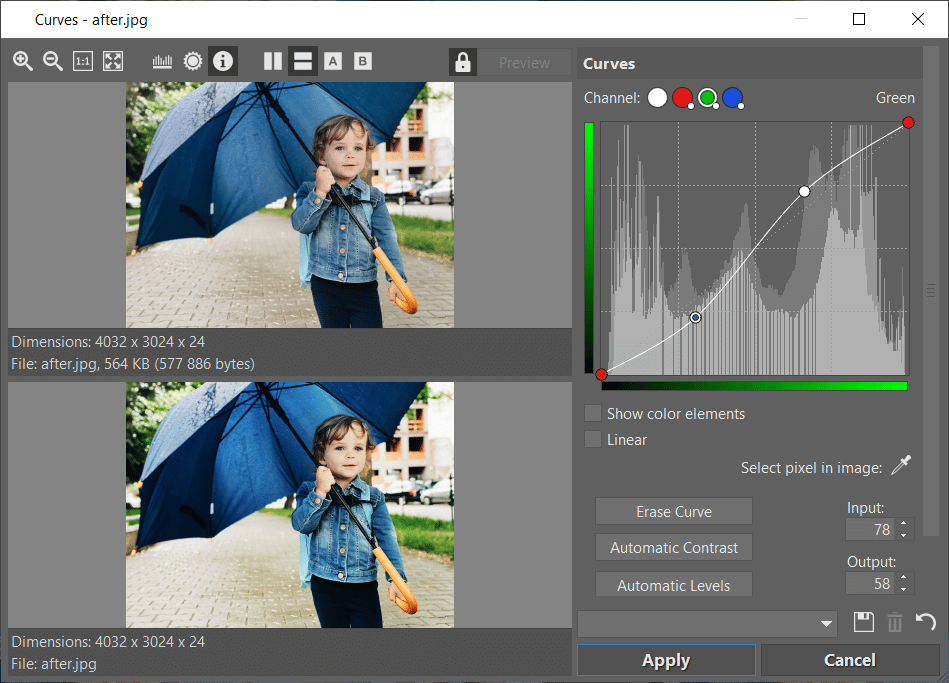
You can also try bending some of the curves into a reverse S shape, or a mirror image of the letter S. Don’t be afraid to experiment. Just be sure your photograph always remains a photograph. With major changes, you run the risk of “posterizing” part of the image or decreasing the number of colors and losing detail, making it poster-like. That, along with the overall color change, can make your photo look more like a vector image.
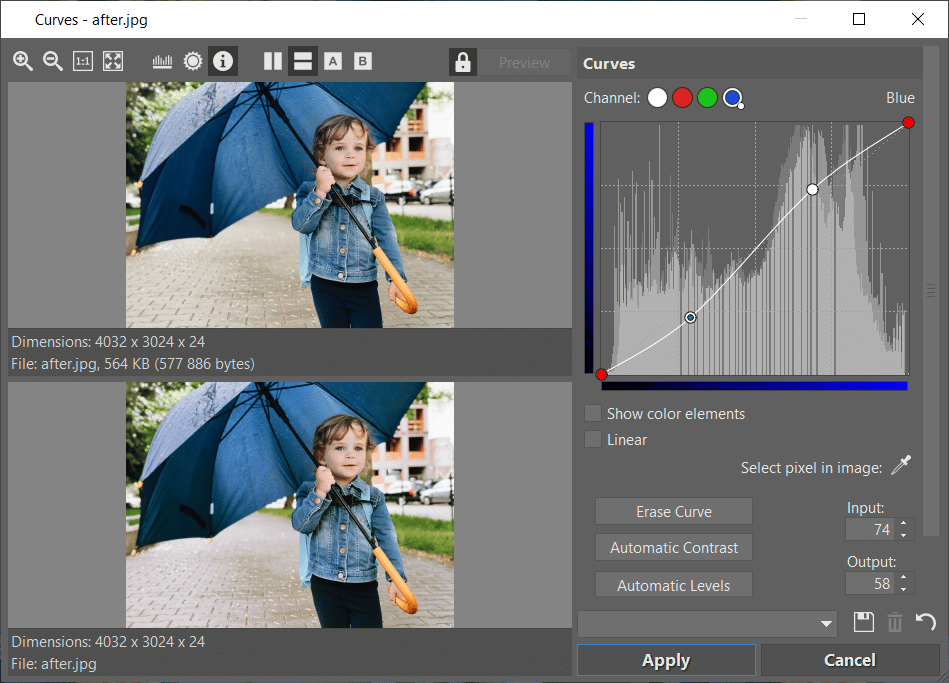
Each photo requires a slightly different approach depending on how it was exposed. Don’t be afraid to move points along the curve, especially when you can undo it by clicking Erase Curve in the window. This returns you to the original state of the color channel and you can resume experimenting.


The original image on the left; On the right, after digital cross processing with S-shaped curves
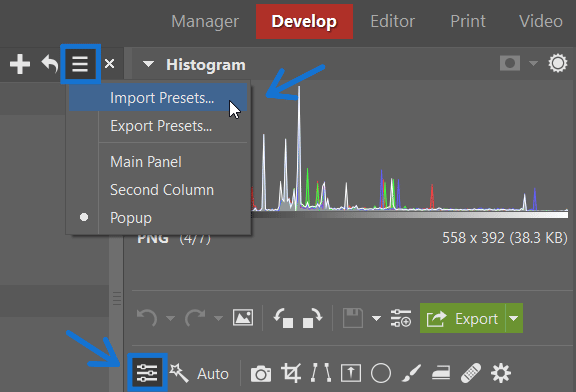
Presets
To make things easier, we regularly release a variety of presets that you can easily apply to your photos to get the cross processing effect. After downloading presets, they can easily be imported to the Develop module in Zoner Photo Studio X.
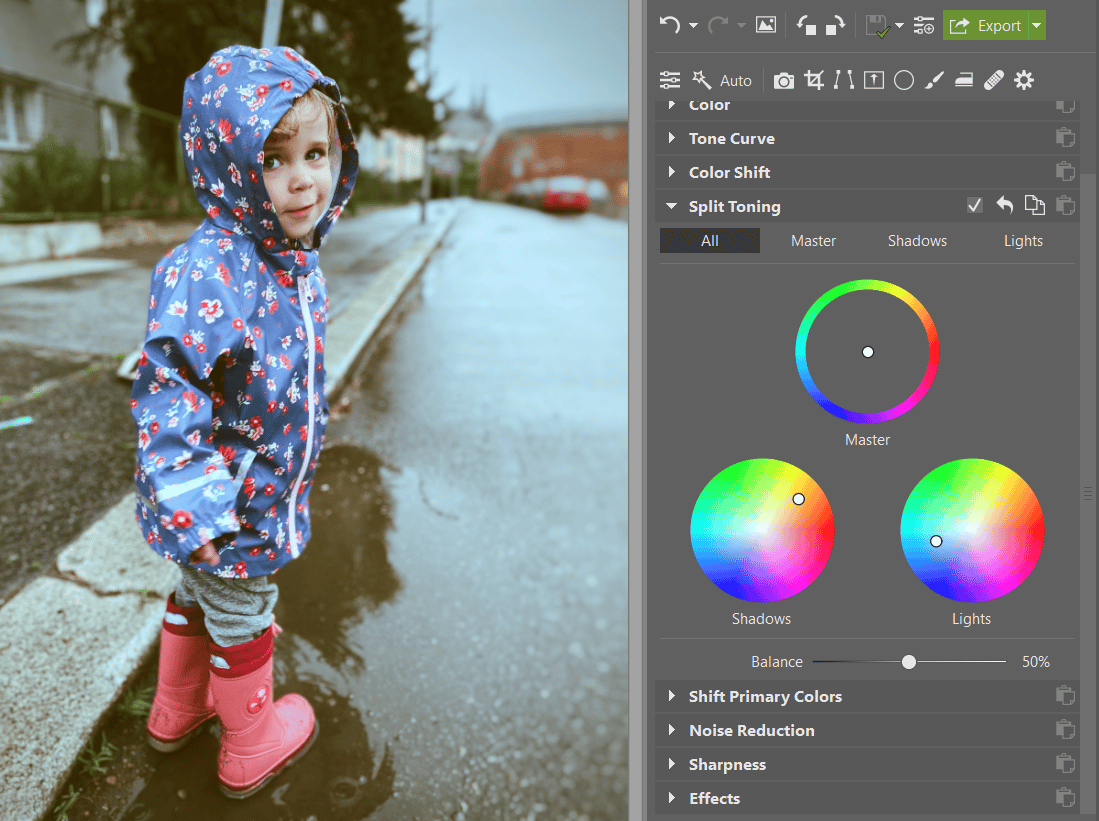
Split Toning
You can also do cross processing using Split Toning in the Develop module. Split Toning is based on the principle of covering certain places in the photo with a color “screen” with your chosen hue and saturation. You can tint the entire photo or only certain areas such as the lights and shadows. To really make your photo stand out, you can choose a completely different color for lighter and darker areas of the image.
Now you see how it’s done! It’s simple. Download Zoner Photo Studio X free for 7 days and try editing your photos using cross processing too.
There are no comments yet.