Experiment: Making a Room-sized Camera Obscura
Prepare for an article full of noise, blurry photographs, and warped perspective. Today we’ll be telling you about the day we created a giant camera obscura in the very same offices that stand behind Zoner Photo Studio.
At Zoner Software, we’re not afraid to experiment. And our marketing expert Josef is the least afraid of them at all. Last year you could enjoy his notes on photographing fruit in water. This time around he’s picked a “darker” theme. This time he’s teamed up with his deskmate Alena to produce a room-sized camera obscura.
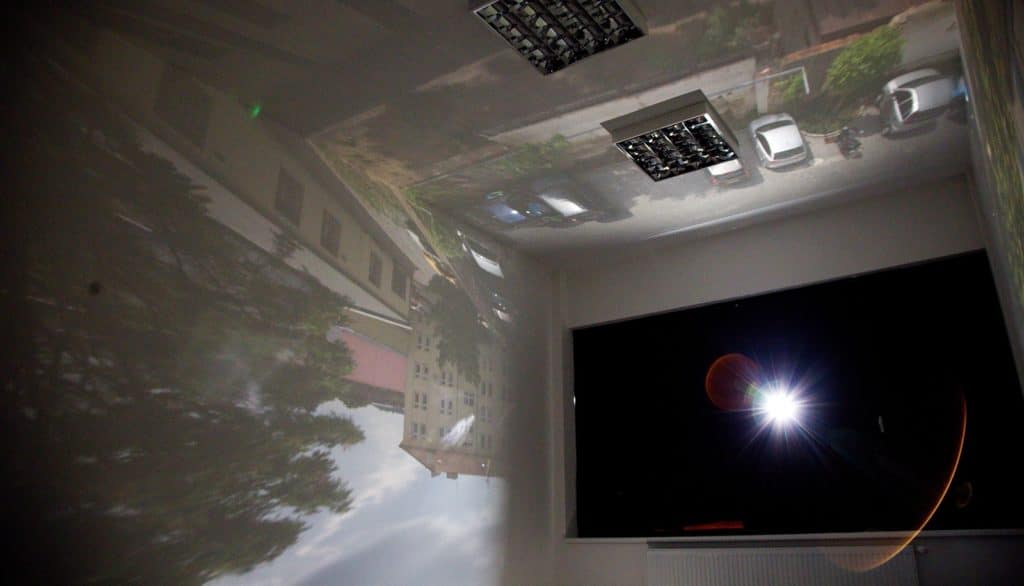
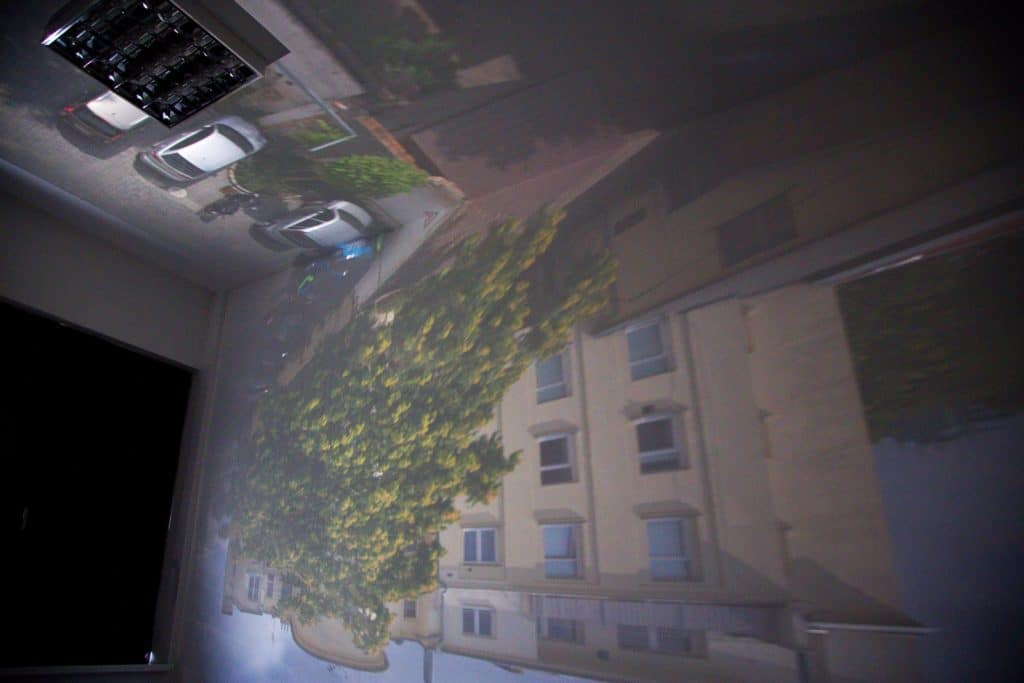
Canon 6D, EF 24-105 mm F/4 L IS USM na 24 mm, čas 30 s, F 4.5 a ISO 12800
What Is a Camera Obscura?
A camera obscura (Latin for dark chamber) is a device that projects an external image, turned upside down, through a small hole onto a darkened sheet or wall. This phenomenon was already known in ancient Greece, and was first thoroughly described in the 11th century. Since then it’s been used for drawing pictures (by tracing the image it shows) and observing sun phenomena (no need to look at the sun that way), and it also helped in the rise of photography as we know it today.
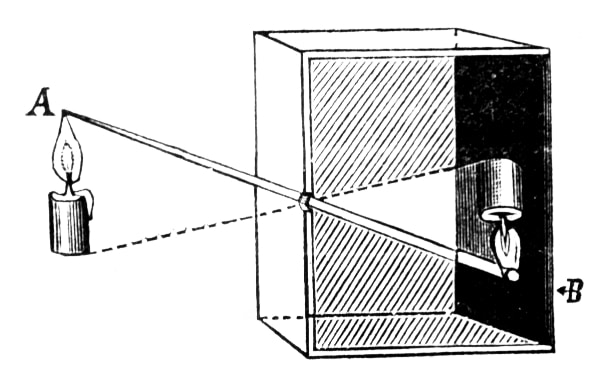
Technically the reason for the inverted image in a camera obscura is the way the lines of light travel through the device’s narrow hole (its aperture). Source: Wikimedia Commons (http://bit.ly/UWizGI)
Maybe “device” is the wrong word here, as it suggests something small. A camera obscura can be small, but it can also be as large as a room, or even a whole building. (One such building stood in New York’s Central Park in the 1800s.) You can find countless examples and attempts at building camera obscuras over the years. So it goes without saying: you can also make one yourself.
How to Make Your Very Own Camera Obscura at Home (or at Work)
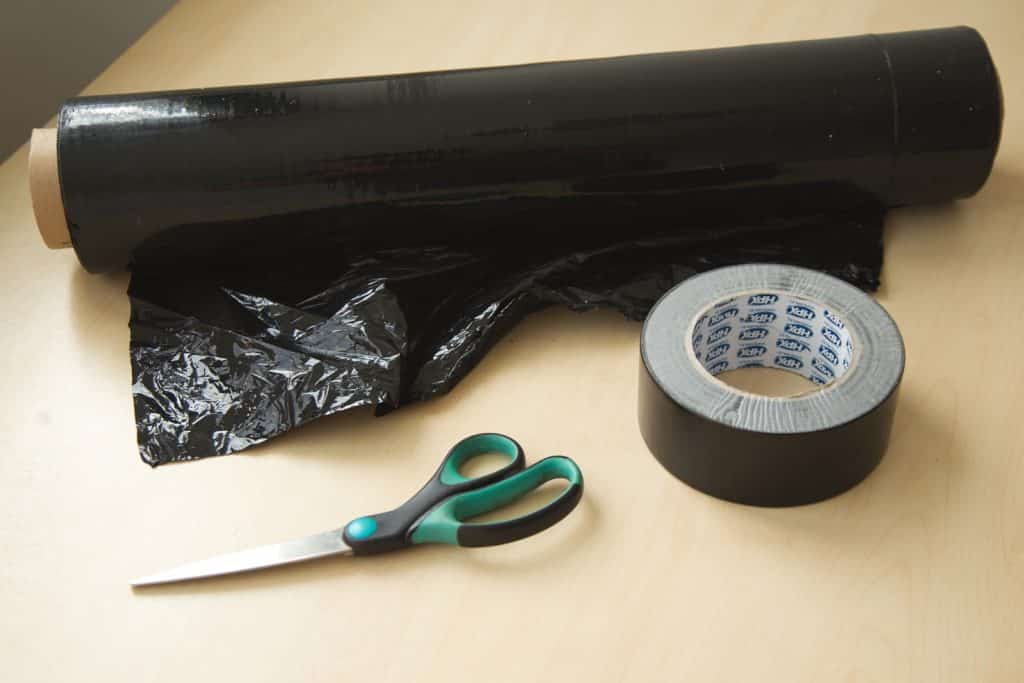
If you want to try out a room-sized camera obscura, there’s not much you need for it. Your foundation will be a room with a window, as little furniture as possible, light, single-colored walls, and a way to darken it. You’ll also need a black sheet, scissors, and tape. We found black cling wrap to work best as the black sheet, for a couple of reasons. First, it’s really cheap. Second, layered cling wrap sticks to itself, which we want. For us this layering was critical for flawless darkening. We tried out several other kinds of sheet, but no cheap, readily available variety provided perfect darkness with just one layer.
Meanwhile the setup work is also very simple. You just eliminate all the room’s sources of direct or reflected light. You need to get almost complete darkness. Pay attention to other light sources as well, like LEDs in electronics (cameras often have an LED that shines during exposures!), cracks under doors, and glass in doors.
Keep in mind that fluorescent lights still emit light for a while after you turn them off. So if you’ll be using a fluorescent-lighted office, turn those lights off ahead of time.
What Size of Hole?
I have good news for the less technically-inclined among you. The hole is the only thing that you can get wrong during this experiment, and it’s also easy to fix if you get it wrong: just tape over it with black tape and try it again. Make a hole roughly in the center of the darkened surface.
Too small a hole leaves your with a room that’s too dark, where you can’t see well enough. Meanwhile, too large a hole reduces the image’s sharpness, that is, how much detail it will have. Overall, the smaller the hole, the better the image detail. But with too small a hole, you can get edge refraction and a worsened image instead. I recommend starting your experiment with a hole a few millimeters in size, and expanding it from there.
The image quality also depends on how precisely-crafted the edges of the hole are. It’s degraded if they’re frayed or otherwise low-quality. For our hole, we first used a pin, and then enlarged it using scissors.
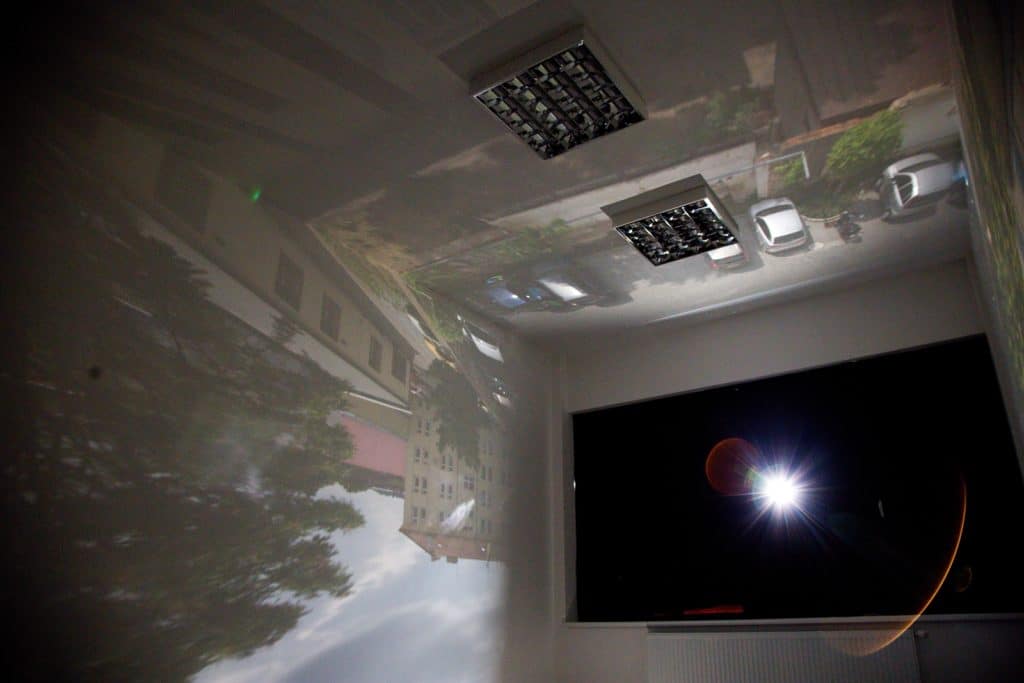
Canon 6D, EF 24-105 mm F/4 L IS USM at 24 mm, time 30 s, F 4.5 and ISO 1600.
How to View It, How to Photograph It
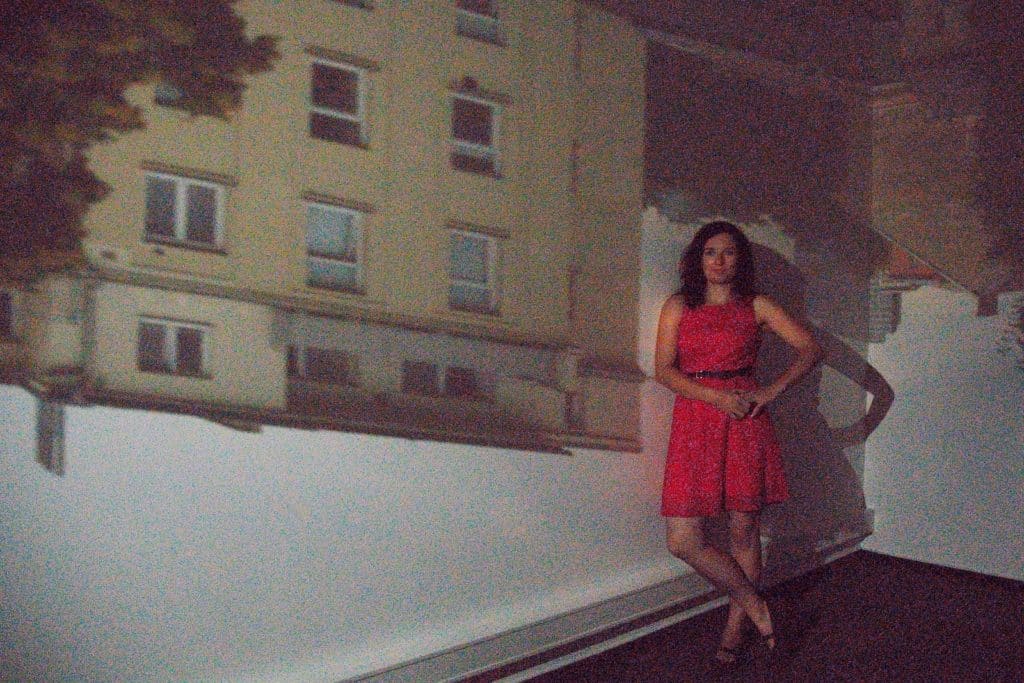
If you try this experiment yourself, you’ll notice that the colors you get are blander than what you see here. We got ours by cheating: we used a long exposure, and then we edited the result in Zoner Photo Studio, where we raised the contrast and saturation. In low light, human vision sees mainly black and white (the cells that react to light are more sensitive than those that react to light’s color), that is, outlines and black or white surfaces. But with the right light conditions, you can expect color too.
The result is also influenced by the amount of light outside (ideally a sunny day) and by how well your eyes have adjusted to low light. So don’t immediately be disappointed by a faded image. Stay in the room a few minutes first.
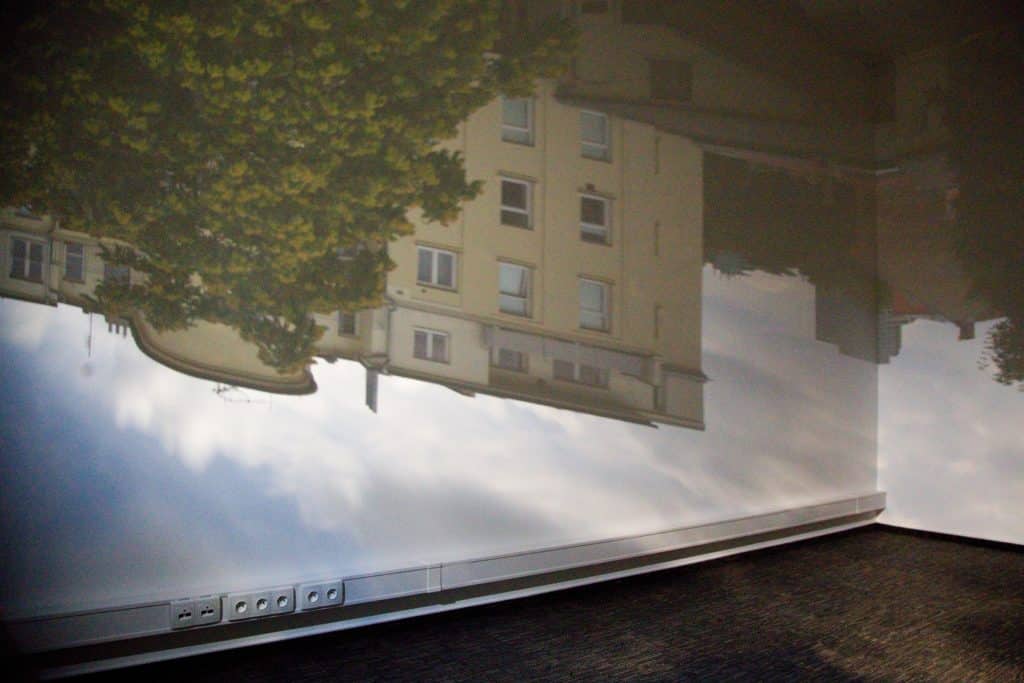
Canon 6D, EF 24-105 mm F/4 L IS USM at 24 mm, time 30 s, F 4.5 and ISO 1600
To capture this kind of experiment in photos, you’ll need a tripod. While it depends on the light conditions outside, generally you’ll want to use a long exposure time (30 seconds) and a high ISO (for our sunny-day shot, we squeaked through at ISO 1600).
For better results, use a camera with a large chip; this minimizes the noise that comes with such a high ISO. Camera phones and tiny compacts are a bad option here. For best results, use a DSLR with a large sensor, or even a full-frame device. We used a professional Canon 6D DSLR.
When taking the picture, don’t forget to use the timer and, for DSLRs, the mirror lock-up too, so that you don’t have to touch the camera during the shot. Also, don’t forget to eliminate all the light that the camera gives off during a shot.
Have you tried making a camera obscura at home? Or are you thinking of doing it? If you don’t have an empty room to use, you can try creating a camera obscura in a box and observing the results using a mirror. Send us your results if you’d like, or try showing them off on Zonerama.
frantivol
Very, very nice !!!!!
Frantivol
Zoner
Thank you. Have you ever tried something like this? In smaller box, of course.. :)