Focus Problems? Fine-tune Your Autofocus with Dot Tune
Sometimes you’ll find that your pictures aren’t completely sharp after you use automatic focus. But there’s no need to throw in the towel and send your camera back to the shop to have its autofocus adjusted. With the “dot tune” method (AF fine-tuning), you can adjust focusing yourself. All you need is a newspaper, a tripod, and a little space.
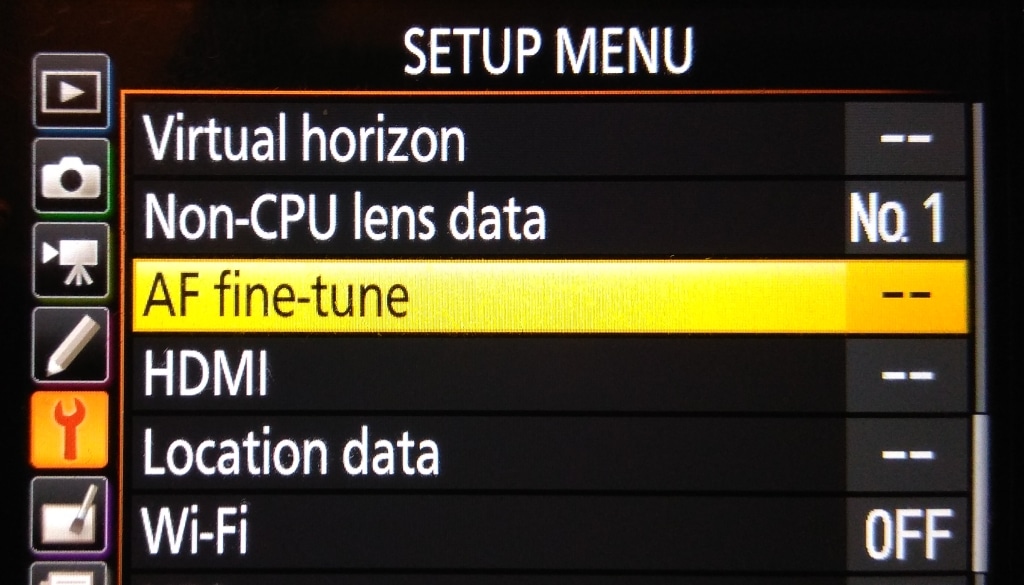
But first you have to find out whether your camera enables dot tuning. Unfortunately not all cameras enable this. You can generally find this out from the menu or the manual. If your camera supports this kind of fine-tuning, then you’ll also need the following:
- a lens that itself has dot tune support,
- a tripod,
- an AF fine-tuning plate or a printout of a scale with equal spacing between the numbers or words (but a newspaper will also do),
- a remote trigger or perhaps a timer,
- sufficient lighting for the surface you’ll be test-shooting,
- space,
- and patience.
Angles and Distance Matter for Dot Tuning
For proper AF fine-tuning, the distance between the testing table and the camera needs to amount to 25x the lens’s focal length. If you use a 50mm lens, the distance between the testing table and the camera will be 50×25=1250 mm – i.e. 125 cm.
However when measuring the distance, pay attention to one more thing. The testing table must be tilted towards the lens at a 45° angle. So if you put it on the ground, it’s not enough to just measure the distance between it and the camera. Depending on where you’ve located the table, you have two possibilities for forming the needed angle:
- Put the testing plate on the ground and tilt the camera towards it at a 45° angle.
- Place both the camera and the table at the same height, and tilt the table towards the camera at a 45° angle.

Aperture Priority Will Help You to Fine-tune AF
Don’t forget to also switch your camera to manual focusing. If you’re working with a Nikon camera, you’ll also need to take one more step—set the focus to be tied to the rear trigger. Otherwise you run the risk that this method will not work correctly.
As soon as you have the focusing, distance, and correct angle set up, switch your camera to Aperture Priority mode (A or Av) and set a suitable ISO and the lowest possible aperture (or one step higher if needed).
Then turn on the Live View and focusing on a specific point (AF-S, OneShot). Working like this, focus on your chosen point in the table. Then turn of the Live View and press the trigger. (For Nikon cameras, don’t forget that you have focusing switched to the rear button.)
When the viewfinder shows an arrow instead of a dot, you have to increase or decrease the AF tune value.
To speed up this method, it’s best to set the value to the highest one possible (e.g. 15) and then go down by fives. This approach will save you a lot of time. After all, if the picture is sharper between -10 and -5, you know what range to move within at one-degree increments.
Once you have a dot in the viewfinder, that means you’re focused correctly. Save the settings and take a picture. Then zoom in on the picture and check that the focus point matches your intention. If so, keep the settings as they are.

Configuring AF on Zoom Lenses
When you need to fine-tune the focus on a zoom lens, you have to adjust the settings for its far and near focal points separately. Then save each setting separately.
Even though configuring autofocus might seem complicated at first, it’s really not. If you master this method, you’ll gain a very good helper for your focus adjustments to lenses that have been focusing a little in front of or behind your desired point.
There are no comments yet.