

Focus Stacking in Zoner Studio: Get Pin-Sharp Photos
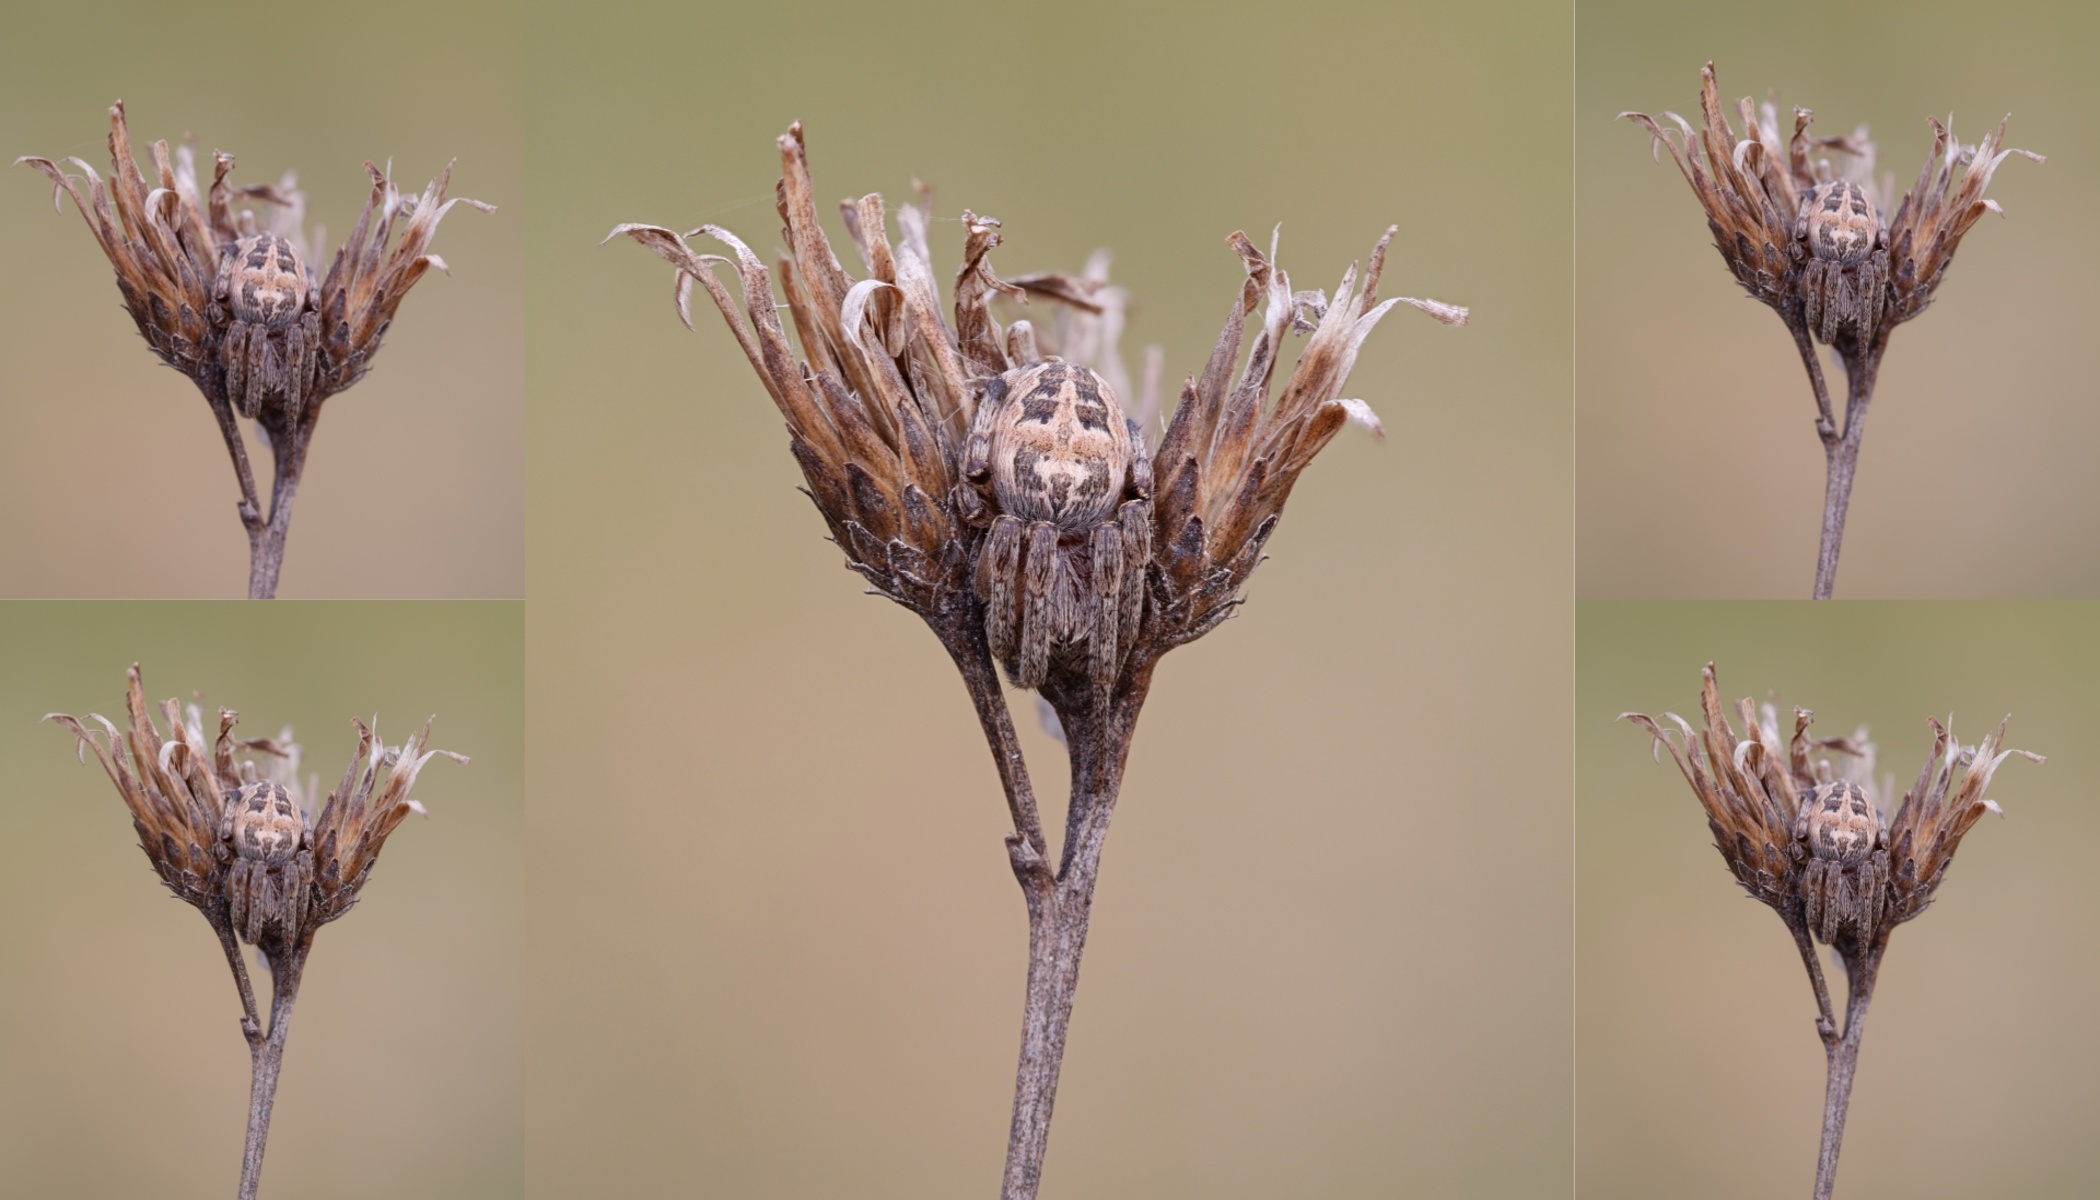
In macro photography, product photography, and nature close-ups, shallow depth of field is often unavoidable. Only part of your subject may be in focus, even at higher f-numbers. The solution is focus stacking—a technique that combines multiple photos with different focus points into a single image with much greater depth of field. In this article, I show you how to shoot a focus stacking sequence and merge the images using Zoner Studio.
In this article, you’ll learn:
- What focus stacking is and when to use it.
- How to shoot a focus stacking sequence.
- How to create a focus stack in Zoner Studio.
- When focus stacking isn’t the best choice.
- How to get the sharpest possible results.
What is focus stacking and when should you use it
Focus stacking is a technique where you take several photos of the same scene, each focused at a different distance—from the nearest detail to the farthest part of the scene. Zoner Studio then selects the sharpest areas from each image and merges them into a single final photo.
The result is a natural-looking image that’s sharp from front to back—something that isn’t possible with a single exposure.
Focus stacking is most commonly used for:
How to shoot photos for focus stacking
Successful focus stacking starts with the shooting stage. The more precisely you capture your image sequence, the better the result. Be sure to use a tripod. The camera should be perfectly still between shots. Although Zoner Studio can automatically align photos, minimizing camera movement produces the best results.
Use manual mode or lock the exposure. Every image should have identical shutter speed, f-number, ISO, and white balance.
Focus gradually. Start by focusing on the closest point of your subject, then gradually move the focus point farther back. You can adjust focus manually or use your camera’s built-in focus stacking feature, if available.
Don’t use an unnecessarily high f-number. Many photographers try to maximize depth of field by stopping down as much as possible. However, at around f/16 to f/22, diffraction begins to reduce image sharpness. In most cases, you can get better results by shooting at around f/5.6 to f/8 and using focus stacking instead. These values are a general guideline and vary depending on your lens.
How to create a focus stack in Zoner Studio
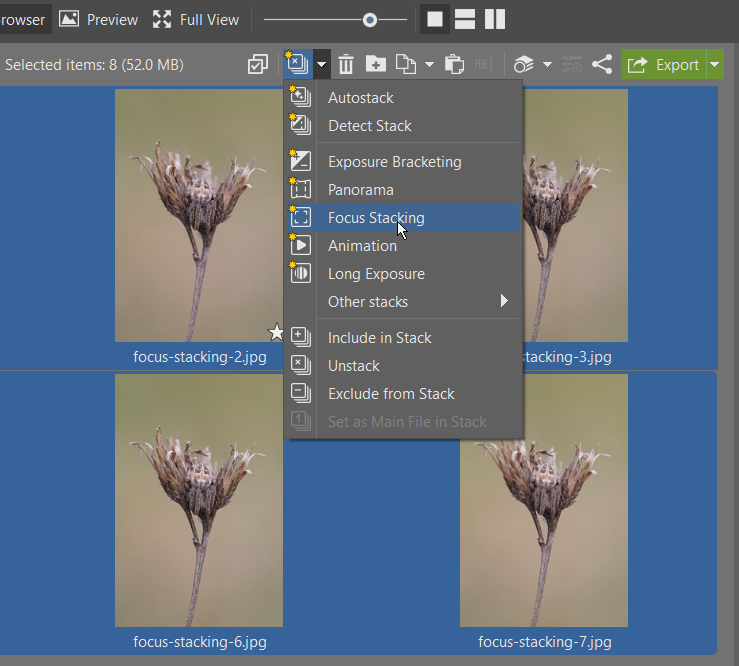
Once you’ve captured your focus stacking sequence, you can easily combine the images in Zoner Studio. In the Browser in the Manager or Develop module, select all the images you want to merge. Zoner Studio can automatically recognize focus stacking sequences—just click the stack icon. If the images aren’t automatically grouped, select them manually.

For the best results, apply the same adjustments such as white balance, exposure, and noise reduction. Alternatively, you can merge the original images first and edit the finished composite afterward.
Next, click Merge next to the stack icon, or click the arrow next to Detect Stack and choose Focus stacking.
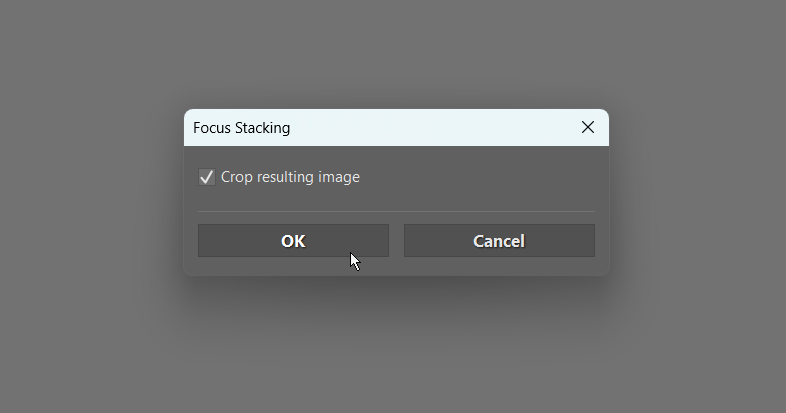
A dialog box opens with the Crop resulting image option. I recommend leaving this box checked (it’s selected by default). If there’s a slight shift between images, Zoner Studio automatically crops the edges so that no gaps appear in the final photo.
Zoner Studio analyzes the images, detects the sharpest areas in each one, and merges them into a single TIFF file. Processing time depends on the number of images and their resolution. Once the focus stack is created, you can edit it just like any other photo.


Left: Single exposure. Right: Focus stack. Combining multiple images produces a much greater depth of field than a single exposure alone. Photo Credit: Zbyněk Nantl
When focus stacking doesn’t work
Because focus stacking combines several images taken in succession, it isn’t suitable for moving subjects. Any movement between exposures—such as leaves blowing in the wind, flying insects, flowing water, people, or animals—can create unwanted artifacts in the final image.
Tips for best results
The more consistent your images are, the better your focus stack will be. Use a tripod whenever possible, use a remote shutter release or self-timer, and avoid windy conditions when doing macro photography.
If your camera supports automatic focus stacking, it can capture the entire sequence in seconds using perfectly even focus increments.
Summary
Focus stacking lets you create images with a depth of field that isn’t possible with a single exposure. It’s especially useful for macro photography and product photography, but it also works well for landscapes and technical close-ups.
You can complete the entire process in Zoner Studio in just a few clicks. Select your image sequence, choose Focus Stacking, and Zoner Studio automatically aligns the images and merges the sharpest parts of each one into a single TIFF file. If you’d like to try focus stacking, you can download Zoner Studio free for 7 days.
Watch the video tutorial
Watch the step-by-step video and get additional tips in the video.
FAQs
What is focus stacking?
Focus stacking is a technique that combines multiple photos focused at different distances into a single image with a much greater depth of field. This ensures that the entire subject is in focus.
When is focus stacking used?
Focus stacking is commonly used for macro, product, and landscape photography, where a single exposure can’t keep the entire subject in focus.
Is a tripod necessary for focus stacking?
It’s not required, but greatly improves your chances of getting clean, high-quality results. The less movement between images, the easier it is for Zoner Studio to align and merge them accurately.
Can you create a focus stack in Zoner Studio?
Yes. Simply select your focus stacking sequence, choose Focus Stacking, and Zoner Studio automatically aligns and merges them into a single final photo.


There are no comments yet.