Ghost Photography Tutorial

Halloween goes hand-in-hand with fall photography. This means it’s time for spooky photoshoots filled with ghosts. We’ll show you a simple trick for creating your own spooky photo. It can even be a fun jumping-off point for a Halloween-themed family photoshoot.
How to shoot a translucent ghost and add a spooky effect to your photo? You’ll need your camera, a tripod, a sheet, and Zoner Studio. You can take your own picture using a self timer or ask a friend or loved one to be your model.
Preparation and the shoot
Your camera must not move during the shoot, so you’ll need a tripod. If you don’t have one, find a flat stable place where you can put your camera. You’ll need to take two photographs. One photo with the ghost, and one without it. Then, you’ll join these two photographs in post-production.
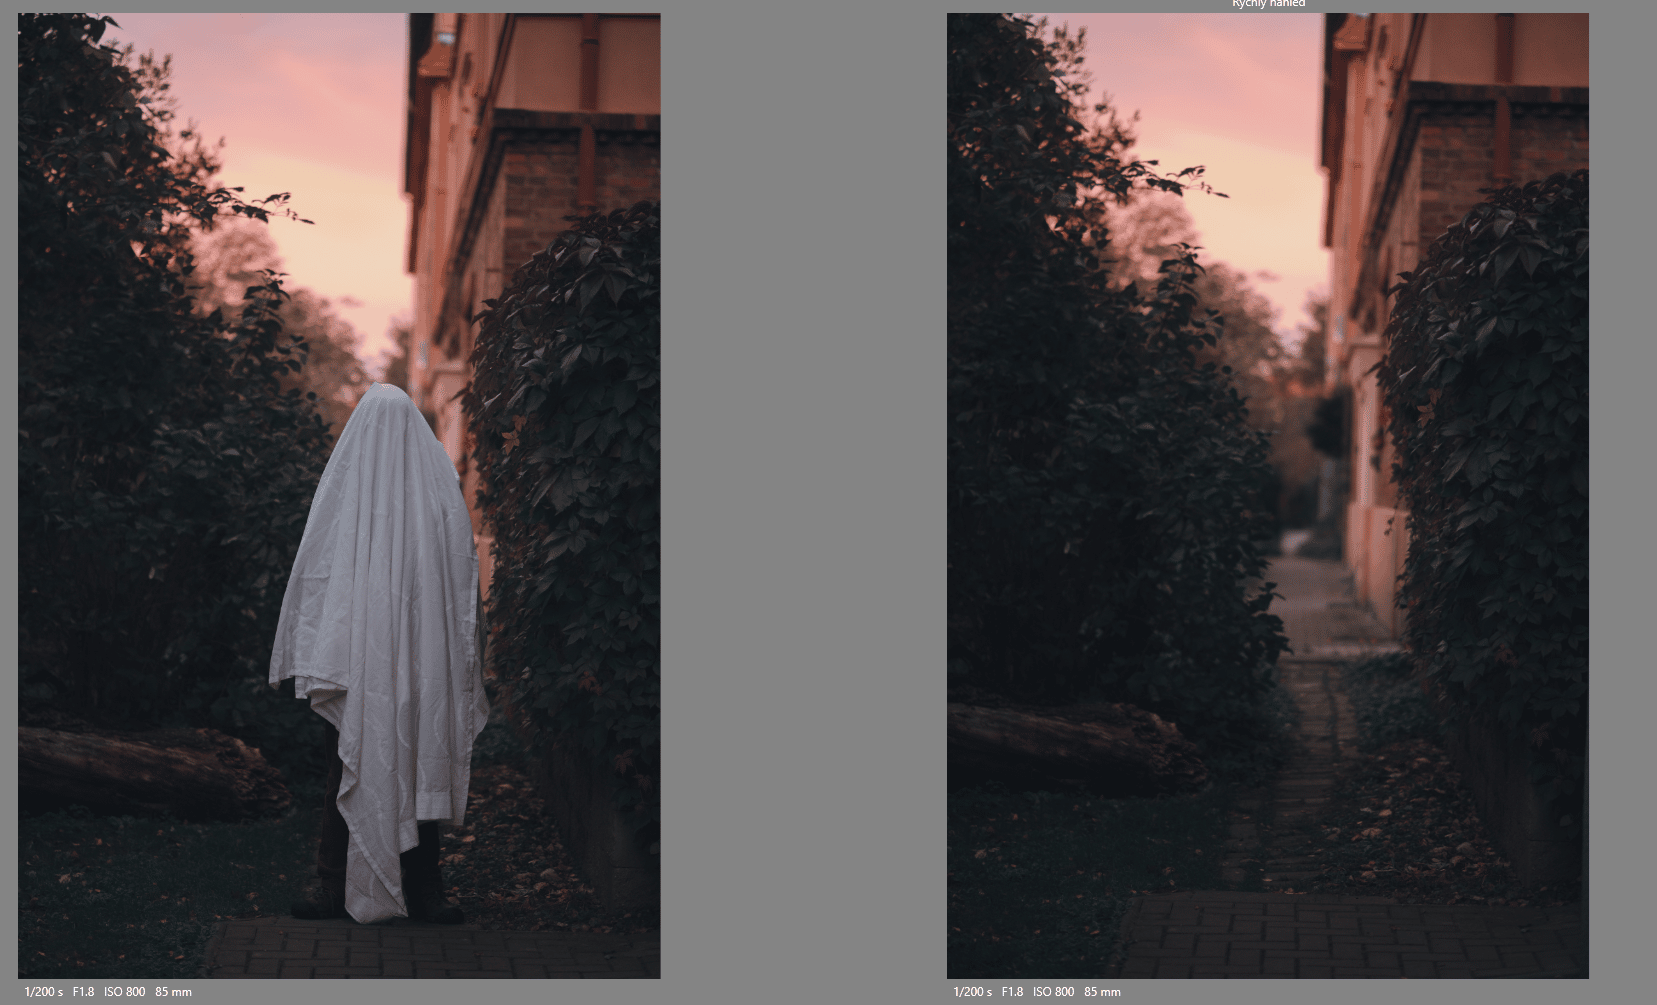
Prepare your scene and set your camera to manual mode. This is very important because if you have it set to automatic, autofocus can ruin your attempt to make both shots identical. Once you have the ghost in focus, take your first photo and then “release” your ghost and press the shutter button again.

If you are your own model, use the camera’s self timer. You can then take the second photo yourself without a problem.
There shouldn’t be anything that can change between the two photos. For example, if you use smoke bombs, your photos won’t be identical. Moving clouds or changing light can also be a problem. Take the photos one right after another, ideally within a minute.

Shoot in RAW format.
How to edit your photo
You are now going to edit your ghost photo in the Develop module. After editing, it’s important to copy the adjustments you’ve made and paste them to the second photograph.
You do this by right clicking the photograph in the bottom filmstrip and selecting Copy Develop Module Adjustments.
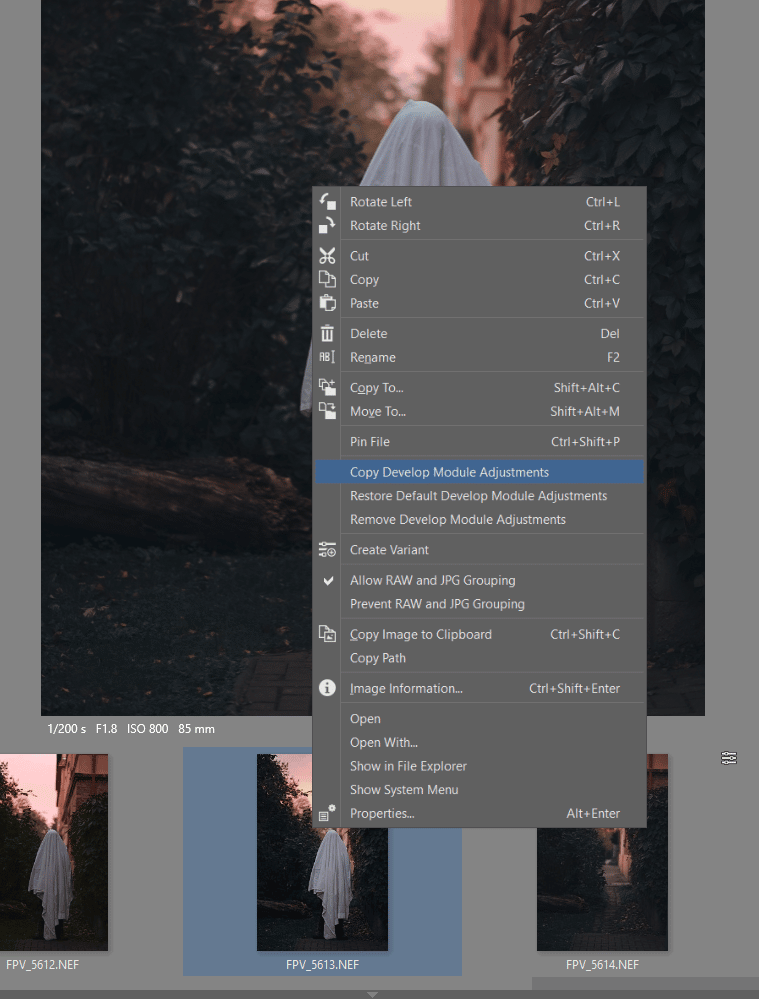
You can also copy using the Copy button below the right side panel. This option is faster, but doesn’t let you choose specific adjustments.
Now paste the copied adjustments to the second photo by right clicking the photo in the filmstrip and selecting Paste Develop Module Adjustments. And you’re done.
You can now export both photographs to JPEG in the size you want.
Final adjustments
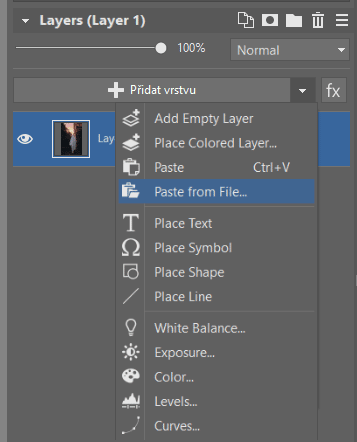
Now go to the Editor module and open the photograph without the ghost. Using Move and Transform (V), paste the second photograph from the file.
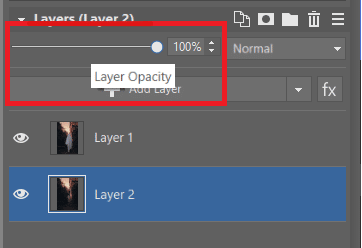
You now have a ghost photo in the layer above the photo with no ghost. And now comes the magic. If your photographs are truly identical, simply move the Layer Opacity slider to approximately 60%.
We are almost done. The main magic trick is complete. But what if the ghost’s feet are showing?
Go to Selection Tools. Select the Magnetic Lasso and select the legs just like we did.
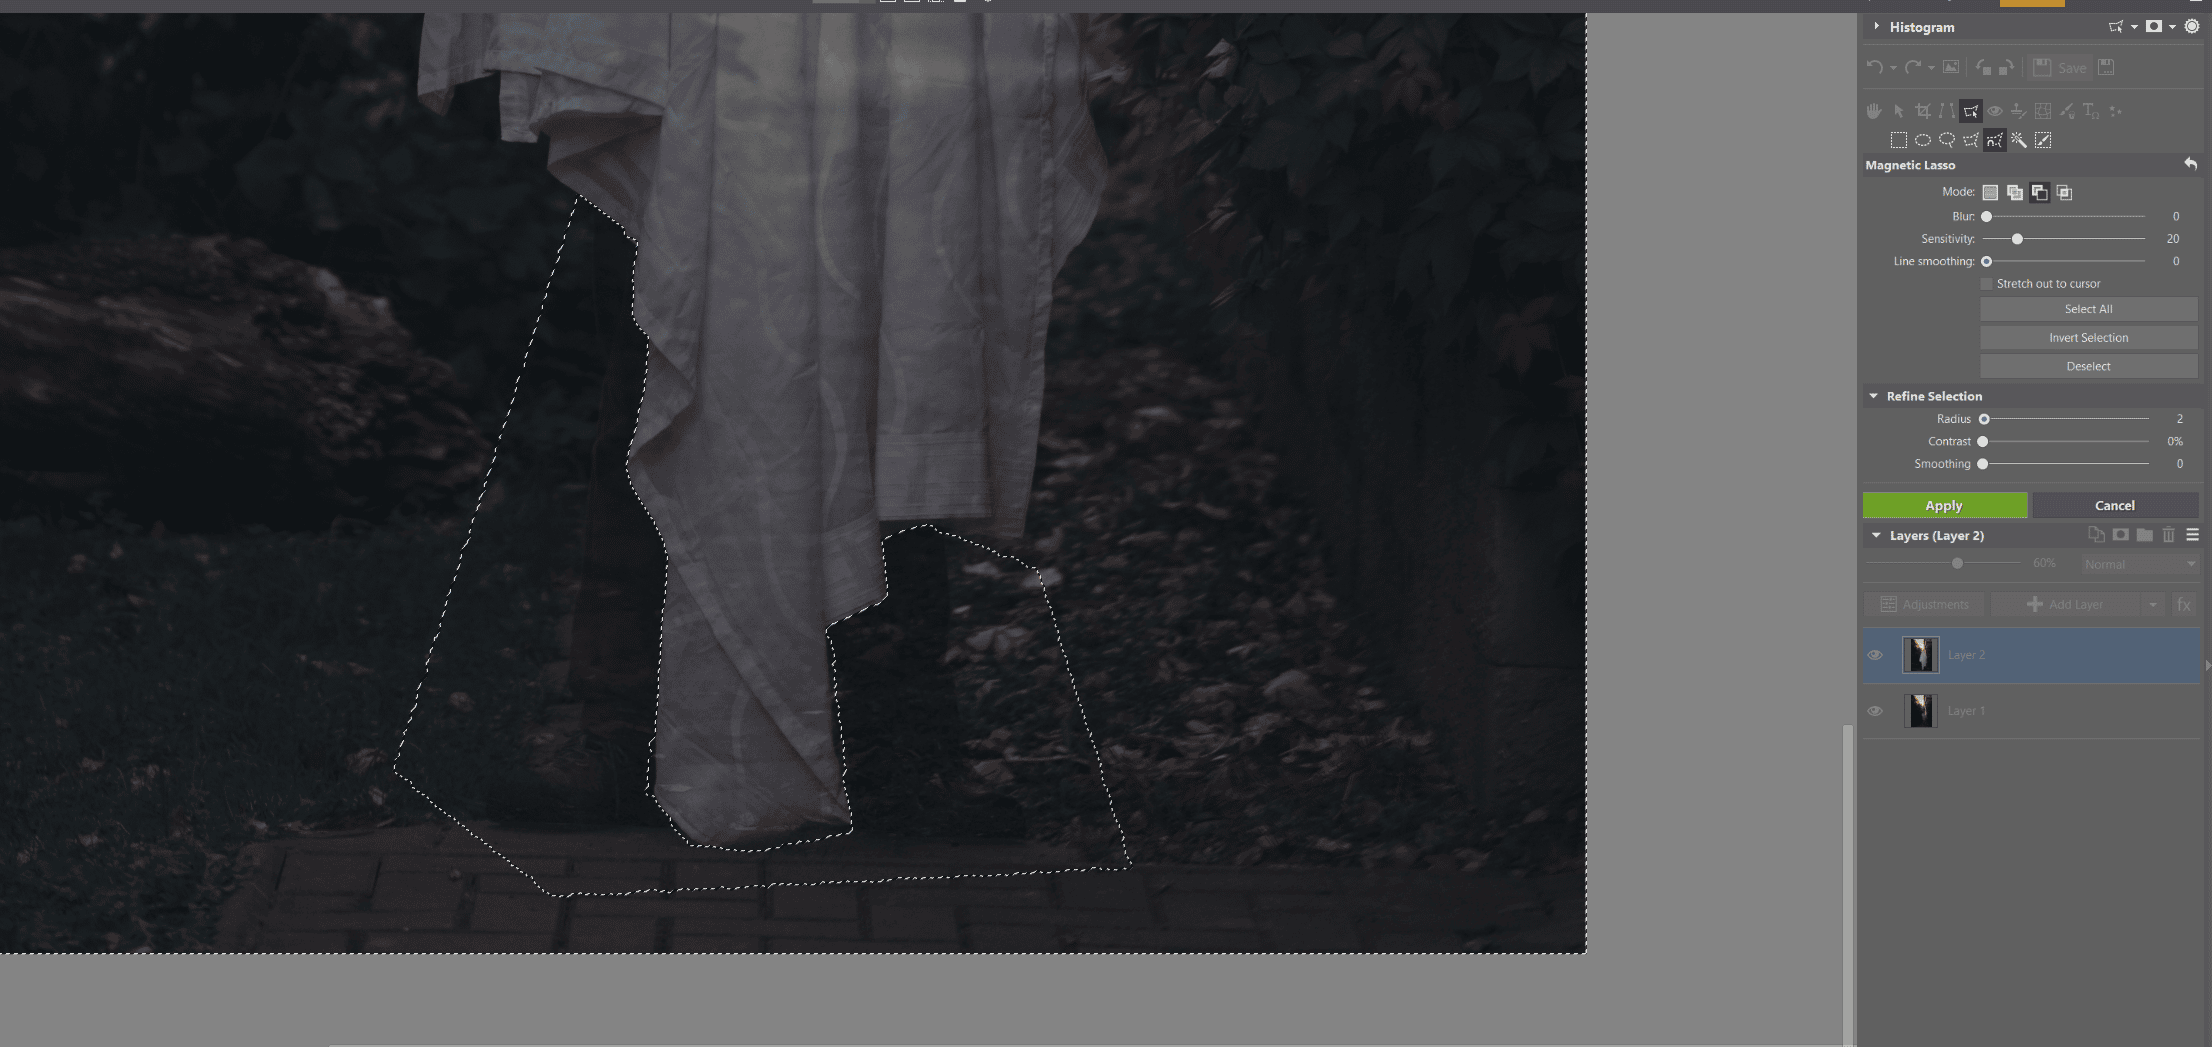
Once you have the legs selected, we recommend increasing Radius by about two values in the Refine Selection section, then click Apply.
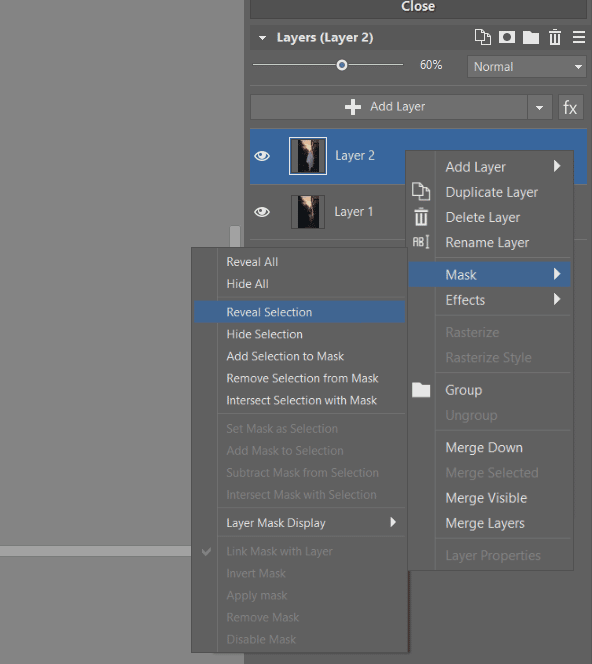
Now, hover over the top layer and right click to select Mask > Reveal Selection. As soon as you do this, the legs will disappear.
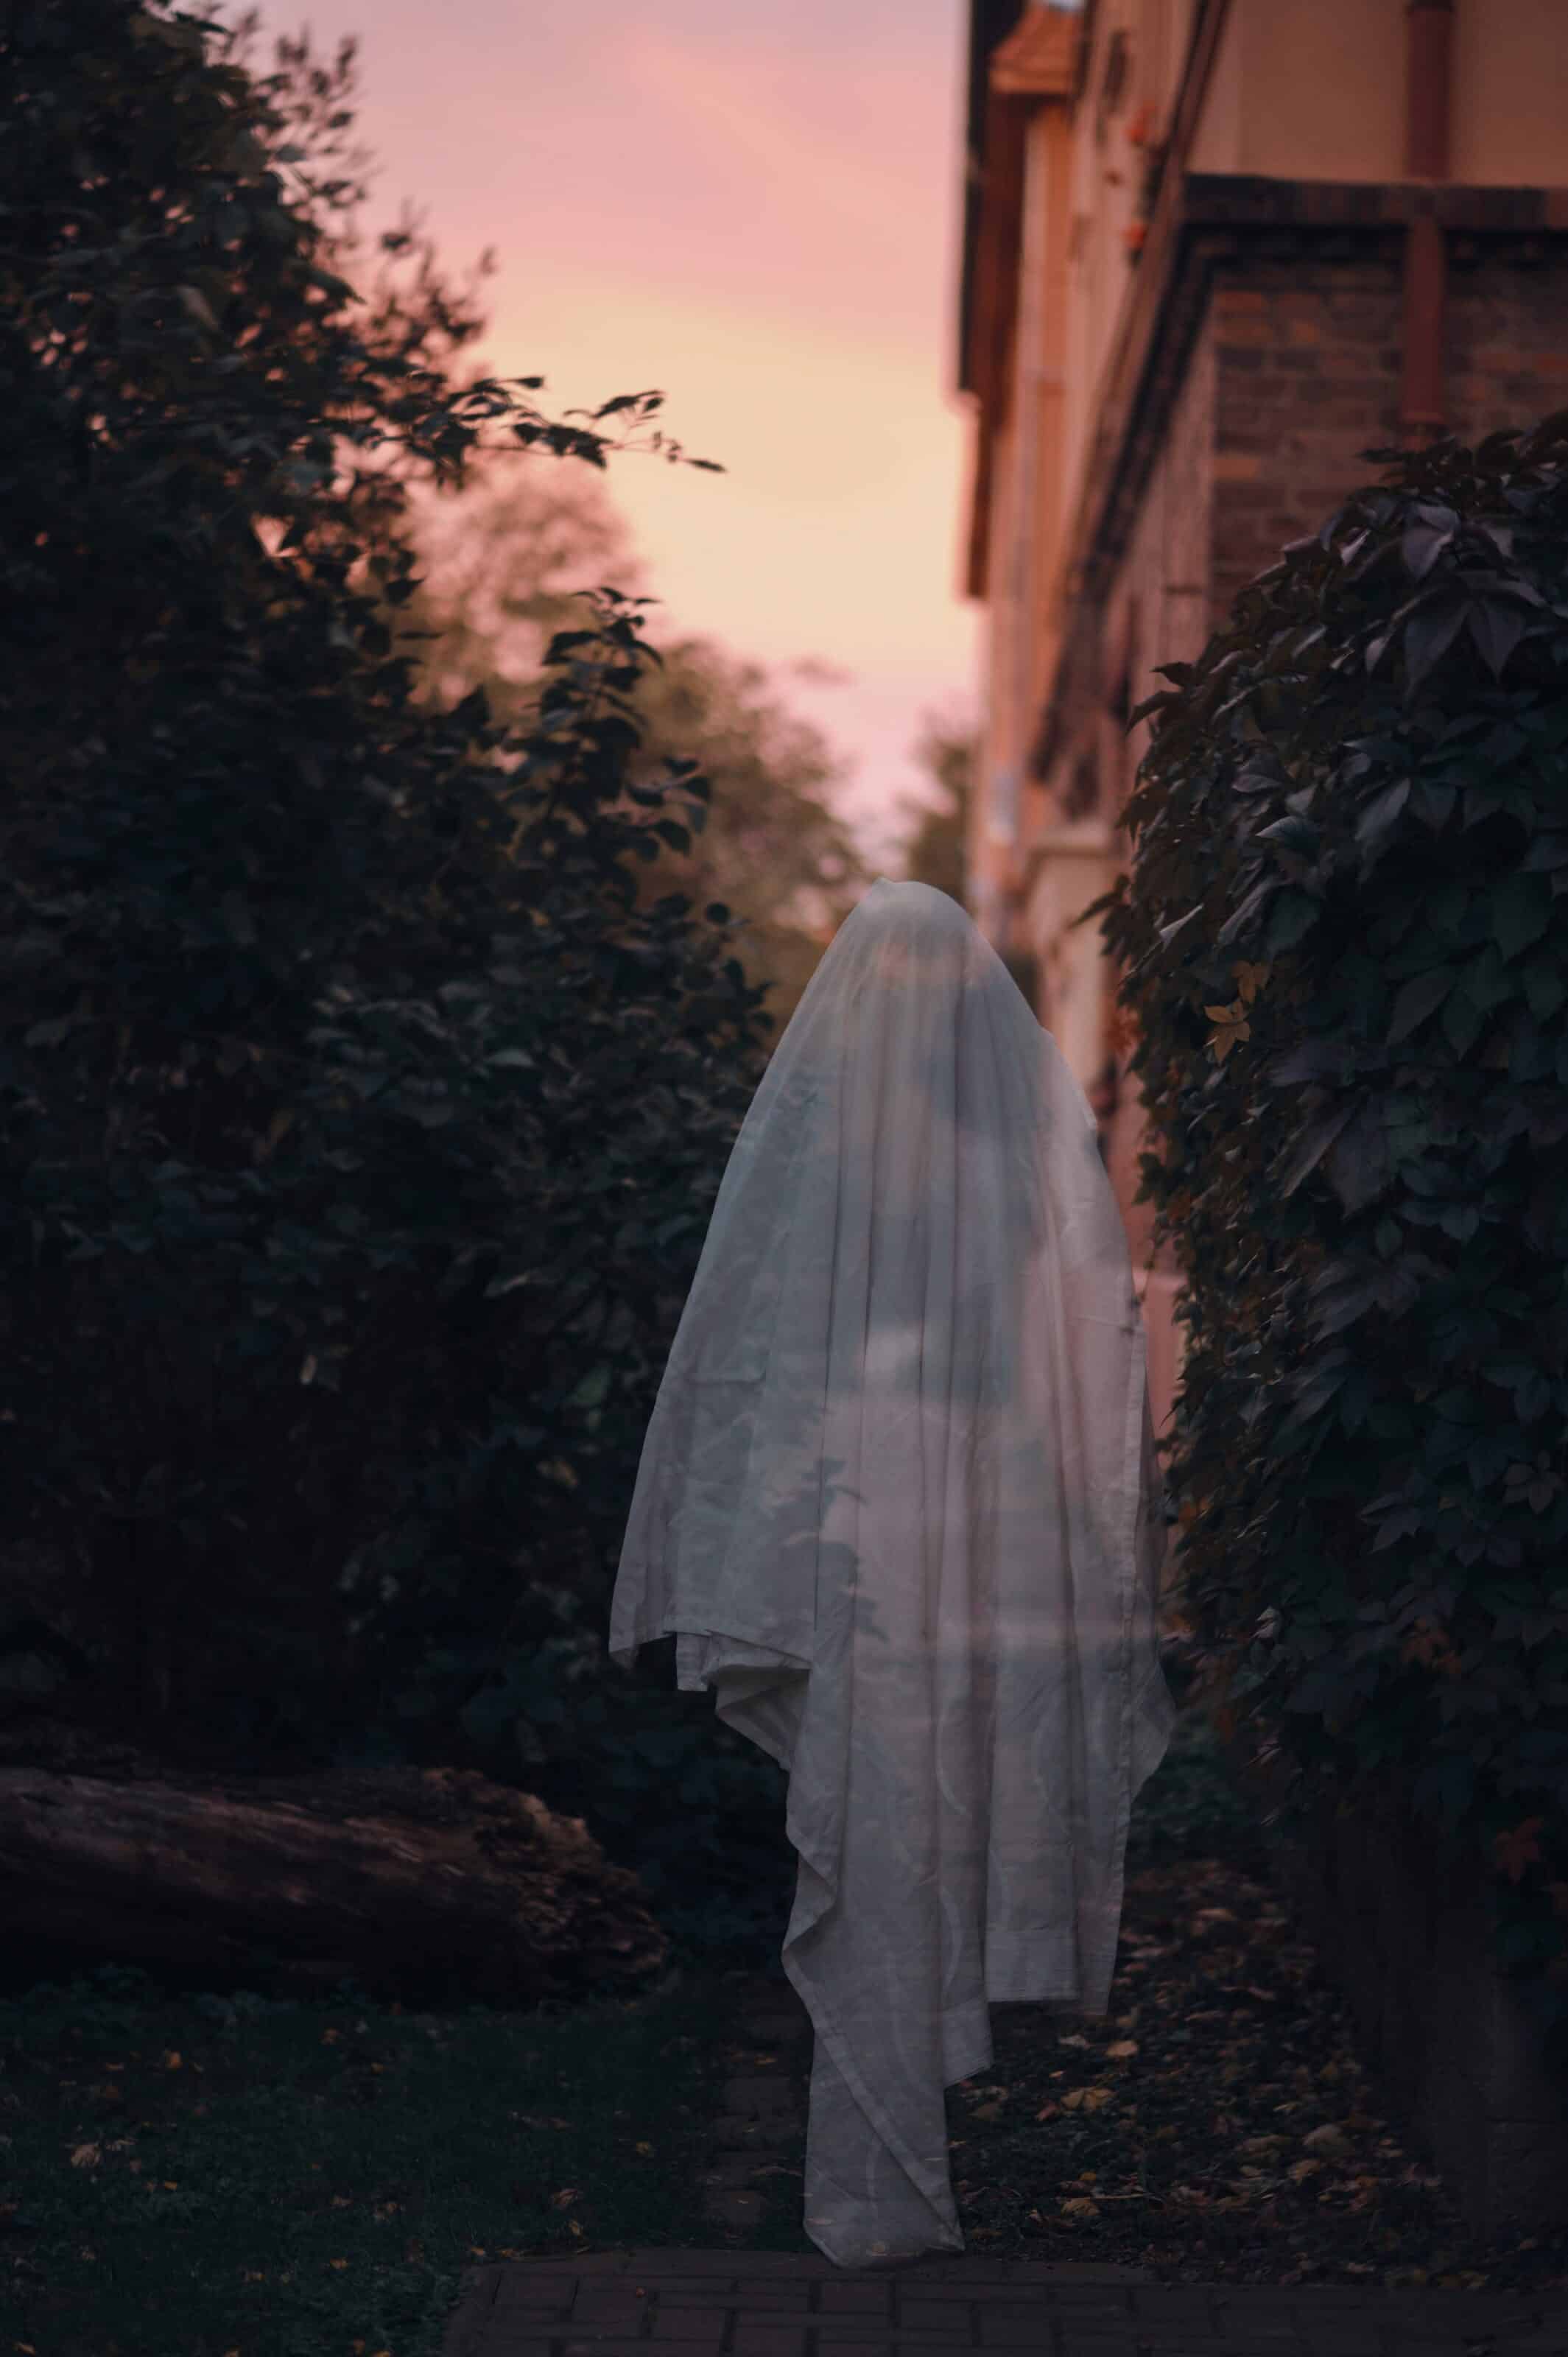
And you’re done! Now you can scare your family and friends with a scene straight out of a horror movie.
There are no comments yet.