Give Your Old Photos New Colors
The article is over 5 years old. The information in it may be outdated.
![]()
We are working on its update. In the meantime, you can read some more recent articles.
When you’re taking digital photos and their colors are globally shifted due to a bad white balance setting in the camera, the fix is a matter of moments in Zoner Studio. You just set a neutral color using the white-balancing eyedropper. But what if you want to fix the colors in a scanned photo? One where the tooth of time has gnawed at the colors? Then you need some more demanding edits. So let’s take a look at how to fix this kind of picture, where time has left its mark on the colors.
Analyzing the Picture
Editing a photo’s colors on a computer is a matter of moments, but what if you’re cleaning up your photo box and you run into a photo you didn’t even know about? Then you’ll bitterly regret how strongly time has marked the picture and how you probably can’t fix it.
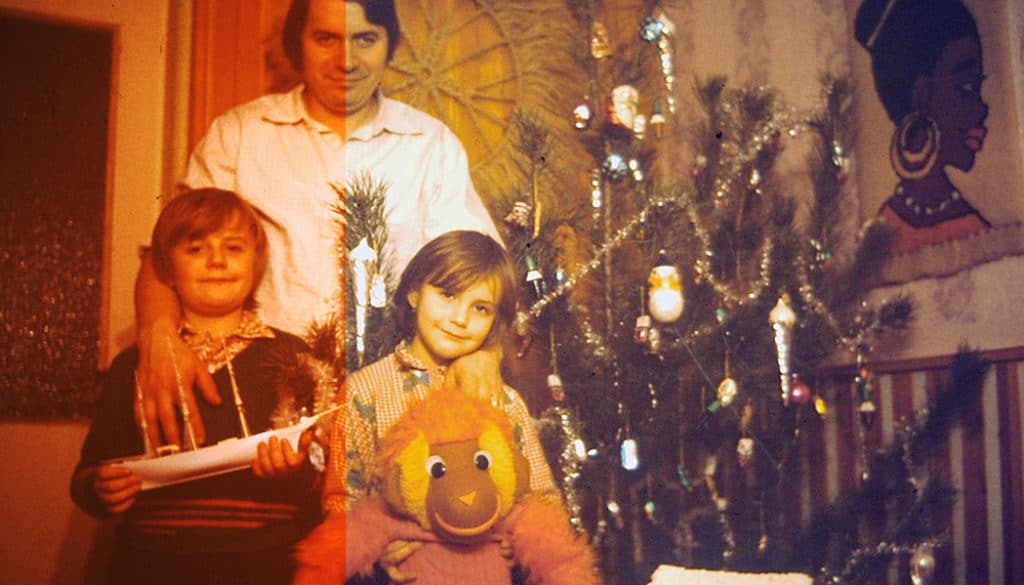
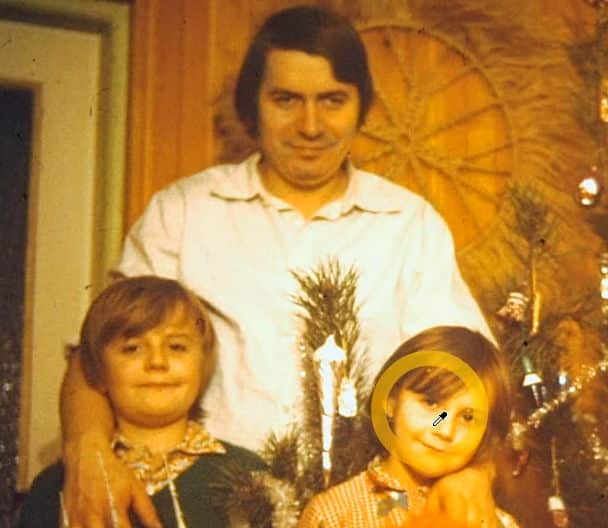
But you can! Sometimes. Even a picture where different colors have been degraded by differing amounts can be saved:

The problem with photos like these is that the individual basic colors don’t degrade to the same extent over time. So the photo doesn’t actually have a global color shift that you can repair just by shifting its white balance. For photos with this kind of degradation, you need to work with the individual color channels.
We’ll illustrate how you can use Zoner Studio to fix this kind of photo, so that when you’re browsing your family album, you’ll never have to say “it’s a shame this photo is in such bad shape.”
Fix Colors Using the Develop Section
For illustration, I’ll be editing an example photo in the Develop section—the place for making non-destructive edits.
Before we take a look together at the steps for this edit, I should note that if you use the white balance eyedropper to fix this kind of photo, you’ll just make it worse.

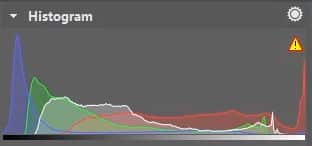
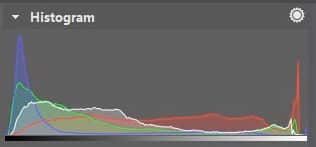
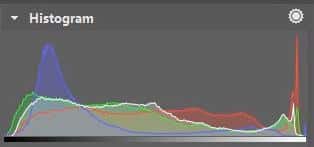
One important aid you’ll use to decide on how to go forward is the histogram for the picture’s colors. For this photo, I can assume that all three color channels (red, green, and blue) should be represented in it evenly. But a glance at the histogram immediately tells me that they aren’t—right away I can see strong underexposure in the blue and green channels, as well as the large amount of detail in the red channel. This corresponds with the picture’s overall red tint.
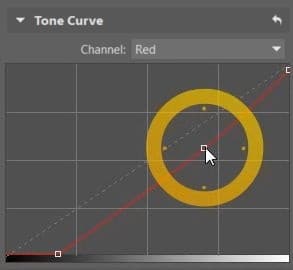
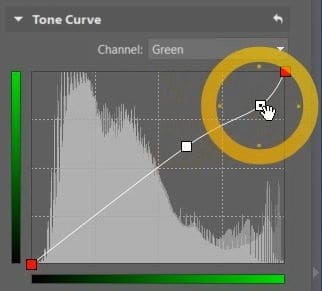
Levels are an ideal tool for balancing color channels—but they’re not available in the Develop section. But that’s no problem because you can also use Curves to adjust the color channel levels.
Alter the tone curves for the individual color channels one by one and carefully watch the histogram while you do it. To stretch out the individual color channels over the full range of the histogram, move the handles inward along the x-axis—in other words, create a steeper curve. For a channel that’s blown out past the edge of the histogram, typically the red channel like in my example, move the right handle along the y-axis.
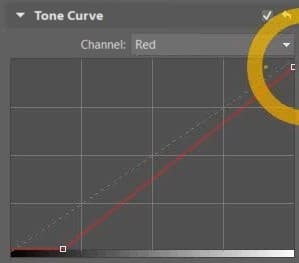
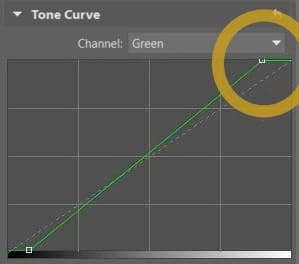
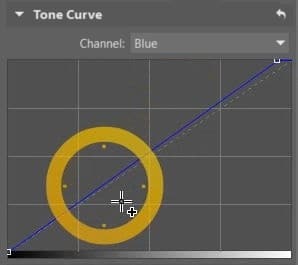

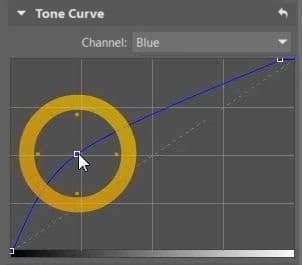
To restore the greens and blues to a photo, move those color channels’ tone curves upwards. Meanwhile, move the red curve slightly downwards.

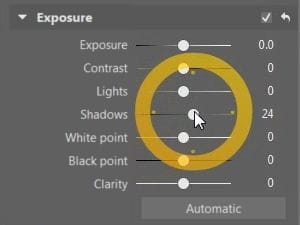
The image lacks a bit of detail in the shadows. I brighten these by raising the Shadows slider.

Finish up in the Editor
To fully repair skin tones, it’s not enough to work by eye based on the histogram. You have to work with precise colors. Because of this, I’ll be wrapping things up in the Editor.
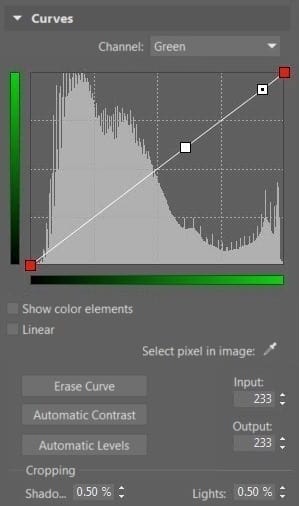
I start my work in the Editor by visiting Curves once again. Here it’s under Menu > Adjust > Curves (but I can also press Shift+C). In the Curves filter in the Editor, you can work with an eyedropper to pick up specific tone values in the photo (Select pixel in the image)—and that’s what I’m going to do. Feel free to follow along with me on a picture of your own. Pick up two pixels for each color-channel curve. Pick the brightest spot in the skin and a spot with an average skin tone (see the illustrations).
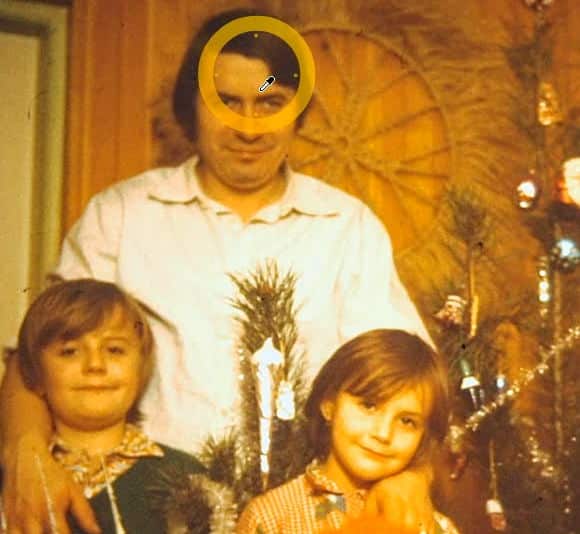
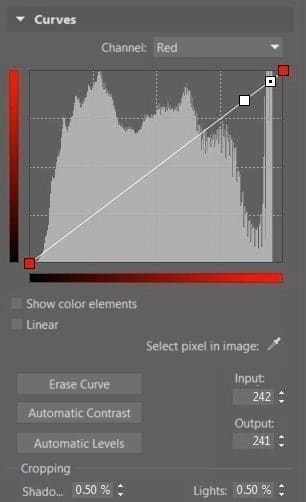
Using the Select Pixel in Image eyedropper, read in precise tone values for the individual color channels in spots of your choice in the photo.

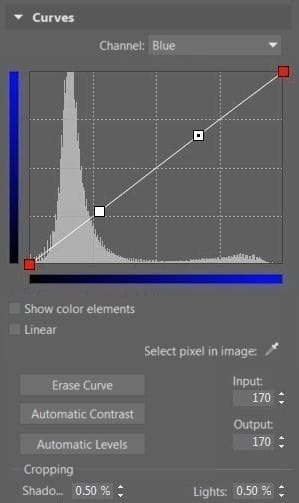
When editing the tone curves for Caucasian skin, keep in mind that typically in this kind of skin, there is more red than green, and far more red than blue. After reading in the color, I get 220, 163, 66 in the medium skin tones. These correspond to the Red > Green > Blue principle, but the difference between the green and blue channels is larger by too much compared to the difference between the red and green channels. You can see that as a result, the picture is shifted towards yellow, which is the complementary color of blue. So I’ll want to increase the amount of blue by shifting the corresponding handle in the curve upwards.
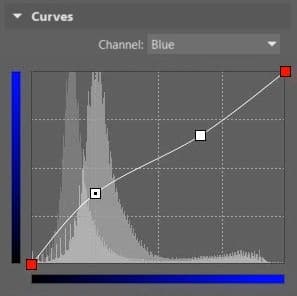

Apply a similar edit for places with light skin tones as well. In my case, I’m getting an even stronger shift towards the yellows than I had for the medium skin tones. Here again, you can try adding blue by moving the corresponding handle in the blue channel upwards—but you’ll get better results by subtracting green. To do that, move the handle in the green channel downwards.


Fixing Minor Defects Using Selections
Even after all the work above I still have some red tinting, but compared to the original situation, where no other colors than red were distinguishable at all, things are noticeably better. With a stronger edit, I might lose some skin detail and create some artifacts—some unpleasant, noticeable artificial patterns in the picture due to my edits—so I’m stopping here.
There is one possible way to keep improving this picture, though. I could use local edits. That is, instead of working with the whole photo at once, I could work with individual areas inside it using selections. This takes significantly more time, but it does give a more pleasing result. In any case, if I go (or you go) on and work this way, the above steps will still be a great foundation.
Here’s a comparison of my sample photo before and after my edit:


Do you too have time-damaged photos in your photo archive? Download Zoner Studio, use it 7 days for free and touch them up.
andre
This article is quite interesting.
I have a lot of photos (negatives) from the pre-digital time and i’ve scanned some of them (that’s mainly a job for winter months …).
You first edit your photo in the section of Zoner. And afterwards, you go to the . But isn’t the Curves Filter of the Editor not the same (as for the results) as the one in Develop ? And there is also a Shadow slider in the Editor.
In the Editor one can come back to the original image in cancelling the edits. Furthermore, one can compare the edited image with the original (a function that is not present in the Developer).
Anyway, I’ve learned some more interesting things about ZPS.
Erik Piper - Zoner Software Customer Support
Hello Andre,
Thanks for your comment.
You’re right, the Curves filter works practically the same in Editor as well as in Develop, although it looks a bit different. The main difference is between the two sections of the program (Editor and Develop). You have highlighted the advantages of the Editor yourself; as for Develop, it offers non-destructive edits: editing without downgrading the picture quality the way that Editor edits eventually do.
We’re working on making as many functions available in Develop as possible, but not all of them could be included there in version 18. So for now it depends on what kinds of edits you prefer.