Glass photography at home
Whether you want to photograph elegant glass vases or simply create a memento of your favorite wine glass, you’re moving into a somewhat advanced realm of photography. Still, it is one that can be accomplished at home with a bit of improvisation and only the use of your mobile phone and a flashlight. See how, in this article.
When one hears “glass photography,” it may bring to mind elegant, designer photos that come from a studio with fancy equipment. But the principles of photography and lighting remain the same no matter your equipment. If you’re willing to make a few sacrifices, you can take stylish photos yourself using what you have at home.
In order to demonstrate that this is not merely theory, I limited my own gear to only an ordinary mobile phone camera and a flashlight instead of studio lighting.
Lighting for glassware and other glass objects
With “ordinary” objects, we’re used to finding the right light and photographing. Glass doesn’t work this way. It can’t be lit up in and of itself and it constantly reflects what is around it. We technically can’t see the glass itself, but rather the background deformed by the glass or the foreground reflected in it.
Based on this explanation, we can conclude that it’s important not to shine on the object itself, but on its surroundings.
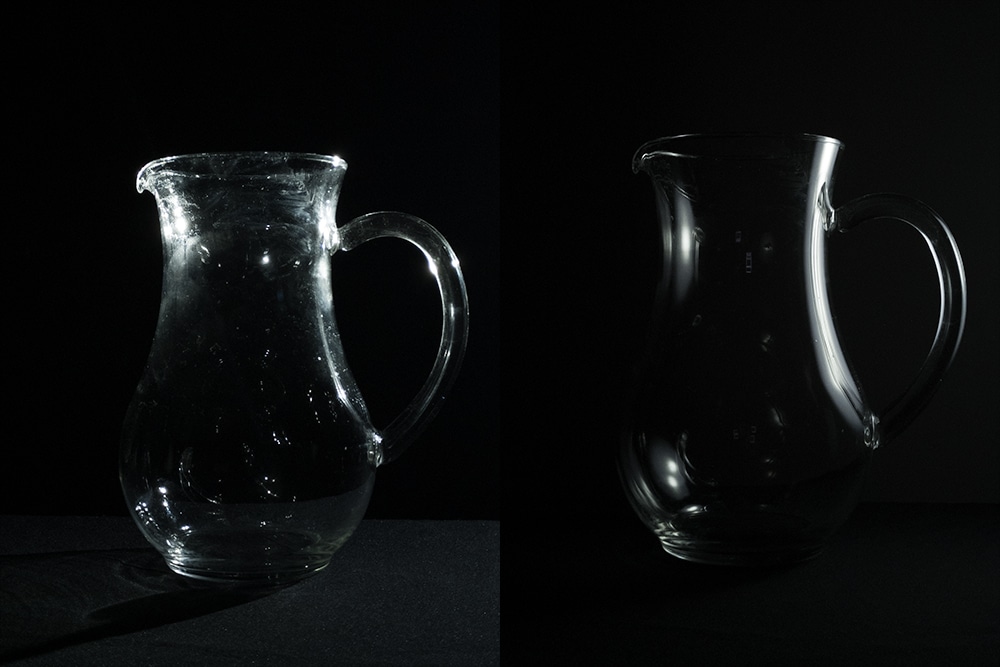
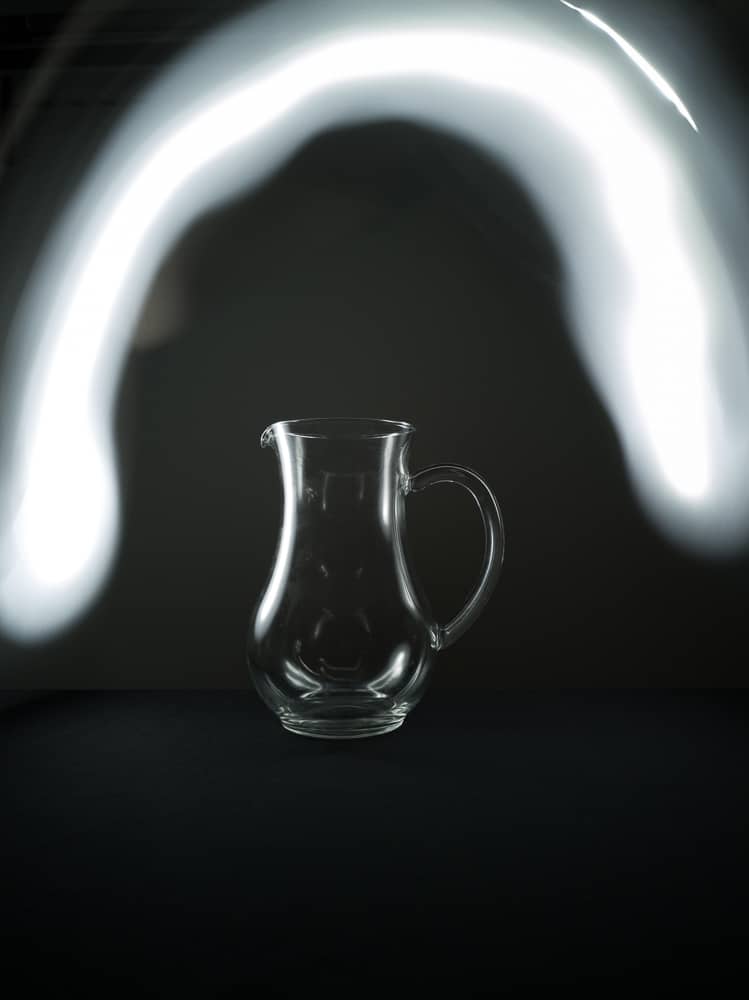
A setup that is theoretically well planned out can be ruined by stains on the glass, which also refract light. For instance, when you shine a light directly on an ordinary pitcher this light is reflected not only in the glass material, but also in the sediments found on the glass. The first thing you can do is clean the surface but another solution is to spread the light over a larger surface and then have it reflected in the main object. The light softens, appears more soothing, and conceals any smudges.
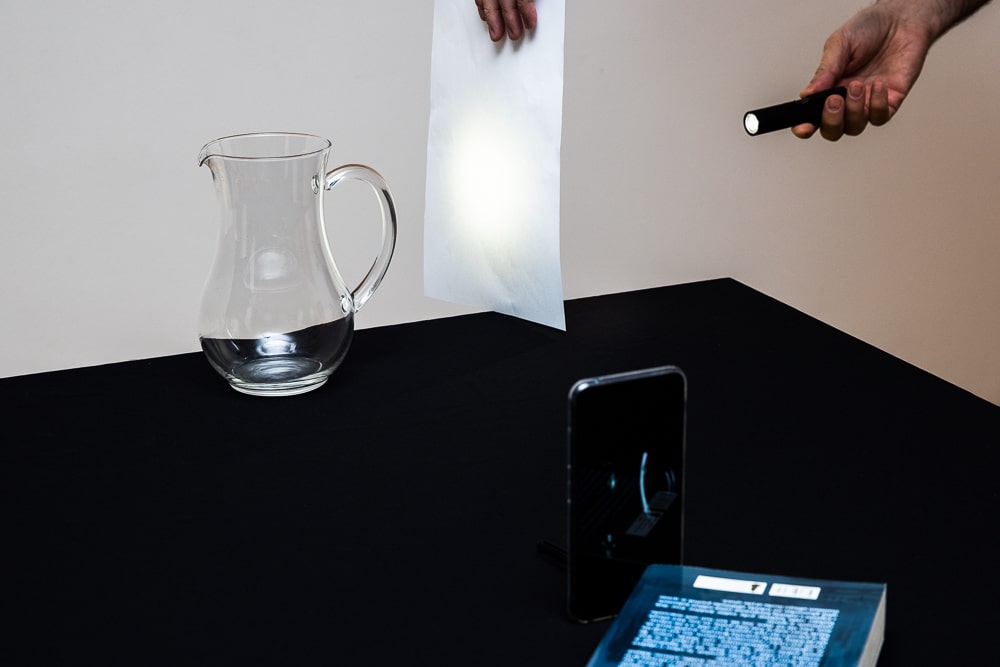
For this image, I was holding a flashlight in one hand pointed in one direction, with an ordinary A4 size piece of paper in its way, held with my other hand. In this way, the flashlight isn’t visible in the pitcher and only the illuminated paper is reflected in it. The distance and size of the paper make a difference, so don’t be afraid of some trial and error.
LG G8s, 1/8 s, f/1.8, focal length 4.36mm.
In a similar manner, a whiteboard, wall, white cloth, and other props can be used, all lit from the front, of course.
With a bit of practice, you can make even an ordinary A4 paper grow to any size. All you have to do is use the technique of light painting, where you set a longer exposure time and move the paper and flashlight during it.
The photoshoot took place in a dark room. In addition to the lighting you choose, glass often reflects other light sources. Windows are the most common culprits. Window blinds may not be enough, so if you don’t have blackout shades or curtains, it is best to do the photoshoot after dark.
Camera setup
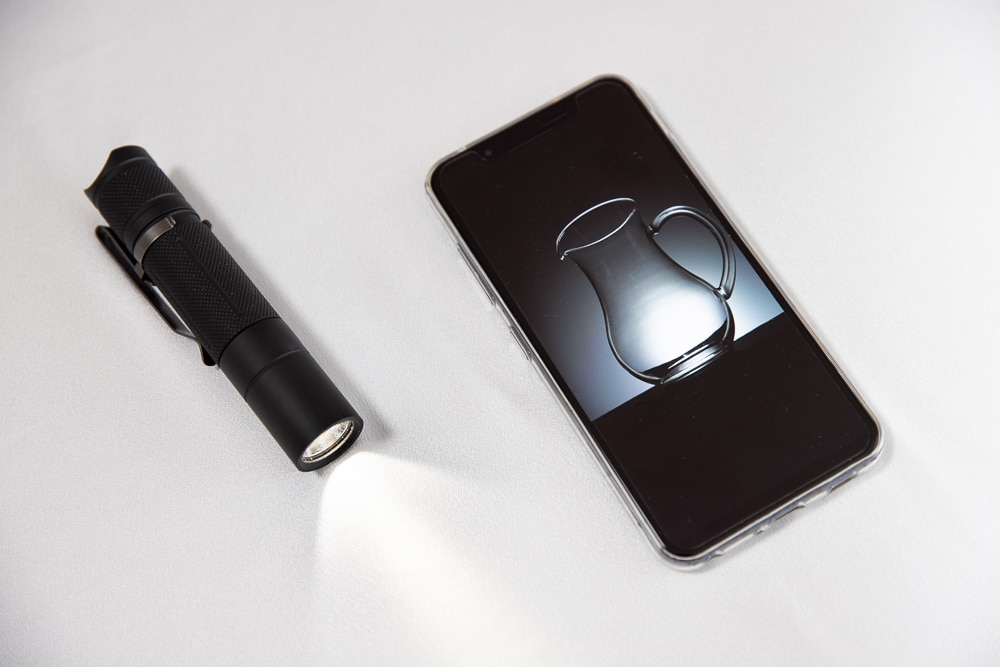
All of the photos below, aside from the backstage shot, were taken using an LG G8s mobile phone. A bigger camera will give you more options and higher image quality, but for our experiment, it wasn’t necessary.
It’s best to secure a set place for the device and light so that the experiment can be repeated. Then you just come back to change exposure settings or light intensity and you can get the same image as before, just with different settings. A camera performs best when used with a tripod, but even this can be avoided by placing the mobile phone between two books.
I used the camera delay timer in order to not move the phone and also so I had time to grab the flashlight to shine in the right place.
It’s best to use a longer focal length. On a normal camera, this would be around 100mm or more. This is so your image doesn’t have large perspective distortion and also so the device can be far away without being reflected in the glass. With a mobile phone, the use of a telephoto lens is more difficult in the dark, so I used its basic lens knowing that the phone would be placed somewhat further from the object and I would later only crop around the center of the image.
For higher quality, I recommend shooting in RAW or DNG format, and setting ISO sensitivity to a minimum.
Exposure time will depend on the intensity of light coming from the flashlight and also the size of the illuminated surface. Due to the fact that the mobile phone/camera was firmly positioned, even a several-second-long exposure wasn’t a problem.
Let’s start the shoot
The basics are clear, just a note about the background: Even though the wall appears to be part of the photo, it’s actually a meter or two away. Even so, it is a challenge to use the flashlight and paper to shine only on the object and not on the wall. For lighting in only a given direction, studio softboxes work well, though I don’t use them here.
The objects stand alone on the table covered by black or white cloth and are always placed at the back edge of the table.
We’ve already demonstrated “encircling” the pitcher using the illuminated paper. This is the same photo, just slightly tweaked and with the light streak around it removed.
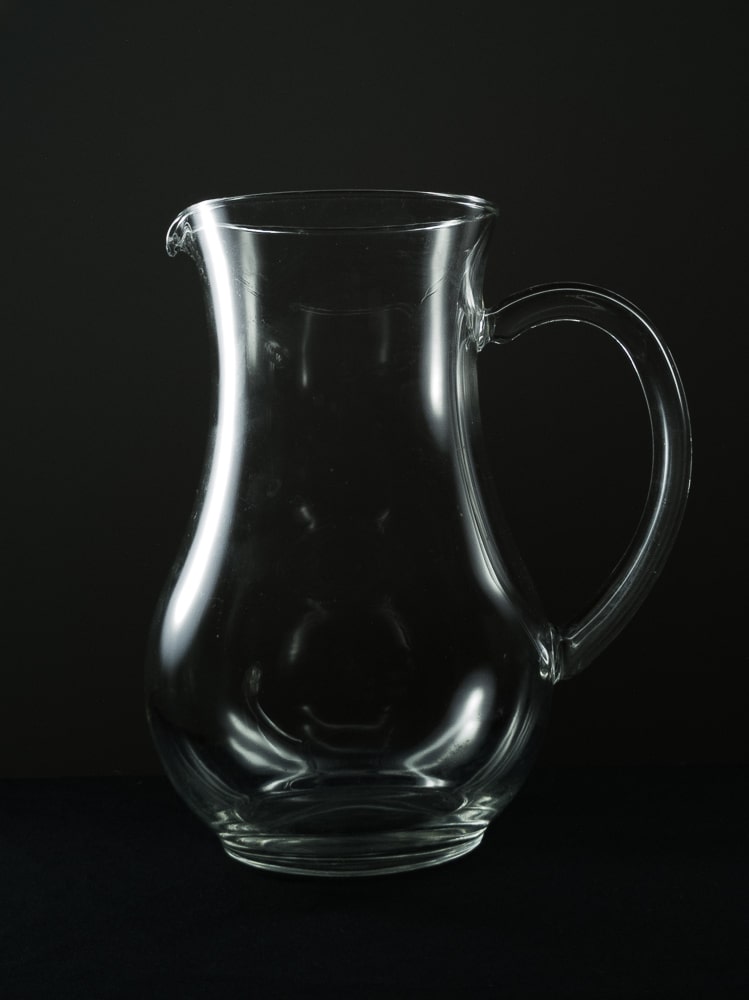
LG G8s, 2 s, f/1.8, focal length 4.36mm.
An effective yet very simple strategy is to illuminate only the wall and allow the refracting light to do its work.
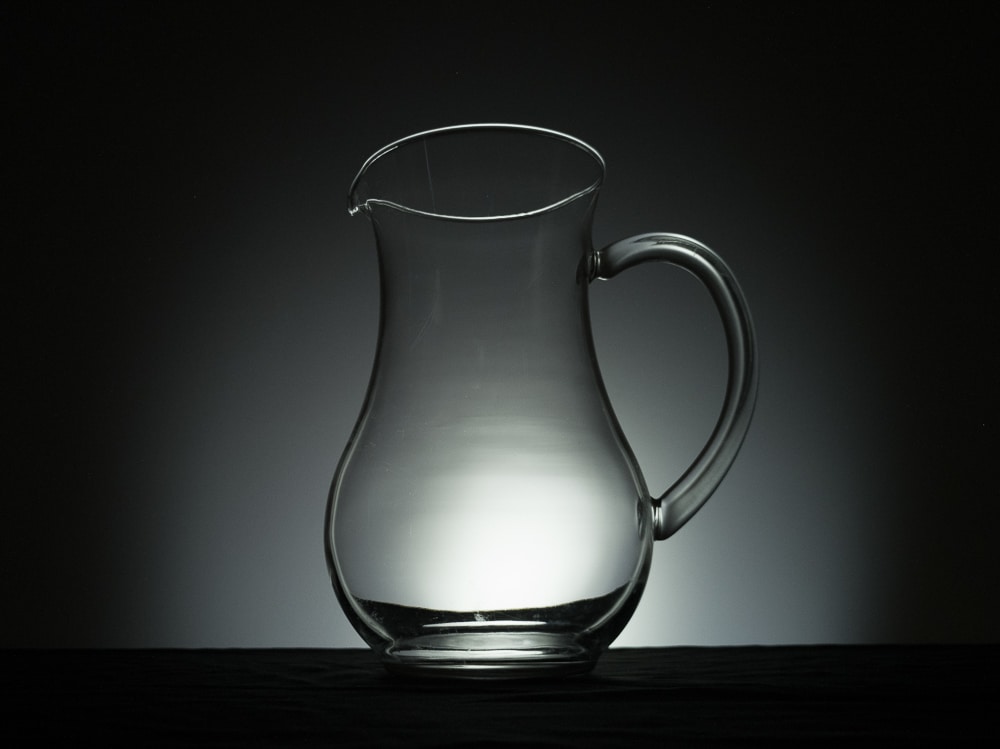
LG G8s, 2 s, f/1.8, focal length 4.36mm.
Combining multiple lights
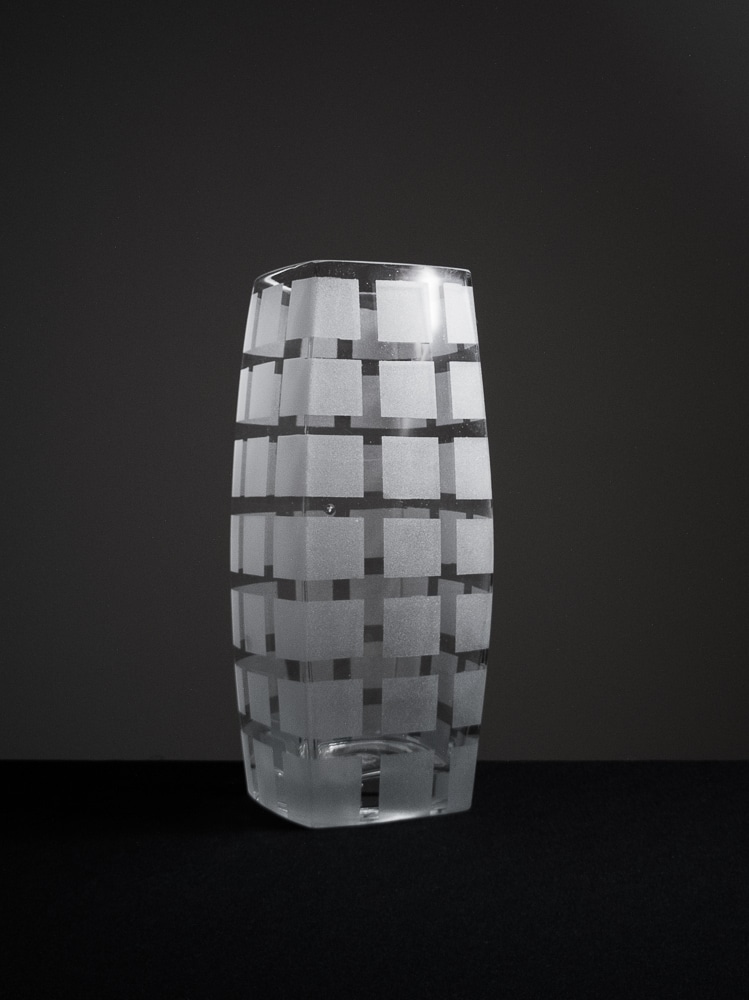
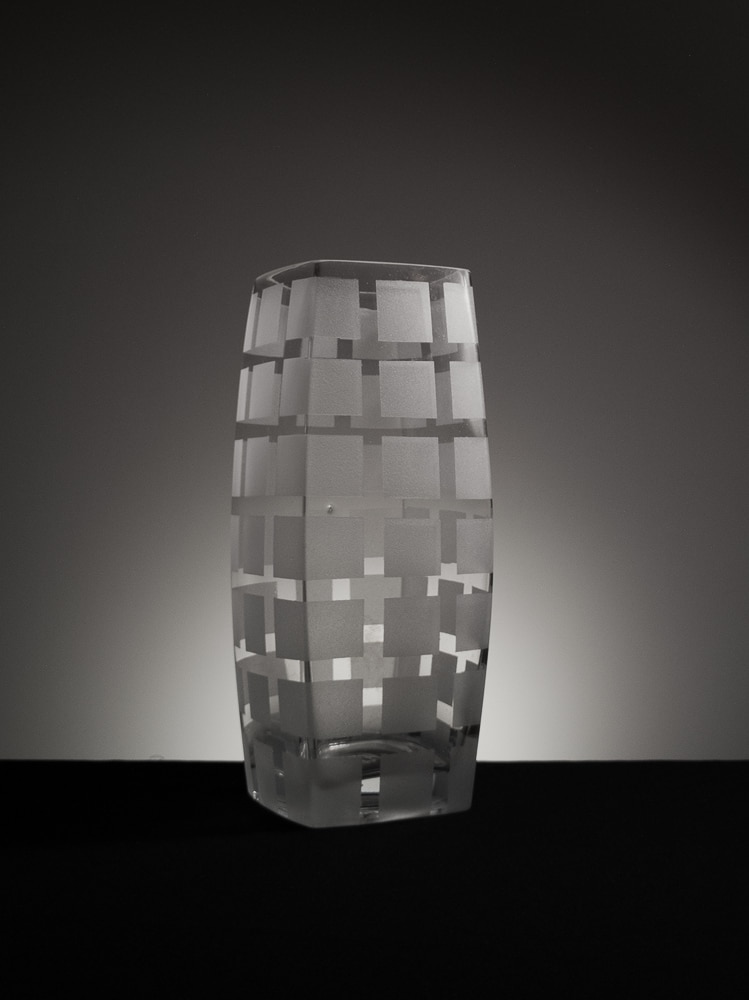
This time we’ll try a vase with details of textured glass. Backlight always works well, but in this case, the textured glass isn’t visible.

LG G8s, 2 s, f/1.8, focal length 4.36mm.
On the contrary, when lighting from the front through a white paper, the decorations on the vase are visible, but the background is too dull.
LG G8s, 2 s, f/1.8, focal length 4.36mm.
How about combining both methods? With the mobile phone or camera in the same place, you could do it digitally, but “coloring in” with light in one shot works just as well. With an exposure time of two seconds, there was enough time to illuminate the wall, move the flashlight, and shine more light through the piece of paper:
LG G8s, 2 s, f/1.8, focal length 4.36mm.
A bit of water
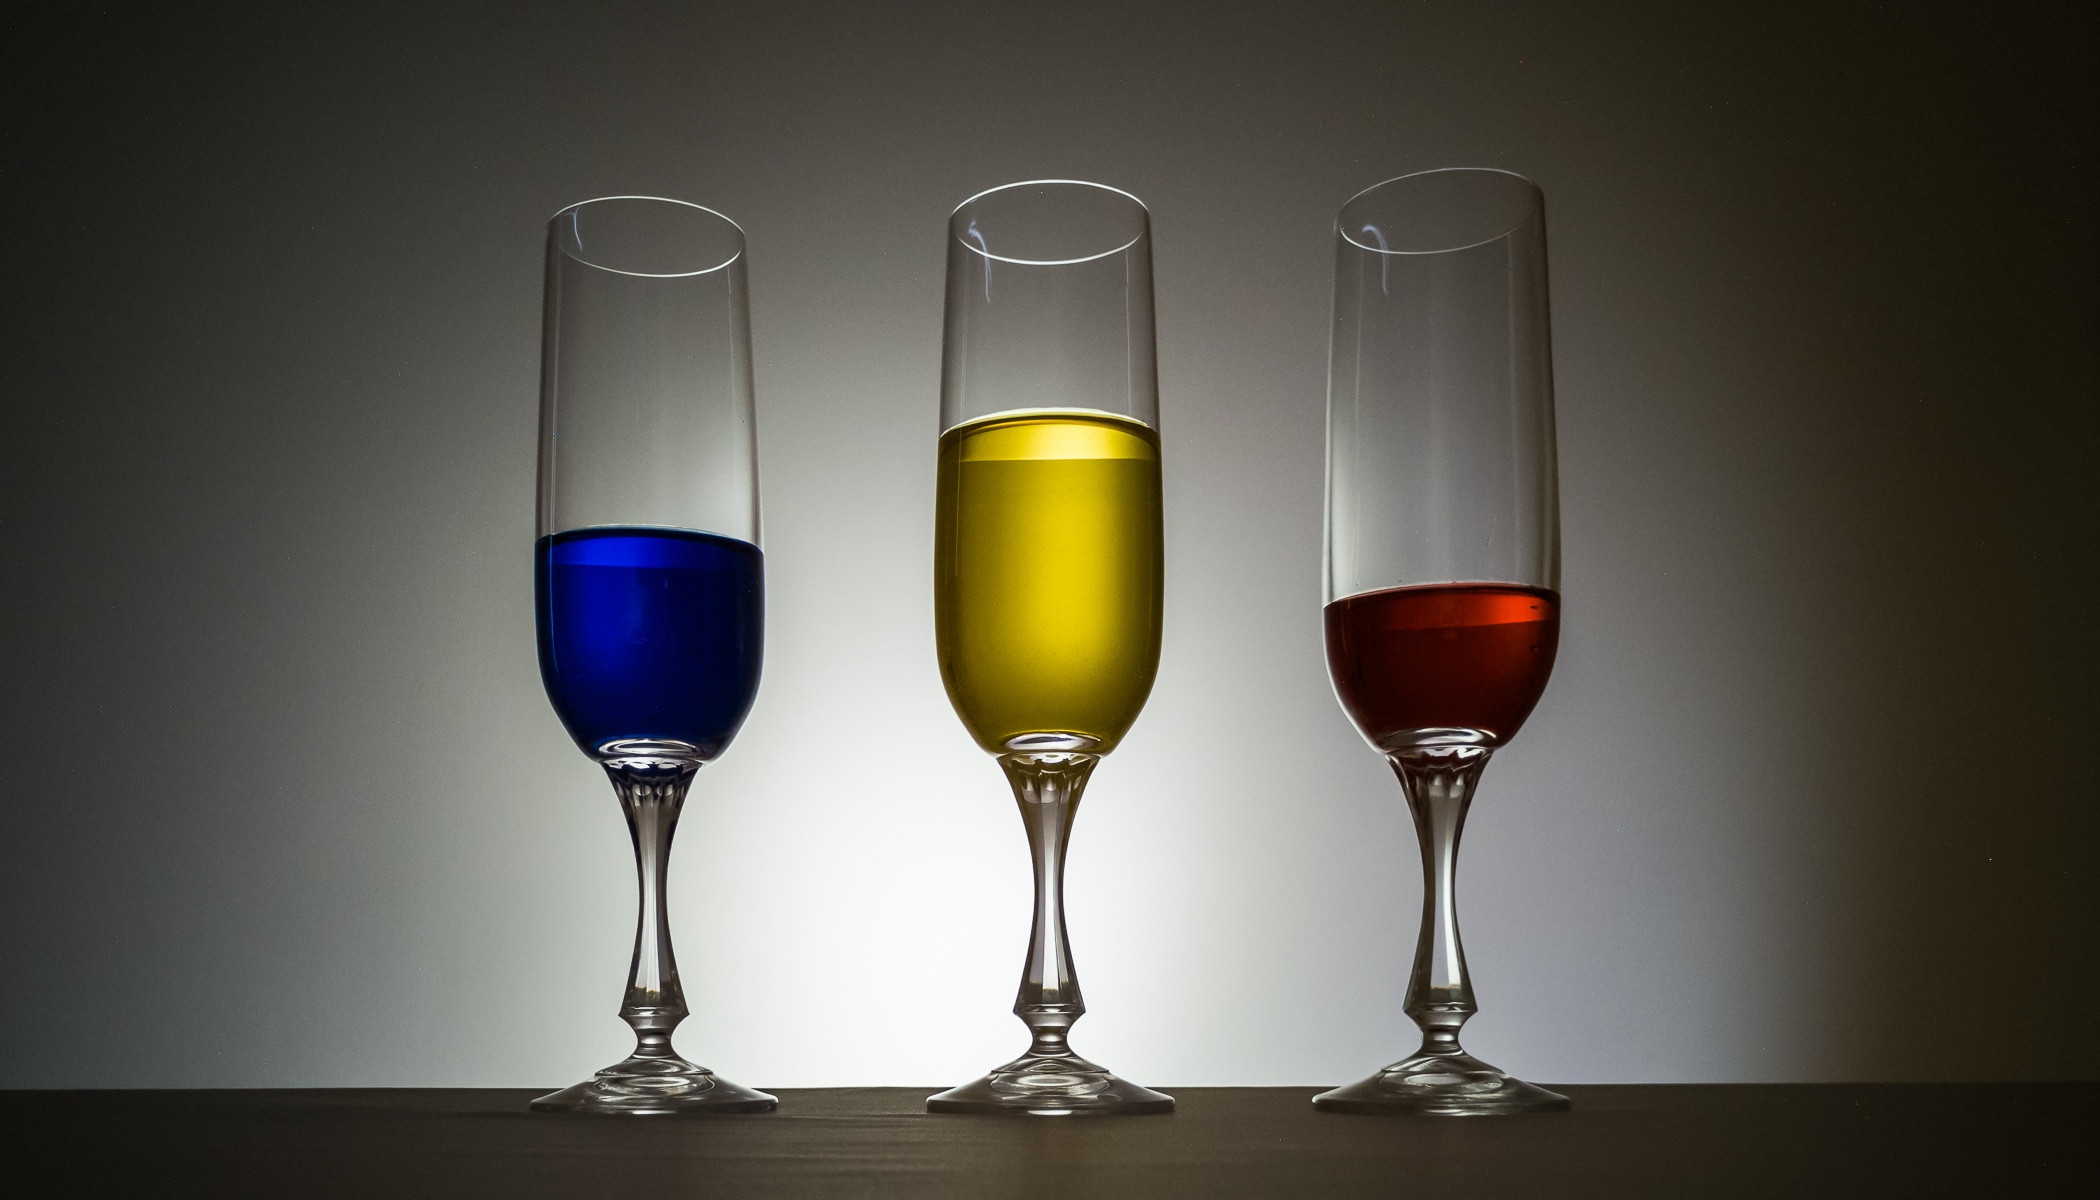
Water adds an element of uniqueness by only changing the way the light is refracted. Here, I also added some food coloring. Using the same methods from before, you’ll get similar, though more vibrant results.
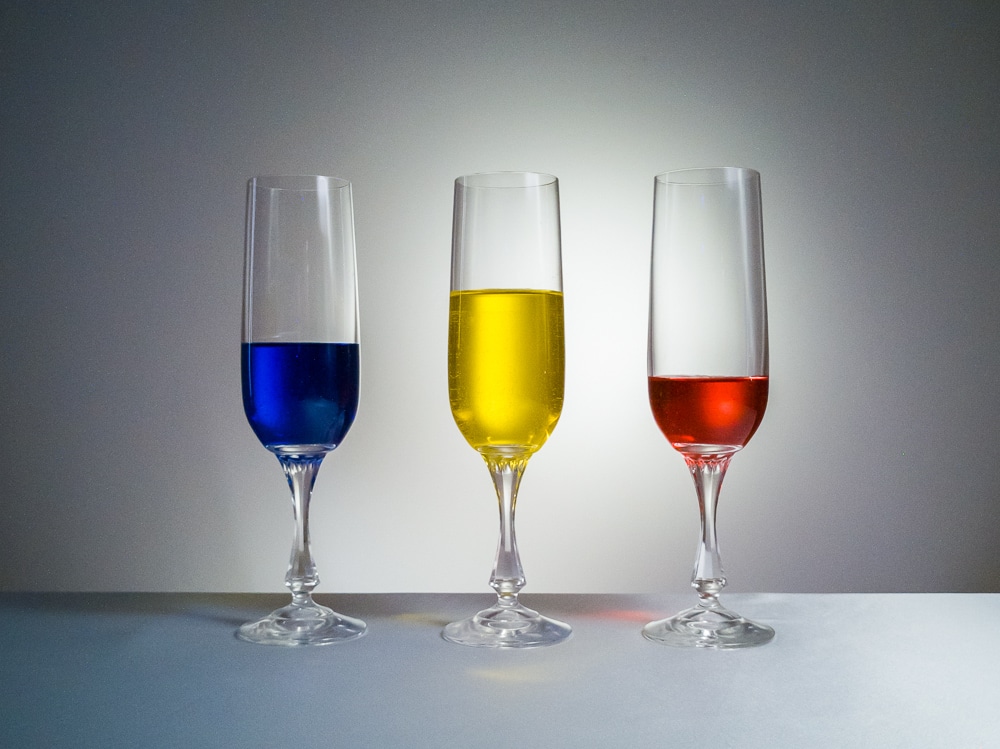
LG G8s, 3.2 s, f/1.8, focal length 4.36mm.

LG G8s, 1 s, f/1.8, focal length 4.36mm.
When I bend the rules from the beginning of the article and use single-point lighting of the flashlight without the paper, I get harsh, even colorful shadows.
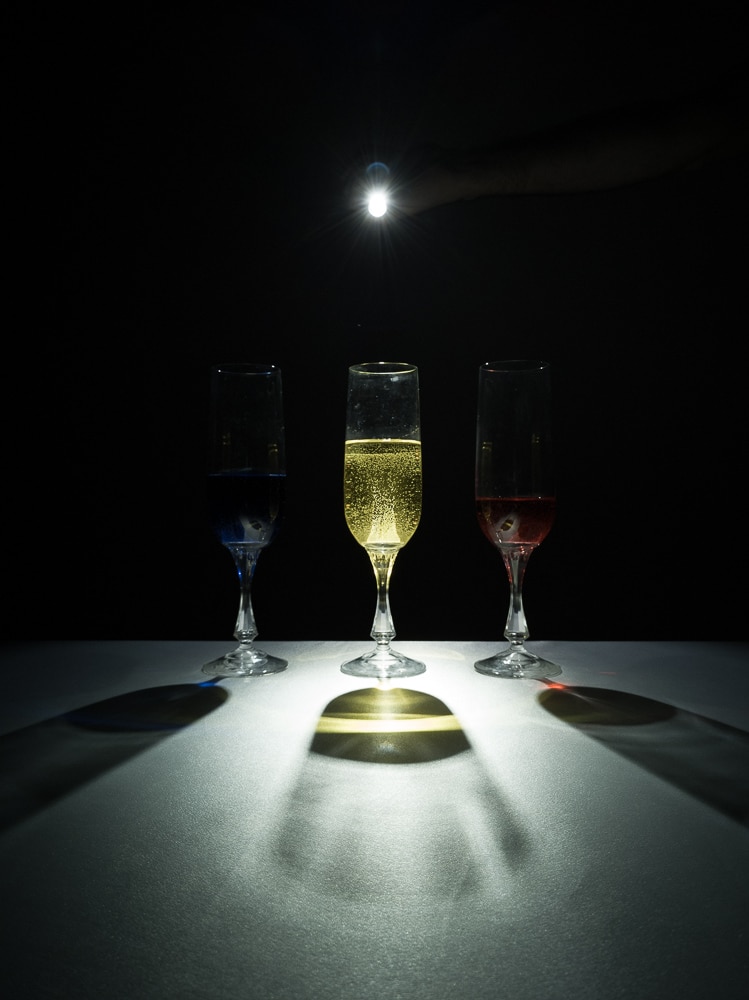
LG G8s, 3.2 s, f/1.8, focal length 4.36mm.
The flashlight performs well enough with further experiments, so I didn’t have to limit myself with a tripod and short exposure time. I shot handheld, with the flashlight in my other hand.
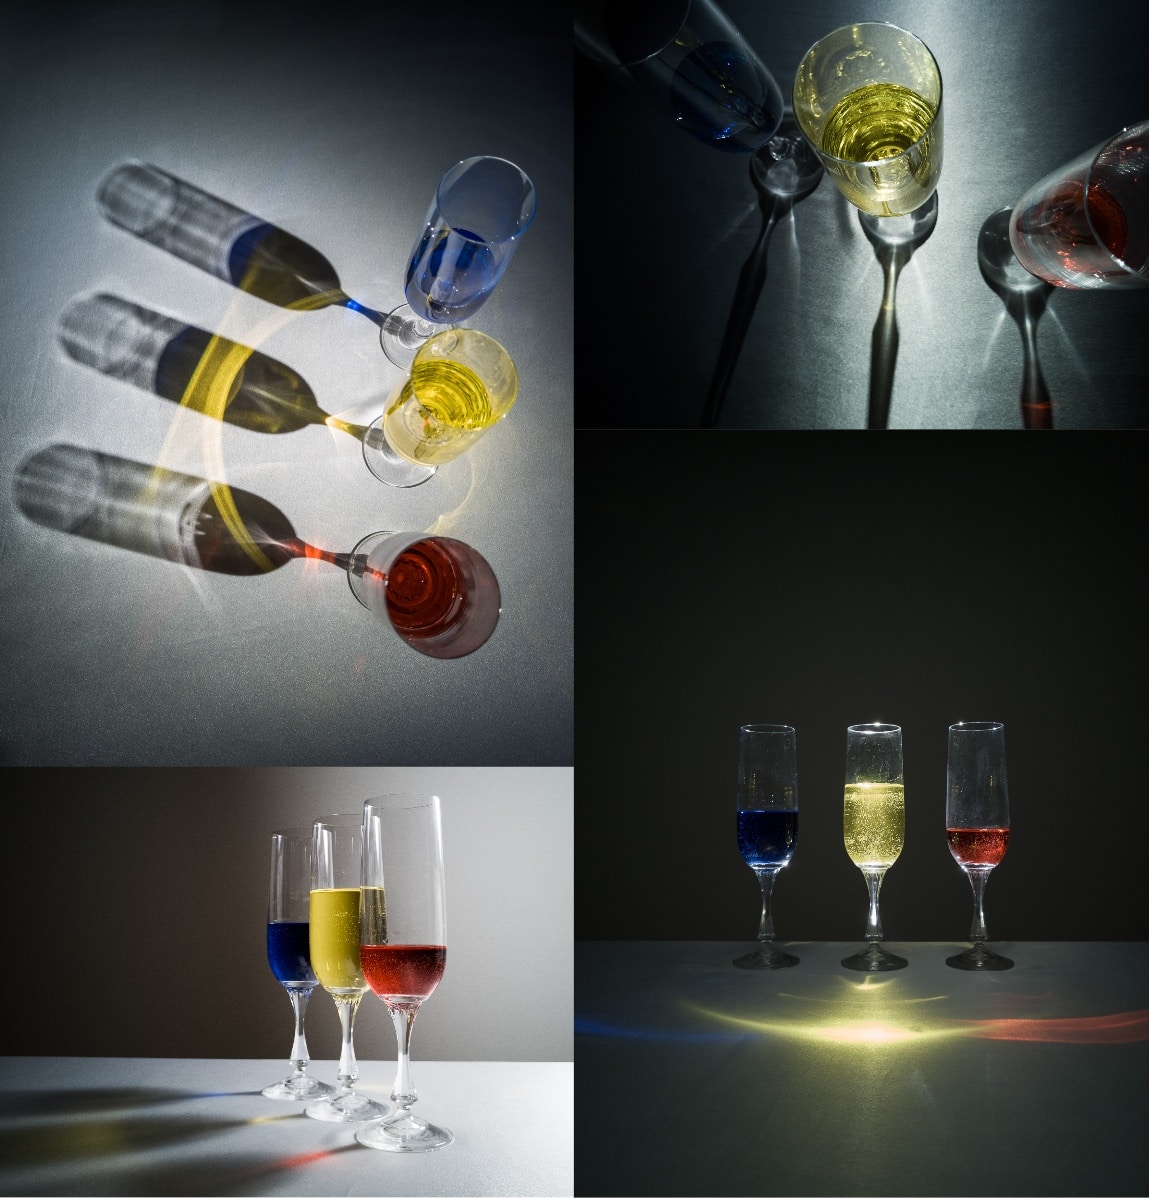
LG G8s, 1/125 s, f/1.8, focal length 4.36mm.
Graduate to better gear
More advanced gear brings with it many advantages. An interchangeable lens camera allows a greater distance, sharper photos, and potentially higher dynamic range. A good tripod gets rid of the need to be careful when using the camera and the worry that it will fall or ruin your carefully perfected composition. Several remote flashes with softboxes would make it easier to repeat shots and gradually tweak to get the perfect shot. Using a camera rather than a mobile phone also gives you a wide range of editing options in Zoner Photo Studio X.
TIP: Also read the article Product photography using a white background.
But if you’re just starting out, it’s ideal to experiment with minimal gear. Then, when you find your way in the given style, start considering an upgrade. The results themselves will improve and you’re sure to have even more fun with the photoshoot.
There are no comments yet.