Head for the Trees!
Forests are a popular topic in photography, both because they’re visually appealing and because they’re easy to reach. Read on for some tips of how to get more out of your forest photography.
Often after coming home from a summer vacation, people brag about the exotic locations they visited, in-person and on the web. But really, many of the prettiest places are paces from home!
Nature’s Little Helpers
Forests look good in pictures from every season, taken with any camera, but that doesn’t mean they can’t look even better. One thing you’ll want for that is a polarizing filter. Choosing a good time of the day and year doesn’t hurt either. Autumn is of course the most classical season, and if on top of that you take advantage of a “golden hour” (the time in the morning or evening when the sun is just above the horizon), you can get truly elegant pictures that evoke a fairy forest kingdom. Personally I’m partial towards mist and thin clouds; these can add a new dimension to photos.
But that definitely doesn’t mean that October mornings are the only worthwhile time to photograph the forest! Don’t be afraid to take pictures anywhere, anytime. You’ll get much better variety than you would by restricting yourself to just autumn.
Taking the Wide View
When a hiker heads to a higher spot after a long trip, the classic reward is a beautiful view… and a beautiful photo. This type of photo is very impressive no matter when in the day it’s taken, but there are some technical challenges involved. Take a moment here to compare the final version of the picture below to the out-of-camera original:

Canon 7D, Sigma 30/1.4, 1/60 s, F9, ISO 100, focus 30 mm
In the original photo, the forests are too dark, and the sky is too bright. I could have solved this problem during the shot by using a gradient filter to darken the sky. But many people don’t own such a filter, and so a simulated filter added via computer editing is the more common solution. To do that in Zoner Studio, follow the advice in this article.
If the brightness ranges you’re encountering are really overwhelming, for example because you’re shooting against the sun, then all you can really do is turn to HDR—to take multiple source pictures and merge them together:

Canon 5D Mark III, Canon EF 16-35/2.8 II, from 1/800 to 1/50 s, F9, ISO 400, focus 16 mm
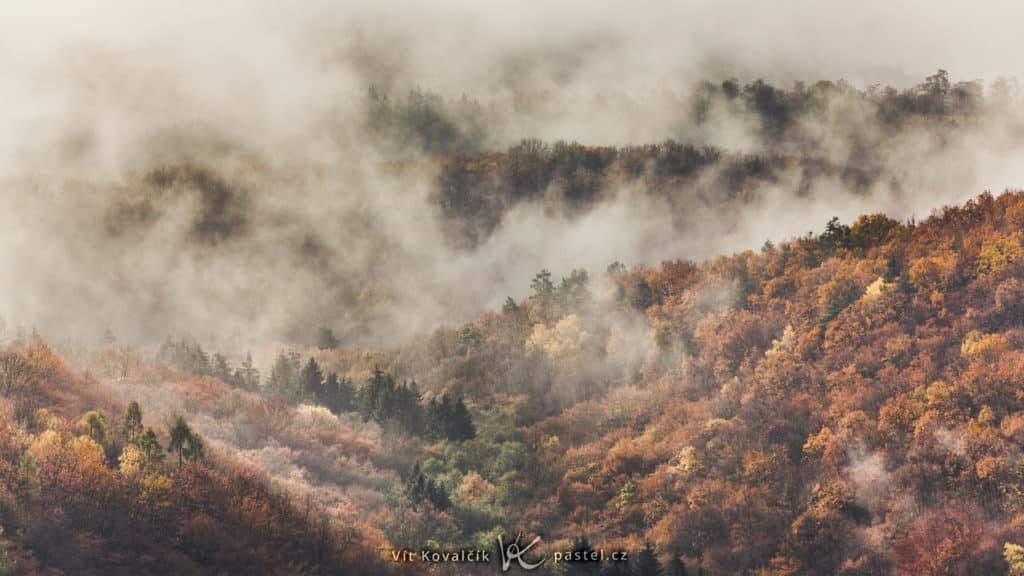
Now for inspiration, here is a picture with the mist I love so much. Most misty scenes are short on contrast, making them need drastic post-processing. To make sure that your pictures survive post-processing in good shape, I recommend that you expose to the right.

Canon 5D Mark III, Canon EF 70-200/2.8 IS II, 1/125 s, F13, ISO 100, focus 88 mm
Close-ups
While a wide shot reminds us that Nature is monumental, a telephoto shot taken from the very same spot can really highlight the detail that interests us the most.
The last illustration showed off an 88 mm lens; here is an even more detail from a different location than before, taken with a 165 mm.

Canon 5D Mark II, Canon EF 70-200/2.8 IS II, 1/400 s, F8, ISO 100, focus 165 mm
If you’re curious, take a look at the first photograph above of springtime hills, which was taken from the exact same spot. Can you find this part of the landscape in it? (I admit I obviously took it at a different time of year.)
In the Forest
Shots taken right among the trees also have their charm. You’ll want to watch the play of the sunshine and adapt your composition to it. Even a small patch of forest with an isolated ray of light is enough. Cameras typically struggle to avoid overexposing the spot where a sunray falls, so you will need to carefully double-check the picture after you take it, to avoid getting an all-white blob instead of a sunray.

Or go a different route and use a wide-angle lens to fit in the Sun… and something else interesting as well.

Roads are always a good way to guide a viewer’s eyes. Once again a somewhat misty picture, this time with a line through the forest:

Details
You don’t have to always capture huge swaths of the forest in your photos. Details that you find make for pretty pictures too.

You can also highlight shadows when they form delicate patterns on nearby hills.

Digital cameras’ restricted dynamic range makes it easy to create silhouettes—in this case, leaves in shadow behind other, more illuminated leaves. You can fine-tune the brightness and saturation of shots like this on your computer after the shoot. That kind of post-processing can squeeze vastly different moods out of a single source picture. You can get, say, an optimistic, bright variant (like the one here) and a darker, less contrasted one that gives off a melancholy feeling.

One last thing in closing. Don’t think you have to always hold your camera traditionally! Odd angles have a lot to offer too. Here for example I combined camera tilt and blue-heavy white balancing to get a dramatic effect.

A Word in Closing
The forest conceals a multitude of photographic opportunities. Just take a look around the next time you visit, and you’ll come back with many interesting photos!
keithhalley
Beautiful images. Thanks for sharing.
Zoner
Thank you, we’re happy you like it!