Enhancing Landscape Photos? Local Edits Can Help
With landscape photography, it may appear that something is not quite right at first glance. The sky is too bright, the forest in the background is too dark, and the river in the center of the photo is dull. When this happens, landscape photographers use a simple trick—local adjustments. Let’s see how they’re done.
When editing landscape photos, basic adjustments to contrast, exposure, and saturation are sometimes not enough. The solution is local adjustments. Local adjustments allow you to enhance just the parts of the photo that need it. For example, you can use local adjustments to darken the sky or bring out the main subject. Since the fall 2023 update, local adjustments in Zoner Studio have been expanded to include additional functions.
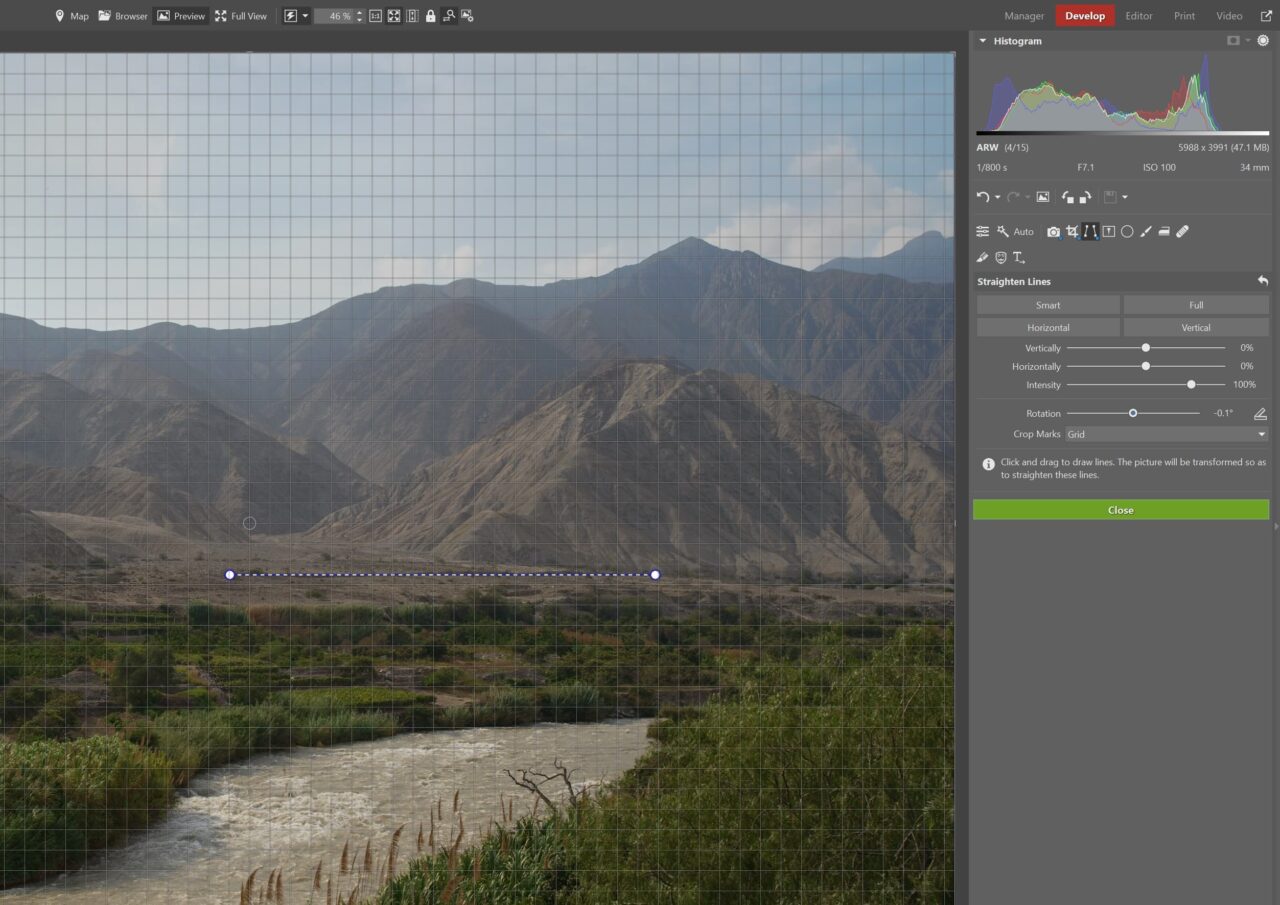
Open your landscape photo in the Develop module and adjust its overall exposure, contrast, and dynamic range. If needed, align your photo’s horizon using the Straighten Lines (K) tool.
Gradient Filter
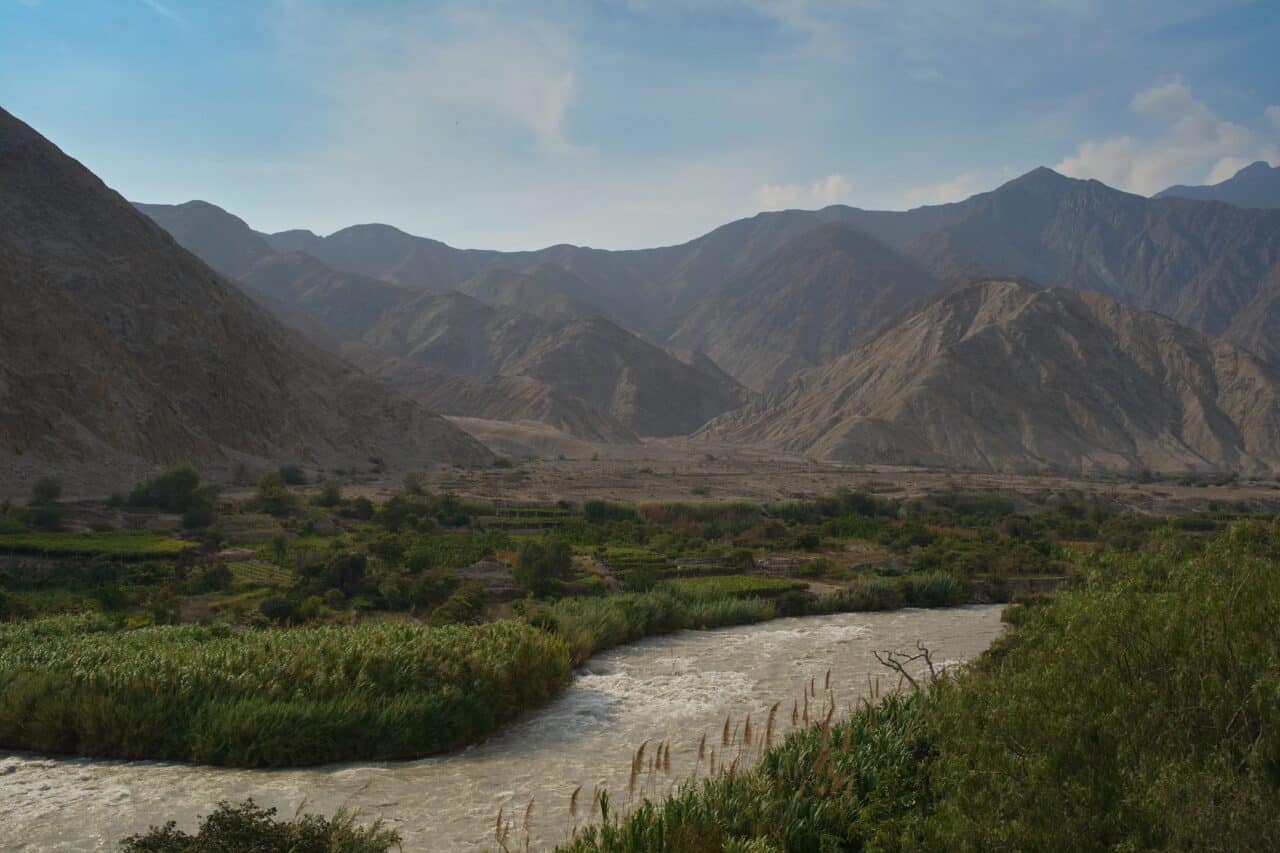
In our photo, you can see great contrast between the sky, mountains, and grassy area below. The Gradient Filter (G) helps you even out the exposure in different parts of the photo.

Rename the filters to give you a better idea of what part of the photo you are editing.
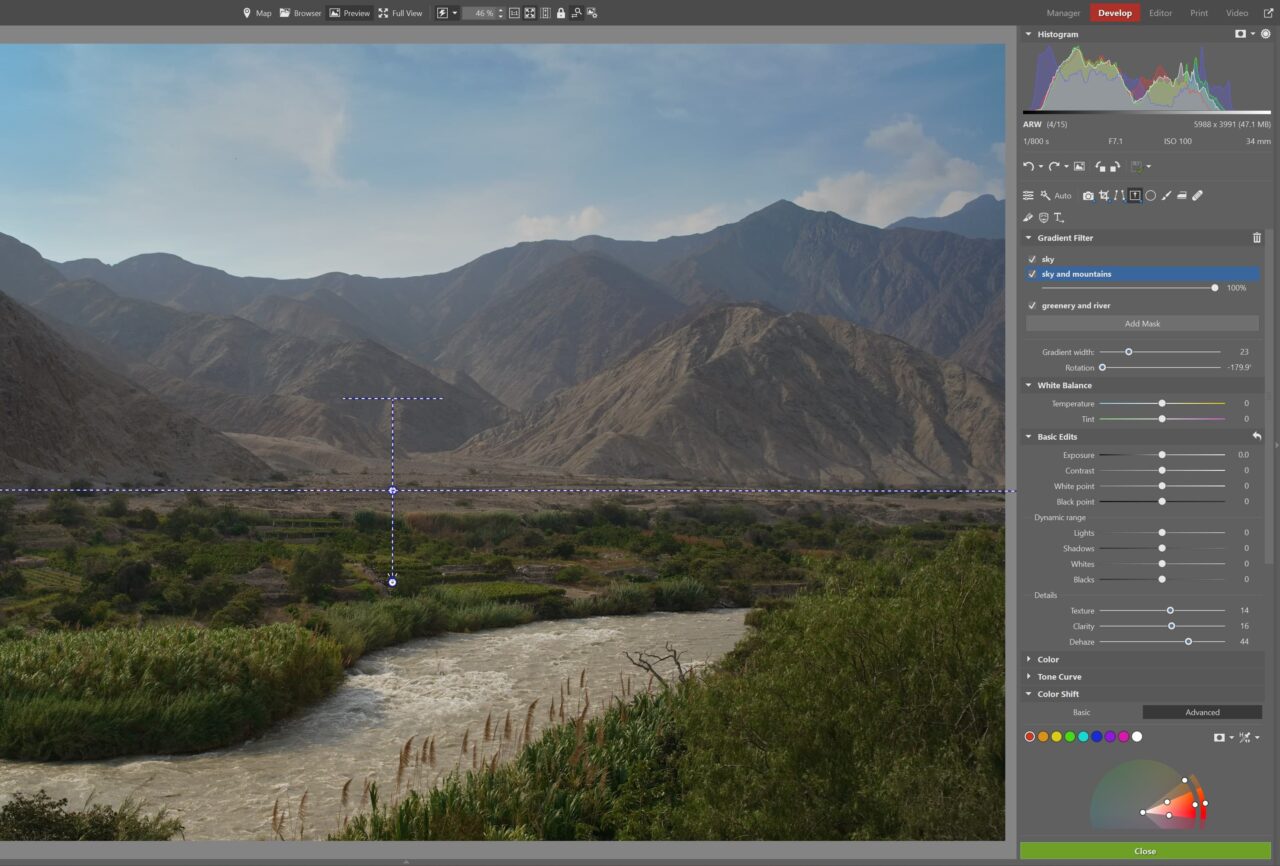
Also, use the Duplicate and Invert mask options. As in our example, you can duplicate a mask for the sky and mountains, and then use invert mask to select the rest of the photo, or the grassy areas and river.

Duplicating and Inverting masks often saves you time applying other filters.

Filter Brush
The Filter Brush (B) is perfect for selecting complex objects with irregular shapes. This gives you control over each and every part of your photo. Don’t forget to rename each mask, just like with the Gradient Filter
When using the Filter Brush, turn on the Show Mask option at the top of the right side panel. This shows you exactly what parts of the photo you have selected.
In our photo, we first selected the river and adjusted Temperature to make it look bluer and not so murky and brown. We fine-tuned the color of the water to match the color of the sky and also reflect the color of the sky.
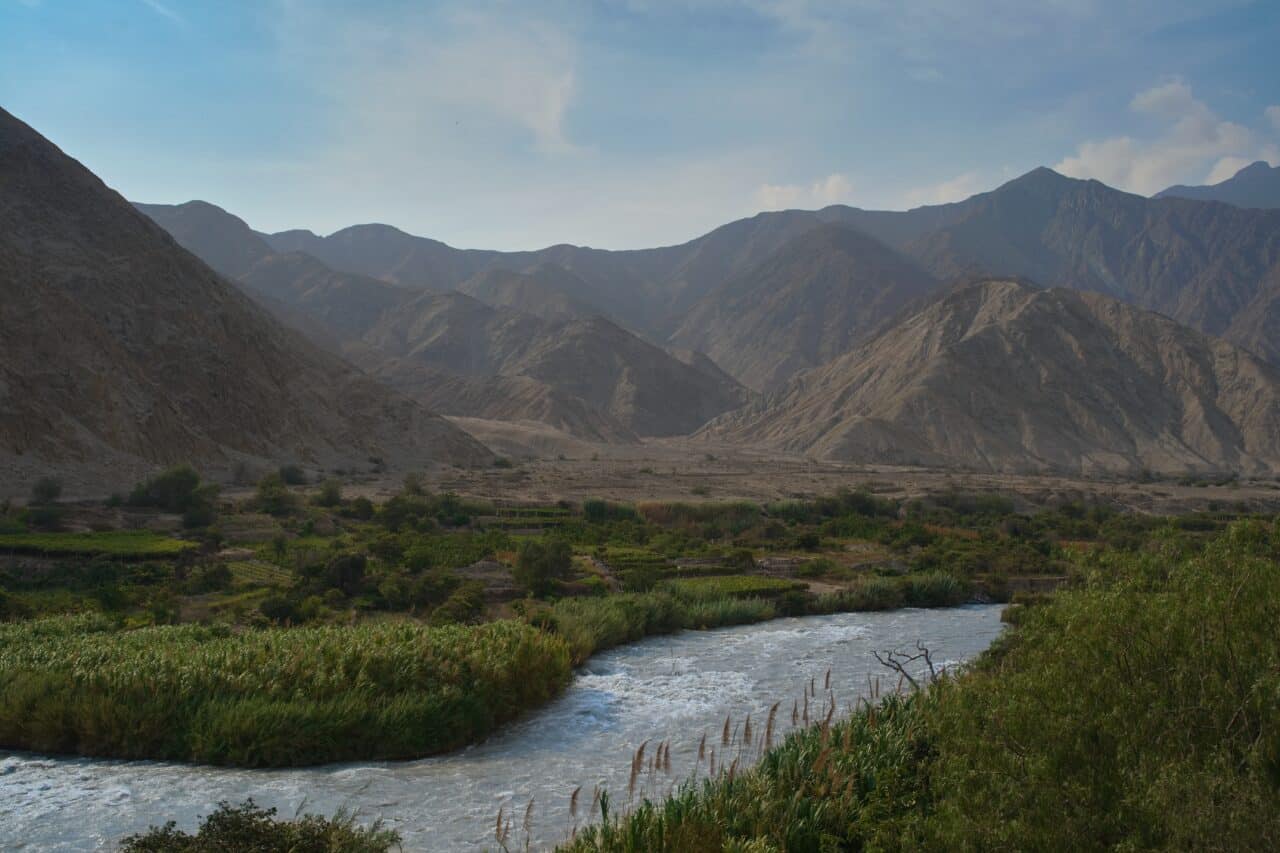
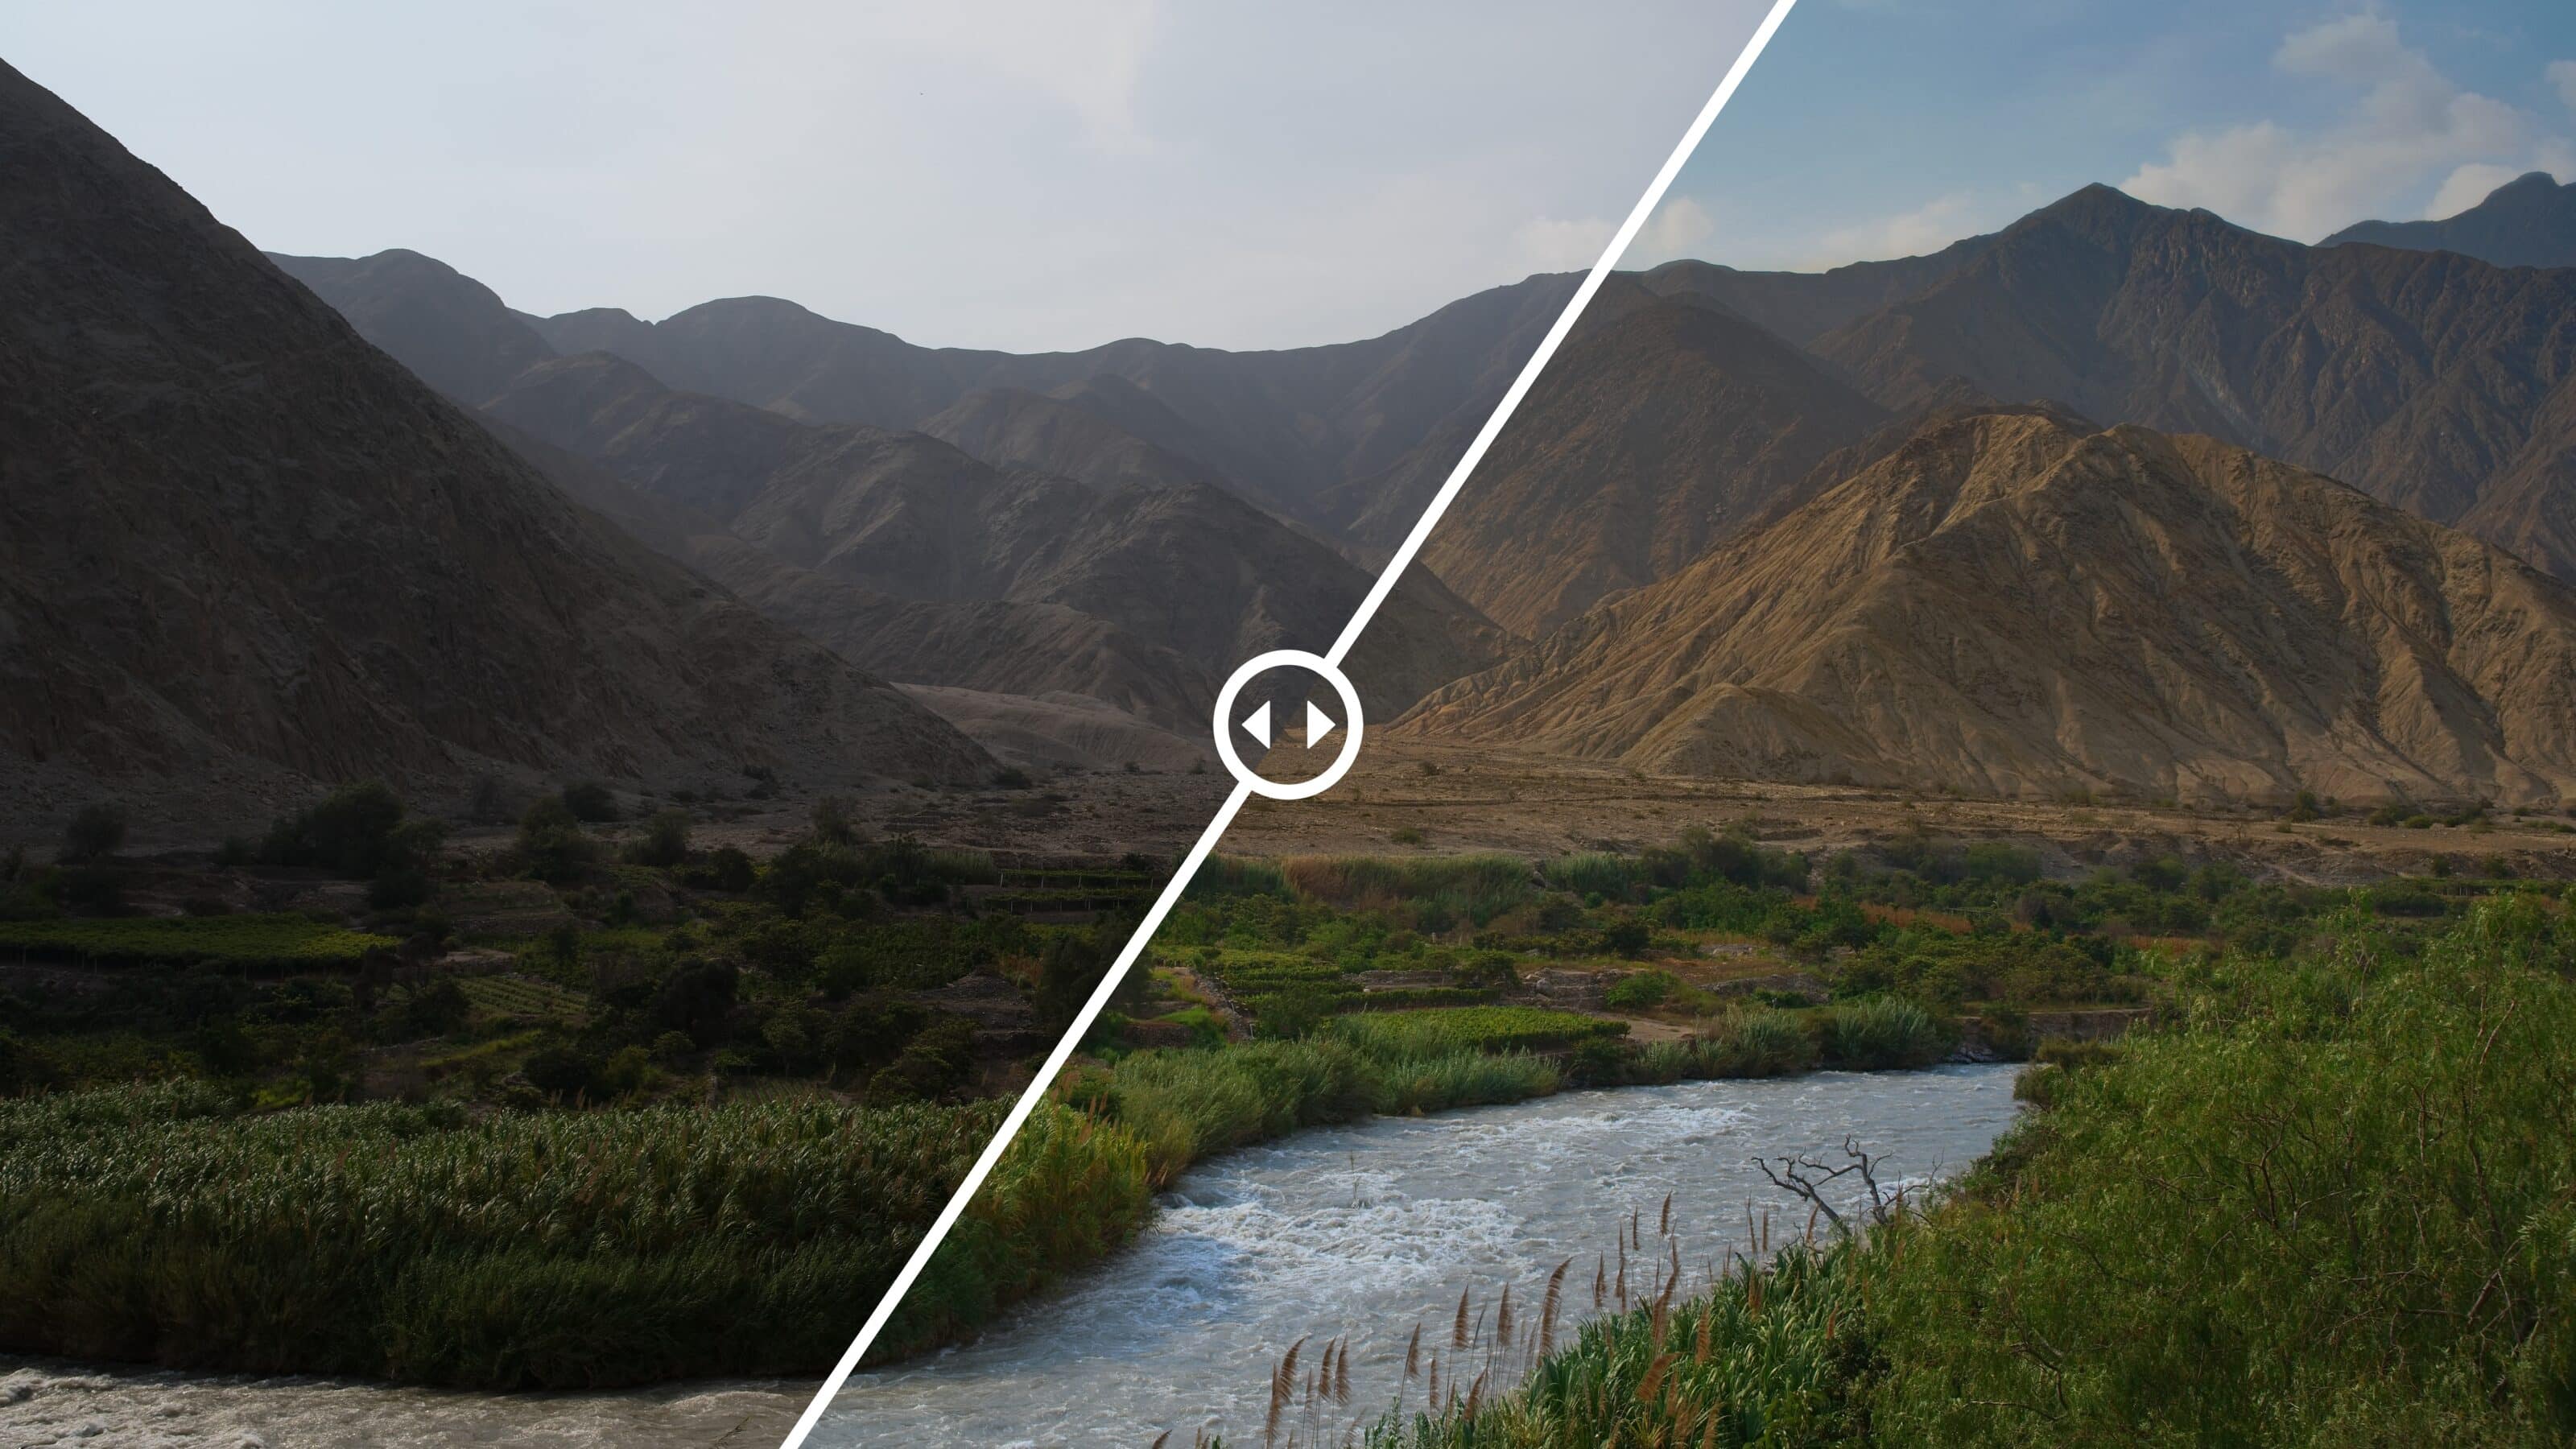
This is how the river looks before and after Temperature adjustments.
When adjusting colors, be careful with their saturation. If you go too extreme, the colors will look unnatural, which is not what you want for landscape photos.
Next, we selected the mountains and moved their Temperature toward yellow. We also adjusted Exposure, Saturation, and Vibrance.

Then, we selected the grassy area in the foreground around the river and adjusted only Saturation and Vibrance to make the green stand out a bit more.
Finally, we used the Filter Brush to color correct the sky on the left and then the right because the colors on both edges were unbalanced and were a different shade of blue than the center.
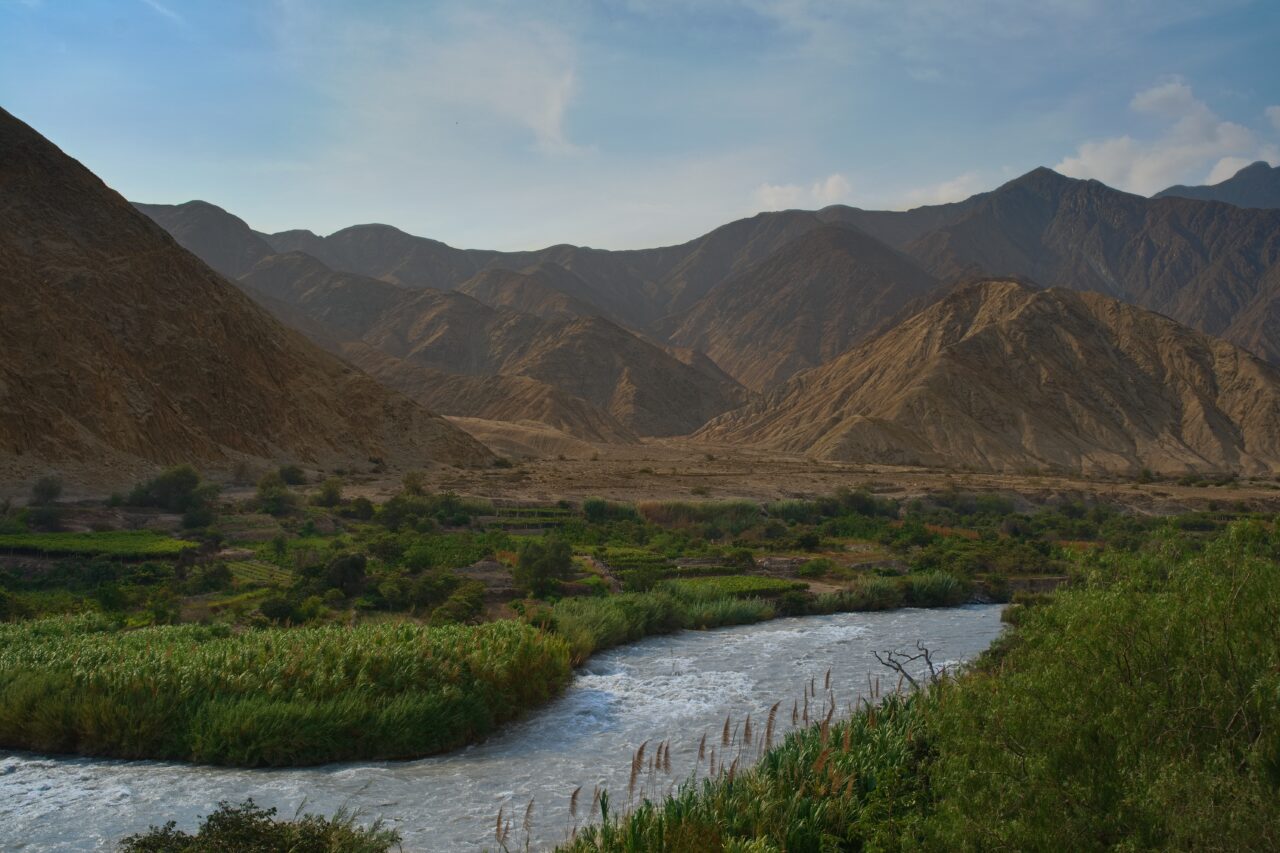
This is what the final product looks like after applying local adjustments.
Using local adjustments can work magic on your landscape photos. Download Zoner Studio free for 7 days and try using local adjustments on your own landscape photography. Or, download our demonstration photo and try the adjustments yourself.
There are no comments yet.