How to Add Snow to Your Photos: It’s Easy With Layers
The article is over 5 years old. The information in it may be outdated.
![]()
We are working on its update. In the meantime, you can read some more recent articles.
This time around we’ll be looking at another of the many ways to make use of layers for your photo editing. We’ll teach you how to add realistic-looking snow to your photos. Adding textures to photos is very popular, but you need to learn the right approach if you want your results to look believable. Fortunately it’s not complicated—you can do it using layers in Zoner Studio.
You may remember that I mentioned precisely this edit in my article named 6 Edits You’ll Do Better to Avoid. Yes, when used wrong, fake snow puts you on thin ice. But that doesn’t mean that it can’t be used at all. It all depends on what photo you’re adding the snow texture to, and how you’re doing it. When you do everything right, the result can look great.
Only Add Snow to Your Snow-friendly Photos
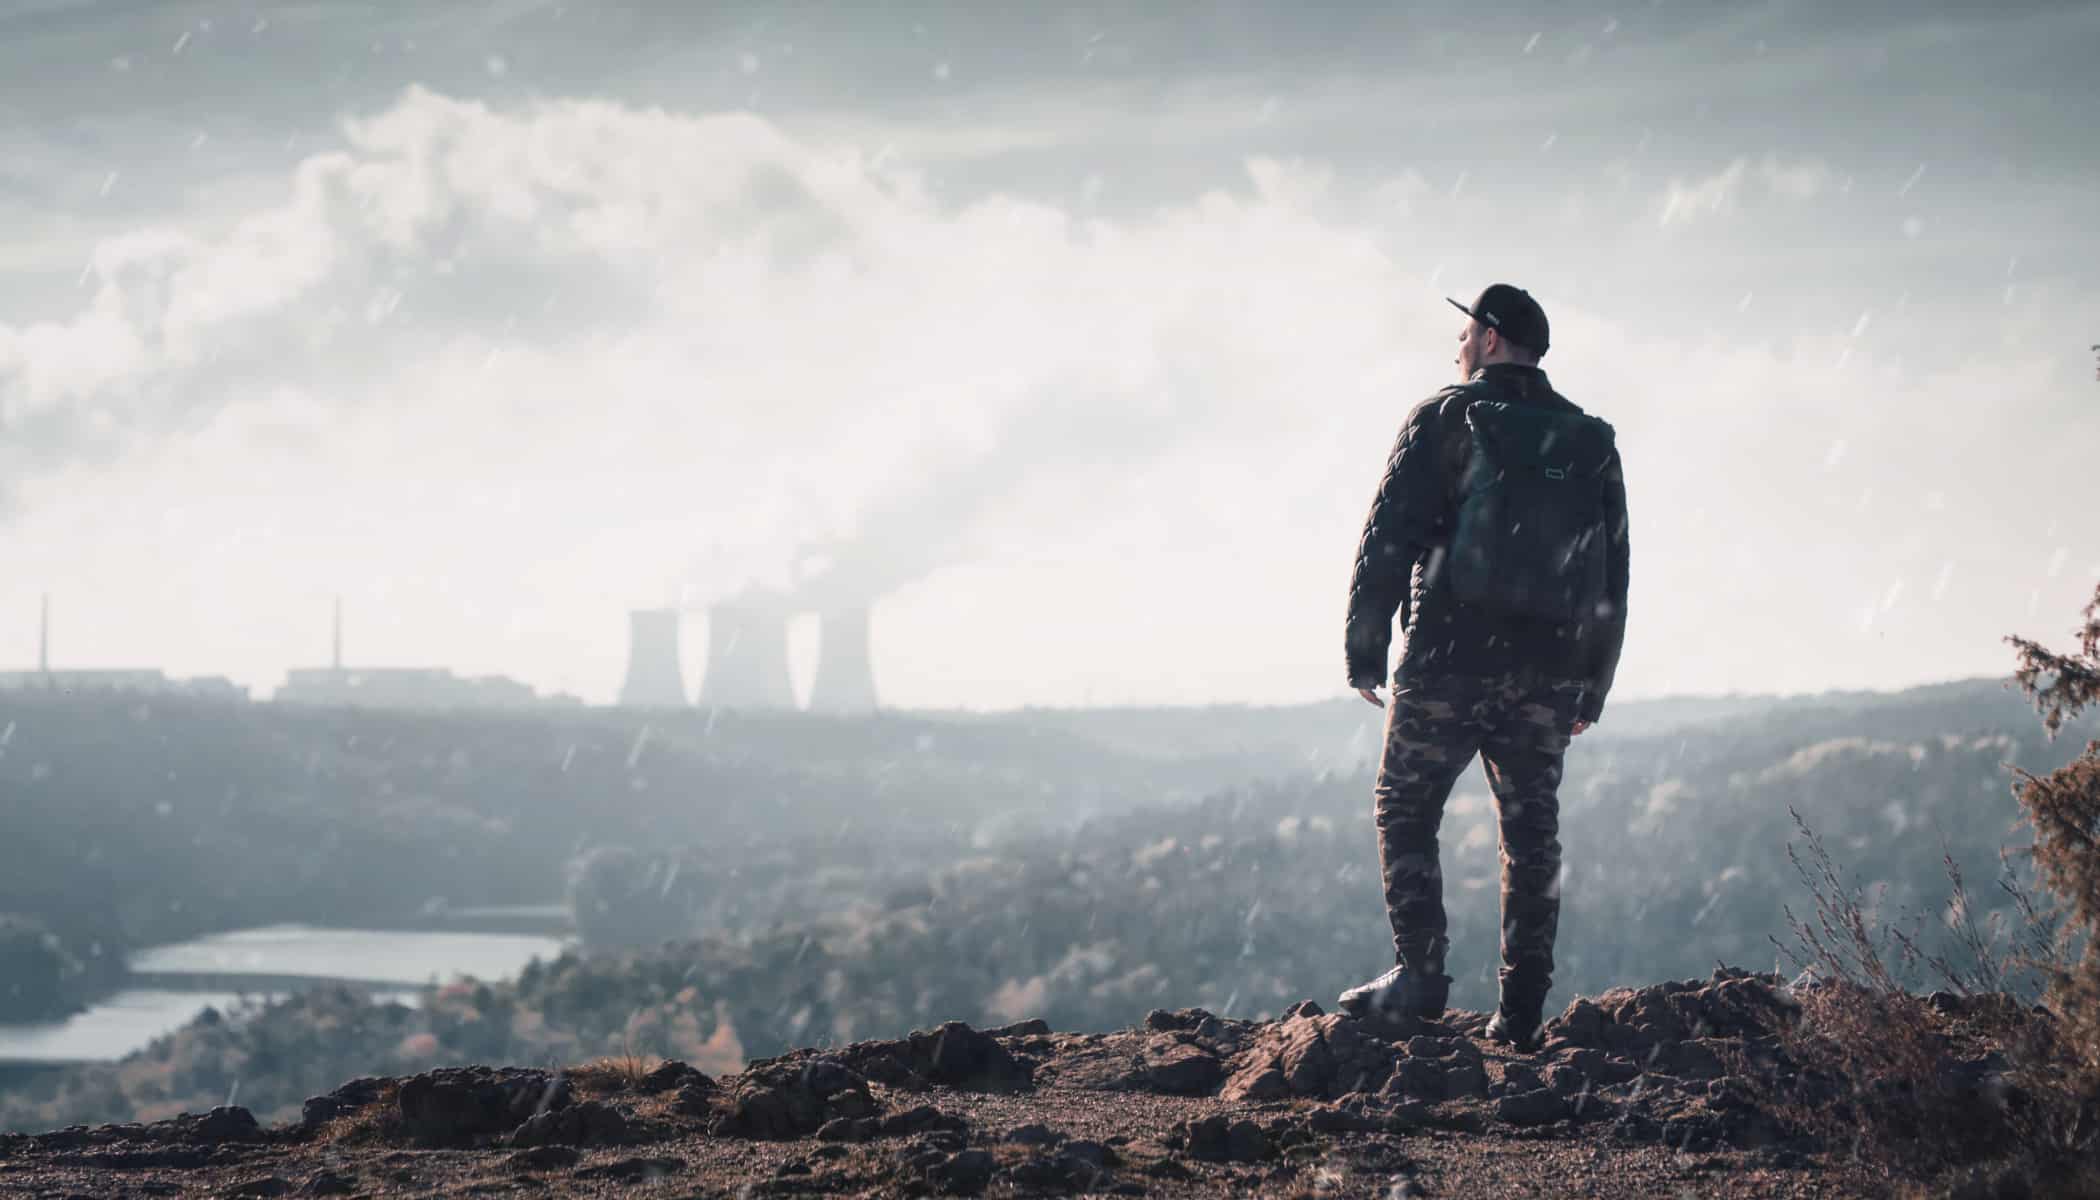
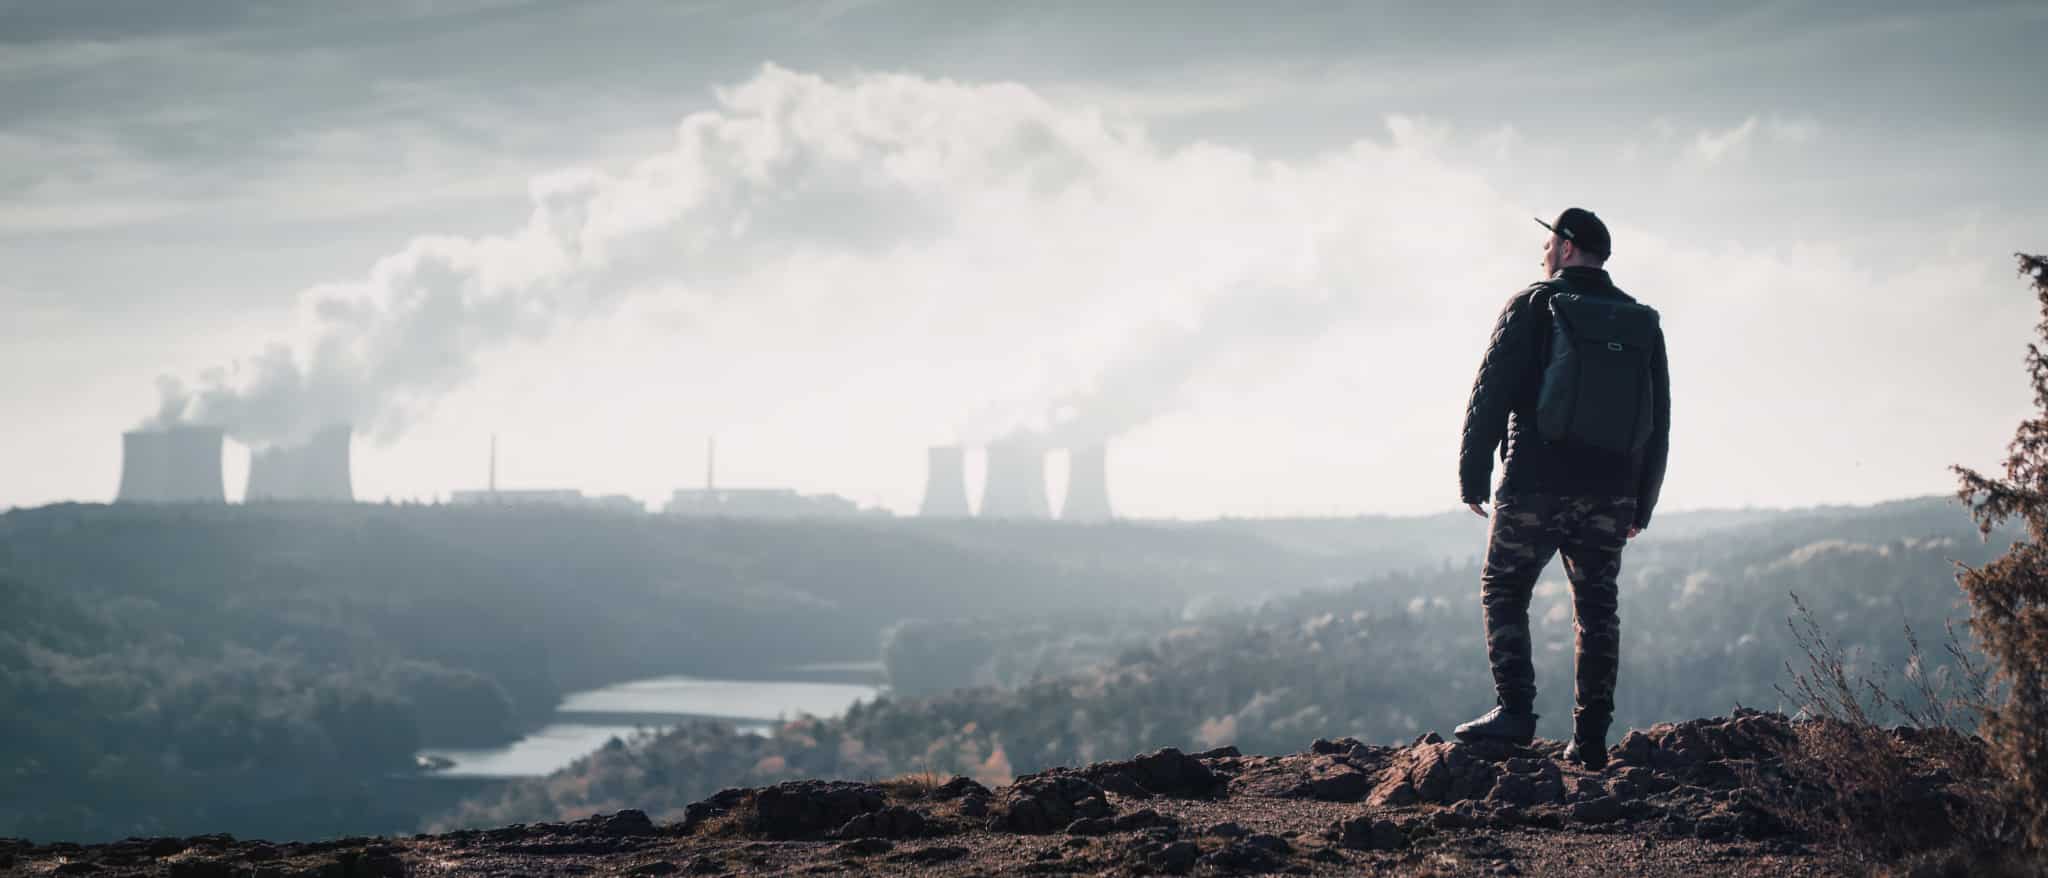
Your choice of photo is fundamental here. First of all, the weather should fit, that is, it should be cloudy in the photo. There also shouldn’t be too much green in the photo, and if there is any, it will be better to desaturate or recolor the green areas.
TIP: yellow or orange grass works best in winter landscapes. But if the grass in your photo is green, that’s still OK. You can change its color easily. Read our article Change a Photo’s Colors in Just a Few Clicks. There you’ll learn how to do this trick.
And last but not least, there naturally shouldn’t be any people in t-shirts in the photo—nothing at all that feels summery will be a good fit.

Where Can I Get the Snow?
Now that you’ve picked a photo, it’s time to gather some snowflakes. You’ve got two options here. If you have time, photograph falling snow at night somewhere near a light source against a dark background.
But the more frequent, simpler, and more likely case will be that you download some kind of snow texture from the internet (one that you can use without violating copyright, of course). You just have to type something like snow on black or snow png into your browser’s address bar. We used a texture that’s available for free from the photo bank named Freepik.
Add the Snow Layer to Your Photo
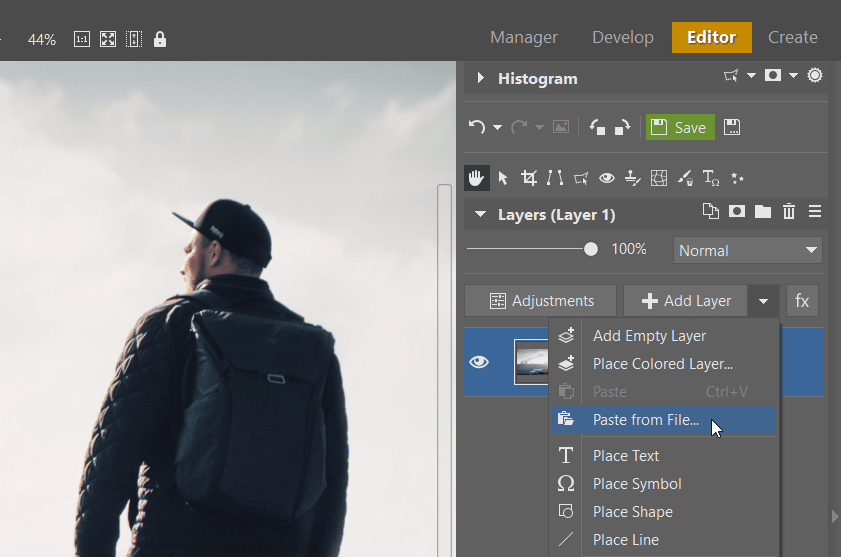
Once you’ve got your photo and falling snow against a black background, start up Zoner Studio and open the photo in the Editor. Click the arrow next to the Add Layer button and choose Paste from File…. Choose the snow texture you downloaded and confirm. The snow is added on a new layer.
Don’t have Zoner Studio yet? Download it and test it free for 7 days… and try out our steps while you’re at it.
Adjust the Snowflakes’ Locations and Visibility
Use the Move and Transform tool (V) to stretch the snowflake image or otherwise adjust it as needed.
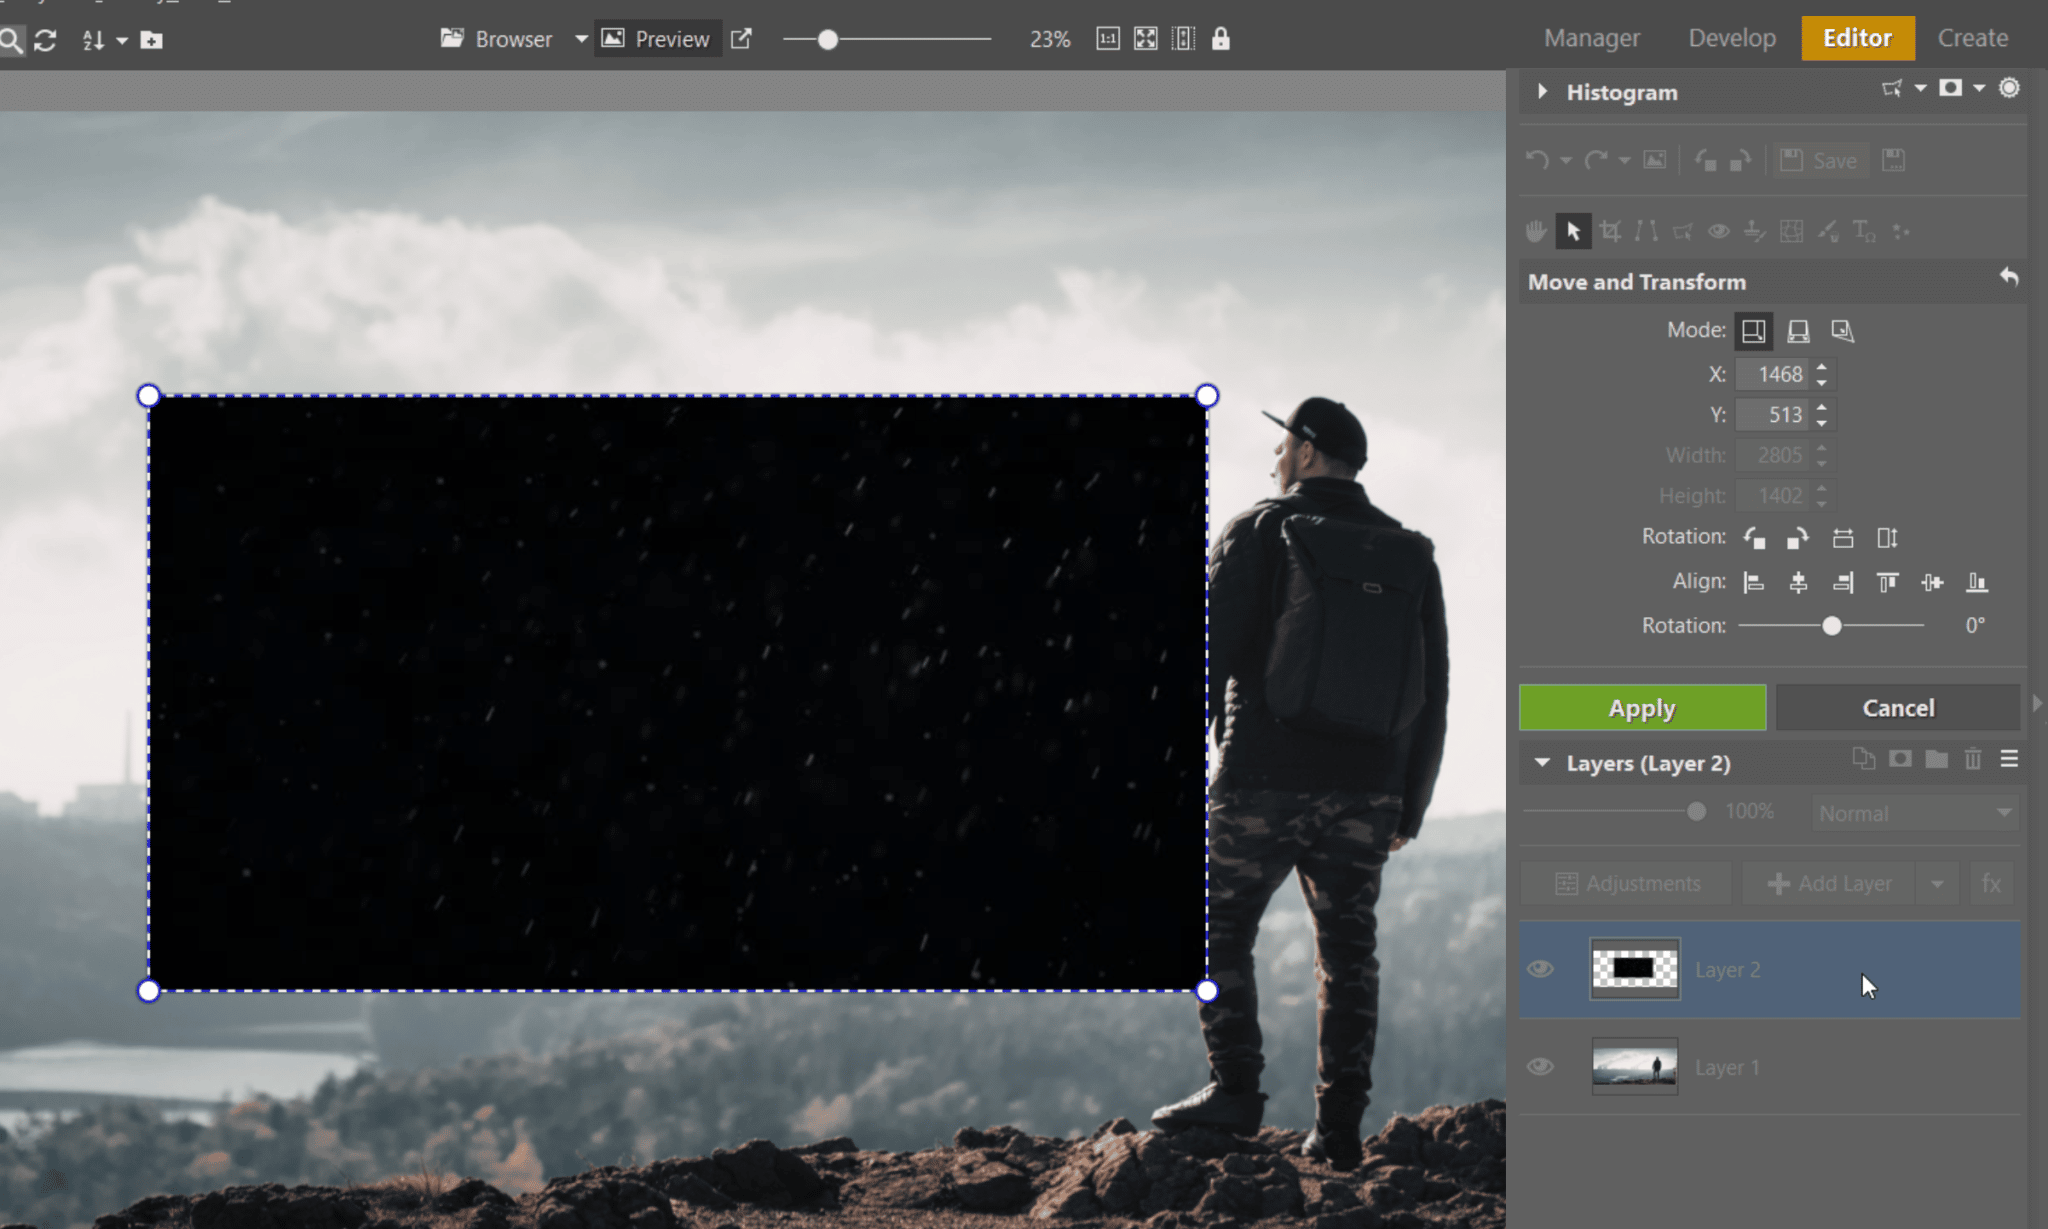
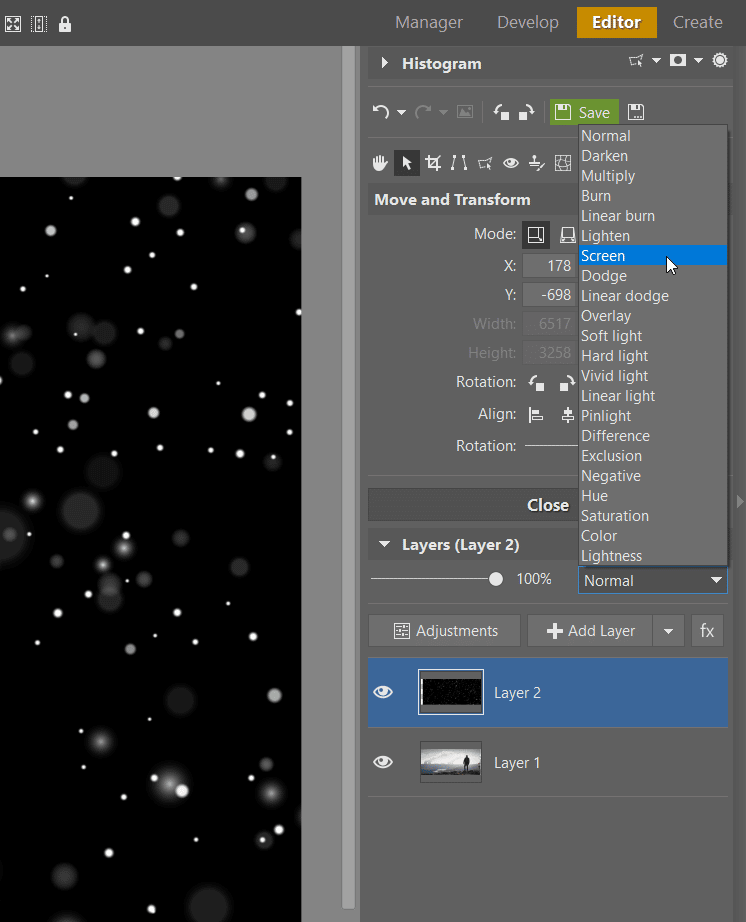
The most fundamental step in the whole process is changing the layer’s Mode. You need to hide every part of the layer except its light parts—the snowflakes. And the best way to do that is Screen mode.
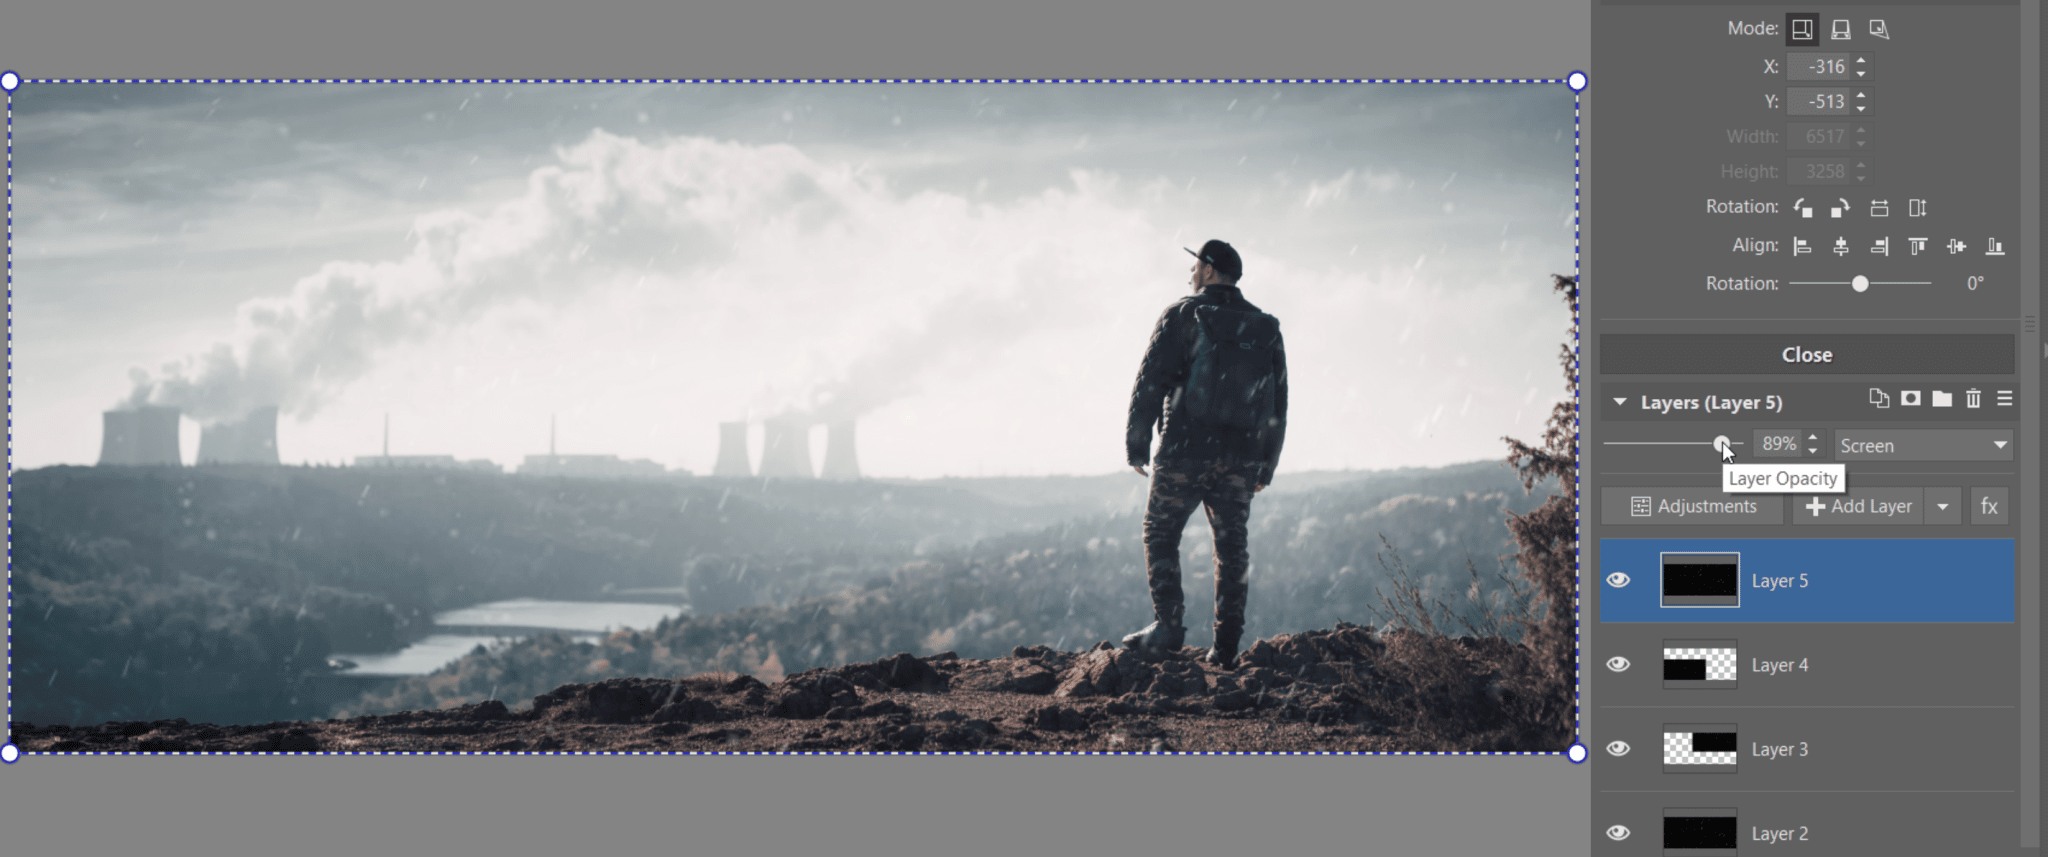
If the snow turns out to be too visible, reduce the layer’s Opacity. But what should you do if the snow isn’t visible enough even when you have the Opacity set to 100%? Just duplicate the layer. Two layers both in Screen mode on top of each other will emphasize the individual snowflakes more.
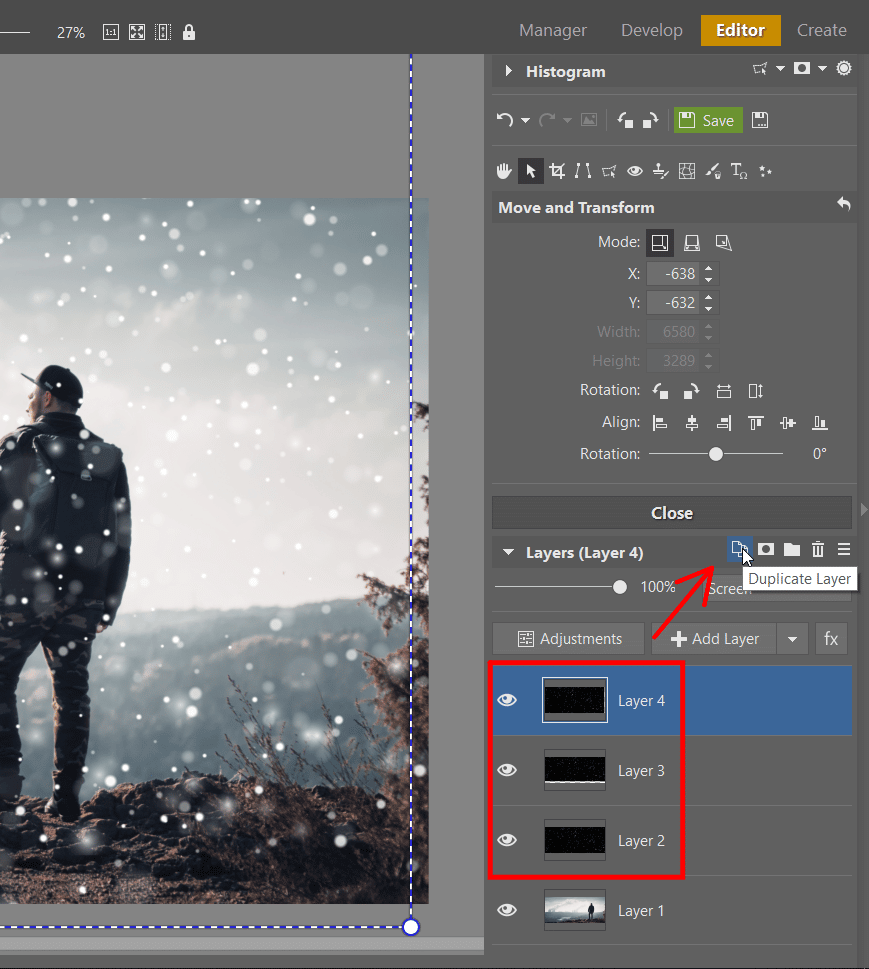
You can also do this duplication more than once, and if needed you can shrink the layers or resize them to fill in empty spaces. On some layers the snowflakes will be a bit too visible. There go ahead and lower the opacity again.
Adding Nighttime Snow Is Different
The approach to use for a nighttime photo is very similar. But when it’s snowing at night, you can mainly see the snowflakes well around streetlights and other light sources. Meanwhile, they are hardly visible at all against dark backgrounds. So if you were to add the snow texture in the same way as you did for a daytime photo, they would look very unrealistic.

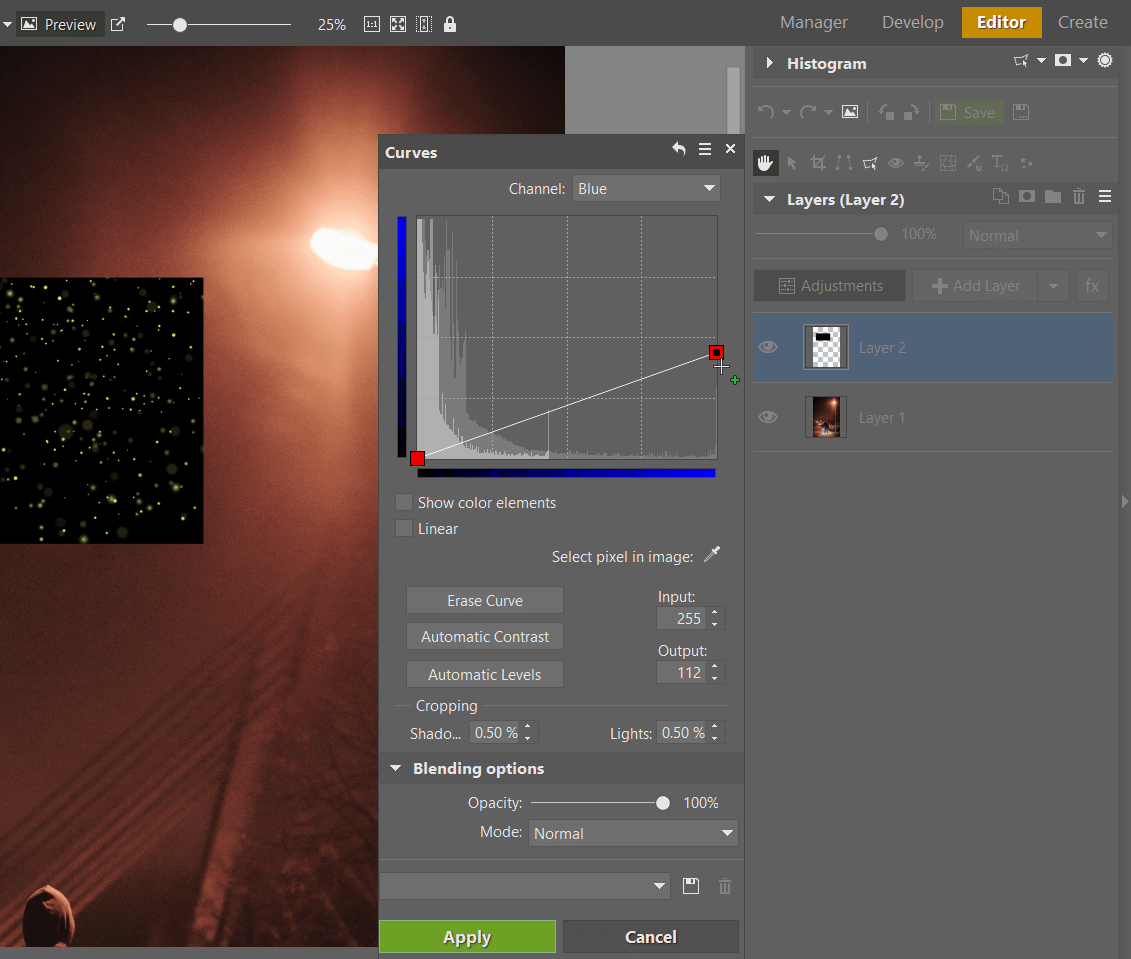
Adjust the Color Based on the Light Source
Start in exactly the same way as you did when you were adding daytime snow. But your next step after that should be to slightly tint the snow. Since streetlights have significantly warmer colors than daylight, the white snowflakes around the yellow lamp would look quite unnatural. You can solve this problem using any one out of several different tools, for example the Curves controls. Draw down the blue curve to give the snowflakes a warmer tint.
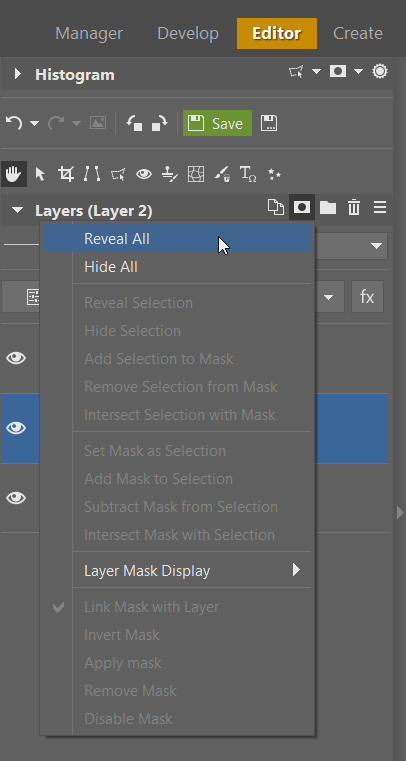
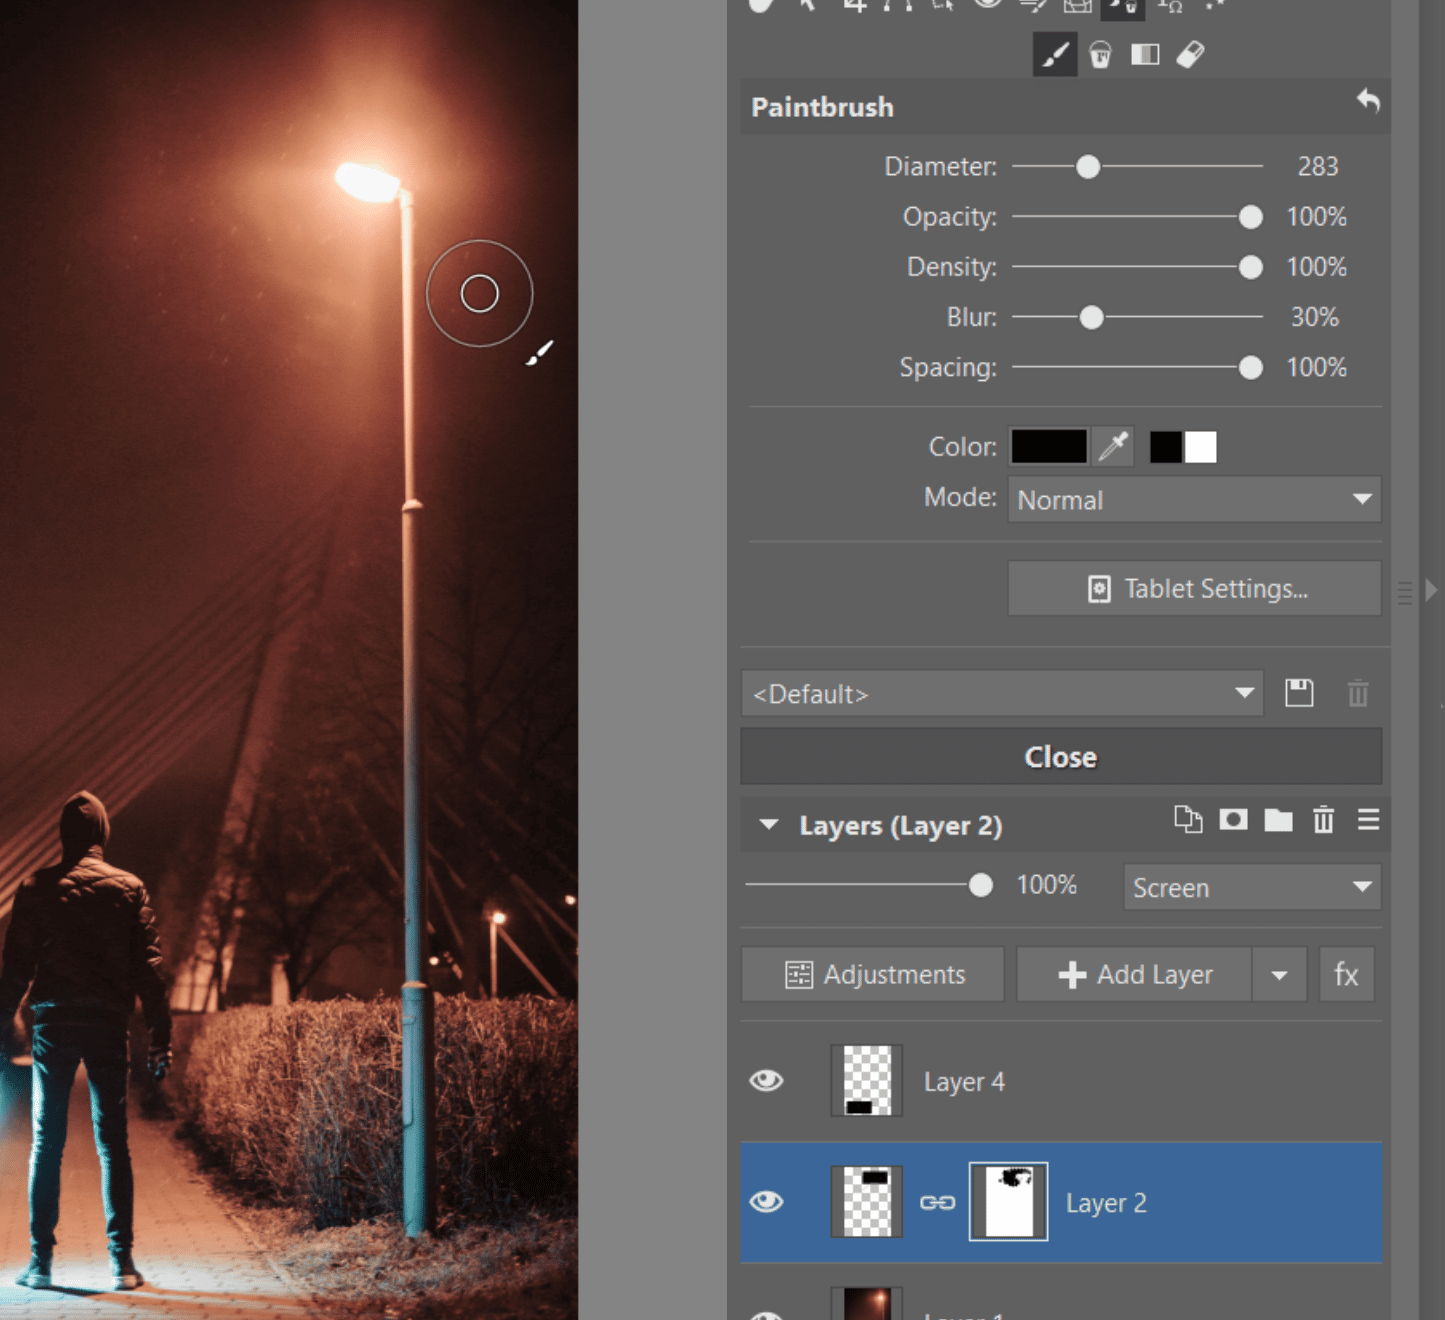
The other thing that will come in handy for nighttime photos is masks. These can help you to fine-tune the snow that’s close to the light sources. To mask a layer, click its mask icon and then click Hide All or Reveal All.
Learn to work with masks. Read all about how to master this useful tool.
Then just use the black and white brushes to set where the snow should be visible.
In all other respects, things work the same as for daytime. Duplicate, relocate, resize…
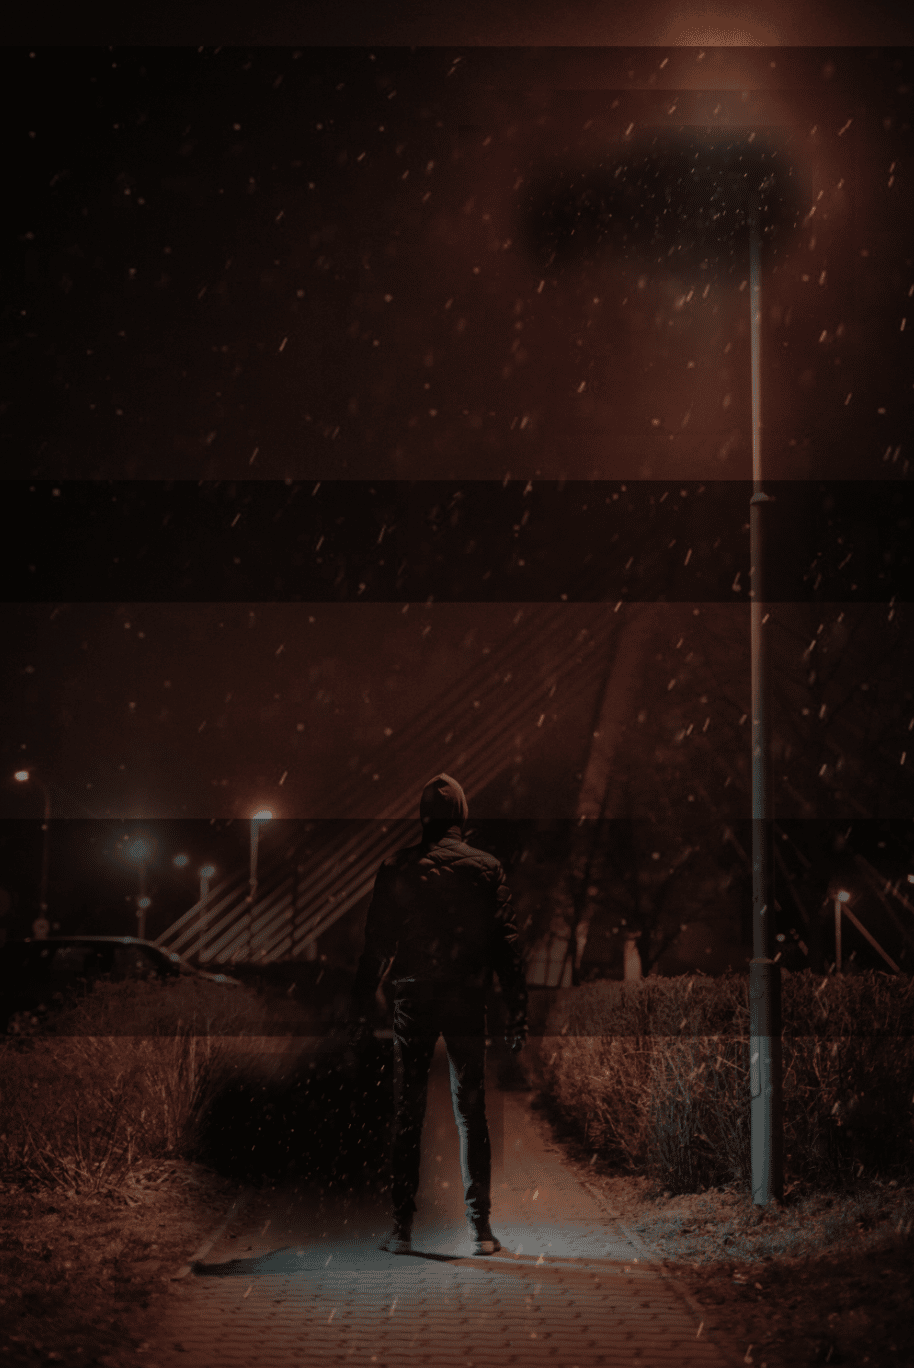
Here’s an example of how the individual layers might look if you switch their mode from Screen back to Normal:

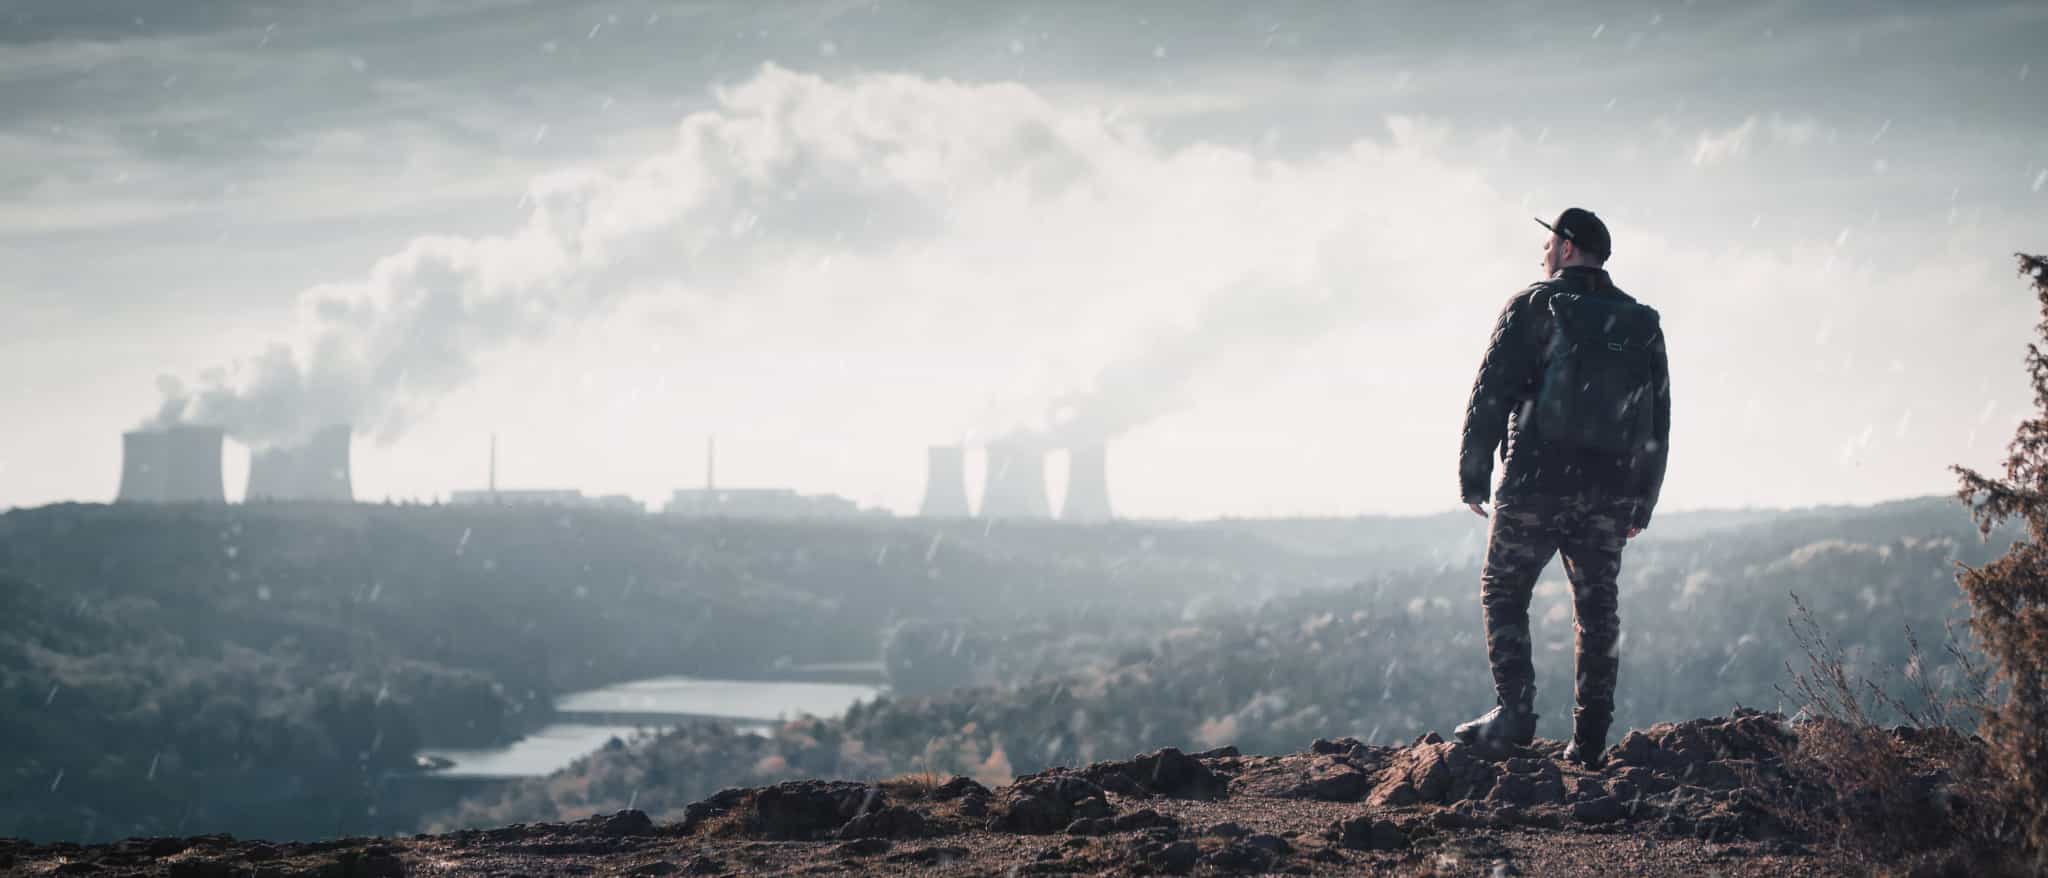
And here’s the final picture. Thanks to work with masks and histogram curves, the snow looks realistic.
Snow Is No Savior, but It Can Be an Enhancer
In general, if a photo isn’t good, special effects won’t save it. But if you have a photo that you want to make more interesting and at the same time snow is what it’s “missing,” give it a try.
Download Zoner Studio, test it free for 7 days, and try out work with layers and textures. The possibilities are endless!
There are no comments yet.