How to Brighten up Your Underwater Photos

The article is over 5 years old. The information in it may be outdated.
![]()
We are working on its update. In the meantime, you can read some more recent articles.
Underwater photography is fun, but it’s hard to get pictures that look as clean as the ones you take on land. In underwater photography, you lose contrast and colors, and your pictures look pale and bland. Luckily you can easily fix many of these flaws of underwater photos on your PC. We’ll show you how to get the most out of these photos.
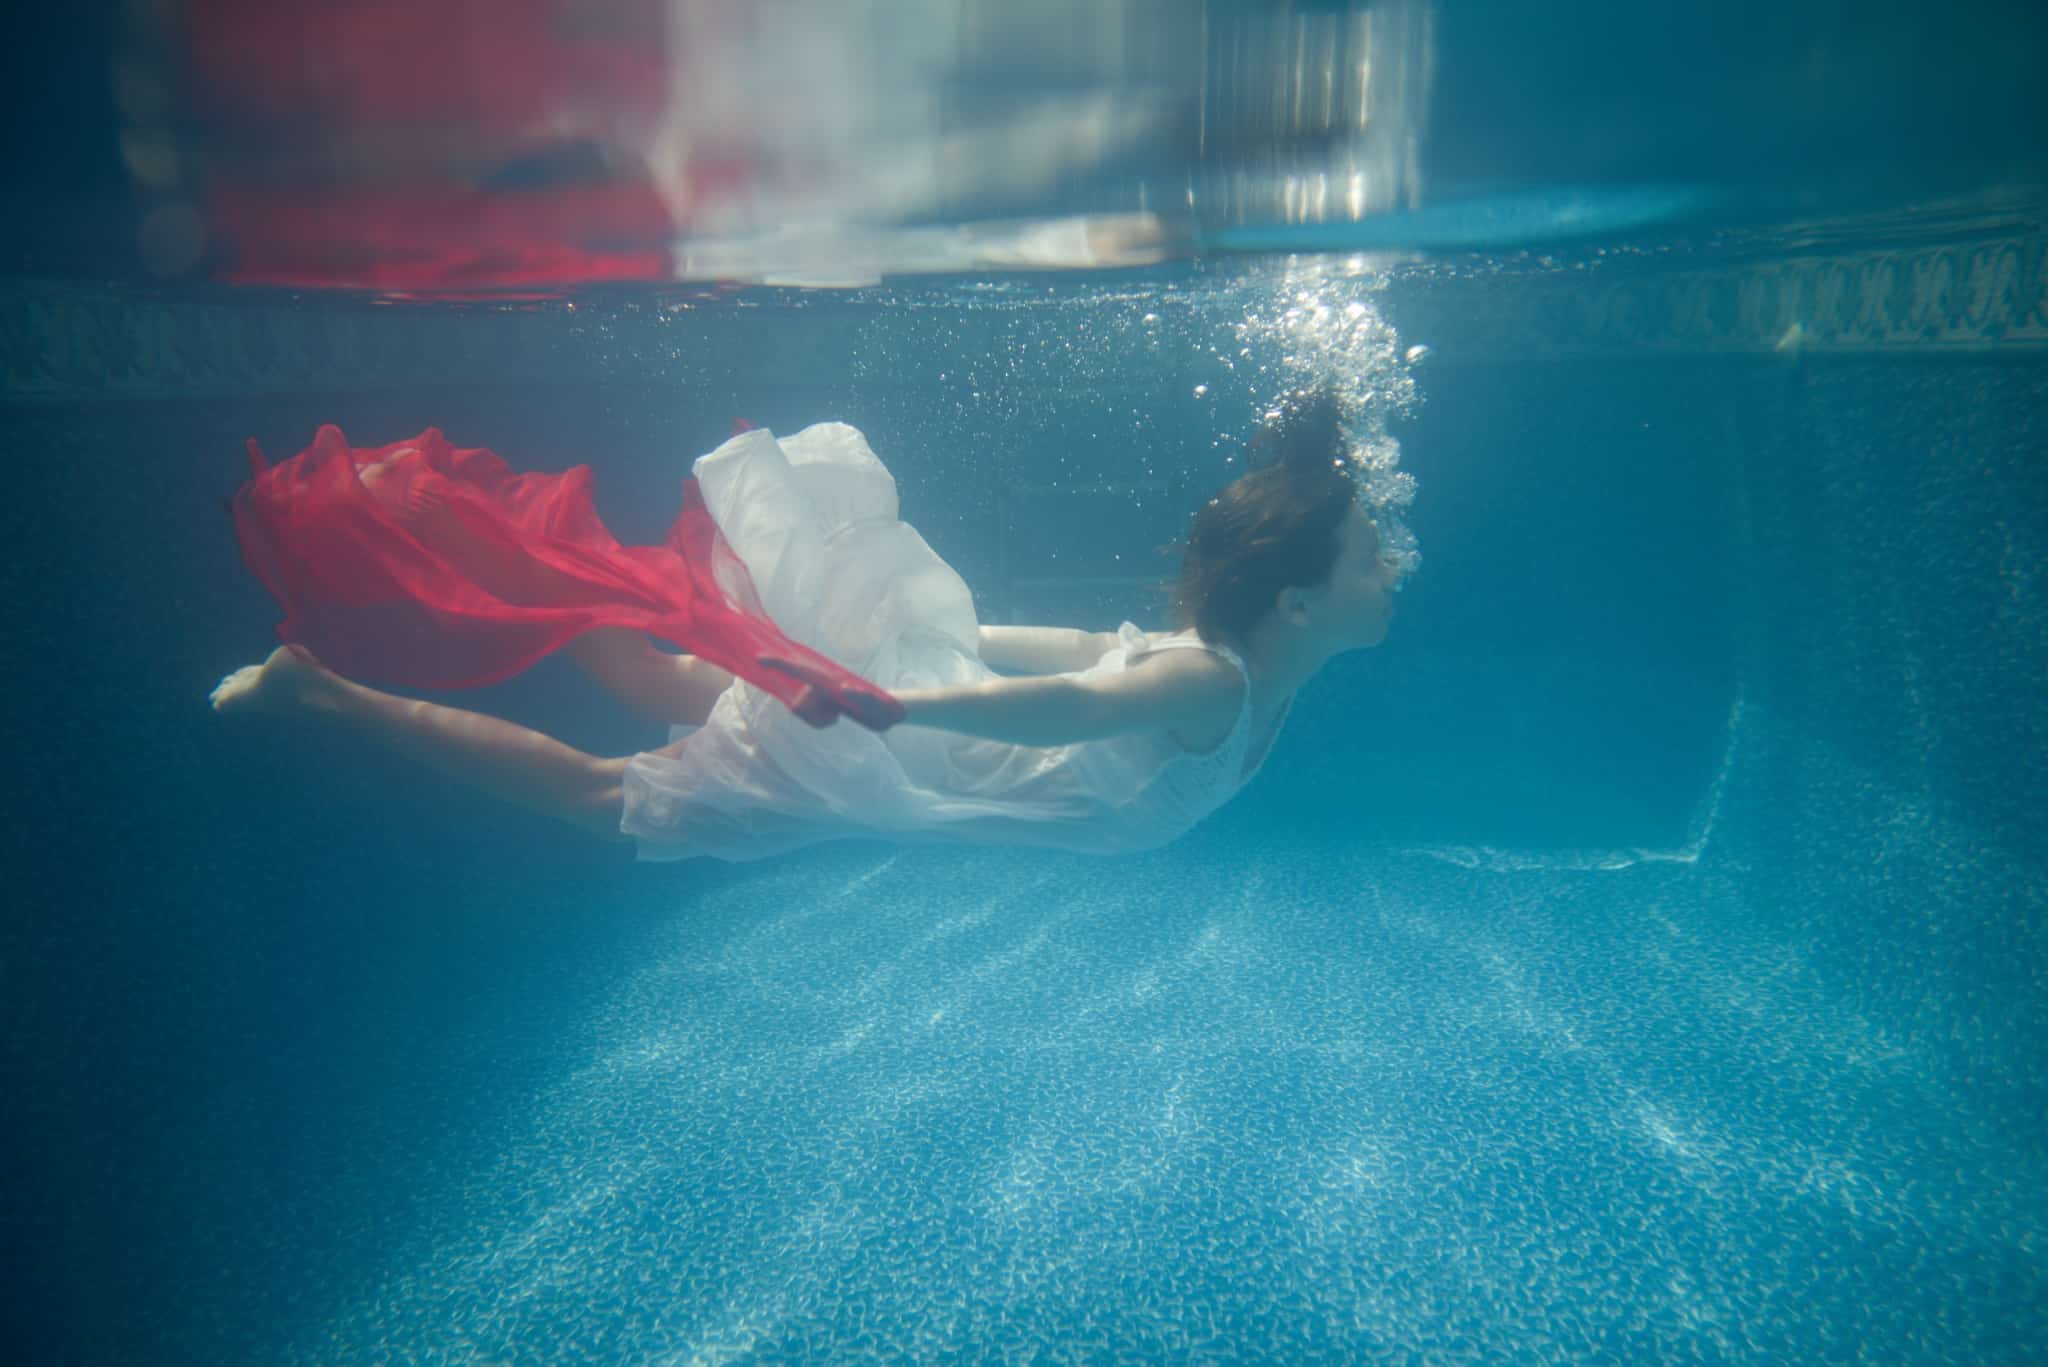
We went over the underwater shooting process itself in our article Underwater Photography:It Takes Less Equipment Than You Think. But what do you do with the photos after that? Most of the time you won’t be able to make do without edits. The loss of contrast and colors is almost always noticeable in these pictures. After all, there’s a lot of water between you and your subject, and so your subject is literally drowning in a grayish haze.
We’ll be looking at several tools in the Develop module of Zoner Studio that will brighten up your underwater photos. You’ll mainly be helped out by the Contrast, Clarity and Dehaze sliders. After that, you’ll fine-tune the colors by setting the right White Balance and using Shift Primary Colors. So let’s get started!
You Lose Contrast Underwater
In underwater photography you’ll generally lose a lot of contrast, sharpness, and color. The thicker the layer of water you’re shooting through, the more noticeable this effect is. So it’s a good idea to use wide lenses so you can get as close to your subject as possible.
Exposure
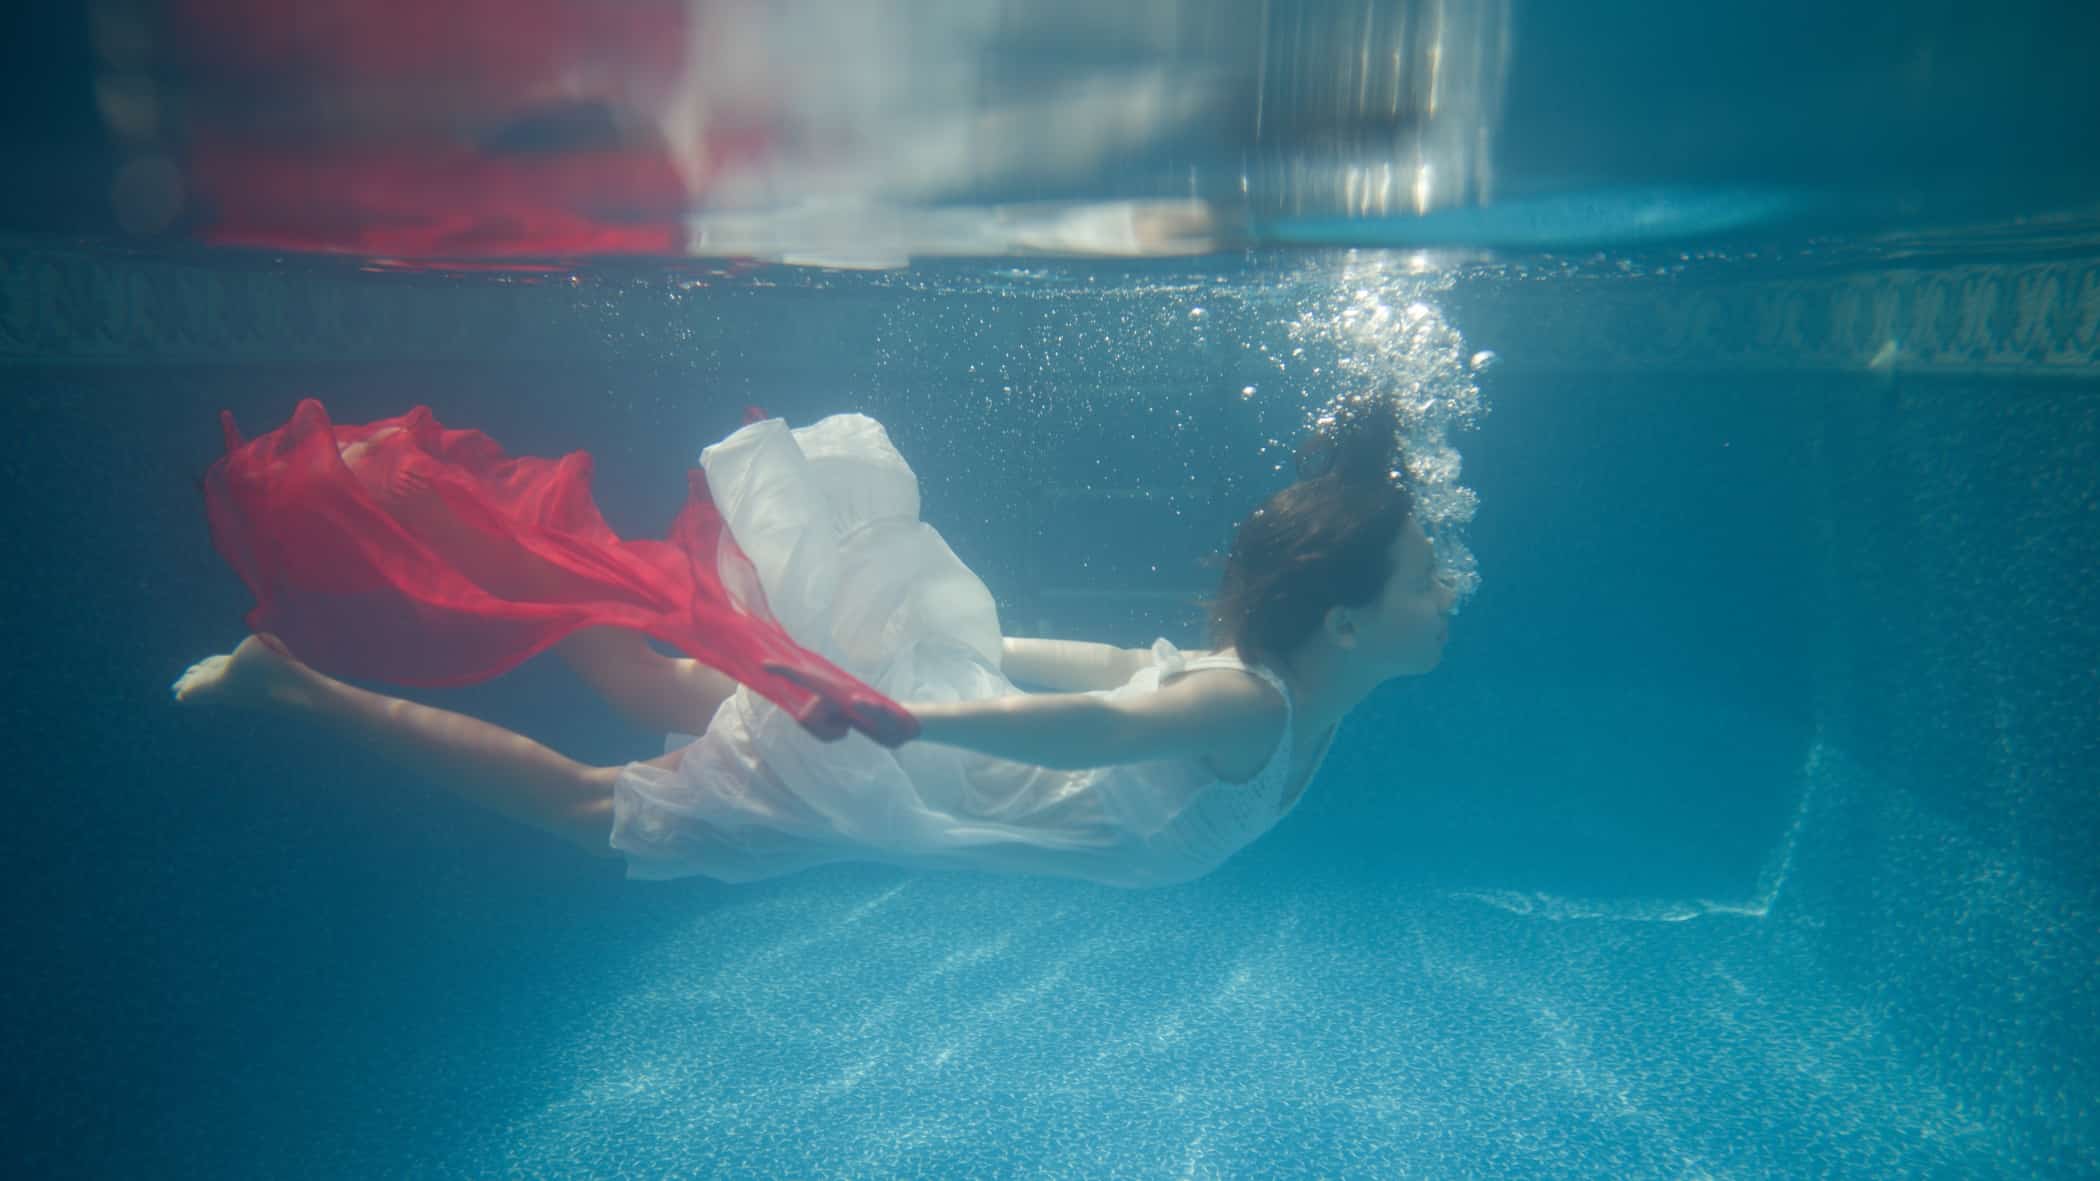
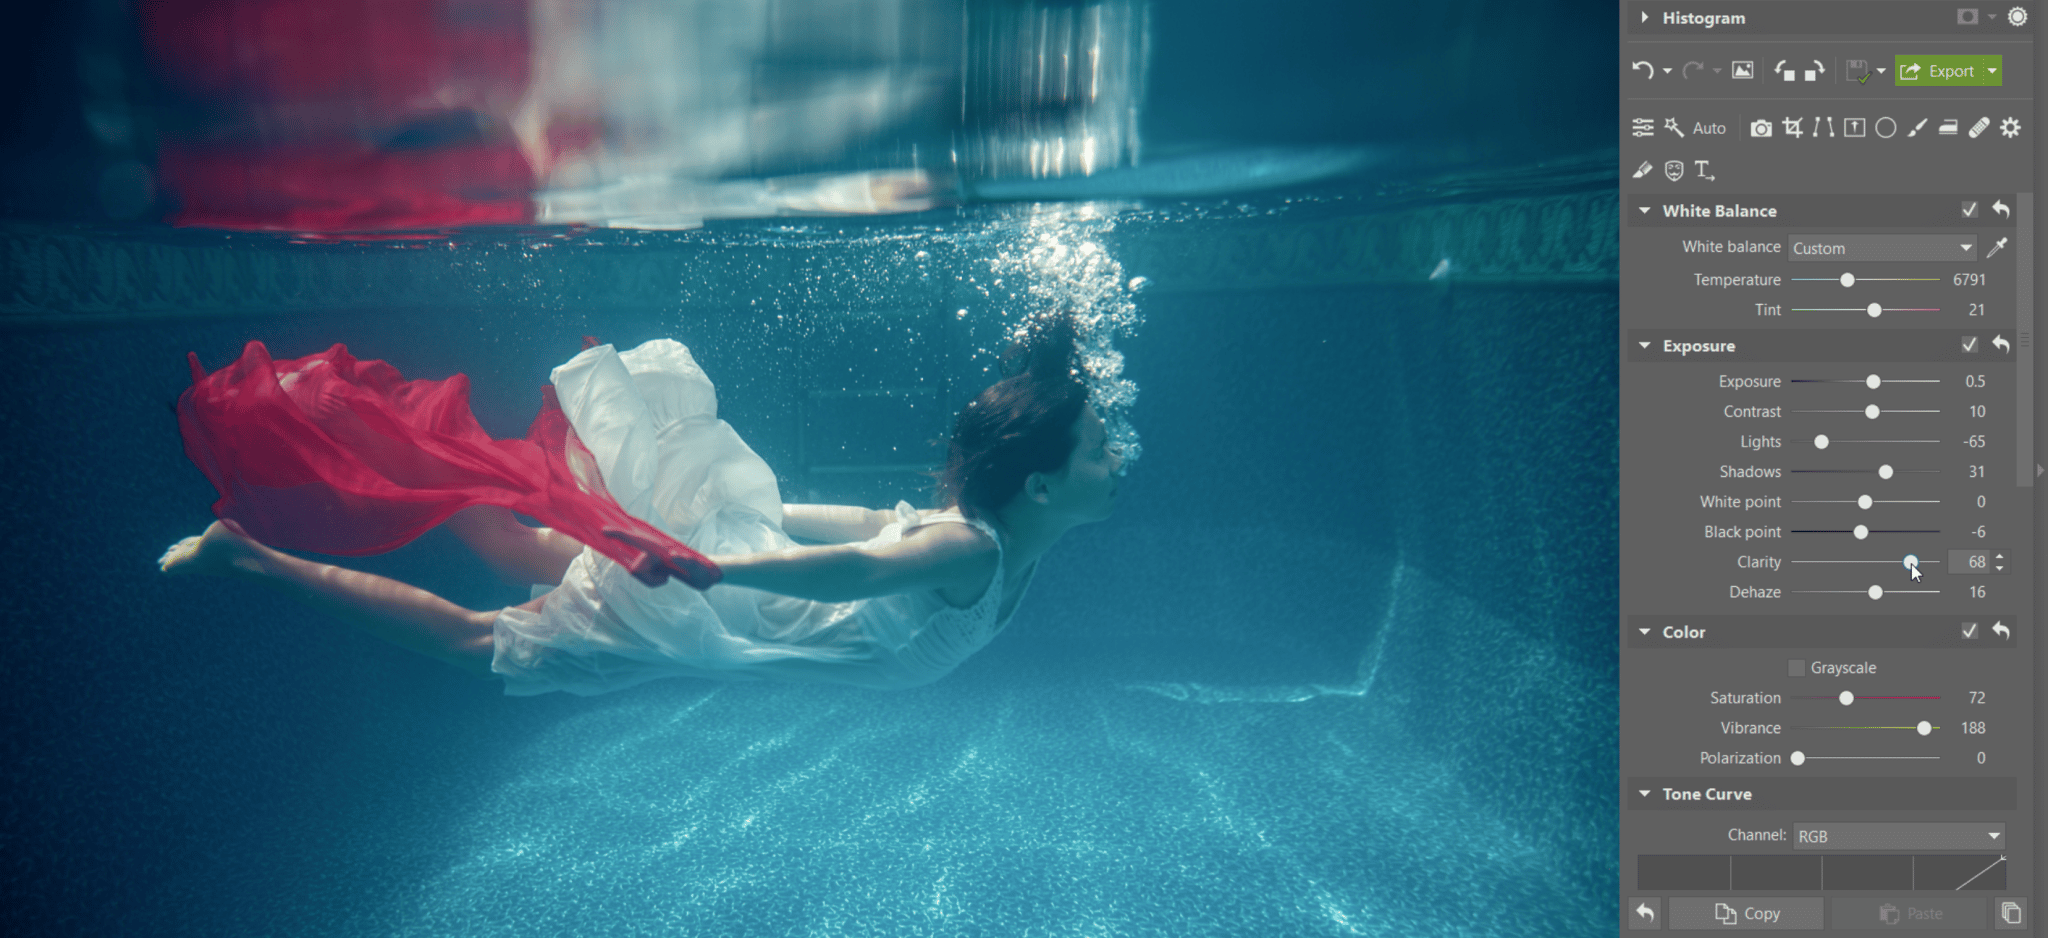
Open the photo in the Develop module of Zoner Studio and go to its Exposure tools. It’s usually enough to raise Contrast, Clarity, and Dehaze. By doing that, you suppress the loss of quality caused by the water between you and the subject.
White Balance and Color Adjustments
White balance is bit tricky underwater. It depends on how much the sun is shining (if at all), what the pool’s made of (if you’re in one), and how deep you are. But usually your photos will be too blue and too green. So shift both of the White Balance sliders, Temperature and Tint, to the right.
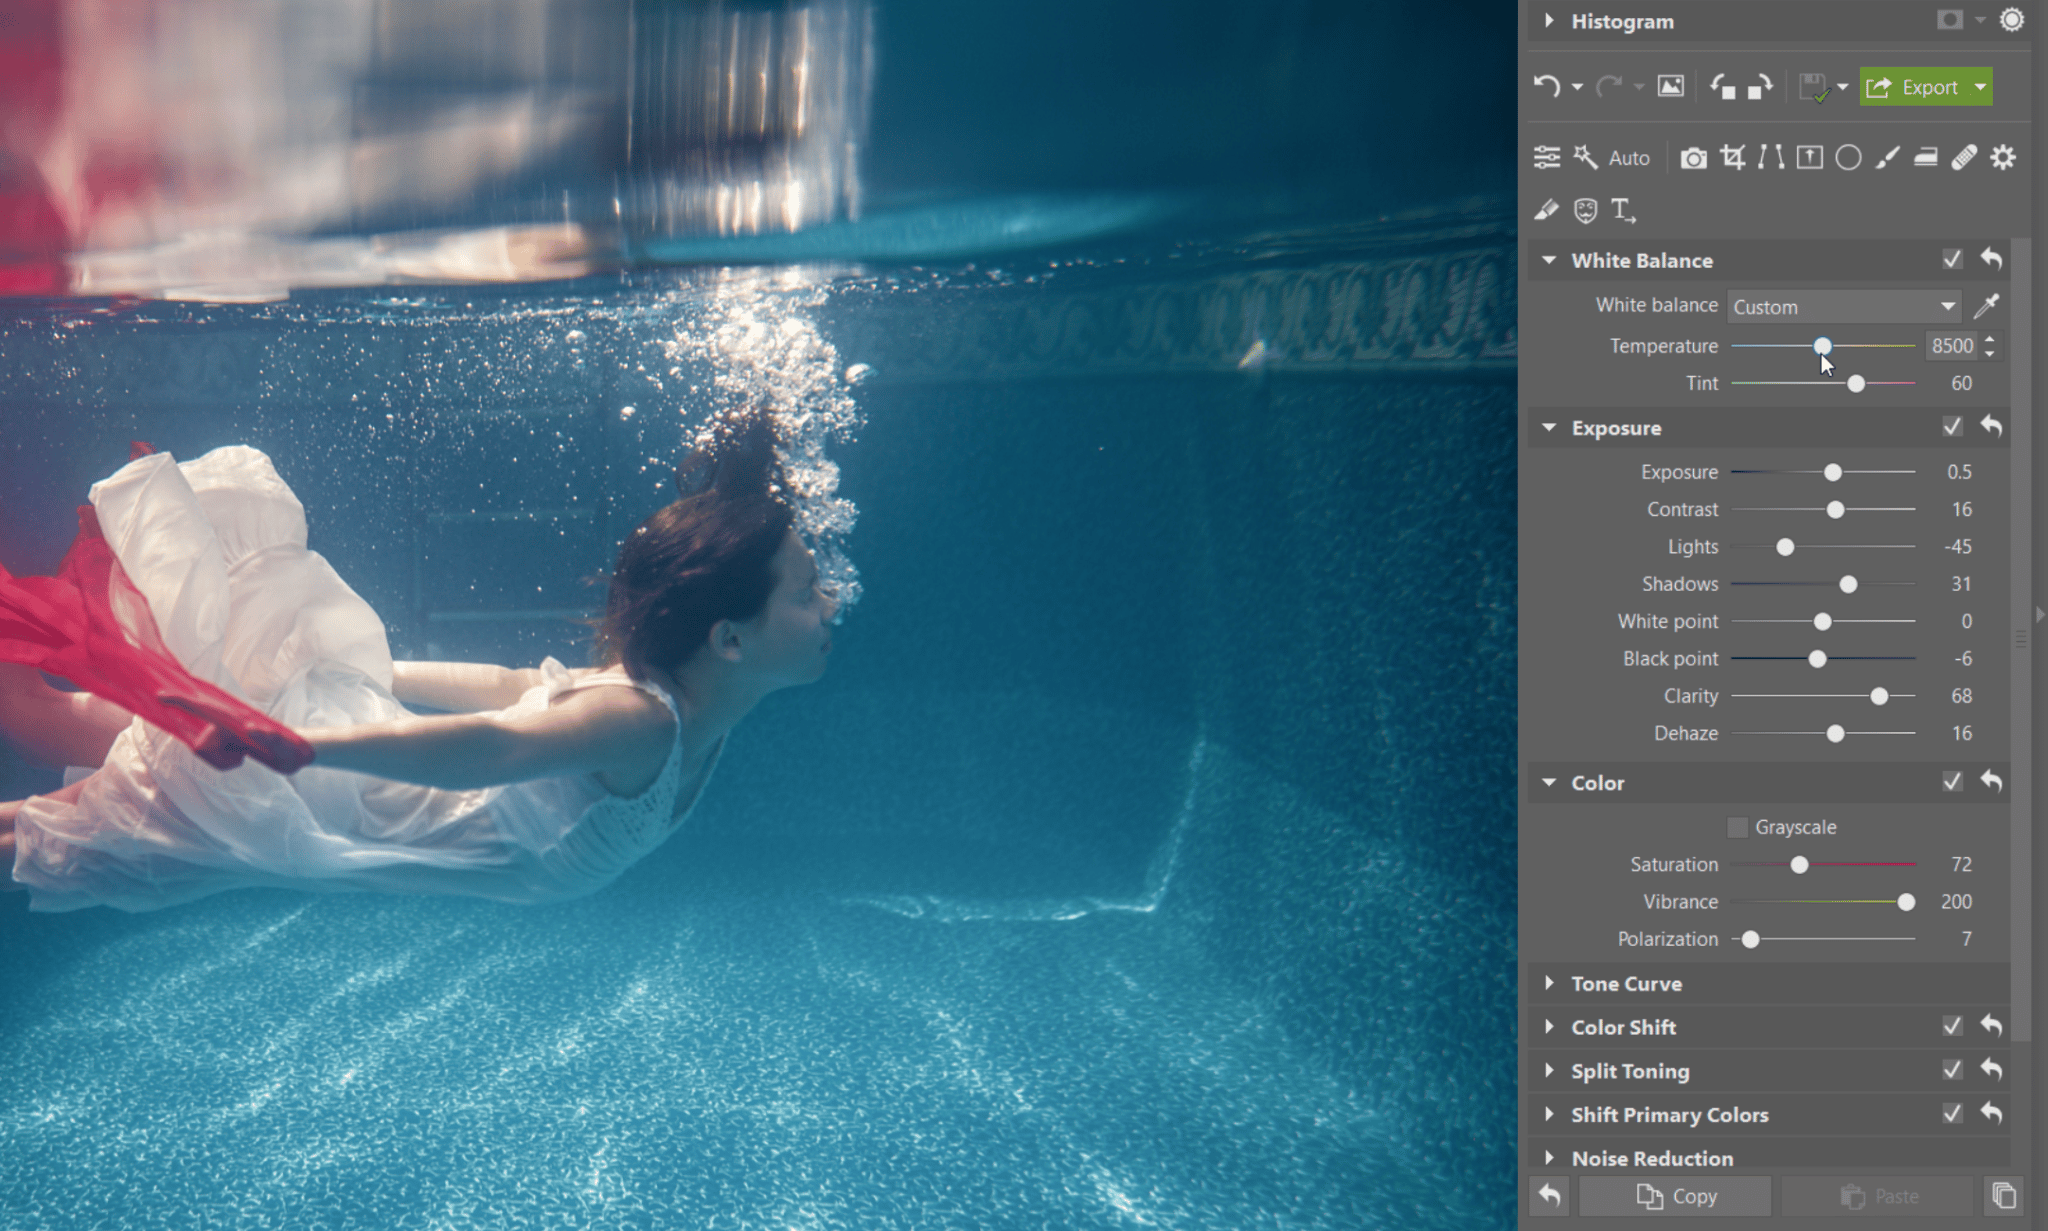
Tone the water and its surroundings to fit the situation by moving the slider for blue in Shift Primary Colors. Fine-tune any skin colors using the slider for red.
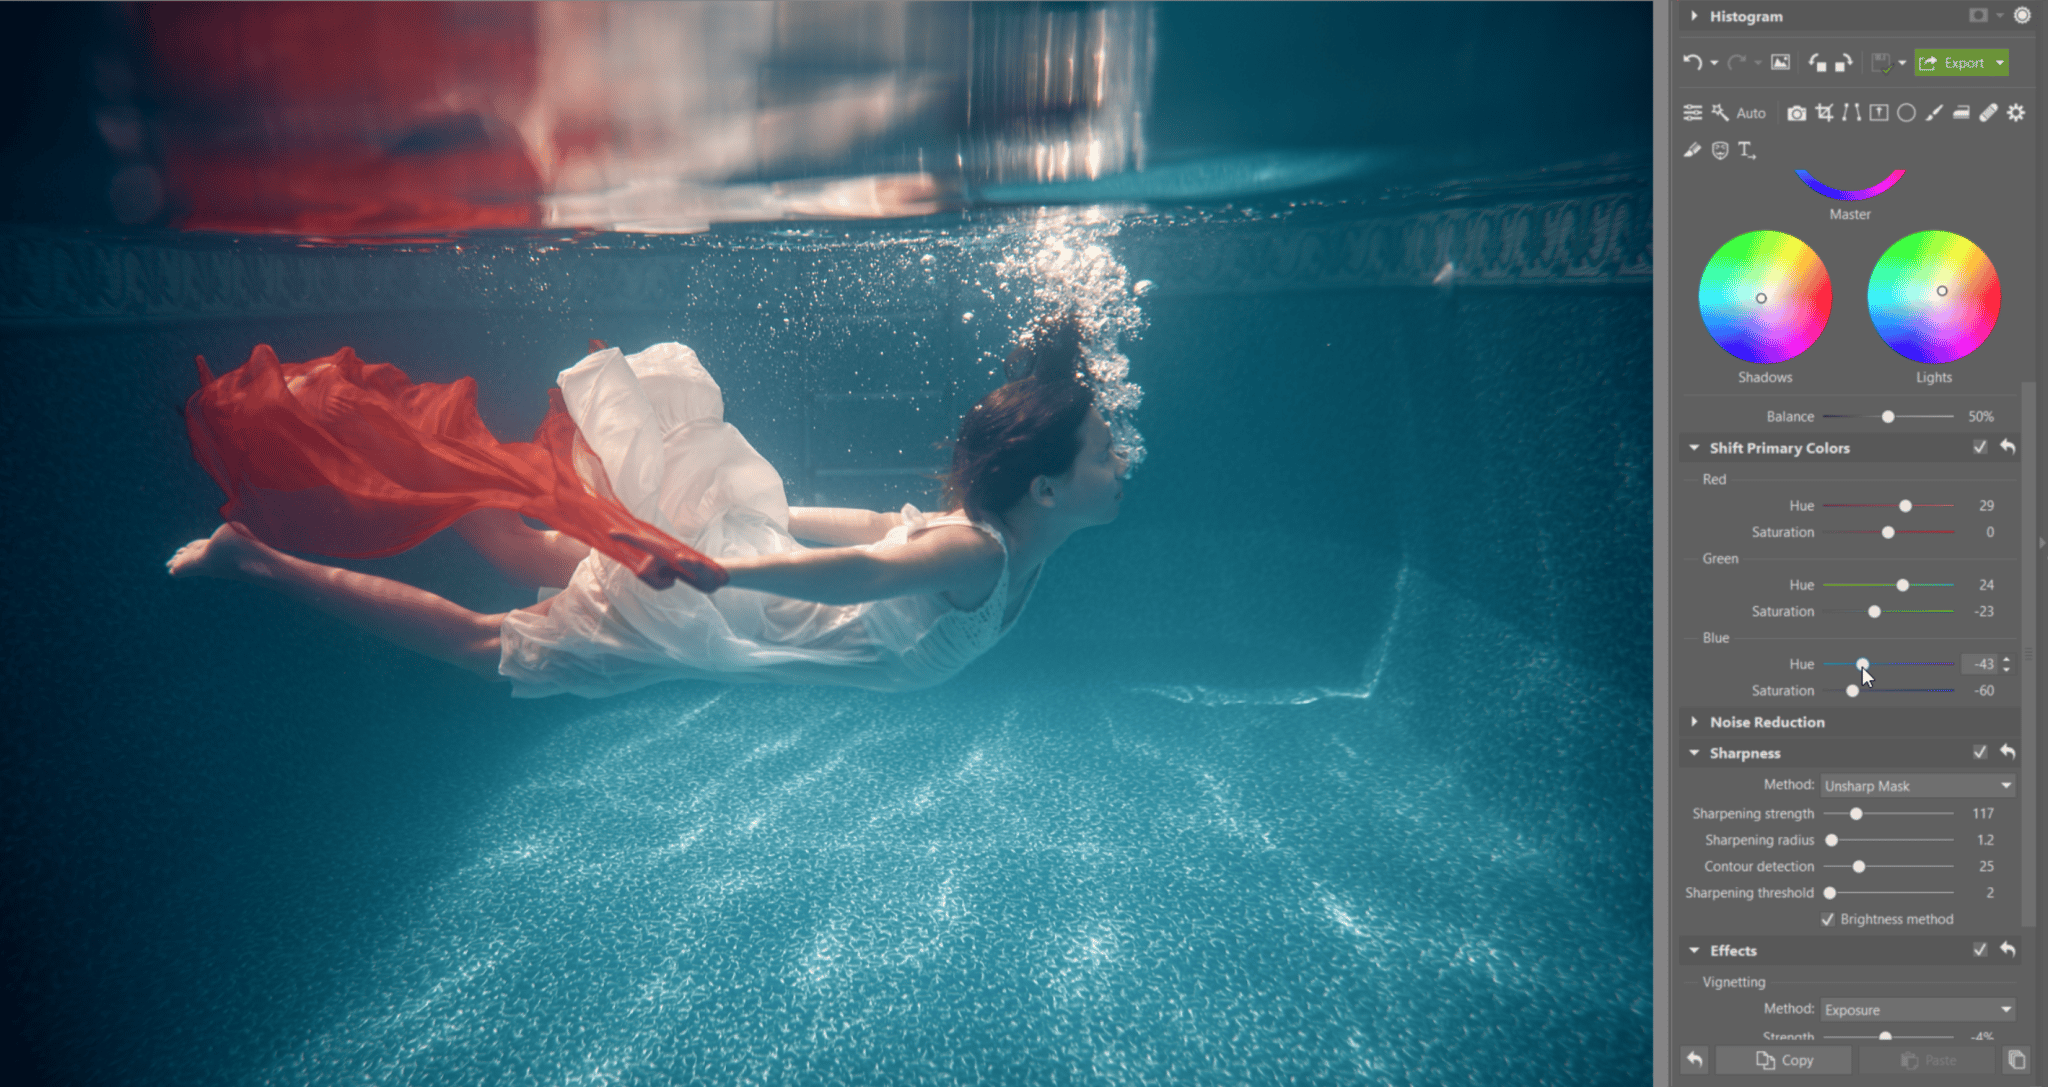
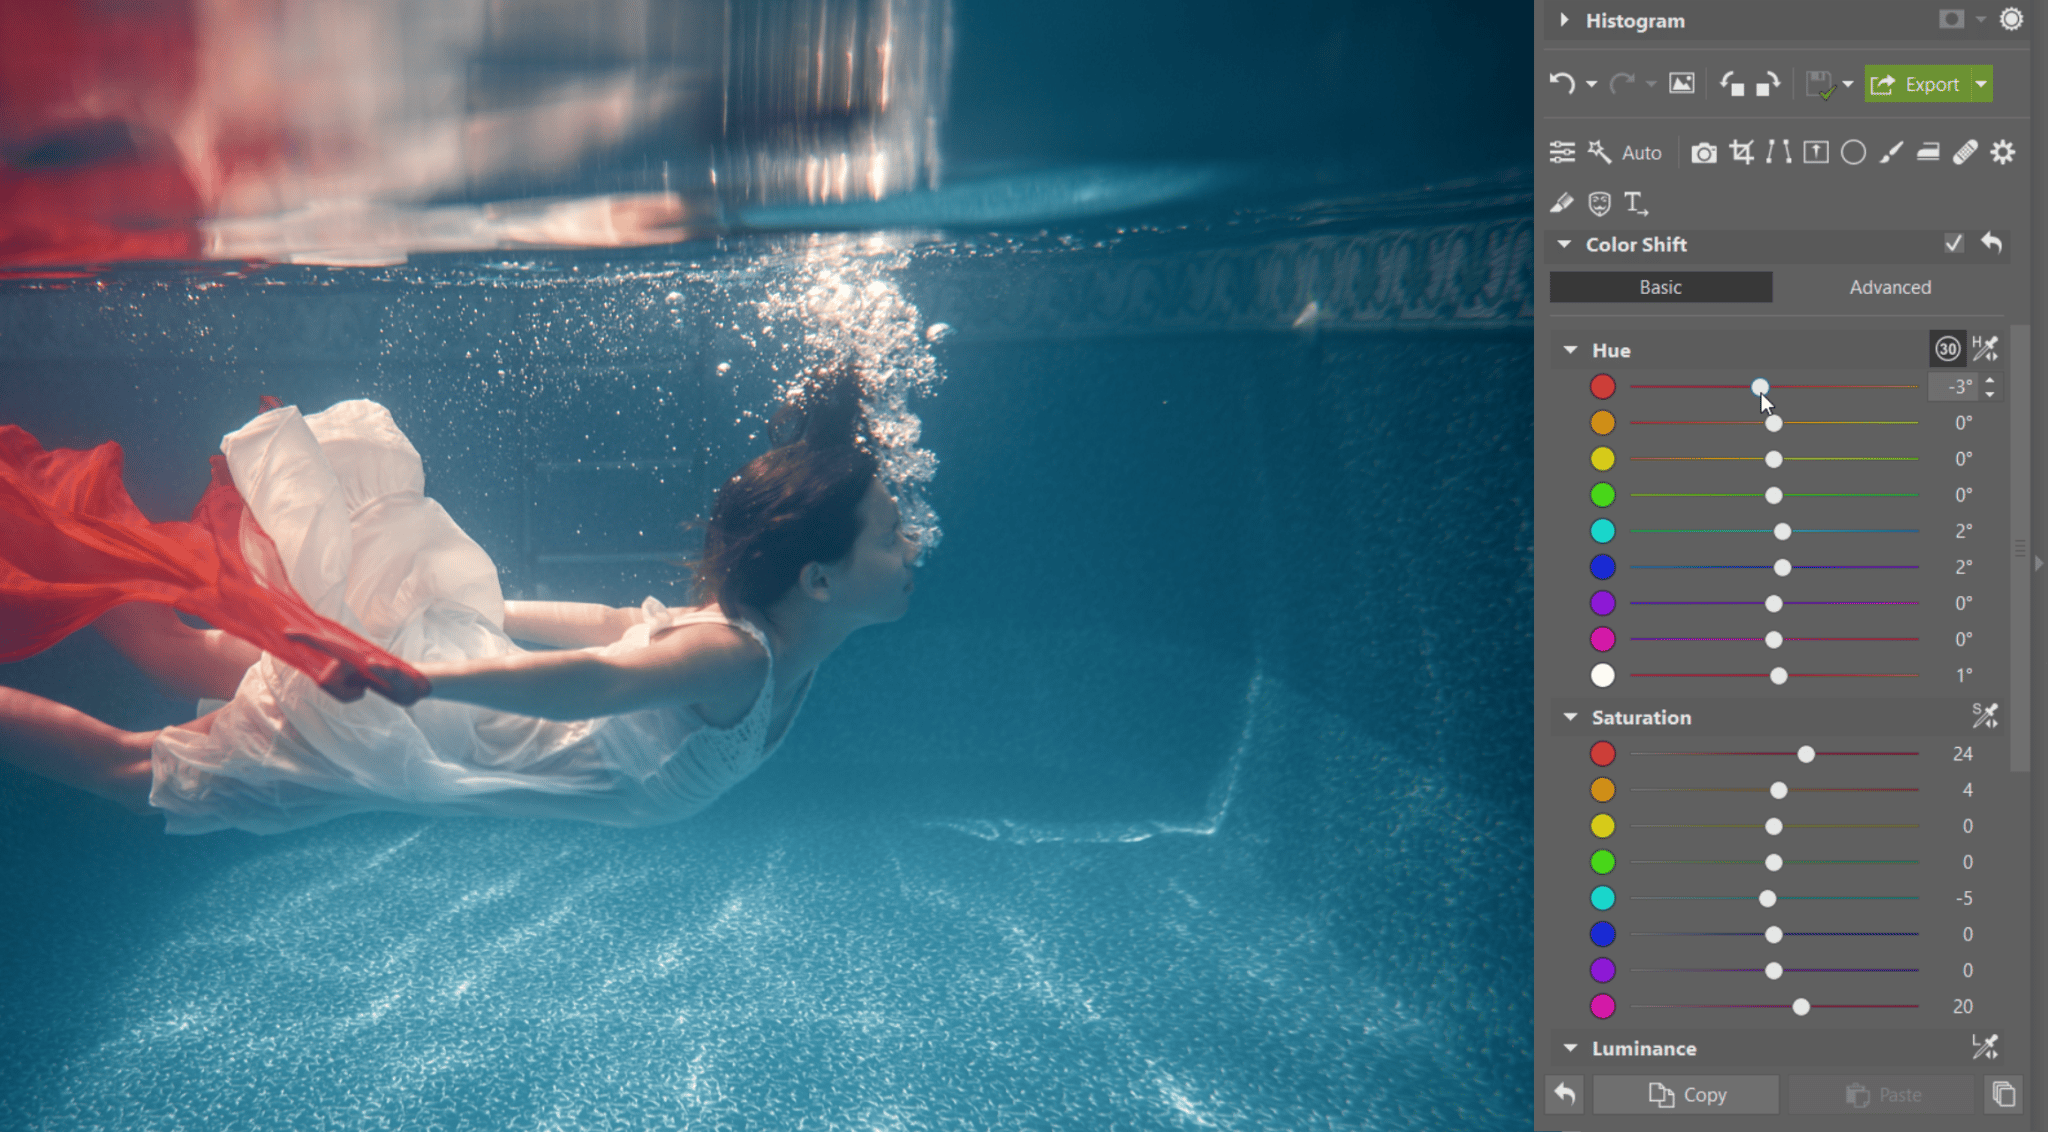
For more precise color shifting if needed, work with Color Shift. Use the Eyedropper at the top right of Color Shift to pick the color to change.
Straighten the Horizon and Crop the Photo
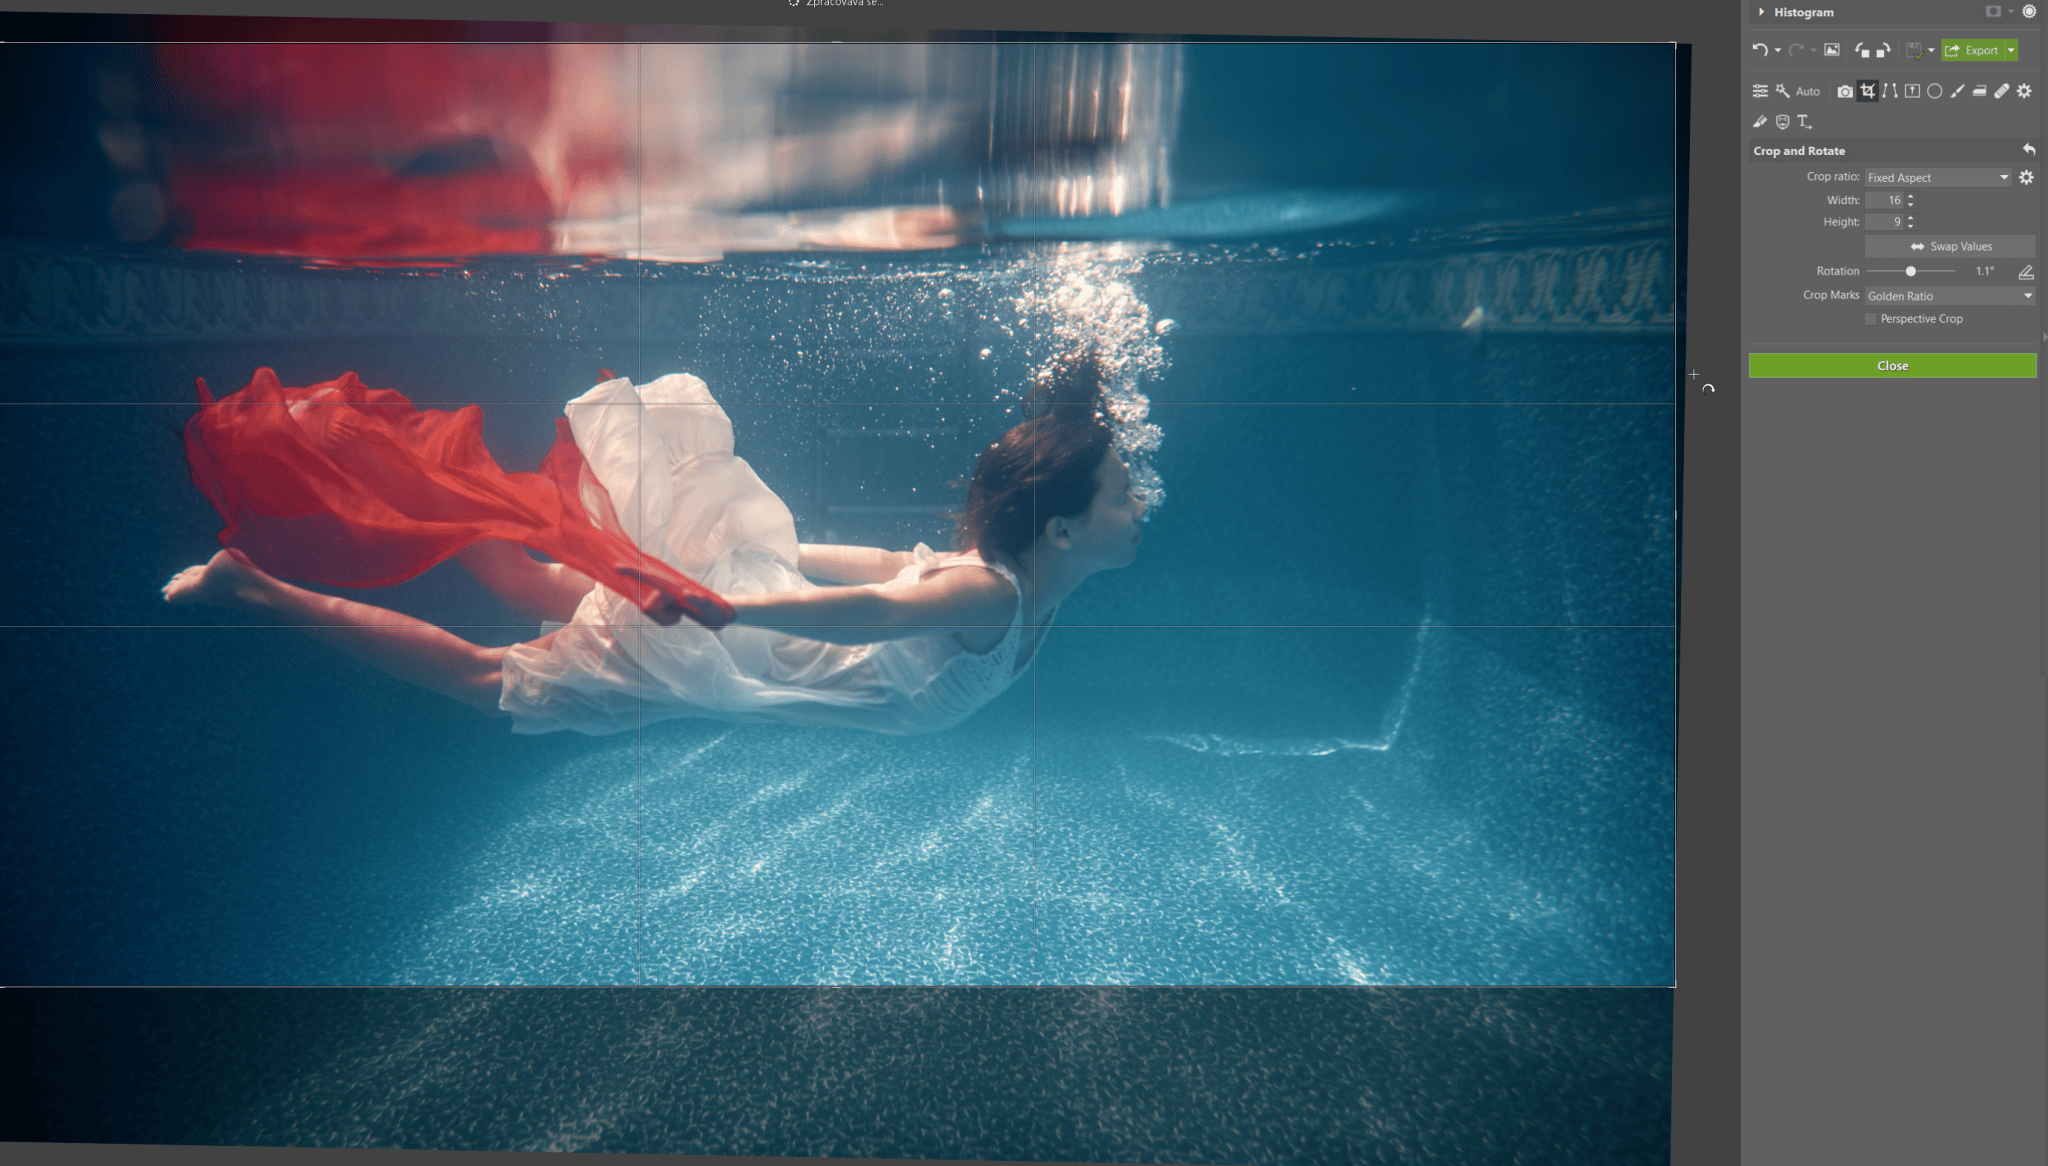
When you’re taking pictures underwater, you often can’t concentrate on keeping a level horizon. But at the same time, if you have the surface in the picture, a level horizon is important. The water shouldn’t be “pouring out” of one side. So use the Crop and Rotate tool (C) and straighten the photo.
Another thing that’s hard to completely control is the composition. Working just below the surface, you can’t afford to tilt the camera if you have the viewfinder above the water. In this photo here, that situation led to an empty area towards the bottom. One way to solve this kind of problem is via a crop to a 16:9 ratio of sides.
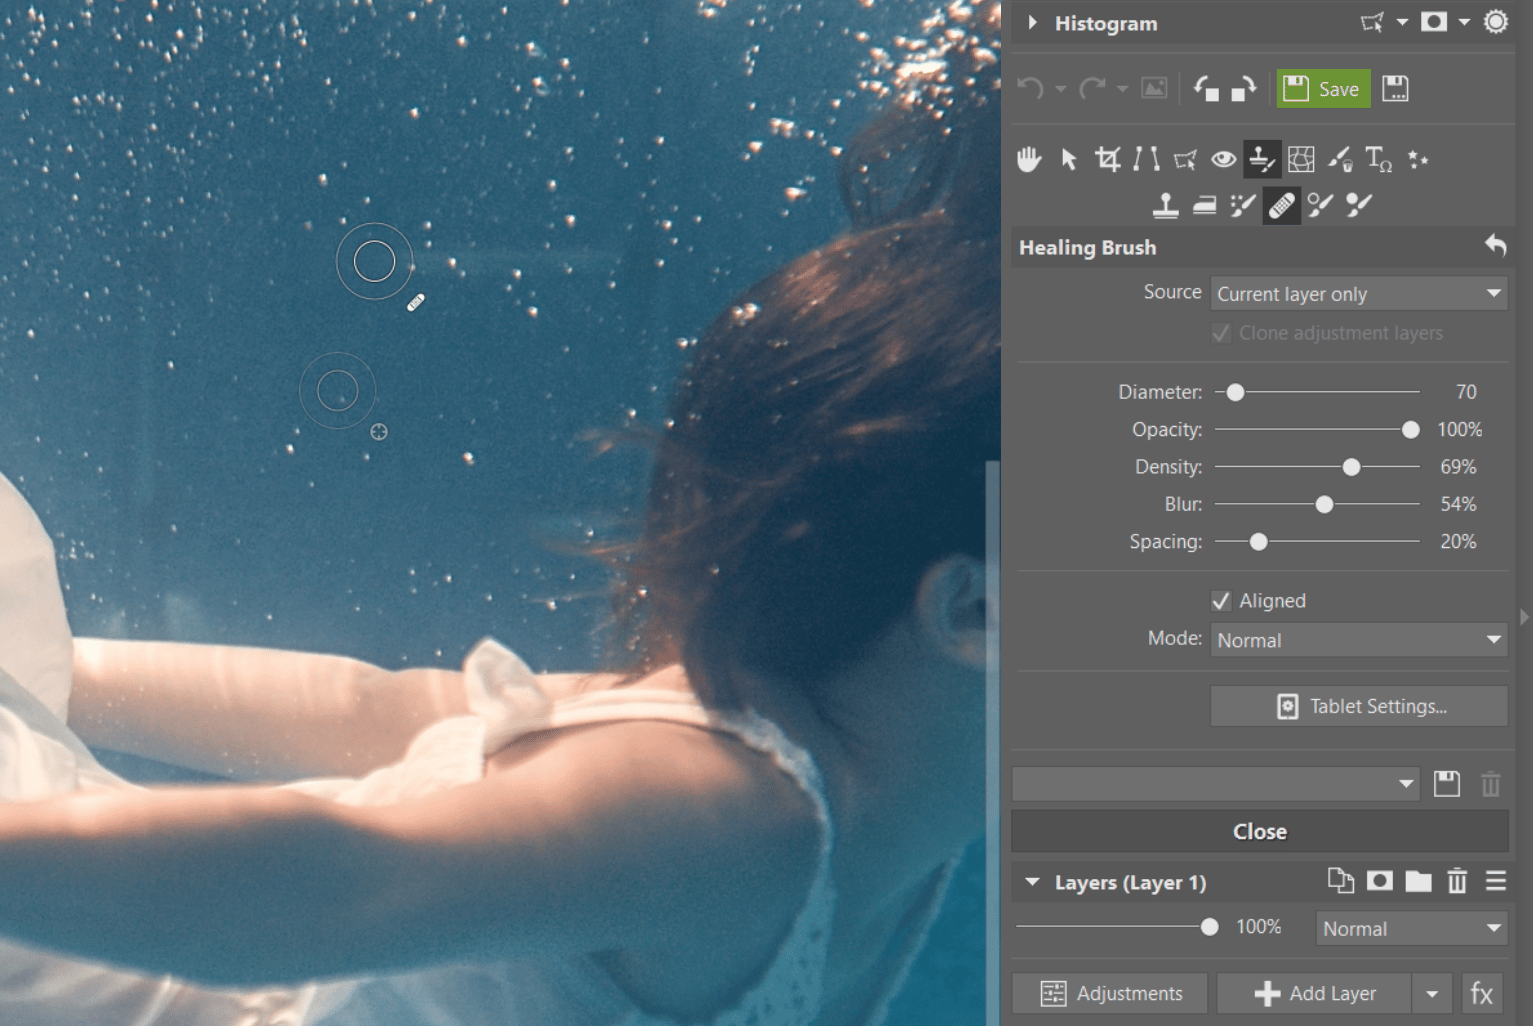
Retouch Distracting Details
In our example photo, the ladder in the background is slightly distracting. You can easily retouch away details like this using the Healing Brush (J) in the Editor module (or for smaller edits, in the Develop module). We’ve covered individual retouching tools and how to work with them in an earlier article.

Download Zoner Studio, try it free for 7 days, and practice editing your underwater photos!

There are no comments yet.