How to Brighten Your Photography with Sunstars
You may have already noticed that in some of your pictures the sun looks like a star. This can be a stylish, sought-after effect. You also may have noticed that at other times, sunstars don’t appear in your photos. On another day, you might get a sun star with a different shape or length of its rays. There are several factors at play that affect how sunstars are made. Read how to create sunstars when shooting against the sun and other light sources.
In order for a sunstar to appear, several factors must coincide. These include the right choice of scene, photography equipment, and camera settings. Let’s take a look at them one by one.
Light source in the frame
In order for sunstars to appear, you must have a single-point light source in the frame that is significantly brighter than the surrounding areas.
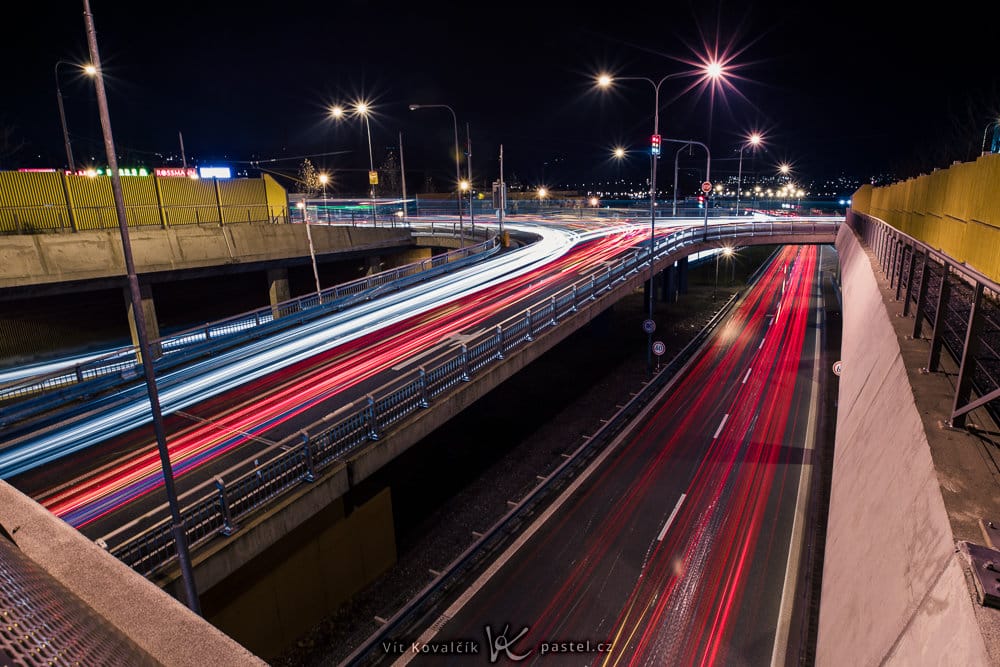
Sunstars are also common in night photography. Street lighting doesn’t come close in comparison to the sun, but sunstars appear when street lighting is contrasted by very dark surroundings.
How sunstars are formed
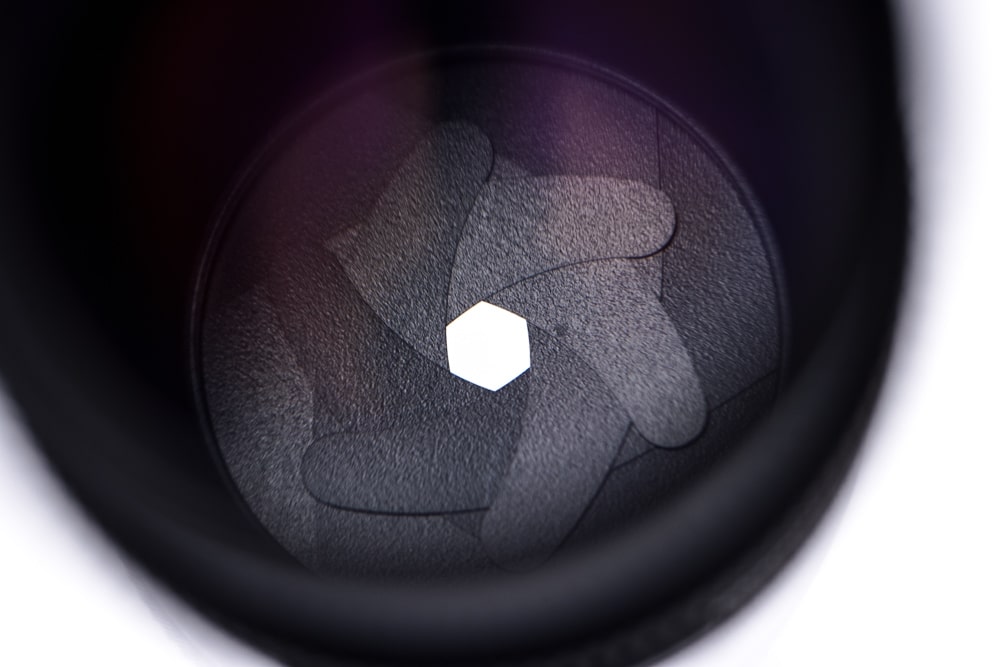
Sunstars are actually a type of optical aberration – diffraction. This means the light bends at the edge of an object. That object is the actual aperture blades inside the lens.
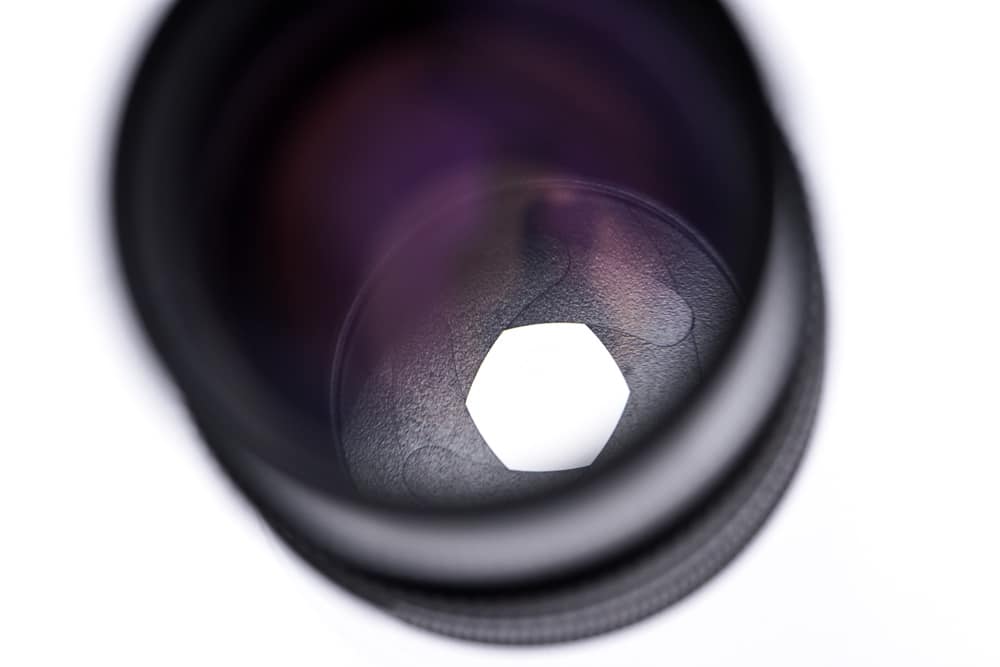
The aperture does not form a perfect circle, but rather a polygon. Because of this shape, the light is diffused to form distinctive star shapes. The movement of light over the edges is usually negligible, but with extremely bright light sources, it is detectable.
The f-number determines how noticeable the effect is
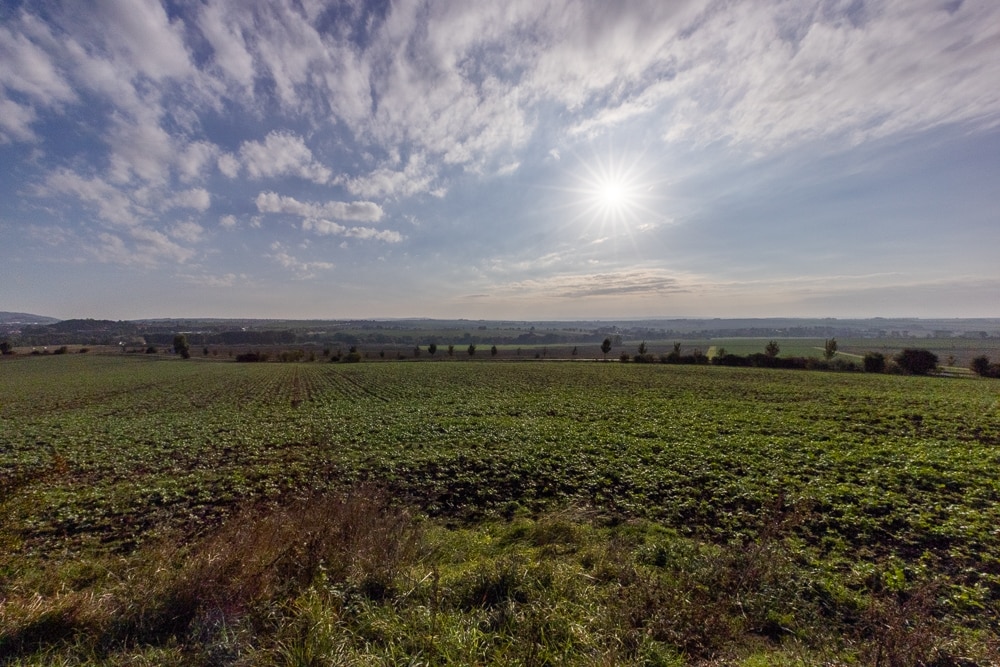
The more closed the aperture is (i.e. smaller opening), the higher percentage of photons pass through the edge and create more noticeable sunstars. To get the most dramatic sunstars, you must use a high aperture.
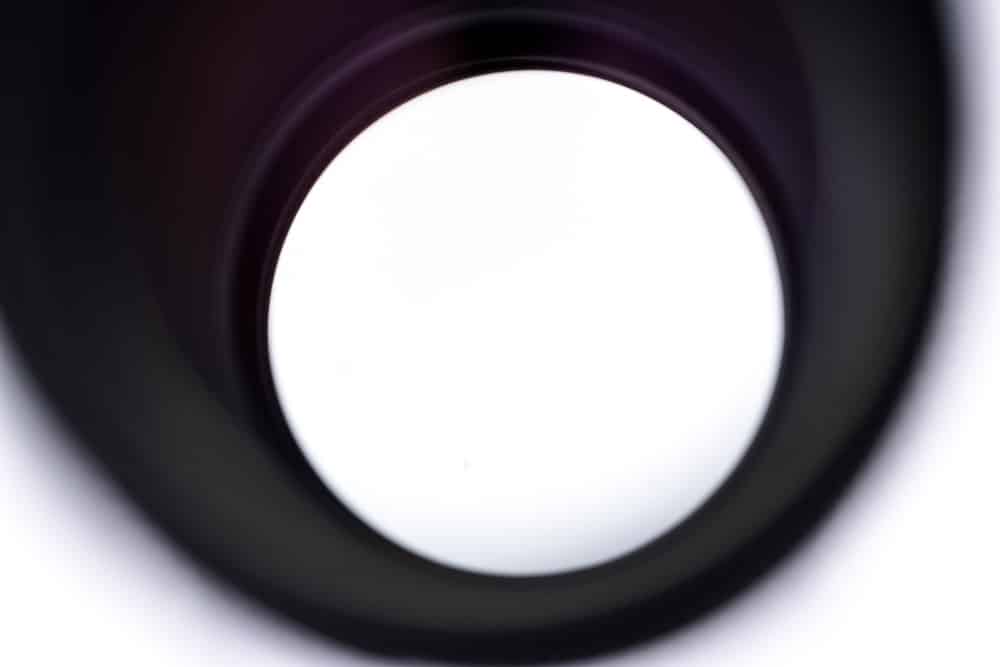
On the contrary, with the lowest possible aperture, the diaphragm is retracted out of the light’s path. Only the basic aperture opening remains, which is perfectly round, meaning sunstars won’t appear. The light is refracted, but evenly in all directions.
The aperture diaphragm determines the sunstar’s shape
Sunstars are not always the same. The number of blades in the aperture diaphragm determines the shape of the sunstar. The number of blades is unable to be changed because each type of lens has a set number. More expensive lenses tend to have more aperture blades.
An even number of blades gives a sunstar with the same number of points as blades, while an odd number of blades creates sunstars with double the number of points as blades.
The shutter adds undesired points
In some situations, vertical lines appear that don’t belong to the sunstar (if you are shooting vertically, these lines will be horizontal).
These are reflections of the shutter blades. When the light is extremely bright, it reflects in the shutter as it travels to the sensor.
If your camera has the option, you can test out using mechanical shutter, electronic shutter, and electronic front-curtain shutter to see how it changes the shape.
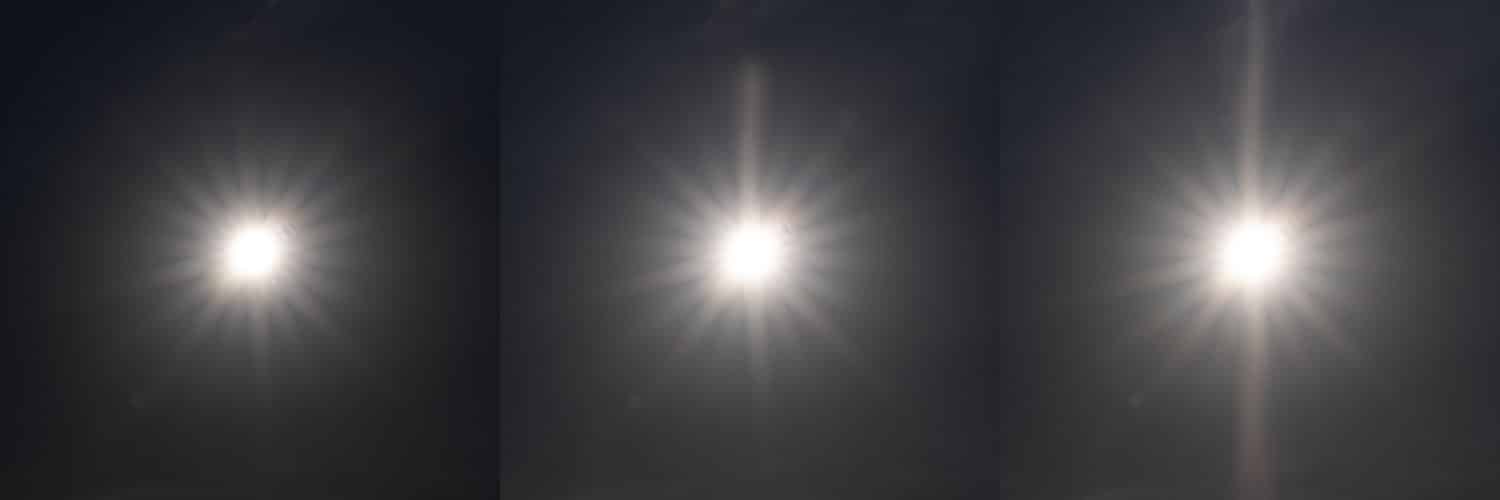
It is clear what shutter type you should use. Unfortunately, even electronic shutters have their drawbacks. With landscapes, there is potentially higher digital noise and therefore, lower dynamic range. So it’s worth considering whether to use it on a case-by-case basis.
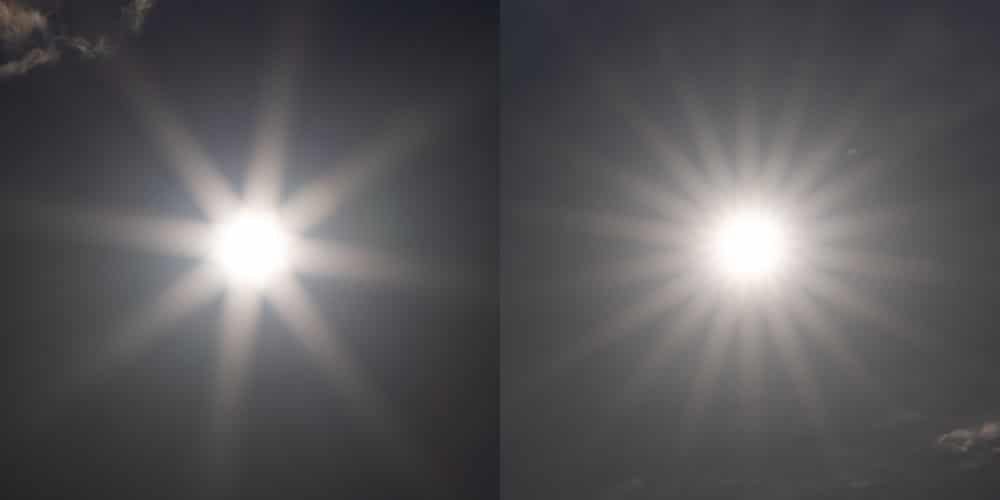
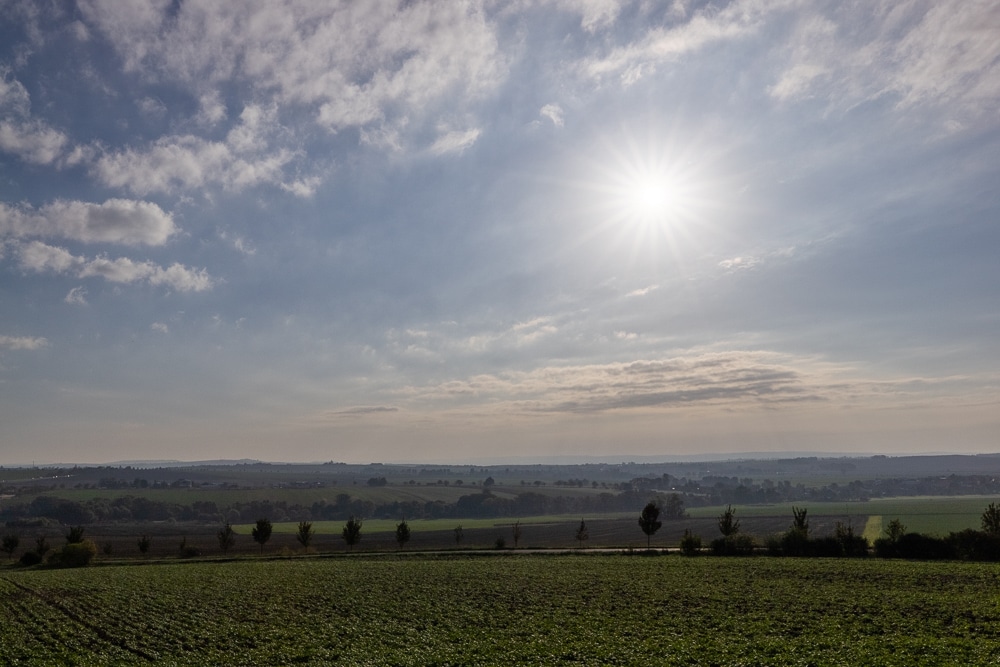
Changes to focal length
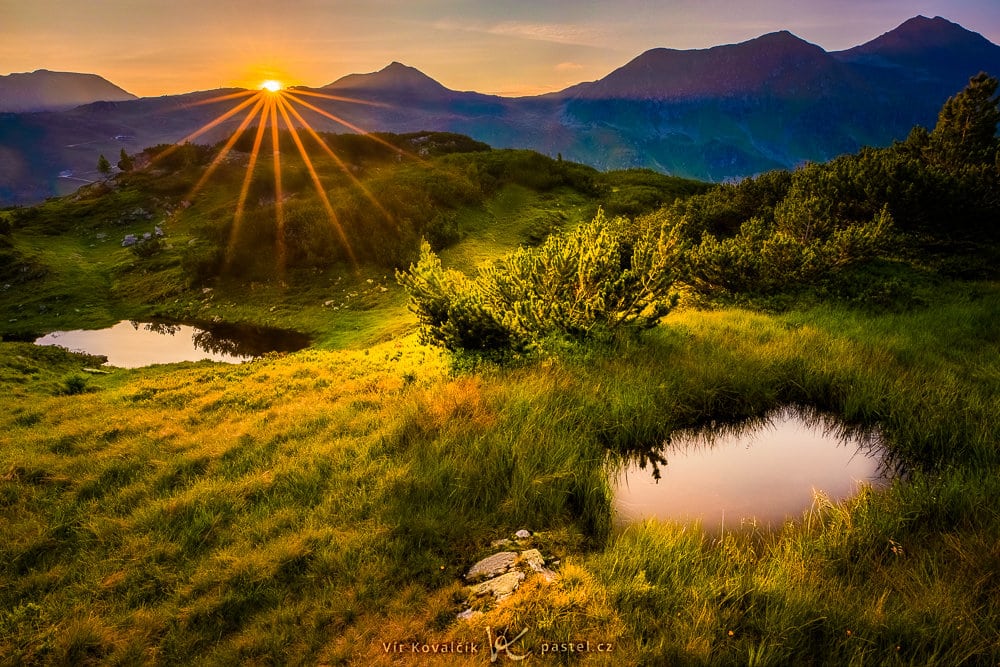
At the beginning of this article, we mentioned single-point light sources, but the sun is certainly larger than a single point. It is actually a ring of light that gets bigger or smaller as you zoom in or out. Sunstars will still appear when zooming in, but the smaller the light source, the sharper the effect. On the contrary, with a large light source, the sunstar is the least defined and begins to dominate the scene more and more, which may or may not be desirable.
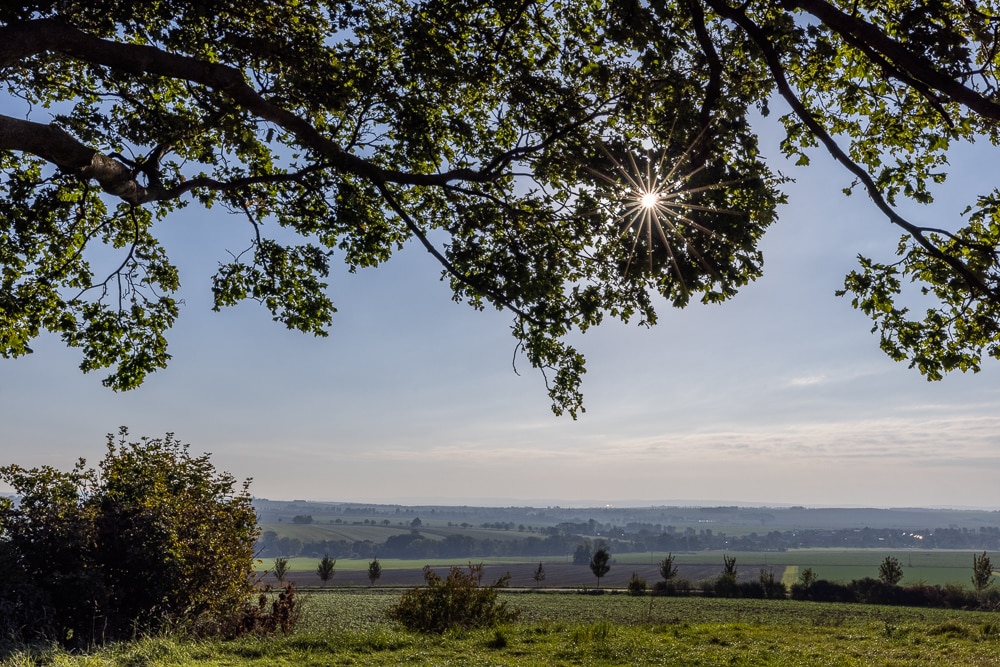
Play peekaboo with the sun
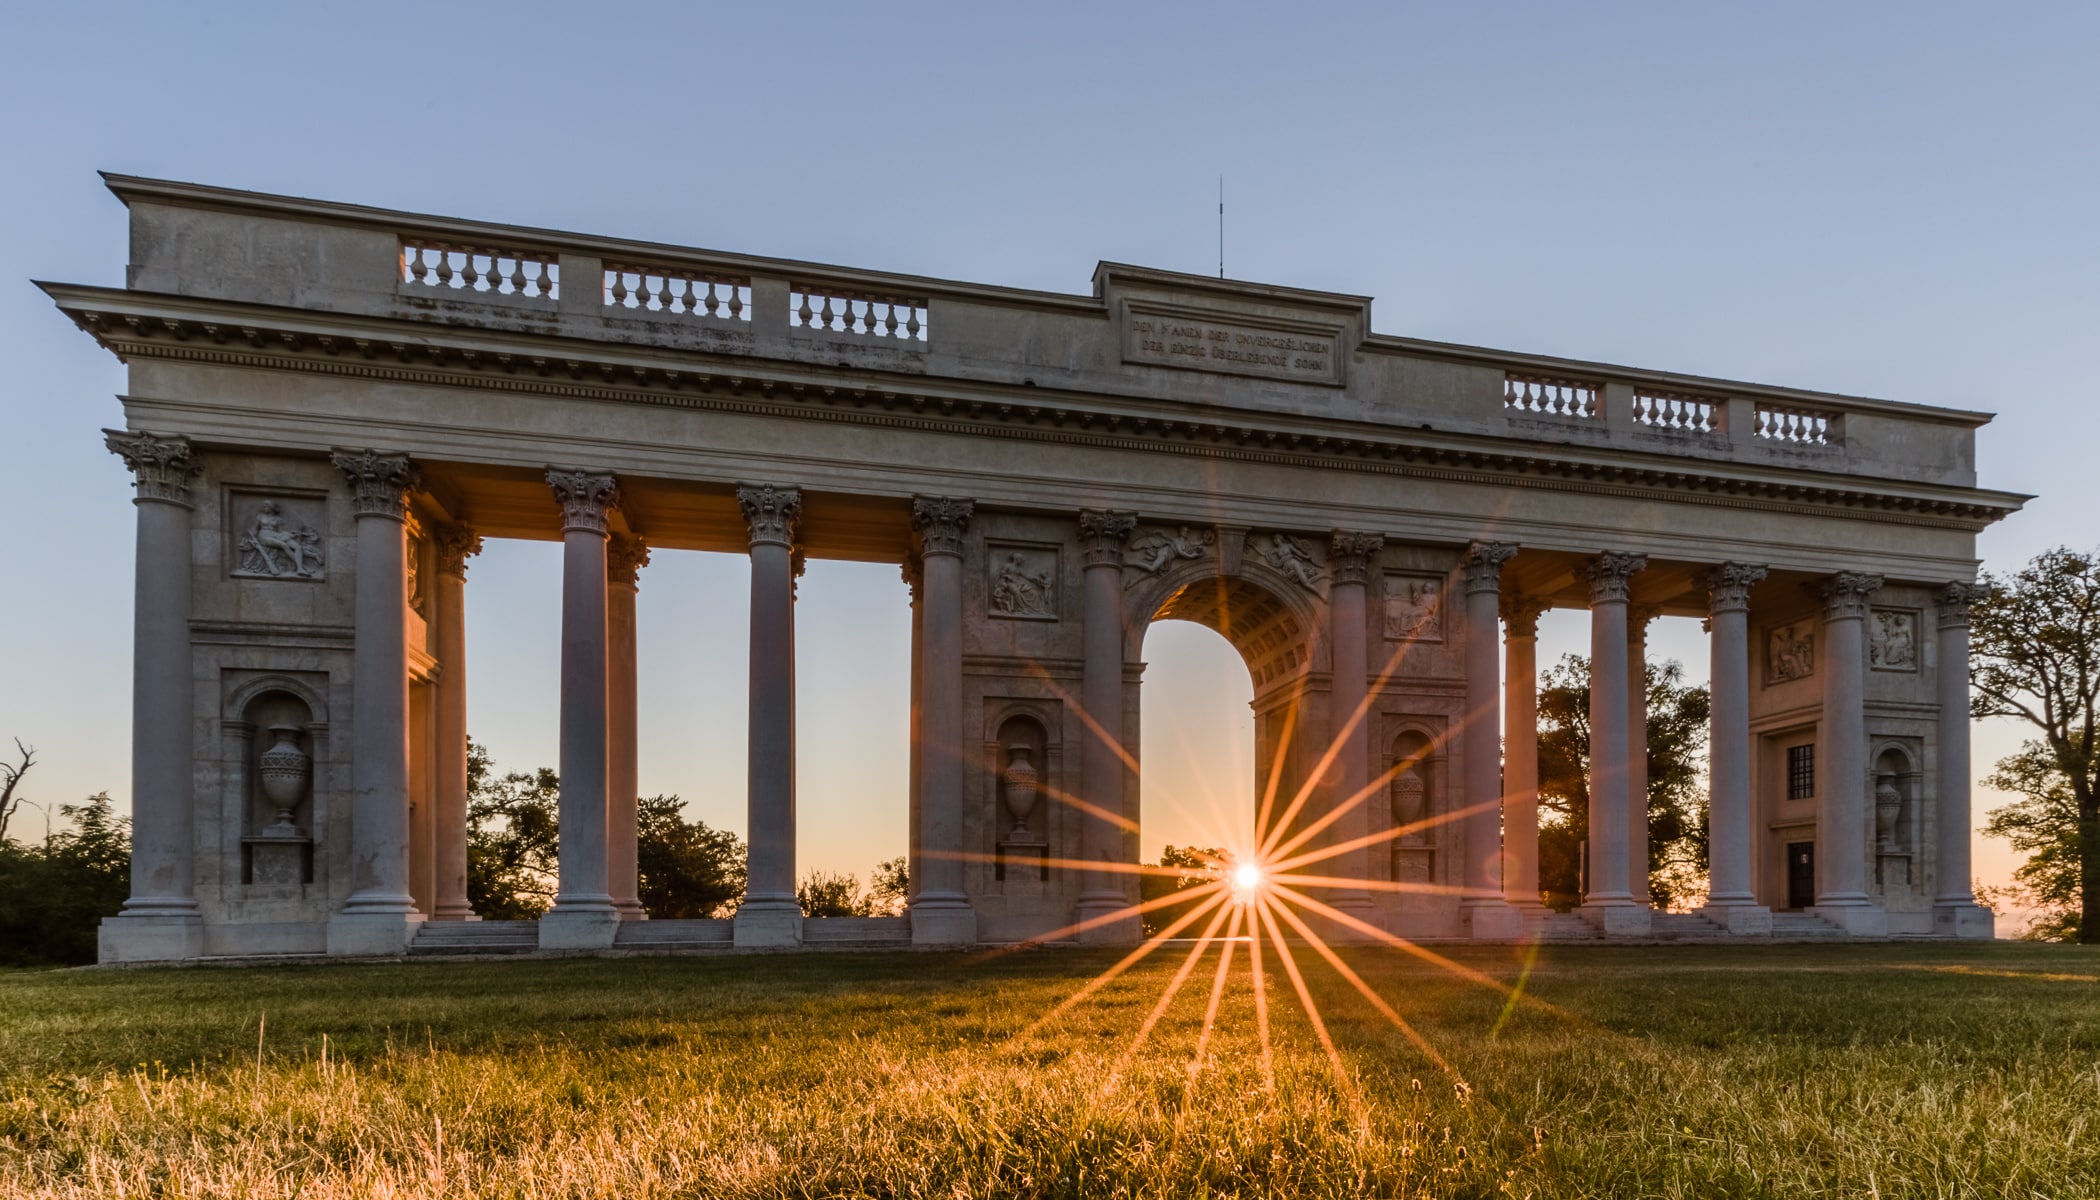
Another method for achieving sharper-edged sunstars consists of partially hiding the sun behind an object.
In addition to reducing the light source, there is another advantage to playing peekaboo with the sun: the object is turned away from the sun, so it is very dark, making the effect very visible.
Furthermore, the camera isn’t blinded by the sun, so it can handle longer exposure times, which now stretches the points of the tiny light source to its limits and makes the image much easier to edit overall.

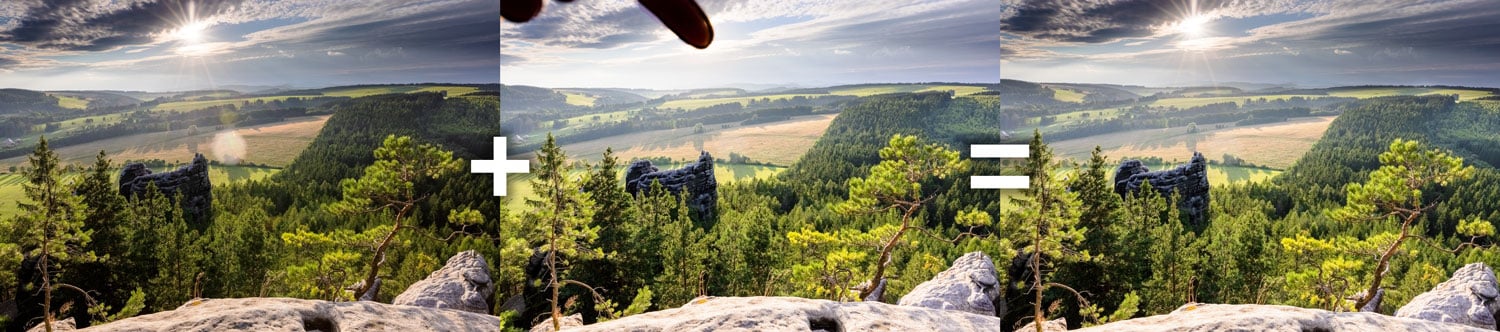
Avoiding lens flare
When shooting landscapes with the sun, there is one more trick to deal with another issue. You’ll often find that besides making beautiful sunstars, the sun also creates lens flare, usually caused by reflections from inside the lens. The number, size, and color of these defects depend on the specific lens and they can sometimes be impossible to avoid completely.
Smaller lens flares, especially those in the sky, can be easily removed with retouching while editing. However, when there are multiple lens flares or they cover complex terrain, or even your subject, this makes retouching complicated. There’s something you can do while shooting to avoid this.
All you need to do is take the same picture two times, ideally using a tripod. The first time, normally, and the second with the sun covered (your finger works great). You will have two images. One, with the sun and additional lens flare. The second, without the sun or visible flare. The two images are then joined using a mask in Zoner Photo Studio X, resulting in a photo with the sun but without any lens flare.
Sunstars basically make themselves
Now you know how it’s done. The last section admittedly gets a bit more complicated, but the ones preceding it consist of quick and easy settings changes. In the majority of cases, choosing a wider angle and higher aperture is enough for you to find your sunstars and add some sparkle to your photography.
There are no comments yet.