How to Do At-Home Product Photography
At-home product or food photography doesn’t always need to involve high-tech equipment, lighting, tripods, and specialized lenses. You’d be surprised at how much can be done with the use of an old sheet, a house plant, and some natural lighting.
We’ll take a look at some unconventional product concepts: low-key, appealing, personal, and (some may say) unprofessional. We’ll show you how to arrange the scene using things you have at home, as well as how to work with light and camera settings. We’ll also throw in a few tips for editing your product photos in Zoner Photo Studio X.
Arrange thescene
There are virtually no limits when setting up the scene for your product photography. You can use whatever you have around the house that you consider attractive and works for your product:
- Fabric – old sheets, leftover fabric with simple prints, tablecloths, or clothing.
- Flowers – house plants, fake, dried, or freshly-picked flowers.
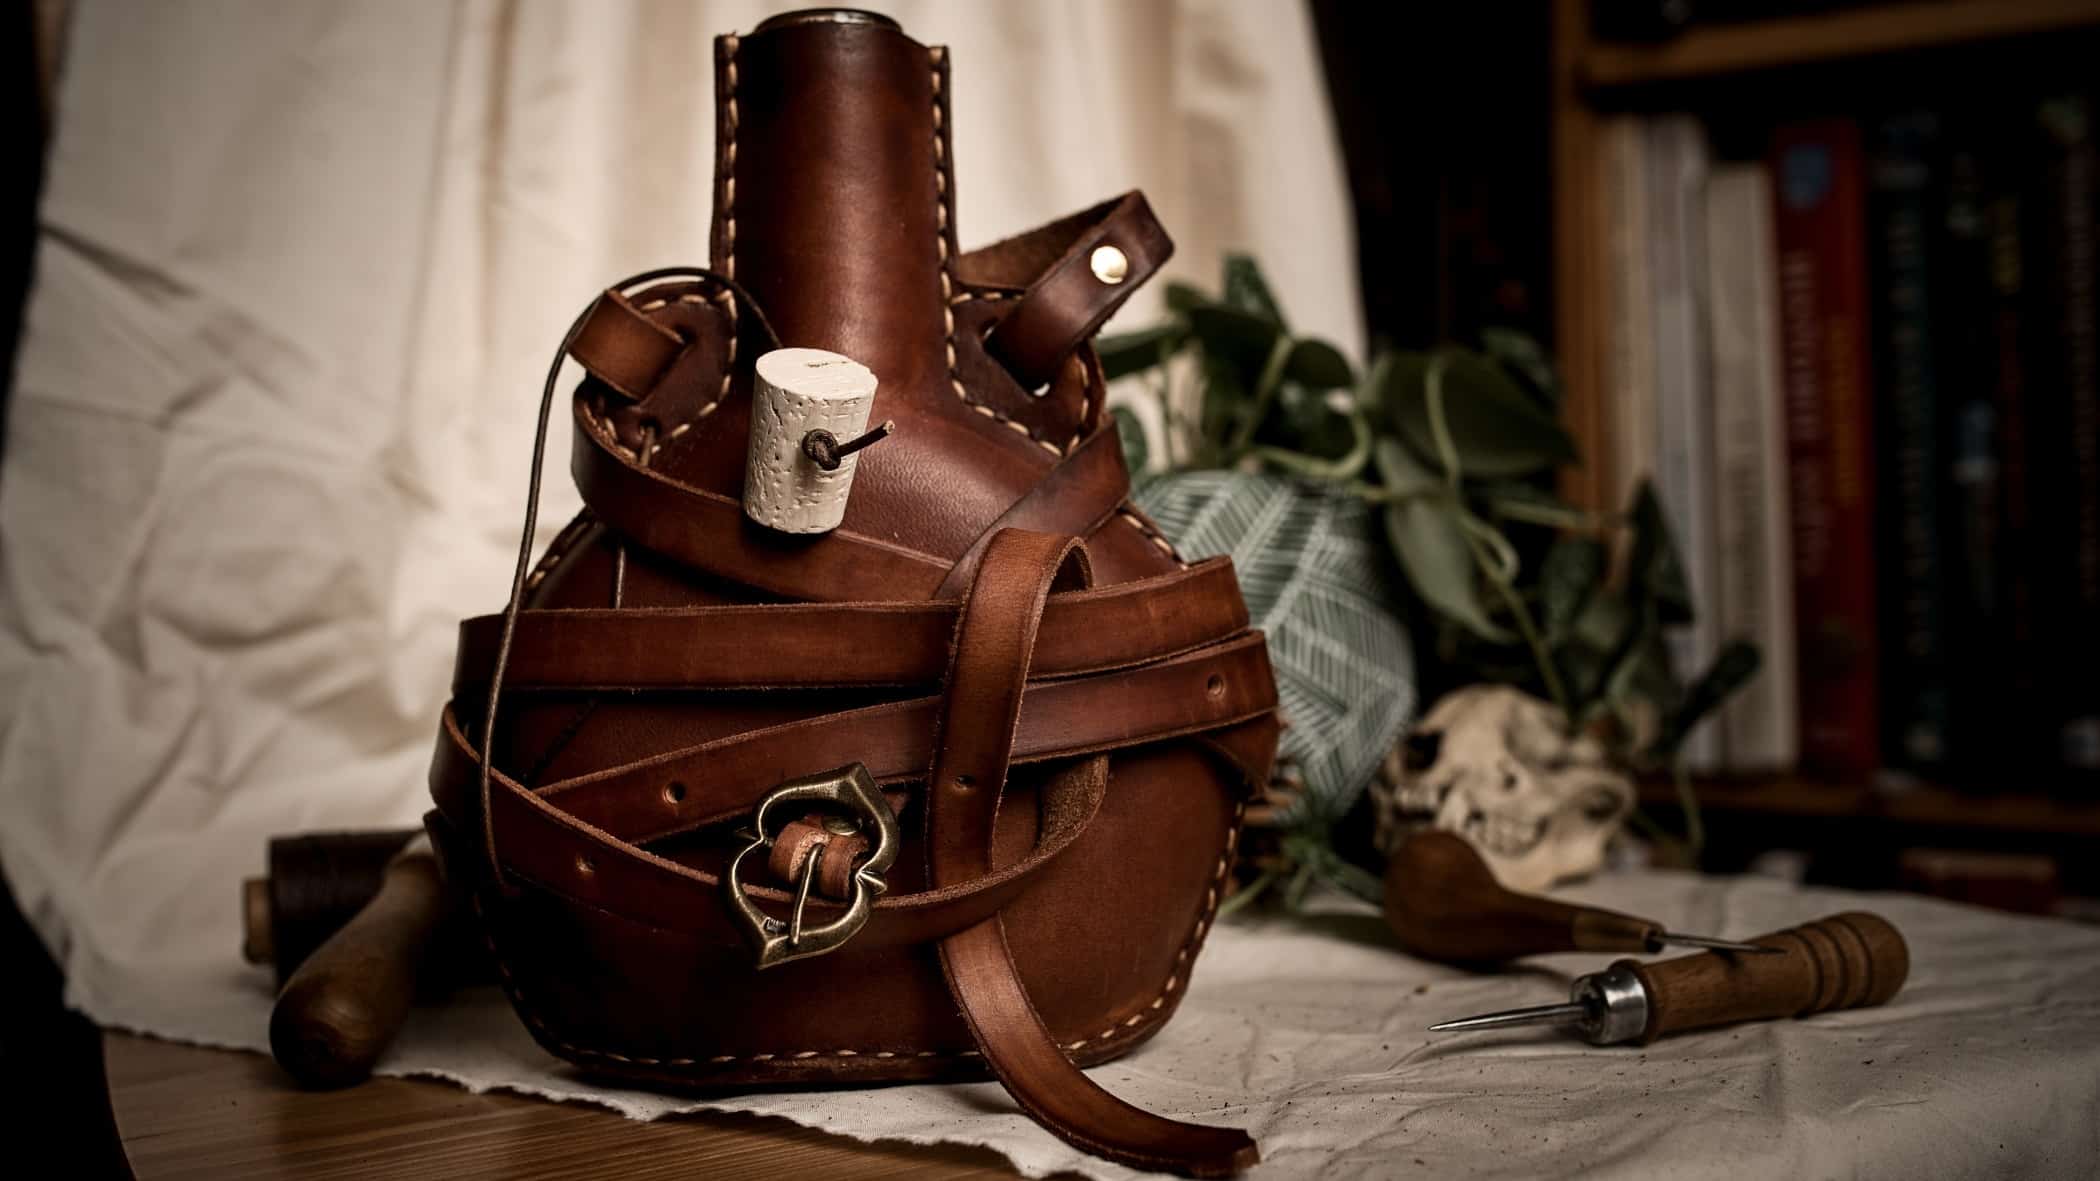
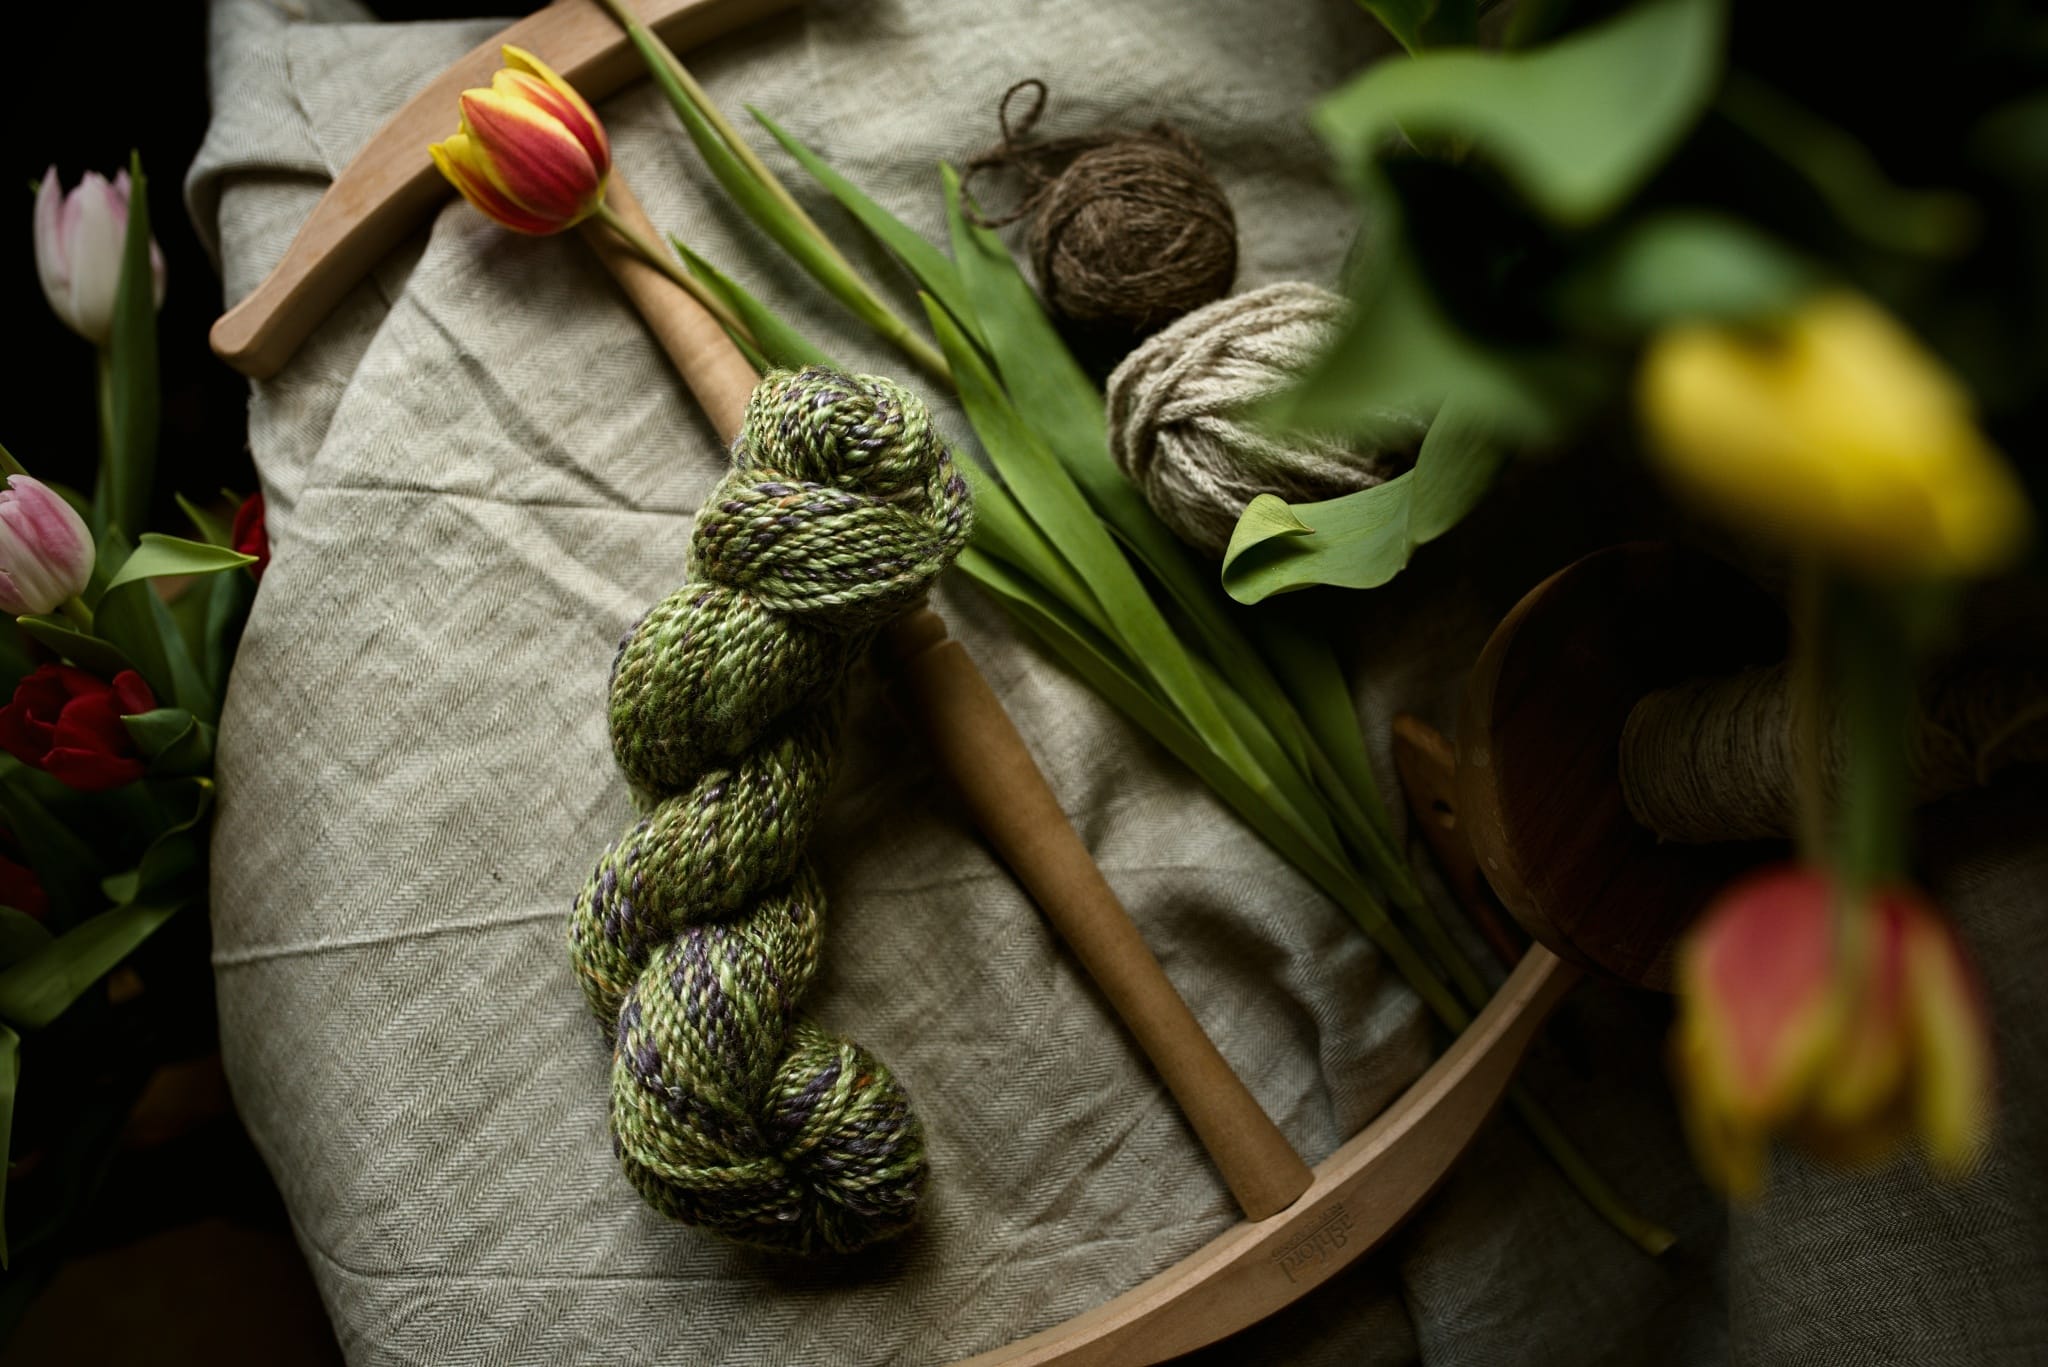
- Themed items – objects that go with the product you are photographing. For example, for embroidery, include an embroidery hoop and threads; for a painting, a paintbrush and paints; for food, a wooden spoon or herbs.
- Background – a cutting board, wood, flooring, newspapers, TV stand, carpet, or anything where the product and items can be arranged.
- Something extra – any items that you think look good and fit the overall concept. I like to use pine cones, dried flowers, rhinestones, jewelry, books, and newspapers.
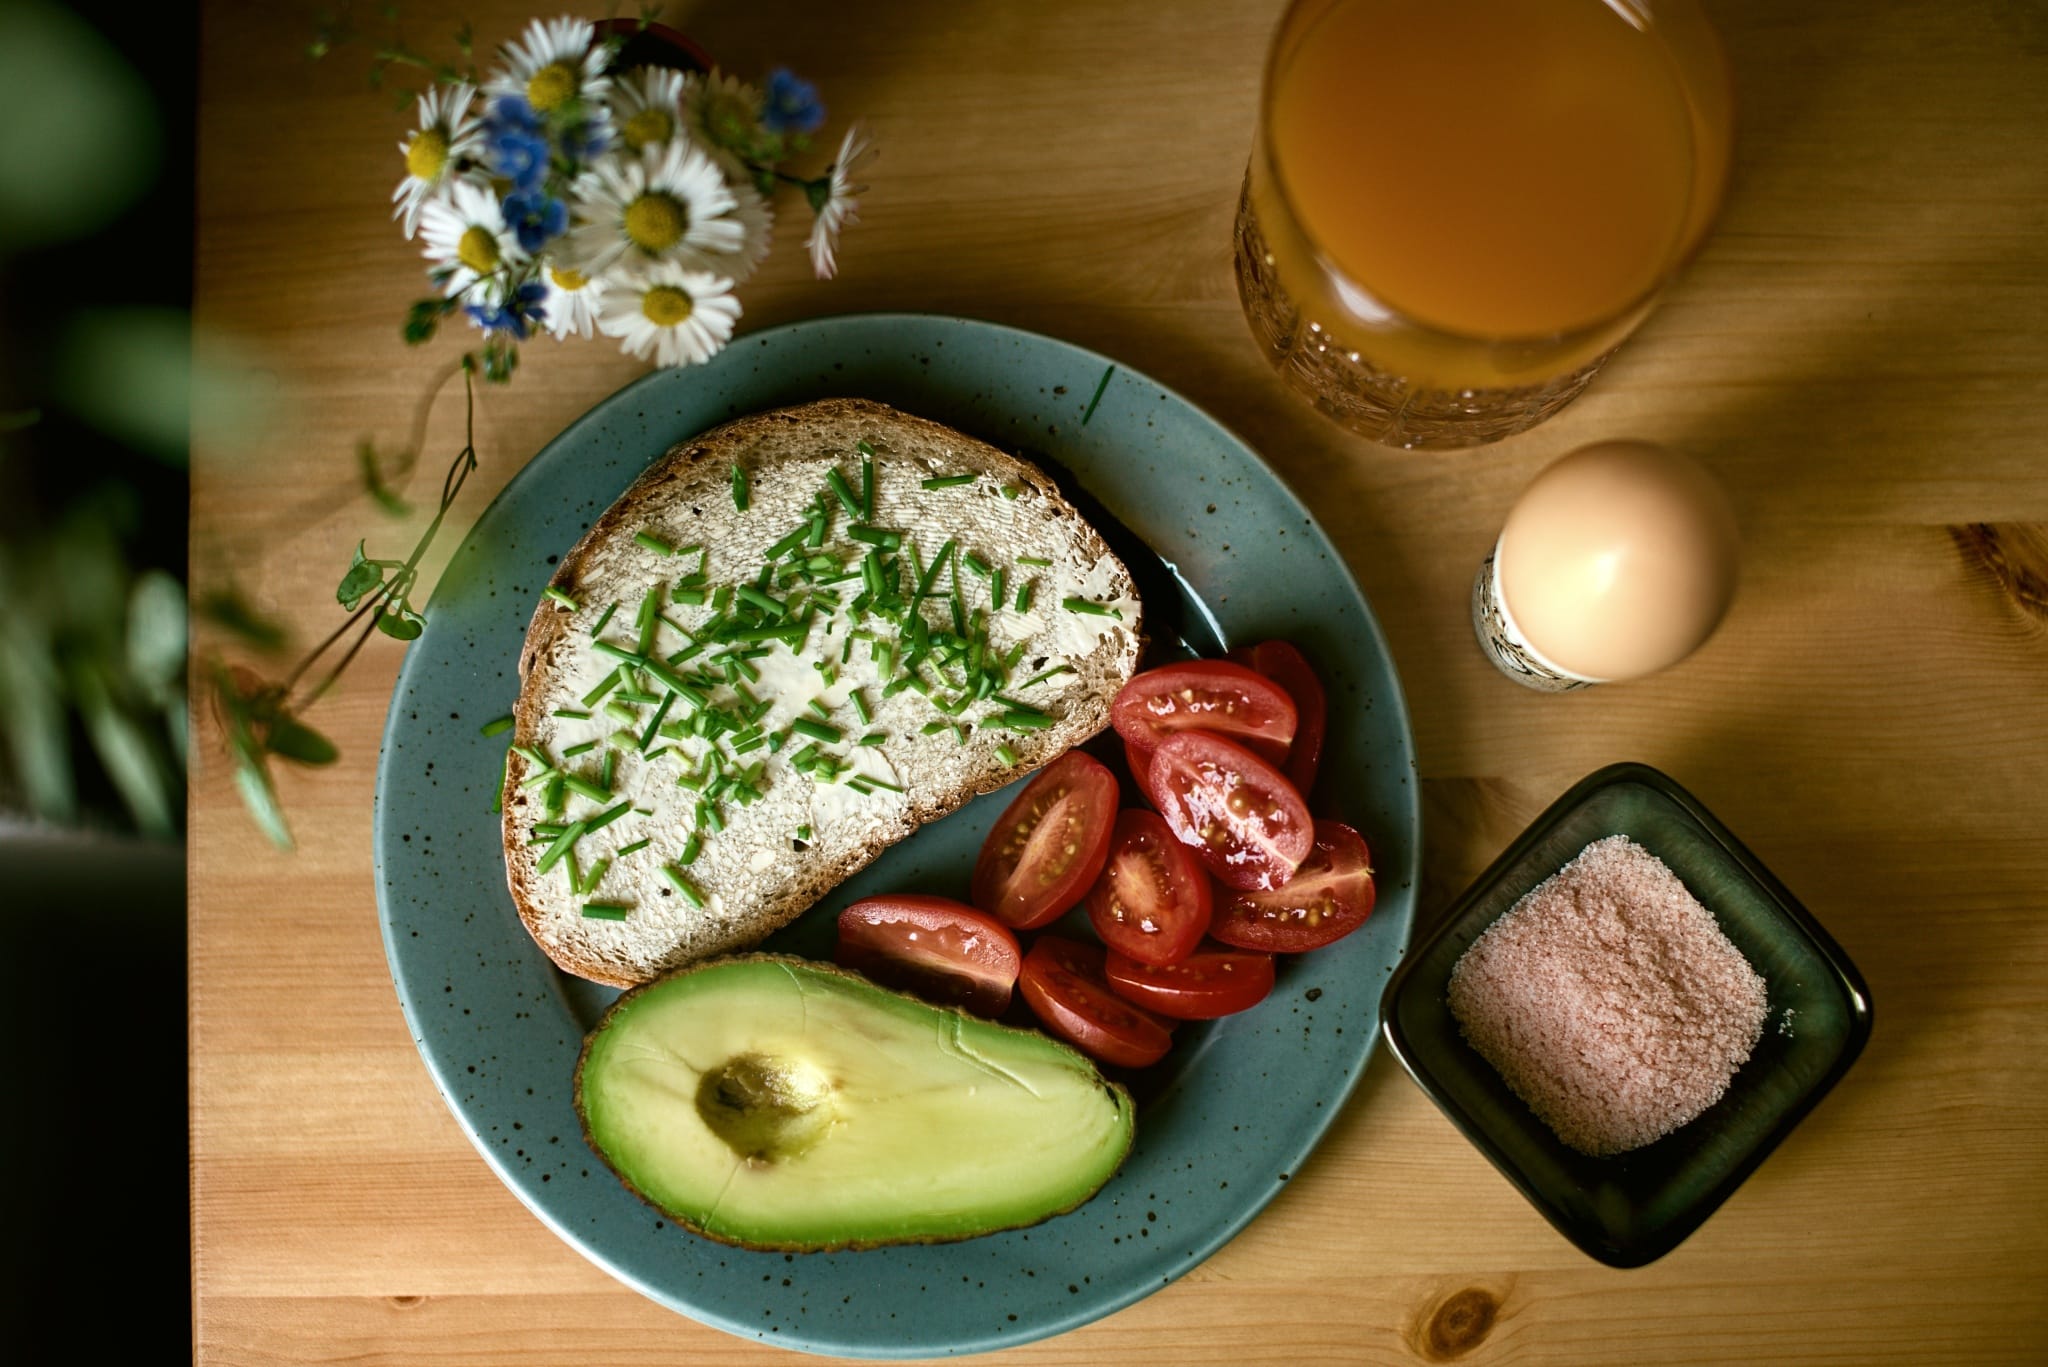
Your product needs to be the center of attention. Everything around it merely complements the overall concept. Be sure to fill the space in the photo because too much empty space is undesirable.
At the same time, any additional items should be out of focus, out of the light, and far enough away from the main subject. These additional items should not attract more attention than the main subject. If you are shooting from above, everything will most likely be in the same depth of field so pay special attention to the placement and lighting.
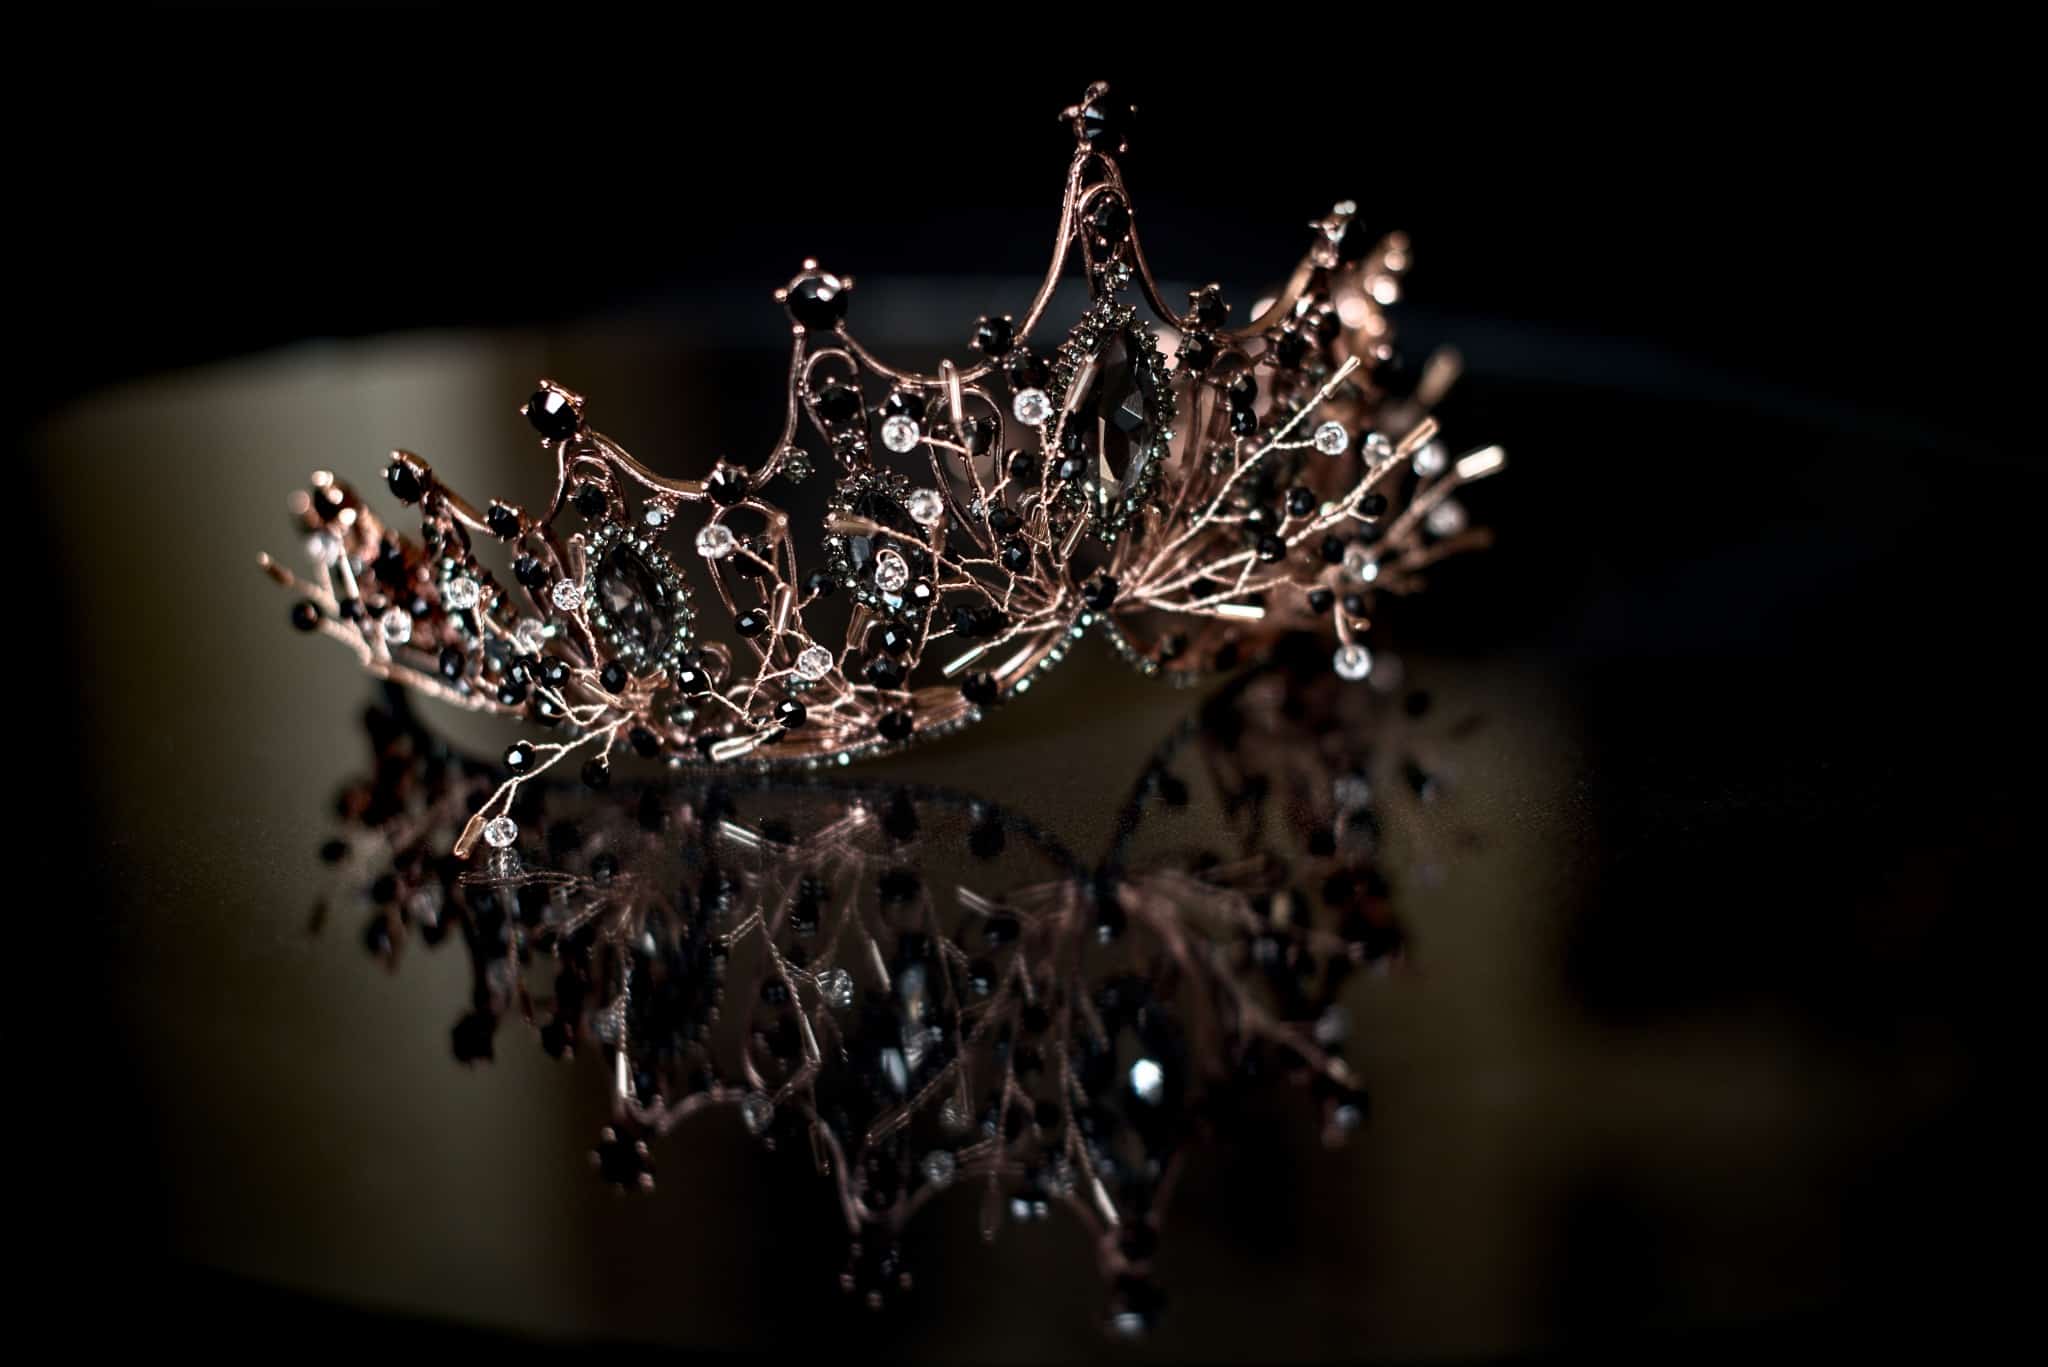
As far as your product’s placement goes, choose either the exact center or try the rule of thirds.
You can see the coffee photo‘s entire editing process in this before and after:


Working with natural light
Be sure to take your product photos by a window, but be careful never to have direct light on your product. Ideally, you want diffused light. For example, use a north-facing window during the day, an east-facing window in the evening, a west-facing window in the morning, and so on. Don’t let the sun shine directly in your frame. Harsh, direct light will ruin everything.
Arrange your scene near the window by pulling up a chair or table, or shooting directly on the ground. Ideally, you want the product you are shooting to face the sun in order to catch as much light as possible. If you prefer to shoot outside, avoid direct sunlight and shoot in the morning or evening, or on an overcast day.
Nikon D750, Sigma 35mm f/1.4 DG HSM Art, 1/200s, f/3.5, ISO 200, focal length 35mm.
10 basic tips for product photography
- Shoot from several different angles, try different positions and arrangements.
- Prepare your product, clean it, arrange it, iron it, make adjustments, and pay special attention to it.
- Pay attention to sharpness and shoot using a higher f-number.
- To demonstrate actual size, add something for comparison.
- Try using Christmas lights for bokeh, or put bokeh on a monitor behind the product.
- Place the product on a reflective material such as a mirror or glass.
- Try capturing the product in motion and compose it in a way that makes sense.
- Shoot using a low ISO value to make the photo more detailed and less grainy.
- Take your time, play around with your setup, and pay attention to every detail.
- Don’t be afraid to experiment.

Nikon D750, Nikon 50mm f/1.4 AF-S NIKKOR G, 1/250s, f/1.8, ISO 400, focal length 50mm.
Nikon D750, Nikon 50mm f/1.4 AF-S NIKKOR G, 1/80s, f/2.2, ISO 200, focal length 50mm.
What equipment to use
For this type of photography, it’s preferable to use a slightly wider focal length, but it depends on your vision. If you use a very wide focal length, every detail will be sharp. However, a certain level of depth can add to the photo’s appeal.
If you only have one lens and don’t have more to choose from, don’t despair. You can do product photography with practically any lens. For the demonstration photos, I used a 50mm prime lens because it is a universal lens that most photographers own.
It is true that a longer lens may result in issues with space, forcing you to significantly increase your f-number, but don’t let it turn you away. A 20mm lens may show too much of your background and the room in which you are shooting. From my experience, a 35mm prime lens was the lens that worked best.
Nikon D750, Nikon 50mm f/1.4 AF-S NIKKOR G, 1/125s, f/2.2, ISO 200, focal length 50mm.
Editing your photos
My favorite adjustments to do to product photography are:
- Add Clarity
- Add light to the product using local editing
- Increase Lights and lower Shadows in the Exposure menu
Clarity brings out every detail of the product. Don’t overdo it, but also don’t be afraid to use it. Use the Radial filter (R) to increase the exposure of a certain part of the photo.
Use the Luma curve to bring out the highlights and lower the shadows in the photography.
Be sure not to dim or significantly alter the colors if they define or are important to the product. You want to capture the product as it is in real life, not change it completely.
If you are interested in learning more about editing your product photography in Zoner Photo Studio X, be sure to check out our article, Editing Product Photos: How to Deal With Cropping, Retouching, and Light where you’ll learn much more about this topic.
Conclusion
Whether you wish to sell your own creations or you’ve made something you want to show off to friends and family, don’t let product photography scare you away. Now you know how simple it is to do product photography without any previous experience, fancy equipment, or a studio. Try starting out with a nice breakfast photo and with time add whatever strikes your fancy. Let your imagination run wild. There are no wrong answers when you are happy with your photography.
There are no comments yet.