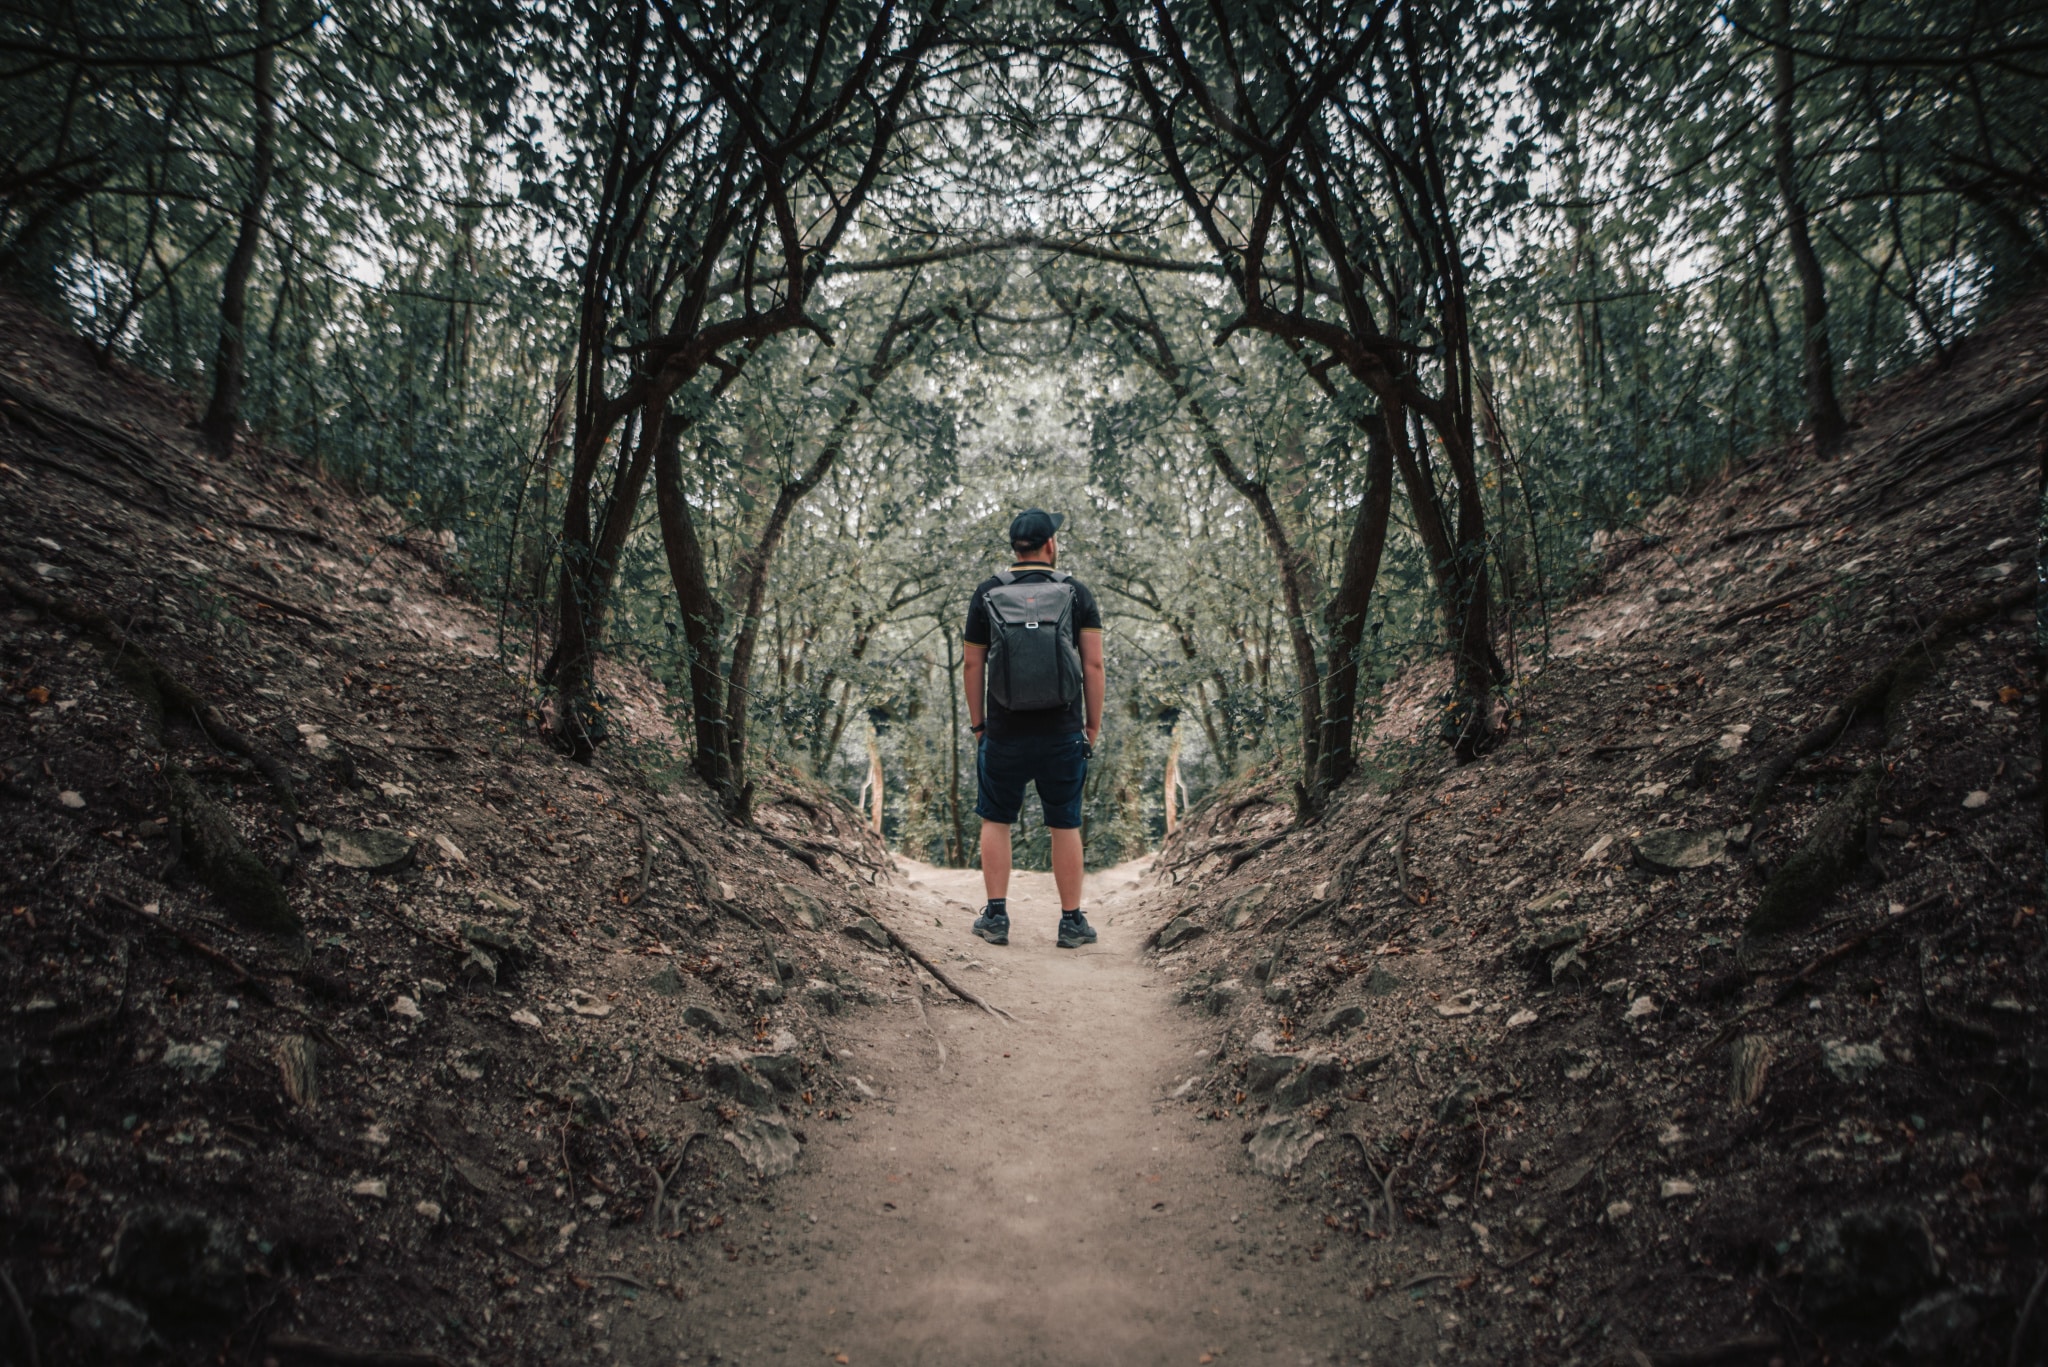
Symmetry is a very powerful element in photos. You’ll mainly make use of it in centered compositions. If you don’t have a suitably symmetrical scene at hand for a shot, but symmetry would look good in it, there’s a solution. You can easily produce symmetry on your computer. With some help from layers in the ZPS Editor, you’ll have it done in a jiffy.
The article is over 5 years old. The information in it may be outdated.
We are working on its update. In the meantime, you can read some more recent articles.
Symmetry is a very powerful element in photos. You’ll mainly make use of it in centered compositions. If you don’t have a suitably symmetrical scene at hand for a shot, but symmetry would look good in it, there’s a solution. You can easily produce symmetry on your computer. With some help from layers in the ZPS Editor, you’ll have it done in a jiffy.
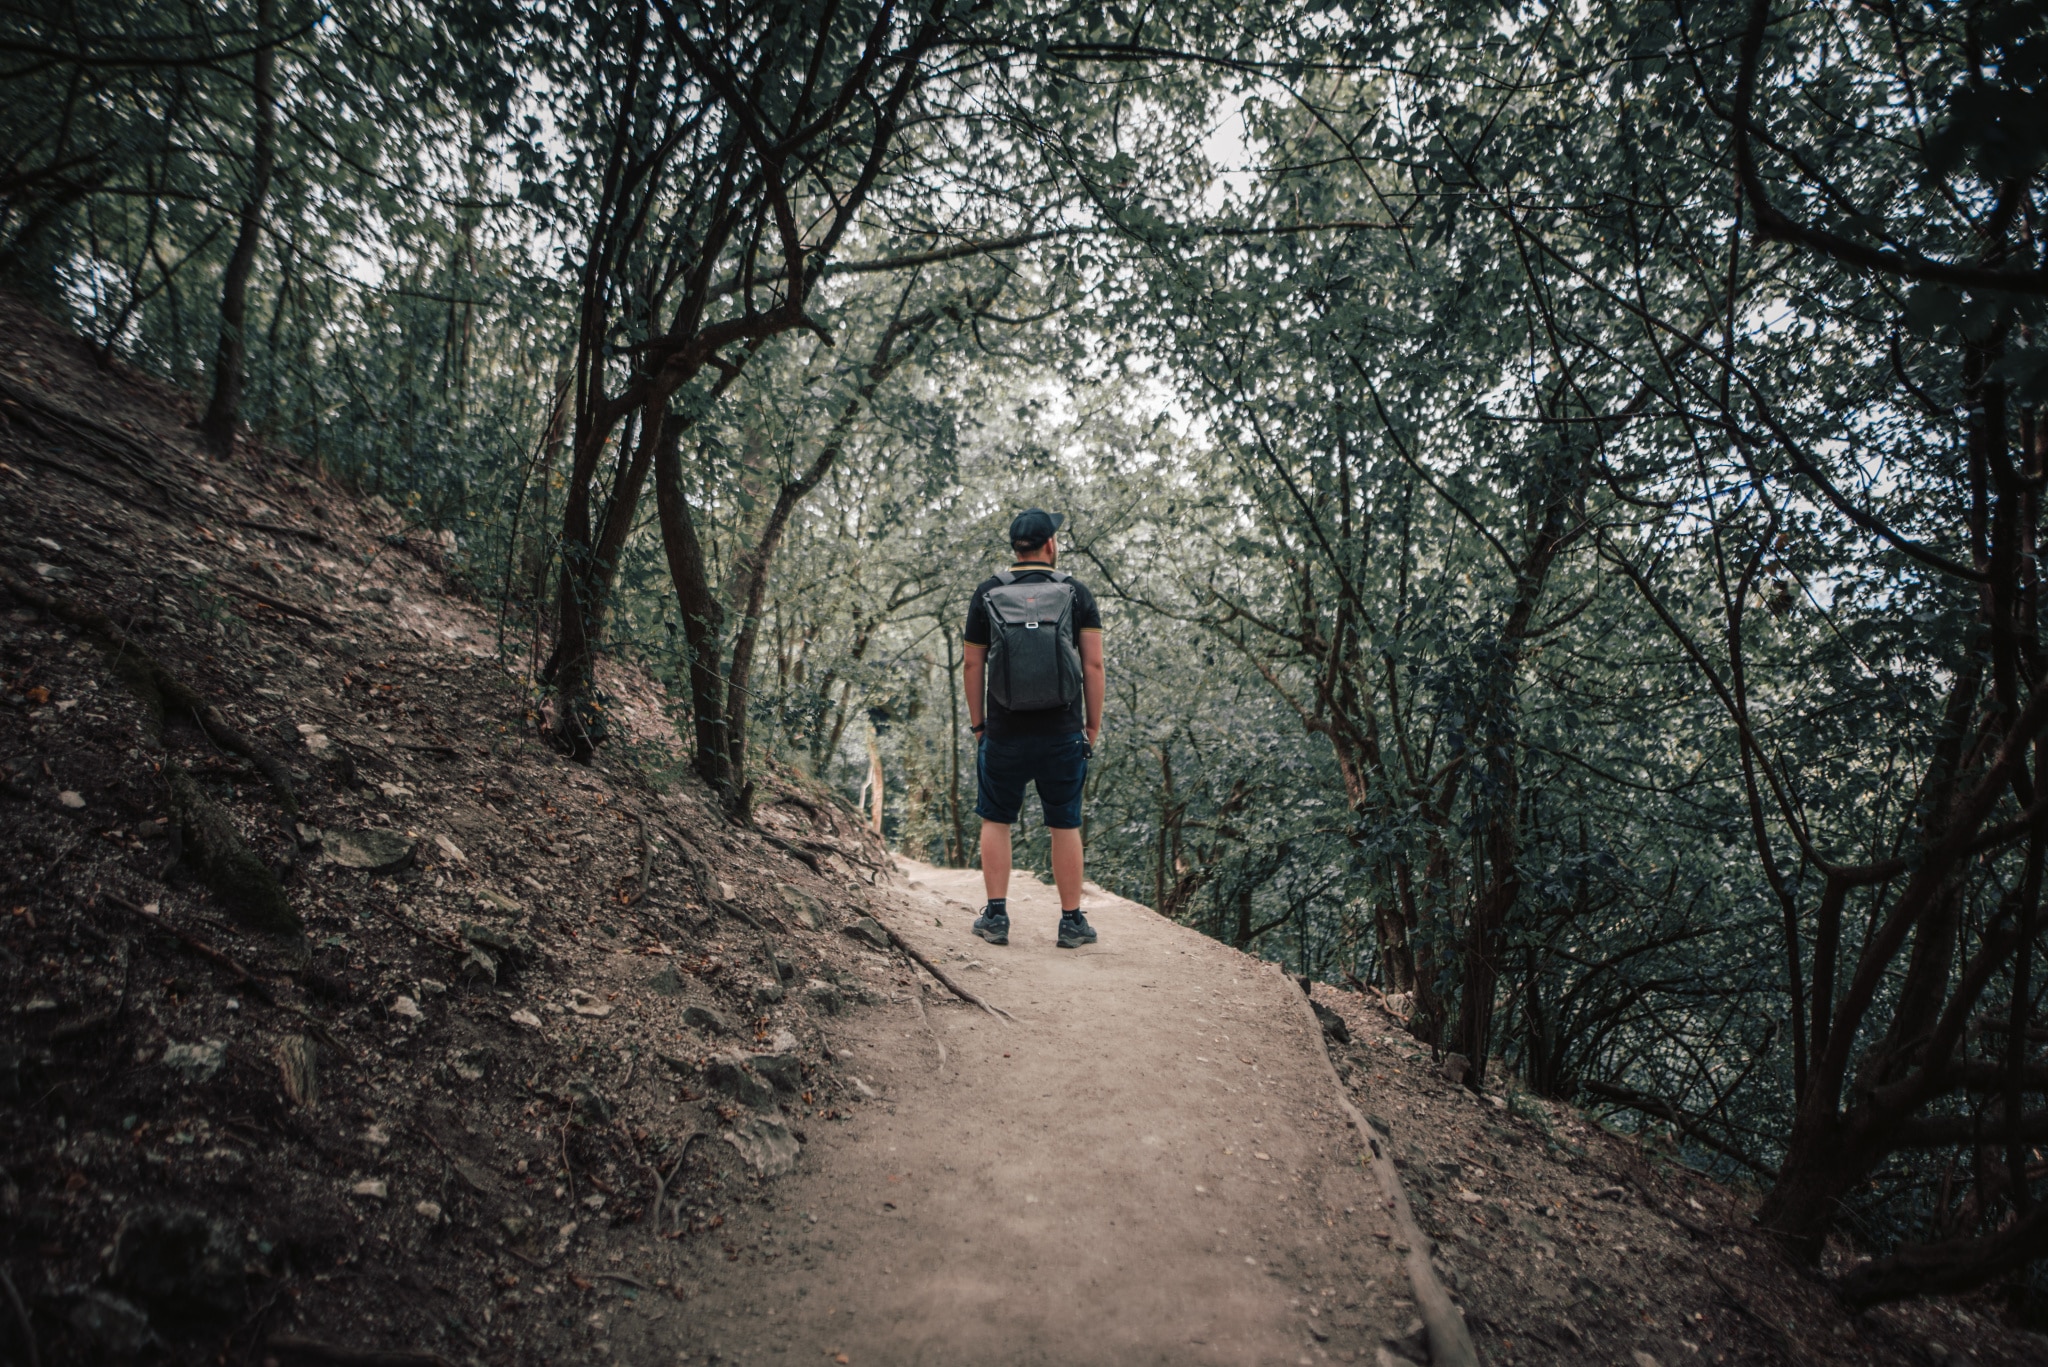
Mirroring part of a photo is something that you’ll usually be doing in pictures where the subject is in the middle. You can use mirroring to get perfect symmetry and lead your viewer’s eyes right where you want—to the picture’s center. This approach can also mask away situations where the environment on one side of the scene is uninteresting.
Start by Duplicating and Flipping
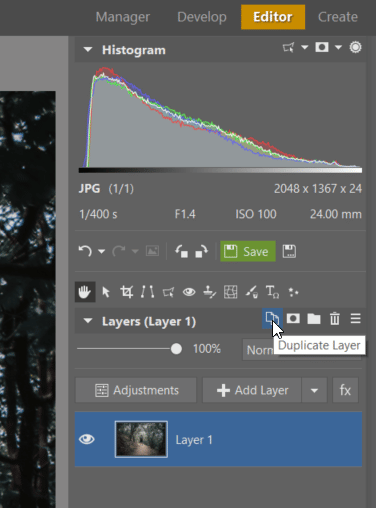
The edit itself is actually nothing complicated. First you open the photo in the Editor in Zoner Photo Studio X and click the Duplicate Layer icon.
Duplicating the layer.
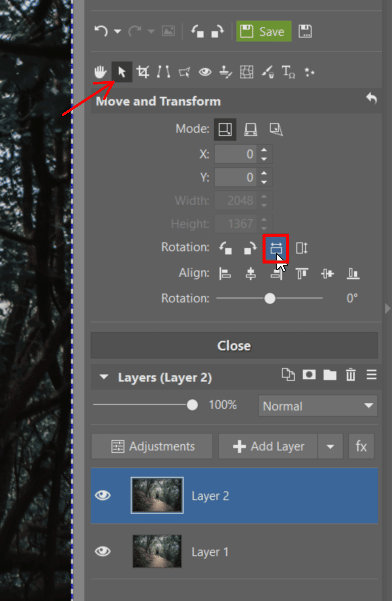
Now you have two identical layers right on top of each other. You now need to flip the top layer. So activate the Move and Transform tool (V) and click the icon for horizontal flipping. Now you have two mirror-image layers on top of each other, and you need to keep one side from each of them.
Horizontally flipping the top layer.
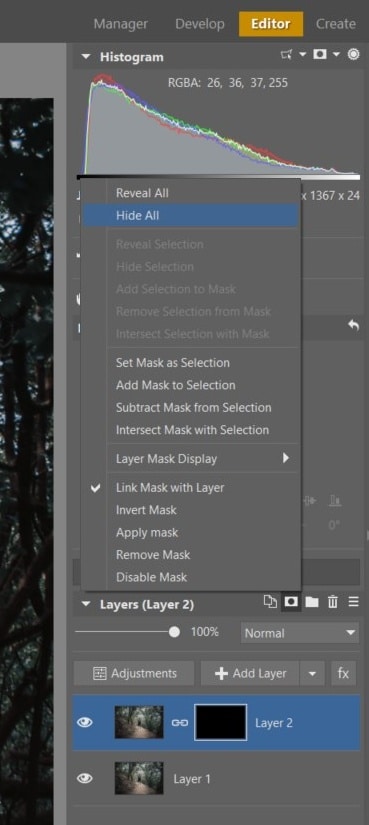
Apply a Mask to the Top Layer
Select the top layer, right-click the mask, and use Hide All. This gives the top layer an all-black mask. You can then use the brush to paint some parts of the mask white, while leaving the rest black. Remember: the black parts of a layer’s mask hide those parts of the layer, while it shows through in the white parts.
Adding a mask.
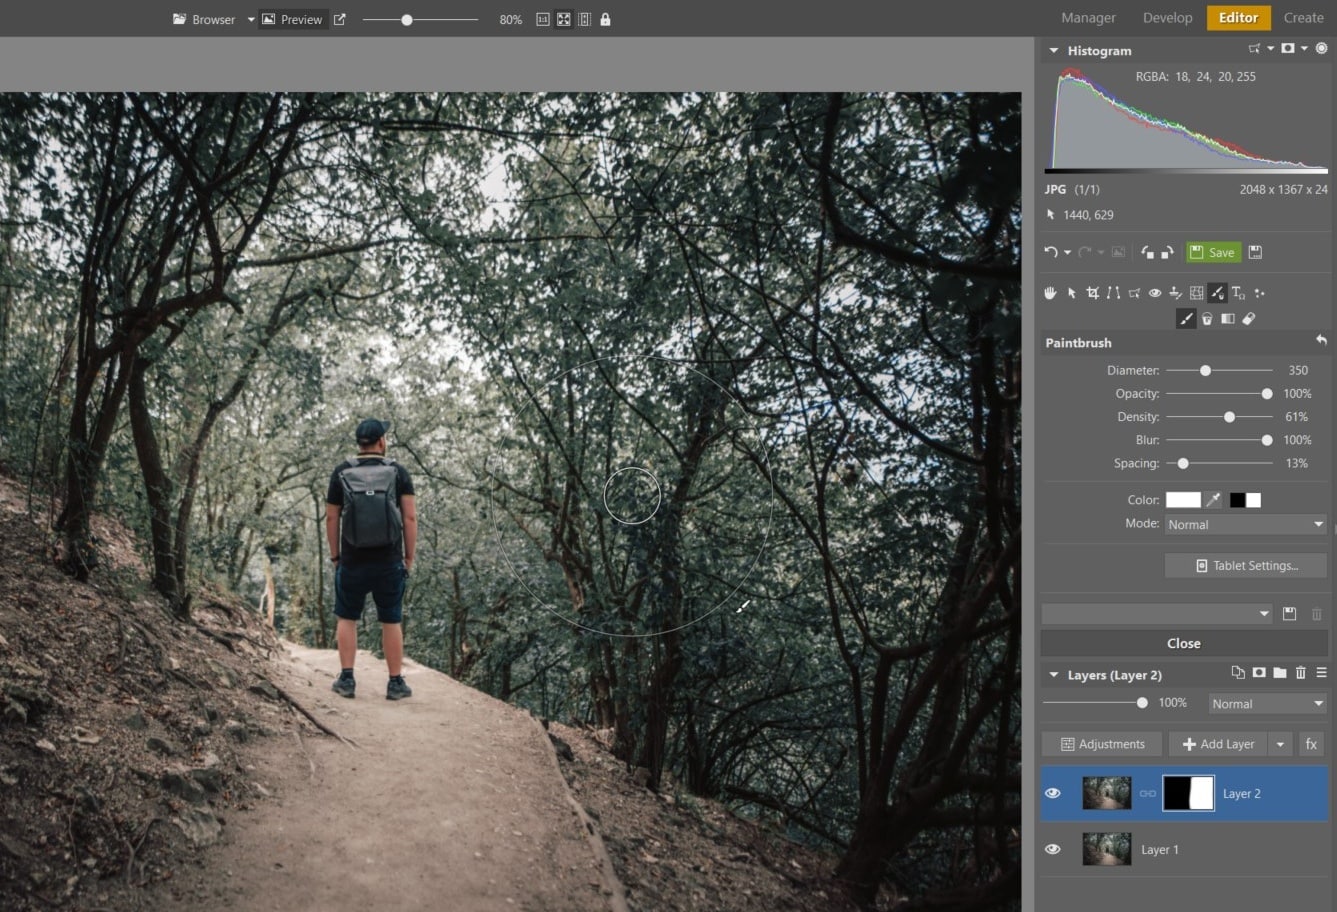
Click into the layer mask and then, in the drawing tools, click the paintbrush. Brush settings are a bit special when you’re editing a mask: they make it very easy to switch into a white or black brush. Now use a white brush on the half of the flipped photo that should be visible. Make sure that the brush opacity is set to 100%.
Masking one side of the flipped photo.
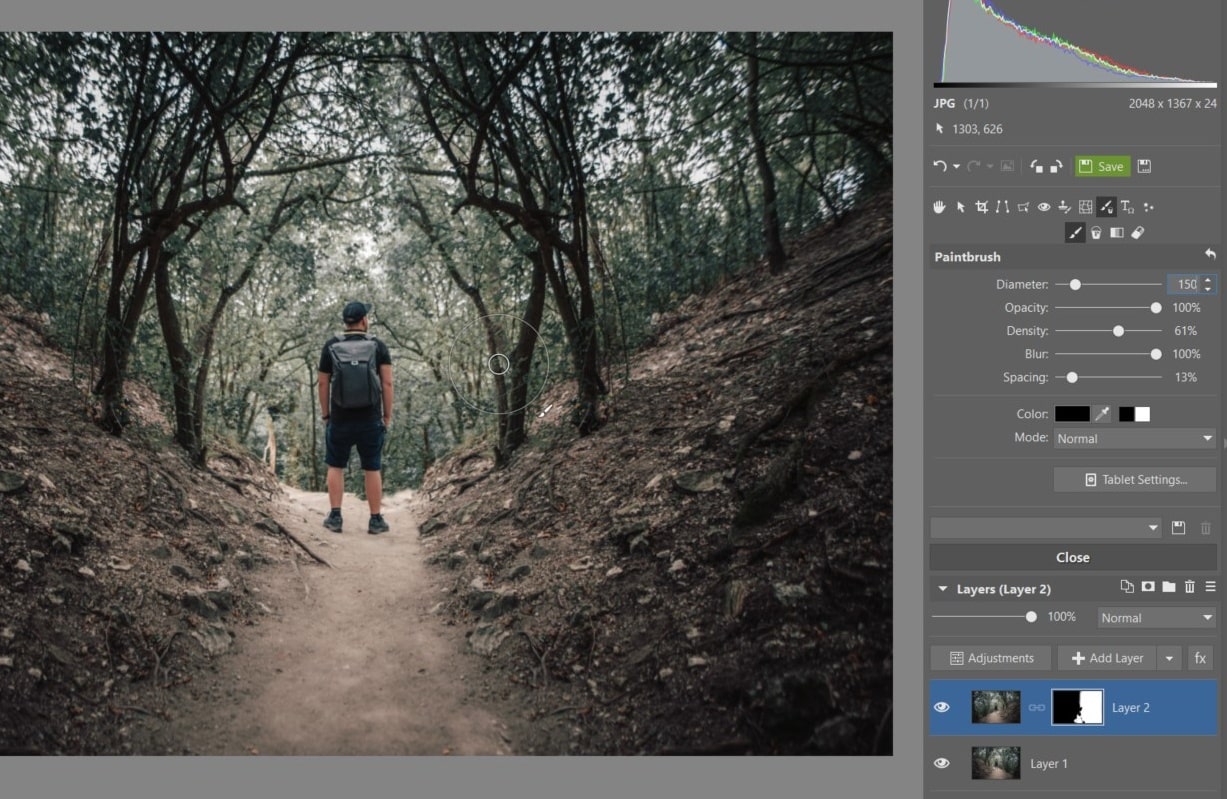
Detailed Masking and Retouching
Now comes the most time-consuming part of this whole edit. You need to mask half of the flipped photo. But not precisely half. That would be too easy. If there’s a person in the middle, keep “their” part of the mask black—you don’t want them mirrored. Also check how things flow into each other in the middle. Sometimes mirroring can produce distracting “kaleidoscope” patterns.
Masking takes a little while.
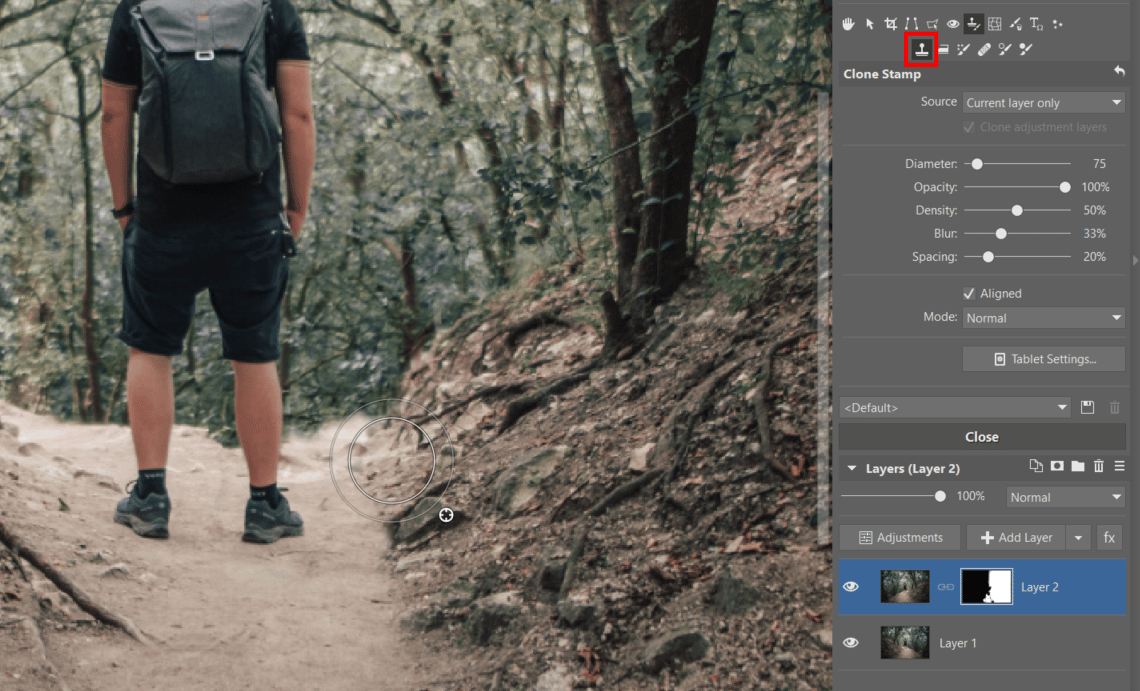
Now you’re almost done—you’ll just need to patch up some details. If there’s anything that doesn’t look right, you can add or remove minor things using the retouching tools as usual. For example in this case there was a strange stair-like formation right in the middle of the path, and it was better to let the two sides flow into each other smoothly.
Wrapping up with some retouching on the details.
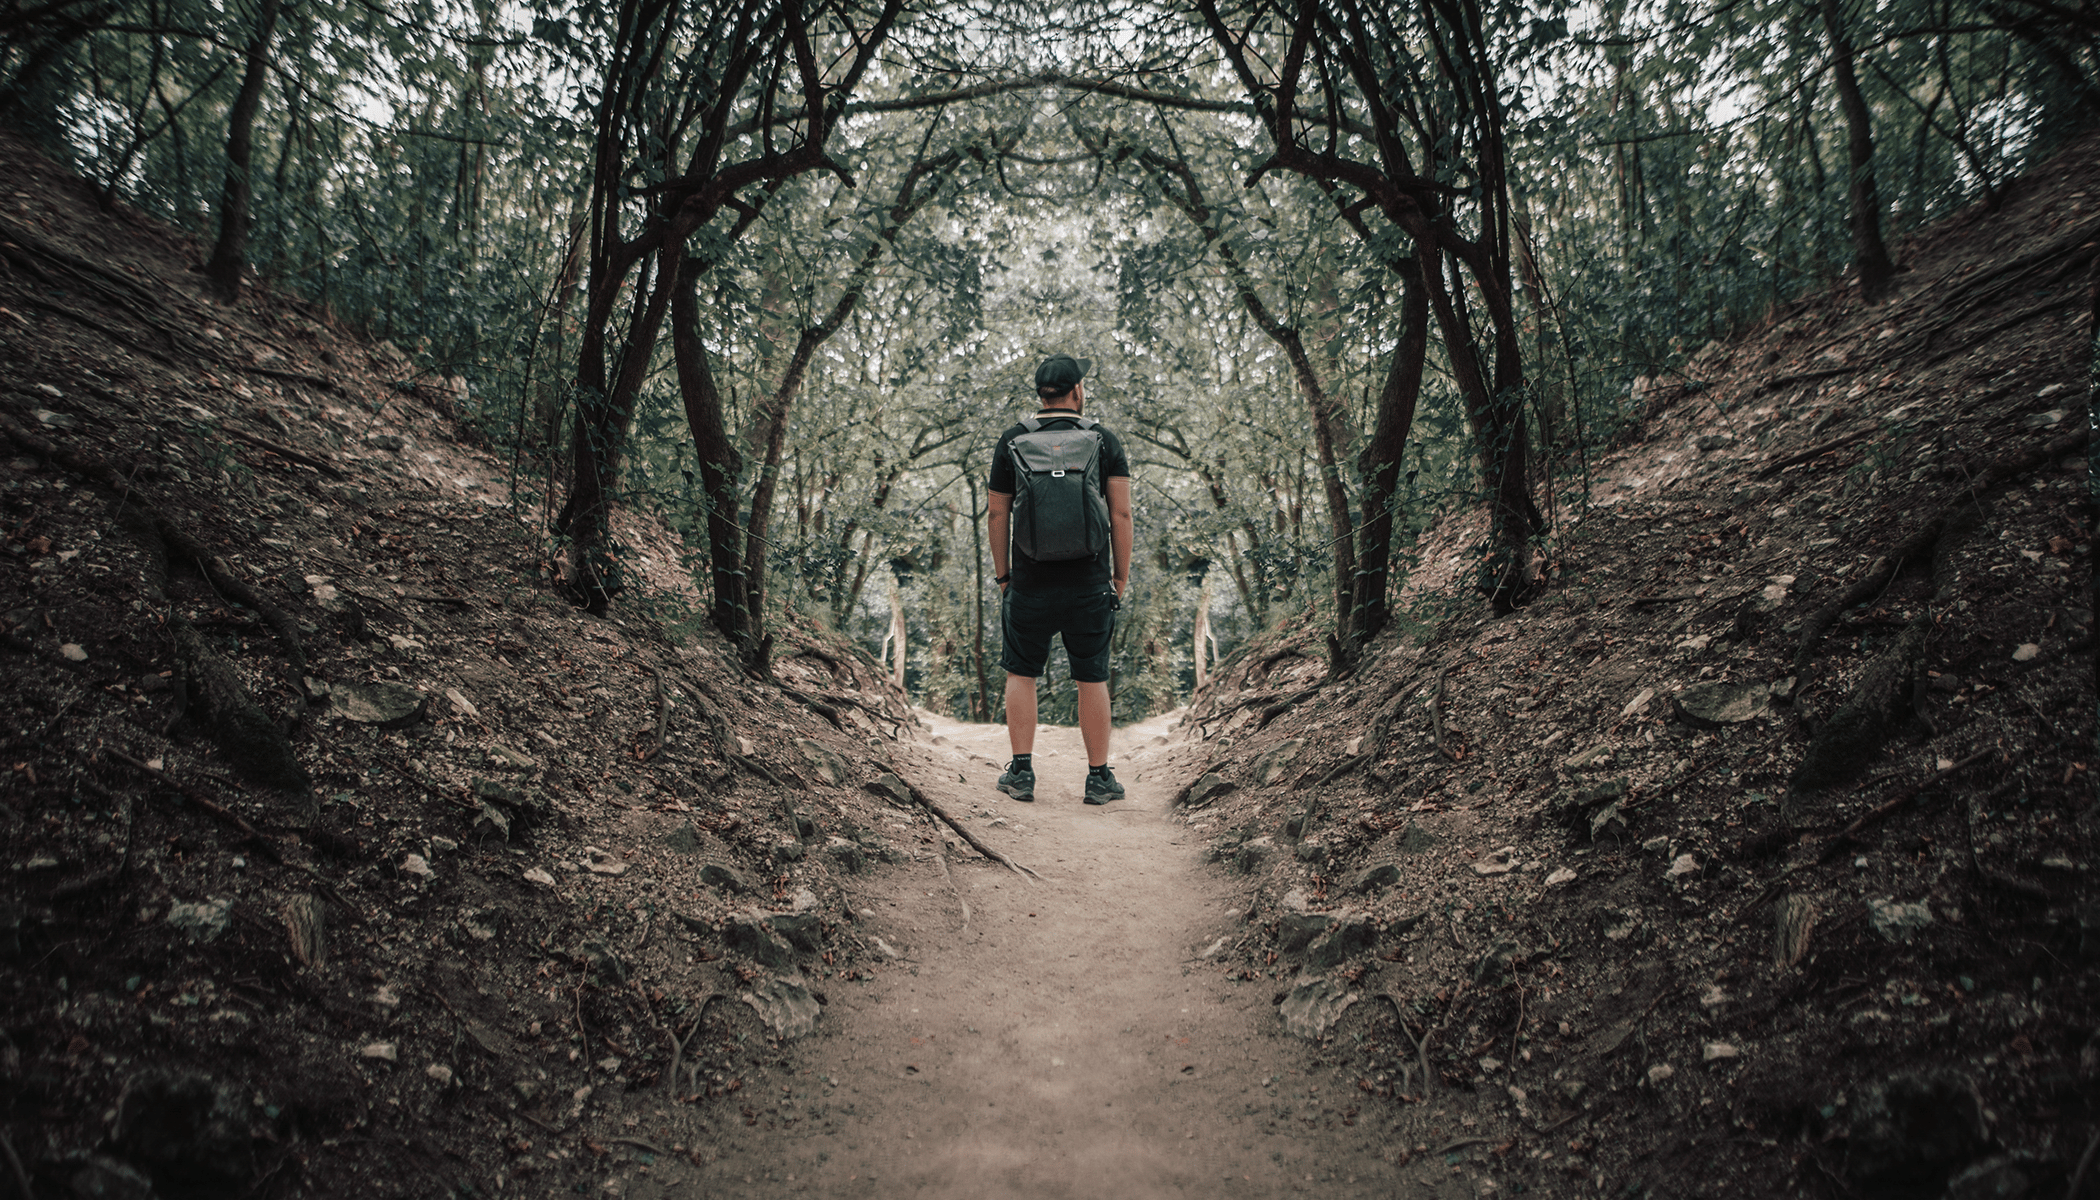
In our example, my trickery has produced a path in the middle of a valley between two slopes. It doesn’t look very typical, but it definitely does look interesting. As far as the treetops go, I have to admit that they’ve formed a strikingly unnatural formation at the top. What you would do with that part is up to you. You might leave the mirroring on purpose, or you might use retouching to make the branches flow together more naturally.
And we’re done!
Symmetrical Branches Are Just the Beginning
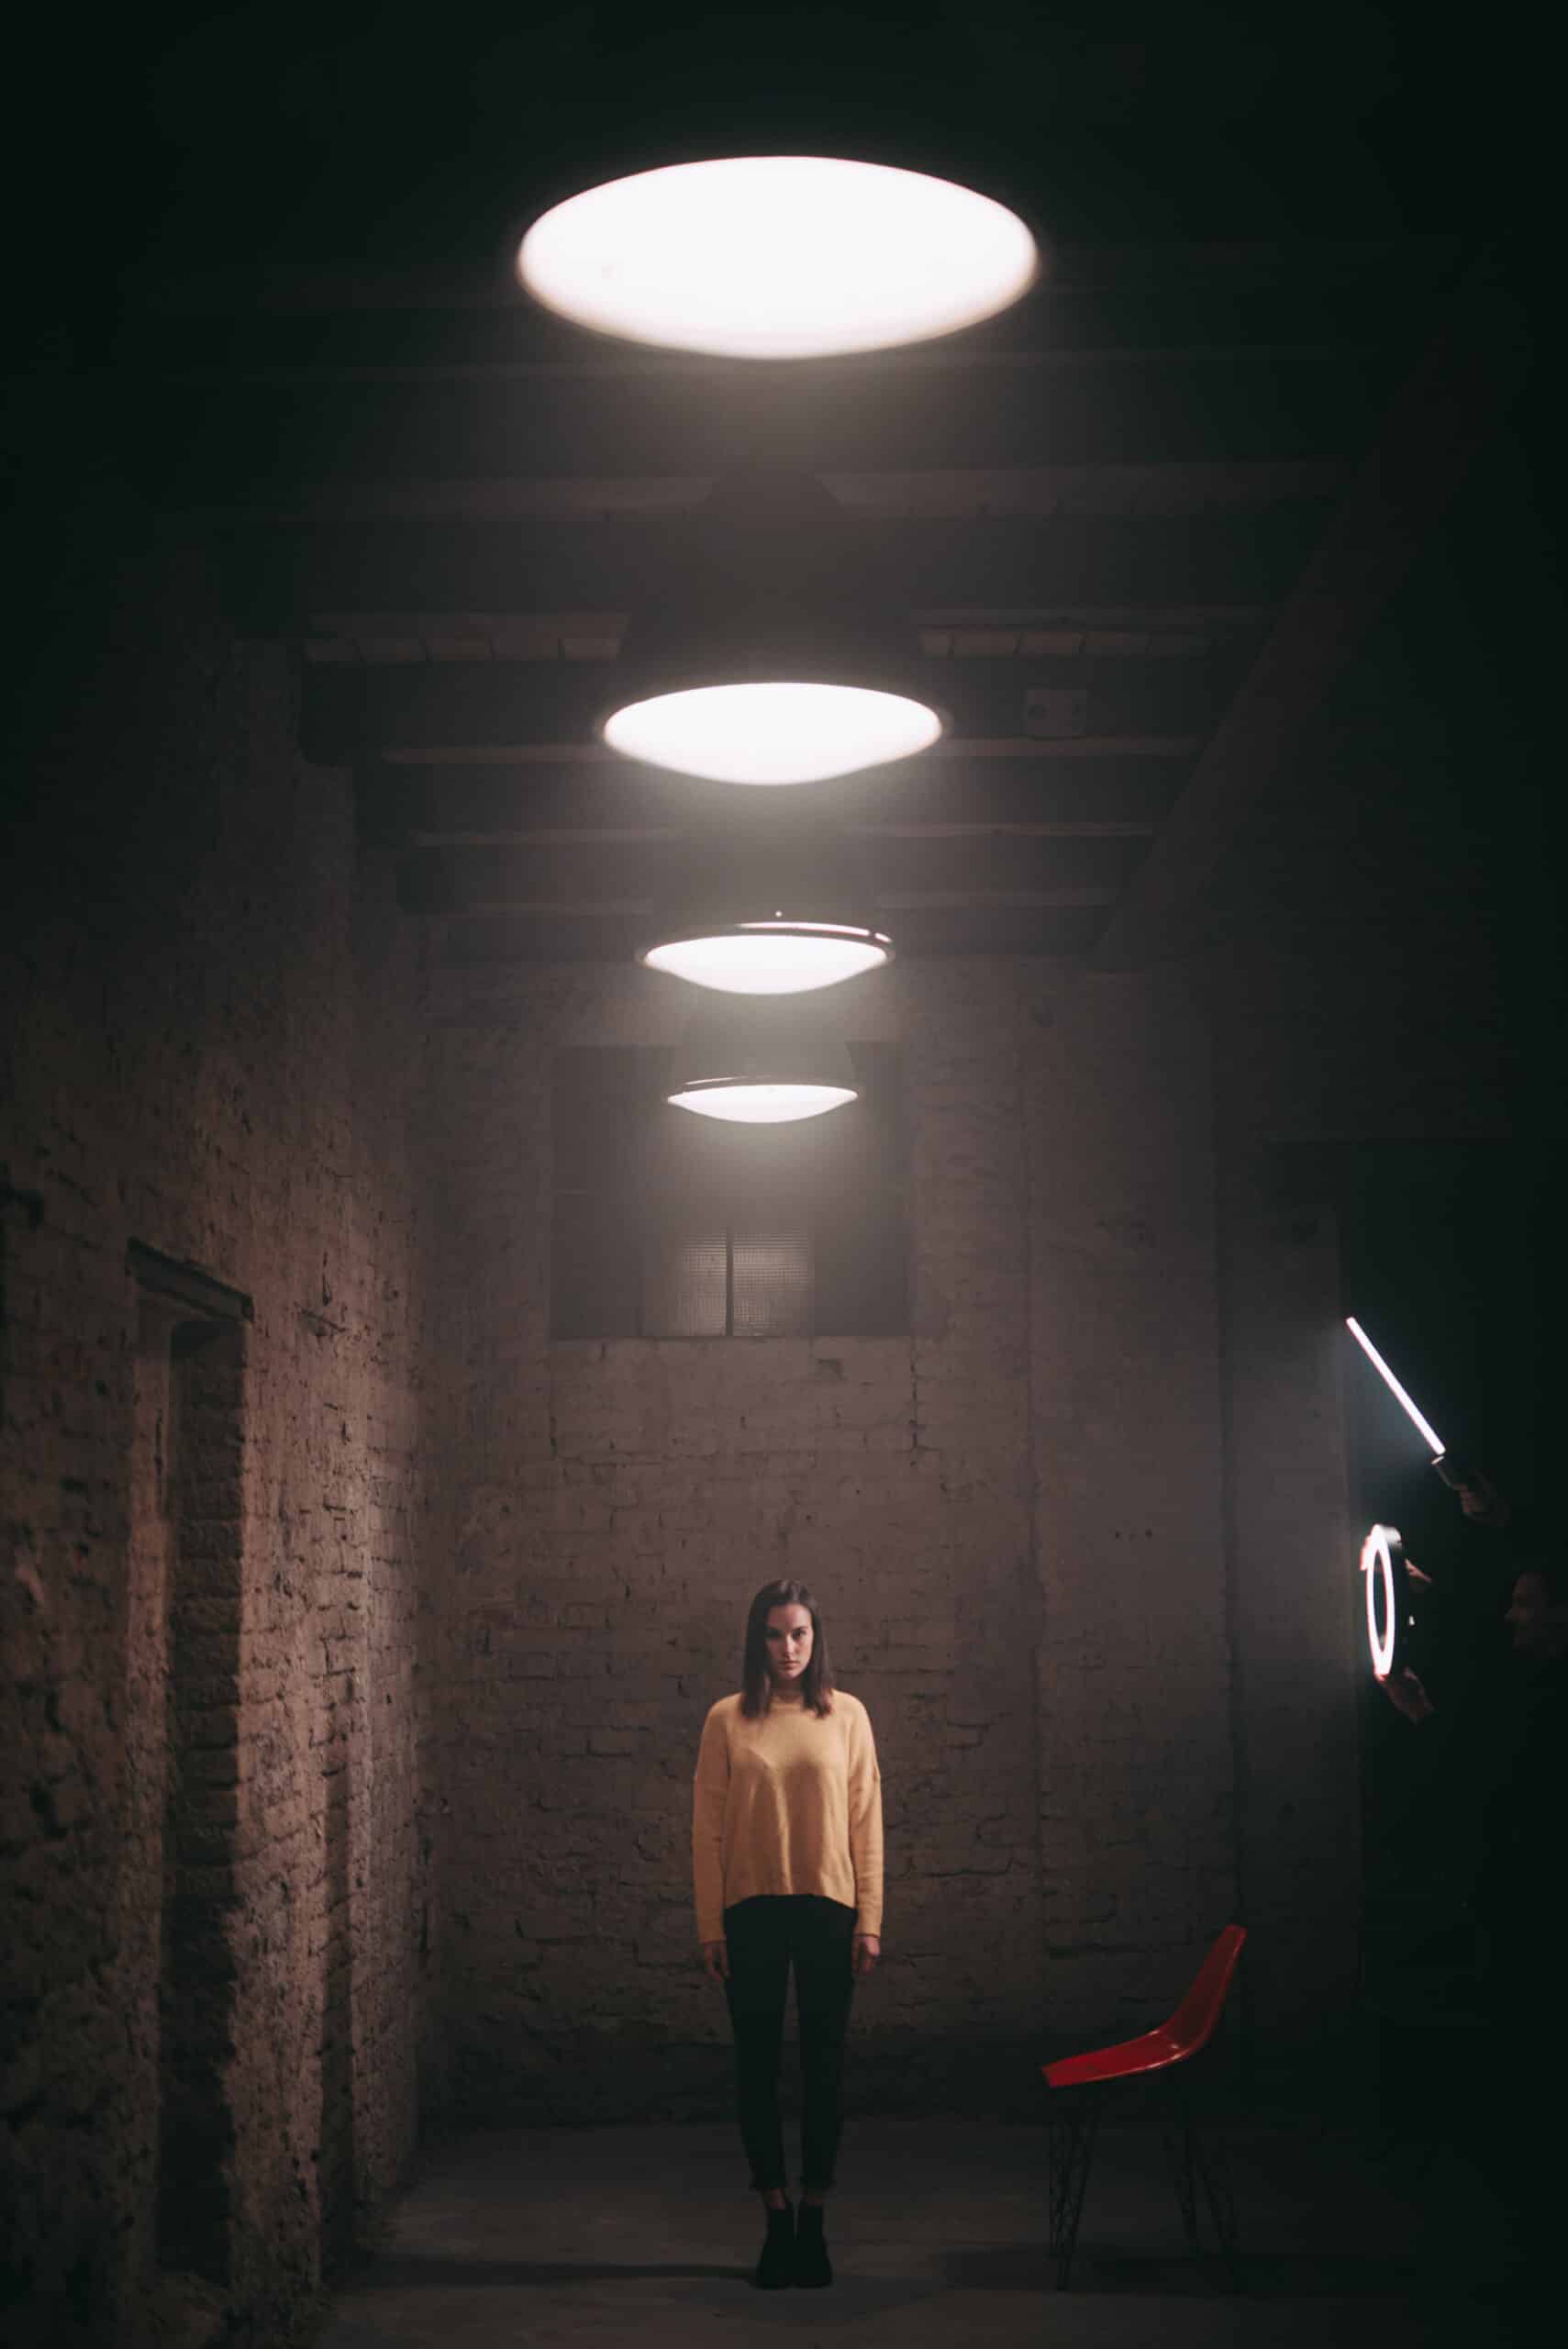
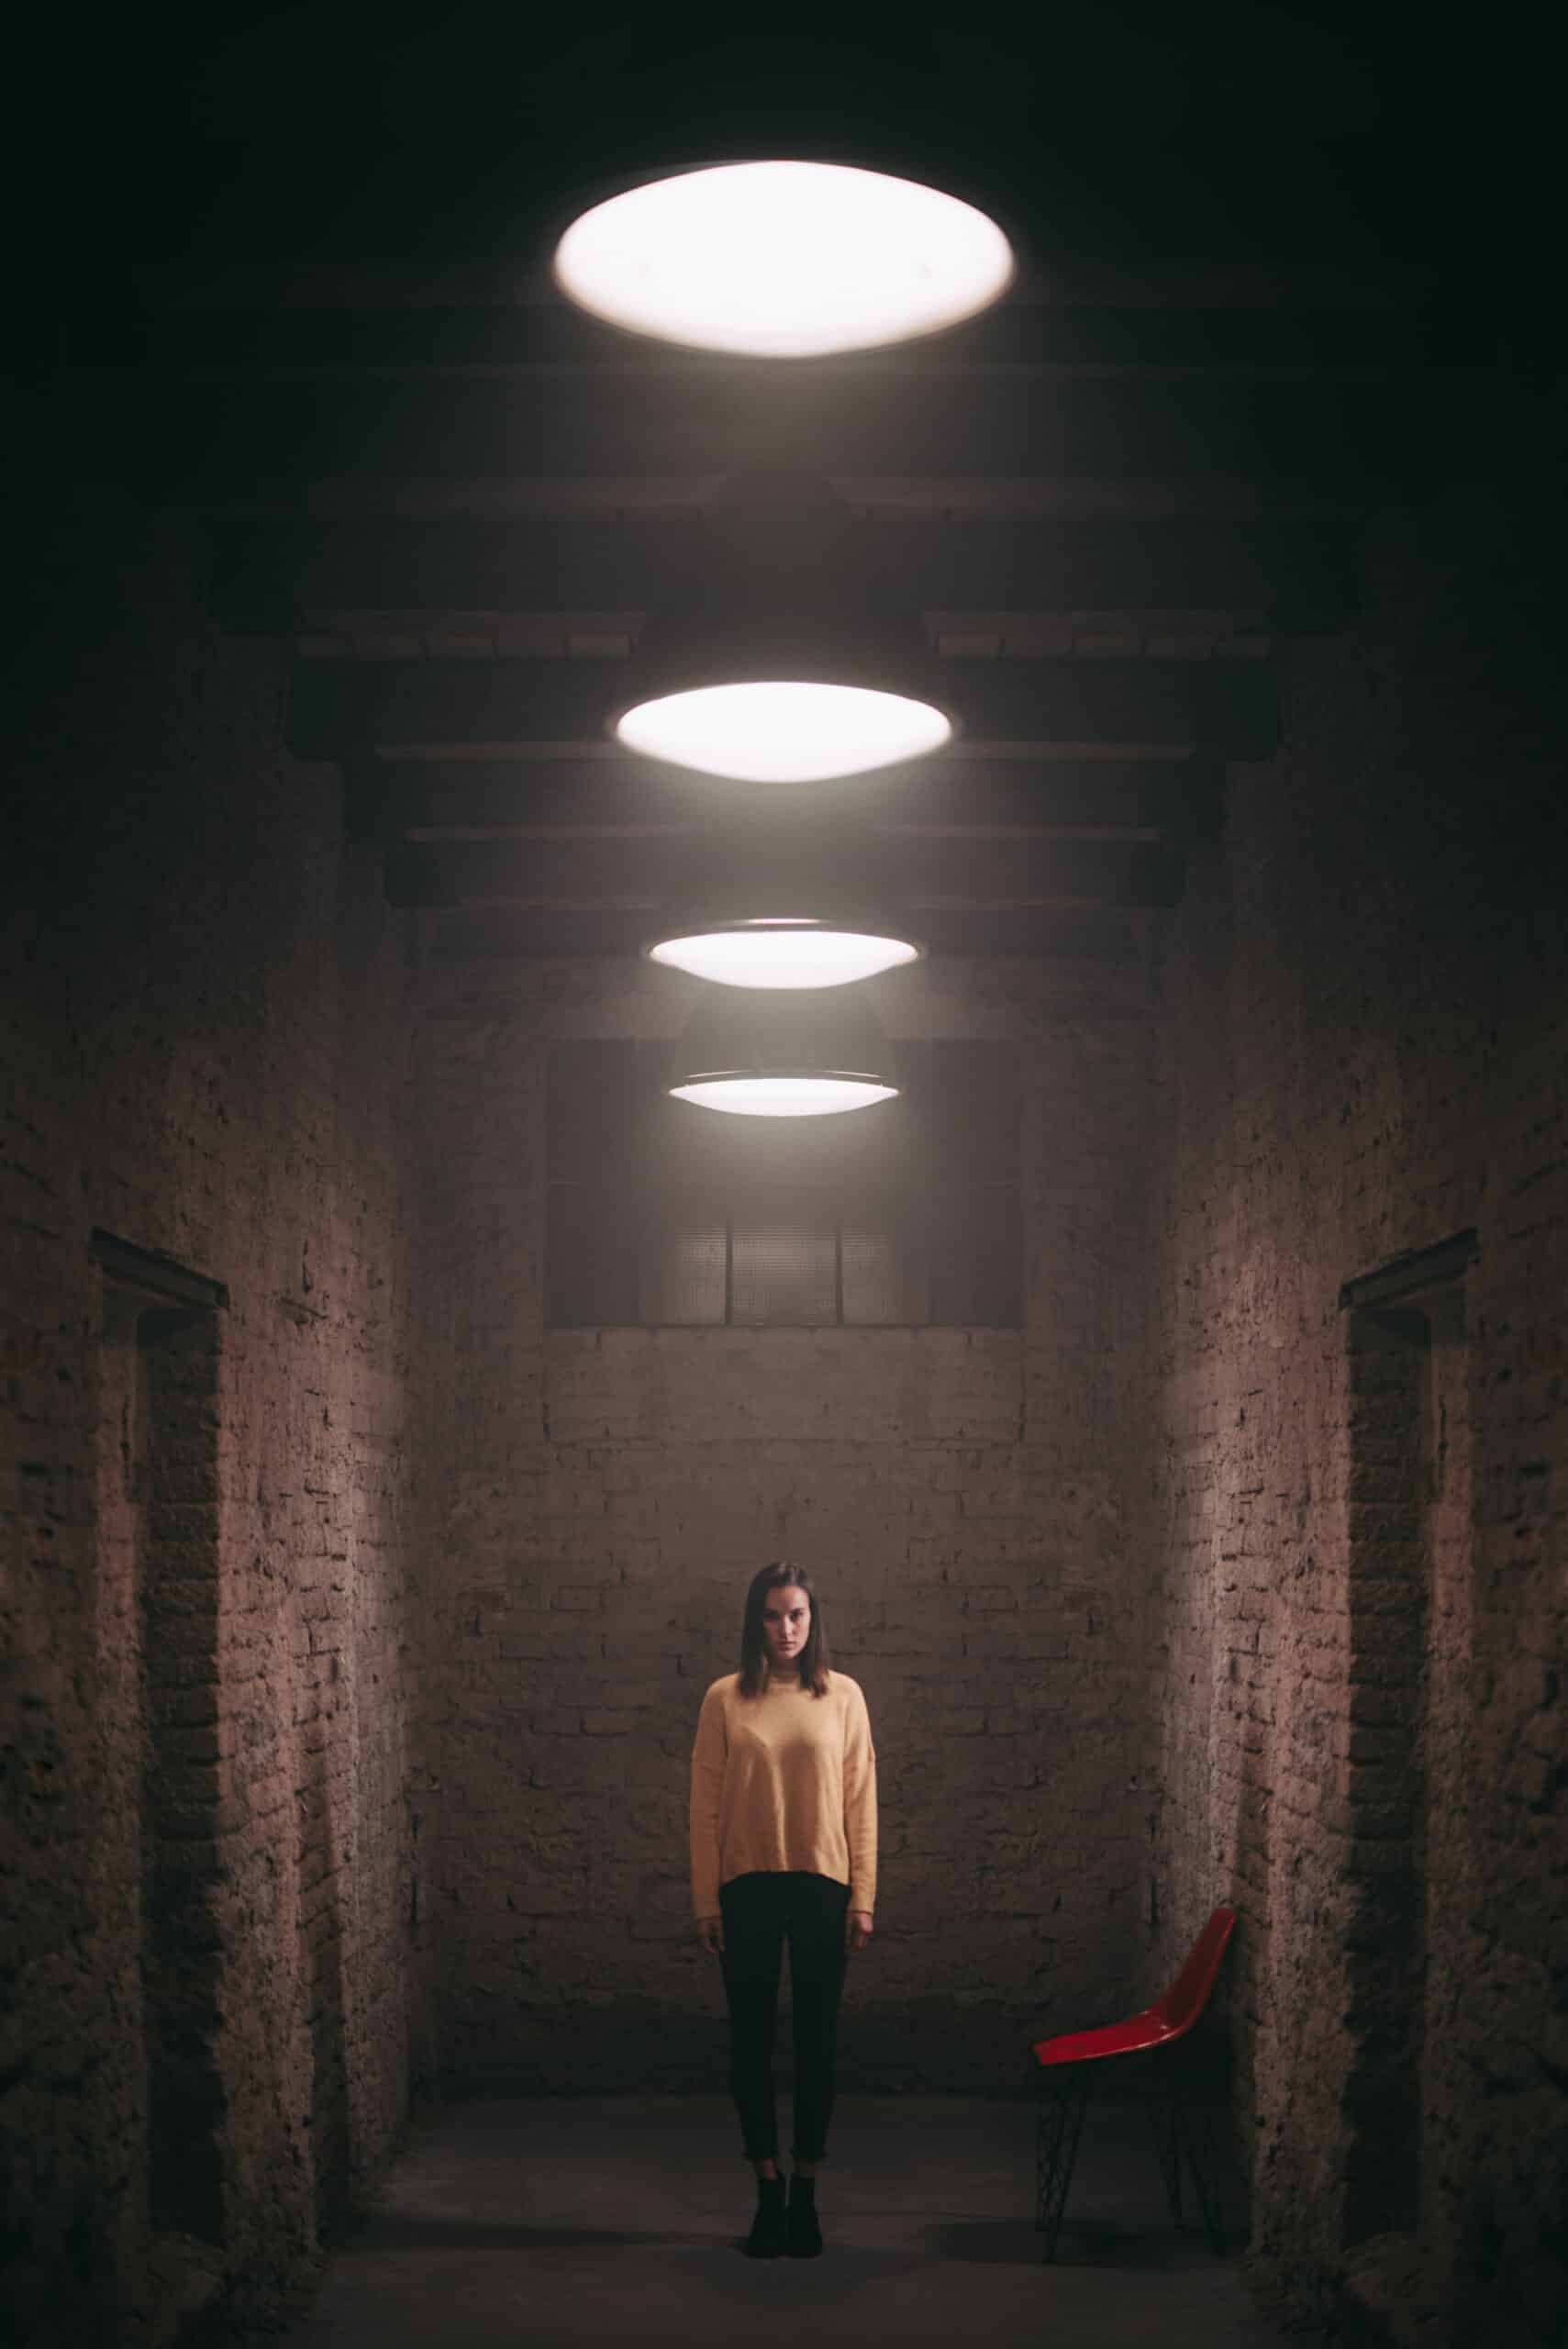
Many of you have asked us how we created the symmetry in one of the photos from our article about shooting with a ring light. That edit worked fundamentally the same, and this was a great example of a photo that was just begging for this edit. I already had mirroring in mind when I was taking the picture, and because of that I tried to keep a number of the lights, and the composition overall, as level as possible.
I most love taking pictures of people. Weddings, portraits, graduation photos, balls... I am always in search of backlight, but I enjoy various types of lighting and mostly like to use shorter lenses. I love my Nikon, my guitar, and a kebab. You’ll find my photography on my website or on Facebook.

There are no comments yet.