How to Photograph the Moon
The moon has been fascinating people for centuries. And photographers are no exception. It attracts their lenses in all of its phases—not to mention during eclipses. But moon photography has its specifics. Learn how to photograph the Moon and configure your camera, and what to watch out for.
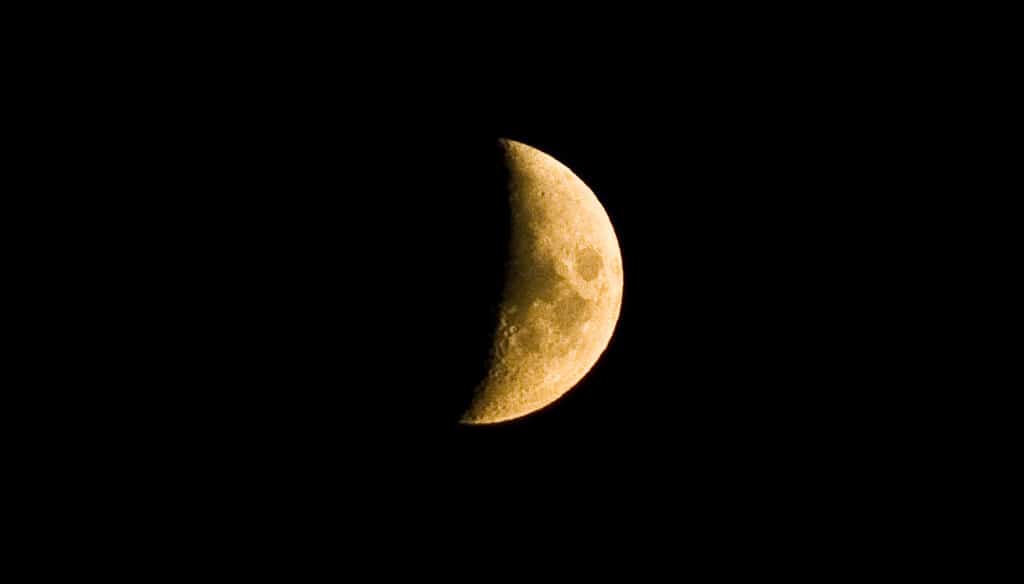
The moon is unusual and mysterious at first sight. This shining body on the horizon, with craters and unevenness that you can see with your naked eyes, is magical for many. Especially when they see it in all its glory.
Choosing a Phase
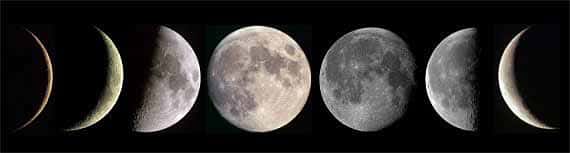
There are several phases to choose from in your moon photography:
- New Moon—Here the Moon is invisible, since the sun is shining on its “dark” side and it’s roughly on the path from the sun to the Earth.
- First Quarter—In this phase you see the moon in the shape of a big letter D
- Full Moon—The whole disc of the moon is visible
- Last Quarter—In this phase you see the moon in the shape of a a big letter C
Each of these phases has its magic; a small moon crescent captured in a dark blue sky, or a large disc that is so close you could reach out and touch it. Both forms have something to say for themselves, and due to its constant changes, the Moon is a good subject for long-term photography projects, which can produce both interesting individual pictures and good series.
However, people have forever been drawn by the view of the full moon, just like gazing into fire. And we have to add that the full moon has a quite specific effect on many of us, especially those of us whom it won’t let rest—perhaps it awakens our werewolf ancestors?
A Point-and-shoot Is Enough
But back to reality. Photographing the moon is fairly simple, and it’s not even very equipment-dependent. You might say that you can photograph the moon with any old camera that lets you set the exposure length. It doesn’t have to be a DSLR; a compact that offers exposure modes is enough. If your digital doesn’t offer this option, don’t despair.
There’s also the option here of using one of the creative exposure modes—you’ll generally find them on the exposure picker under easy-to-understand icons, or you can choose them directly in the menu, where there’s also a short description of each mode or help on when to use it. So in general you can use every type of camera out there; the only condition is that you have to be able to set the exposure length.

You’ll Need a Tripod
Since you need to work with long exposure times in night photography, a tripod will be a necessity. In theory you could use a stabilizing beanbag (or rice bag) as an alternative, but in practice if your lens is pointed at the sky, then your viewfinder will normally be pointed at the beanbag, which won’t work. Here the owners of cameras with flip-out displays are at an advantage.
The main reason for using a tripod is to eliminate motion blur caused by standing uncomfortably to point towards the moon. It’s not so much due to exposure length—well-chosen exposure values (see below) will give you around 1/200, which is not too long. However, you’ll usually be using the longest lens length, and with your hands pointed upward, it really is hard to keep your camera from shaking.
When using your tripod, don’t forget to turn off image stabilization, or at least switch it into a mode that’s customized for shooting from a tripod. Otherwise your pictures will probably be unsharp due to the motion of the lenses within your lens assembly, or of the camera’s sensor.

How Should You Expose?
Configuring your camera right is equally important. Generally for night photography it’s recommended to choose a lower sensitivity. That’s because long exposures lead to digital noise, and while it’s unnoticeable during normal photography, it’s not ideal in combination with the noise caused by high ISOs.
You can easily go wrong when configuring exposure; moon photography is specific in that scenes contain huge differences between lights and shadows. So it’s good to make use of spot exposure metering, which either works with the area around a selected focusing point (usually on DSLRs) or takes into account the center of the viewfinder (about 6–8% coverage). You can’t go wrong with a little added EV, to make the moon bright instead of pale.
If you use average metering, it will take the whole scene into account… and most of it is dark. So it will set a long exposure and give you a totally overexposed moon. Use the histogram or the blowout display in your camera to make sure you get the right exposure.

White balance is not a problem, and you can leave it in automatic mode, but on the other hand you can also experiment with using different white balancing to tint the moon. And of course, you can edit white balance later in Zoner Studio.
Auto-focus, meanwhile, may not work; there’s not enough light for it to focus on the moon correctly. Try aiming the focus point at a place in the moon where there’s a visible gradient. Still, focusing isn’t actually as much of a problem as it might seem.
There are no comments yet.