How to remove glare from eyeglasses and other glass objects. Use the Editor Module, masks, and layers.
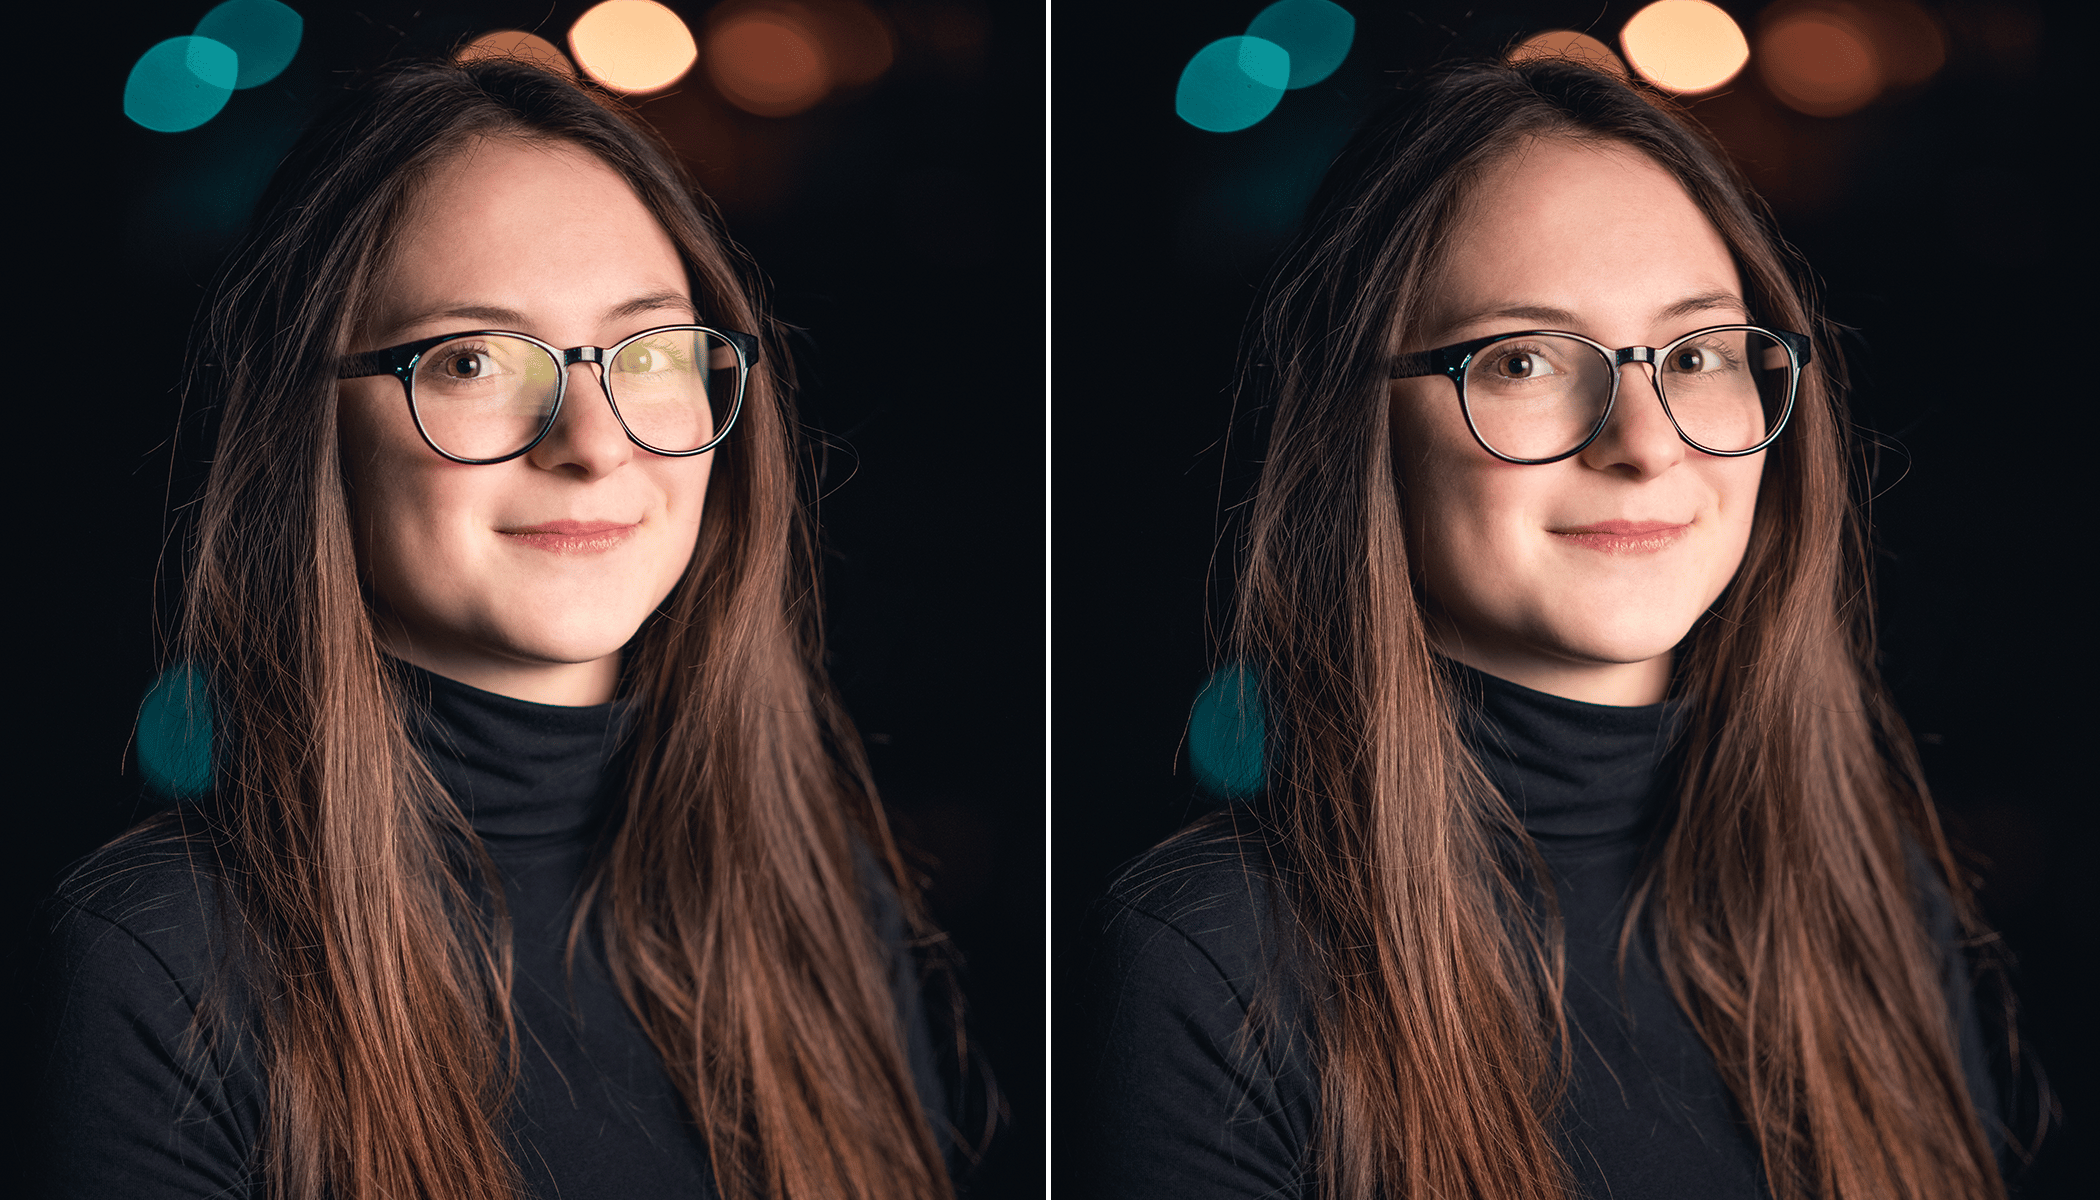
When taking pictures of people wearing glasses, you’ll often run into problems with glare, making it difficult to see your subject’s eyes. Of course, it’s best to prevent glare during the actual shooting. However, it’s not always possible and you’ll have to either accept it or remove it in post-processing. If you choose the latter option, this tutorial is for you. We’ll be using the Editor Module and layers in Zoner Photo Studio X.
You’ll also encounter unwanted glare when photographing subjects through glass, such as animals at the zoo or a subject through a window. It’s important that what was originally beneath the glare is at least partially visible. In this case, the glare is most likely able to be removed. Of course, Shooting in RAW will make the job easier.
You will need the Editor and layers
As you will soon see, working with layers isn’t so complicated. Layers make it possible to do more complex edits.
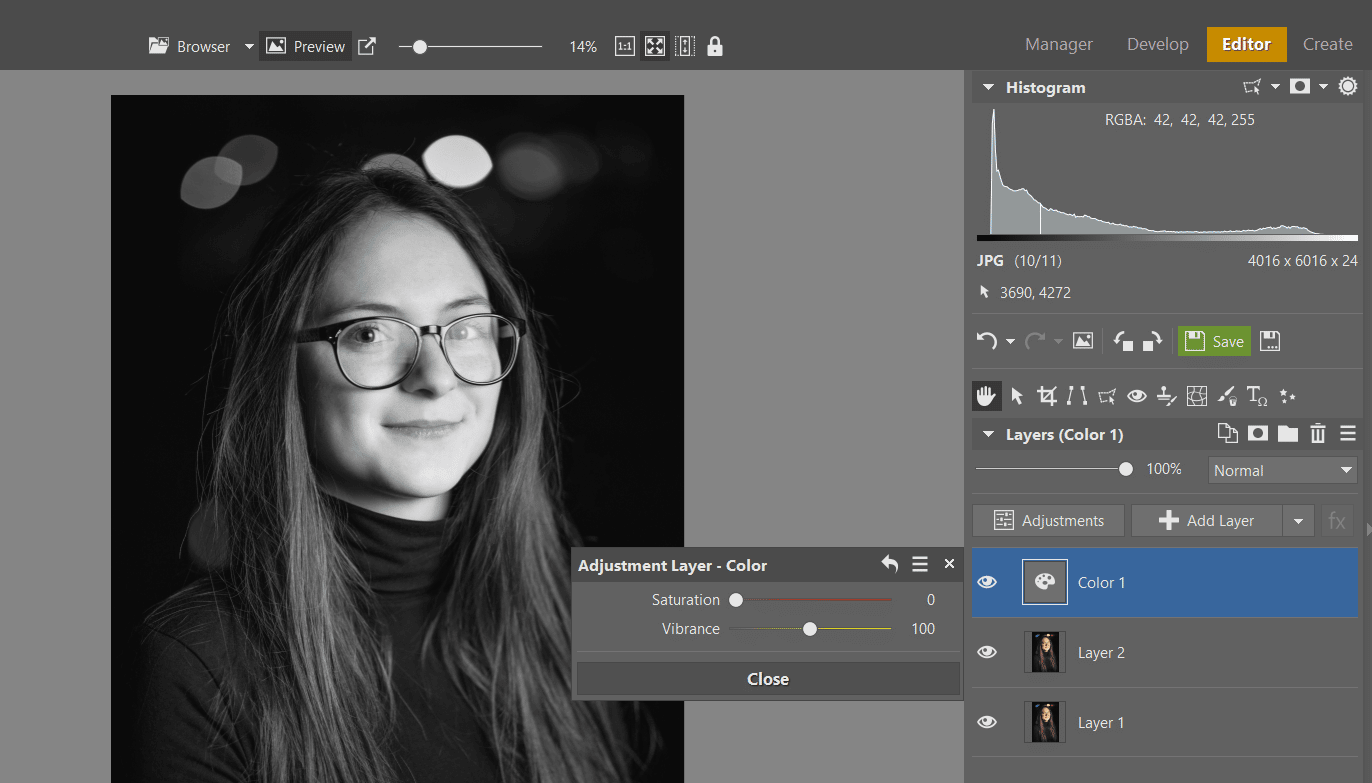
Open your photograph in Zoner Photo Studio X and switch to the Editor Module. To be safe, duplicate the first basic layer, Layer 1. Since we are only editing lightness in the first part, we won’t be dealing with color for now. Click the arrow next to +Add Layer and select the option Color. Then, lower the Saturation to 0.
Use curves and masking to reduce glare
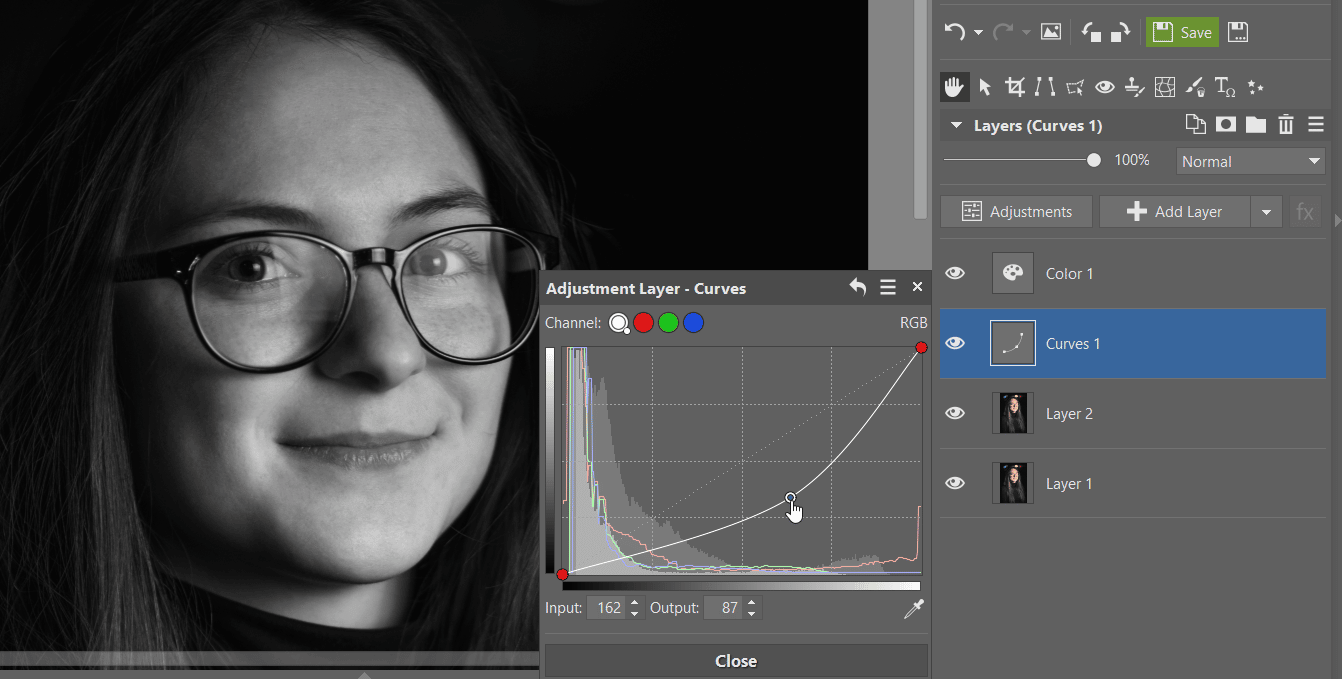
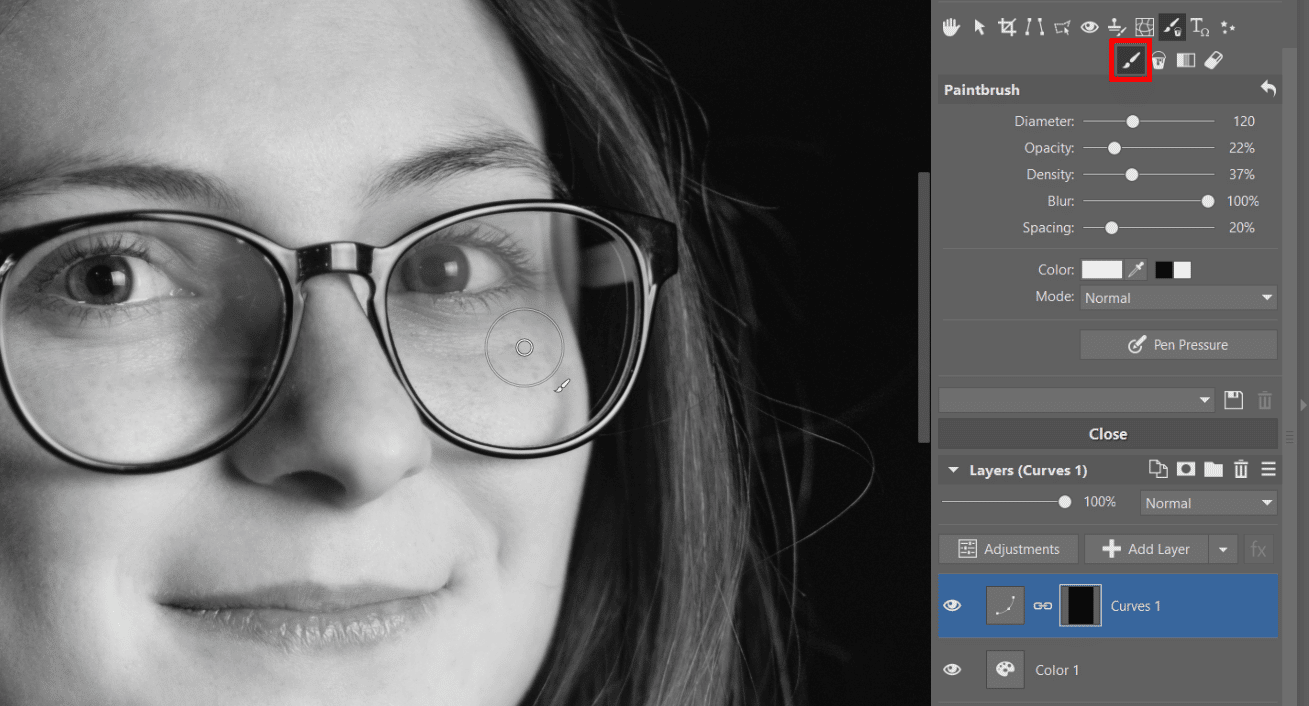
Now, add a Curves layer and pull the curve down so that the area beneath the glare is exposed as much as possible. The rest of the photo will then be underexposed.
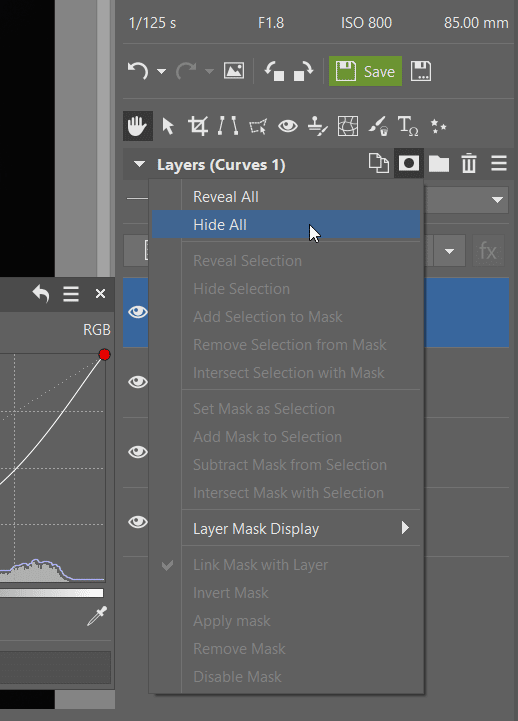
Then, add a mask to the curves layer using Mask -> Hide All.
Adjust lightness and contrast using masks
Next select the Brush (B) tool and use white to mask the areas under the glare, where it needs to be darkened. It is better to use lower opacity and higher blur so that the masking will be as accurate as possible and won’t have harsh transitions. You can add another Exposure layer with higher contrast if, in some areas the lightness is right, but contrast is missing. Again, mask the area in the same manner as before.
Adjust colors
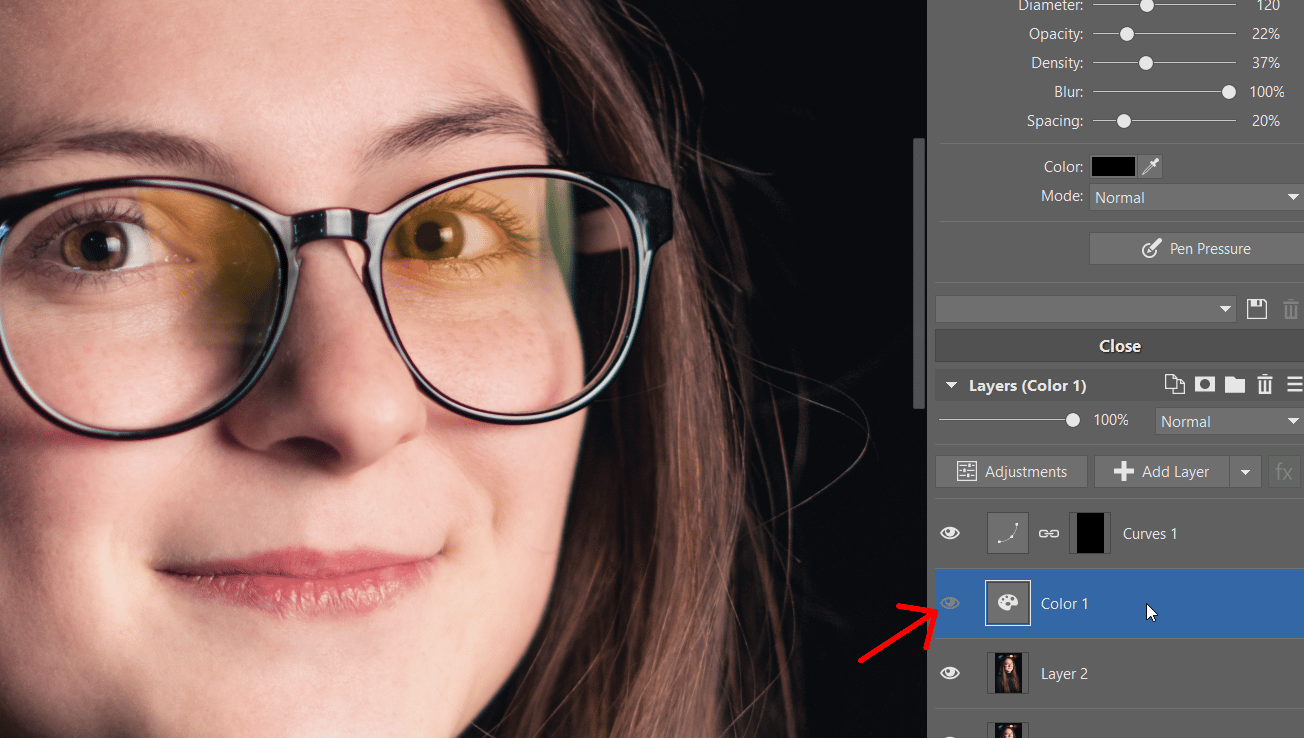
In the next step, we move to colors. After hiding the Colors layer that made the photo black and white, you’ll find that the colors are completely off. Many shades have appeared that don’t fit with the rest of the photo.
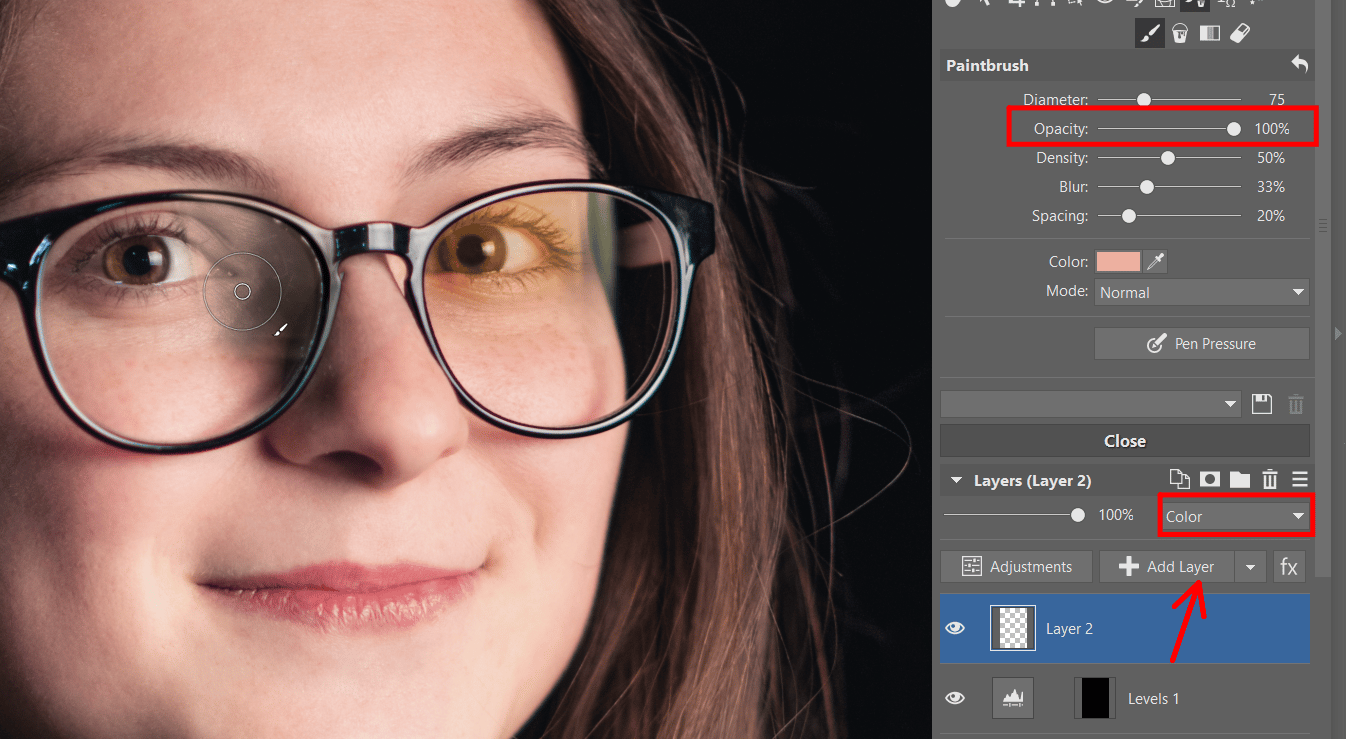
Click +Add layer and again choose the Brush (B) tool. This time we won’t use black and white. Select the Color mode for your layer. For coloring specific areas, use the eyedropper (Ctrl) to borrow colors from surrounding areas where the colors are right to paint the previously glared areas. This part of the editing process may take a bit of time.
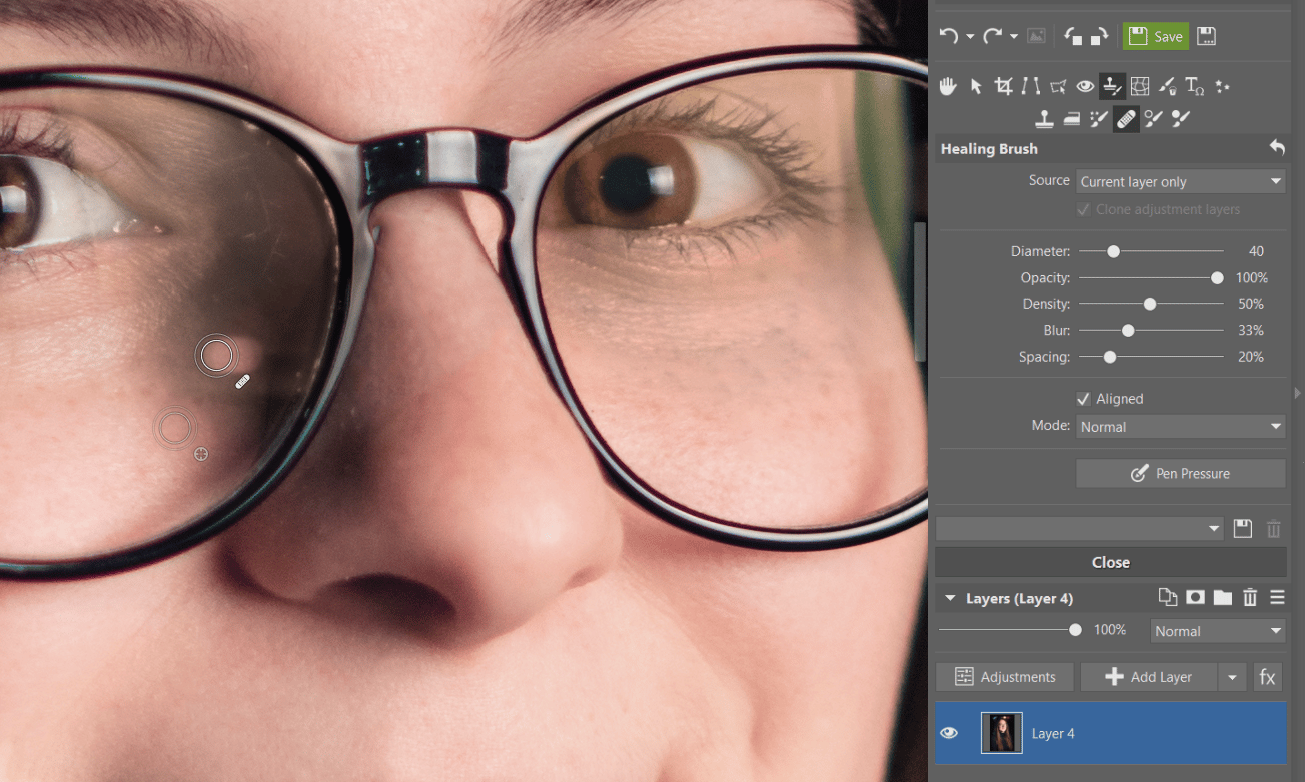
Retouch imperfections
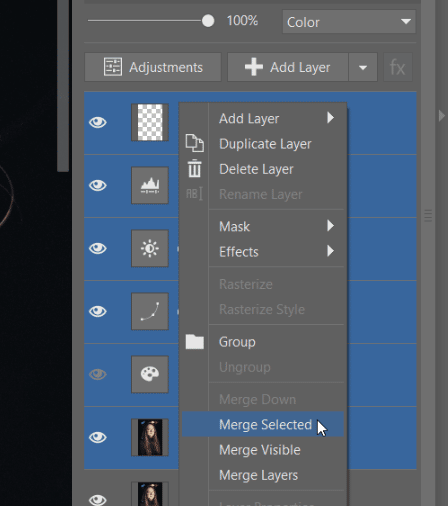
If your coloring is complete, but visible imperfections remain, you may need to retouch the photo. To be safe, duplicate and merge the layers that you’ve worked with up to this point. This way, you’ll be able to retouch in a single layer.
TIP: Merging layers is not the only available option. You can also leave the layers separate and in the retouching tools choose Source: All layers.
Start with the Healing Brush (J) and gradually blend harsh transition lines found near the glare and other distracting items in the image. In some cases, you’ll need to use the Clone Stamp (S) to make fine exposure changes using the Dodge and Burn tools.
After the final retouching, you can save your photo.

Take your time and no one will notice a thing!
The result may not be perfect and upon closer examination, you may still find small glitches. But if you’re preparing your photo for printing in standard formats or for sharing on social media and take extra care, no one will notice a thing. And most importantly, glare will no longer distract from your photo and you will be able to see your subject’s eyes.
Download Zoner Photo Studio X free for 7 days and remove distracting glare from your photos.
There are no comments yet.