Make an Easter Greeting Card with Your Own Photos

Spring is in the air and Easter is coming! Do you want to brighten your loved ones’ day? Send them an Easter greeting card. Even better, make a customized card using your own photographs. It’s certainly a creative and unique way to delight your family and friends.
In this article you’ll learn how to:
- add borders to your photos
- add text to your photos
- use your photos to make a greeting card
Find the photograph you want, open it in the Develop module of Zoner Photo Studio X, and start editing how you’d like it to look. We recommend editing to bring out bright, green, and cheerful elements that go hand in hand with springtime. Family photographs, bunnies, tulips, spring flowers. Any type of photographer is sure to have photos like these available.

Nikon D750, Sigma 35 mm f/1.4 DG HSM Art, 1/100s, f/3.5, ISO 250, focal length 35mm.
When your photograph is ready, go to the Editor module.
Add and adjust borders
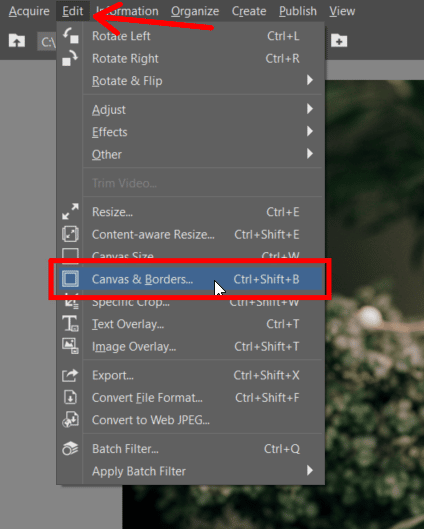
Now you can choose which border you like best. You find borders by clicking Canvas and Borders (Ctrl+Shift+B) in the Edit menu.
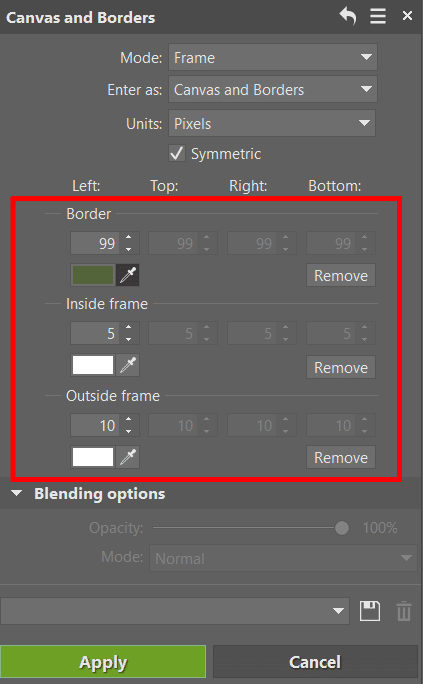
Now adjust the border according to your needs. You can add a simple white border, or any other color. You can add a double or triple layer to the border. Easily set how thick the border (or each line) should be. Similarly, you can easily choose colors – either a hand-selected color from the photograph using the Eyedropper, or a color from the color scale.
TIP: Use a color for your border that is predominant in the photograph. With a nice spring photo, this is usually green or other natural colors. Try using the eyedropper to select different places in the photograph to see what you like most.
Your border can be symmetrical, or you can set it manually according to the units you specify (pixels or percent).
After setting all the values, click Apply and your border is ready. If you use the Canvas and Borders function (Ctrl+Shift+B) again, another border will be added to the already existing border. If you want to edit the current border, go back (Ctrl+Z) and your settings will be saved as Last used. You won’t have to set it again. For other options to undo your work, we recommend working with layers.
Add text
Insert text using the T key, or by clicking Placement Tools->Place Text (T) below the Histogram. Enter the desired text in the field and then click in the picture. The text will then be added as a new layer.
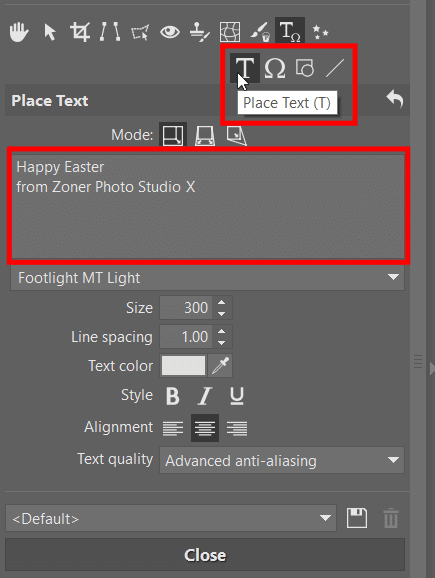
You can move the text around the image as well as enlarge it or make it smaller. You can adjust the text font, color, size, and other settings. You can also change the layer blending mode. Try Exclusion or Soft light modes. Exclusion is great when you need the writing to be black on a white part of the photo or white on a black part. In short, use it to make the writing visible in all parts of the photo.
TIP: You can apply various effects to the text such as shadows or light glow. Just right click the layer with text and go to Effects. Here you can change the appearance of the text as creatively as you want.
Add pictures
If you feel that there’s something missing in your photo, you can add additional objects to the photo. For instance, add another image in PNG format, such as a butterfly, Easter egg, or anything else you want.
Turning your photograph into a PNG image (with a transparent background) is simple. Learn how to do it in the article How to Create a Transparent Background. How do you then add this image to the photograph? Take a look at the article Five edits that every photo montage needs. Learn how to properly add objects to your photos.
Less is more
The only limit is your imagination, but don’t go overboard. Try to keep your card classy, yet beautiful. The photograph you include should always be, despite any additions or edits, the most important part of the entire card.

Send the card
Save your project. Now all you need to do is send the card to your friends or family. You can use the same process for your Christmas or Valentine’s Day cards, as well as cards for birthdays, weddings, birth announcements, and more! We here at Learn Photography wish you a wonderful and happy Easter!
Download Zoner Photo Studio X free for 7 days and create a unique Easter greeting card for your loved ones.
There are no comments yet.