Metadata Tokens
Explaining the terms metadata and tokens to someone who’s never encountered them can be tricky. The Zoner Photo Studio X Fall 2022 Update simplifies working with metadata. You may have previously encountered format strings, a function formerly found in many locations in ZPS X. Format strings were complicated codes that we have now fit into clear cells, called tokens, to make working with them more intuitive. Most importantly, you don’t have to be a computer programmer to set them up.
You can use metadata tokens when renaming files during Export. Click options to the right of the rename field and choose one of the predefined templates, or start typing and the options appear. Time captured, counter, and others are commonly used. If you want more advanced settings with more information details, click Format Metadata Tokens.
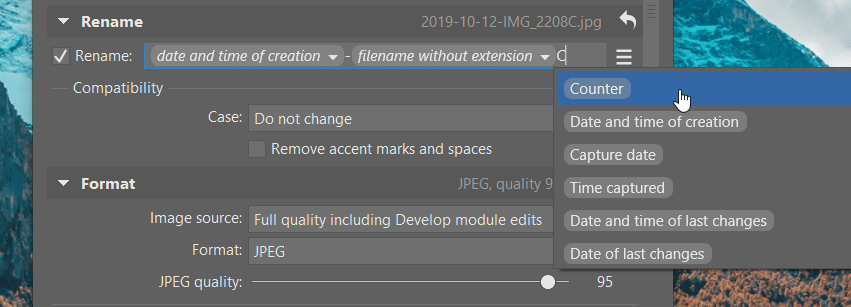
You can then choose exactly how the name should be composed in the window with all the photo information. Add tokens to Rename by either double clicking or dragging. Working with metadata tokens is intuitive because you can overwrite, click, drag, and so on.

Another place you’ll use this function is for information with photo previews. If you open a photo in Preview mode in Manager or Develop, you see certain information below a photo. This information can be customized to the last detail. Access these settings by clicking the Preview Options icon at the top right of the photo and then select Setup Preview Information.

You can configure what information is displayed when previewing photos in the window. The window is divided so that when you click in a certain field, you set what it should display.
You can also add additional fields above and below the photo, but be careful not to overdo it. Leave some space for the photo itself.
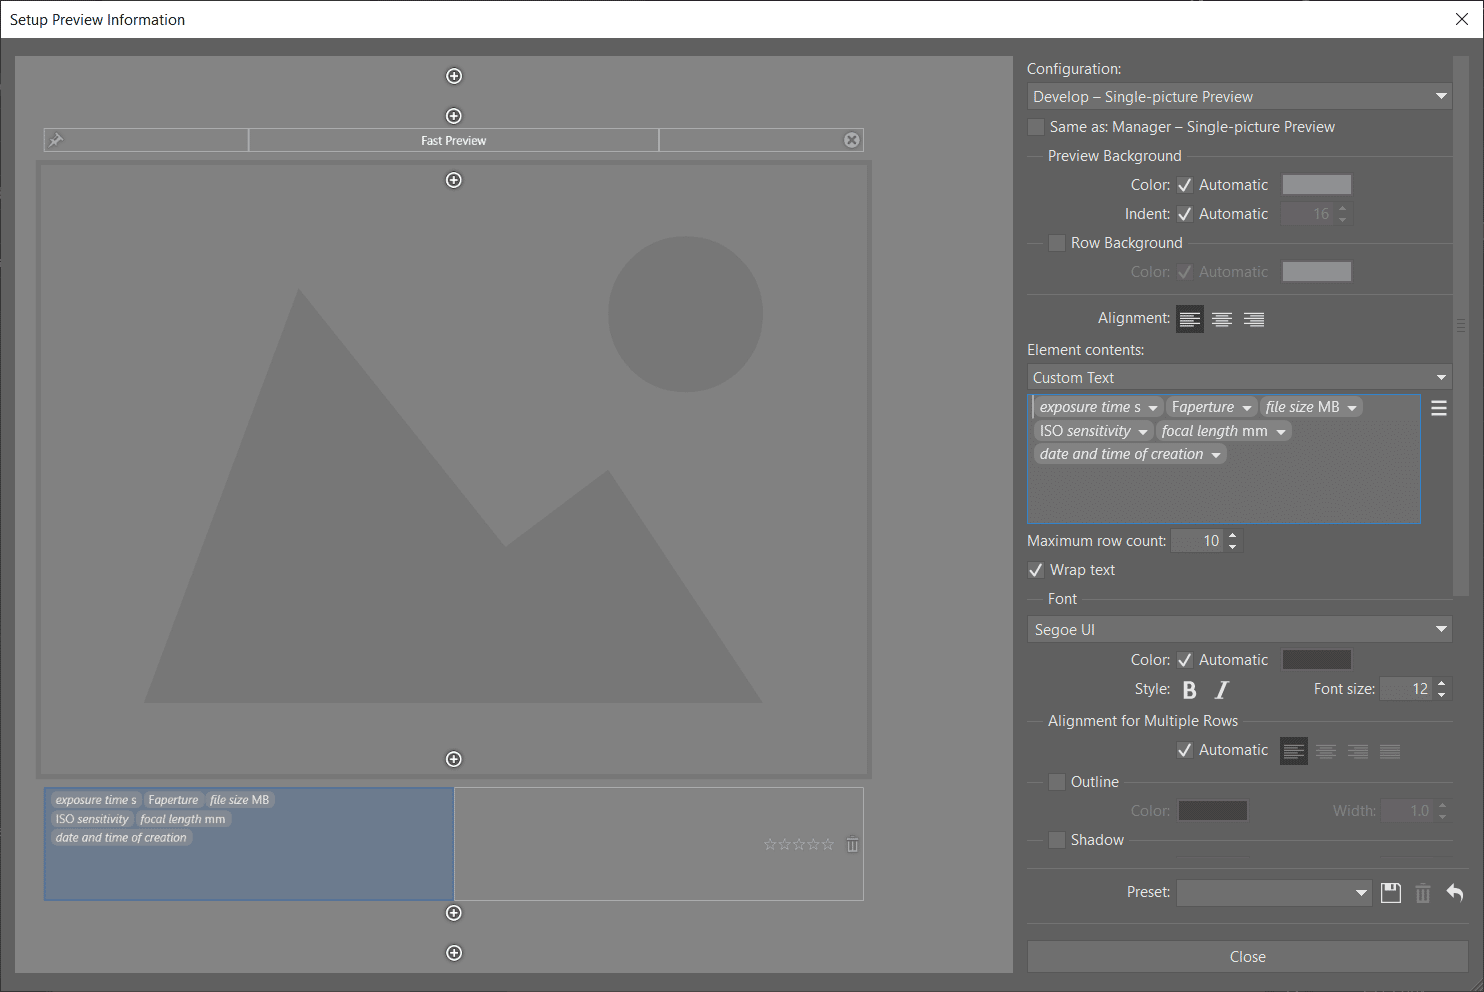
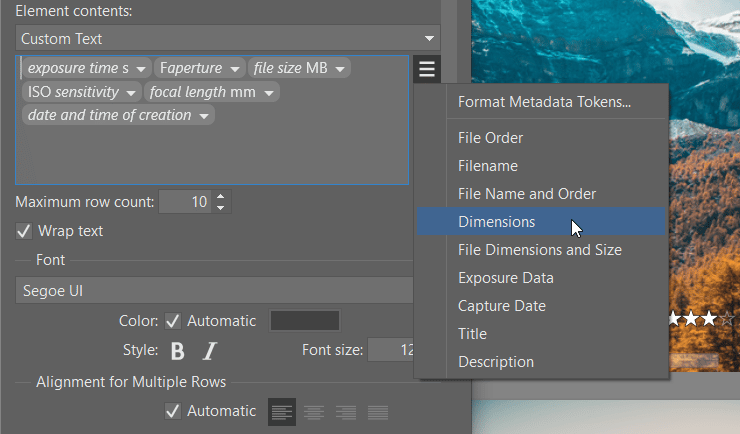
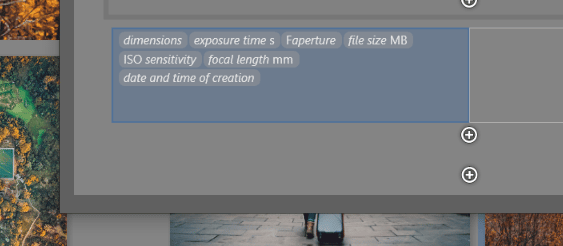
After clicking in a field (in this case, the bottom left of the photo) a set of options appears in the right panel. Of particular importance is the Element contents window where you decide what information is displayed below the photo. After clicking the icon for more options to the right of the window, several predefined token options appear which you can click to add. You can move these around, type in extra spaces, add separators, notes, … basically, whatever you want.
In this case, we selected basic exposure information for the first row and file information for the second row. This way, when viewing photos, we see at first glance how and when the photo was taken and how big it is. You see the changes you’ve made during setup, so you can quickly and easily customize the view.
We don’t want to put limits on your creativity. Working with metadata tokens is simple and you can quickly find your way around. You can now set up all your photos’ metadata to meet your needs.
If you don’t have Zoner Photo Studio X yet, remember you can try ZPS X free for 7 days.
There are no comments yet.