Photo Editing Tutorial: Abandoned Train Station Photo Montage
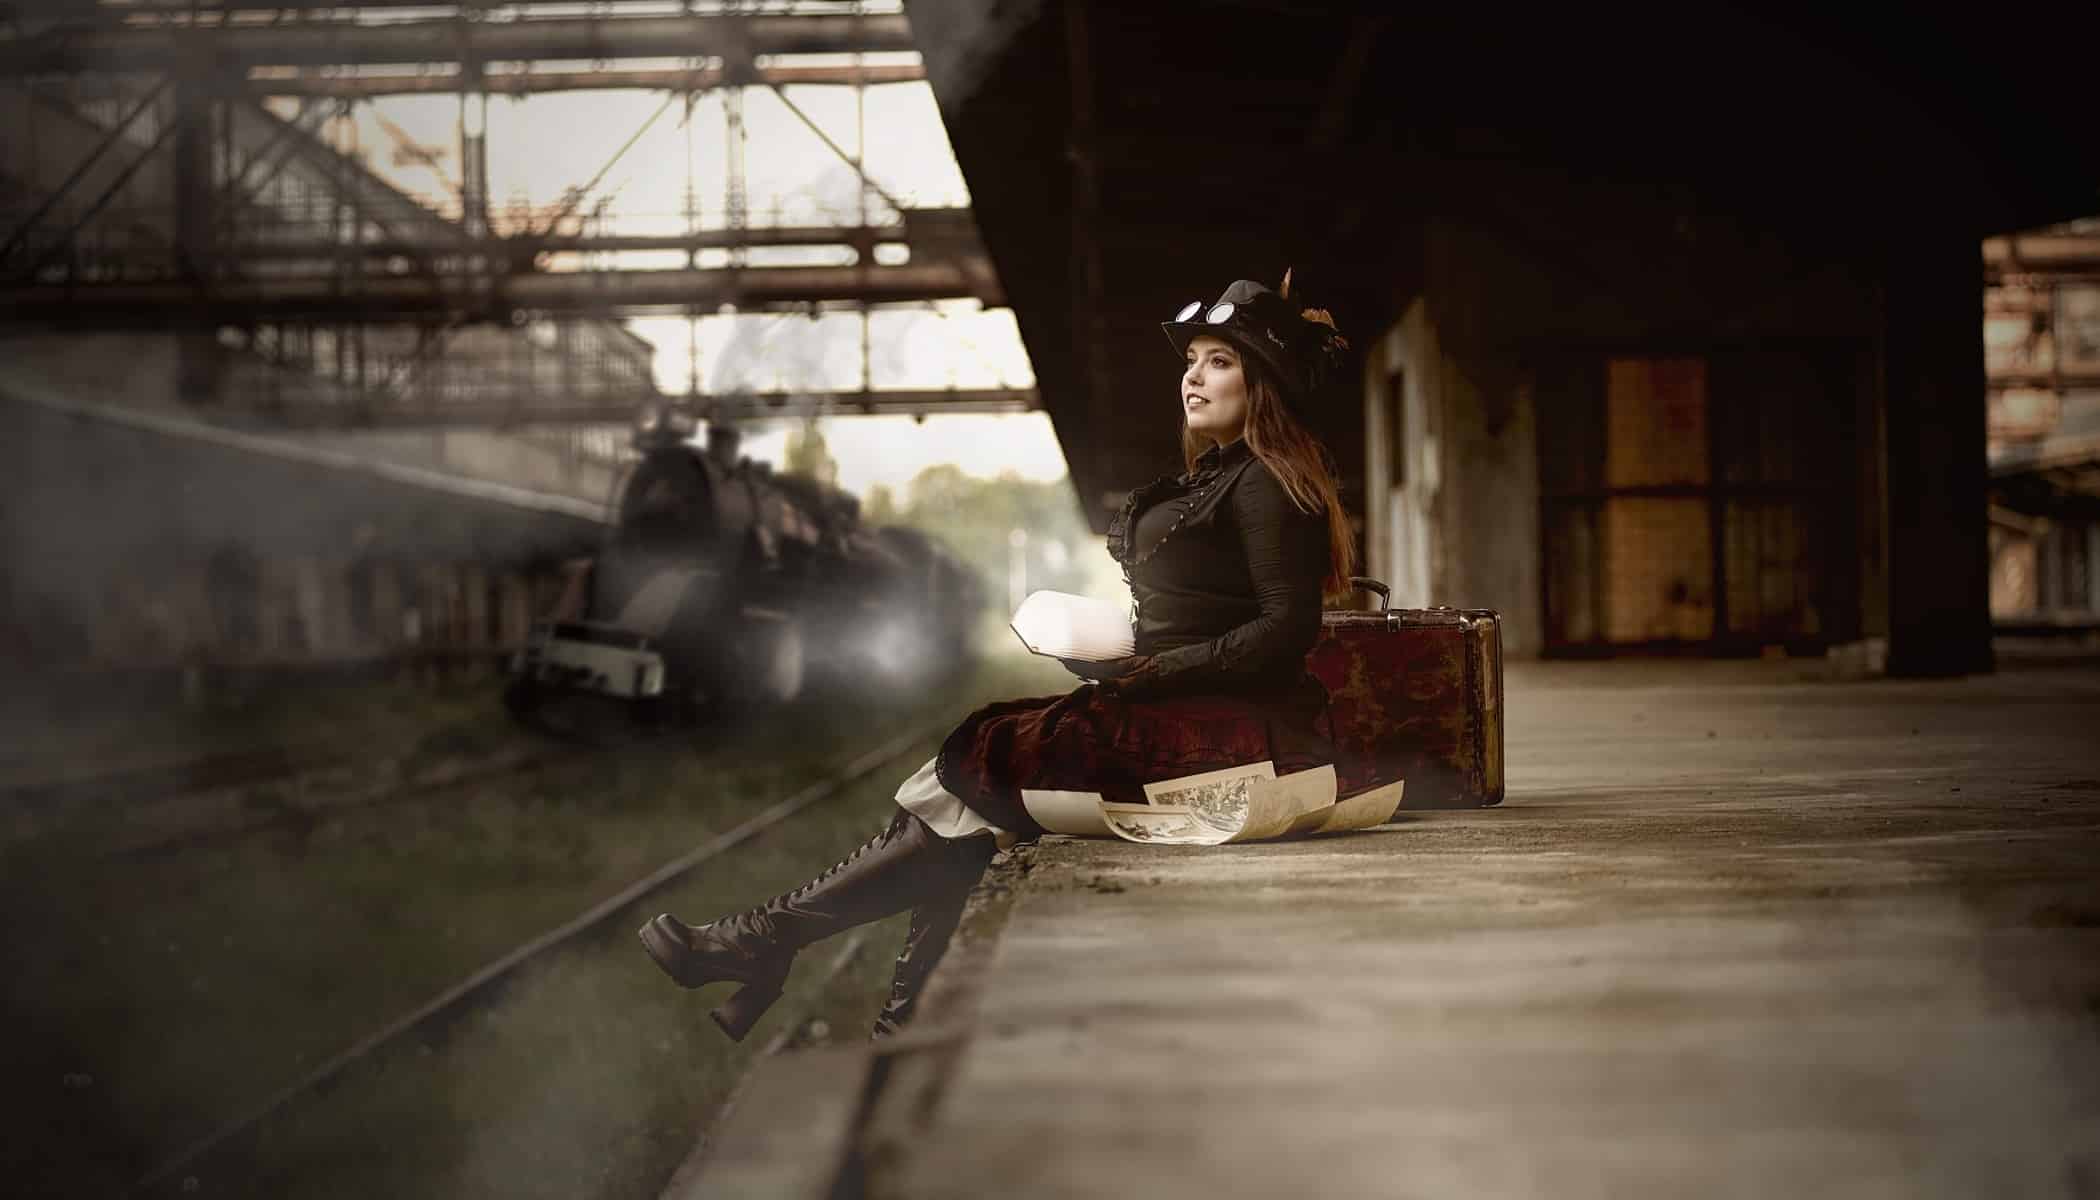
In this article, Zdeňka shows you the editing workflow for one of her photographs. The tutorial describes how to add an object to a photo so that it looks realistic. See how this unconventional portrait came to be and get some inspiration for your photography and photo editing.
We’re focusing on how to add an object to a photograph in the Editor module of Zoner Photo Studio X. We will look at how to add a shadow, get the whole atmosphere of the photo just right, as well as tweaking the colors before arriving at the finished product.
This article may contain some advanced photo editing techniques, but don’t get discouraged. If the editing process seems too complicated, read the following articles where we explain the basics of working with the tools you’ll need:
- How to Place One Photo Inside Another: Create Your Own Photo Montage Using Layers
- Five edits that every photo montage needs. Learn how to properly add objects to your photos
- Learn the Basics of Layers
This type of photo manipulation is by no means simple and requires plenty of practice. Nevertheless, don’t be afraid to try new and different things in your photo editing. Zoner Photo Studio X offers various editing methods and it’s up to you to find the one that works best for you.
Choosing the right photo
Choose photos with a larger depth of field. It’s easier to add slightly blurred objects to these photos. Adding objects to sharper areas of a photo is a much more complicated process. Also, be sure there is enough space for the object you want to add.
It’s important to consider what you plan to do to the photo in post-production. For this reason, you should be thinking about the editing process already while shooting. Carefully consider the object you will be adding so that it matches both the color and theme of the photograph. When just starting, don’t attempt anything extreme. Start with something simple and natural.
Adding the object
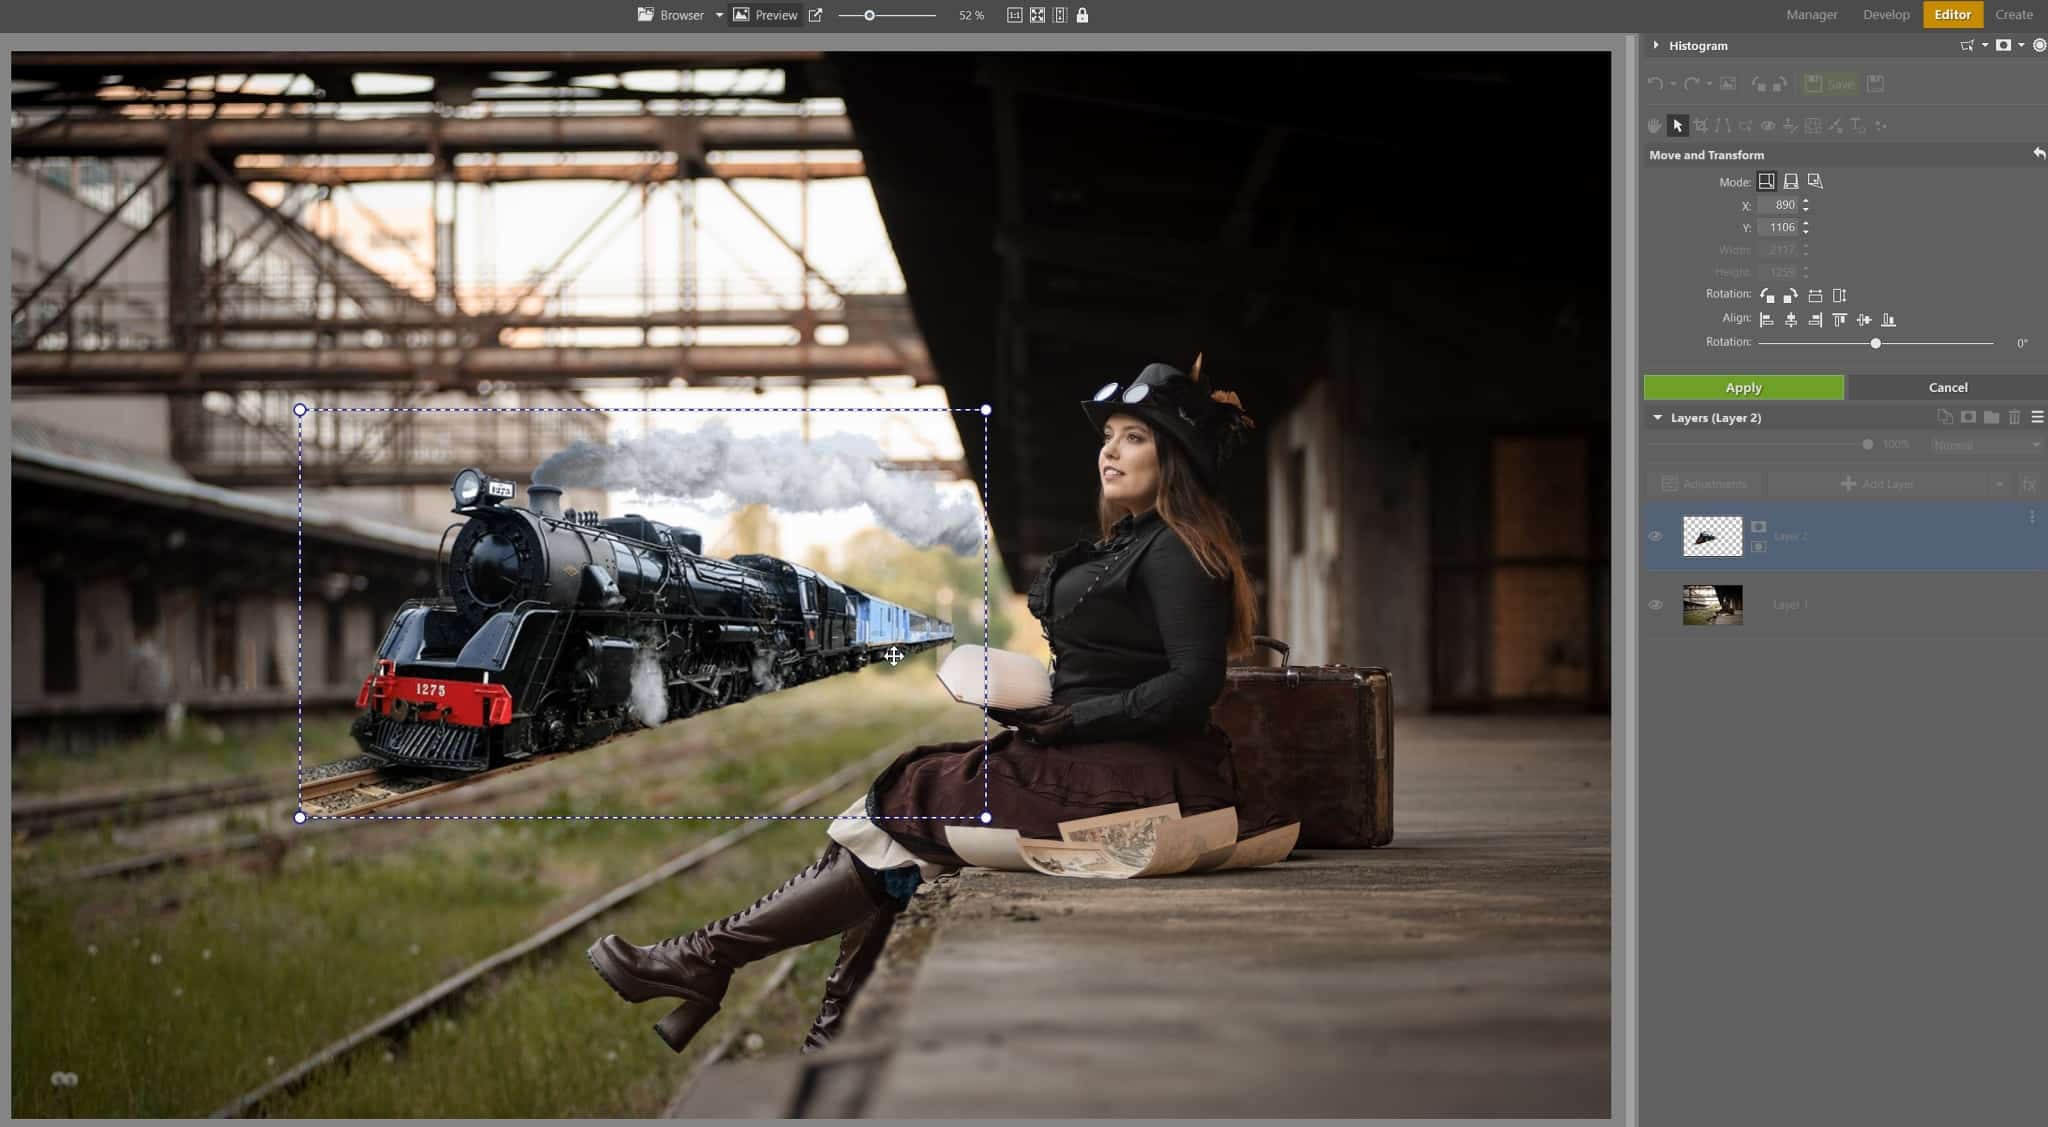
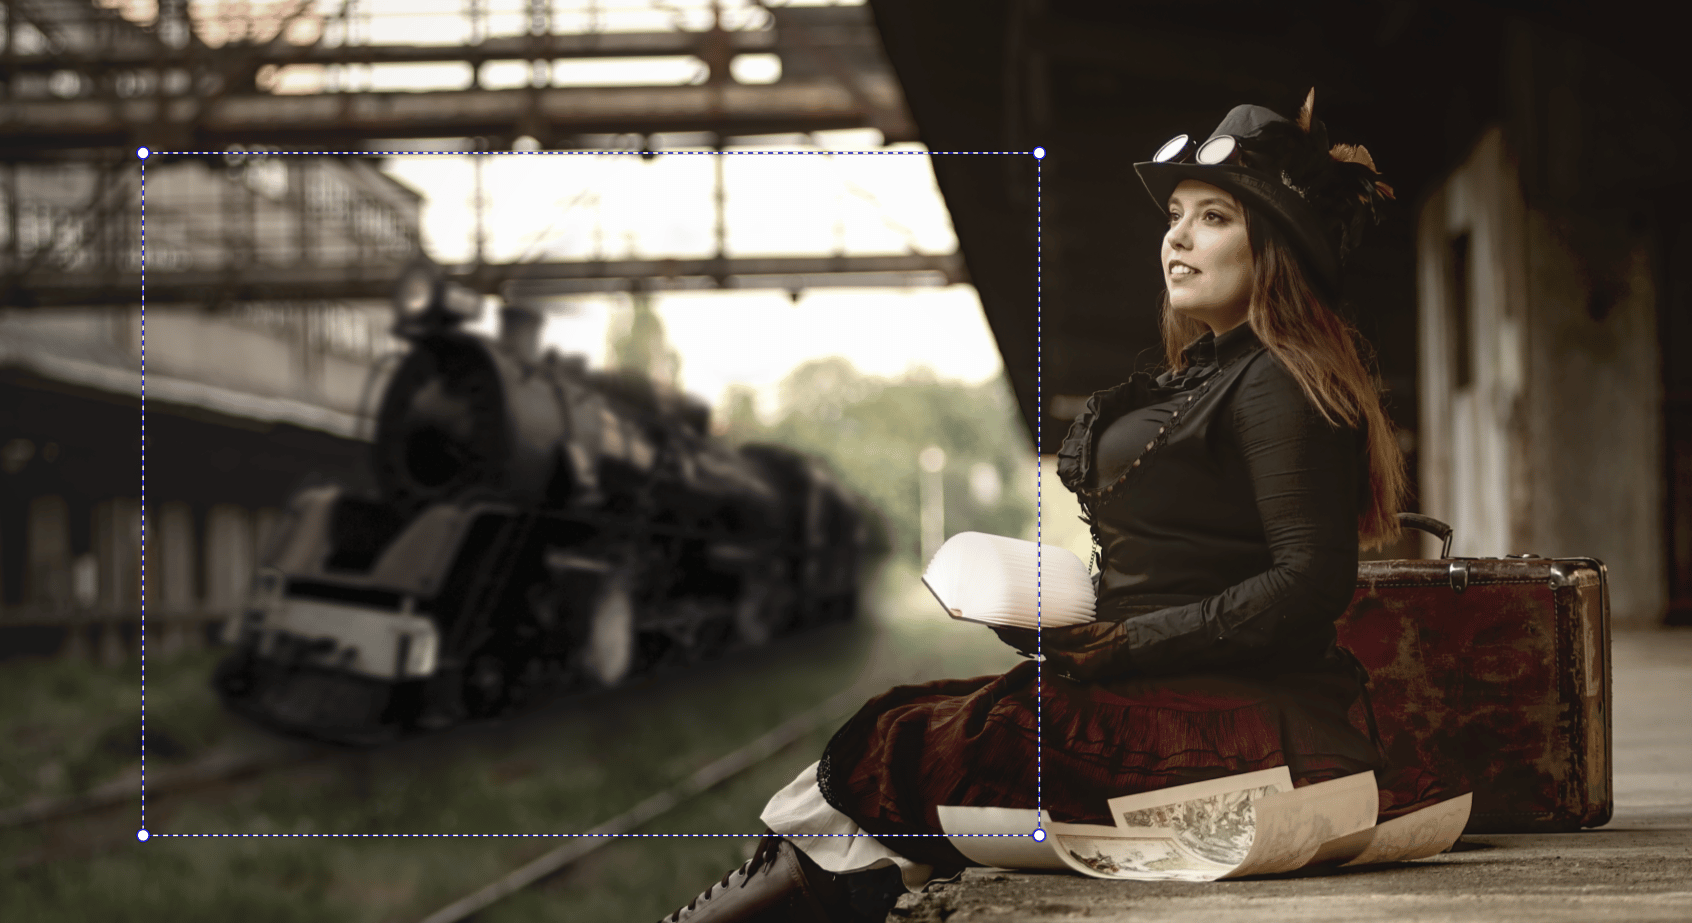
First, paste the object in the photograph (+Add Layer -> Paste from File) and place it where you want it. To move or transform the object in any way, use the Move and Transform (V) tools.
Move the object to the right place and then transform and distort it so that it blends into the picture. Sometimes, you might have to stretch the object a bit or make it more narrow at the end to scale it to the perspective of the photo.
If you need to erase anything from the picture, use the Eraser (Y) under Drawing Tools. This will delete anything from the layer/picture you have inserted.
Add blur and grain
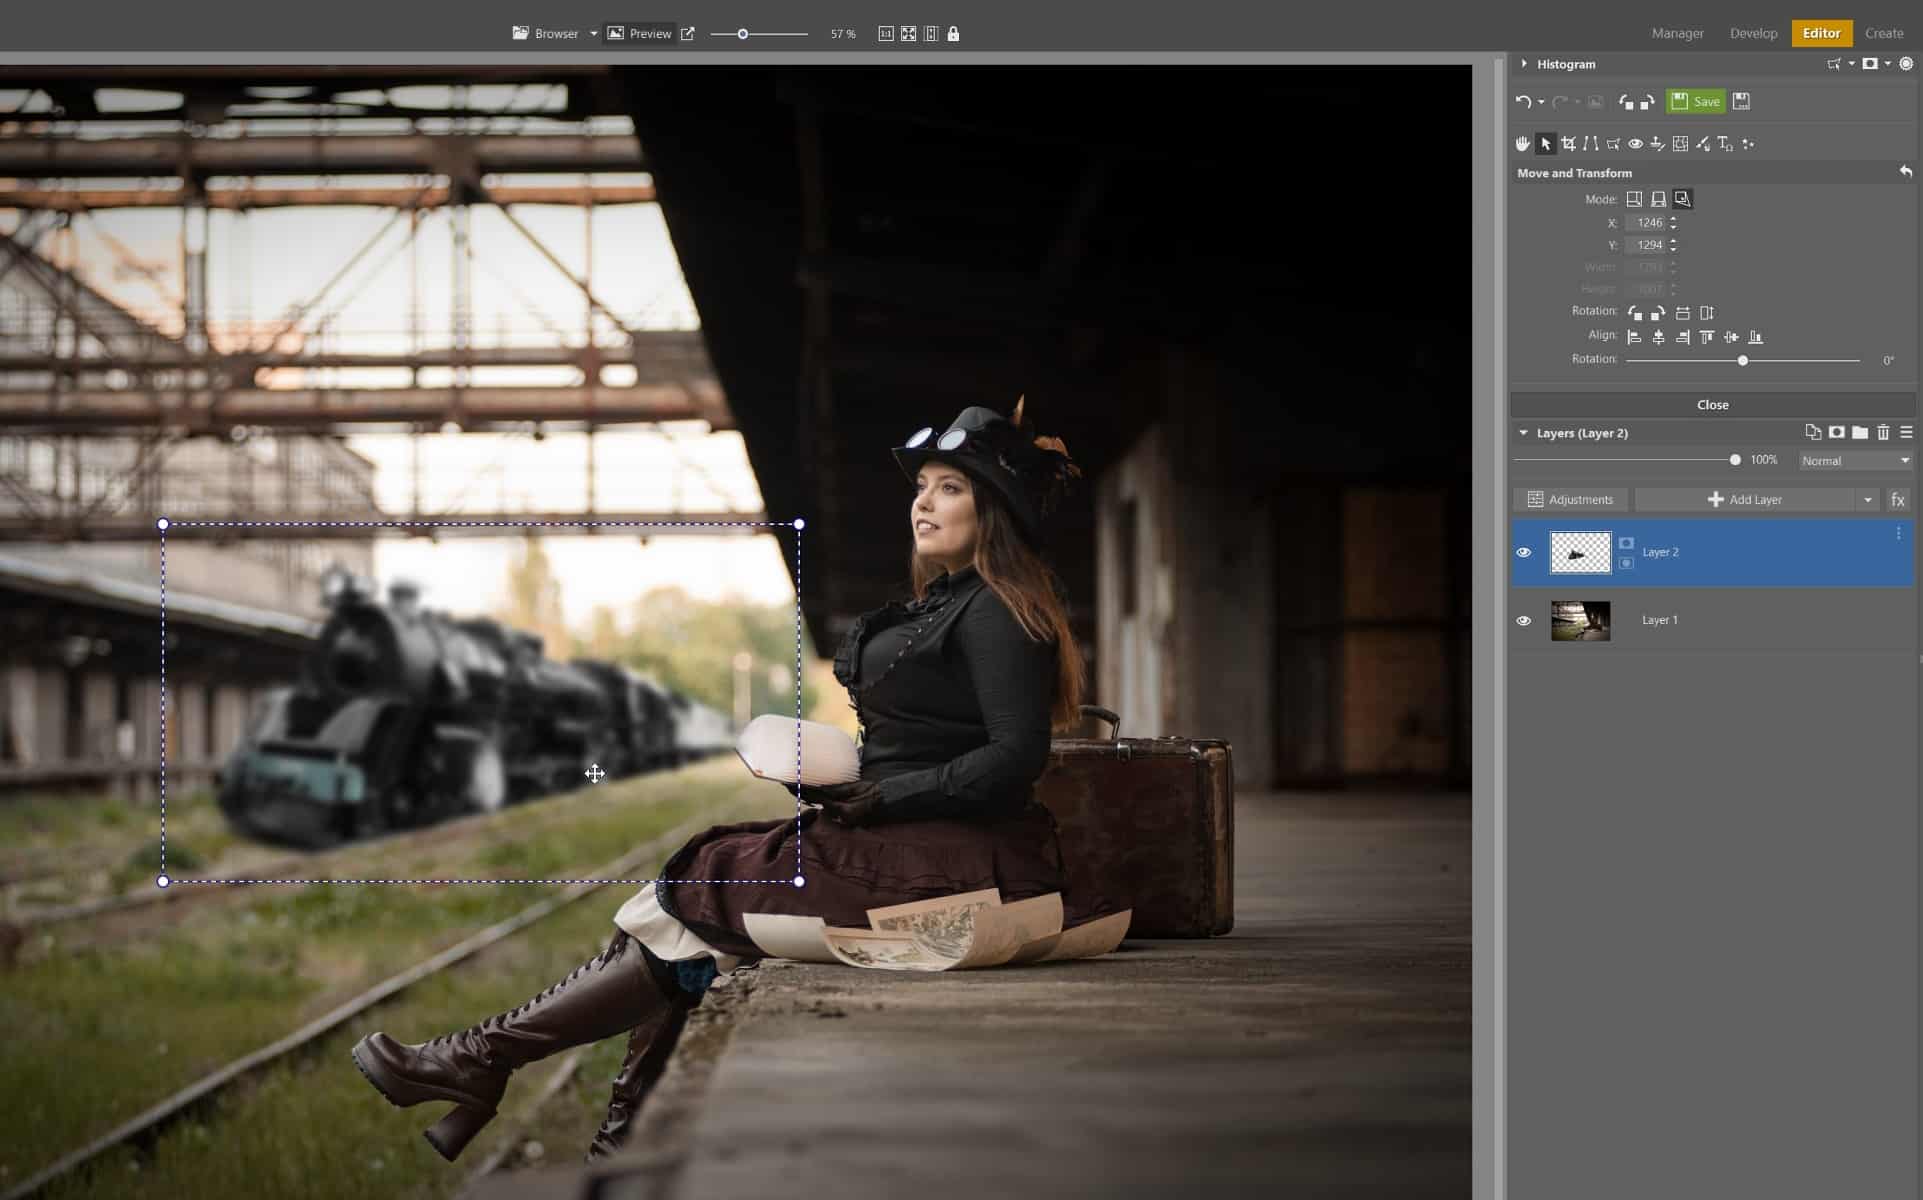
Once your picture is properly placed, you need to blur it, add grain, and tweak the colors. Blur the picture using the keyboard shortcut Ctrl+6. Use Gaussian blur and play around with the slider until the object blends into the photograph. If the object is in the background of the photo, then it must match the blur of the background.
Don’t forget to add grain to your photo. It doesn’t have a shortcut but is found under Effects in the Adjustments menu. The grain in your photo most likely won’t match the grain of the added object because it was taken under different conditions. Grain must be added so that the object matches the rest of the surroundings.
To make the object blend in even better, you need to adjust its color and exposure. In other words, the colors of the object must match and be of similar brightness or darkness as the original photograph and match its surroundings.
- Enhance colors using Ctrl+1, or change the color of the object completely using the Hue slider. You can also tweak saturation or edit the three basic color channels.
- Enhance Exposure using Ctrl+3 where you can change Exposure, Contrast, and much more.
Add a shadow
If the object is added to the ground, it needs one fundamental thing – Shadows. Naturally, if there is light in the photo, there are shadows. How do we create a shadow?
There are two methods for adding a shadow to your photo:
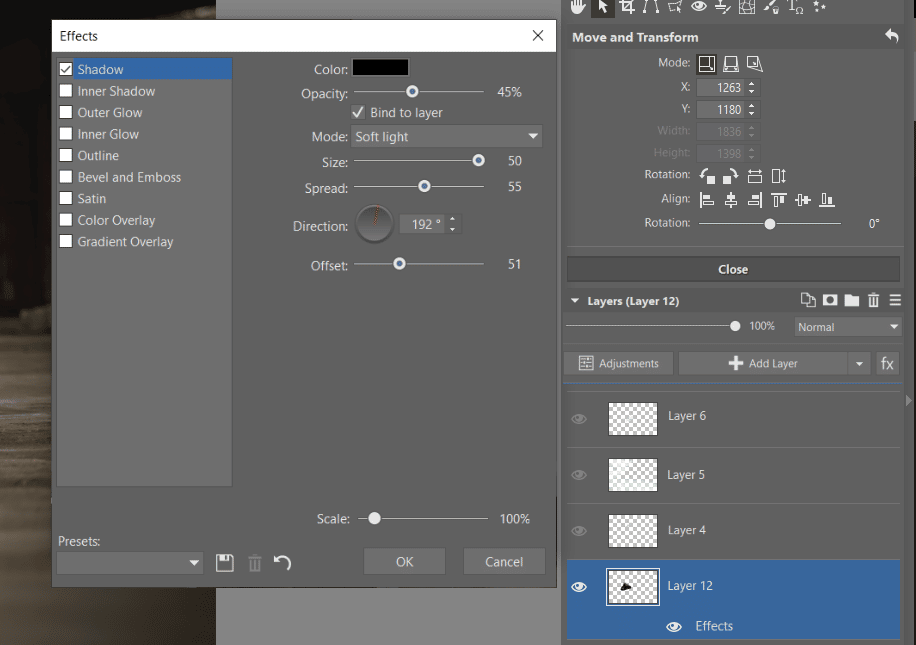
1. Use the Effects function created specifically for this purpose. Right click the layer where you want to create the shadow. Select Effects->Edit Effects. You’ll find the Shadow section where you modify the shadow according to your needs.
2. The second method is more complicated, but in some cases may work better for you as it gives you greater control. Duplicate the layer with the object, set the blending mode to Burn, and blur the entire layer using Ctrl+6. Then, use Move and Transform (V) to move it and make it a shadow. Finally, lower layer opacity or delete unneeded parts.
Final adjustments
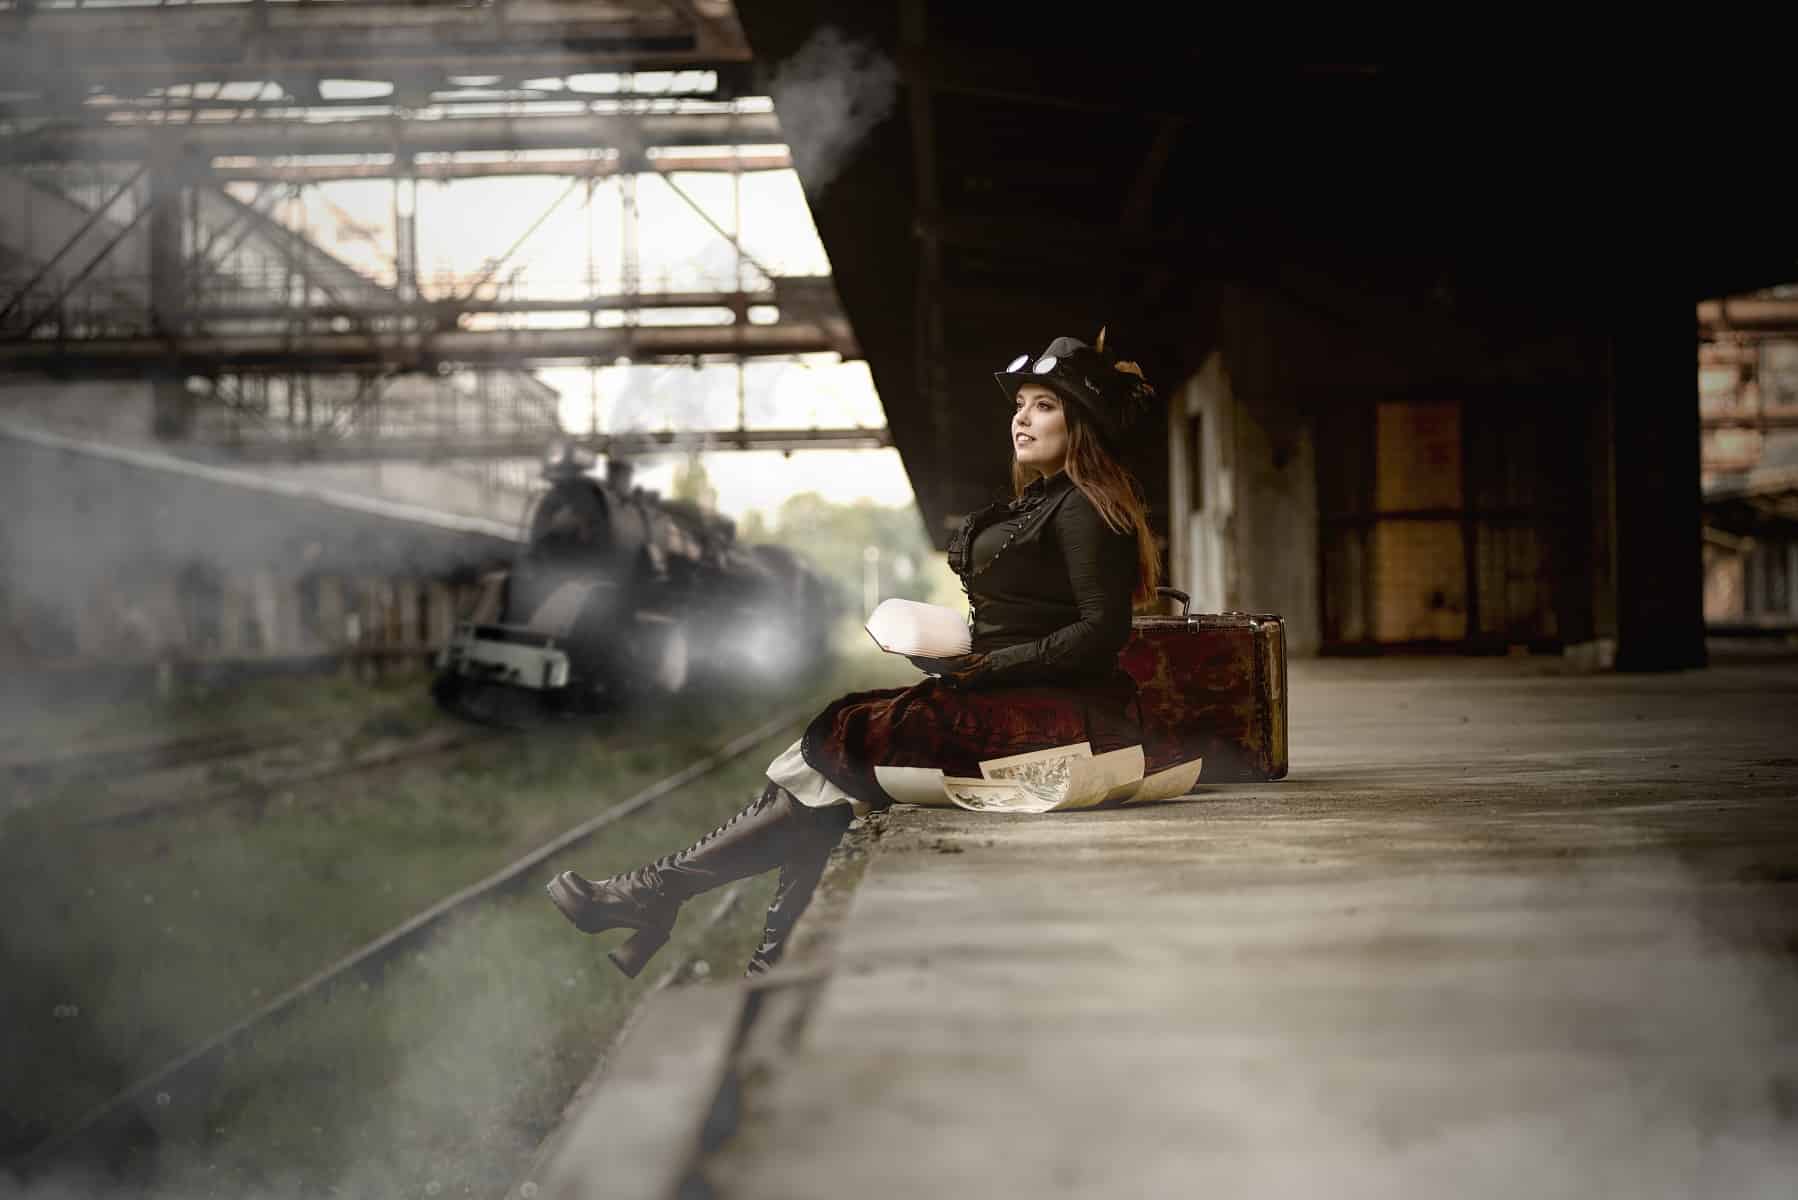
You can now do any additional adjustments as needed. For instance, you may want to add fog. One of the simplest methods for creating this type of fog is to photograph it in front of a black background and then paste this photo as a new layer and set the blending mode to Screen. You can also create fog using a smoke bomb, incense sticks, or fog aerosol spray. Your fog photo will certainly come in handy for future photo manipulation.
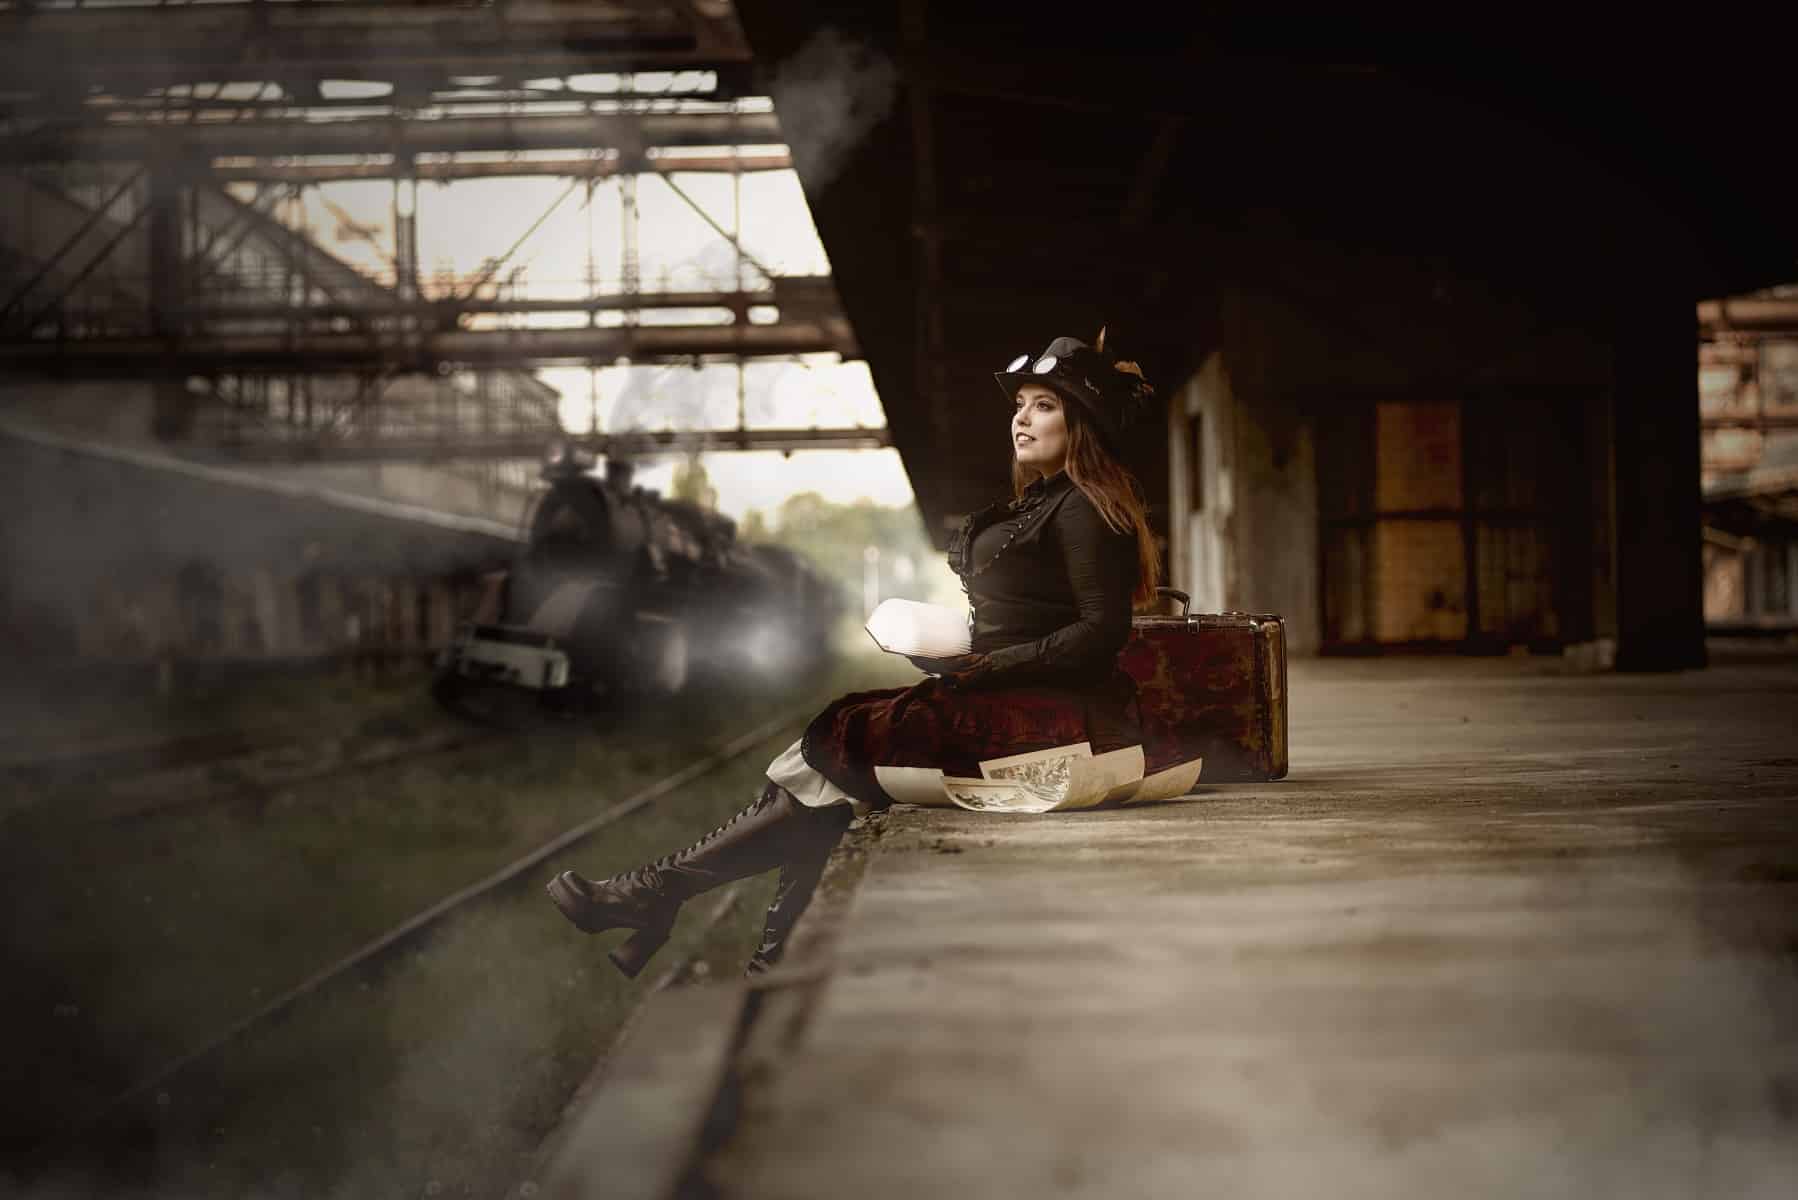
After saving the photo in JPG format, you can always reopen it in the Develop module to fine-tune it. The advantage of this is that the adjustments you make will unify the original photo and added object even more, making the finished product more realistic.
Practice makes perfect
Photo manipulation is no walk in the park. I am certainly not perfect at it, but I hope that these few tips will help you on your journey to fun and interesting photos. Don’t be afraid to try more complicated edits and don’t be disappointed if they don’t turn out exactly how you wanted. Failure is all part of the process and you’ll definitely get better after some practice. Good luck!
Download Zoner Photo Studio X free for 7 days and jump right in to editing your own photos today!
Yusuf
Thank you for your shadow effect tutorial. Your helpful tips are very much needed for us.