Photo Story: Grossglockner and Heiligenblut
The story of how this photograph came to be takes us to the foot of some of the tallest mountains in Austria, to the small village of Heiligenblut. As usual, some planning and preparation was needed. Still, my planning was not enough, and I had to make up for some imperfections with editing in post-production.
The Alps are an almost never-ending source of inspiration for photography. For those of us in the Czech Republic, a destination not too far away. It’s a place I like returning to and discovering new places. For a change, this summer I’ll visit the High Tatras, where the highest Austrian mountain, Grossglockner (3,798m) is visible.
The area offers some breathtaking views. The logical choice for my base was the village of Heiligenblut. Heiligenblut translates to Holy Blood and is also the starting point of the high mountain road.
The village of Heiligenblut
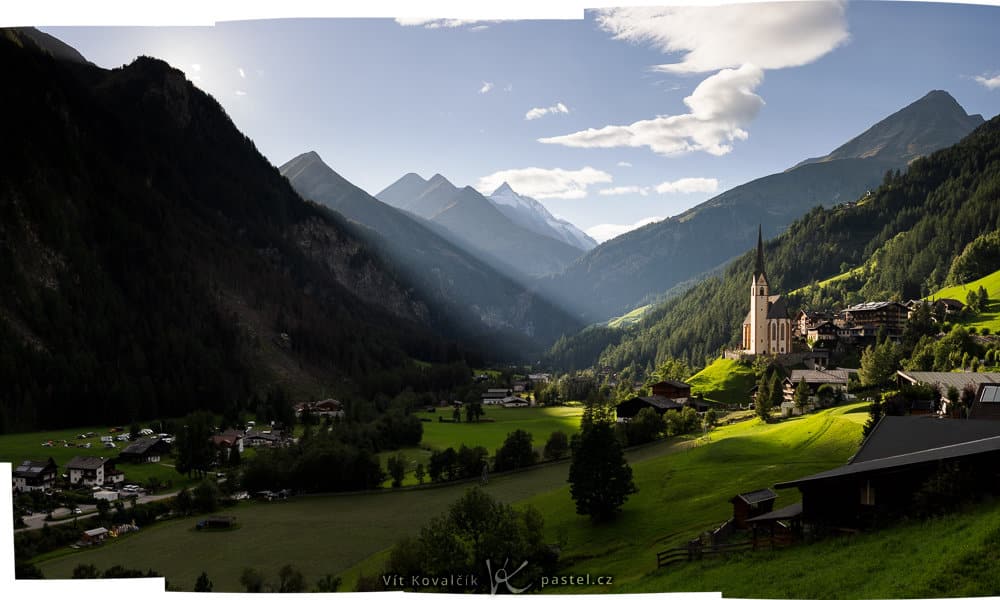
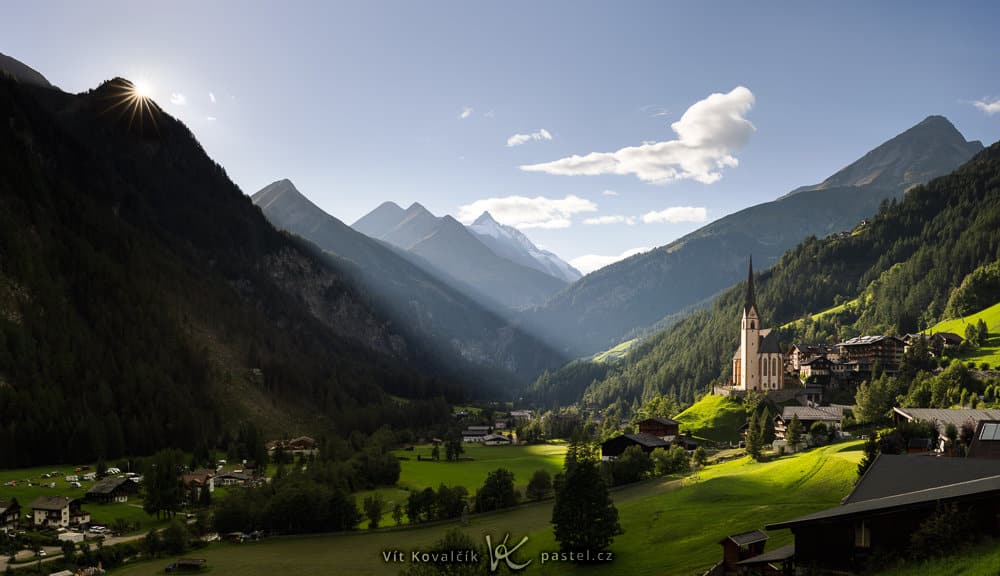
Not only is this town a great starting point logistically, but it’s also stunning to look at. Here’s what it looks like from a distance:
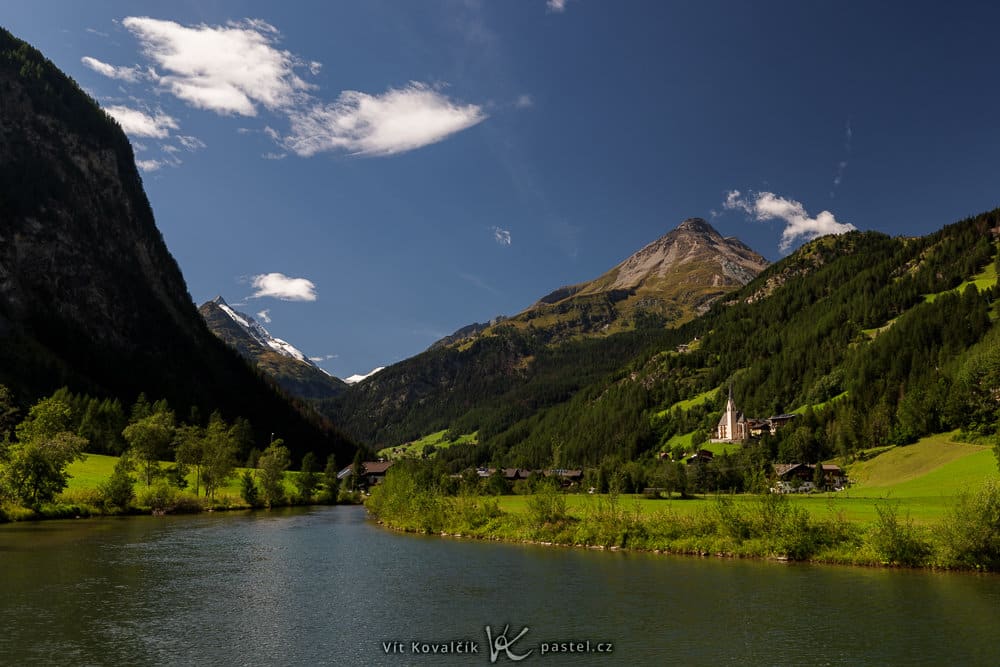
Heiligenblut is set in the middle of high, tree-covered hills, where an odd building peeks out here and there. The only noticeable building is the beautiful church that rises from the hillside. The background is formed by Grossglockner (Great Bell), the snow-capped mountain seen on the left in this picture. For the last photo, I decided to let it take center stage. The Pasterze Glacier is below the tallest mountain, which is the only famous sight we cannot see directly in the photo. The Möll River flows from it, which is right in front of us.
Researching my options
I knew I wanted to capture the village in a majestic way. The good thing was that I was going to spend the next four days there. On the way to the store, or trips further out, I was always looking for the perfect place to get the shot from and be prepared for when a beautiful sunset presented itself. I knew that when that moment came, there would be no time to waste. I would need to be in the right place because the conditions change rapidly and a few minutes later, the opportunity for that perfect photo is gone.
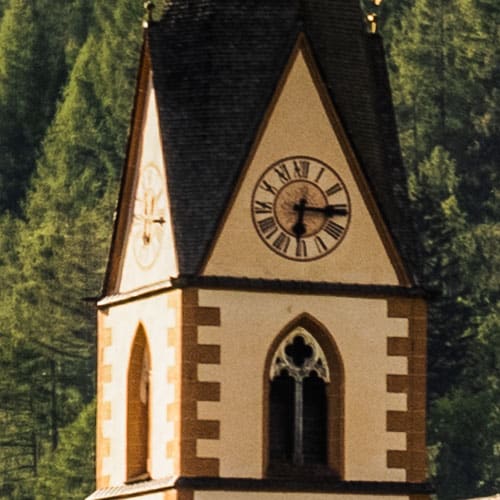
In addition to the shot from afar with the river, I considered the other extreme, where the church vertically takes up almost the entire frame.
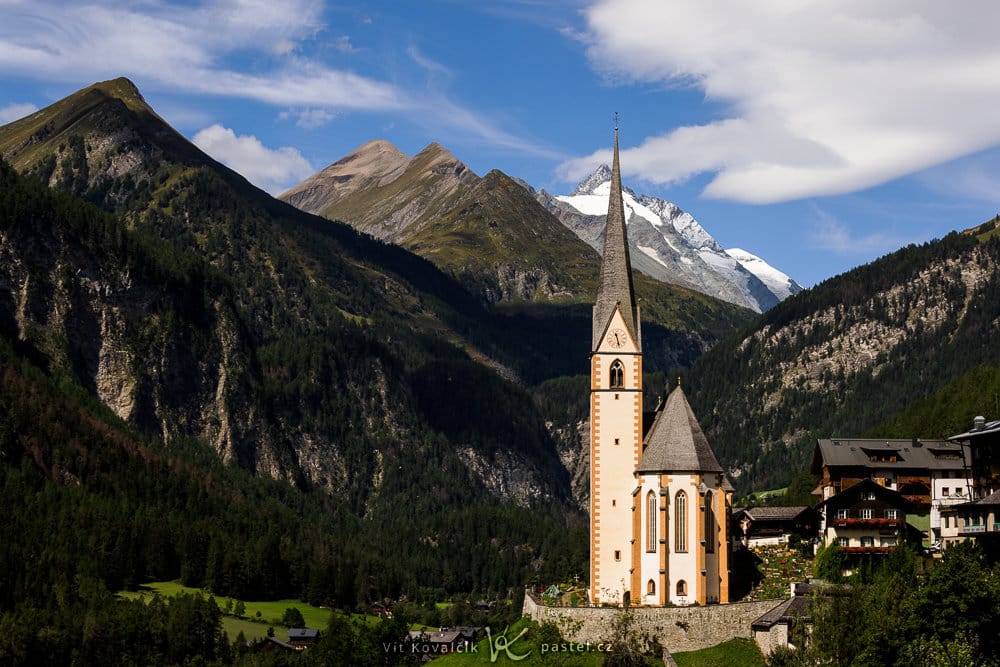
The hotel on the right only serves as a distraction, though it could probably be minimized with some editing. But it bothered me that Grossglockner is unnecessarily covered by the church tower. It’s easy to say that I should have changed locations and moved more to the left, but there was a sharp drop.
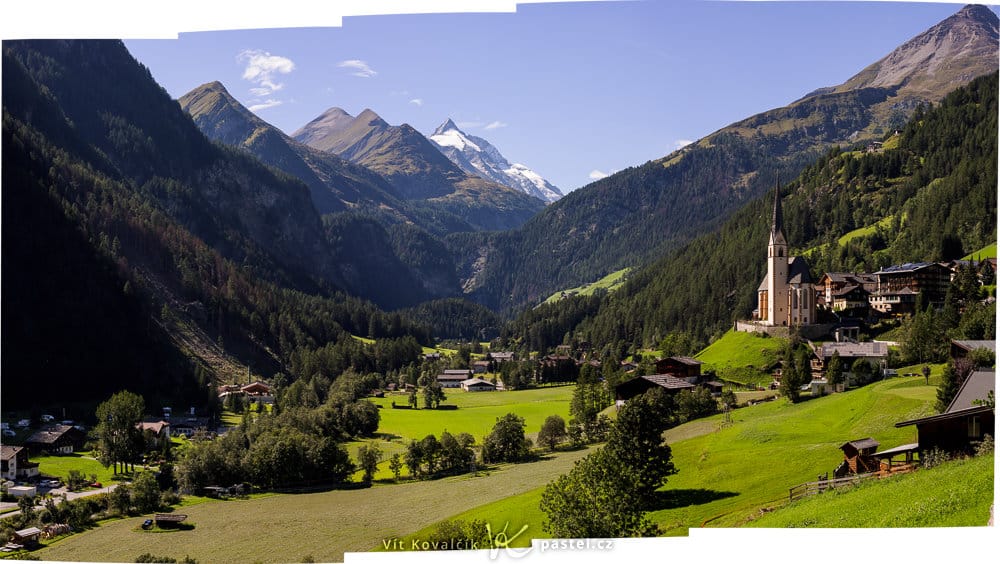
In the end, the middle ground won out. Here, the church and the highest peaks are clearly visible. I just had to sacrifice the view of the river in the valley. It still flows in the middle of the picture, but you can’t see it due to the trees.
Why I did panoramas on a telephoto lens
Some readers may have noticed that the shot is relatively narrow and was composed using several photos taken on a telephoto lens. There are two reasons for this.
The first reason is that on vacation (or in my case, working vacation), I try to carry as few lenses as possible. I usually only bring my ultra-wide lens with a 16-35mm focal length and a 70-300mm telephoto lens. There is a gap between these two lenses and on this trip in particular, the ideal focal length was one I didn’t have. After some time, I routinely took multiple shots in these situations with the telephoto lens turned vertically to combine them later.
The second reason is that while a wider lens would have been enough for the shot, panoramas capture everything at a much higher resolution. This can come in handy for large format printing. Cropping the image also makes it easy to get different compositions.
A drama-filled afternoon
Everything was ready to go. Now all we had to do was relax at the hotel after a day’s hike and watch for the sunset. The plan was to set out as soon as the sun approached the mountain peaks.
But I suddenly realized with horror that my hotel was slightly higher than the location I had chosen. That meant that if I could see the sun high above the mountains, it’s entirely possible that at the actual photo location the sun was already below the mountains.
I was dressed and charging down the street in no time, tripod in hand so I could set it up on the way.
My fears were only partially confirmed. On one hand, I caught the sun just above the mountains and captured it in my photos. At the same time, the scene’s character changed with the later light and the best spot was about 50 meters from where I was. Also, the sun was no longer visible from the new position.
I was mad at myself for my error in planning, but what’s done is done. Unfortunately, the weather conditions didn’t cooperate the next day, so I had to go with what I had.
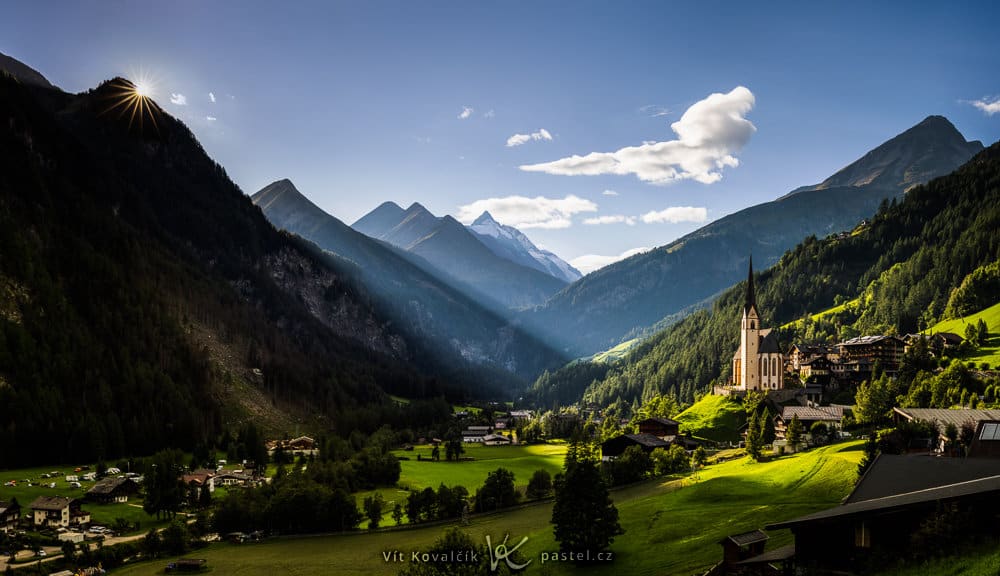
Not everything is lost
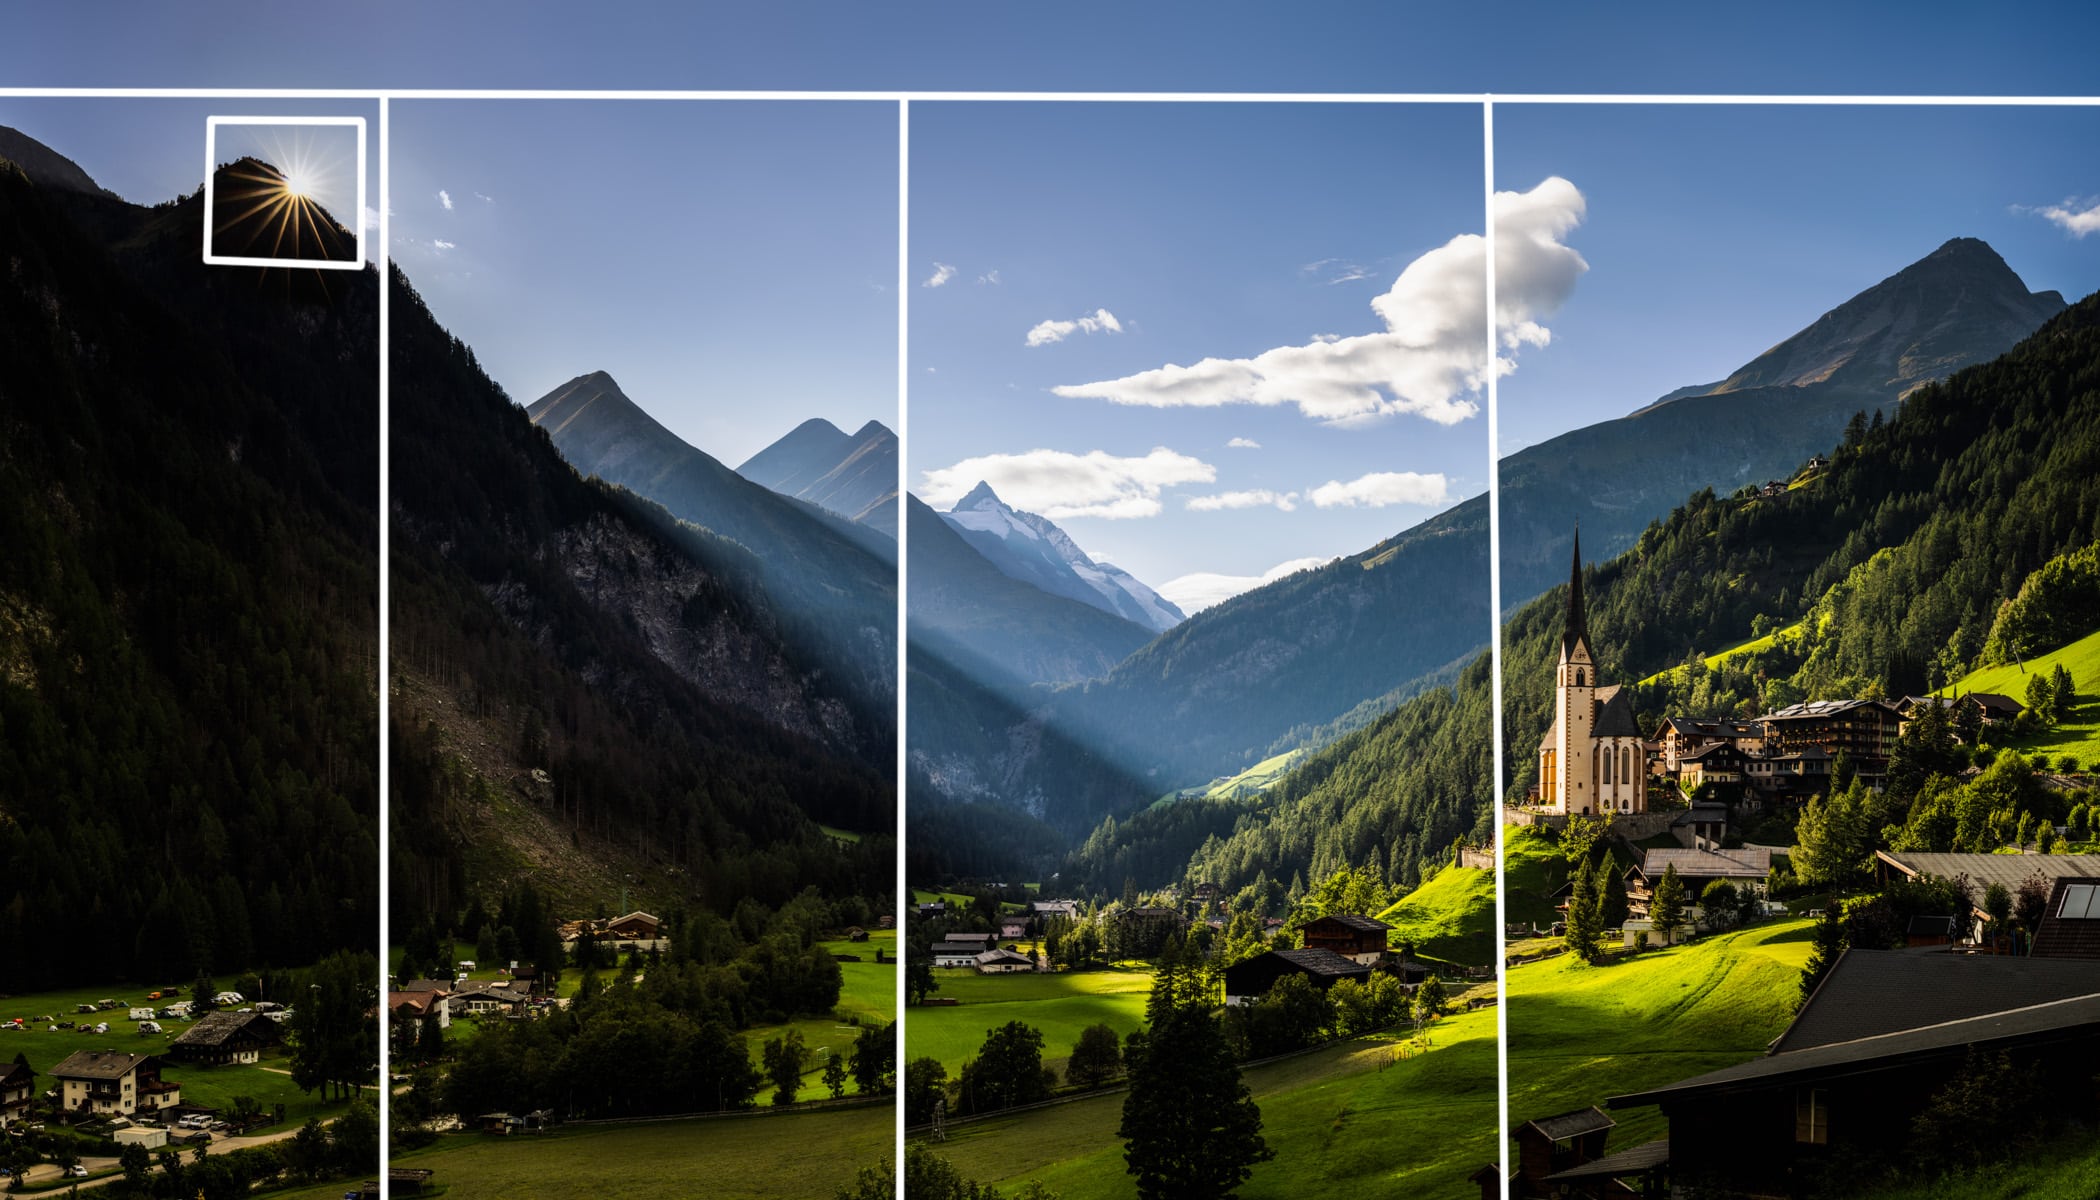
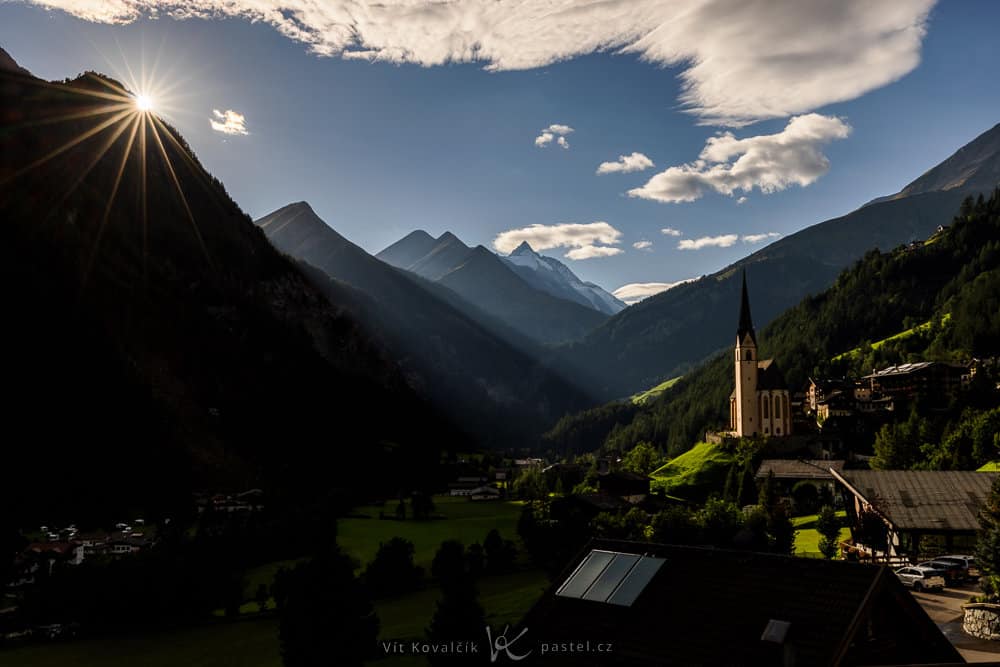
Based on the cover photo, you can probably guess what my next step was. Since I had shots with and without the sun, only from two different places (by a few steps), it made sense to combine them together.
While I was at it, I also decided to make the sun a bit smaller, and make it look like the sun was covered more. It seemed to overly dominate the original image. In hindsight, I’m not sure if such a large reduction was the best choice.
The entire editing process
It seems that I have made an already complicated process even more complicated.
I didn’t settle for just a panorama done with a telephoto lens, but did the panorama in two rows above each other to cover more of the valley. Moreover, the high dynamic range of the scene forced me to shoot each image in three different exposures.
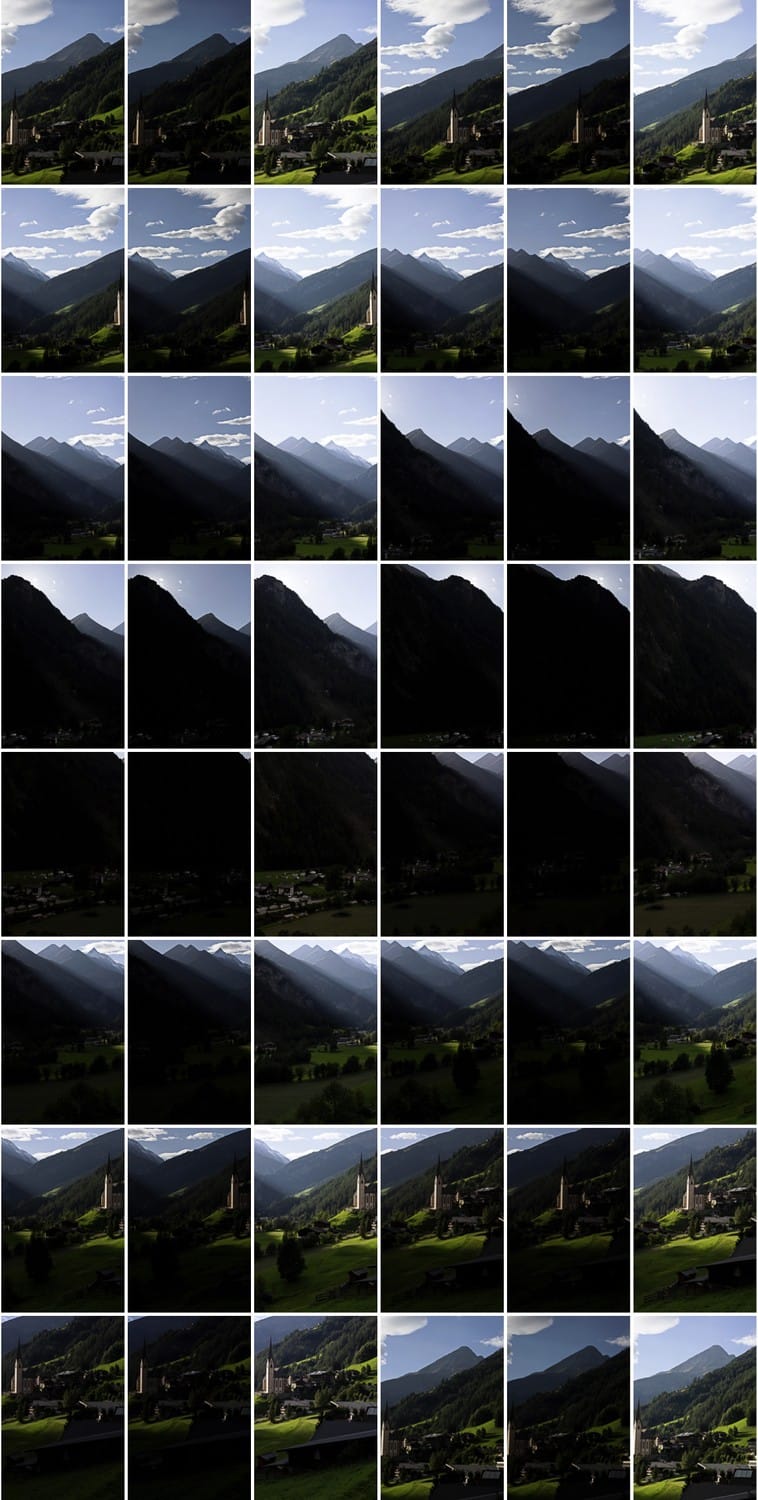
Canon R5, Canon EF 70-300/4-5.6L IS, 1/320 – 1/80s, f/13, ISO 100, focal length 70mm
For the first picture, I had to combine 48 images equaling 1.8GB of data in RAW format on my card. Though I spared no overlays, I wasn’t sure if the two rows ended the same, so I took some “just in case” shots as well. The final image, after cropping, still had almost 200 megapixels.
To do this, I had a photo from the nearby location where the sun was still shining.
Not only did I have to insert the sun at the top of the photo, but I also needed to complete the sky with the piece of the hill. Of these three adjustments, the sun was the most difficult because it wasn’t easy to subtly blend it in with the existing sky. But in the end, I succeeded.
Then, the final color and light adjustments and my image is done.
You can always fix minor errors
Of course, I regret that it didn’t work out to get the sun in the final shot. But I’m glad that I was able to fix my error and the final product reflects the mysterious atmosphere I remember from this location. Have you made a mistake like this before that you had to later fix, hunched over your computer and sweating?
Mary H Warner
Interesting articles and lovely final photo. I have actually been there a few years ago. But I am curious whether all of the post processing was actually done in Zoner Photo Studio. I know what you describe could be rather easily done in Photoshop (an HDR multi-row panorama) but I am wondering if Zoner has those same capabilities. If so, a description of the processing steps would be appreciated. Thanks!