Portraits Painted with Light: The Art of Light Painting, Step by Step

Almost every photographer has tried light painting at some point. Long exposures, running around with a flashlight or string of lights is great fun, but we usually don’t expect much from the resulting photos. They’re just light trails. But with some patience and creativity, this technique can be used to create stunning works of art, including light-painted portraits.
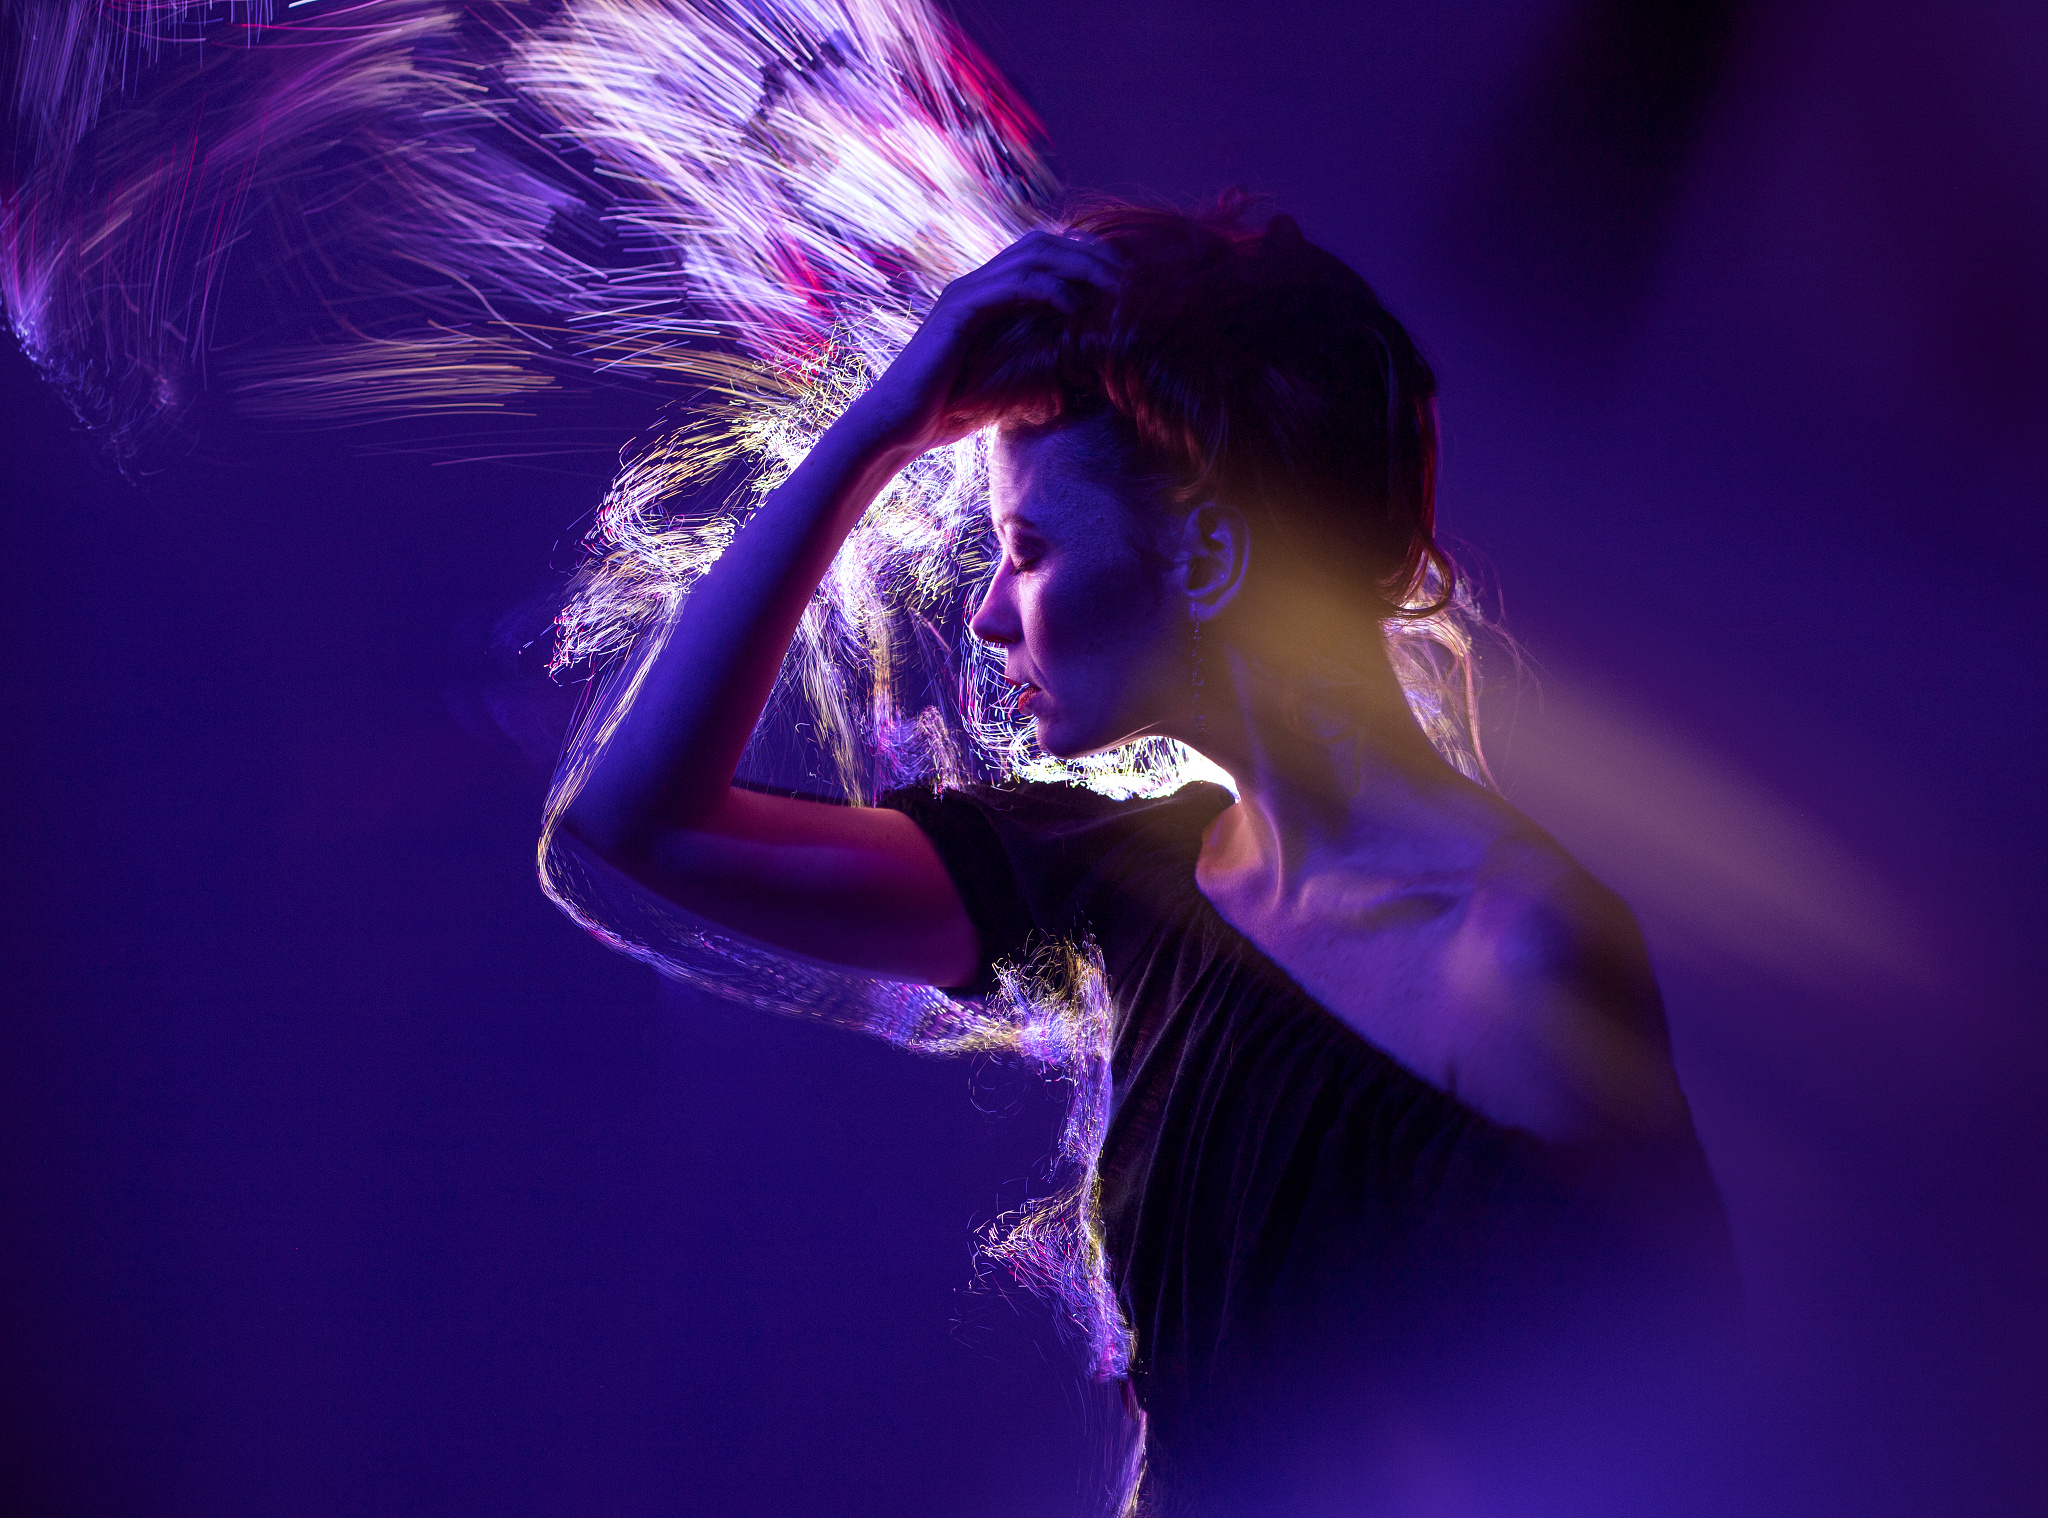
Light painting in portrait photography comes with its own challenges. One major limitation is movement. Since the model must remain still for the duration of the exposure, it’s difficult to find an interesting, dynamic pose while keeping the image sharp. On the other hand, the biggest advantage is complete control over the light. A long exposure lets you simulate multiple light sources, each with different qualities. The results are often magical and mysterious, which is why many of my clients choose to print their light-painted portraits in large formats. Let’s take a look at how to approach this fascinating technique.
What you need for light painting
When it comes to light painting, the camera itself is less important than the light sources you use. I shoot with a 7-year-old Canon DSLR. Still, there are a few essential pieces of equipment you can’t do without.
Camera—I always tell my students to bring a camera with manual exposure settings for our shoots. Smartphones also have manual modes, so if you only have a phone, you can still take light-painted photos. Also, turn off autofocus. It only gets in the way in the dark. Photographers sometimes struggle with this because it’s a setting they rarely adjust.
Lenses—I typically use longer focal length portrait lenses. However, if I want my model to appear sharper, I prefer wider focal lengths, like 35mm.

Light sources—This is one of the most important aspects of light painting and varies from photographer to photographer. Over time, I’ve come to favor a few essential tools: LED light tubes, tactical flashlights, and plexiglass or fiber optic attachments. Occasionally, I experiment with new materials, such as a transparent umbrella covered in holographic film. When shooting outdoors, I enjoy working with fire.

The one type of light I don’t recommend is a programmable LED light sticks that automatically draw pre-programmed images. These photos are easy to recognize by their pixelated appearance and from an artistic standpoint, the photographer’s role is minimal.

Tripod and remote shutter release—A tripod is essential, but in reality, it can be replaced by anything stable. A beanbag, a hat, or even a rubber slipper if you’re shooting from below.😊

A remote shutter release is very useful, though not absolutely necessary. It lets you stay with your model instead of running back and forth to the camera. Mobile apps don’t work in this case because the light from the phone’s display would show in the photo, which we don’t want. Another advantage of a remote shutter release is that you don’t have to estimate the shutter speed. Bulb mode lets you start and stop the exposure precisely when needed. If you don’t have remote shutter release, you can ask an assistant to trigger the camera manually.
Camera Settings
The traditional exposure triangle works a little differently with light painting. Try not to adjust the ISO at all. Keep it at ISO 100 to minimize noise, which can otherwise increase with long exposures. Unlike regular photography, shutter speed doesn’t determine overall exposure but depends on the complexity of the scene.

If you’re painting a simple light pattern, a short exposure is enough. But if you’re working with multiple light sources, refining the foreground and background, and carefully lighting the model, you’ll need a longer exposure, sometimes up to 30 seconds. That leaves aperture as the primary control over brightness. There’s one more factor to consider: the brightness of your light source. The final shutter speed depends on the balance between these two factors. If your light sources are powerful, you need to close the aperture more. If they’re dim, you need to open it as wide as possible.
Choosing the setting: Dark studio vs. exterior
When I talk about shutter speed, I assume ideal conditions. That is, a completely dark room with no unwanted light. However, parasitic light is more common than you think, and it’s not easy to eliminate. It could be a distant streetlight, the glow of city lights reflecting off an overcast night sky, or even a digital clock in the room.

While I don’t always work in total darkness, I try to avoid unwanted light as much as possible. During long exposures, I create controlled ambient light using my own RGB tubes at 1% power. The difference is that I place them exactly where I need them. Technically speaking, this is the same as parasitic light, but the difference is my intent. 😊
Dressing for a light painting shoot
There is a common belief that photographers must wear black, including a hood, when light painting to avoid being visible in the photo. However, this isn’t always necessary because the background itself isn’t always black. If you’re shooting outdoors, the background could be the sky. Indoors, it could be a white wall reflecting light. In both cases, your own shadow appears in the frame, no matter what you’re wearing.
Yes, if you’re working in complete darkness against a black background, black clothing helps. But if you’re shooting against a white background, it’s actually better to wear light colors. Shadows are inevitable, so instead of relying on clothing you need to eliminate them another way: either keep moving or cover yourself with a big blur of light.

Up next—How to work with your model
Now that we’ve covered the basics, we’ll go deeper into how to work with your model during a light painting shoot in the next installment of this article.
There are no comments yet.