How to Replace a Dull Sky
It’s happened to the best of us. You’re somewhere amazing and you want to be sure you beautifully document everything, but the weather is not in your favor. While the subject of your photograph itself may be fascinating, the sky is boring. In most cases, you can use the gradient filter and similar tools to fix it. But there are some situations where no matter what you do, the sky is not how you want it and you have to try something else. You have one last resort– replace the sky with a different one.
You won’t find information about the proper technique for shooting landscape photos in this article. However, we will show you a technique that will help improve or even save your landscape photos in Zoner Studio. As you’ll soon see, the entire process is quite simple.
Right off the bat, I want to warn you not to download images from the internet. Use your own photos that contain a sky that was taken under better weather conditions. Images taken from the internet tend to be low quality and more importantly, they could be copyrighted. It’s important to maintain a certain level of photography ethics when doing your photo editing. It would be unfair to brag about a photo when the best part isn’t even yours.
Step one: Choose the right image
The first step consists of choosing a photo that needs a new sky and another photo where you will borrow the sky to insert into the photo you are editing.
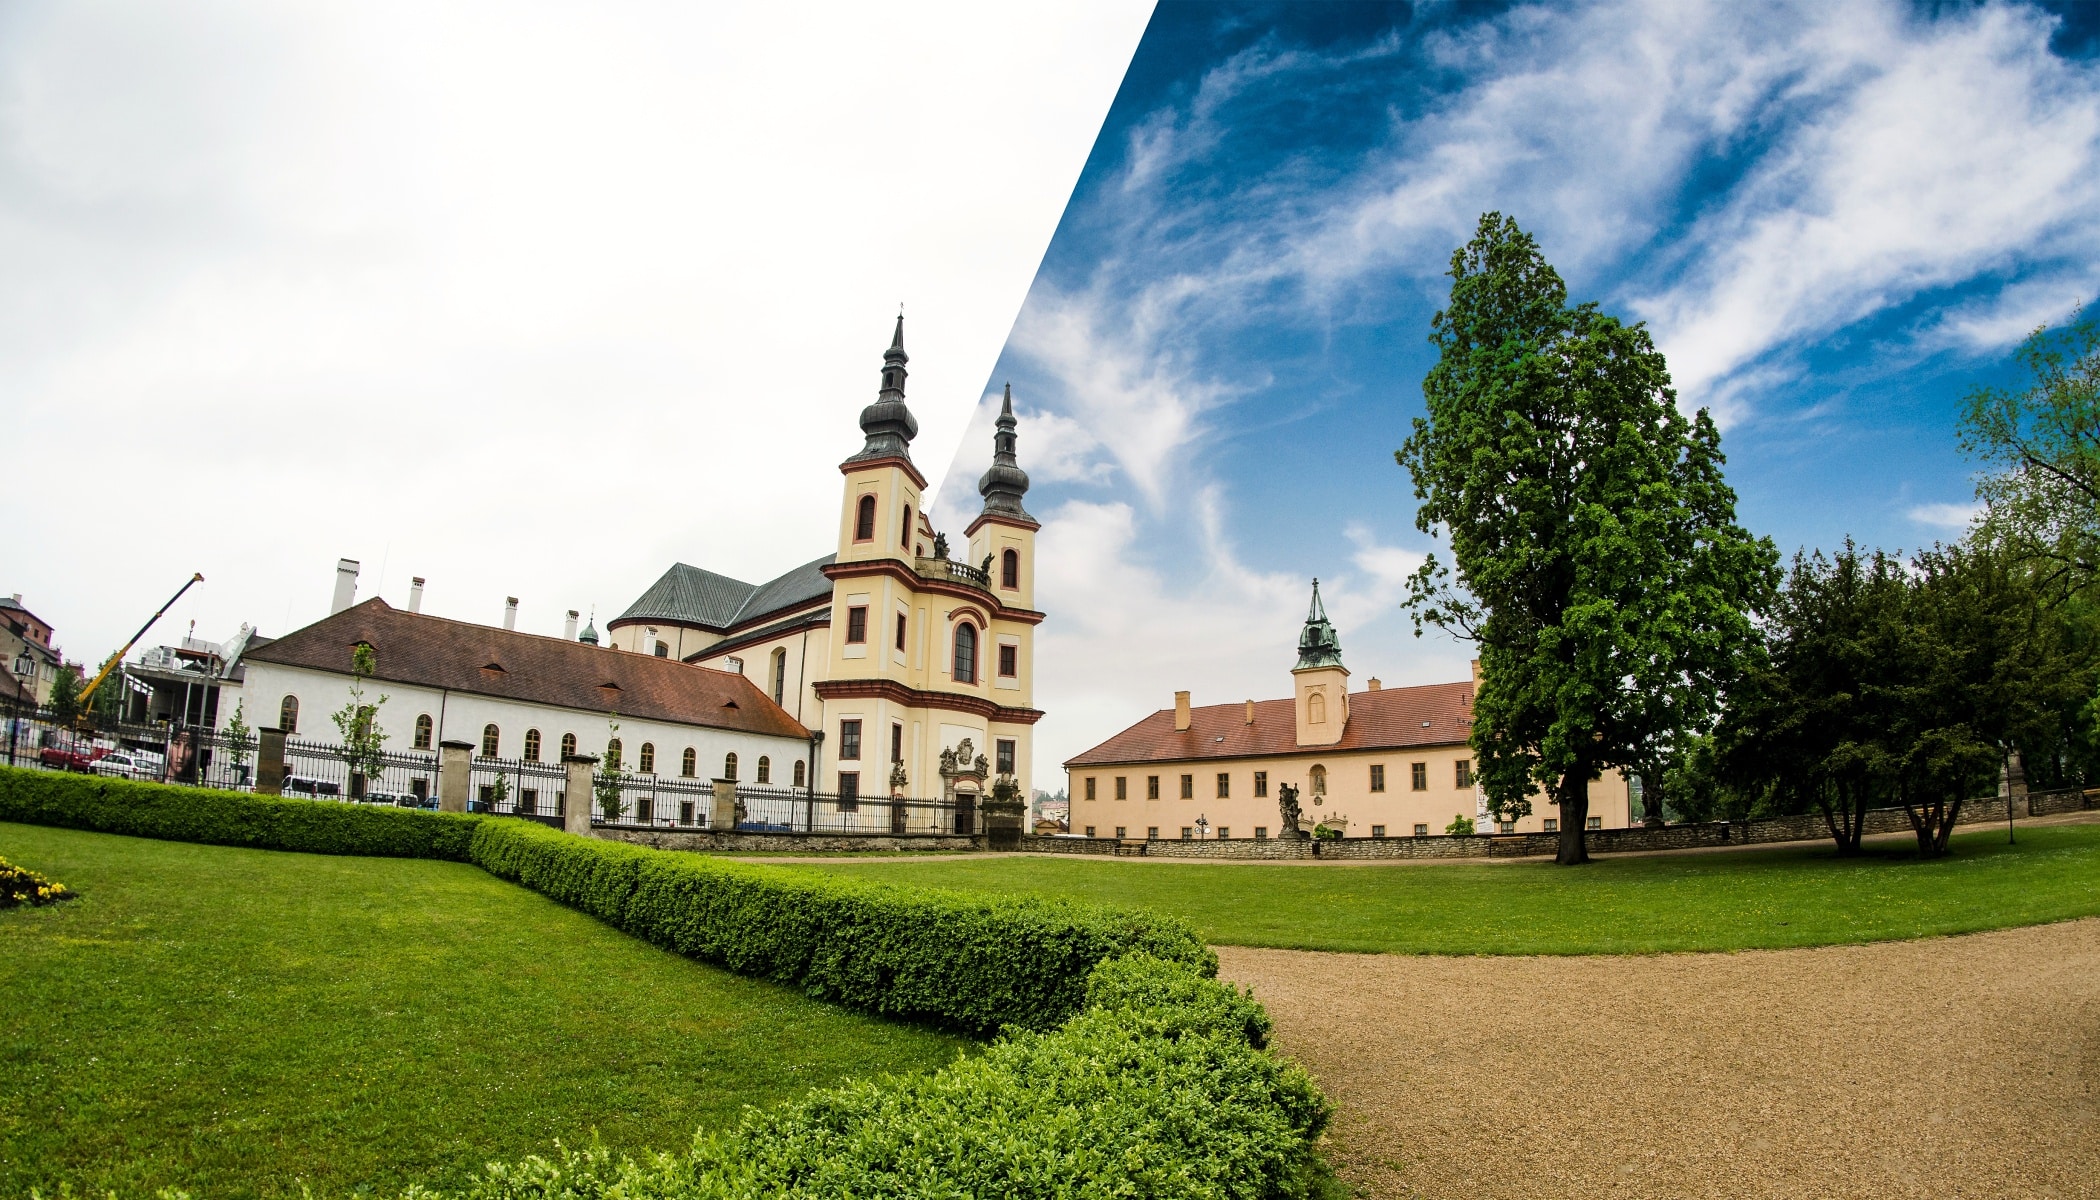
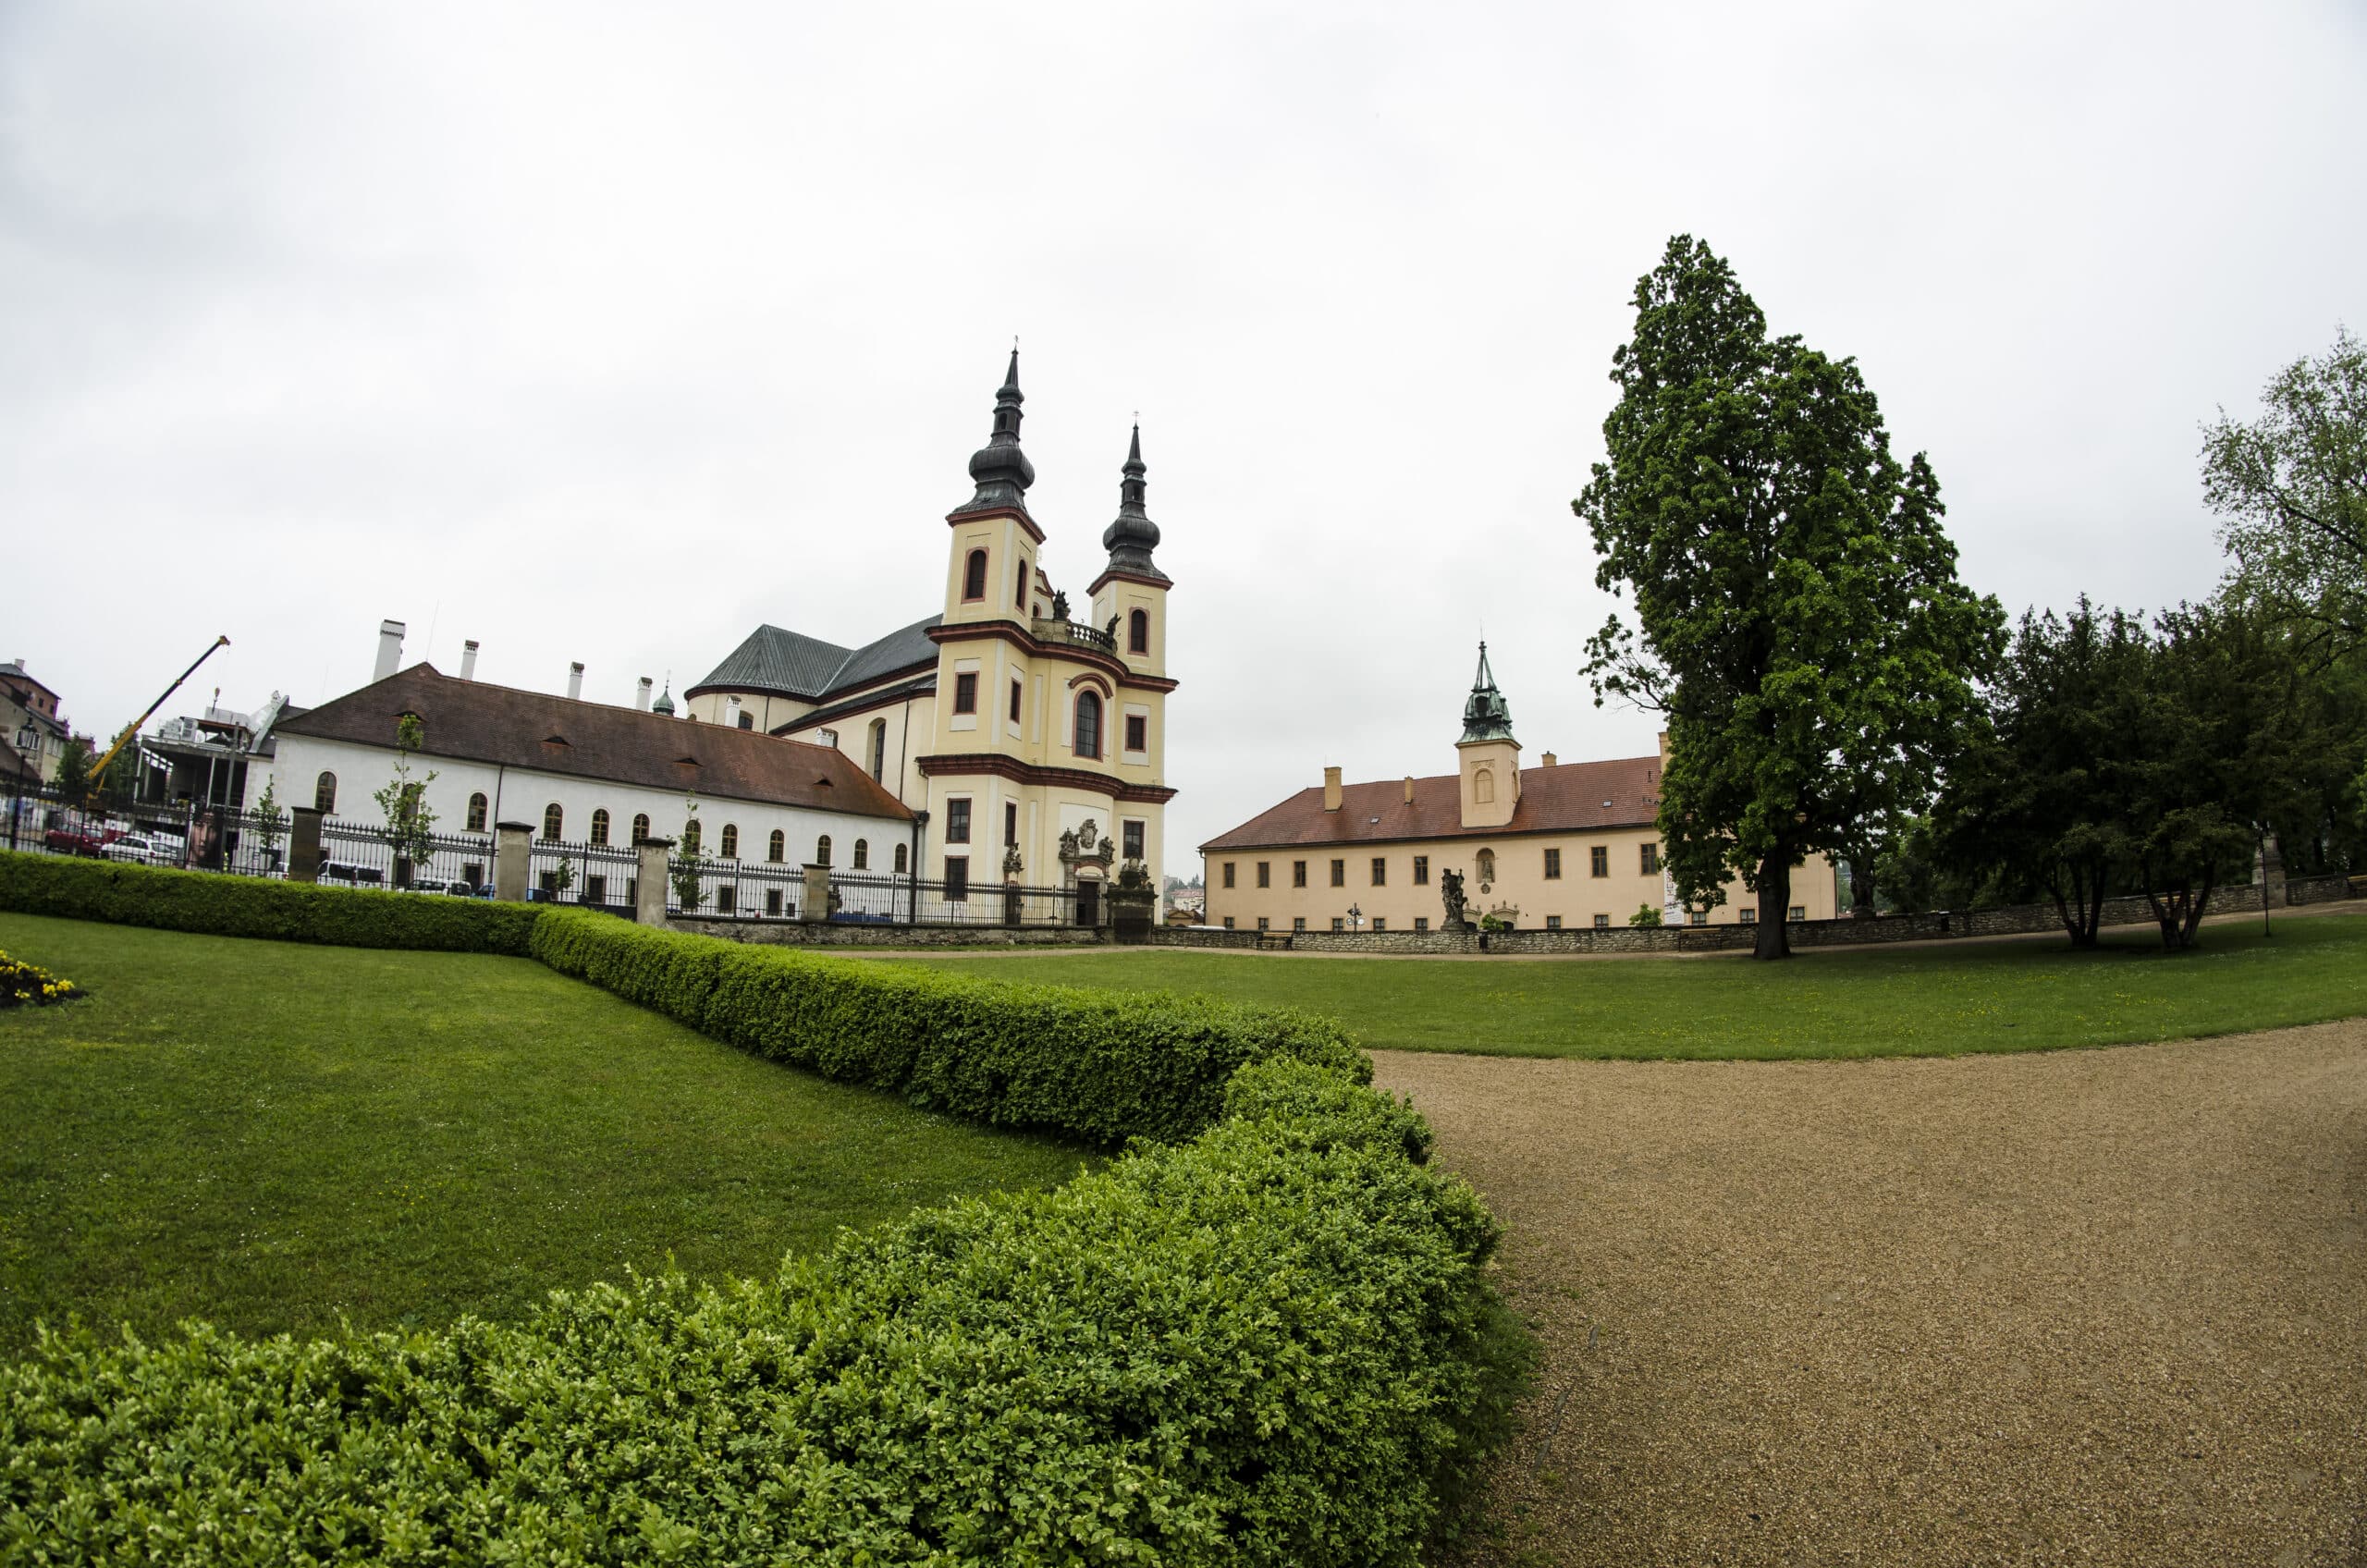
I scoured my photography folders and selected a photograph that would greatly benefit from editing to the sky. This photo was taken in the castle gardens of Litomyšl, Czech Republic. The sky that day was gray and dull, without any clearly defined clouds. It was also drizzling. As a result, the sky in the photograph was boring and drab. It’s the perfect candidate for our demonstration of replacing the sky.
I was also on the hunt for a photograph with a more distinctive sky. I found it in a photograph taken in Brno, Czech Republic. As a whole, the photo isn’t very usable, but the weather in it is noticeably better. For this reason, I’ll borrow the top part of the photograph to replace the sky of my original photo.
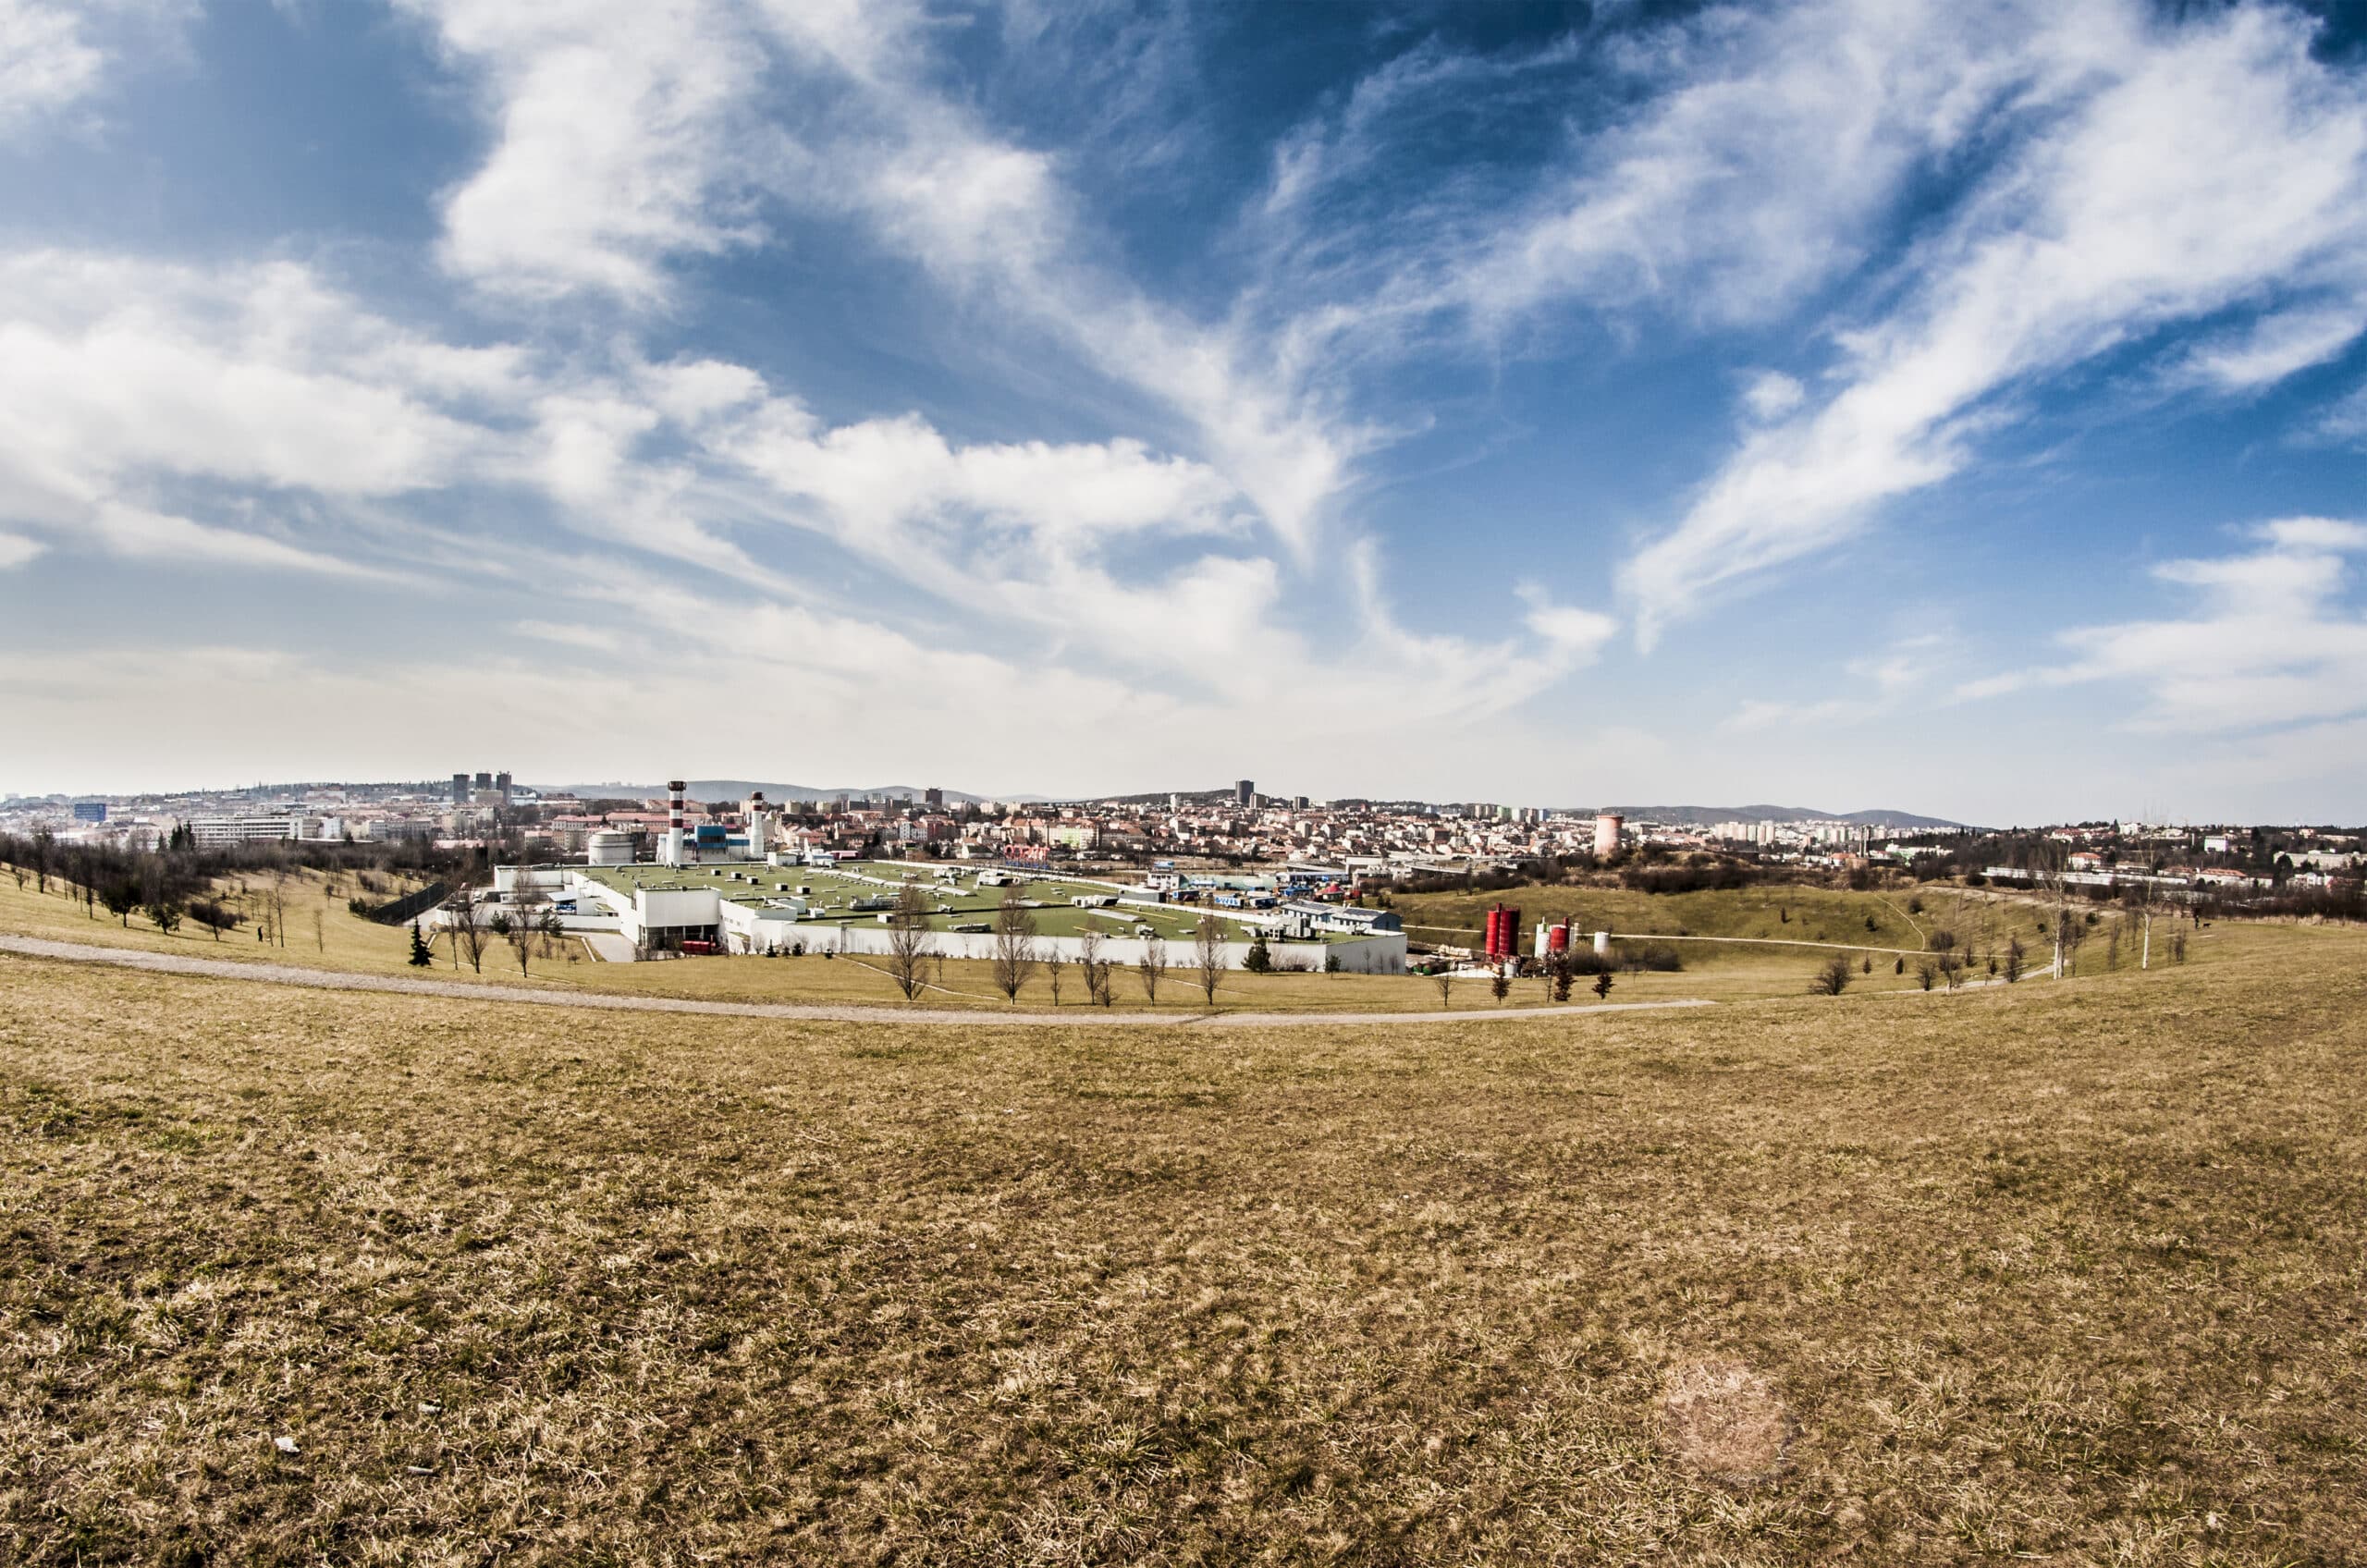
Both photographs were taken using the same focal length, helping to avoid any discrepancies caused by a different width of the frame.
Step two: Overlay the image
Before we get to the second step of overlaying the image, notice that the original photograph’s colors are faded due to the gloomy weather. On the other hand, the photo we will insert was taken in bright sunlight.
For this reason, we will add color to the original photograph in the Develop module. In this particular case, we make adjustments to white balance. We also add contrast and make other adjustments as needed. If the sky you are inserting has sun in it, you need to position it so that the shadows in the original photo are in the right direction.

Also read: Learn the Basics of Layers
Once you are happy with the colors, open the photo in the Editor module. Click +Add Layer -> Paste from File and choose the photo with the sky that you want to use. It is pasted as a new layer. Choose the Darken blending mode for this new layer. This ensures that the new sky will cover only the white parts of the photo.

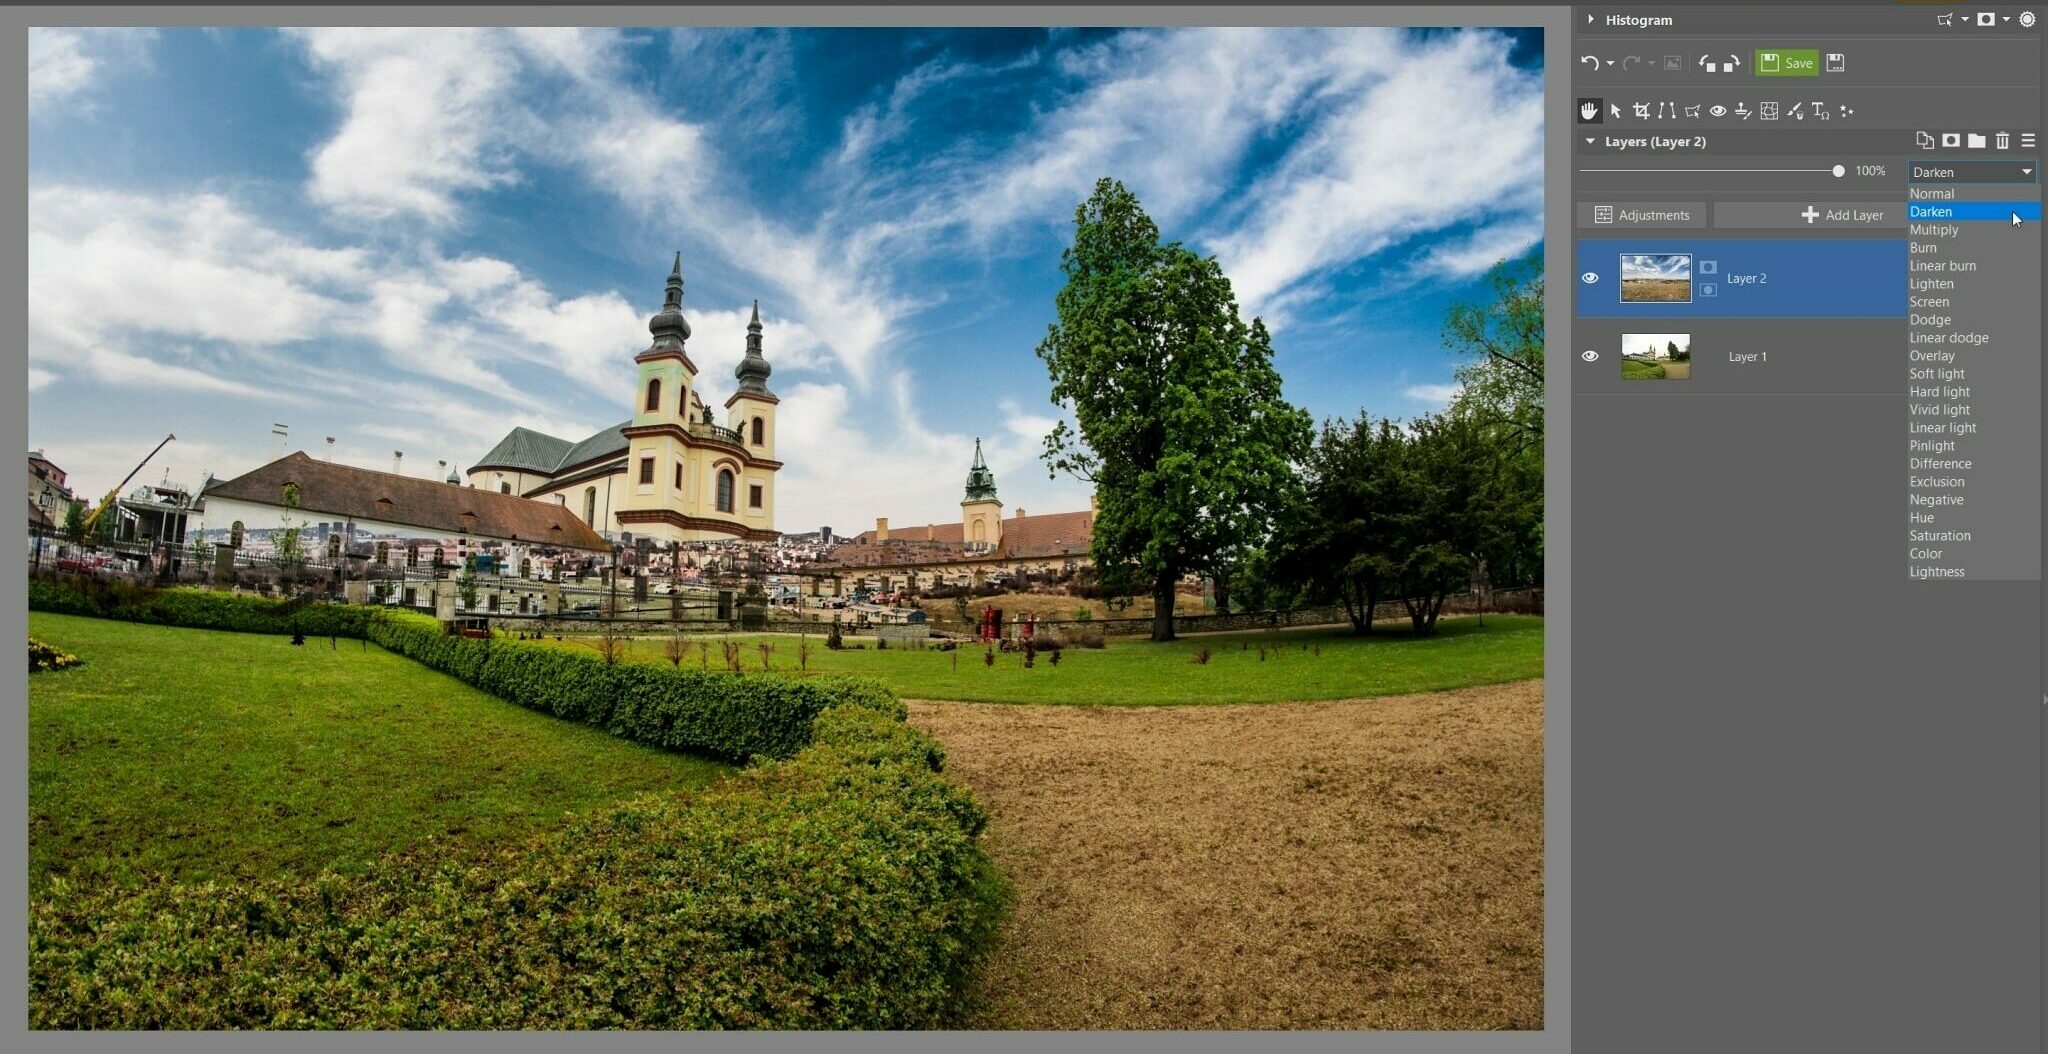
Next, you need to remove the bottom part of the inserted photo where the sky is not present. To do so, use a layer mask. Click the icon at the top of the layer list to create a mask and then Reveal All. A new mask icon appears next to the layer.
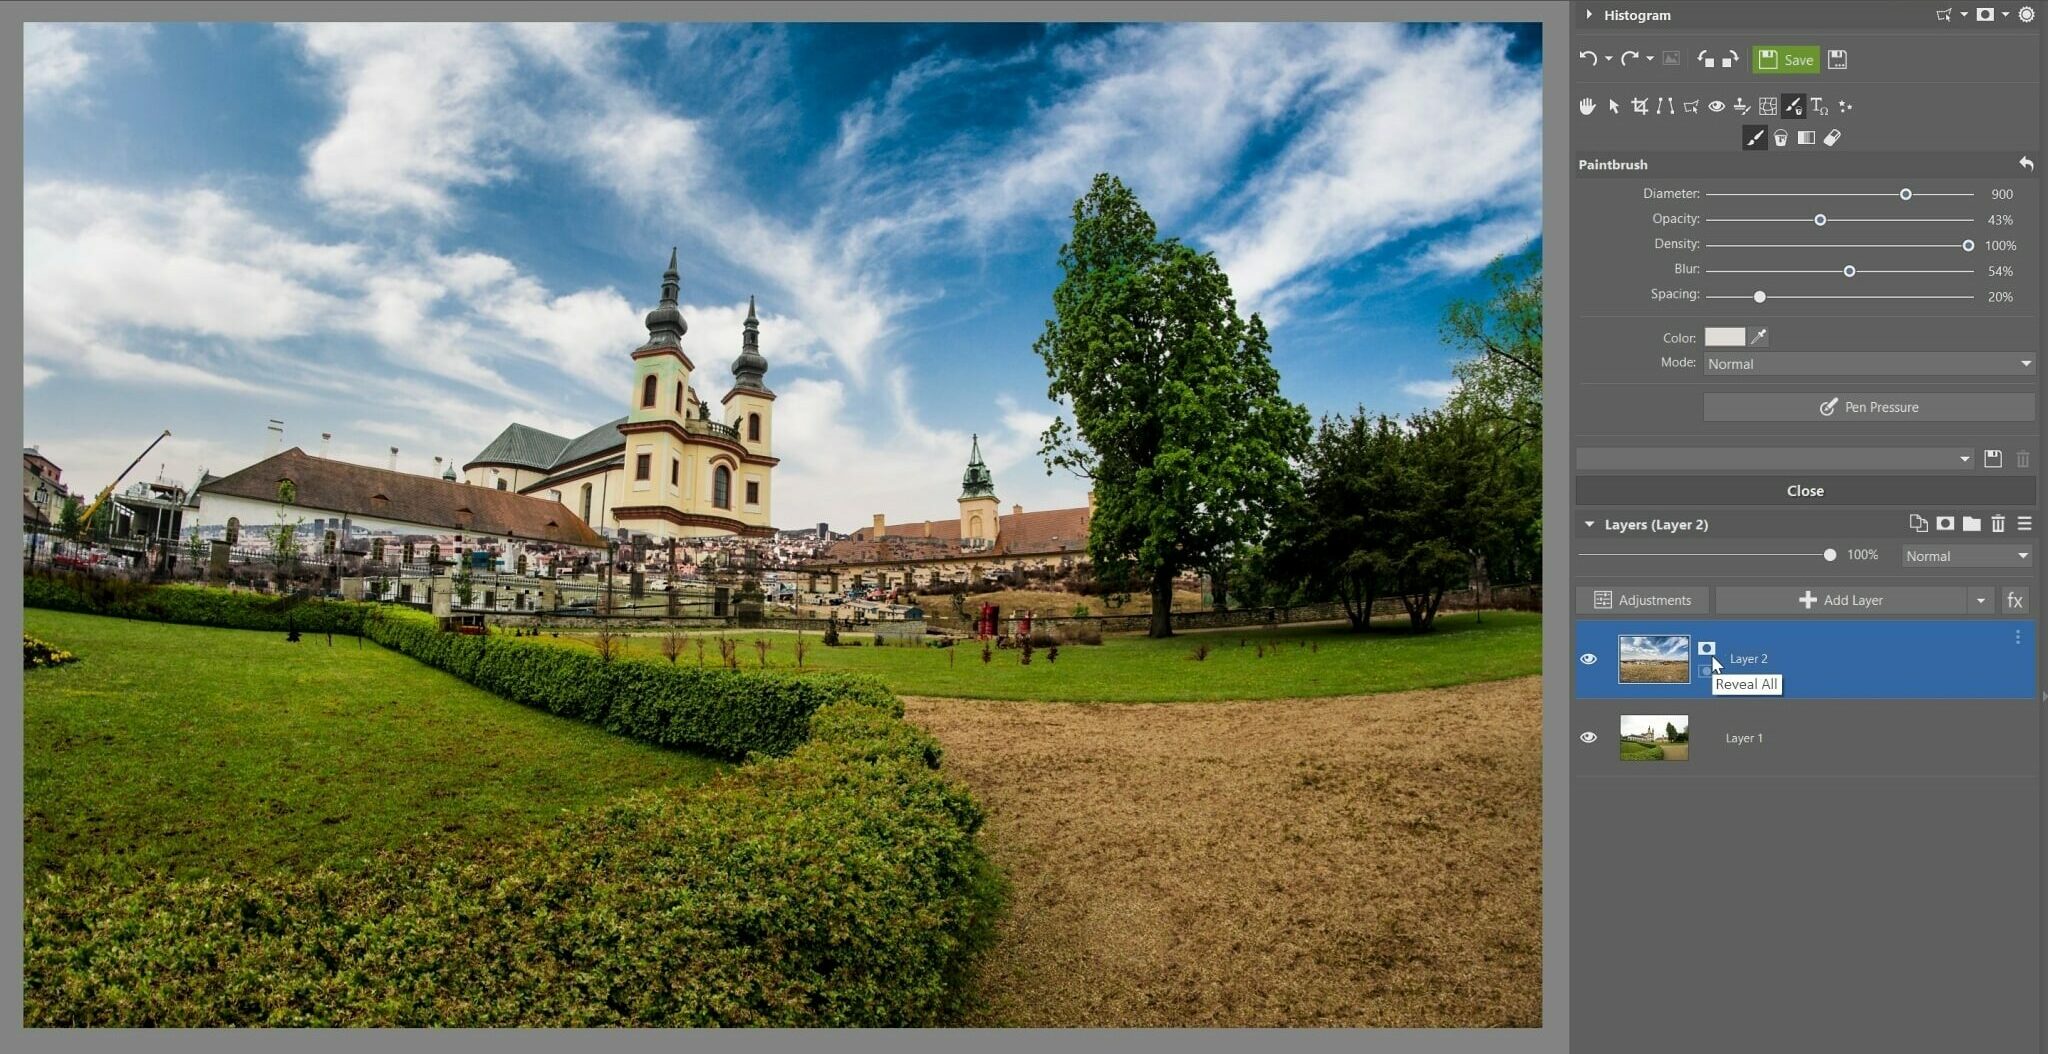
Click the mask and choose the Paintbrush (B) tool to make certain areas invisible. For our purposes, the bottom part of the inserted photo. Choose black for your paintbrush and use it to paint areas of the photo that you want to remove. If you go outside the lines, you don’t have to click “Back.” Just choose white and then paint these areas to make them visible again.
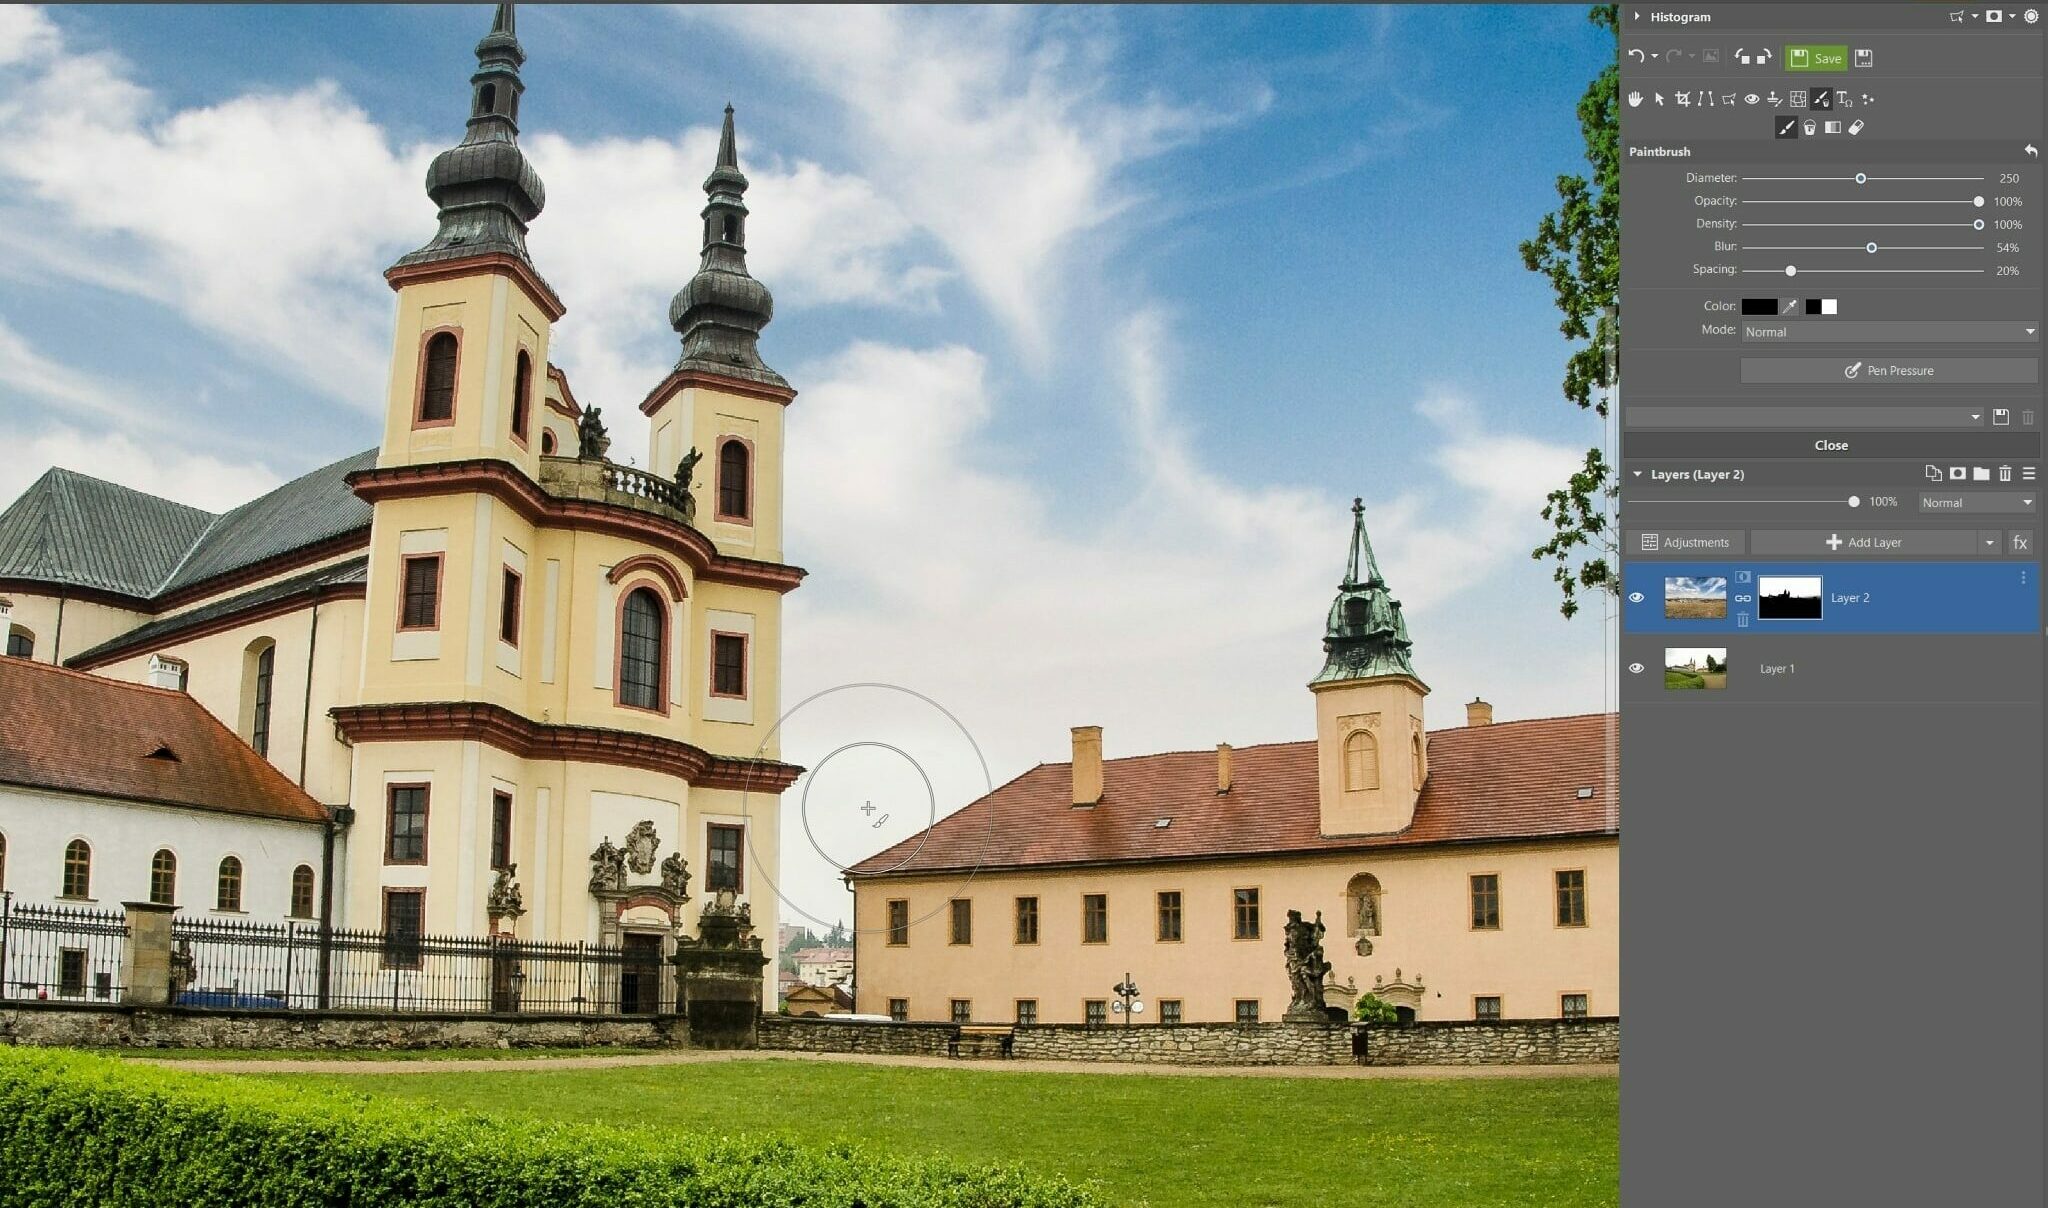
As you can see, there is no need to spend hours masking every detail. Thanks to the Darken blending mode, the new sky is only visible in the bright areas. This eliminates the need to painstakingly pick out every tree branch, chimney, and other details.

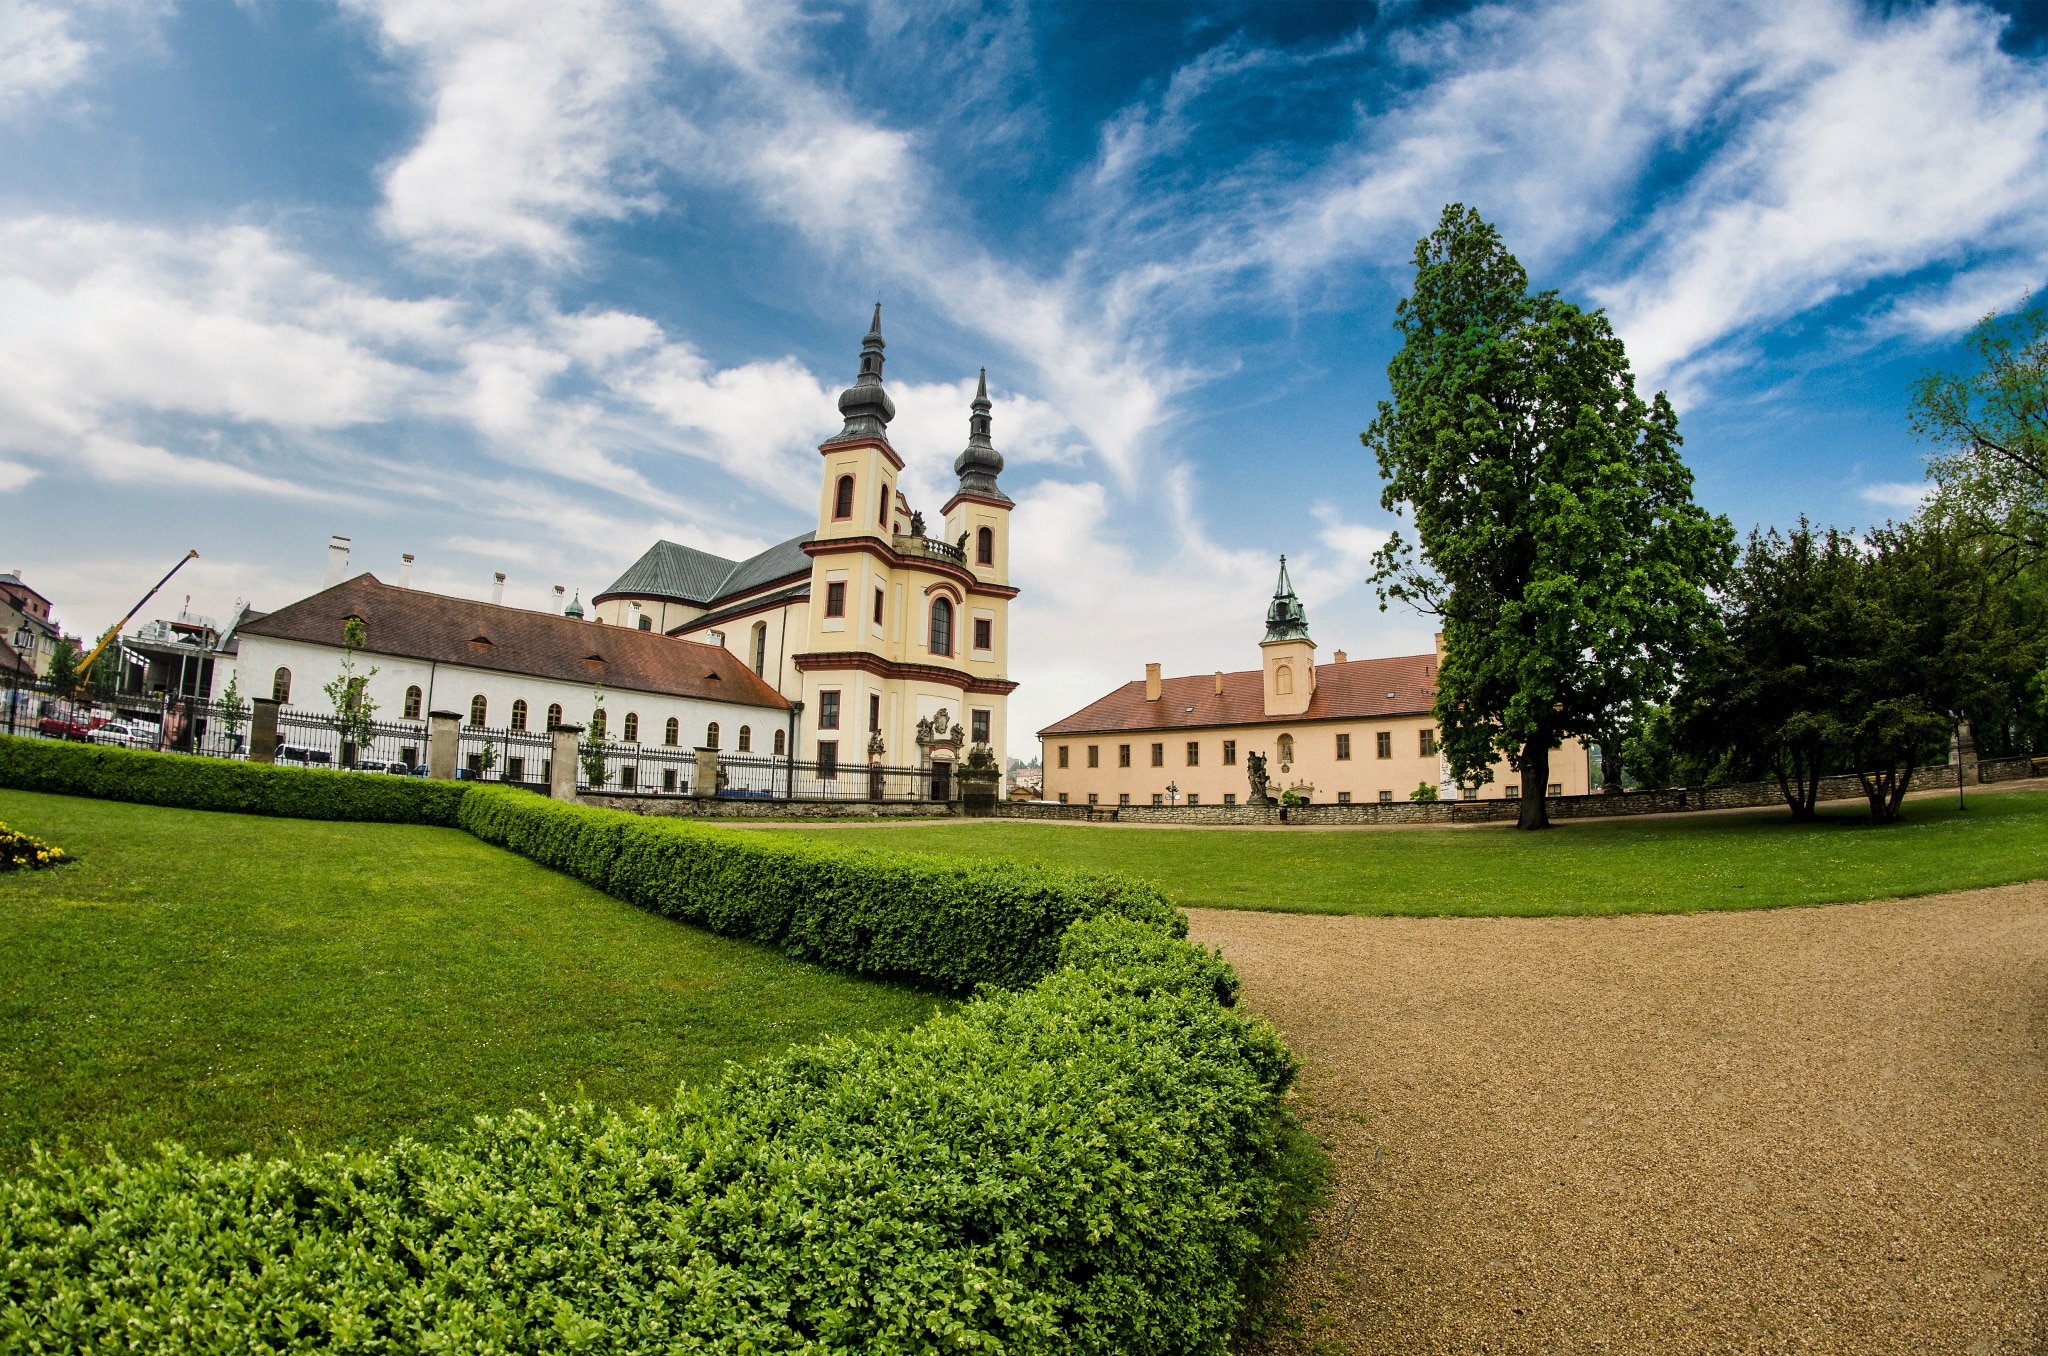
Before and after. To see the changes, move the divider between the pictures.
Is it cheating?
A photo that’s been edited never tells the whole story. It essentially lies about how my trip was. However, in photography, there may be times when you want to capture something other than reality.
I frequently use an alternate method when photographing skies. I take a dark and bright version of the sky and later stack the images together. In some cases, it’s more natural and personal than letting the photo be “auto-assembled” using HDR.
I personally prefer to use the actual sky because that’s what photography in its essence is all about. The editing process described above crosses into the realm of graphic design rather than photography as we know it.
Try replacing the sky for yourself and add vibrancy to your photos. Download Zoner Studio free for 7 days.
TerryB
Great tutorial. One thing though, and it will seem a dumb question as I don’t do this type of image editing, but now feel I ought to, how exactly did you import the sky image to overlay the original?
On a general note, this method looks far more natural to my eyes than HDR and, yes, it’s not the real thing, but only you would know that. Just let others admire our “seeing eye”. Unless something looks really unnatural to us we take what we see as reality.
One thing I definitely would have done is edit out the crane! :D)
Zoner
Thanks for your comment, Terry!
To overlay the original, you choose Place Image (key I) and then Paste from File. Find the picture you’d like to insert and voilà, it’s there.
This kind of editing is always a matter of everyone’s photo-ethique, so there is no right and wrong. And we’ve also happened to see very nice examples of HDR – you actually wouldn’t tell it’s HDR :).
Dgsage
Hello, I am sorry but if I do that I just have the photo overlaid covering completely the original one. How do you select the sky from the first one or how do you select the part you want to keep in the first one. I am very knew at using Zoner and try to recover the use of layers I had an other software I used to work with.
Zoner
When you have the second image inserted, don’t hit Apply, but choose a Selection Brush (Shift+Q) and then select the parts you want to keep. When you’re satisfied, then hit Apply.
You can learn more about selection tools here: https://learn.zoner.com/learn-to-use-selections-your-key-to-precision-edits/
Brian Evans
Well it was fascinating, but as a beginner, I understood about 10% of it. Doubtless many people thought it was a breeze, but please bear the beginners in mind now and then.
Zoner
Thank you Brian for your comment – is there anything we can explain better, maybe in other articles? Please feel free to write us to magazine@zonerama.com what you want to read about. Thank you for your feedback!
Paolo Gennari
Questi tutorial, sono interessanti , ma non esplicativi, occorrerebbe specificare i vari passaggi che si devono compiere per arrivare al risultato finale, solo cosi il tutorial avrebbe la sua funzionalità.
Zoner
Thank you for your feedback, we’ll try to be more specific next time.
Sam
Yes, a very good tutorial indeed. The finished photo is far more pleasing to the eye, and although it is now not an accurate part of your day, it will, in the fullness of time become so. Better to edit the photo as you have done, than have it deleted because of its drabness, the palace would then not be part of “your day”, and therefore not a true record either. A catch 22, be damned if you do, or damned if you don’t.
Zoner
Well, it always depend why you take photographs. We think both, author and you are right. :)
Dan O
An excellent article. I must disagree with the statement “… keep in mind that this kind of edit, useful though it is, pulls you away from photography towards the graphic arts.” I think we need to make the distinction between journalistic and artistic photography more clear.
If you’re not presenting your photo as an accurate representation of what was there, if you offer your photo as an image that communicates something of the feeling that you had at the time, then you’re allowed much greater freedom in editing. Ansel Adams is said to have made 10 or more versions of his famous photo of the moon over Half Dome before settling on the one that we all know and love. (The final version has a darkened sky to lend drama to the image.) Is that not photography?
Cameras don’t always capture what our eyes see, and they certainly don’t capture what we feel. I’m not a journalist, I’m a photographer, and it’s not just a freedom, but a driving force of my art to edit images so that they better reflect the emotion, the story, the drama of my subject.
Zoner
Nicely said, that’s definitely a good point too, thank you!