Softer Photos Using a Mist Filter: The Results of Our Test and Some Alternatives

Mist filters are special effect filters that soften an image, creating dreamy and misty photos. Modern lenses are so good at times that the photos they produce can be boring. Why not enhance them a bit by adding a filter that adds the character of a vintage lens?
In this article and video tutorial, we’ll show you how to shoot with a mist filter. You’ll also find out how you can make this type of filter on your own or get a similar effect using Zoner Photo Studio X.
How does it work?
These softening diffusion filters go by many different names depending on the manufacturer – Pro-Mist, Black Mist, Cinebloom, Dream FX… For our purposes, we’re going to call them all mist filters as that is what these filters do. They are small pieces of glass with evenly-spaced droplets that give your photo that classic softening effect.

Filters are sold at various strength levels. 1/8 is the weakest, through 1/4, 1/2, to full-strength at 1, which gives the most noticeable effect.
Blooming highlights, smoother skin
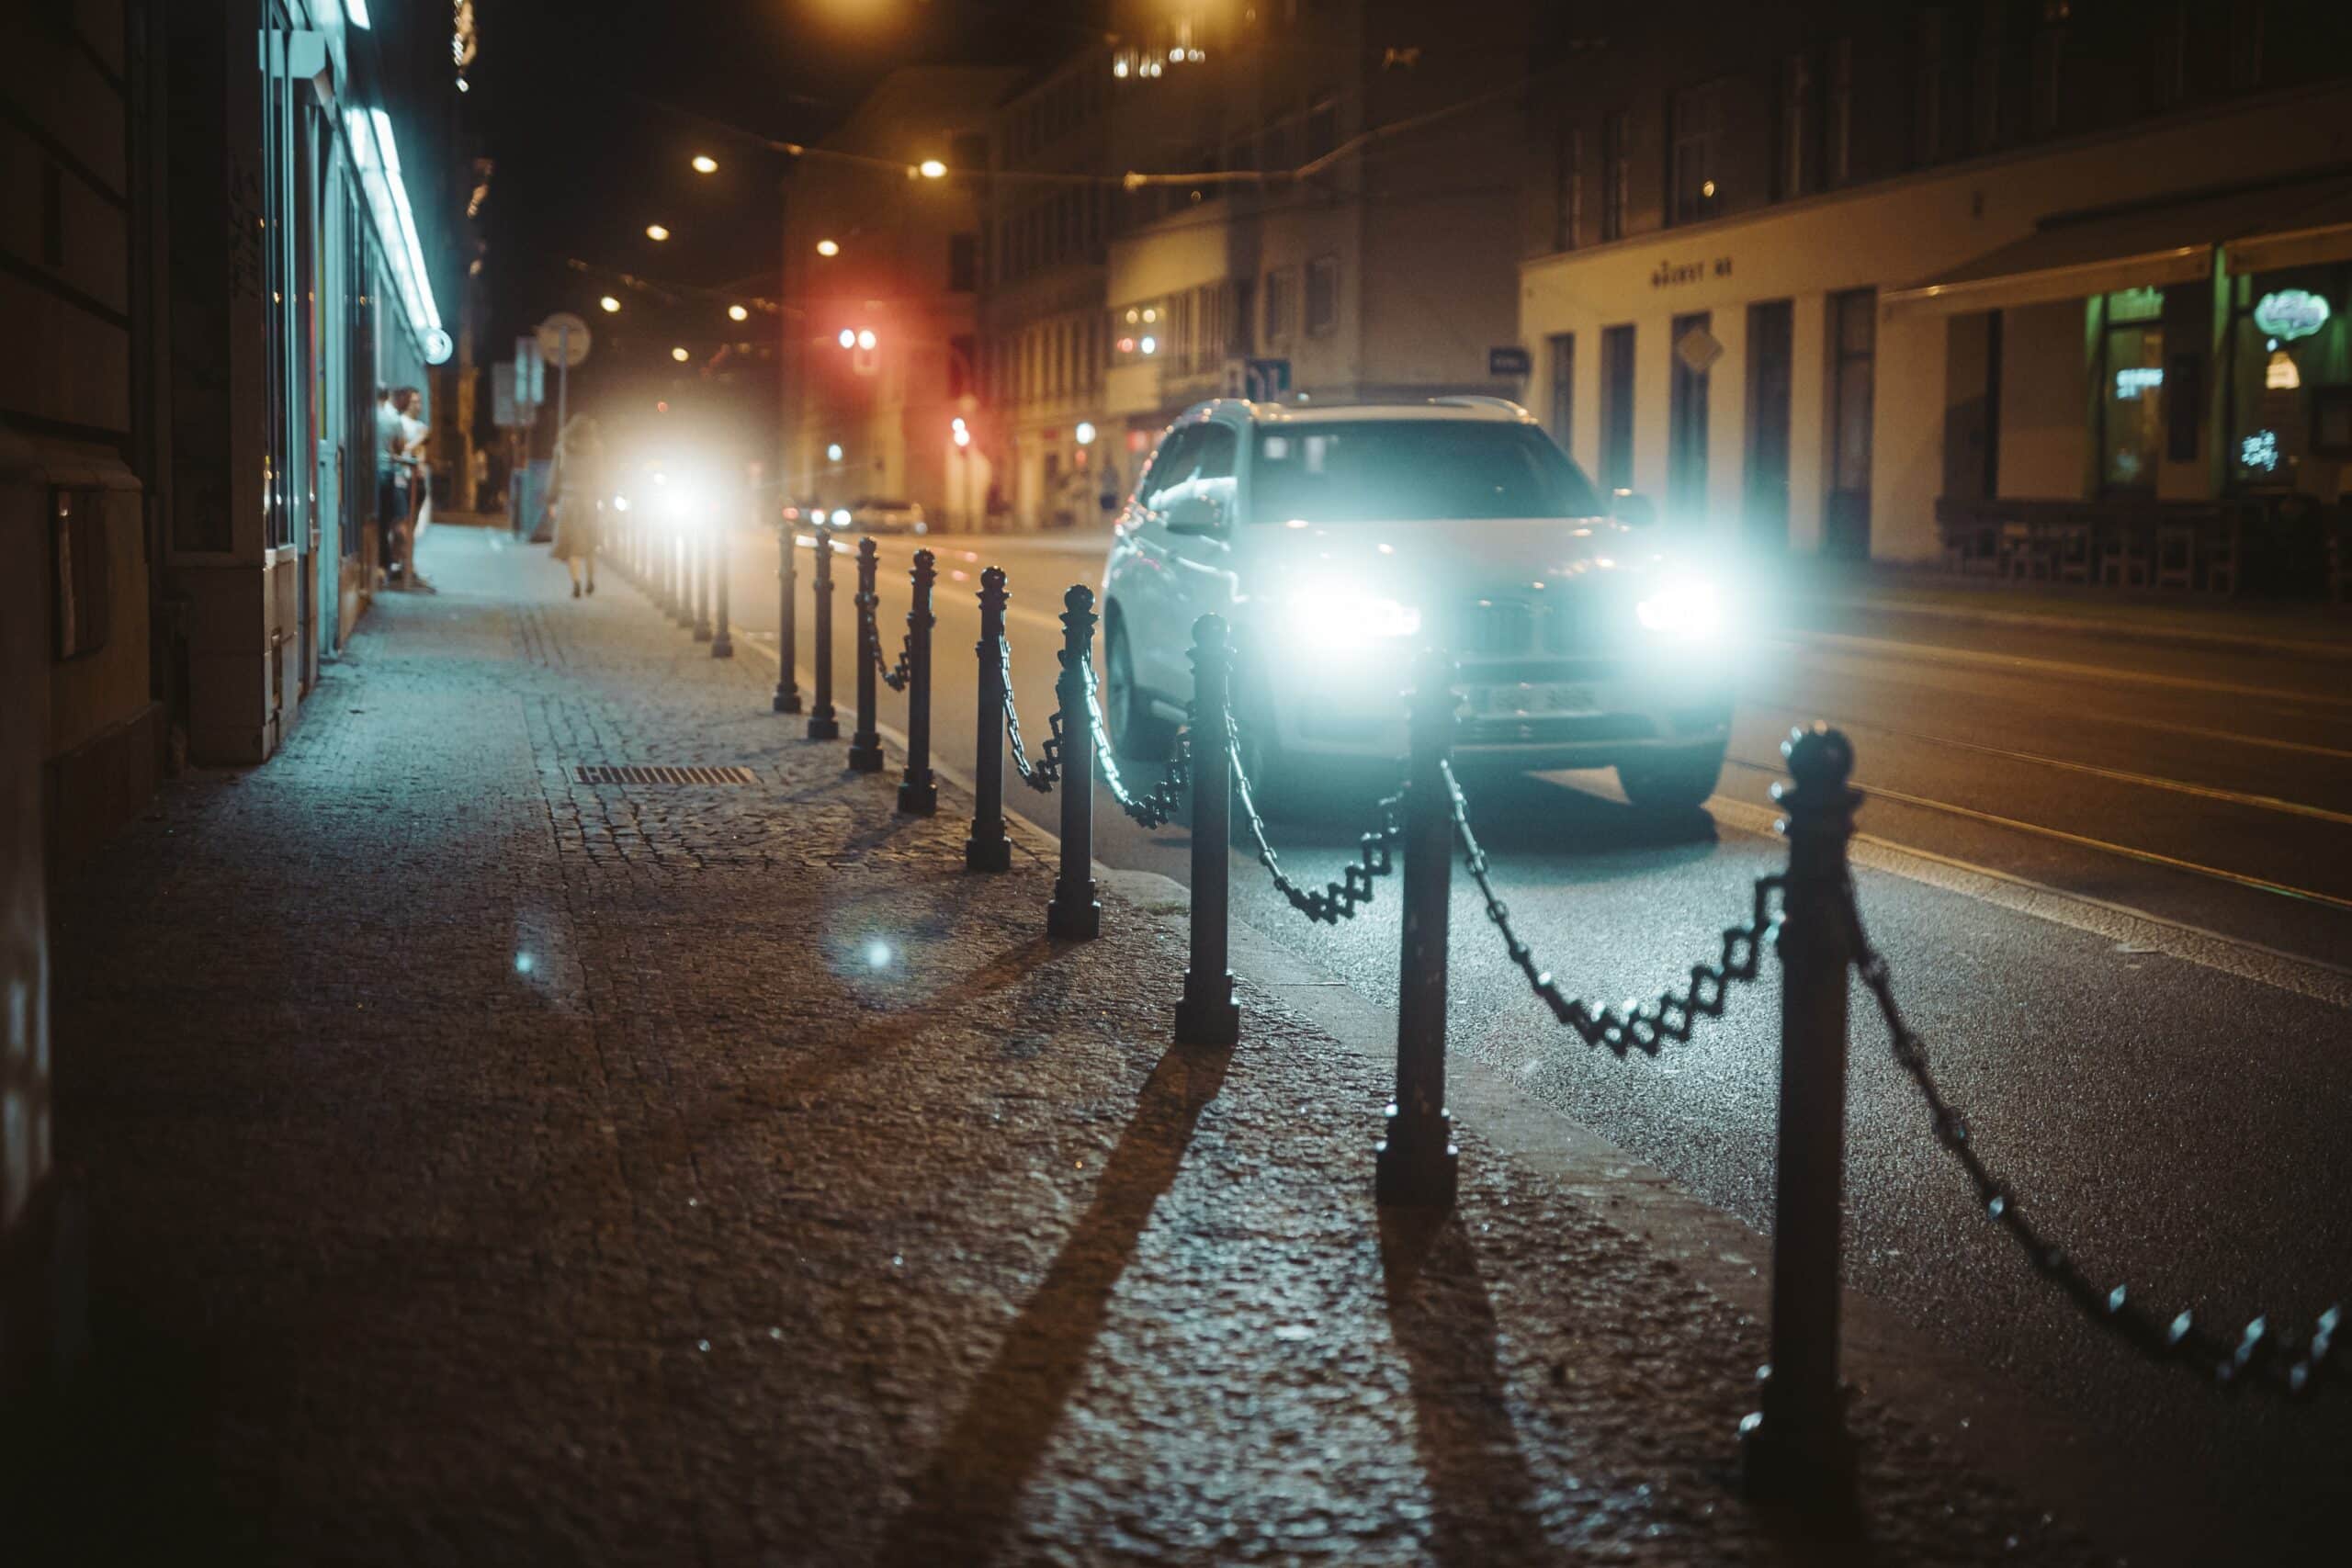
The most noticeable effect at first glance is a soft glow around light sources. This glow is most often seen in lights that are shone directly into the lens. Seek out backlight to make this blooming effect as strong as possible.

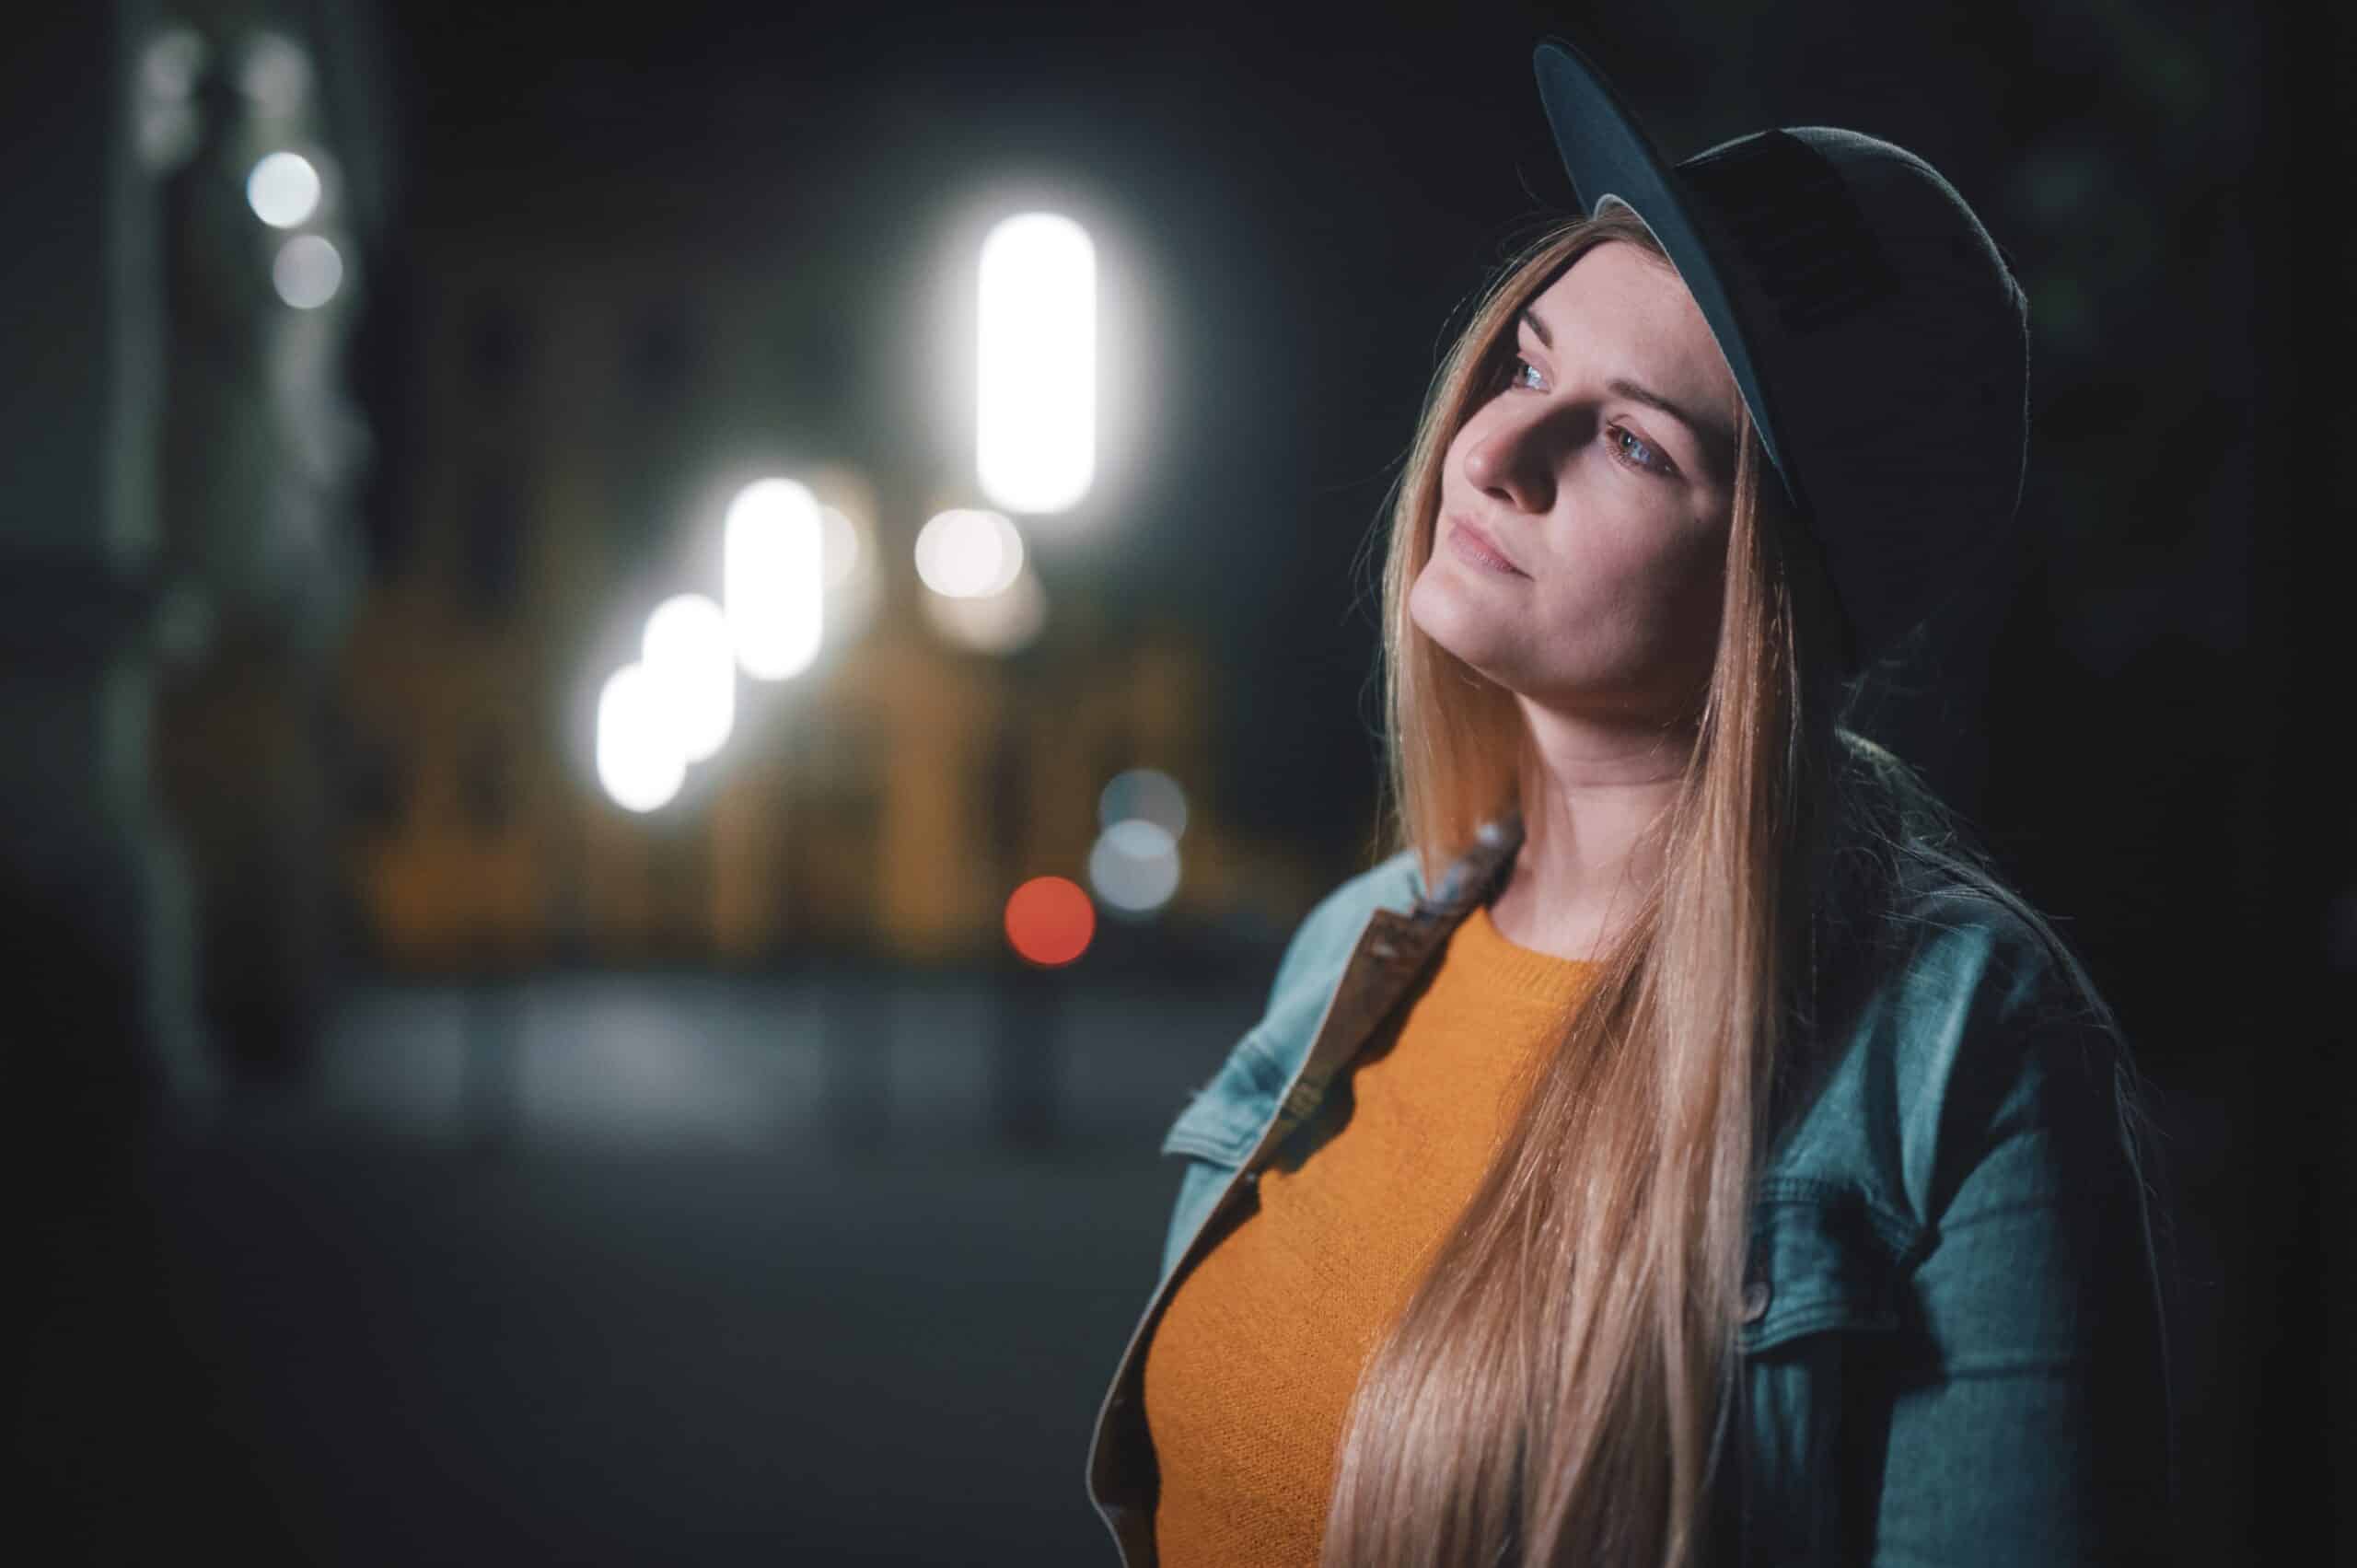
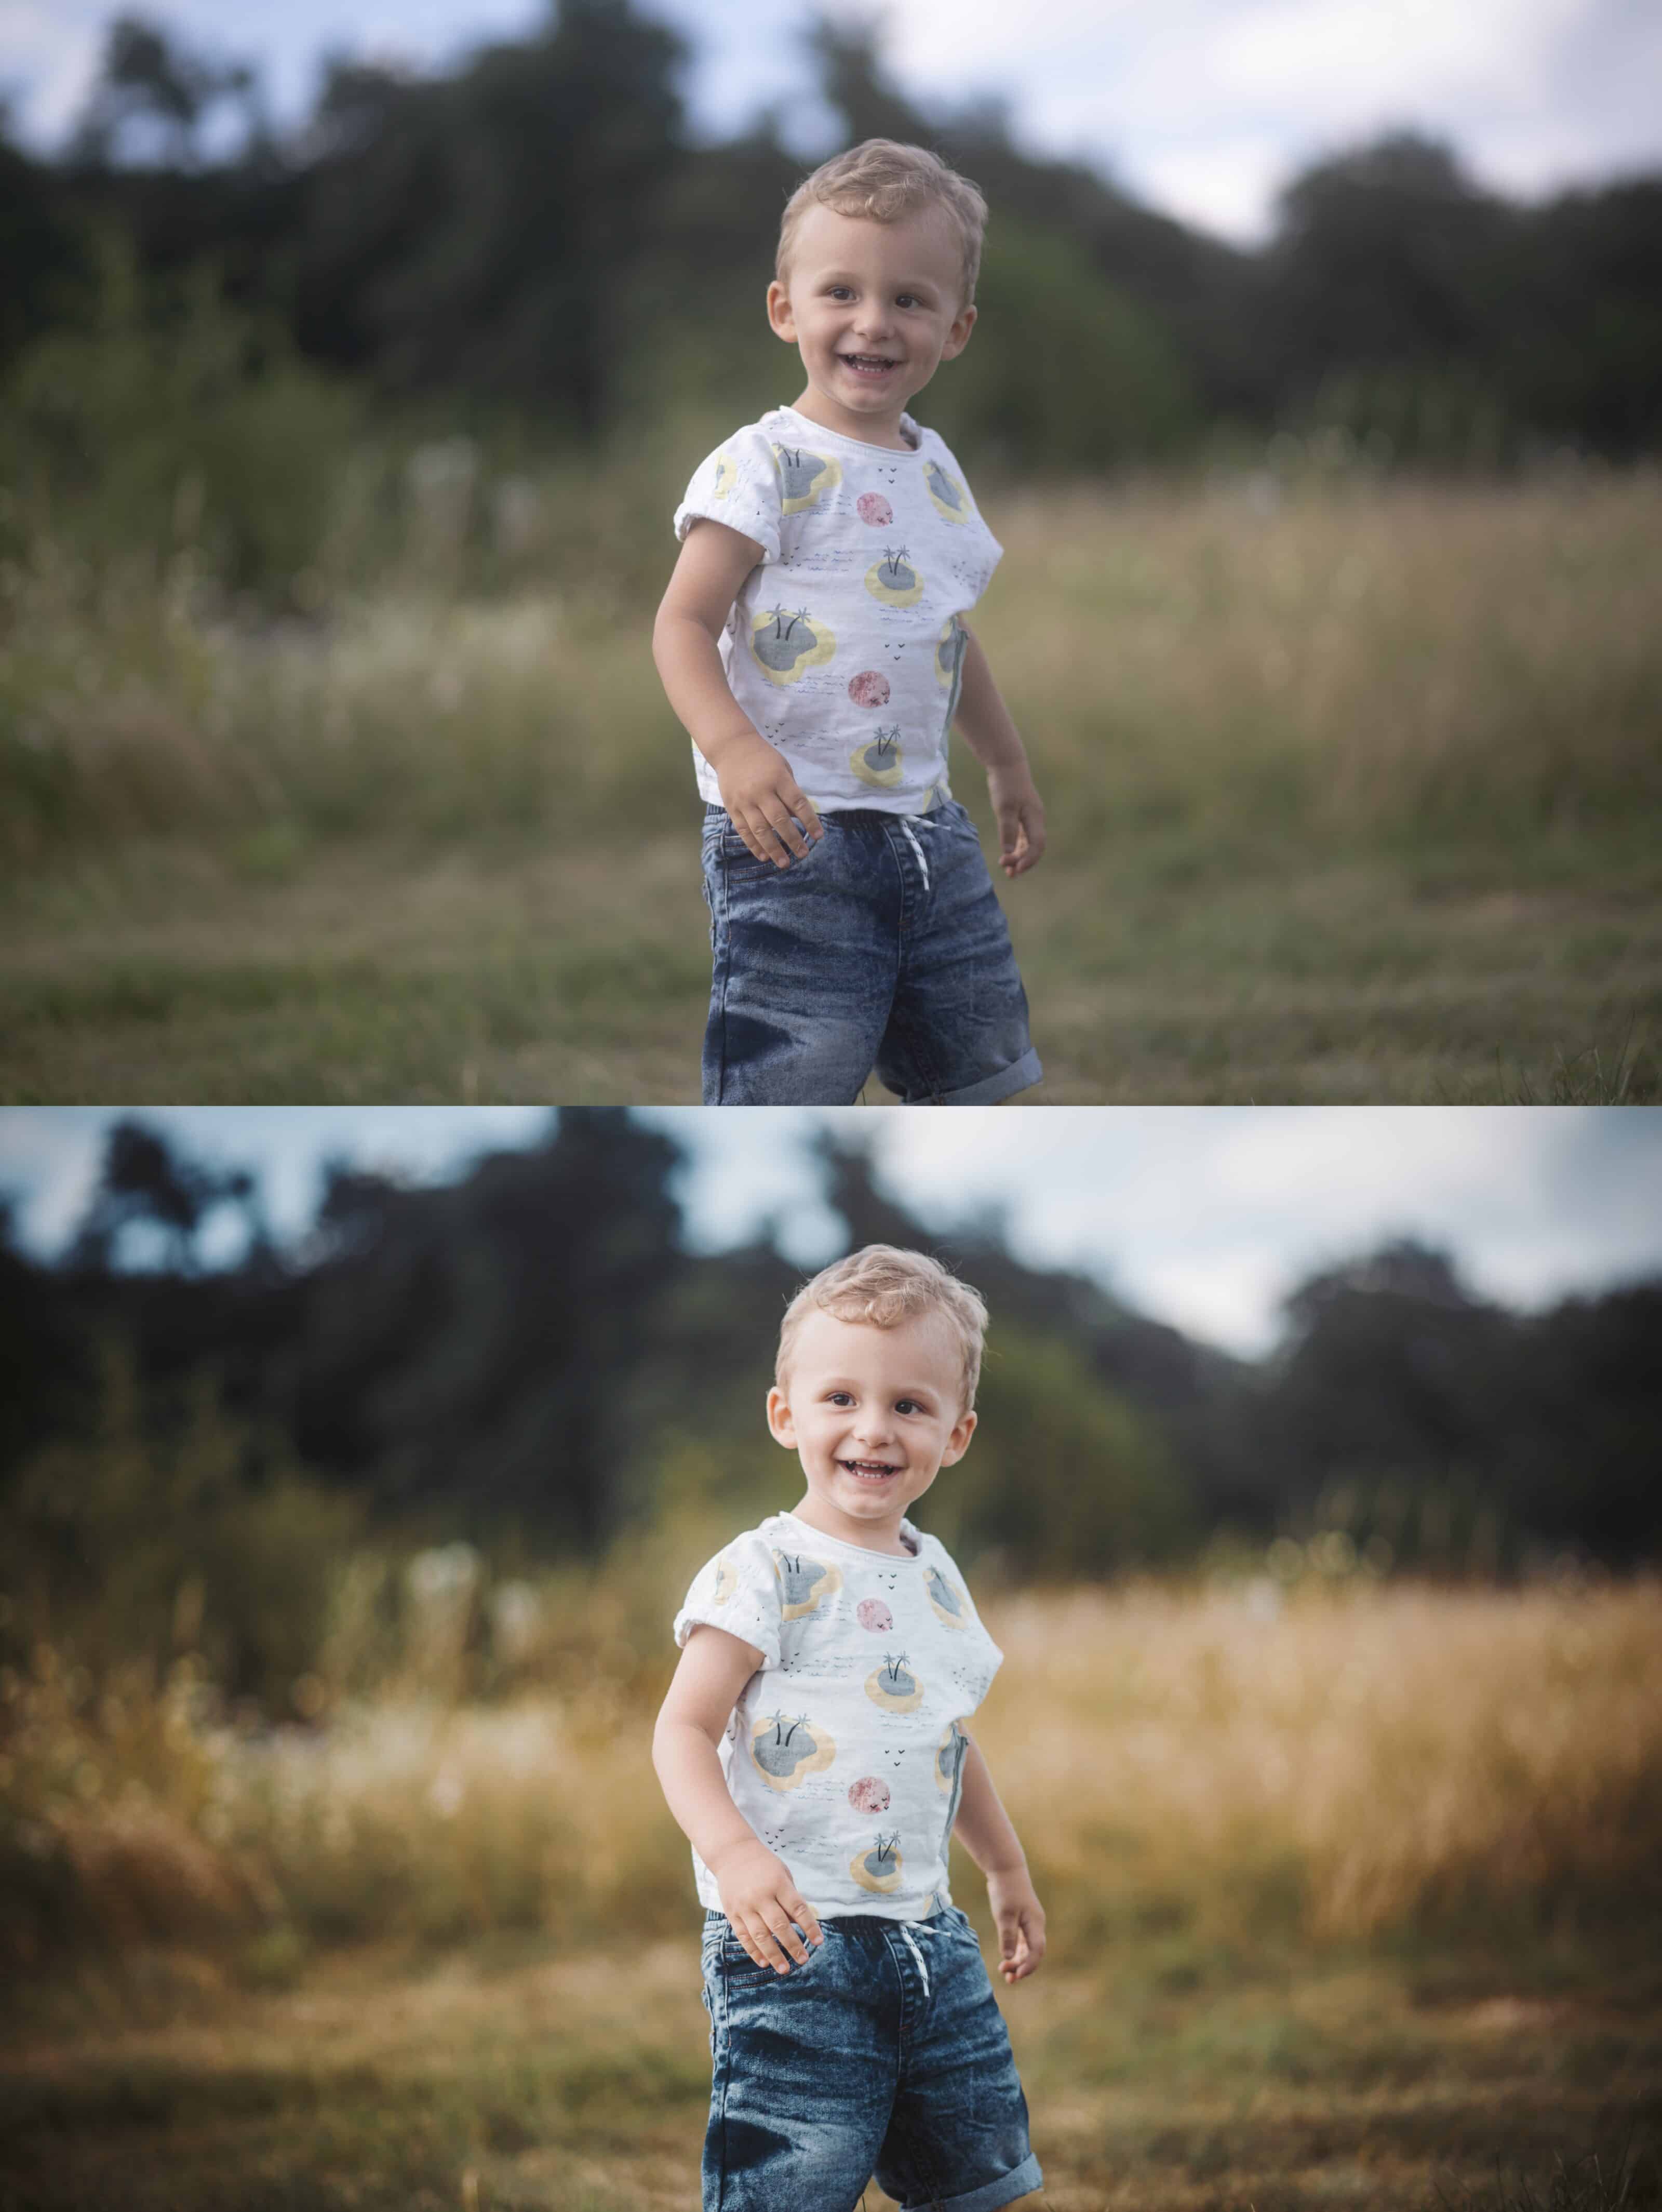
A secondary result of the mist filter is softening of the skin. The photo is still sharp, but edges and complexion are less defined. This will save you time when retouching. We definitely don’t want you to think you can leave out retouching. Think of it more as an added bonus.
Cover up blowouts
Another interesting feature of mist filters is the blooming of not only a single point, but any light surface. So in scenes with large dynamic range, where the camera doesn’t capture light surfaces correctly and blowouts appear, these blowouts will be smoother and less distracting thanks to the blooming effect created by the filter.

Since these filters (or comparable soft focus lenses) are often used by filmmakers, you can achieve a cinematic look using this technique along with some interesting lighting.

Account for lower contrast
Mist filters have their downside too. The softening of the image often leads to a decrease in contrast and clarity overall, in addition to decreased sharpness. When shooting in blacklight in particular, the photo often lacks contrast and is hazy. This adds a significant amount of work to your editing. Luckily tools such as Clarity, Contrast, and Dehaze in Zoner Photo Studio X, along with shooting in RAW format, can handle these issues quite well.
Make your own DIY mist filter
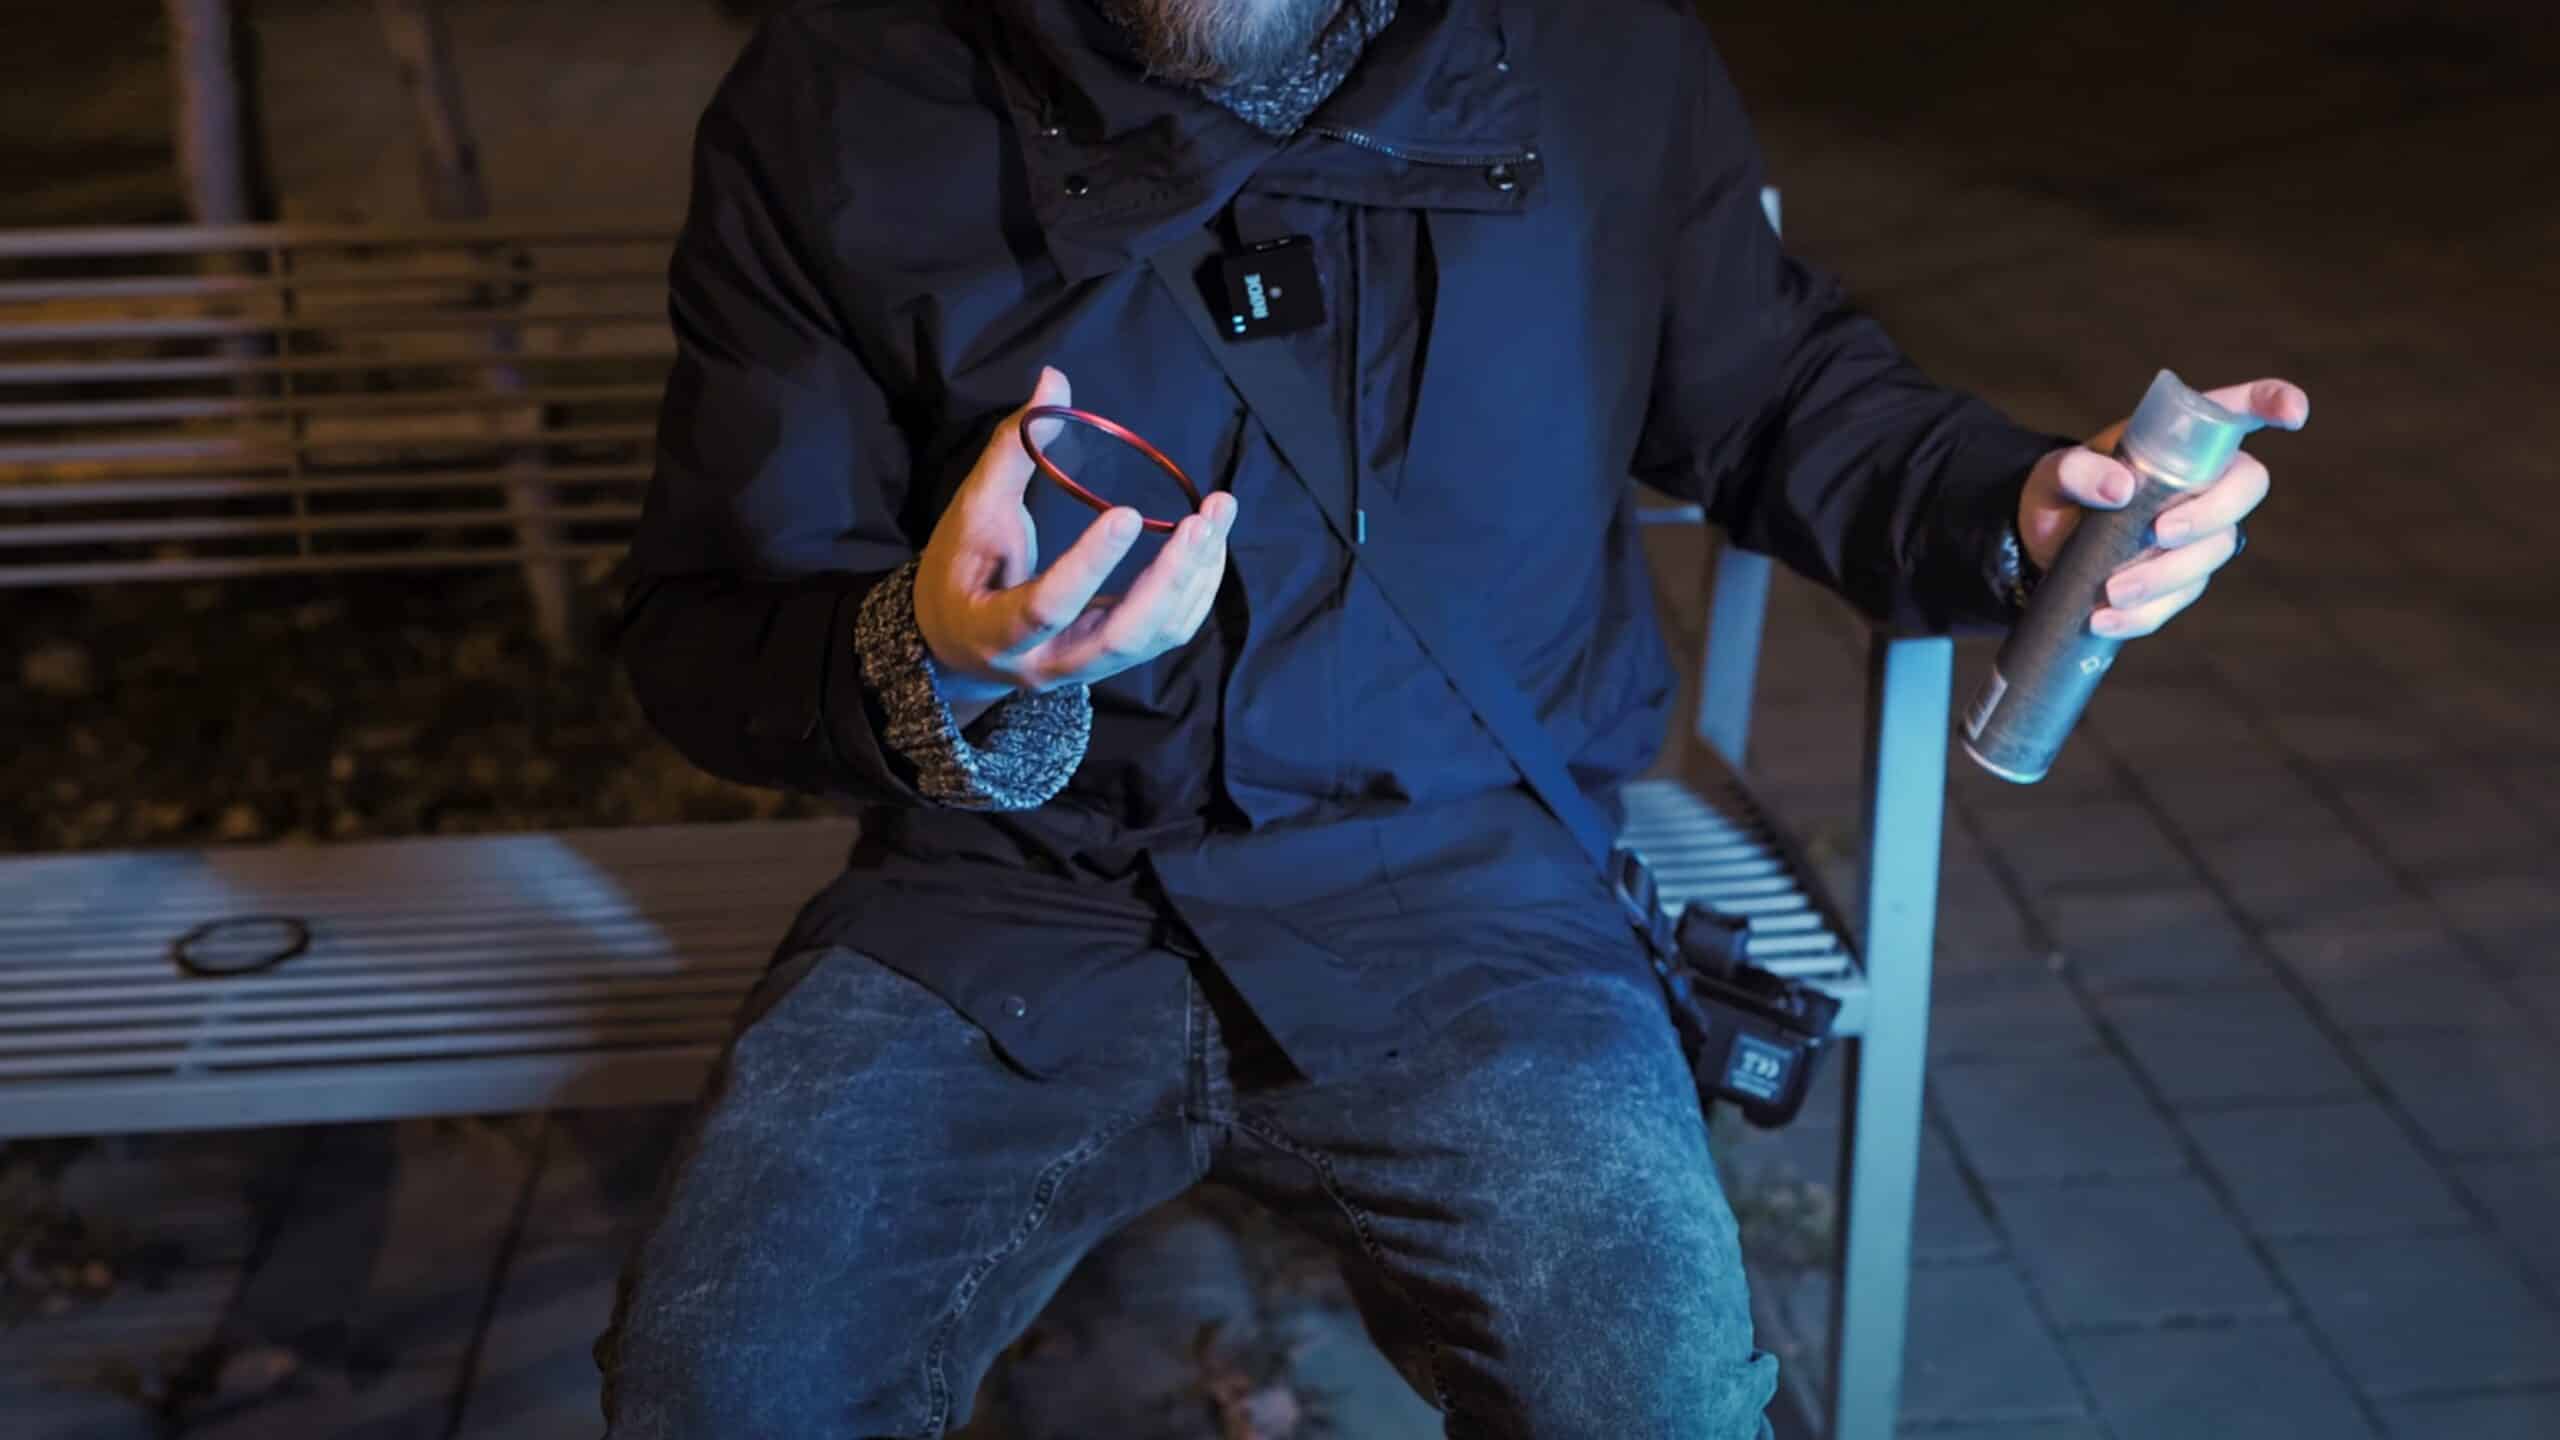
If you don’t want to spend money on a mist filter, make your own. All you need is an ordinary UV filter and a spray such as hairspray. Use the hairspray to make a cloud in the air and wave the filter to catch the droplets that will then dry on the glass. See the video at the beginning of the article for a demonstration. The process can be repeated for a stronger effect, but be careful not to overdo it.

Backlight from two RGB lights creates a strong effect when used in combination with the mist filter Nikon Z6 + 50mm Art, 1/125, f/1.4, ISO 3600. Tiffen Warm Black Pro-Mist 1/2.When comparing results under the same conditions, what surprised us was that the photos shot with DIY filters were virtually identical to those with the original filter.
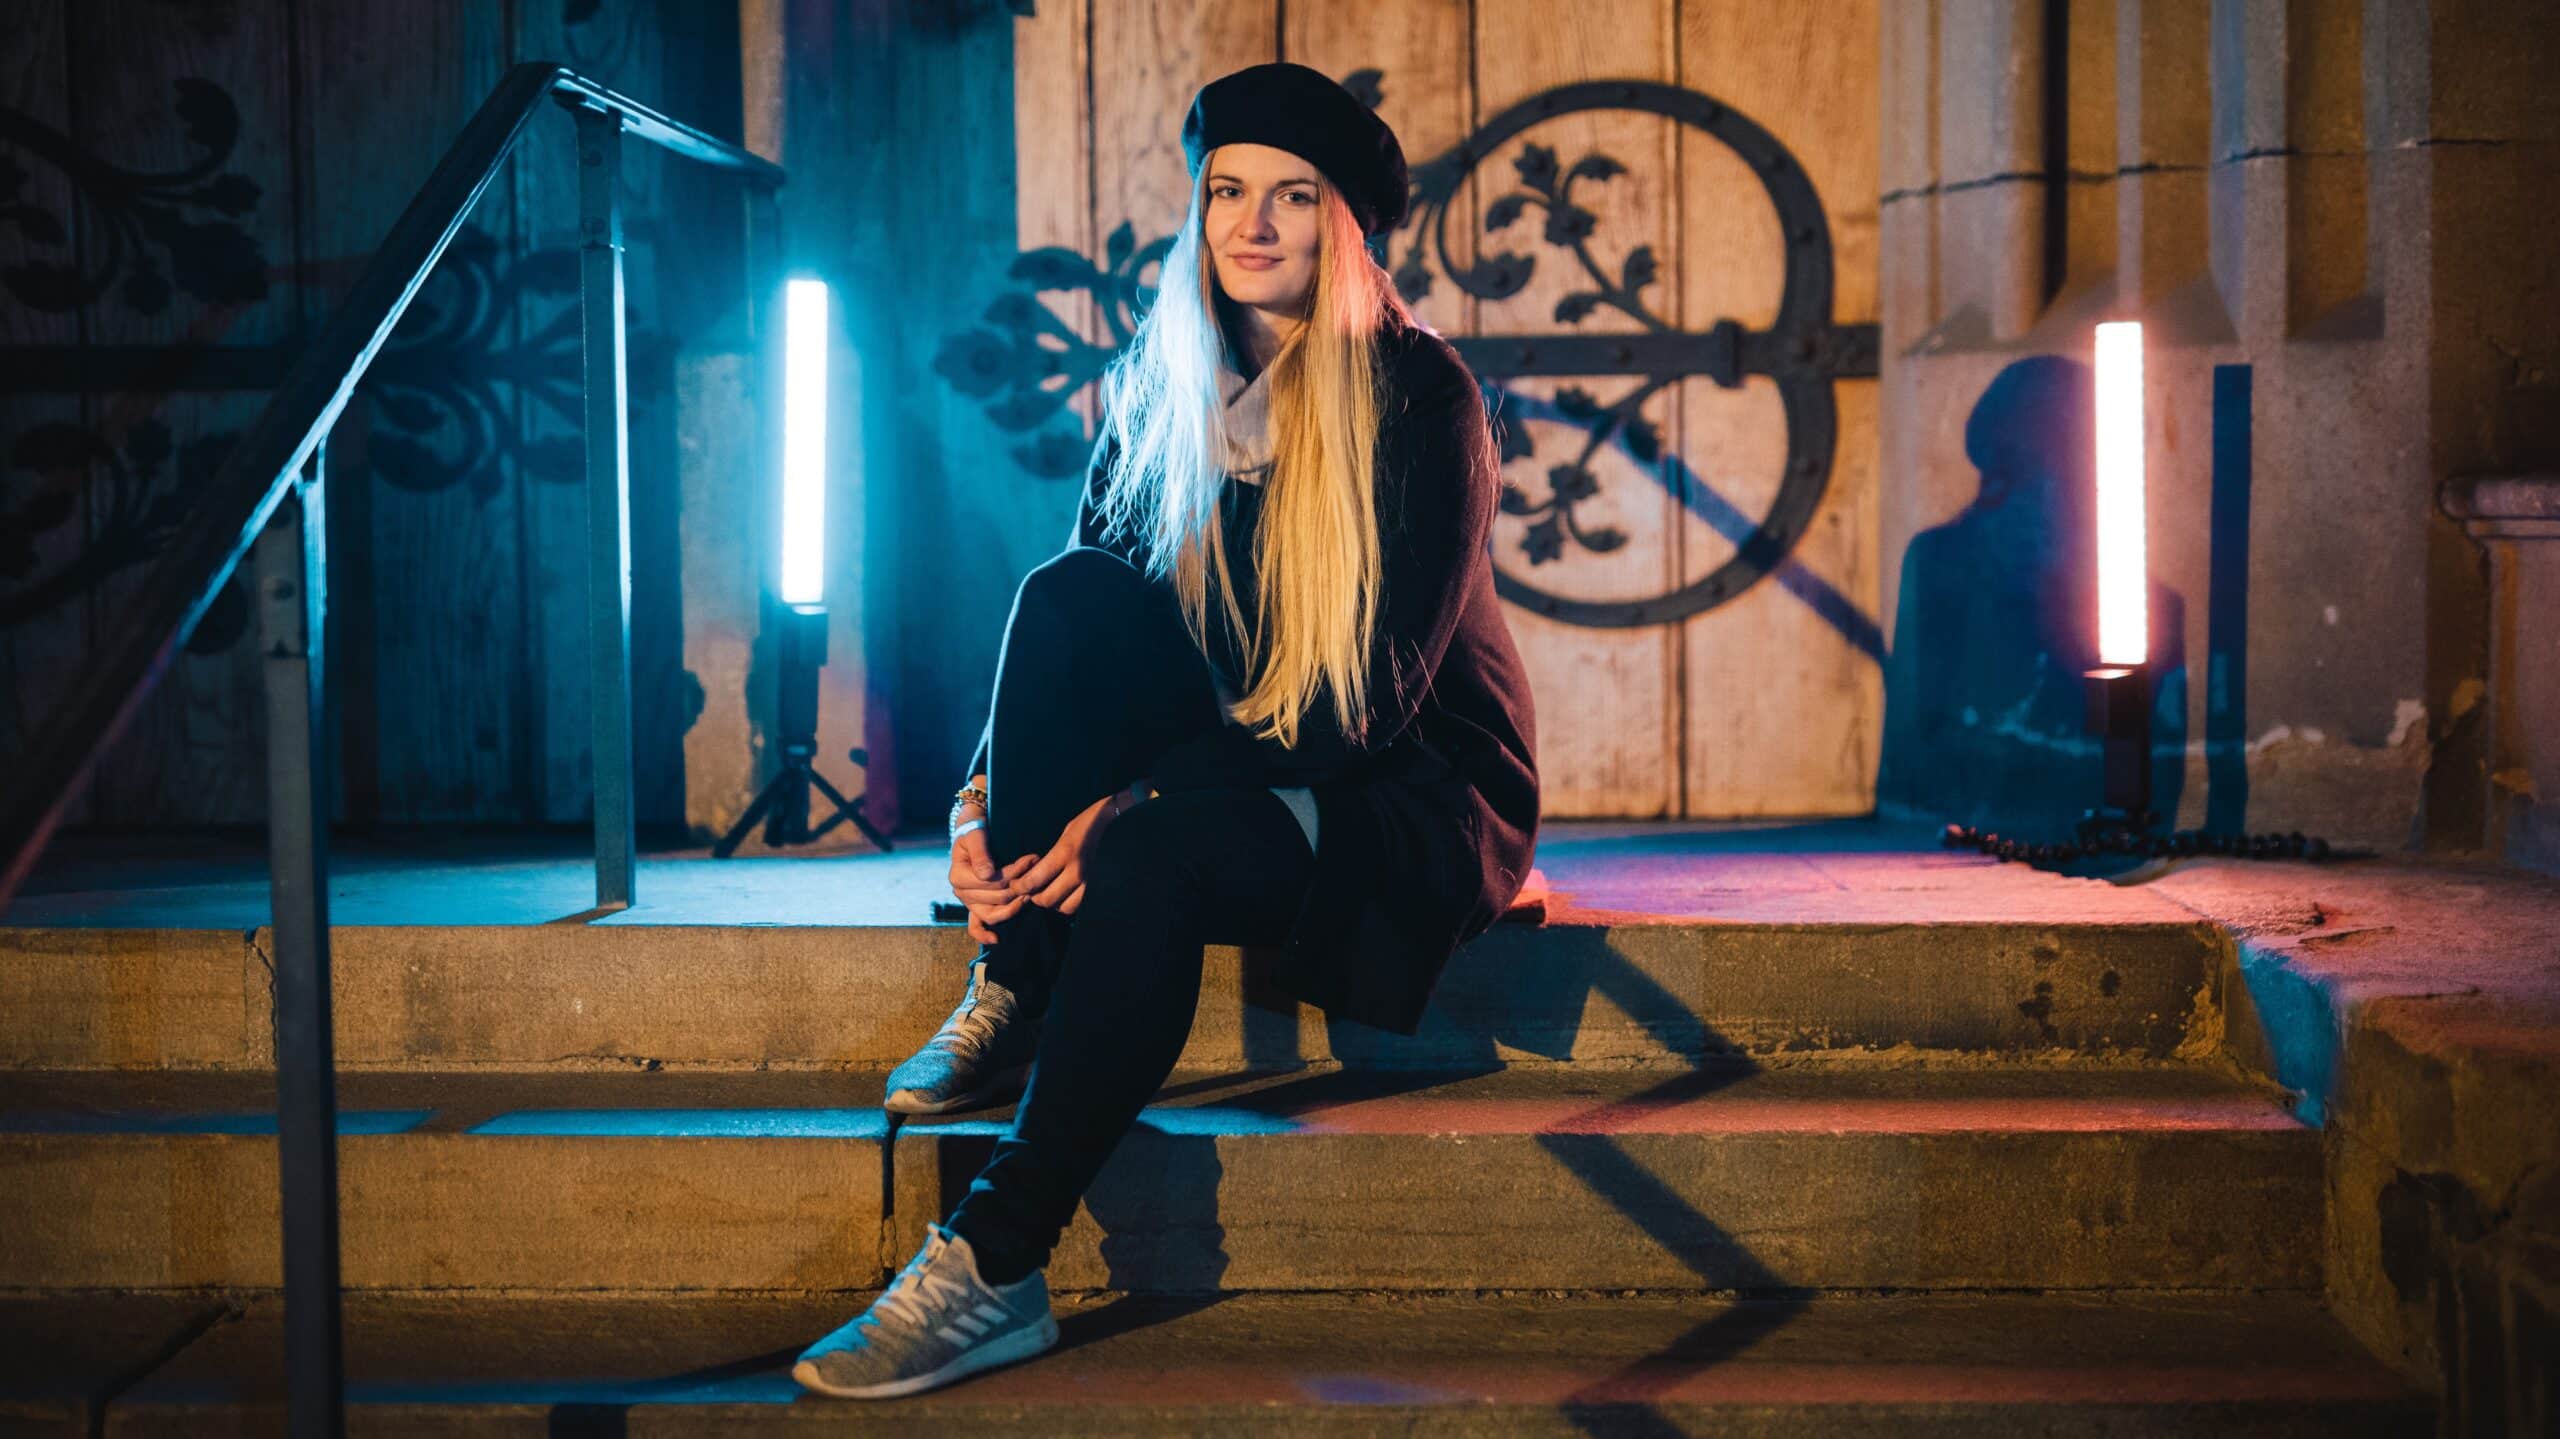
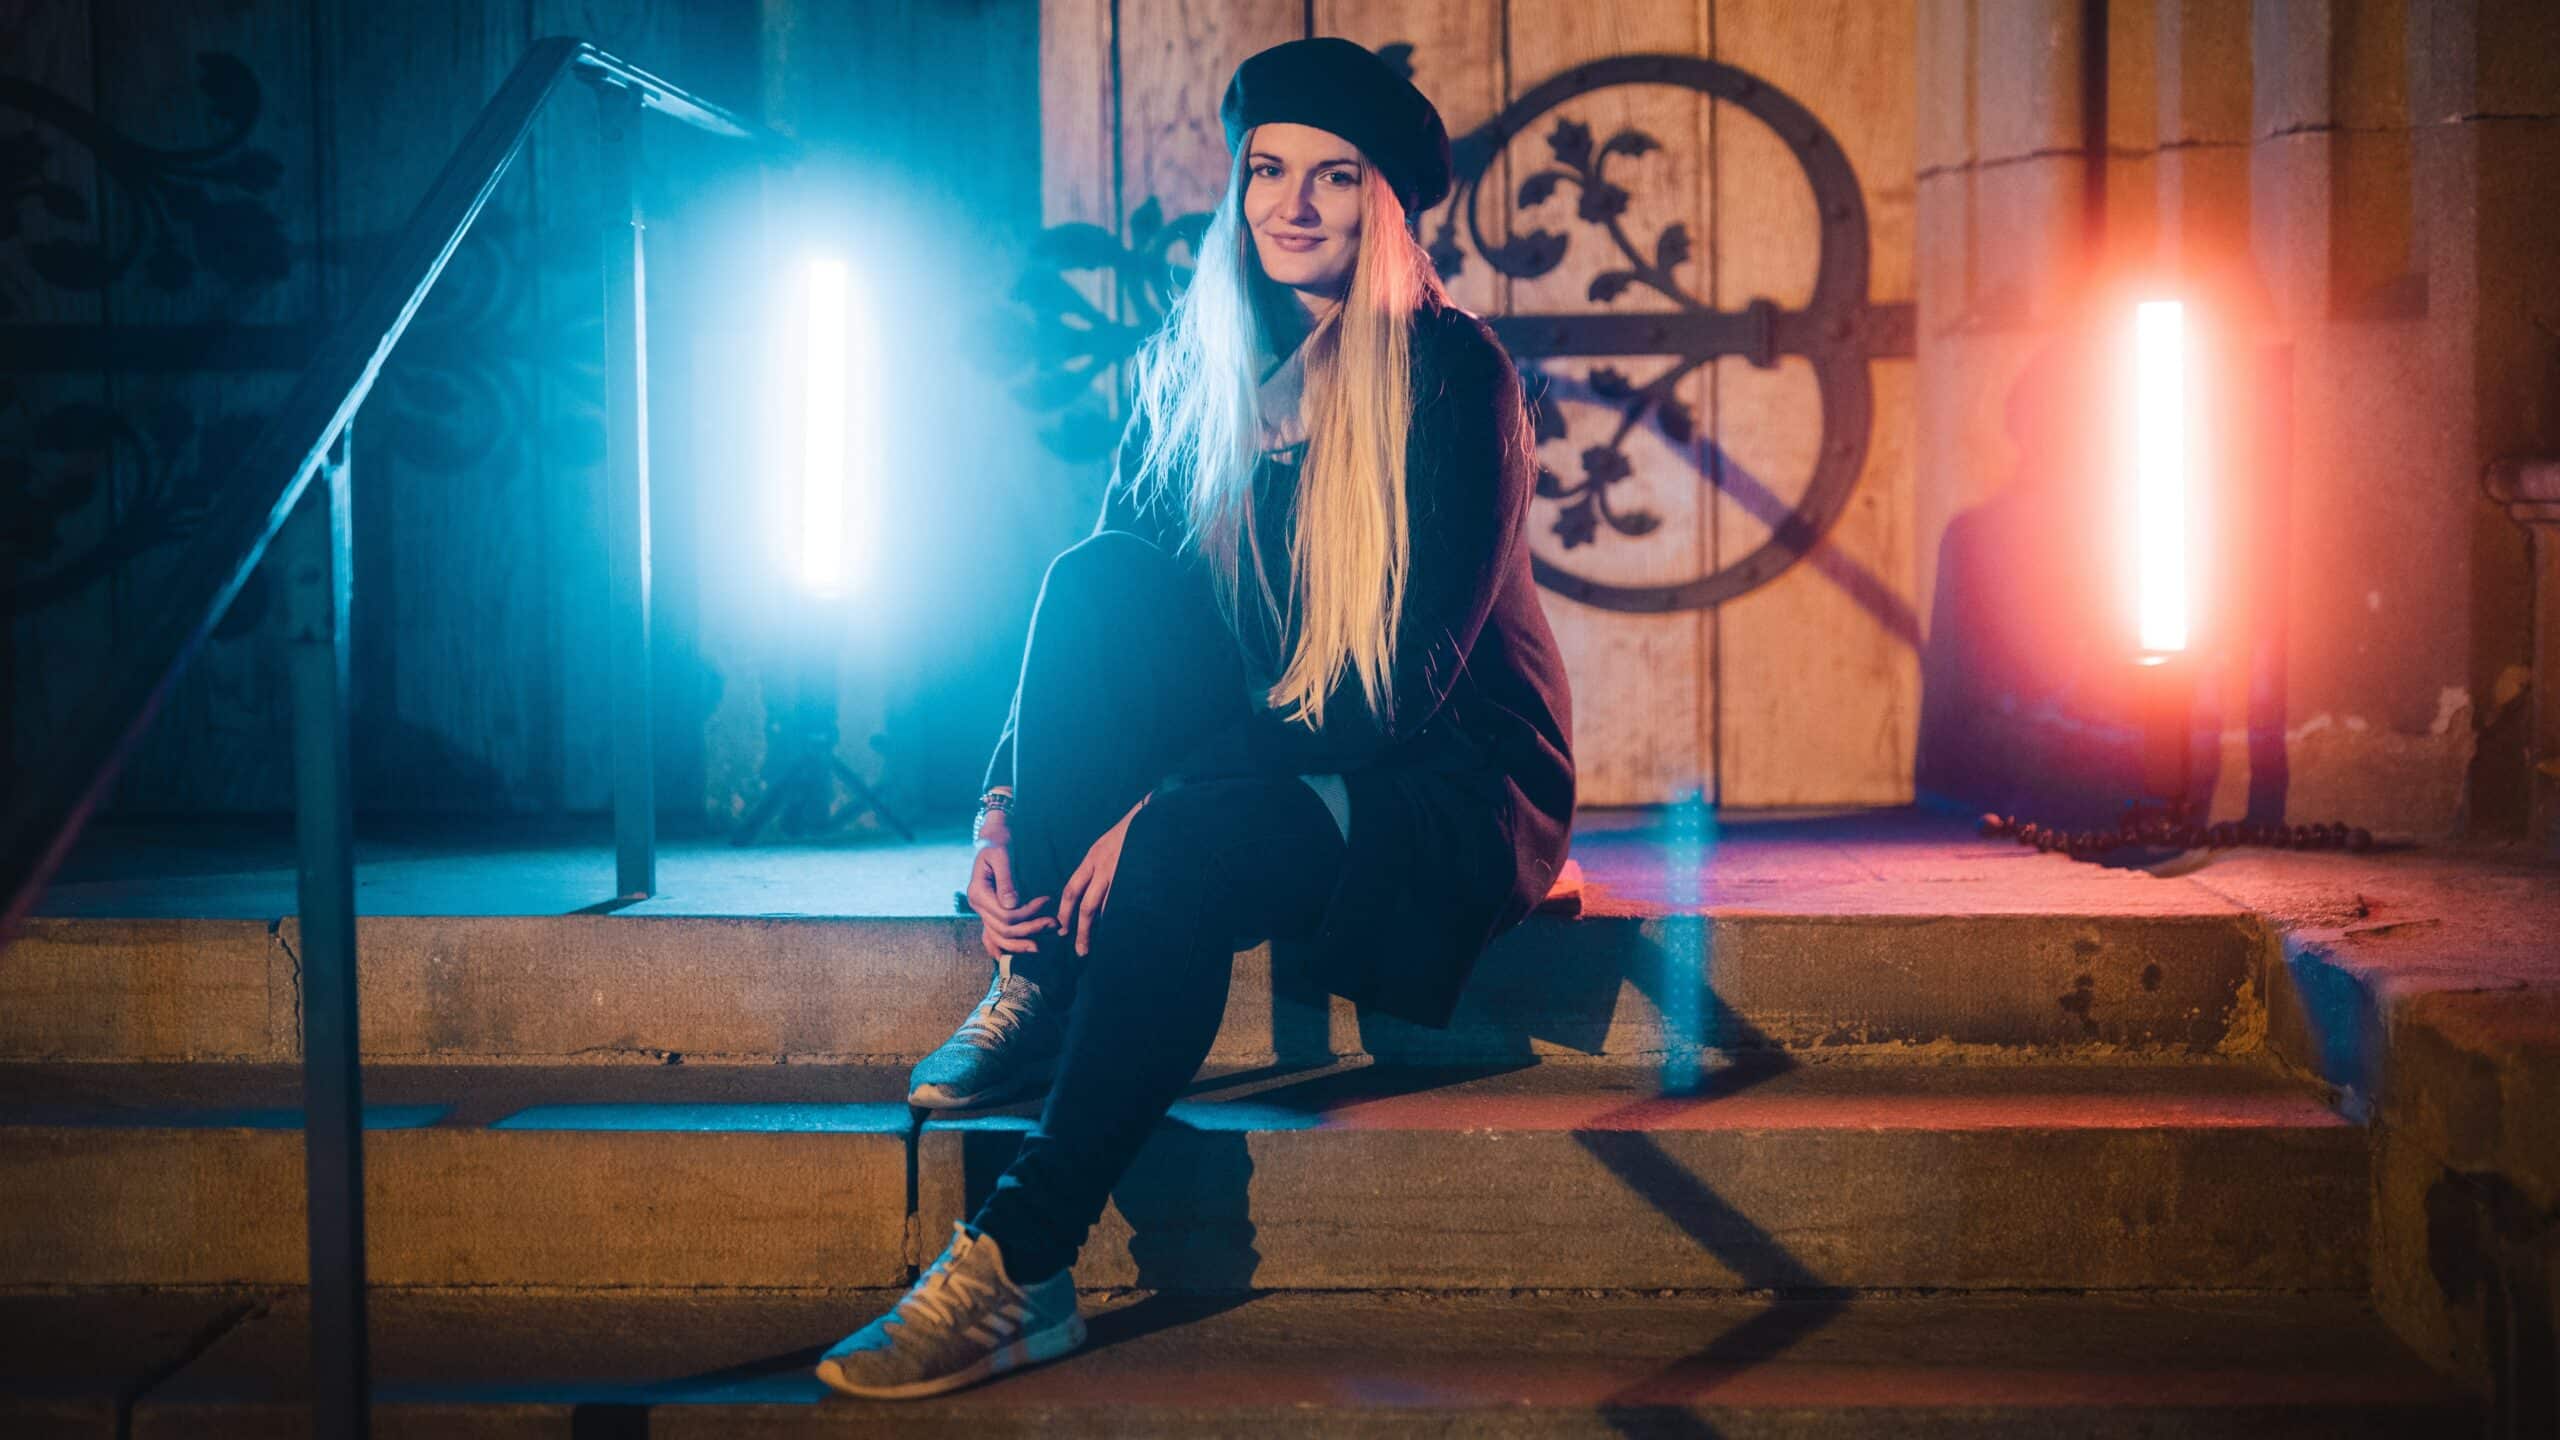
Tiffen Warm Black Pro-Mist 1/2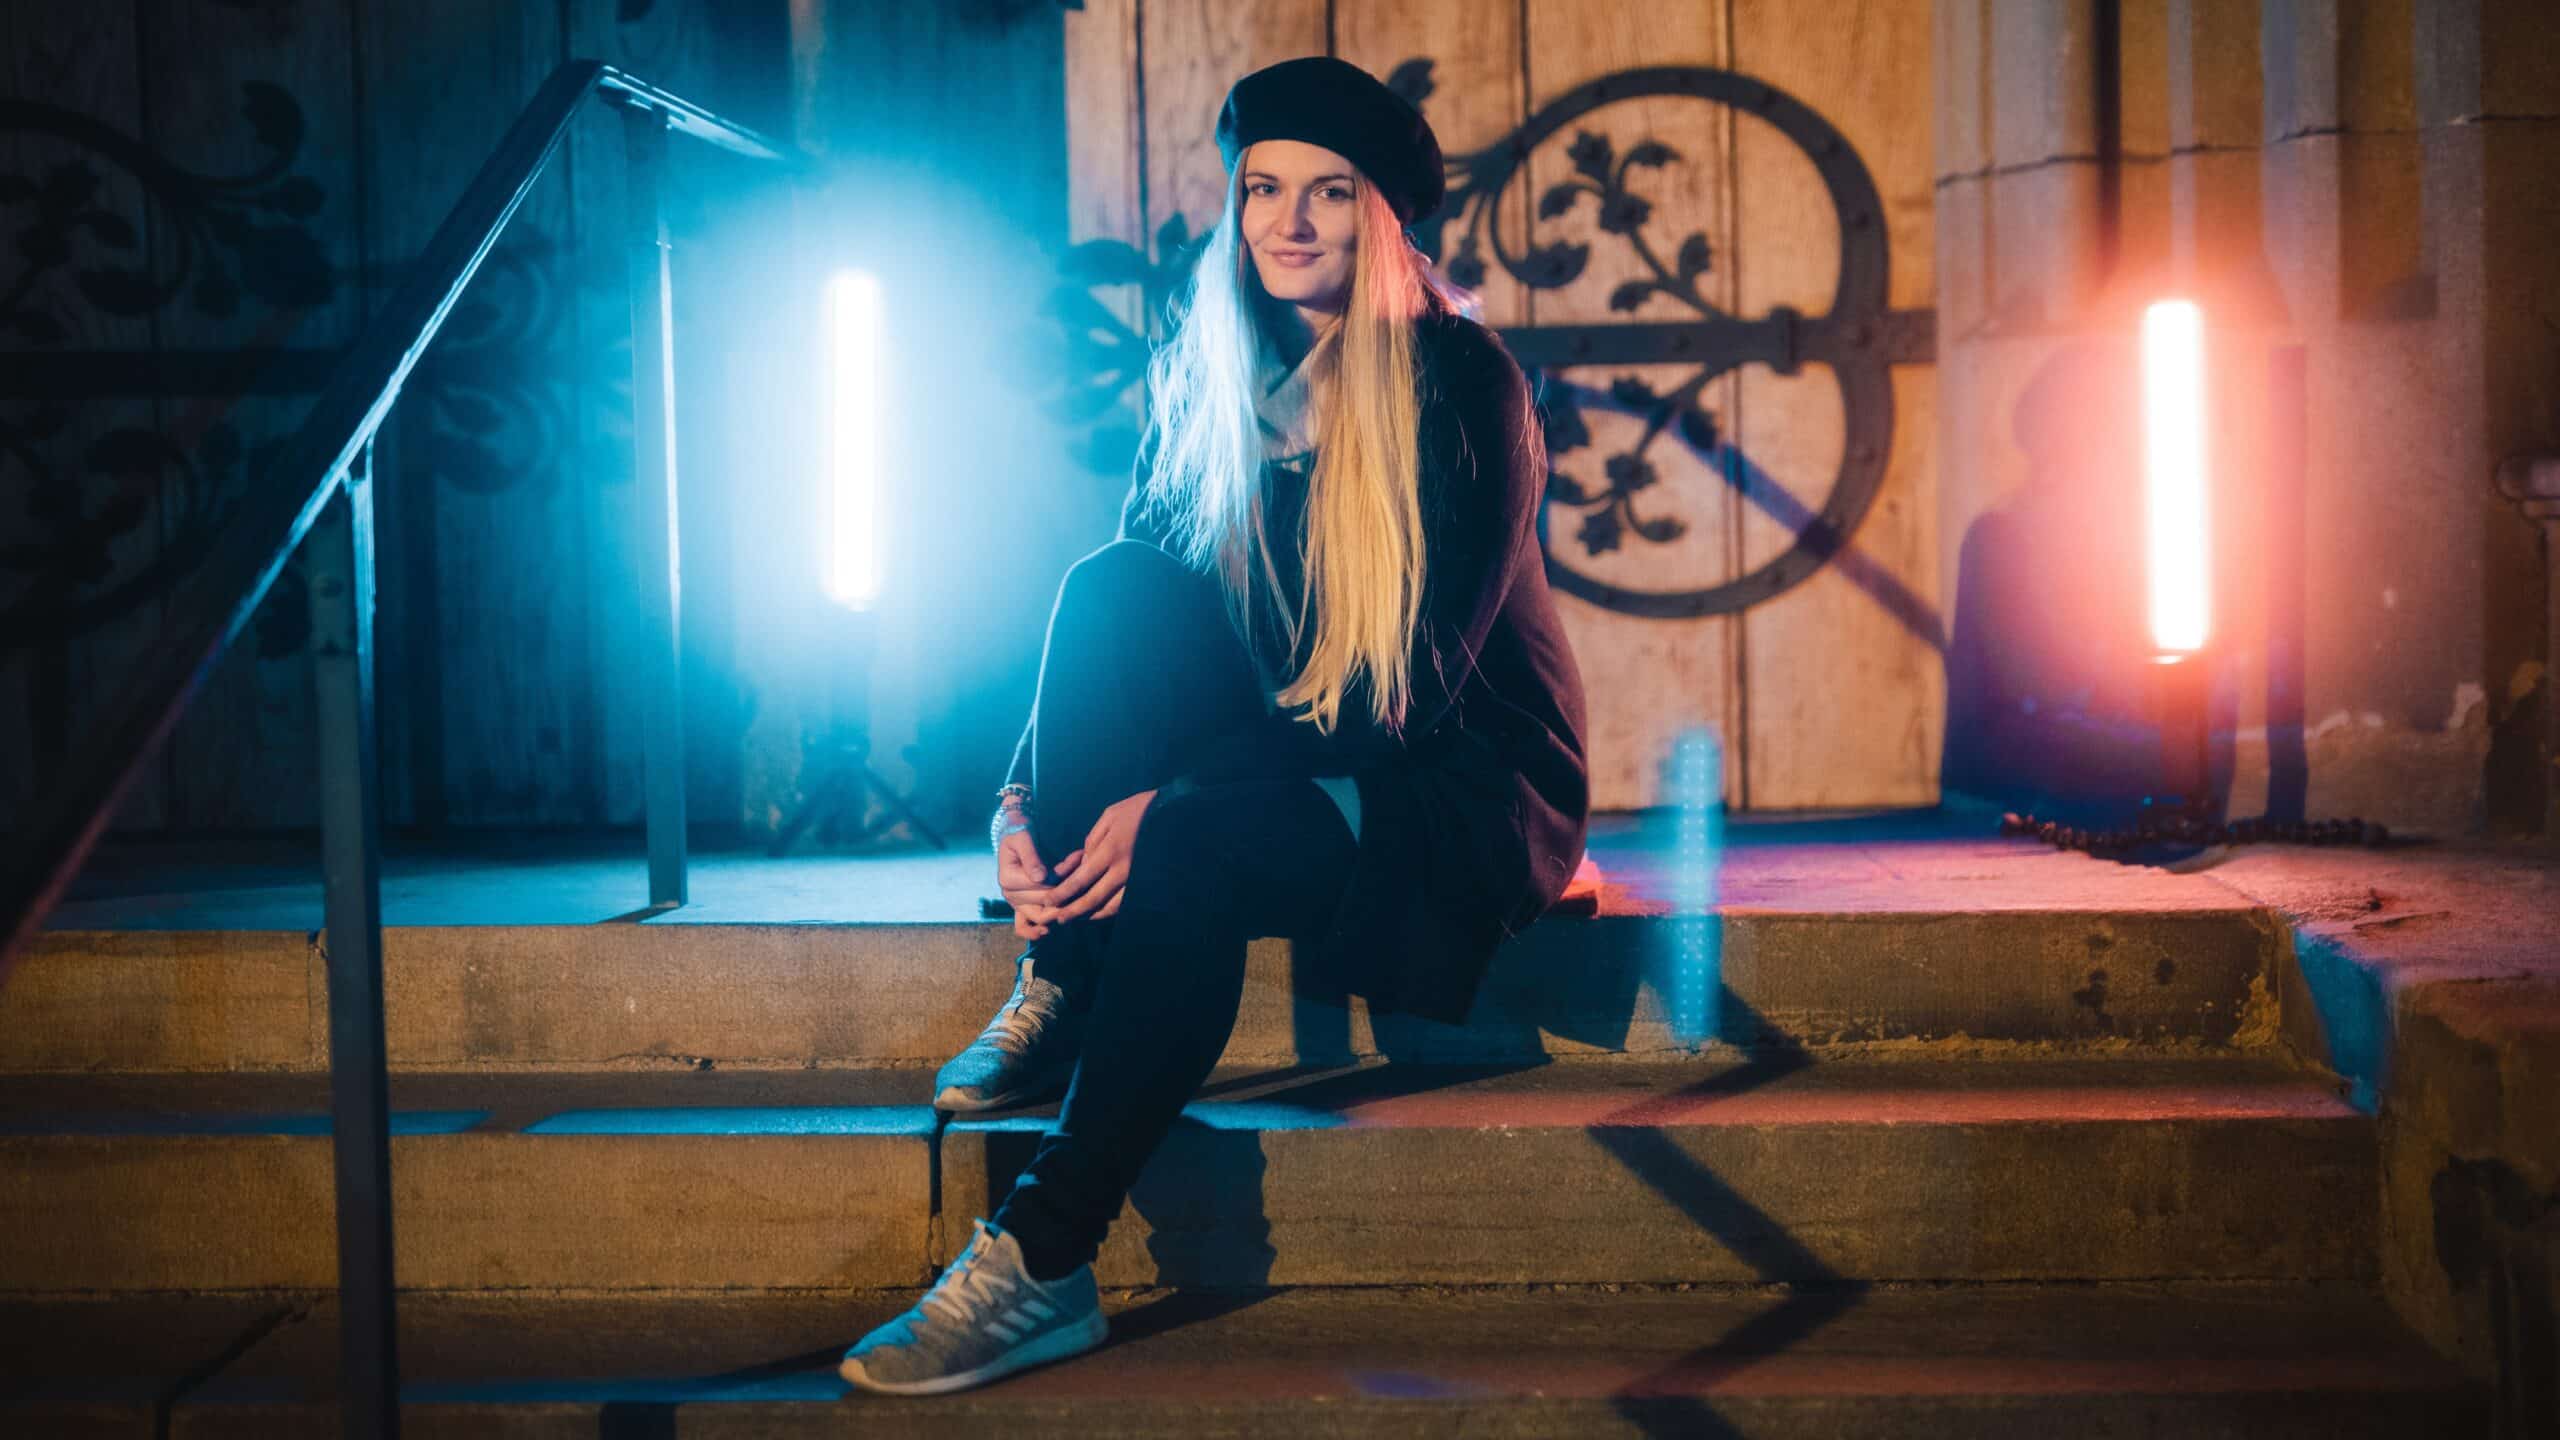
A DIY mist filter using a UV filter + hairspray A mist filter made using hairspray cost us just a few dollars. In addition to the good results, we also enjoyed the peachy scent of the hairspray!
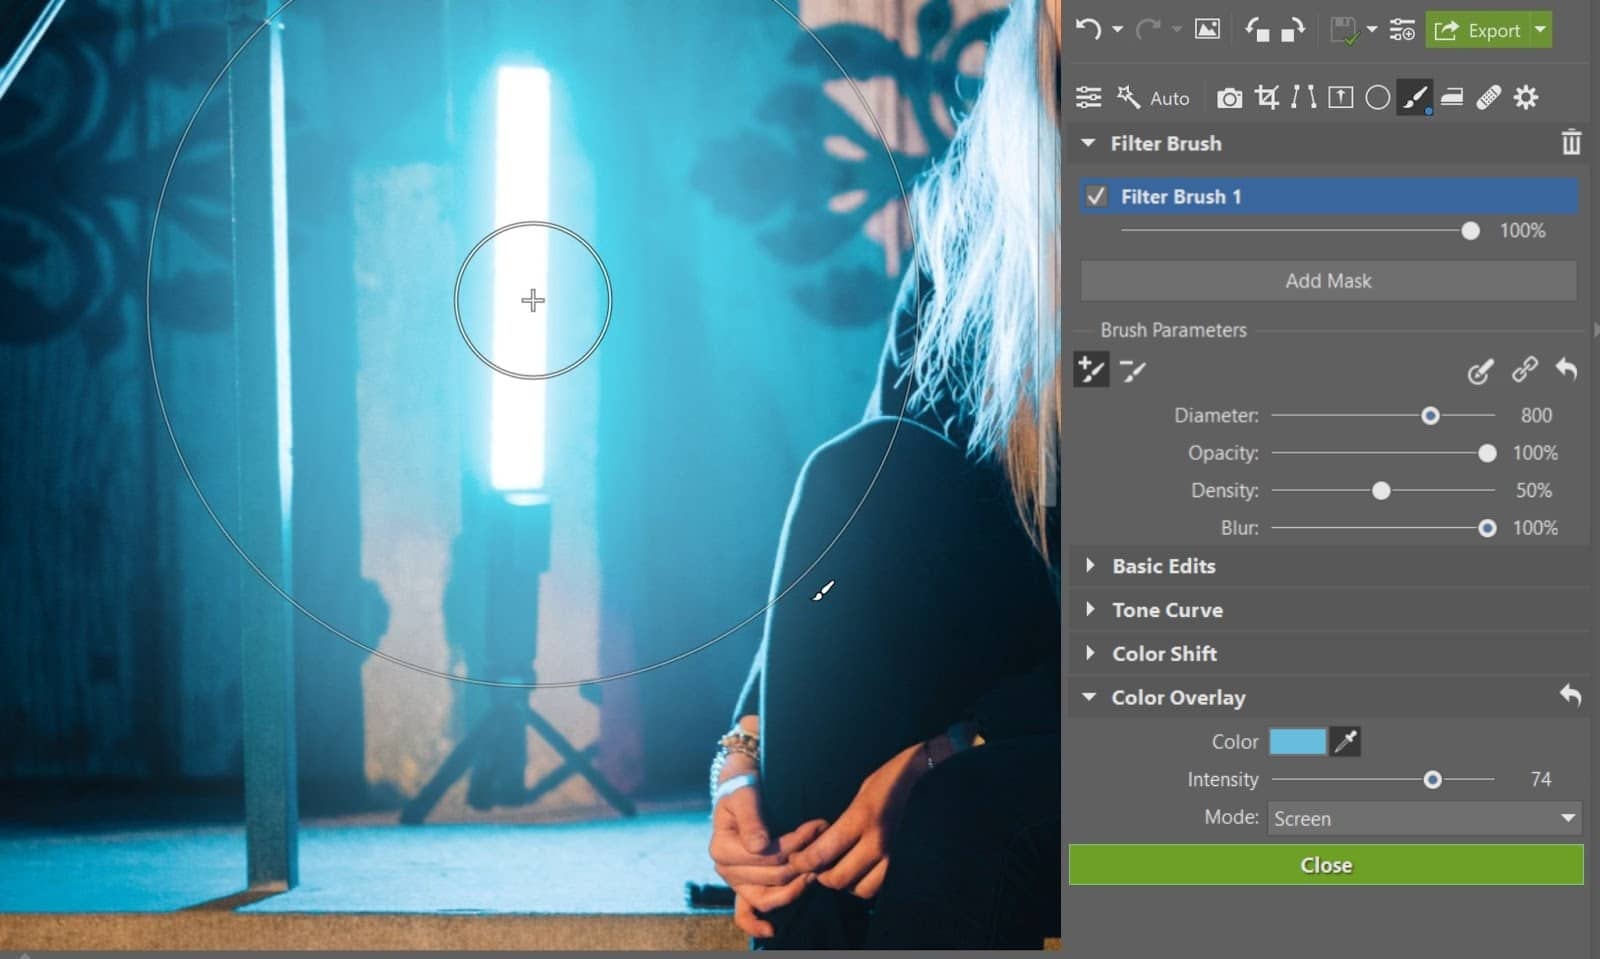
Add the mist effect in post-production
Adding a similar effect is easier than you may think. All you need is the Filter Brush (B) in the Develop module of Zoner Photo Studio X. Choose the color using the eyedropper under the Color Overlay function. Then, choose Screen mode and paint blooming highlights and glow as you wish. You’ll find the entire process in the video at the beginning of the article.
Now that we’ve come to the end of the article, it’s interesting what conclusions we’ve arrived at after writing and taking some sample shots. First, we decided it is simpler and cheaper to make your own filter. We can even argue that it’s even cheaper and easier to rely on photo editing software. In the end, the decision is all yours.
Download Zoner Photo Studio X free for 7 days and try adding the mist effect to your photography today.
Beatrice
bellissimooooooooooooooooooooooooooooooooooooooooooooooooooooooooooooooooooooooooooooooooooooooooooooooooooooooooooooooooooooooooooooooo bravi