Sparkling Water Still Life Photography

Sparkling water creates bubbles giving an ordinary object a unique look. Photographing these objects is not too complicated, but there are a few things you should be aware of. If you are ready to give this type of photography a try, you’ll certainly appreciate this article full of tips you can add to your toolbox.
There are many different ways to approach sparkling water still life photography. We used the following equipment for our setup mainly because it was what we had on hand. Next time, I would probably choose different equipment, but I didn’t have the ideal solution available to me at the time. Therefore, take this article as a source of inspiration and don’t be afraid to diverge from the outlined method.
What to photograph
Natural objects, such as flowers, vegetables, or fruit tend to look good when submerged in bubbly water. But don’t let that stop your imagination from choosing technical or other household items. Colored pencil tips are another favorite.
There’s one good reason we started with this paragraph about choosing objects to photograph: the size of the objects you choose will decide the lighting, the ideal water container, and perhaps even your lens.
Fans of Macro photography will certainly agree – when photographing at a small scale, you need a high aperture to increase the depth of field to make sure at least some of the image is sharp. However, this means you’ll need to use a relatively strong source of light or high ISO sensitivity. Sometimes you can put the camera on a tripod and shoot with longer exposure, but since the bubbles, and often the whole object move in the water, the shorter the exposure time, the better.
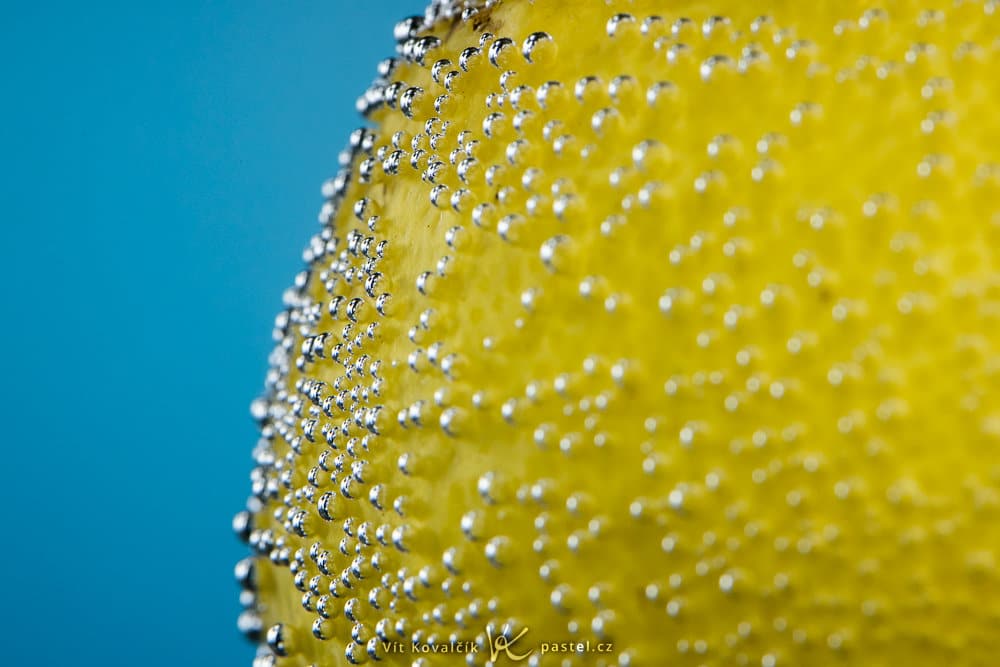
Canon R5, Canon 100/2.8L IS MACRO, 1/200s, f/11, ISO 800, focal length 100mm.
For those of you for whom macro photography is not critical, then there is one less thing to worry about. But another issue presents itself: the size of the container that will hold the water. A large volume of water not only means a larger consumption of water, but also makes it difficult to move when you need to adjust the shot.
For me, the simplest solution was to arrive at a compromise and focus mainly on objects that are about 10 centimeters big.
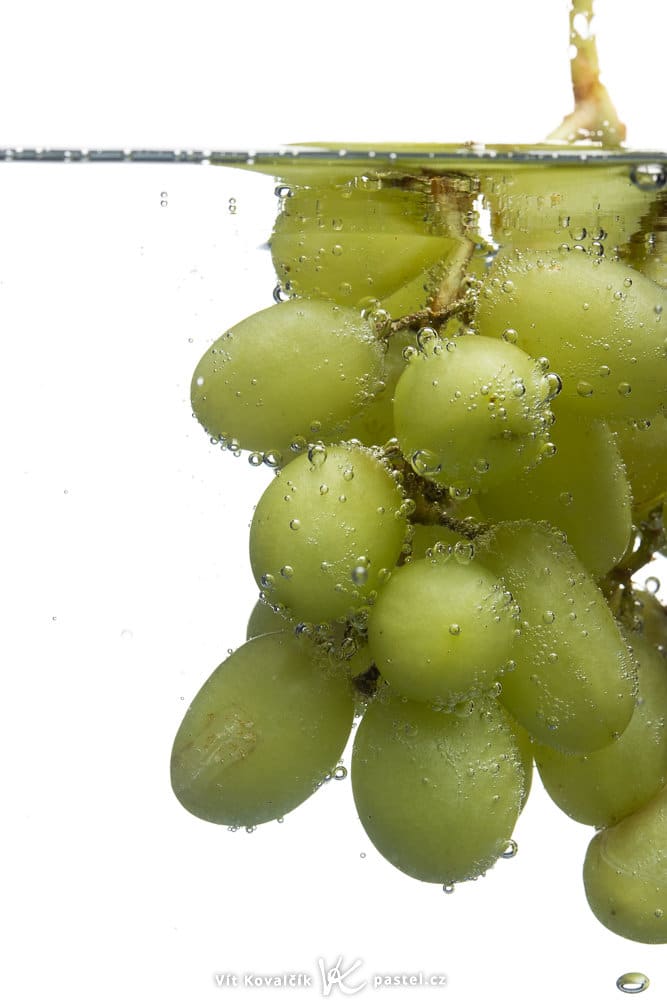
Canon R5, Canon 100/2.8L IS MACRO, 1/200s, f/16, ISO 800, focal length 100mm.
What type of water to use
Any type of sparkling water can be used, but I recommend unsweetened sparkling water. This way, you don’t get yourself, or the objects you want to photograph, sticky. I used the cheapest, most basic sparkling water I could find.
Choose the right container
Ideally, choose a container that is only slightly larger than the objects you will photograph. It’s also a great idea if the container you choose has a flat front side so that the object doesn’t appear deformed, decreasing the quality of the image.
This unfortunately limits your choices a bit, but you can use square vases, other geometrically-shaped glass containers, or even a stylish bottle of alcohol.
Since I wanted to test out differently-sized objects in the water and I didn’t have a better container, I ended up using an aquarium. It was a bit impractical mainly due to the fact that it was difficult to maneuver. Lighting can always be moved around, but the background – the wall –was a different story.
Also, with the larger volume, as the water of the aquarium gradually became contaminated, I couldn’t dump the water out and start over because I didn’t have another 18 liters of sparkling water.
How to secure the objects
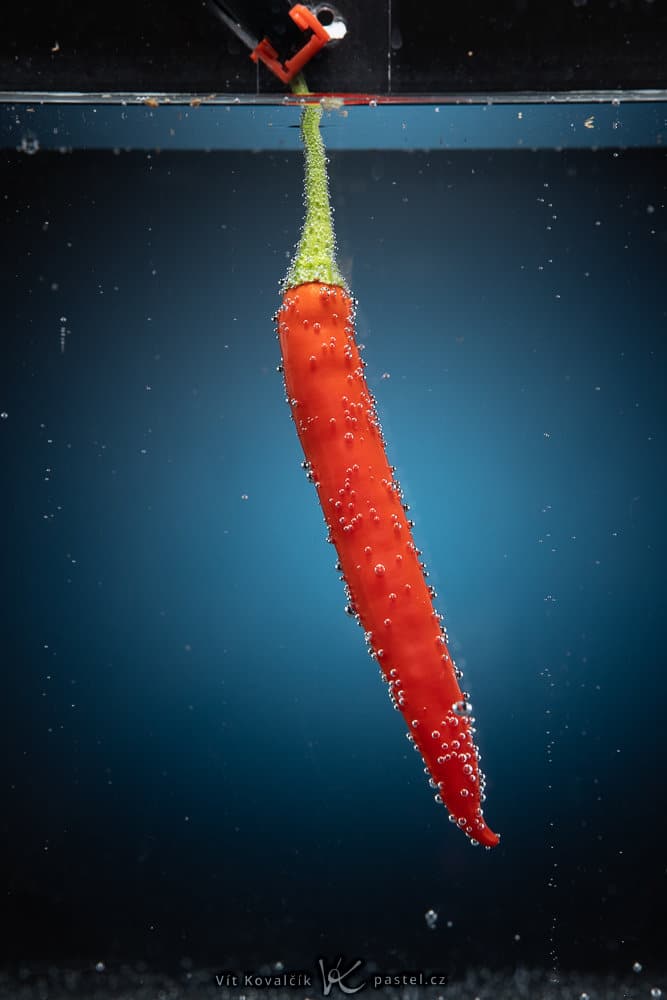
There may be a tendency to be lax on this part and hope that it will “just work out.” I was also hopeful myself. But the photographed objects tend to float rather than sink, especially the fruits and vegetables. The newly forming and constantly moving bubbles also didn’t help the stability of the objects.
Sometimes a piece of string to hang the object on will do. In the end, I found a stiff wire to be the most useful. I used it to pierce the object or attach it from the back. The wire was black so that it didn’t reflect any light. Of course, you’ll have to edit it out later in post-production.
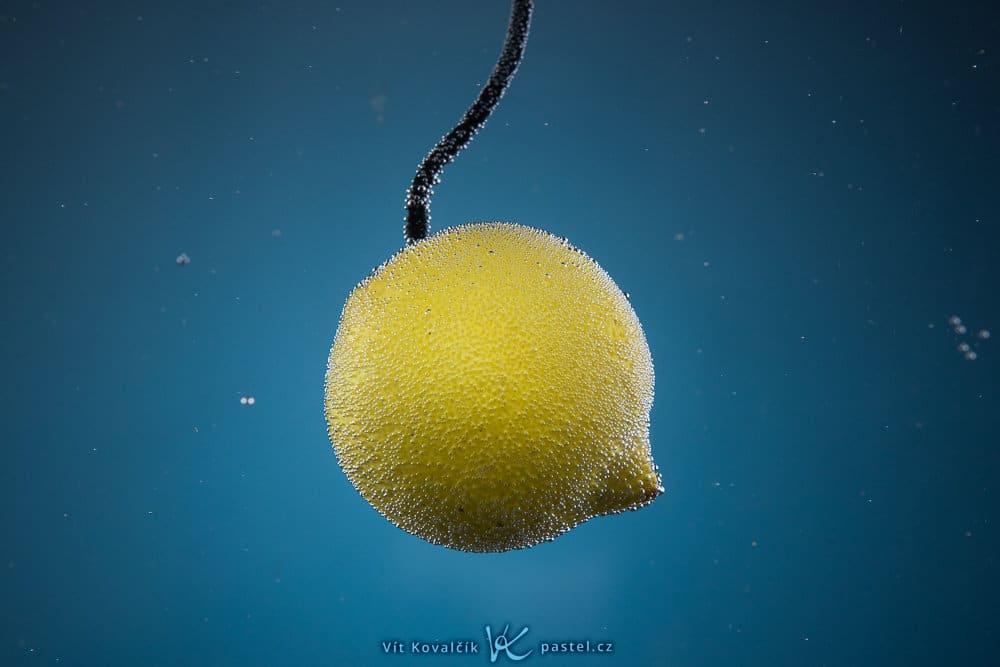
Canon R5, Canon 70-200/2.8L IS II, 1/200s, f/16, ISO 800, focal length 190mm.
What light source to choose
In this photoshoot, I used external, remote flashes. But as already mentioned in the article about glass photography, you can always improvise using an ordinary flashlight. It will be challenging with macro shots, but at a larger scale, the movement of the bubbles is less visible, and a long exposure more tolerable.
I used softboxes, but this was due to a force of habit more than anything else. Flashes placed near the edges of the aquarium without any modifiers would work just as well.
What our setup looked like
I moved the lighting around during the photoshoot based on the situation, but my setup was essentially as seen in the following picture:
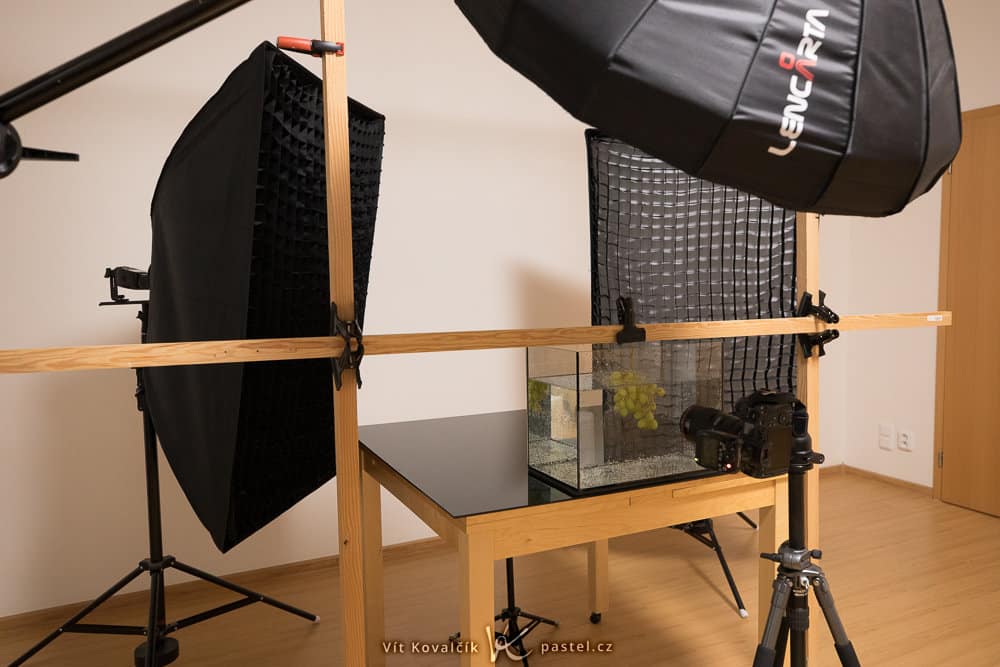
Three of the lights with softboxes are clearly visible, but notice the legs of a fourth stand under the table. Another flash is attached to it, which I pointed at the wall. Depending on whether or not I set this flash off, I was able to decide if the background behind the object would be light or dark. When using colored sheets, the background is tinted to the shade of the sheet.
Putting lights together
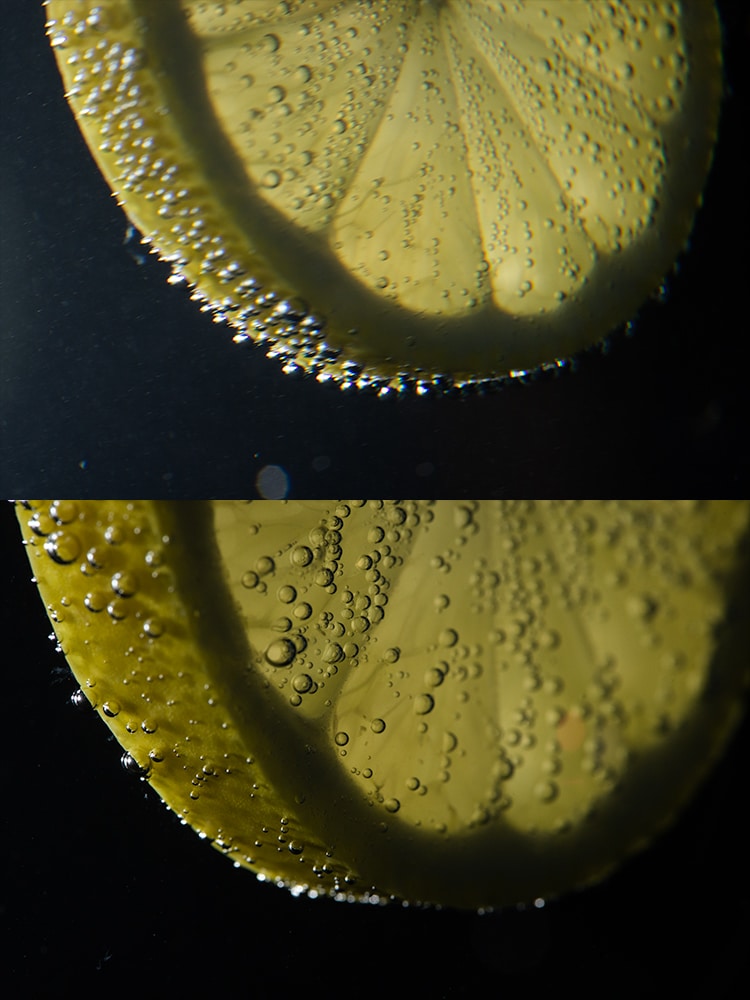
For demonstration purposes, I took a series of photos where I used a number of different lights.

Canon R5, Canon 70-200/2.8L IS II, 1/200s, f/16, ISO 800, focal length 115mm.
In the upper left picture, you can see the effect of only the light from above the camera shining from the front onto the focal point. In the top right, you can see two lights from the side, and at the bottom left, only the light illuminating the background is used. In the last image, all lights were used at the same time.
Dividing up the images this way allows you to edit not only the intensity of individual lights, but also their color. In this case, I used a blue filter on the light for the background, but I could similarly use other colors and side lighting or even front lighting to achieve this color.
Stay perpendicular to the walls
In a perfect world, the glass in the photos would not be visible at all. Though we’re getting close, for now, be aware of three potential problems: the first is a reflection on the rear glass of the container. This forms “ghostly” reflections which you’ll need to digitally remove later.
Canon R5, Canon 70-200/2.8L IS II, 1/200s, f/16, ISO 800, focal length 168mm.
The second problem occurs when shooting at an angle to the front glass. The image quality worsens so it appears as though camera shake caused the blurry image.
Canon R5, Canon 100/2.8L IS MACRO, 1/200s, f/16, ISO 800, focal length 100mm.
Both problems can be solved by photographing perpendicularly to the glass. You can also use a polarizing filter, or remove the reflections in post-processing.
The third issue is the collection of bubbles and other impurities on the front side of the glass. This will need to be wiped down from time to time, either with a wooden spoon or by hand.
Further experimenting with the water’s surface
Once you’ve got the basics down, you can start experimenting and try capturing the water on its own. All you need to do is have light reflected from the surface and if you simultaneously move an object underwater, you will create ripples. If you choose to rotate the photo 180°, you’ll also get some interesting effects. The possibilities are endless and they are waiting to be discovered. So, good luck with the photoshoot and don’t let those bubbles get away!

Canon R5, Canon 100/2.8L IS MACRO, 1/200s, f/11, ISO 800, focal length 100mm.
There are no comments yet.