Tip: Taking Creative Pictures using Color Filters
Every photographer knows that feeling where they want to head out just like that and take some pictures. But often, there’s nothing to take pictures of. The model didn’t show up. Or the weather’s bad. Or it’s dark. Missed moments like this are the right moments for experiments. Today I’ll talk about one such experiment.
I Can Tell by the Pixels
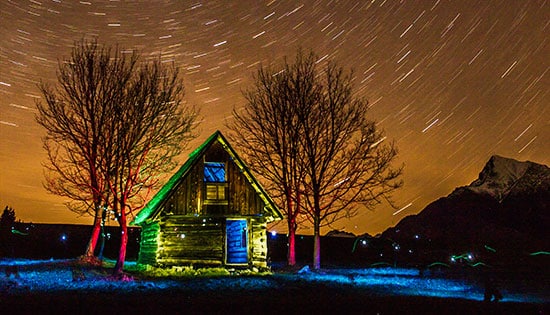
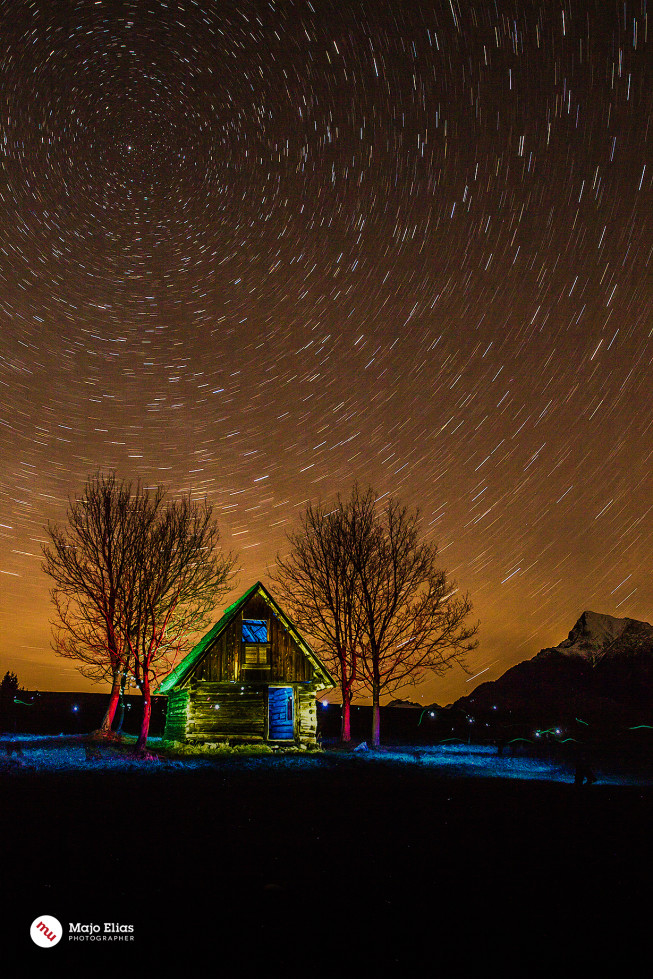
When you look at the picture below, the first thing you might think is that it’s been heavily computer-edited. It’s a natural assumption. But it’s not the case. This picture has only seen simple touchups in Zoner Studio. It wasn’t made so surreal on a computer. Instead I used a flash, colored plastic sheets, and the Earth’s rotation. Below I describe in detail how I did it. You can take this description as instructions for doing a similar picture yourself.
How I Did It
The first steps in taking this picture were a lot like those for long-exposure photography. Besides the camera, I needed a tripod, a shutter release cable, a flash, colored film filters, a compass, and completely black clothing. (I could have replaced the cable with a remote, and the filters with any old translucent plastic sheets.)
I also needed a clear night with no moonlight. Moonlight would have forced me to use a significantly shorter exposure time, and would also have left fewer stars visible in the sky.
Before starting with the picture, I had to create an interesting scene. I positioned something that I wanted “colored” in the foreground. I chose an angle where the camera was pointed north, for a better overall effect. I set Bulb mode on my camera, started the exposure using my shutter release cable, picked up my flash and colored sheets, and headed out “painting.”
I shot the flash through the colored sheets, gradually illuminating the scene. I made sure to check the overall colors in the sky before pressing the trigger. This kept me from having to panic about it during the exposure. Naturally I was present in the scene, so I had to wear the mentioned all-black clothing, to minimize or eliminate any signs of me. I think I managed to leave no trace in this picture!
I made sure never to shoot the flash directly at the camera, as it would ruin the final picture. After “coloring” the scene I left 15-20 more minutes to finish the exposure, and then checked the result.
Tip: Before taking this kind of picture, turn off noise reduction. You will be touching up the picture on a computer shortly after the shot in any case. Reducing noise during this process is easy.
Remember, a picture like this is one big experiment. It takes practice to get the exposure and flash strength right. But don’t consider it work. Take it as play—and have fun!
There are no comments yet.