The 10 Reasons Behind Your Unsharp Photos
Having at least some part be sharp in every photo is a goal for most photographers. But it doesn’t always work out. After all, there’s a number of things that can prevent sharp photos.
The list below is not a complete list. You can find many other problems just waiting to blur your photos. We chose only the problems that you always have to watch out for.
1. Exposures Too Long for Handheld Shots
Your arms aren’t perfectly stable. Nope, not even yours. They shake a little, and so for handheld shots you can’t use any exposure length you want—just a fraction of a second.
How large of a fraction depends on the lens’s focal length. Telephoto lenses can significantly magnify distant subjects, but every millimeter of hand motion can mean as much as a meter-wide jump by the objects in the frame.
That’s why the general rule is that you can do exposures up to [1/focal_length] seconds. So with a wide, 30mm lens, you can use up to 1/30 second, while a telephoto lens with a 300mm focal length will demand a much shorter time: 1/300 second.
If there’s not enough light for such a short shot, then you need to raise the ISO, or use the stabilizer—if your camera comes with one. When neither of these options works for you, then you can shoot from a tripod or lay your camera on a chair.
If there’s nothing usable around you, then you can at least rest your hands against your body. That gives you more stability, and so you can use slightly longer times. By leaning against a tree, you can improve things even more.

2. Times Too Long for the Action
You can have your camera as stable as you want, but if you’re photographing people or other living beings, their motion in photos will still be blurred.
So I’d recommend that, when documenting social events, you keep to speeds of 1/100 second or faster. Or at worst a speed of 1/50… but in that case, be prepared for the risk of blurring.
If you try to photograph sports, you’ll find that even shorter times are needed. They can need times as short as 1/500 seconds… it depends on the sport and the photo’s style.

Canon 5D Mark III, Canon EF 70-200/2.8 IS II, 1/500 s, f/2.8, ISO 3200, focal length 105 mm
Here neither a stabilizer nor a tripod will help you, so if you’re shooting in a hall with a limited amount of light, unfortunately the only solution is a good camera and lens.
3. Not Using a Tripod
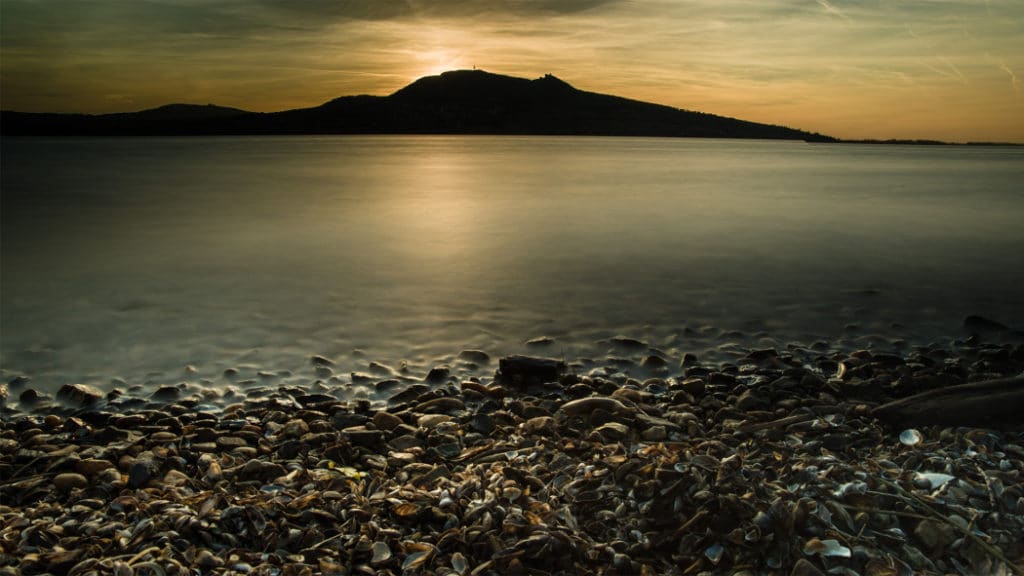
But there are also pictures that outright demand a tripod. Special shots like fireworks photos or shots that deliberately blur stars or cars. And many landscape photos.
A tripod can help you maintain exposure lengths on the order of multiple seconds, or even minutes. But work with a tripod isn’t as simple as it might seem. I recommend studying up on the right way to use one.

Canon 5D Mark IV, Canon EF 24-70/2.8 II, about 4 minutes, f/16, ISO 100, focal length 59 mm
4. Leaving the Stabilizer on
While it’s usually best to leave the stabilizer on nonstop, there are also cases where it’s best to turn it off.
These mainly involve shooting from a tripod, where a stabilizer can start vibrating your whole setup.
But there’s also the case of panned shots, in sports and elsewhere. In this case, the stabilizer interferes in your deliberate hand motions, and so, for example, in the following photo you could end up with a sharp background and a blurry rider.

Canon 350D, Sigma 18-50/2.8 EX, 1/60 s, f/8, ISO 400, focal length 50 mm
Certain stabilizers offer only “on” and “off” options, but some also offer a third option, “on for one axis only.” It fixes precisely this problem.
5. Leaving the Stabilizer off
I sometimes forget to turn the stabilizer back on after shooting from a tripod. And also, I sometimes accidentally push its physical switch while manipulating the lens with my gloved hands, or while taking my camera out of its bag.
That’s why it’s best to stay aware and, if the image in the frame is unusually shaky, to double-check if the stabilizer is actually turned on.
6. Low Depth of Field
Problems with low depth of field mainly show up in two situations.
The first is when you’re using a DSLR with a fast lens and an f-stop of e.g. f/1.8. A great nighttime choice… mostly. It gives you superb optical separation of people from their blurred background. You want that. The trouble comes when photographing groups. You need to keep in mind that for pictures like these, you have to give up on fast lenses and lower your ambitions to e.g. f/2.8 or f/4. Otherwise, all it takes is for one person in the group to take a half-step back, and they get blurry.
The second problem comes when you’re shooting landscapes, and you want to capture both nearly small objects and a faraway horizon. Sometimes even the best accessible f-stop isn’t enough, and the only solution is to assemble a picture from two photos, one focused closer and the other farther.

Canon 5D Mark IV, Canon 24-70/2.8 II, 2,5 s, f/22, ISO 100, focal length 24 mm
7. Bad Focus
Sometimes your automatic focus can be at fault too. It’s sometimes distracted by small nearby details.
E.g. bushes behind people are tricky. Bushes offer lots of high-contrast points that a camera is all too happy to focus on. In the photo below, meanwhile, it was some stray hairs in front of the model that the autofocus found more important than the face.

Canon 5D Mark IV, Canon 85/1.8, 1/800 s, f/2.2, ISO 100, focal length 85 mm
8. A Defective or Low-quality Lens
Once we get down to individual pixels, there’s an obvious difference between an expensive, high-quality lens and its lower-quality brethren supplied with beginners’ cameras. That’s the whole reason for websites devoted to lens tests. If you’re bothered by blurry lenses, there’s really only one solution: explore lenses and invest in a good one.
In the illustration you can see there’s also a difference between a good lens and a great lens. Specifically this is the Canon 16-35/2.8 Version II vs. the Version III, in a worst-case scenario—an f-stop of f/2.8.

Canon 5D Mark IV, Canon 16-35/2.8 Version II (left) and Version III (right), both 1/800 s, f/2.8, ISO 100, focal length 35 mm
In extreme cases, you can also run into truly bad gear. This is harder to uncover, but if you consistently get bad results when the reviews say you shouldn’t, it’s time to take your lens into the shop.
9. Bad or Dirty Filters
A good lens is a good start, but you can always make it bad with a filter. There’s no risk with good filters, but watch out for cheap ones. They can blur a sharp image, and maybe even add overexposed spots as a bonus.
10. No Computer Sharpening
Experienced photographers always sharpen their pictures after shrinking them down to presentation size. If you just shrink pictures without sharpening them afterwards, your work will look worse. For more details, check out this article on how to sharpen pictures.

Onward and Upward
You might already be familiar with the points above, but some might be new for you. No matter what, it’s good to be cautious, and, if maximum sharpness is your goal, to shoot slow. As soon as something seems wrong, go ahead and investigate the potential problem. Experienced photographers can, for example, tell by sound what exposure time their DSLR’s automated systems chose, and correct it for future shots.
Nonetheless for other other problems, you need to know them and check for them periodically. Your reward will be photos that surpass beginners’ efforts even before your edits.
There are no comments yet.