The Photographer Turned Filmmaker: Learn to Give Your Photos a Cinematic Atmosphere
A cinematic look for photos is a very cinematic and impressive look indeed. And it’s not just for the pros—you too can make your photos look like they’ve been snipped from the silver screen—we’ll show you how to easily achieve this effect while you’re taking your pictures. You just need to respect a few basic rules and watch your colors, lighting, and composition. Read our article and transform your photo studio or living room into a Hollywood studio!
In this article, I’ll use an example shoot of mine to illustrate a few simple tips for giving your photos a cinematic look. Taking pictures has a lot in common with filming movies, and there are lots of things that you can take inspiration from when watching them. You can learn about some of these from our article on cinematic composition.
Think About Photos Like Film—Through a Story
I rarely see any action in portrait photography. Often it’s just a prettily dressed model in interesting lighting, and what we take from the photo is “that’s a very pretty young lady.” And that’s OK, it works, so why not.
Nonetheless there’s no harm in involving a bit of reportage in your portrait photography and artificially creating a situation with a plot line. That’s exactly what filmmakers do.
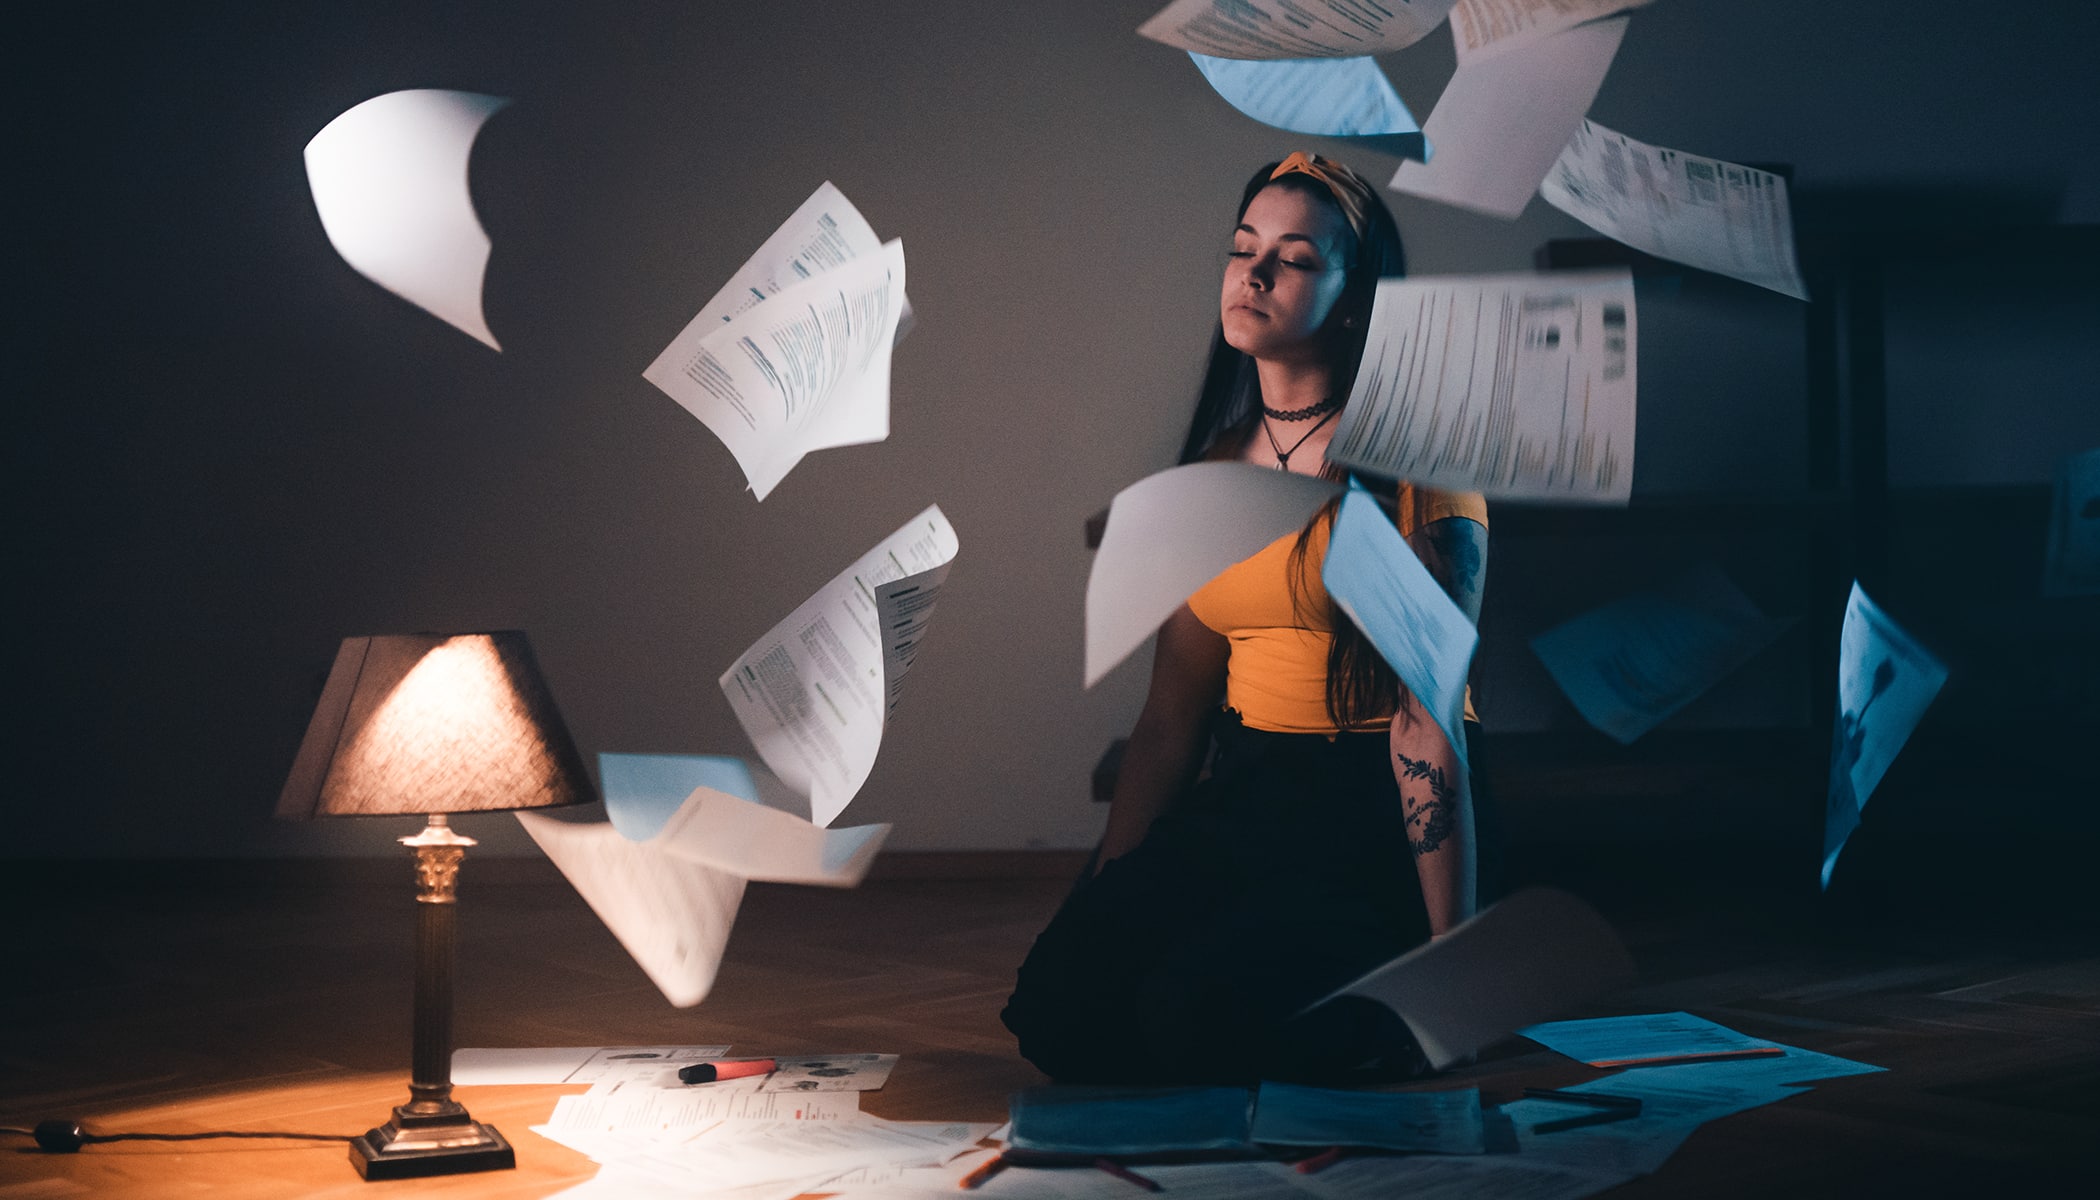
And it doesn’t have to be a complicated story with a surprising twist. Here we’ve created a simple everyday situation. At the end of the article, we’ll show and tell you the whole story. But right now a few words about the preparations.

Plan the Colors, Clothing, Props, and Place
It’s good to tune the colors of everything that will be shaping the overall impression from your picture towards one or two dominant colors. Naturally you can shift the colors at will after that using Color Shift, but it’s better to do your work with colors while you’re planning and not rely on fixing everything later. Then all you’ll need to do on your computer are some mild color shifts.
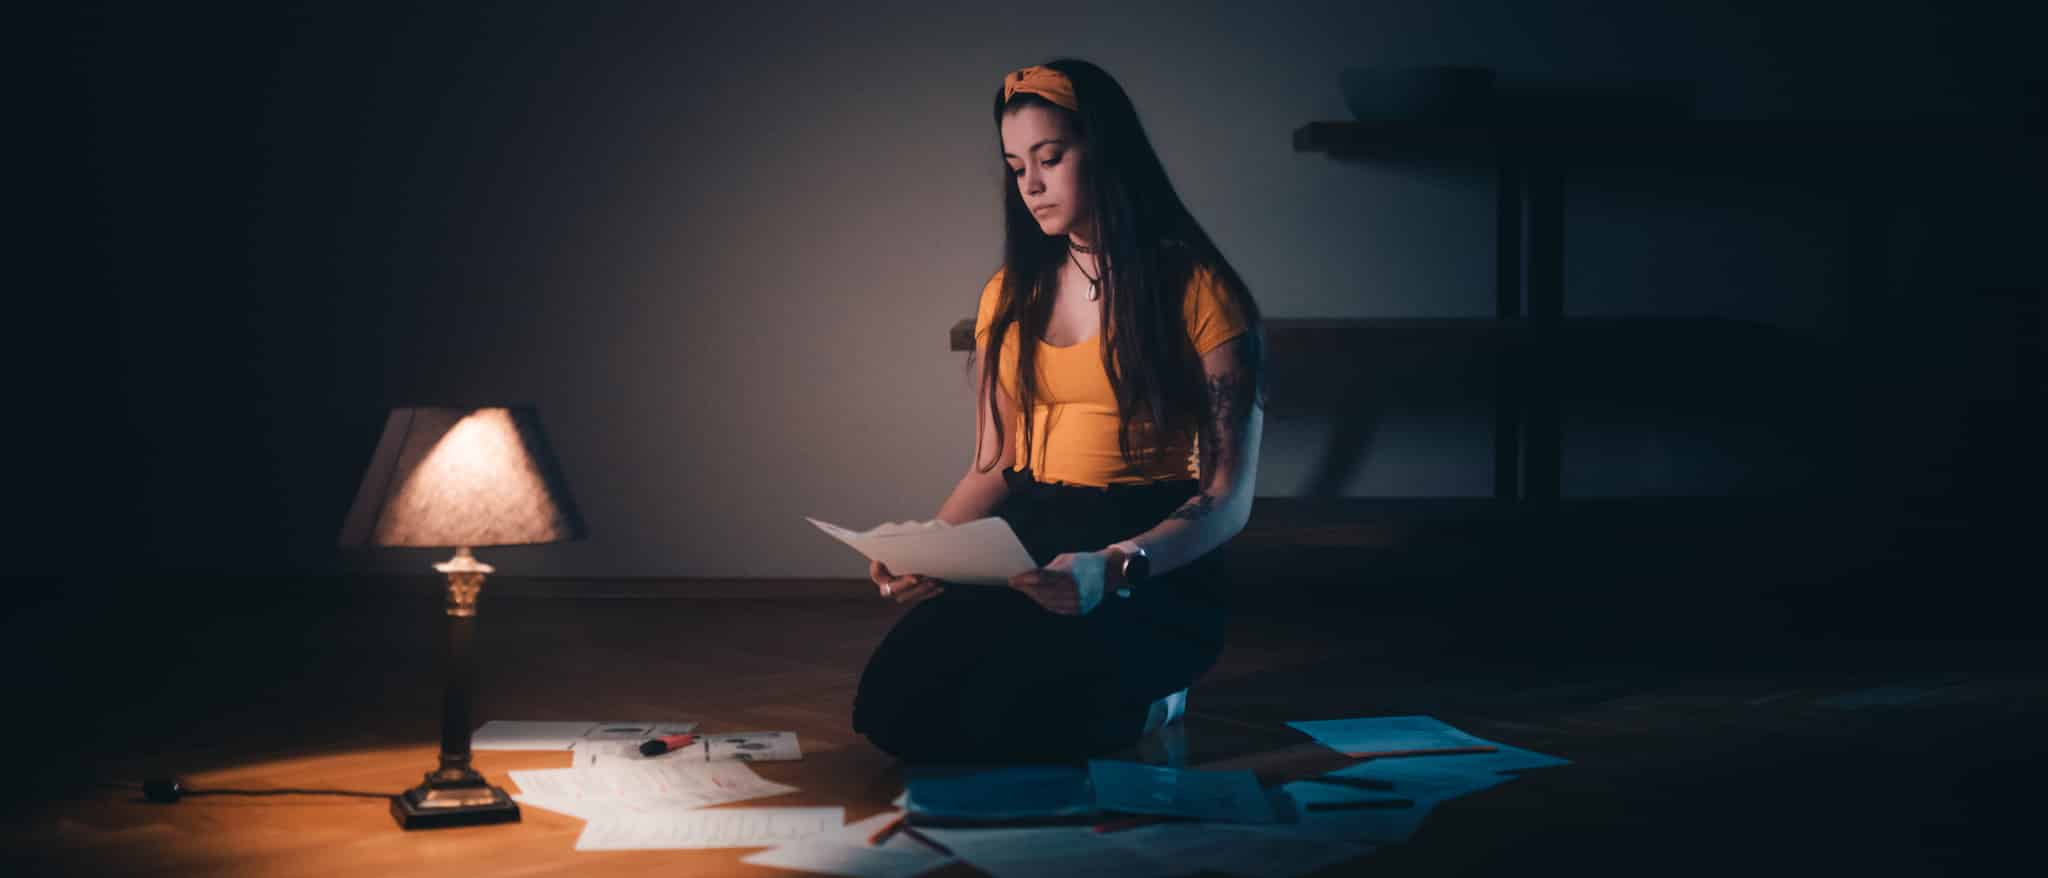
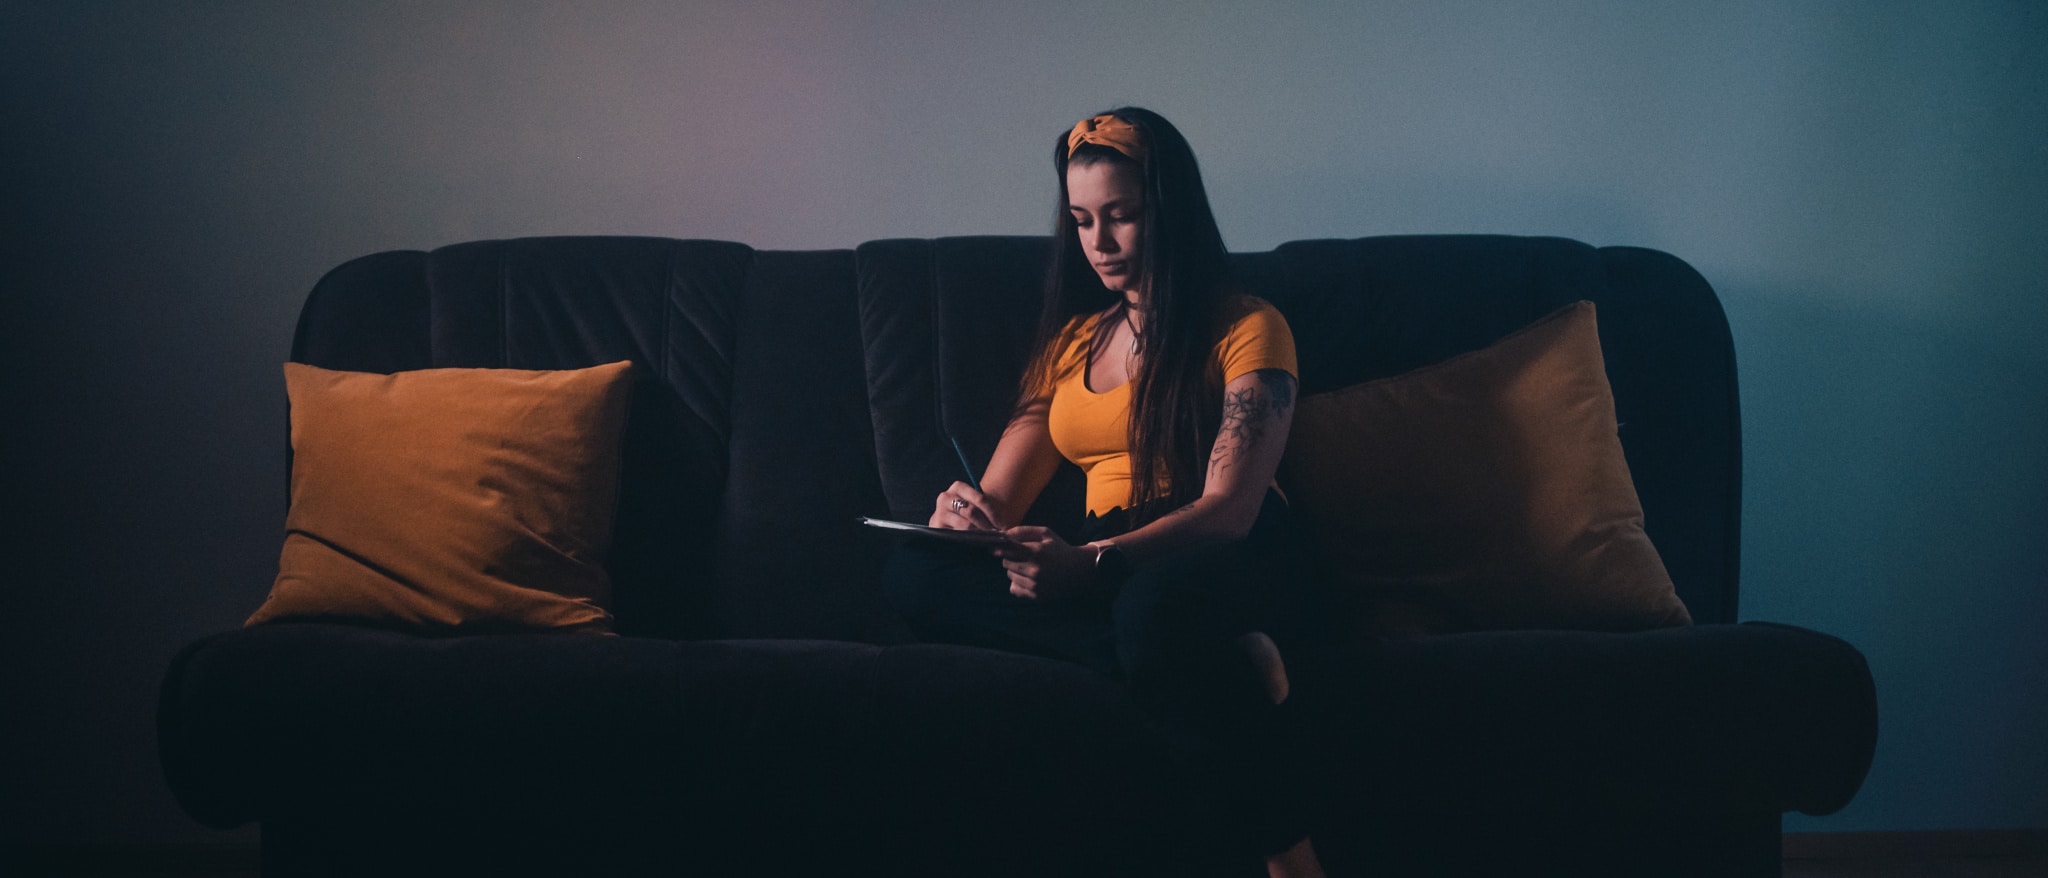
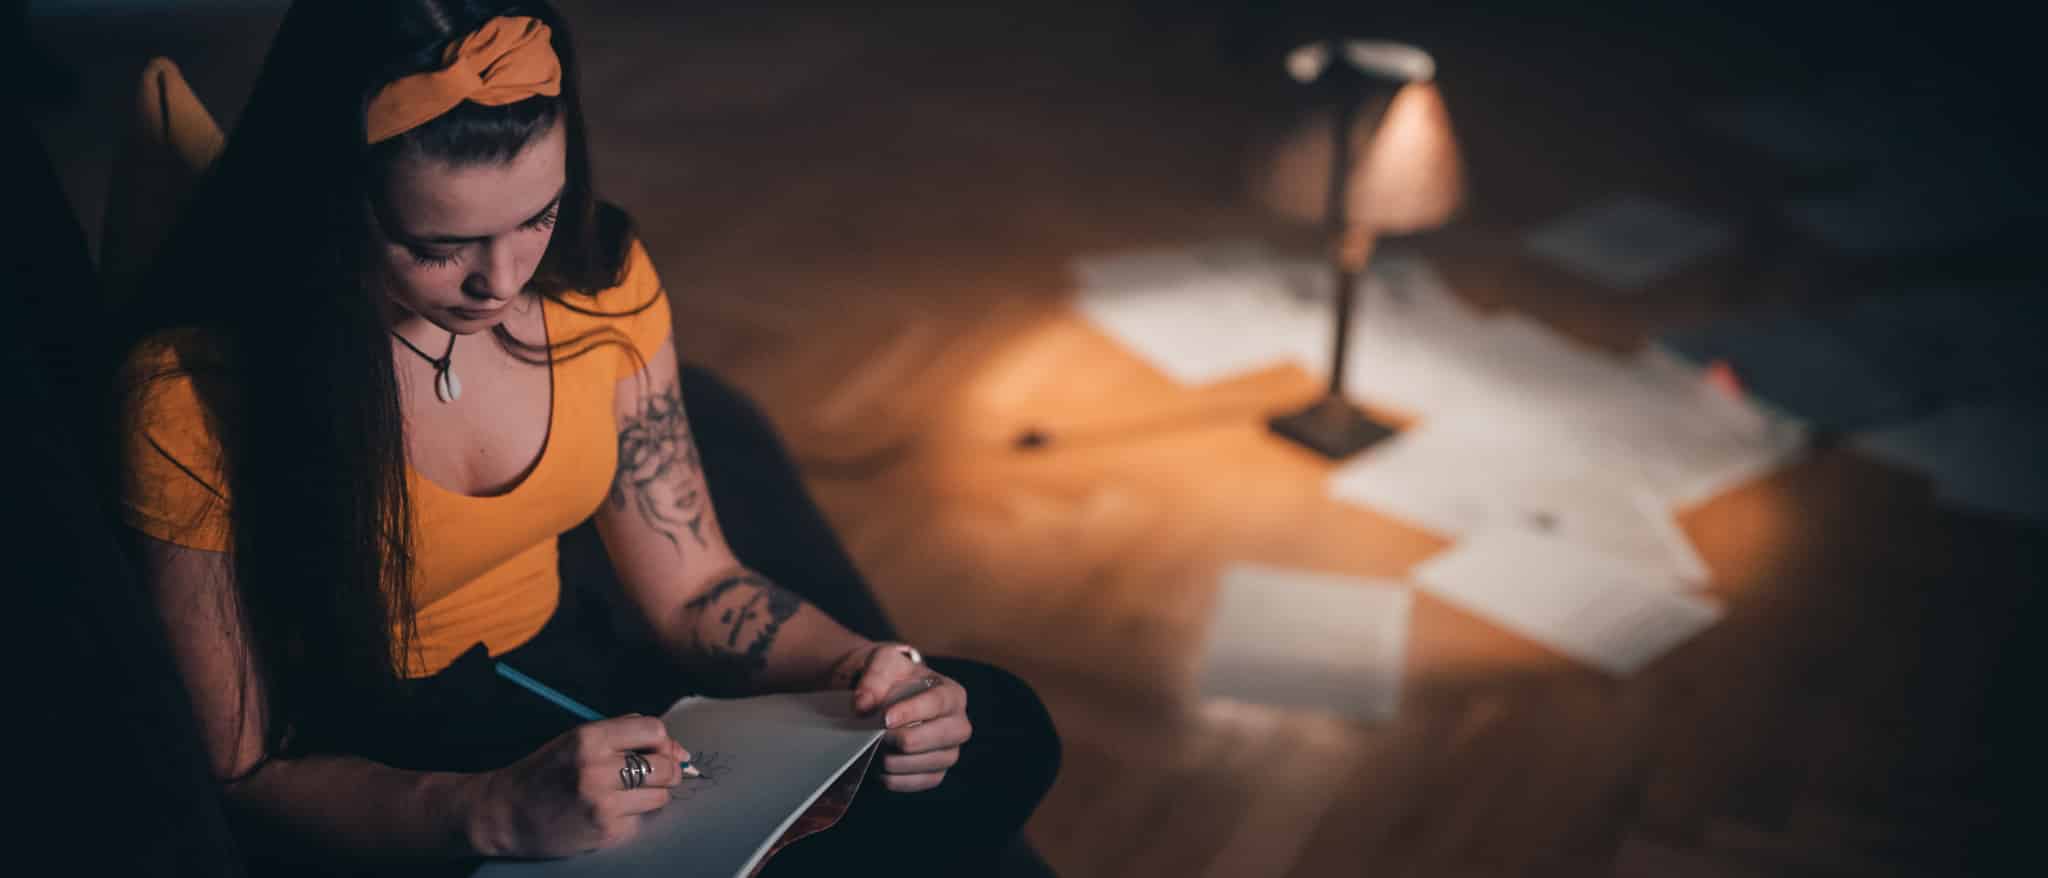
In this case I chose orange as the base color for the model’s clothing and accessories, because it combines well with her skin color, and blends in wonderfully with the warm light of the incandescent bulb in the lamp. The cooler light in the background serves as a second complementary color that forms a color contrast here.

And How Should You Light It All?
This part isn’t too complicated. When movies or videos are filmed with artificial lighting, “three-point lighting” is what’s most often used:
- The key light generally illuminates the majority of the subject’s face, and the more to the side it is, the more shadows are created and the more “mysterious” the scene is.
- The backlight produces color contrast and helps to separate the subject from their background.
- The fill light fills out the rest of the face, to keep facial shadows from being too striking. It is always weaker than the main light.
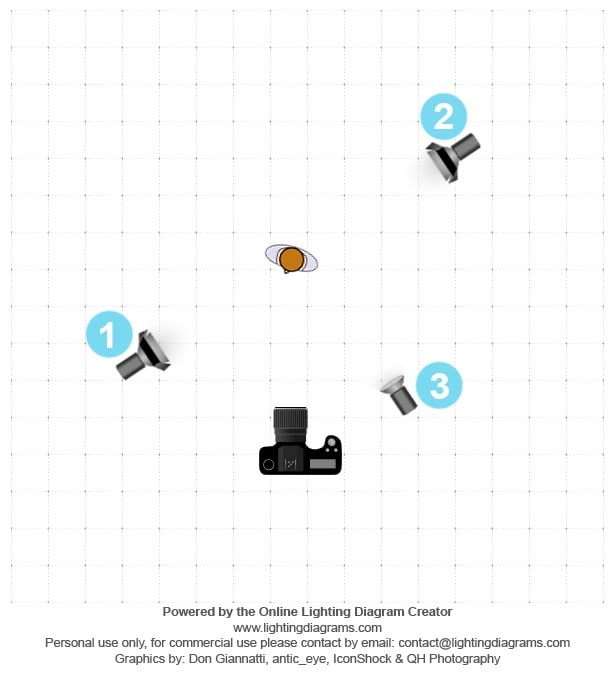
The main light is 3200K, to keep it as similar to an incandescent as possible. The backlight is relatively cool light (5500K, the same temperature as flashes) and simulates moonlight through the window. Both of the lights are LED sticks. I like to work with them because they aren’t bulky, and they’re convenient to use.
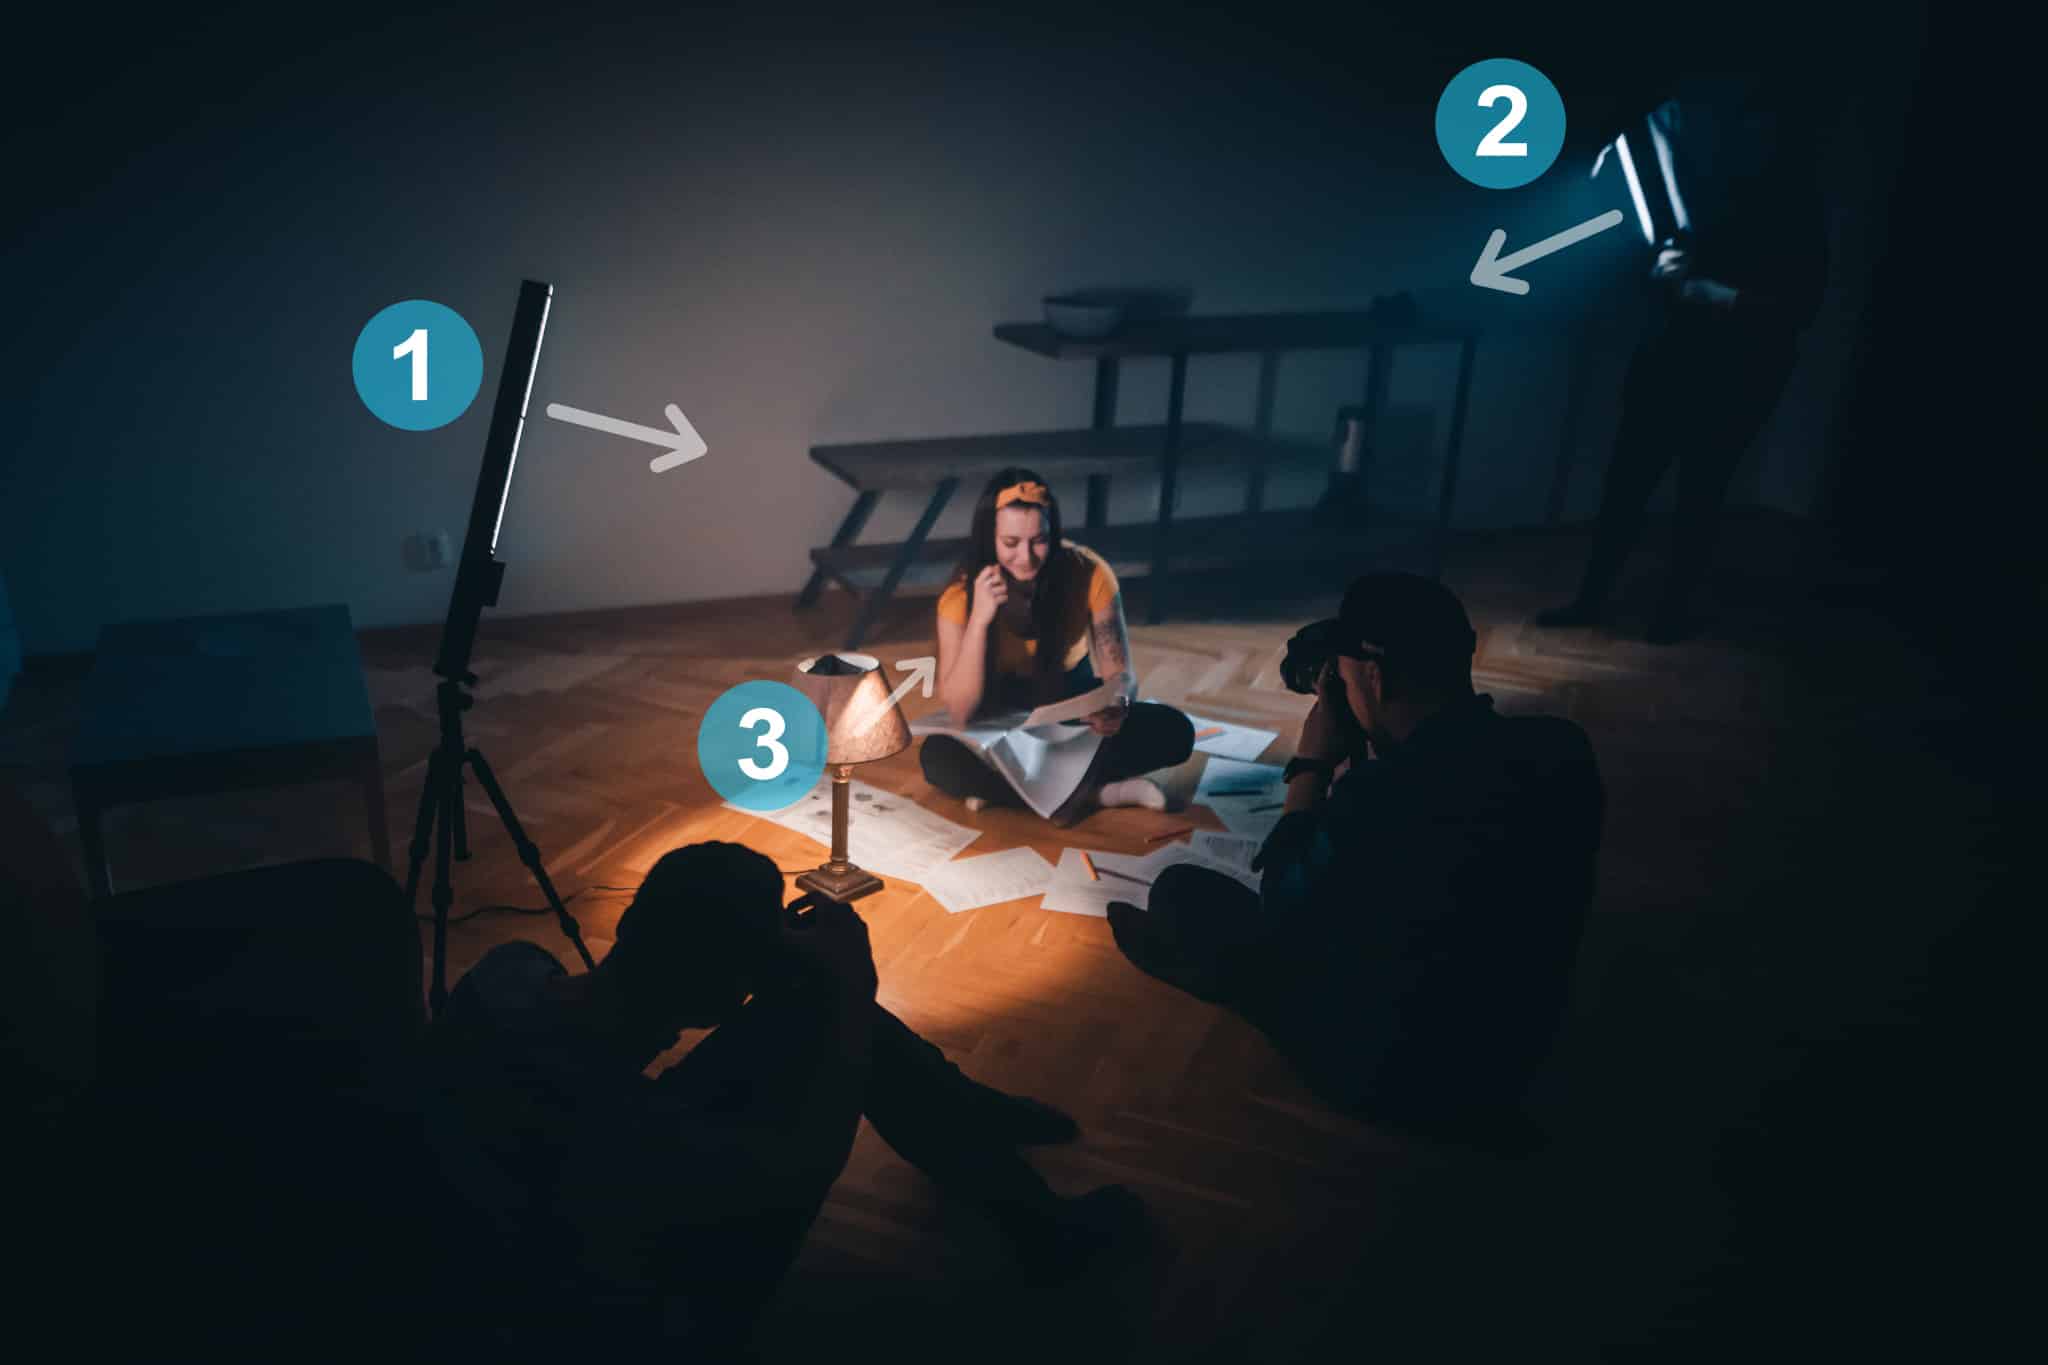
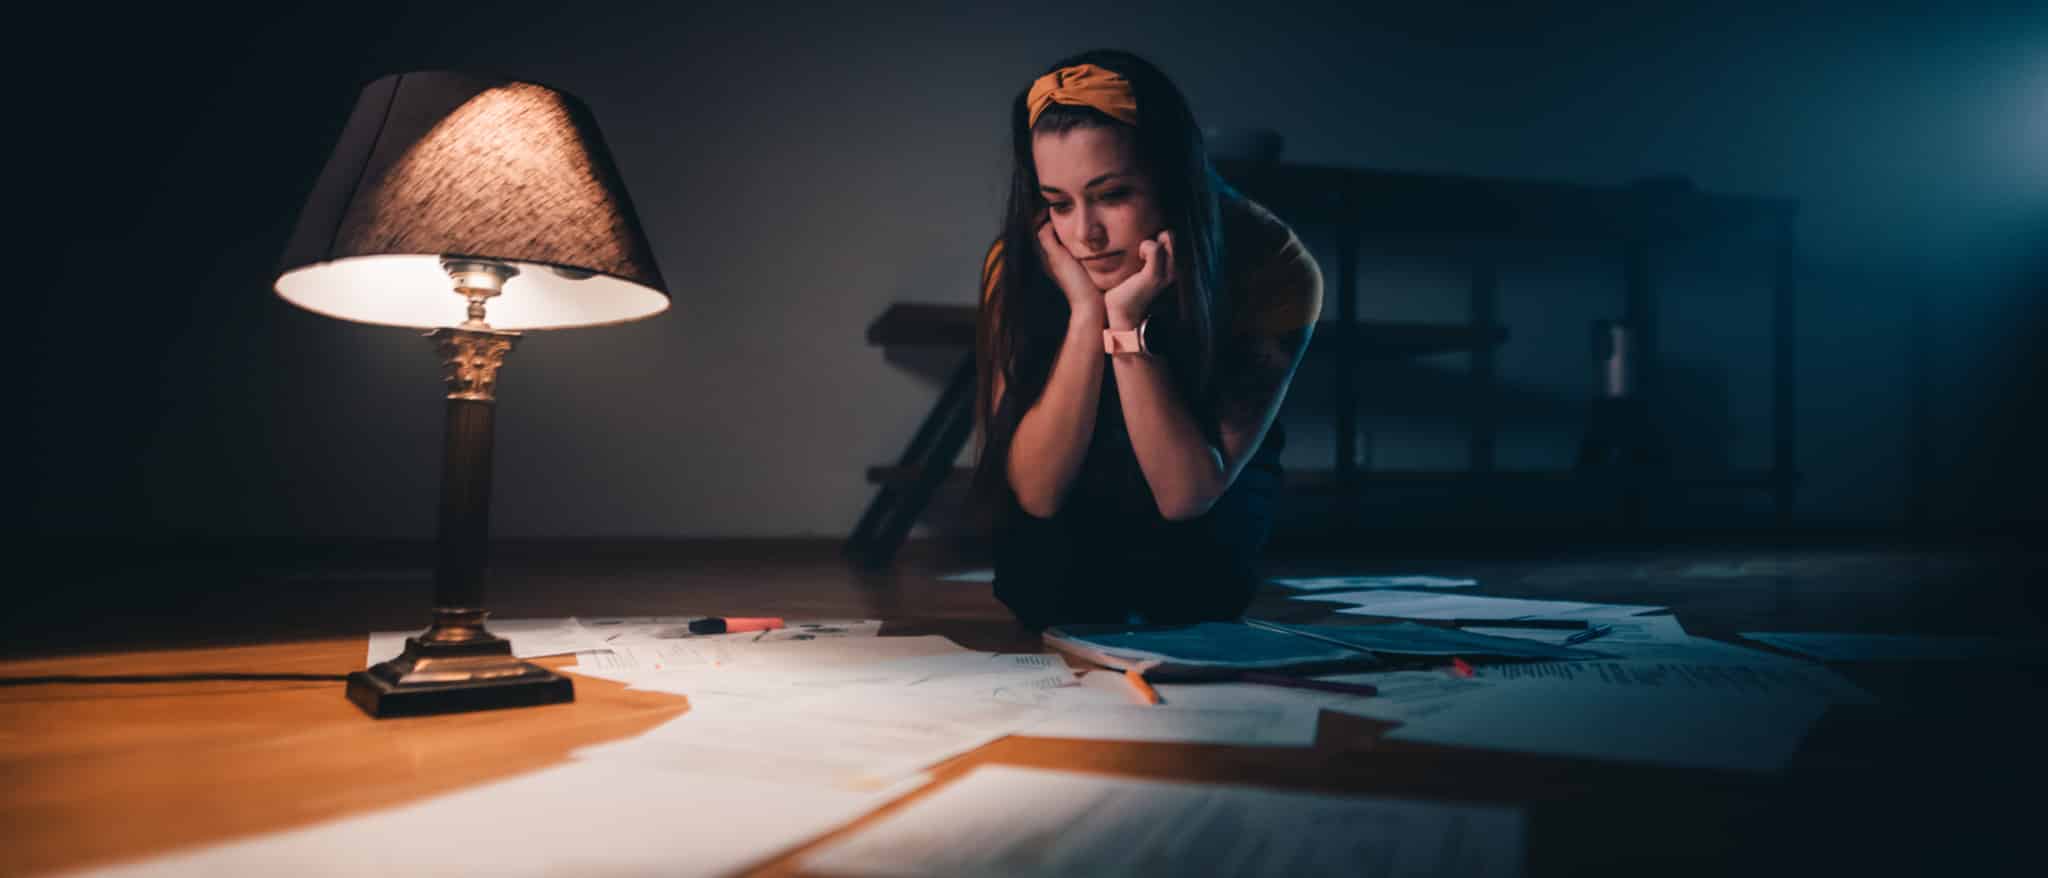
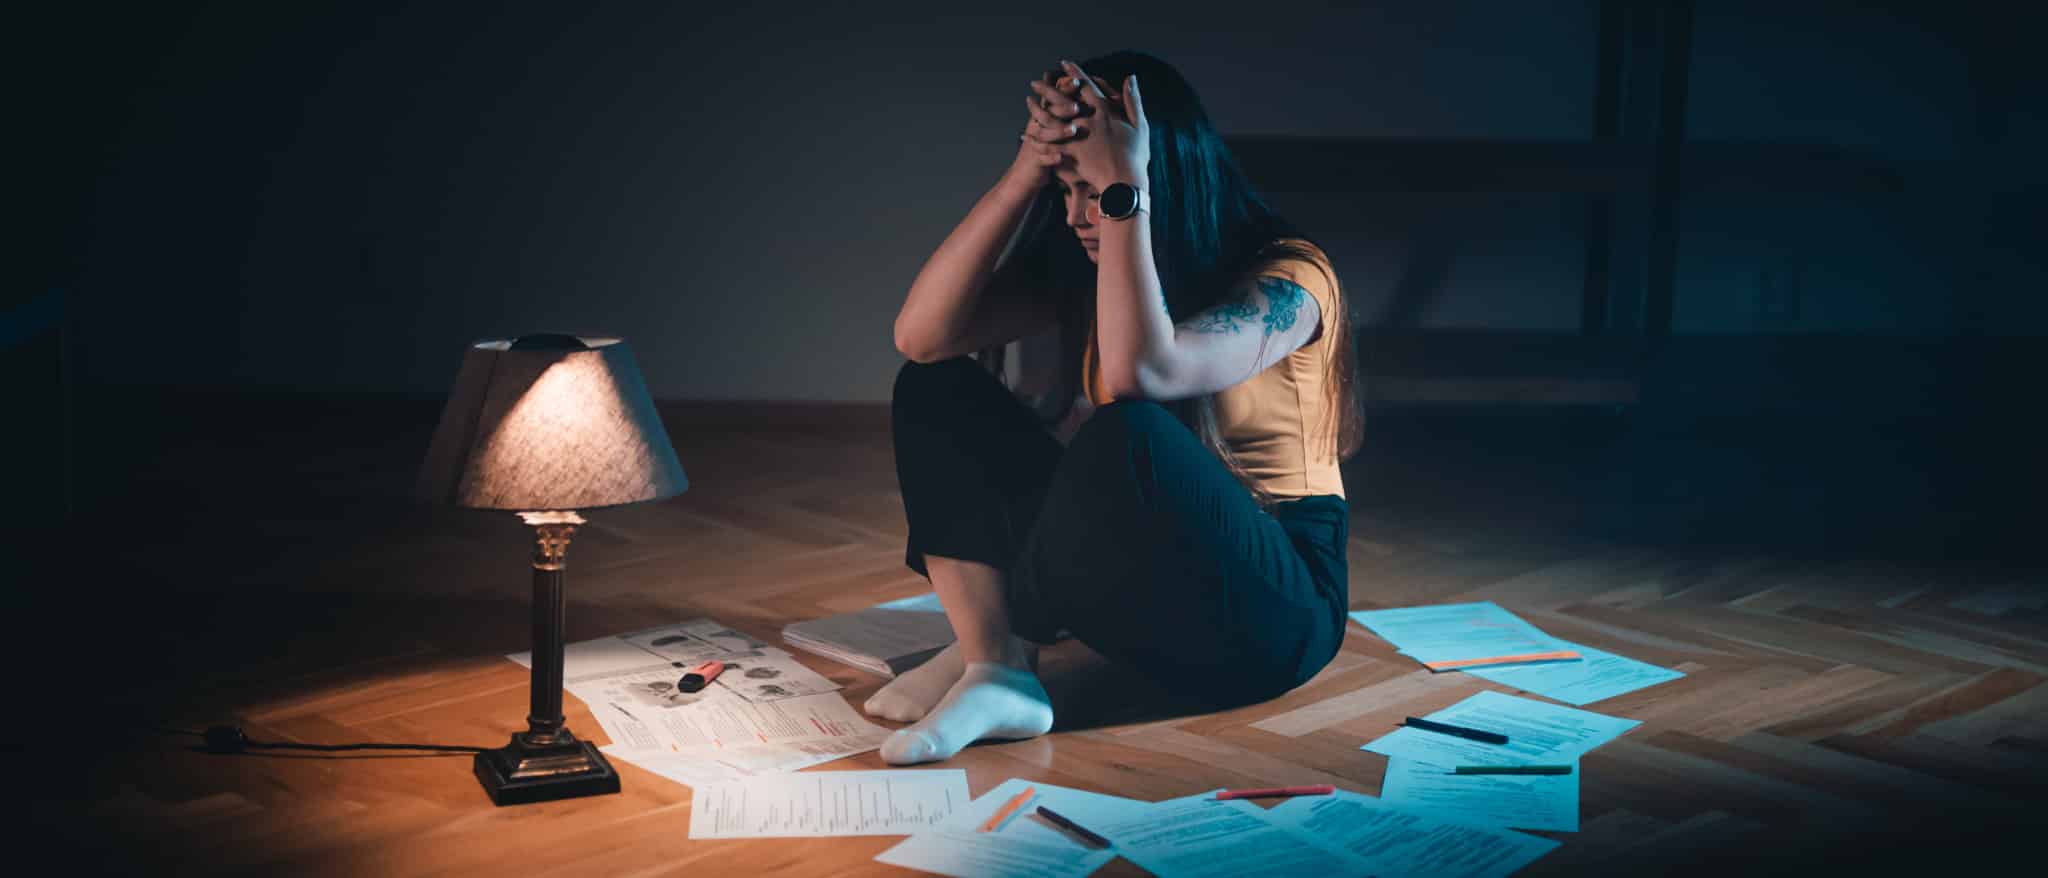
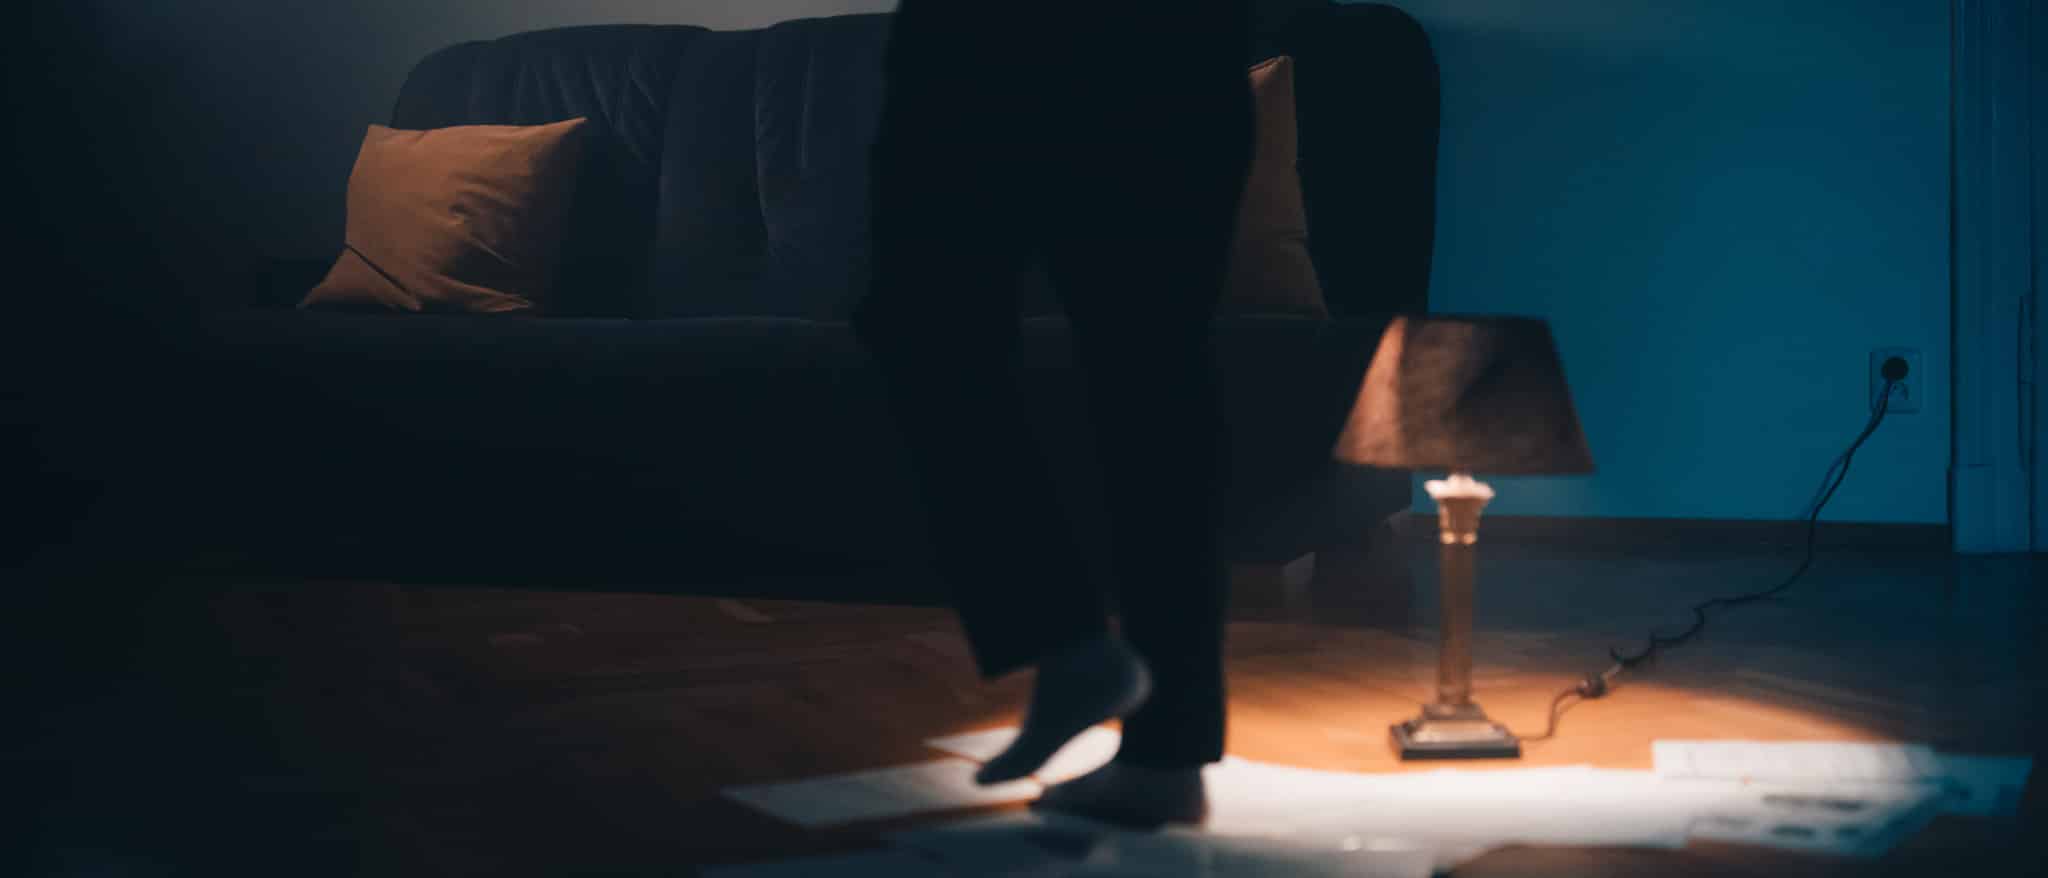
In this case it’s not textbook three-point lighting, because the fill light—the lamp—has been placed on the left rather than the right. So the resulting effect is more of a two-point lighting. The reason is simple—the photos’ mood is meant to tell of the dark atmosphere of night studies with a single little lamp. But that lamp itself shone too much from below, and the main light supplemented it without fundamentally changing the original concept.
This is how the lighted and readied scene looked. We have filmed a video during the shoot to show you how the shots would look in motion. It really does look close to the film version, don’t you think?
Consider Ratios of Sides and Composition During Your Shoot
If your photos will become a series with a narrative, then all of the photos should have the same ratio of sides. But what ratio of sides? This is of course up to you, but there are certain ratios that are good to stick to, and above all to take into account during the shoot itself:
- 4:3 – used only exceptionally today. Television once used this ratio, but it is losing all meaning at present, because all modern televisions are 16:9 or wider.
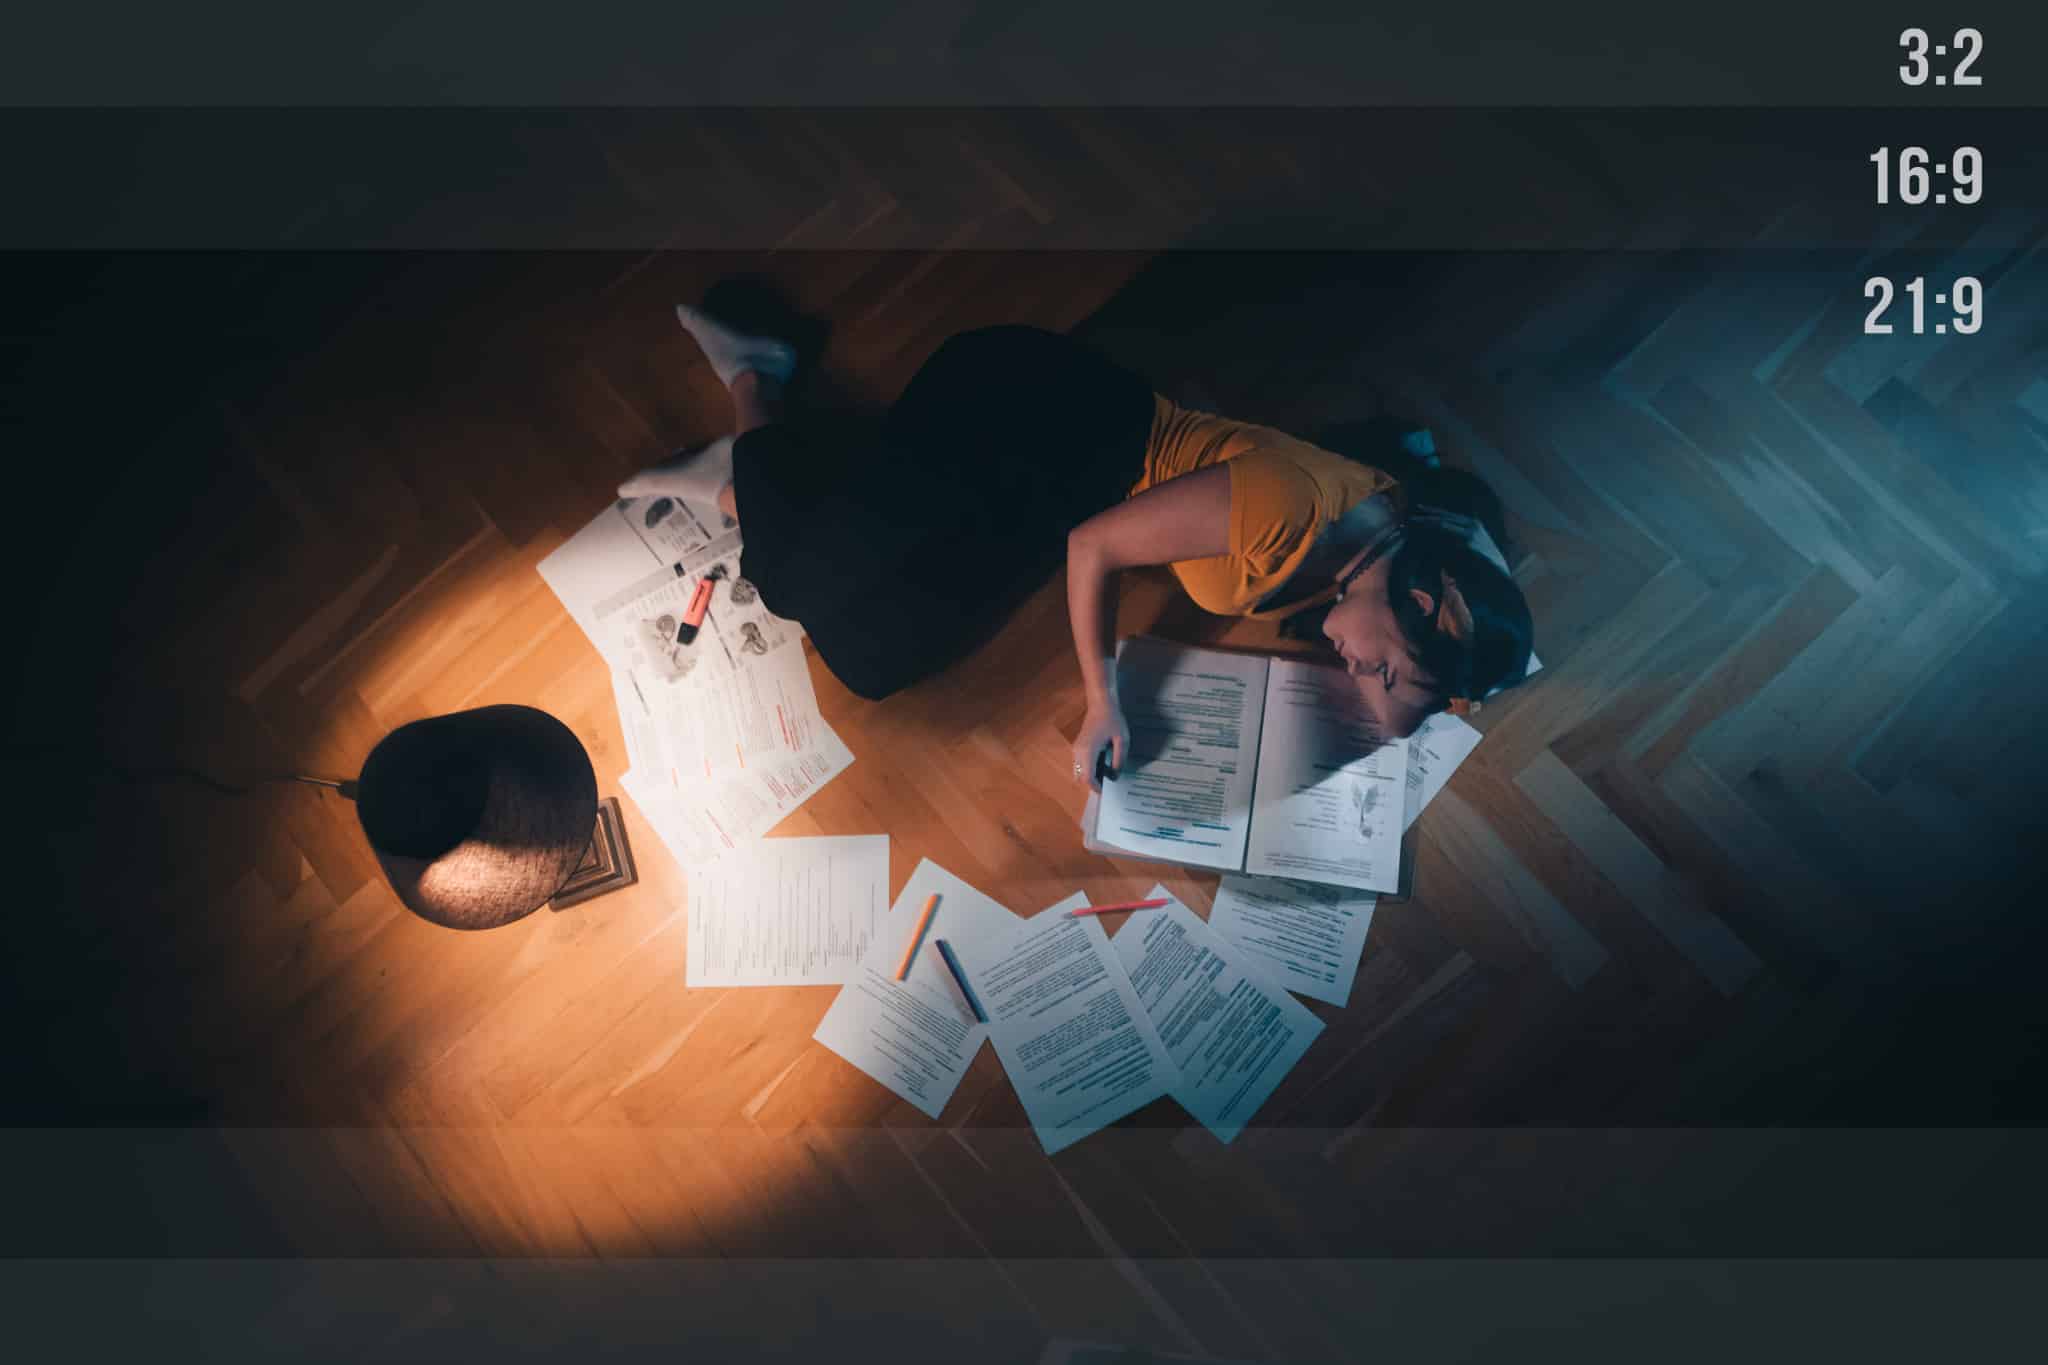
- 3:2 – most cameras have a sensor with this ratio, so this is the simplest solution, because this is how the scene looked right inside the viewfinder. But it doesn’t look very cinematic; it’s a traditional photo.
- 16:9 – most television broadcasting and most series and other shows are in this ratio. It looks cinematic, and a small crop is enough.
- 21:9 – used very frequently for feature films, and looks extremely cinematic. (It is based on the special anamorphic lenses used.) I decided for this ratio.
As you can see, when you’ll be cropping to 21:9 (2.33:1), you need to leave extra room at the top and bottom during the shoot itself. However, composition works a little differently with a narrow image, and it’s often easier to fit a story into it. This is in fact one reason why it’s used in film.
Cinematic Language and Series Shots
Cinematic language is a very complex and extensive topic, but I’ll try to simplify it and summarize the basic rules in a single paragraph. If a series of photos in order is in question, you should observe two basic guidelines:
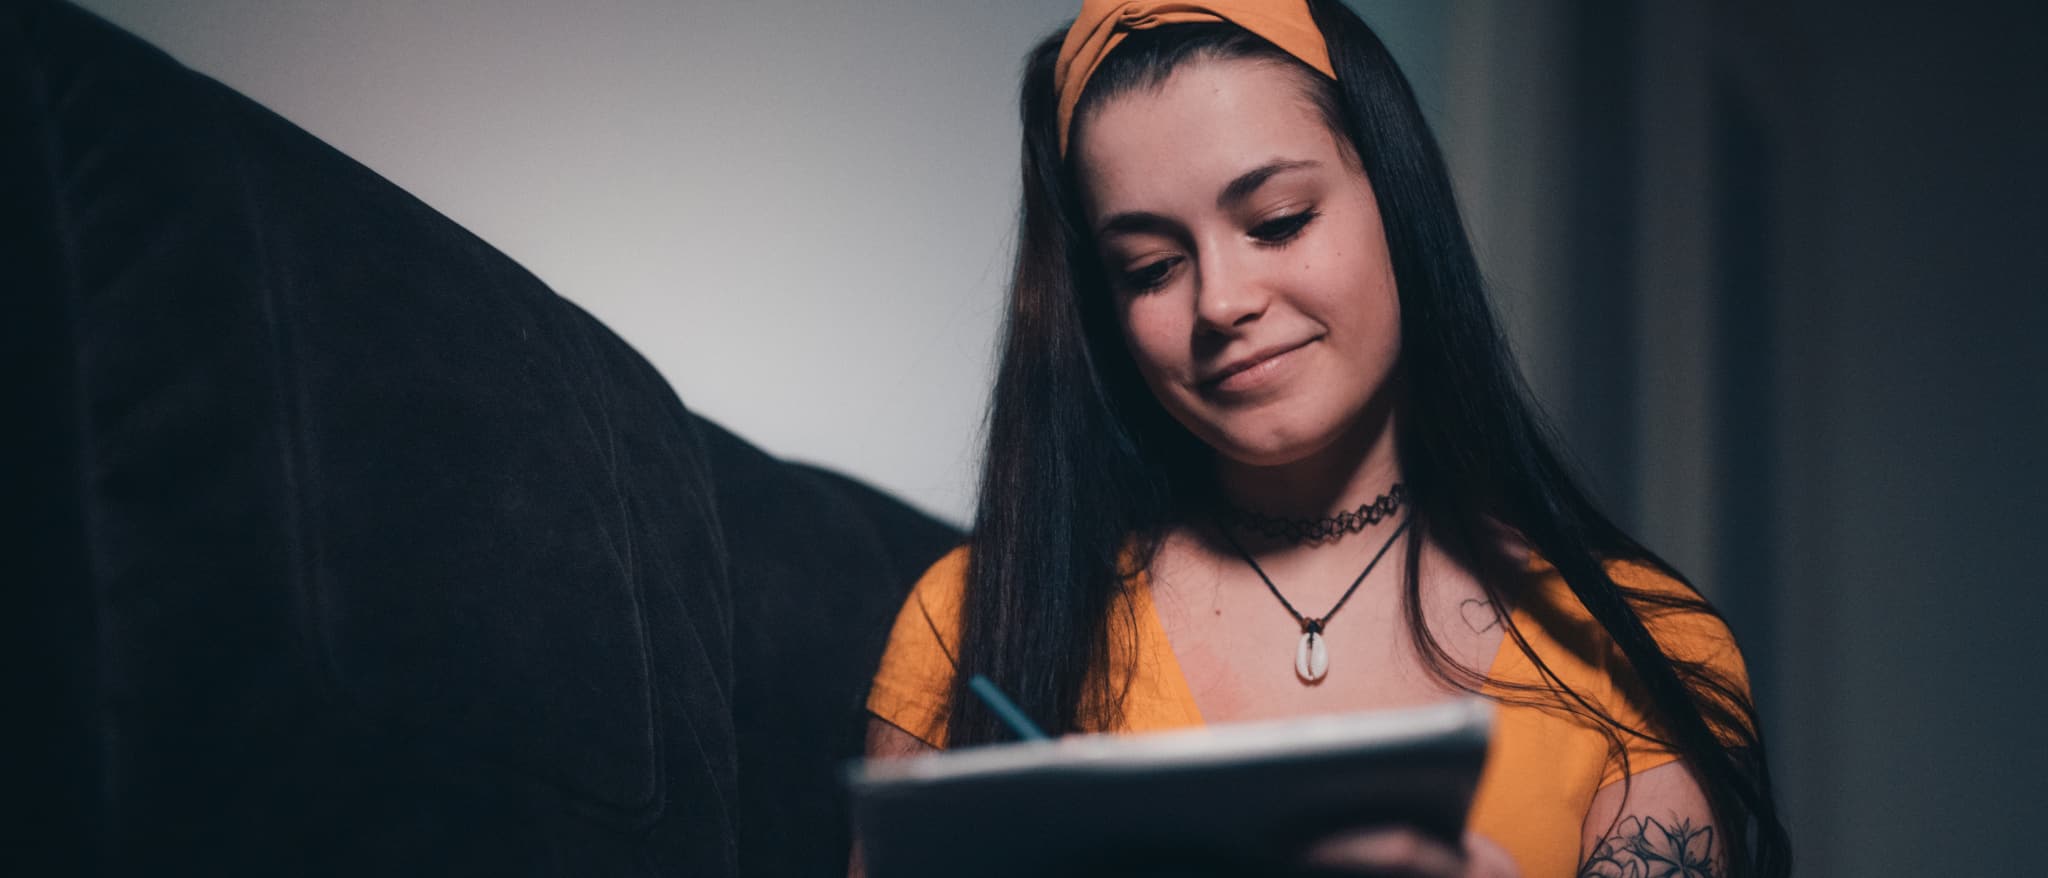
- change the composition so that no two consecutive photos are excessively similar. And include full shots, medium shots, and close-ups into your photos.
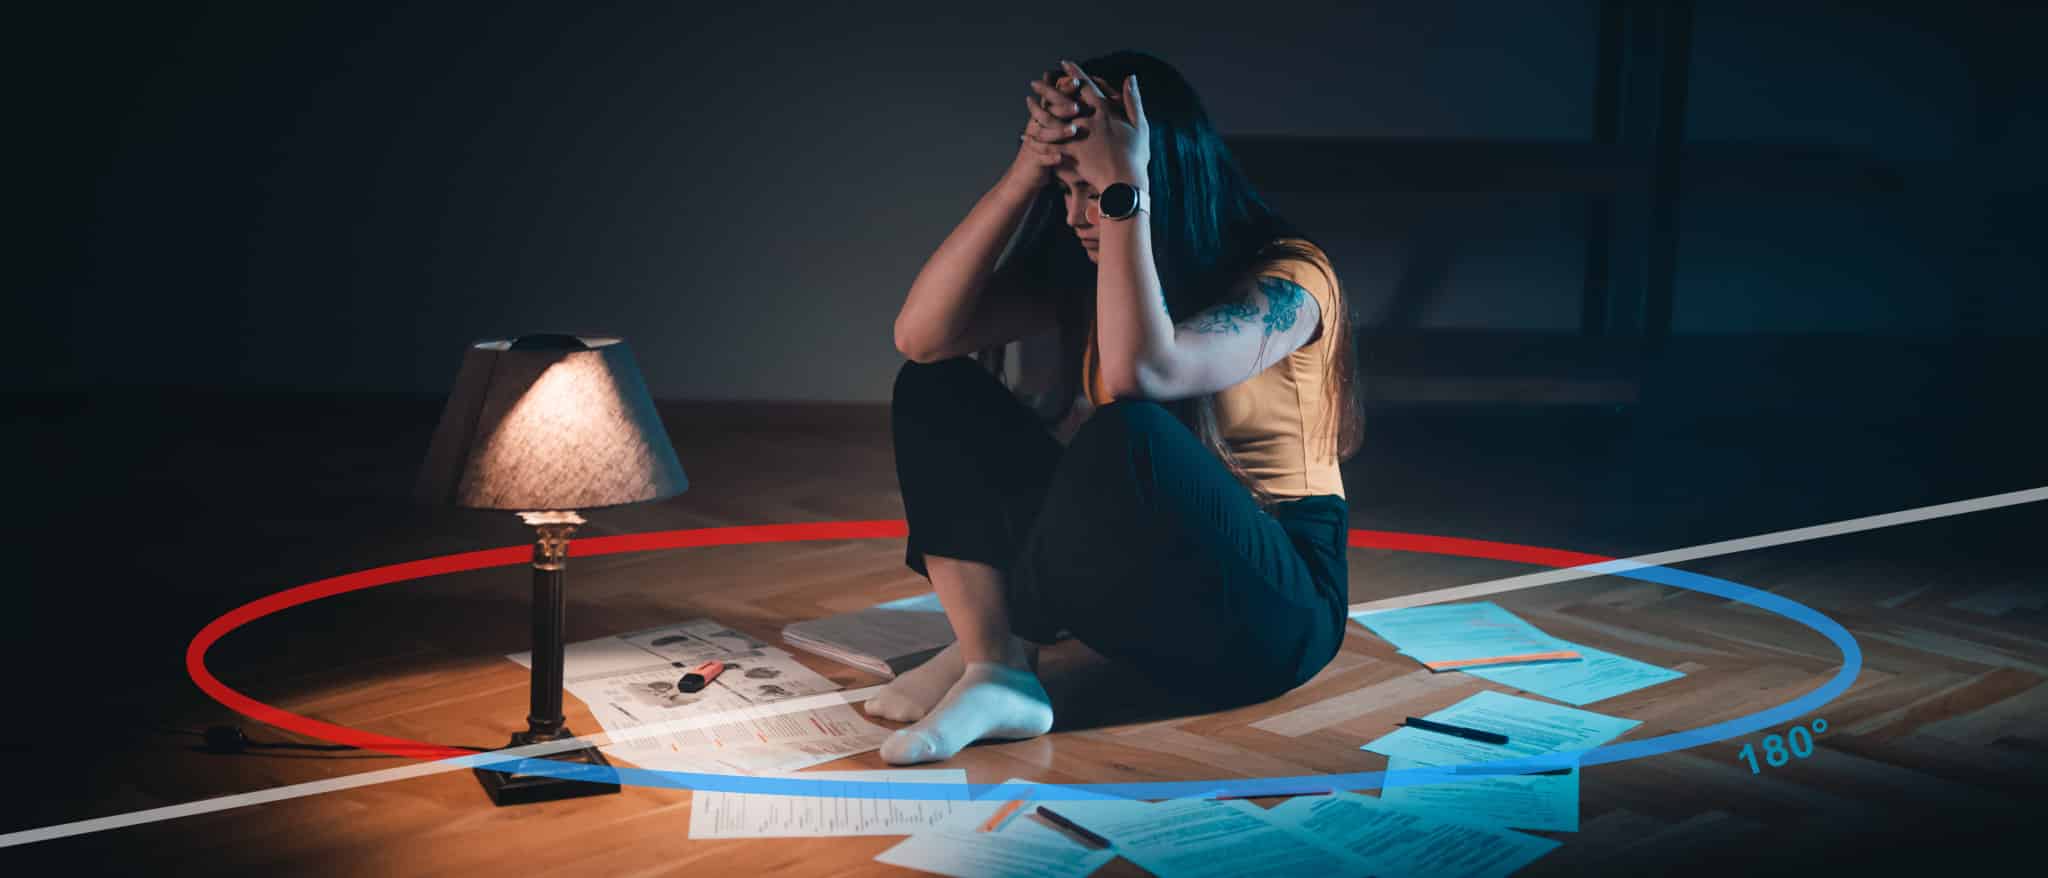
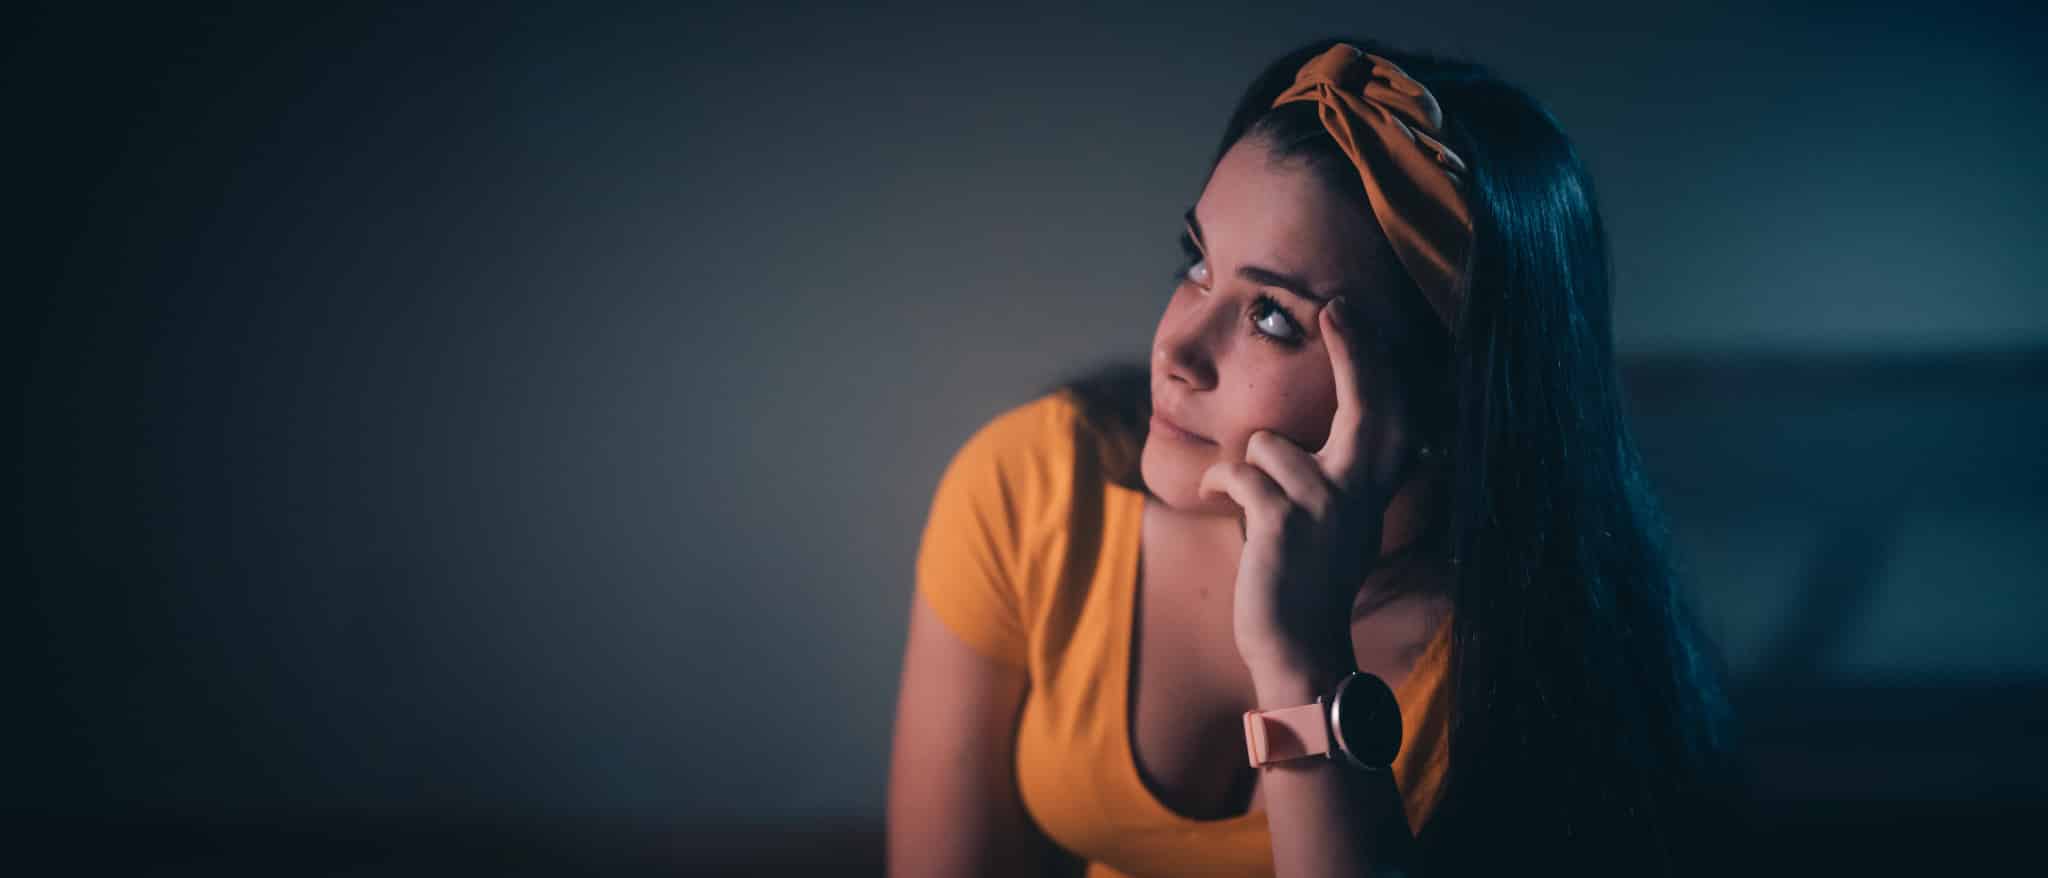
- don’t cross past the axes – an axis is an imaginary line through an object you’re photographing, and you should move within a maximum of 180° around it. That sounds quite abstract, but we’ll illustrate it in the following photo. The model’s gaze runs from right to left. And if you move to the red area in the picture after that, that suddenly reverses the direction, which is better avoided.
However, this is just like other rules of composition—it’s important to know about it, but you don’t need to stick to it 100%.
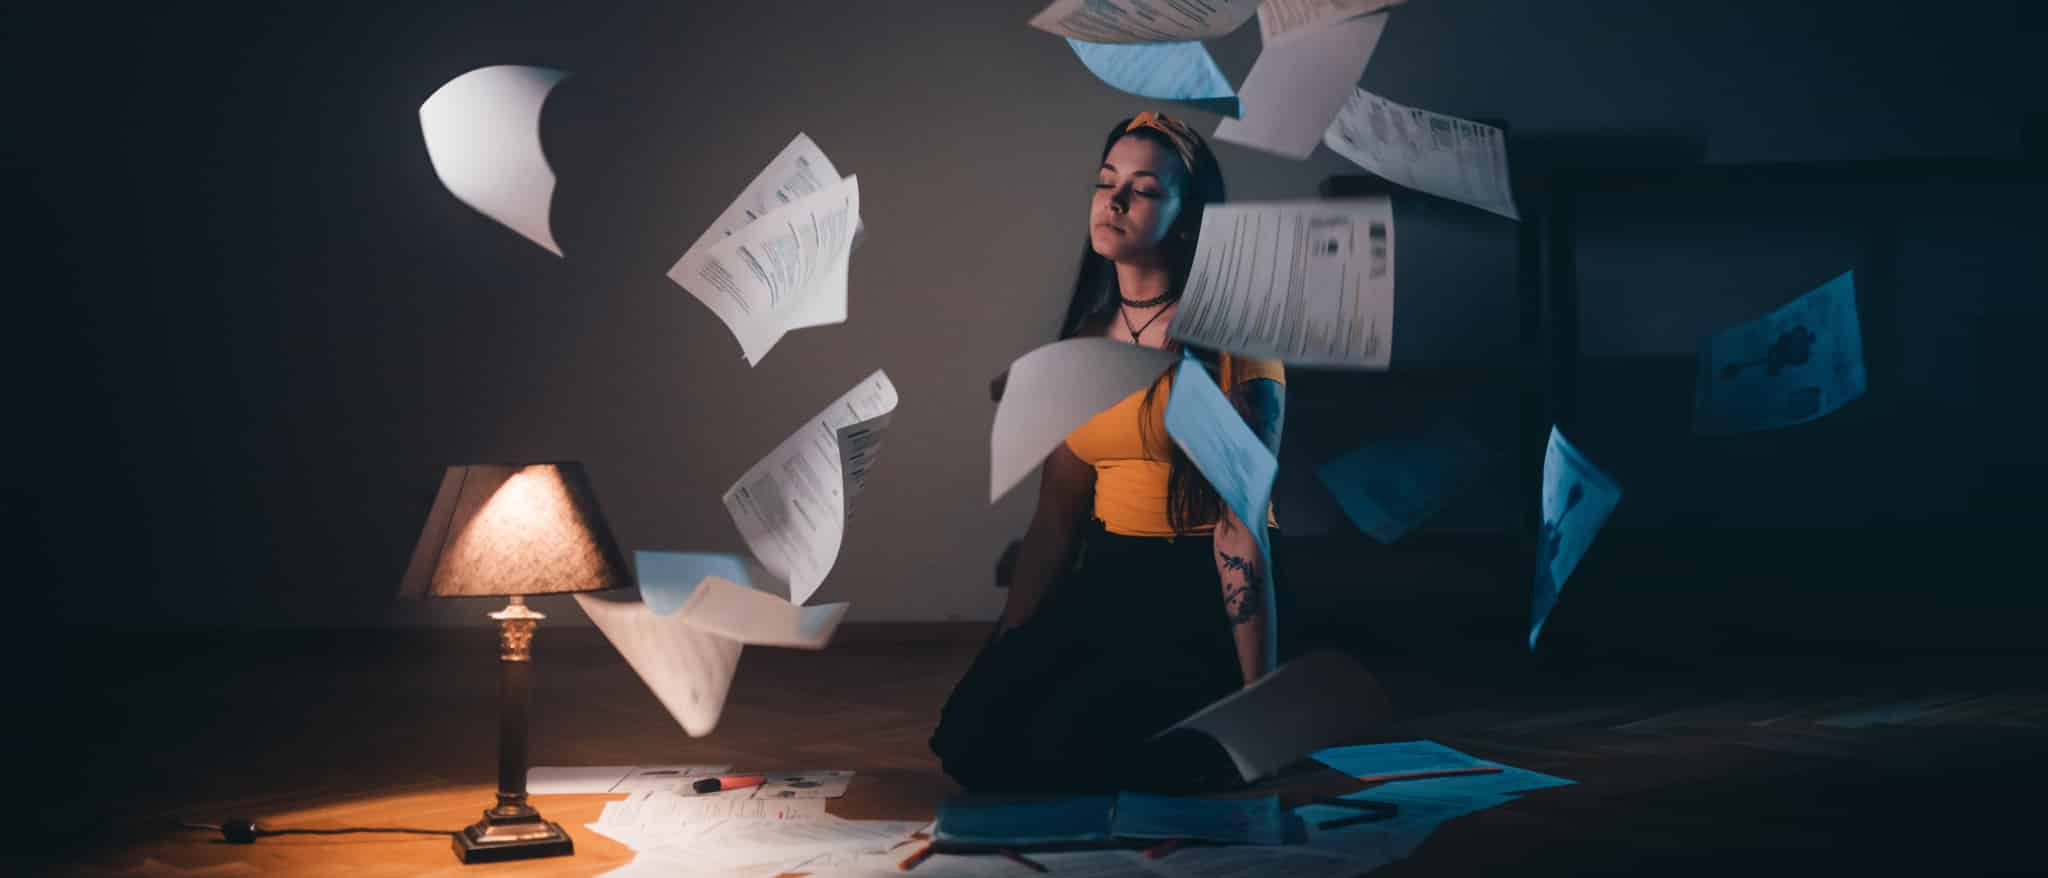
Arrange the Pictures to Create a Story
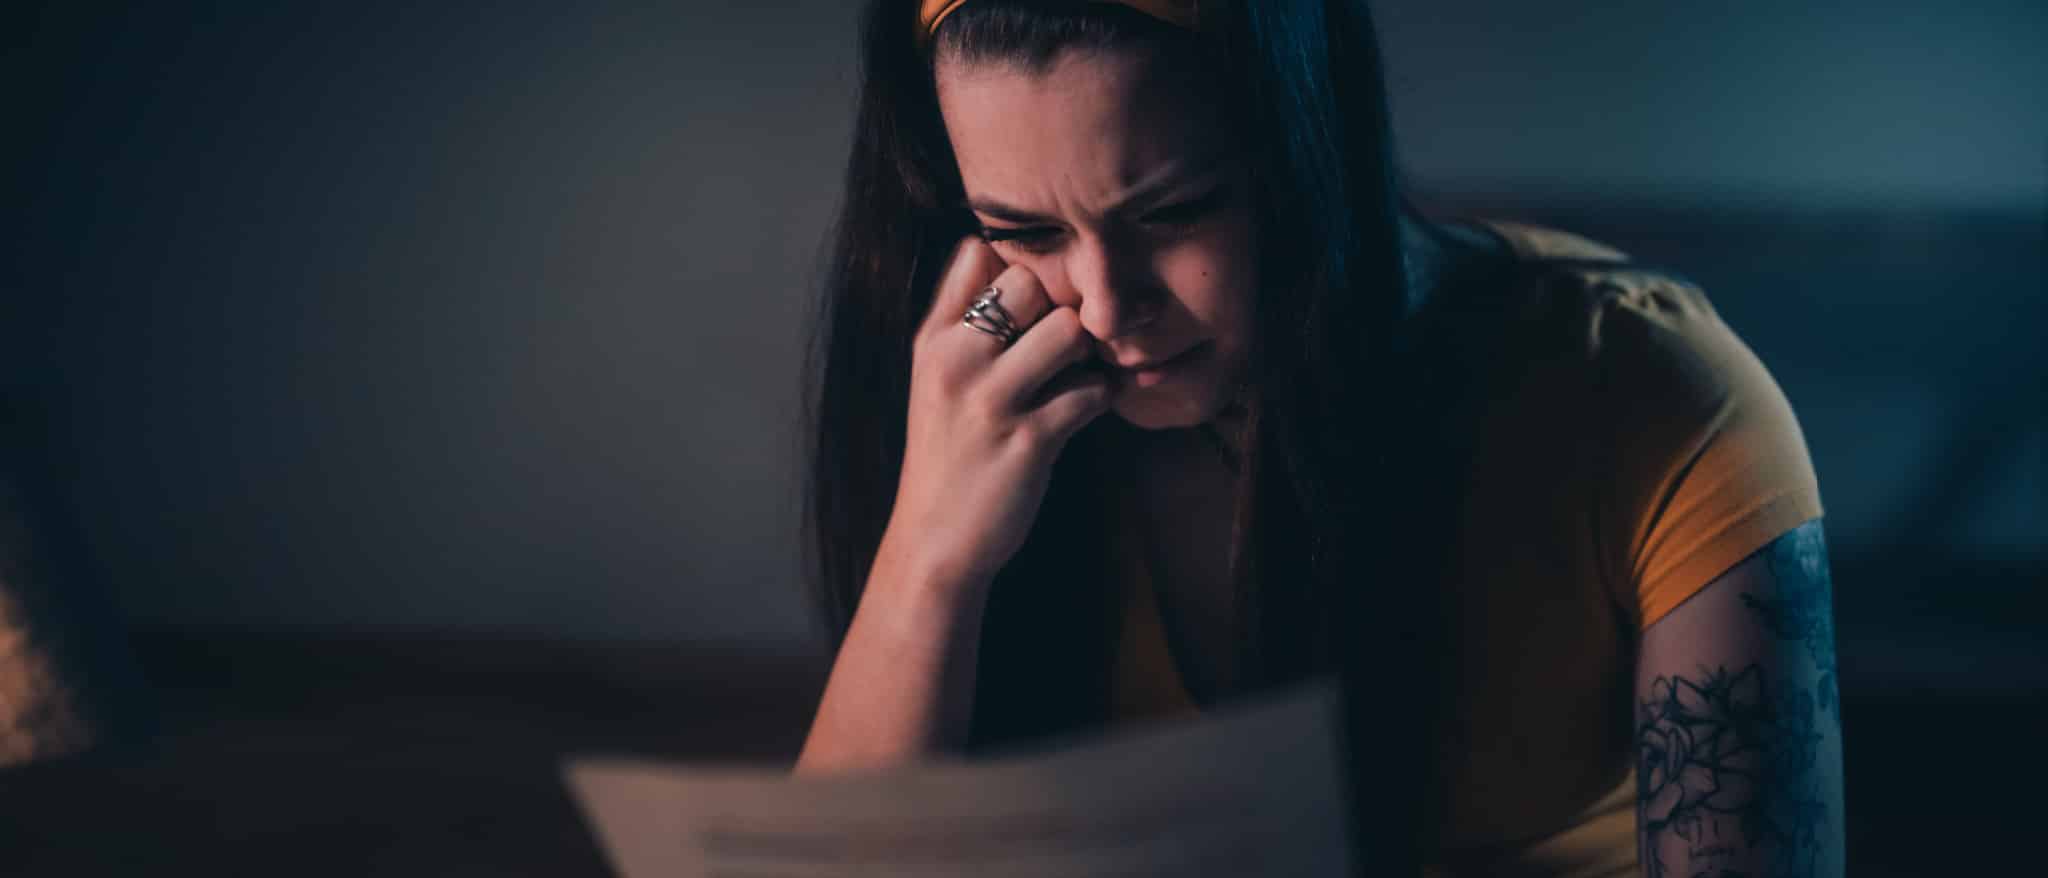
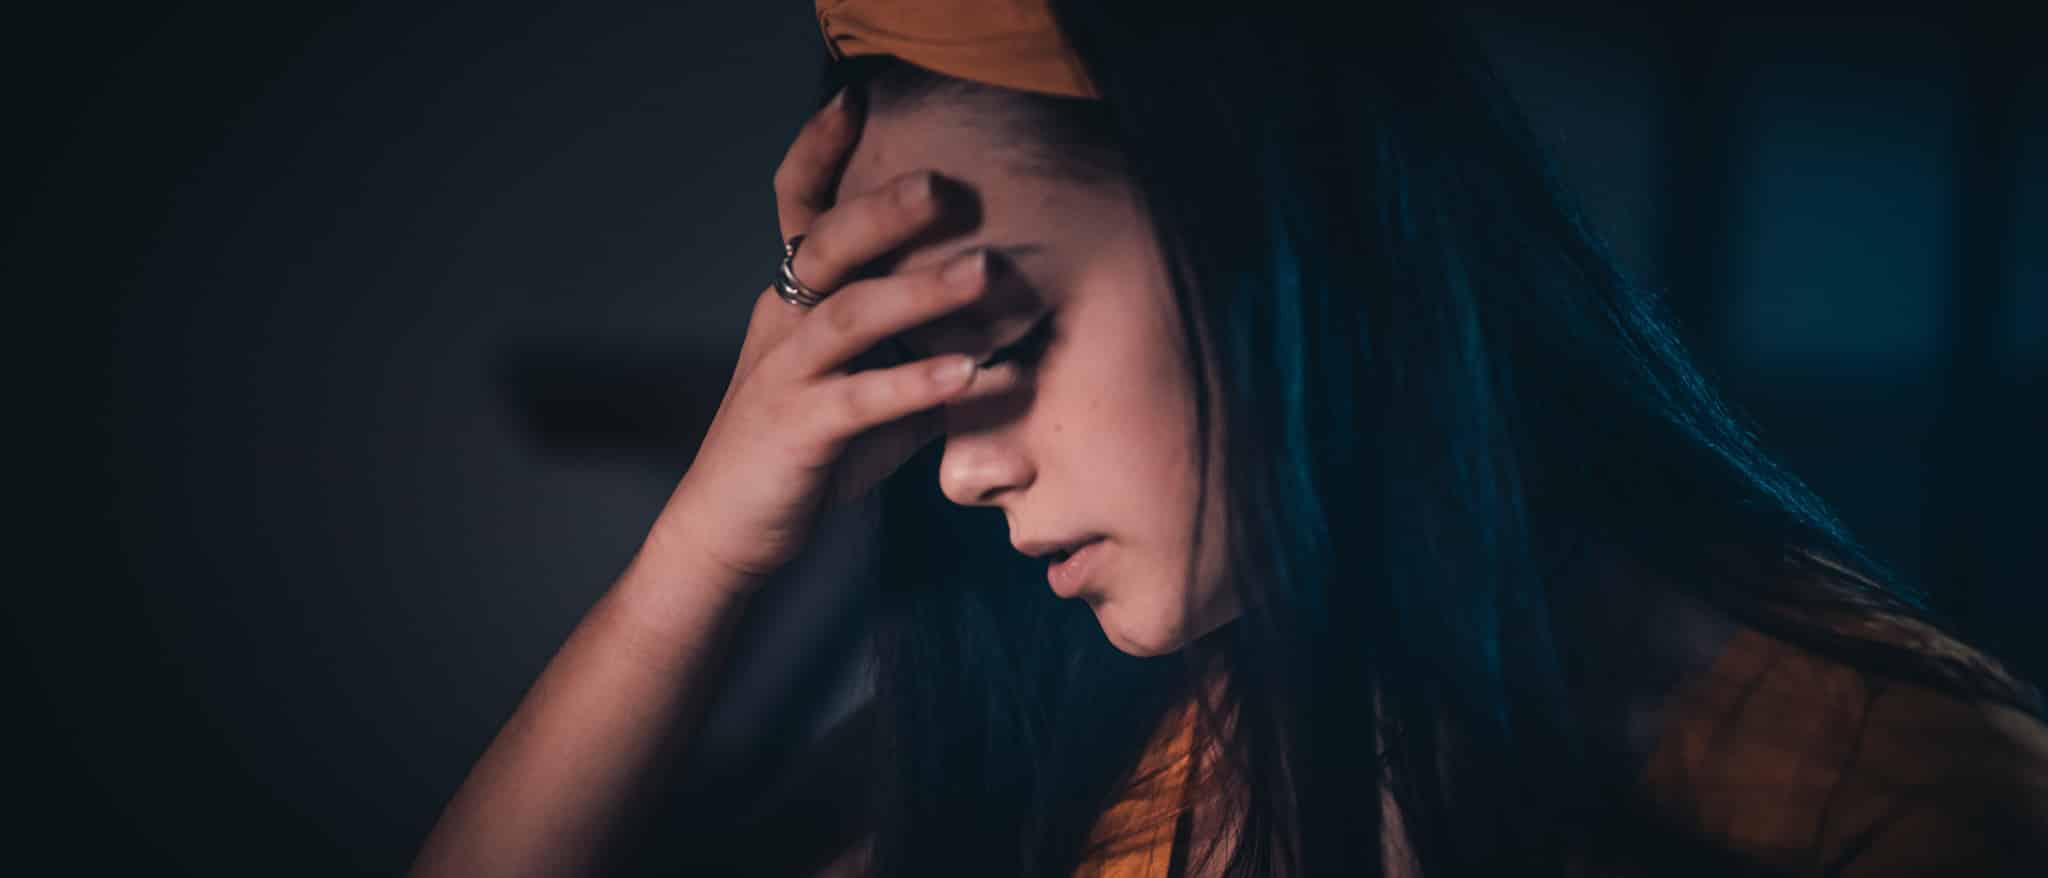
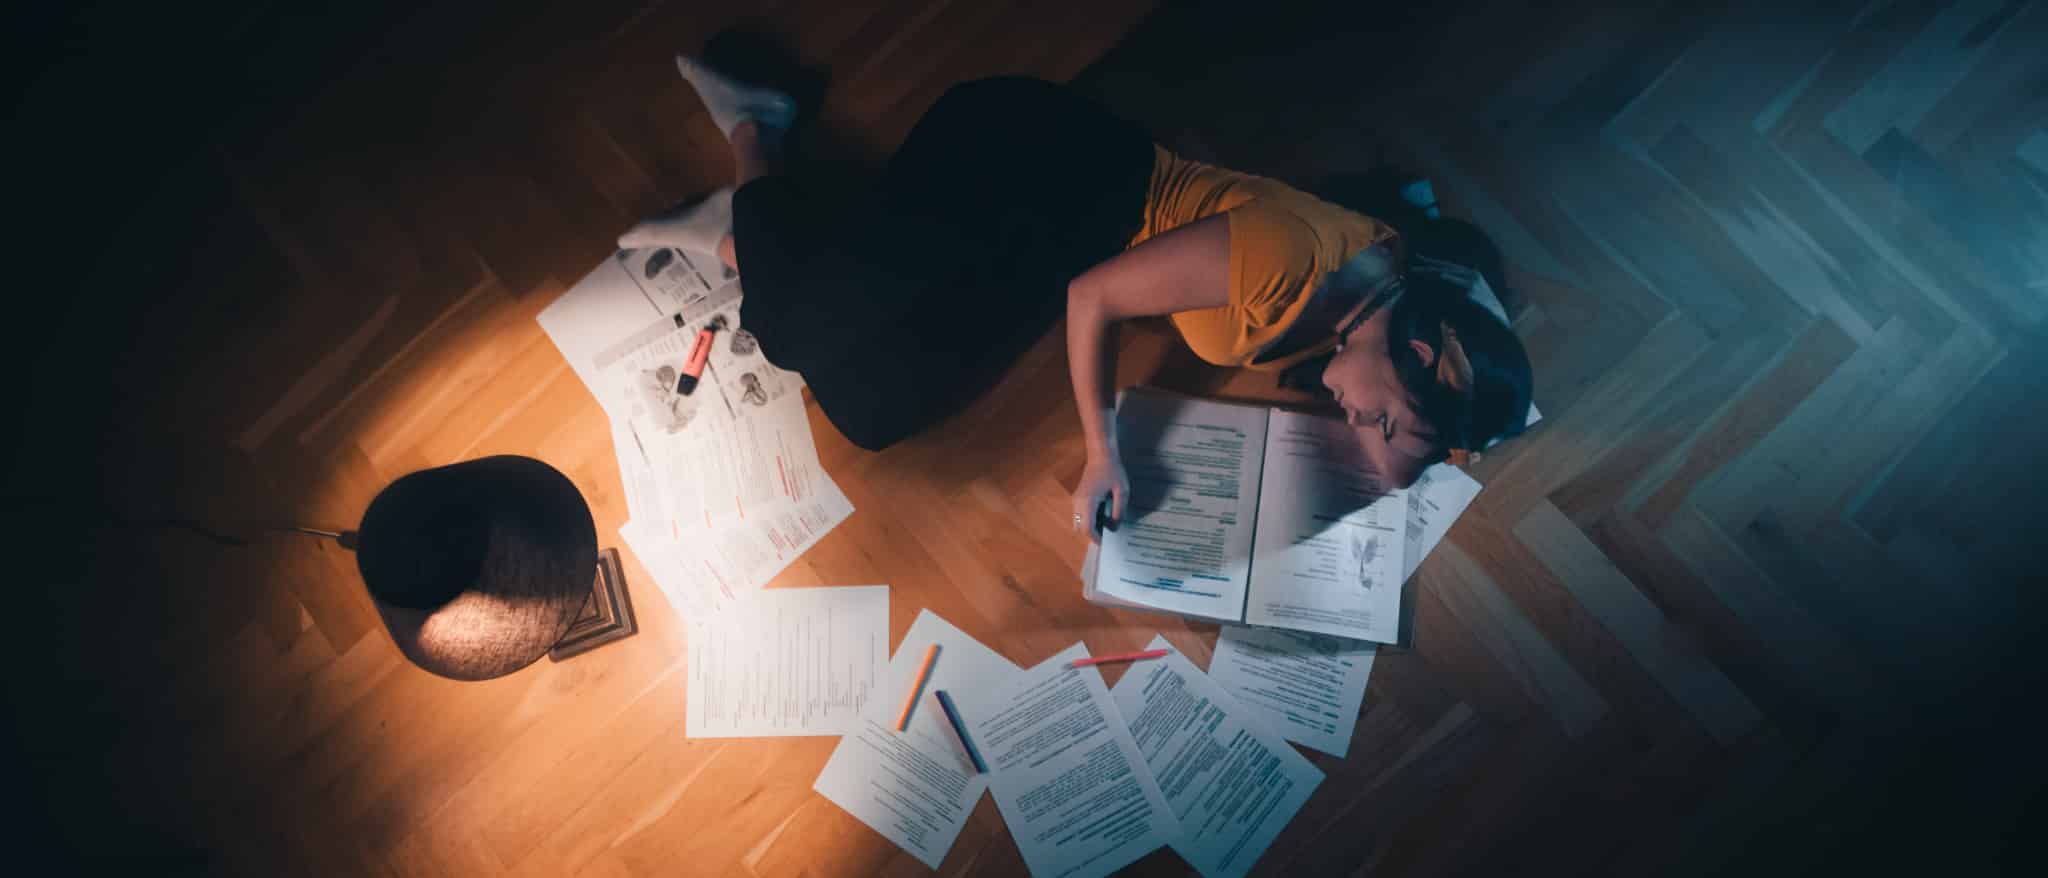
Our story starts with descriptive shots of the whole scene and an introduction to the story—our model has a lot of studying to do. But it’s clear that she doesn’t really want to start. I illustrated this in the shots after that using close-ups of her face where she’s expressing disinterest in continuing and dejection from the mound of textbooks awaiting her. “What now?” Our heroine is thinking about how to get past it all, as shown through another closeup of her face. In the last part she has decided to fling the textbooks away and leave them lying. Instead of studying, she’ll be engaging in something that’s much closer to her—drawing. Her emotions gradually become more positive. The lighting ties in to this; it has a greater share of warm light at the end than at the start.
The last photo may seem to be crossing the axis. But this is intentional, because we’re returning to the beginning. The foreground and the background (the lamp and the study materials, where it all started) are clearly given here and wrap up the whole story.
See the Whole Story
All of the photos were taken on a Nikon D750 + Sigma 50mm f/1.4 Art combo, except for two that used a Sigma 24mm f/1.4 Art.
The majority of the photos were taken with 1/125, f/1.4, ISO 800.
Think About Photography When You’re Watching Movies
When you’re watching an evening movie, take it as both relaxation and a way to train your photographer’s eye, and think about the individual pictures shot by the directors. You’ll see lots of cases where they follow the rules of composition—or creatively break them.
There are no comments yet.