Architecture Photography Part 1: Old Masters
Humans have been creating architecture for thousands of years, and since the invention of photography, we’ve tried to capture them on film. We will focus on photographing architecture from today’s perspective. That is, with modern technology. We’ll also show you how to edit architecture photos in Zoner Studio.
We’ll show you some basic adjustments that can help you perfect your photo. This article is intended for those who enjoy shooting architecture, but don’t have enough time for it, don’t do architecture photography for a living, don’t own any special lenses, or don’t always carry a tripod with them.
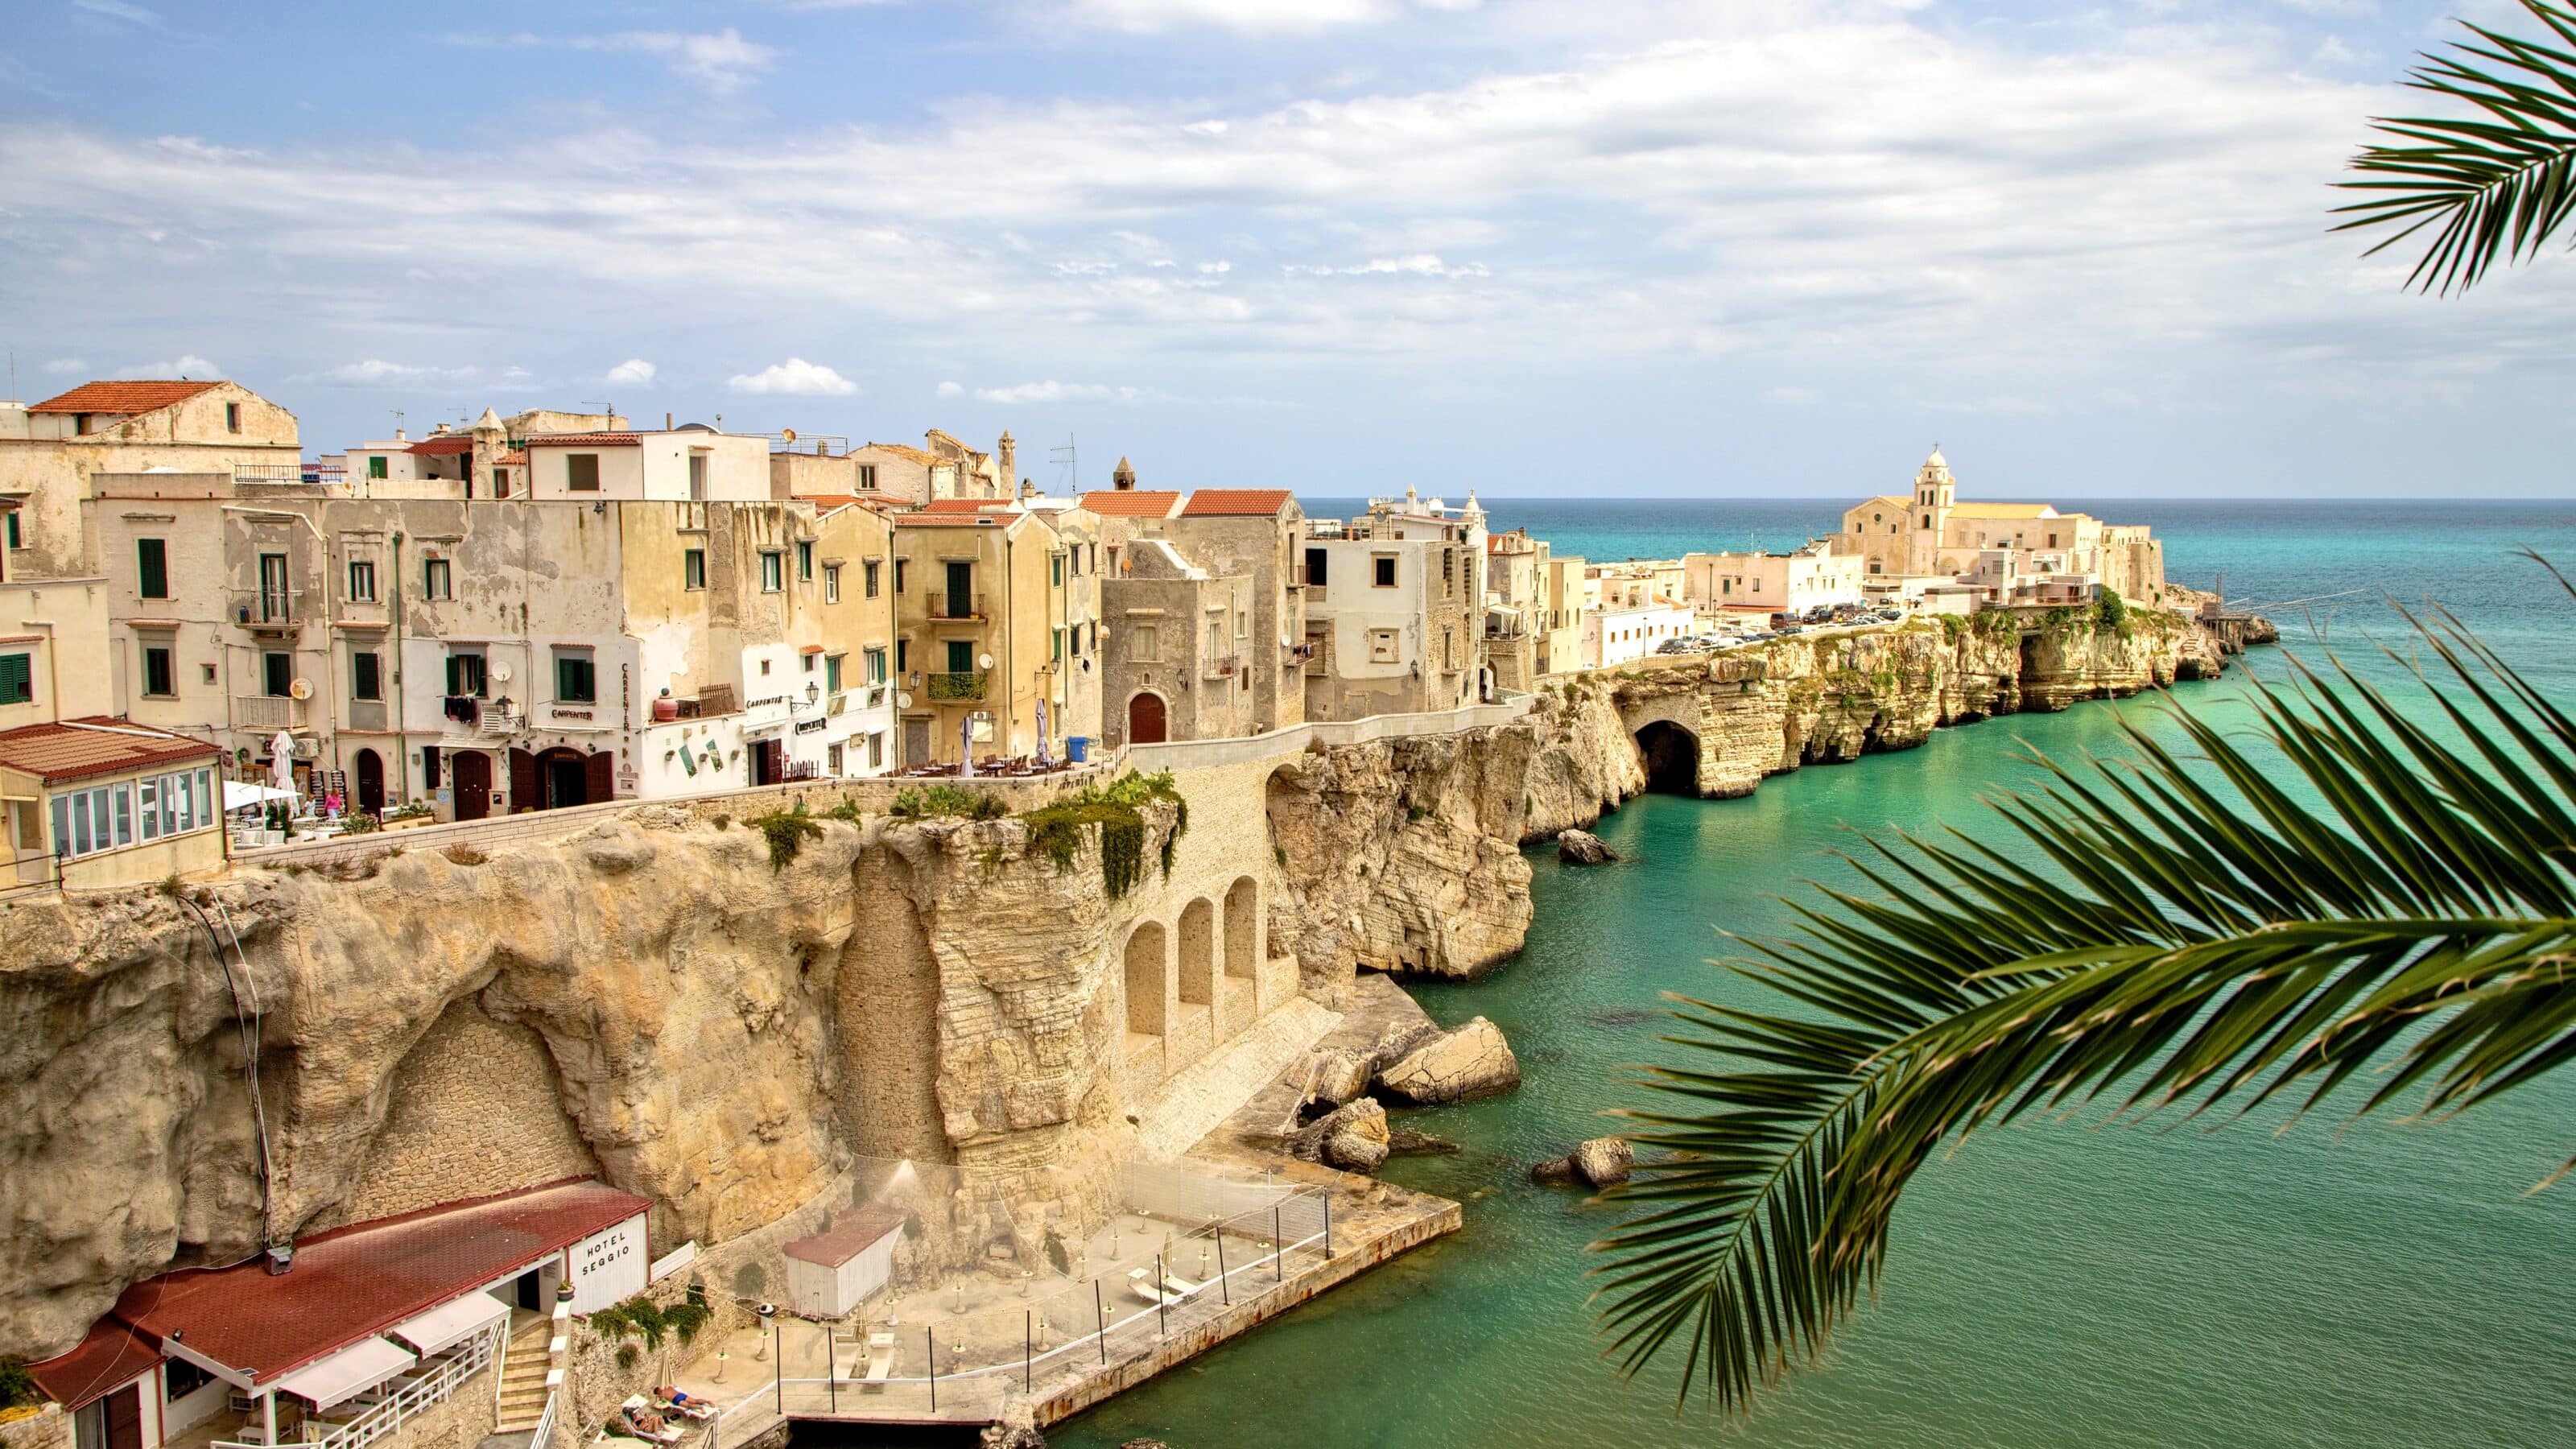
In the first installment of our series, we focus on the works of old masters. These are castles, palaces, cathedrals, old city walls, and many other structures.

In the next installment, we discuss how to photograph modern architecture, from functionalism to modern architecture trends. In the final installment, we focus on different architecture styles like brutalist architecture, urbex, minimalism, or industrial architecture.
Where did it all start?
One of the earliest photographs that can be described as architecture photography is also one of the earliest surviving photographs ever taken, dating back to 1826. It was taken by a French inventor and one of the fathers of photography, Joseph Nicéphore Niépce. The image is called View from the Window at Le Gras. Niépce took the photo for 8 hours straight on his camera obscura using a complicated chemical process.

Today, almost 200 years later, we have more modern equipment and do not have to leave our cameras standing still for 8 hours at a time to get satisfactory results. And, if we’re being honest, who would still be running around with a camera if it was that hard today? There probably wouldn’t be many photographers left.
What to shoot and how?
When photographing architecture, light is one of the most important aspects. Some elements of architecture are even better in hard and direct light, while others benefit from soft light, like evening light.
But what if you like a particular building but don’t have time to wait for better light? Then, focus on the composition. Composition is key.

Make sure that the entire building you’re photographing is in your photo. This can save you time cropping later.
While photos are very easy to crop, the reverse is very difficult. Even though various intelligent algorithms out there do the job for you, we are photographers, and we want to capture reality.
That’s why it’s useful to have more space around the building in the photo so that we can then use software to edit the photo with more confidence and have room to crop. On our computer monitor, we may notice how the horizon in our photo is tilting, or other issues. Straightening lines in post-processing also crops the photo. If there isn’t enough space around the building, we may end up needing to crop the building, which is our main subject.
Perfect your architecture photo with post-processing
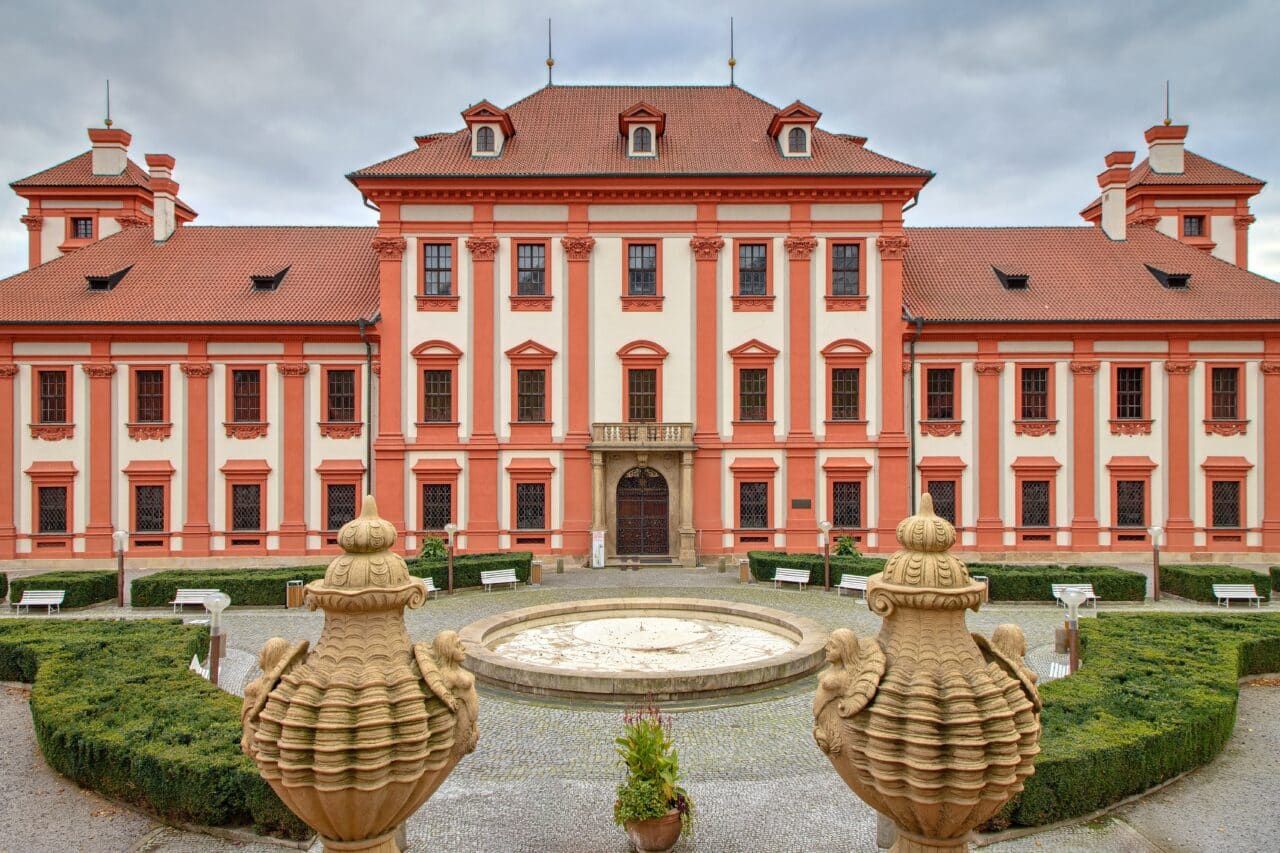
Let’s demonstrate how we edit a photo of the Troja Château in Prague. It can be photographed from many different sides and angles. On the day the photo was taken, the weather was bad. It was cloudy, overcast, and quite cold. You can take a photo of the whole building from the gate by the main road.
However, there is a risk that the photos won’t turn out due to the weather conditions. But we will use Zoner Studio to save the photo. We make all our adjustments in the Develop module.
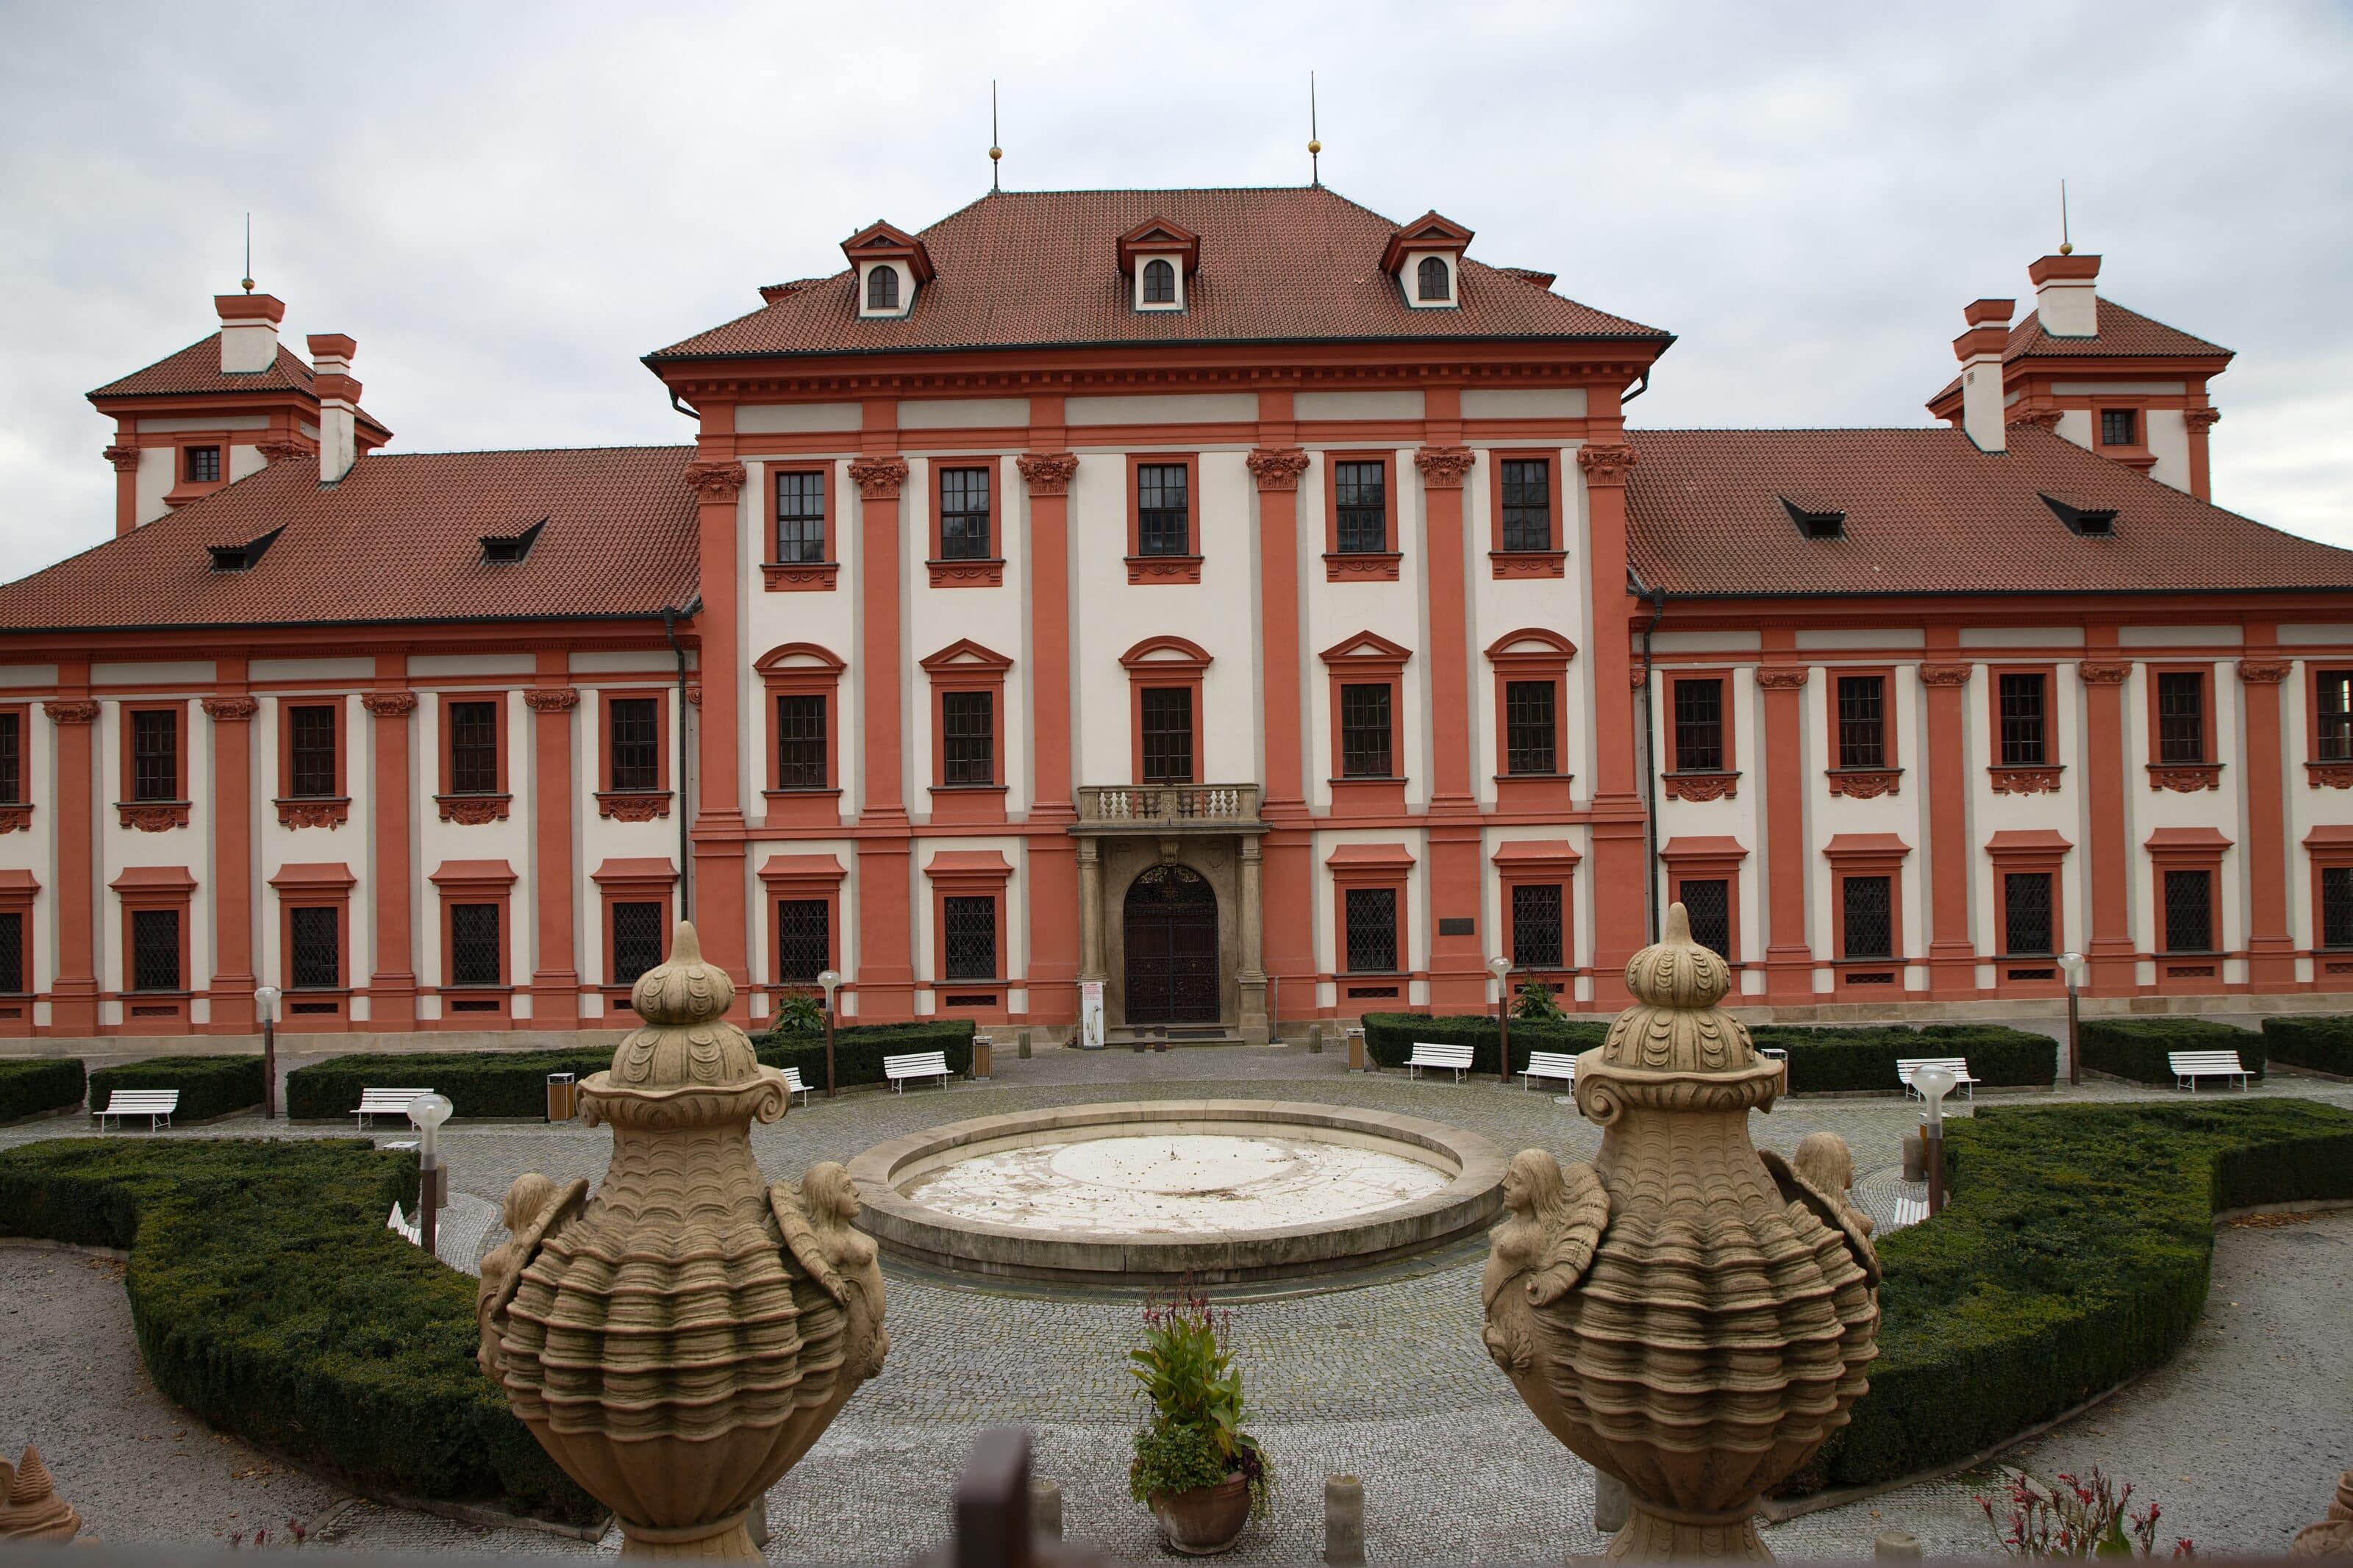
The photo’s colors are bland, the building slants to the left, and you can see parts of the gate that I was shooting through at the bottom. First, we edit the photo using Camera and Lens (M), which helps us remove lens defects, like barrel distortion.
We also straighten the verticals using the Straighten Lines (K) function. Given the number of straight lines in the photo, we can also try Smart Straighten Lines.
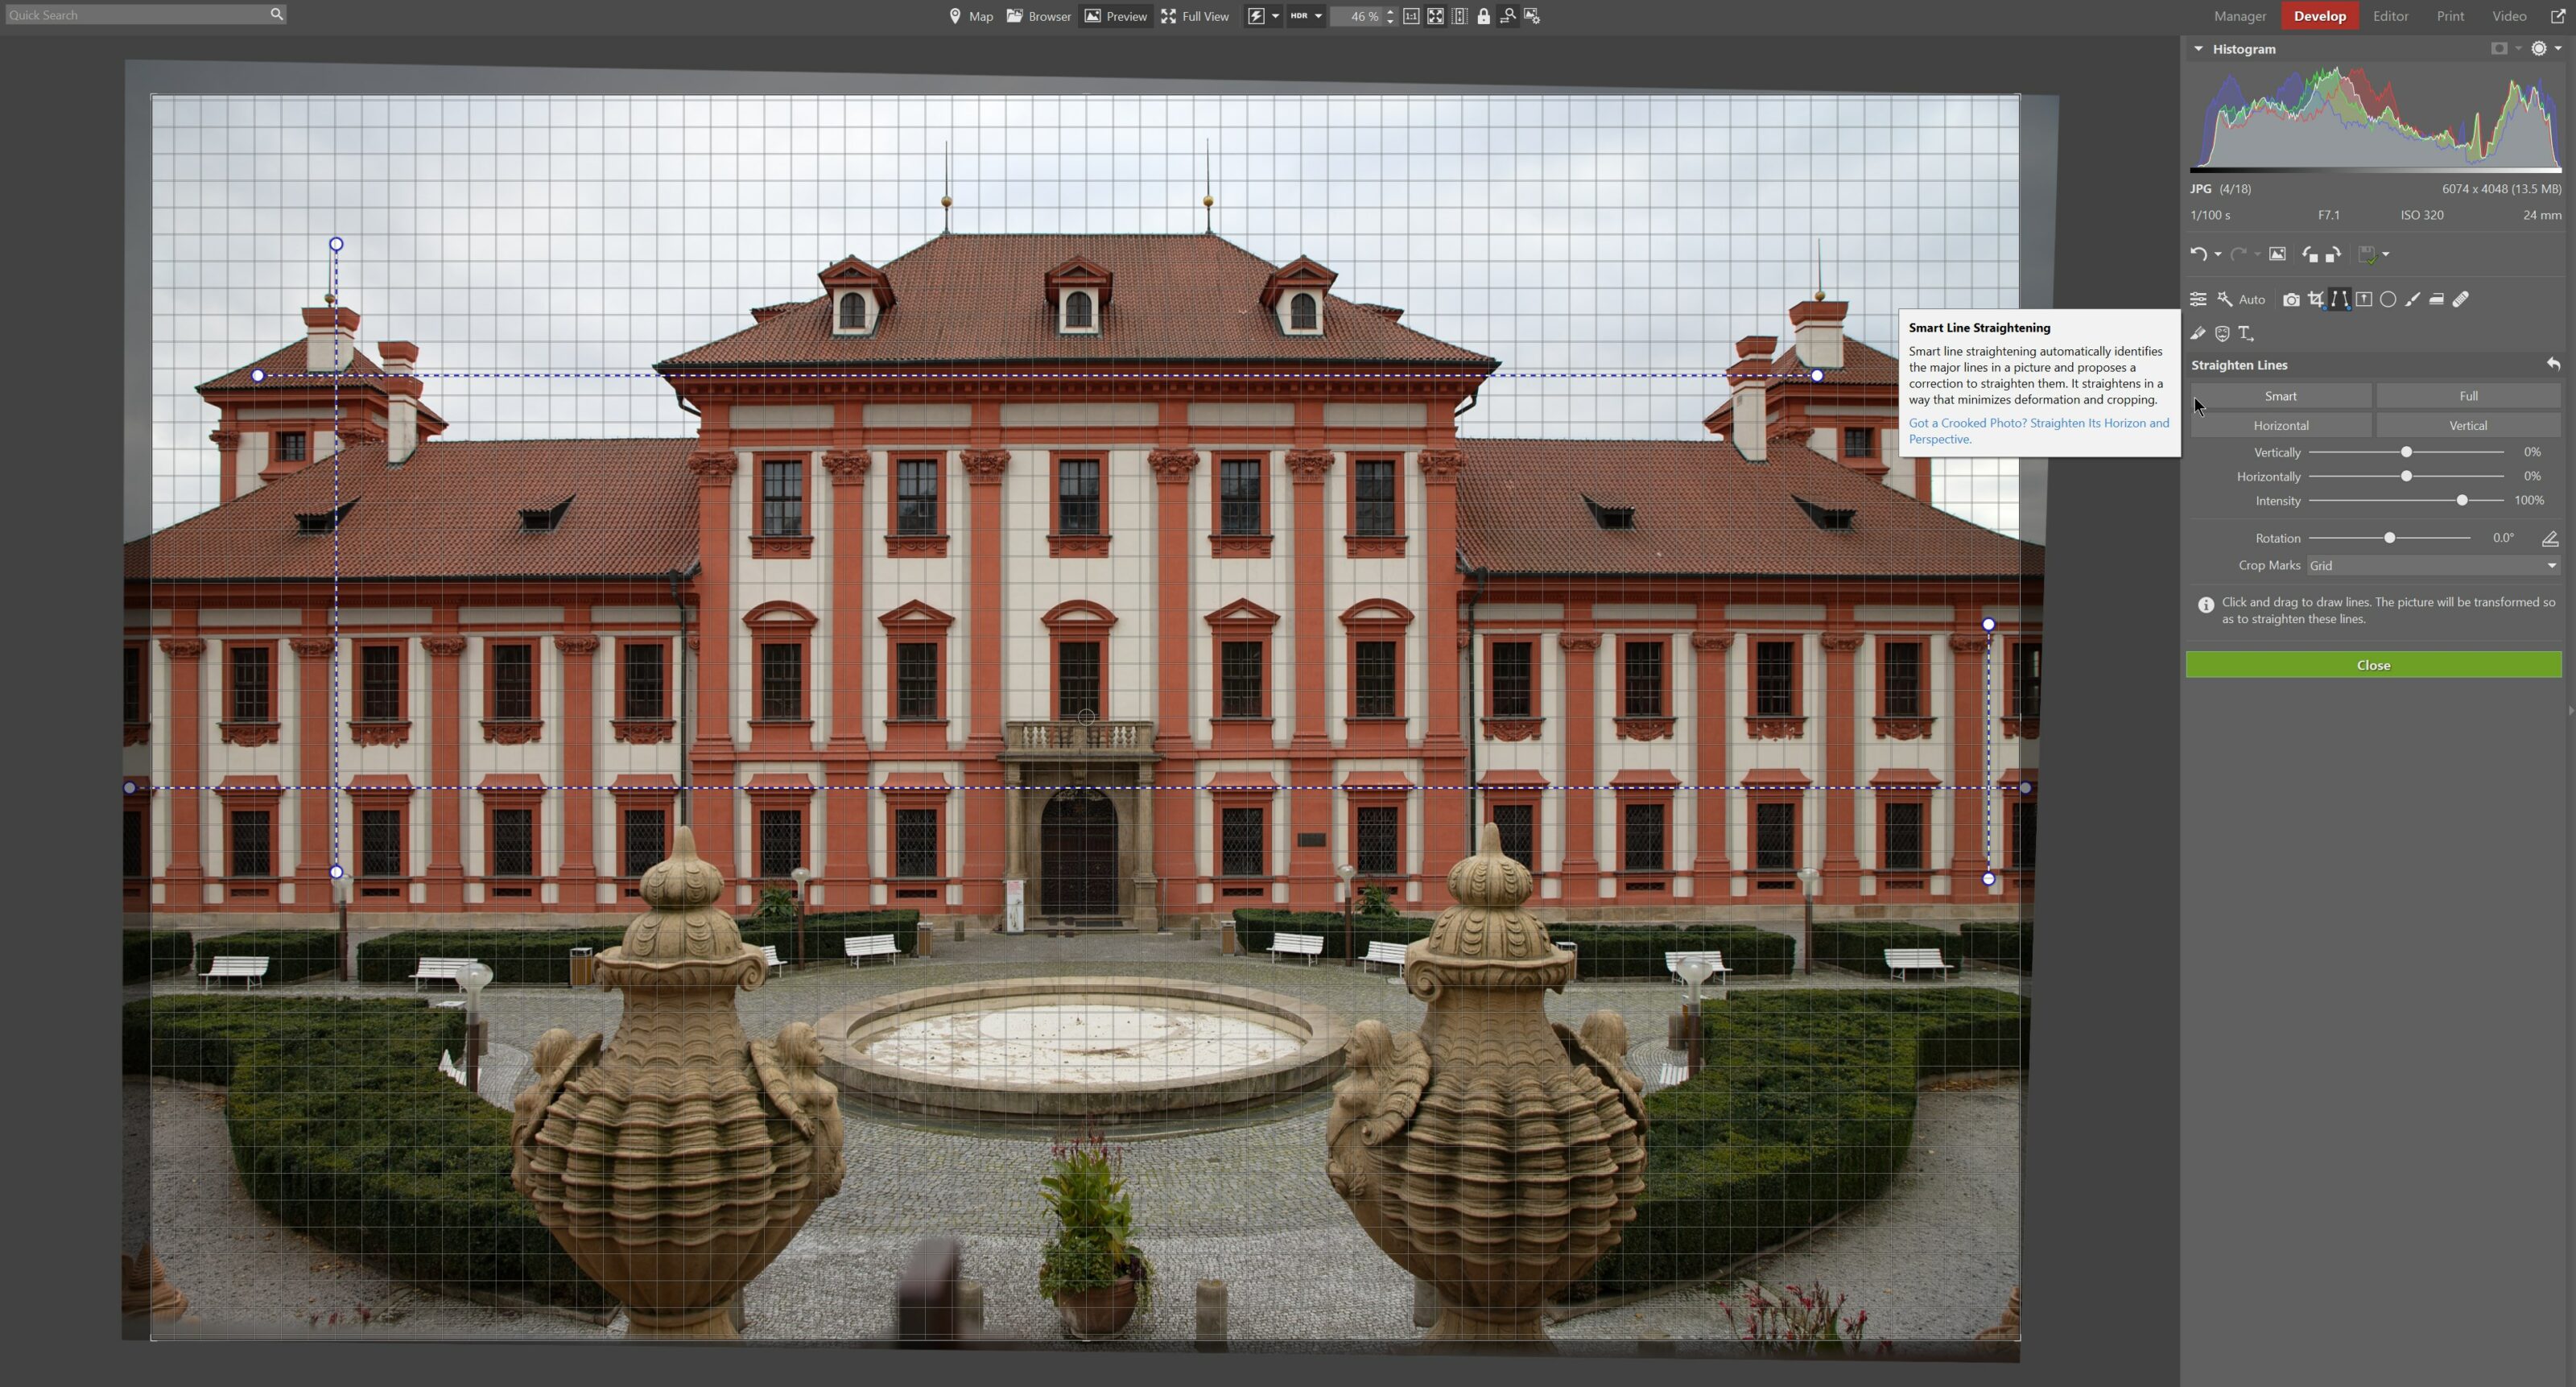
The cost of straightening lines is that the subject is now off-center. To center it again, we have to use the Crop and Rotate (C) function, especially since there’s some extra space at the top. We move the top left corner and make the image slightly smaller to center it.

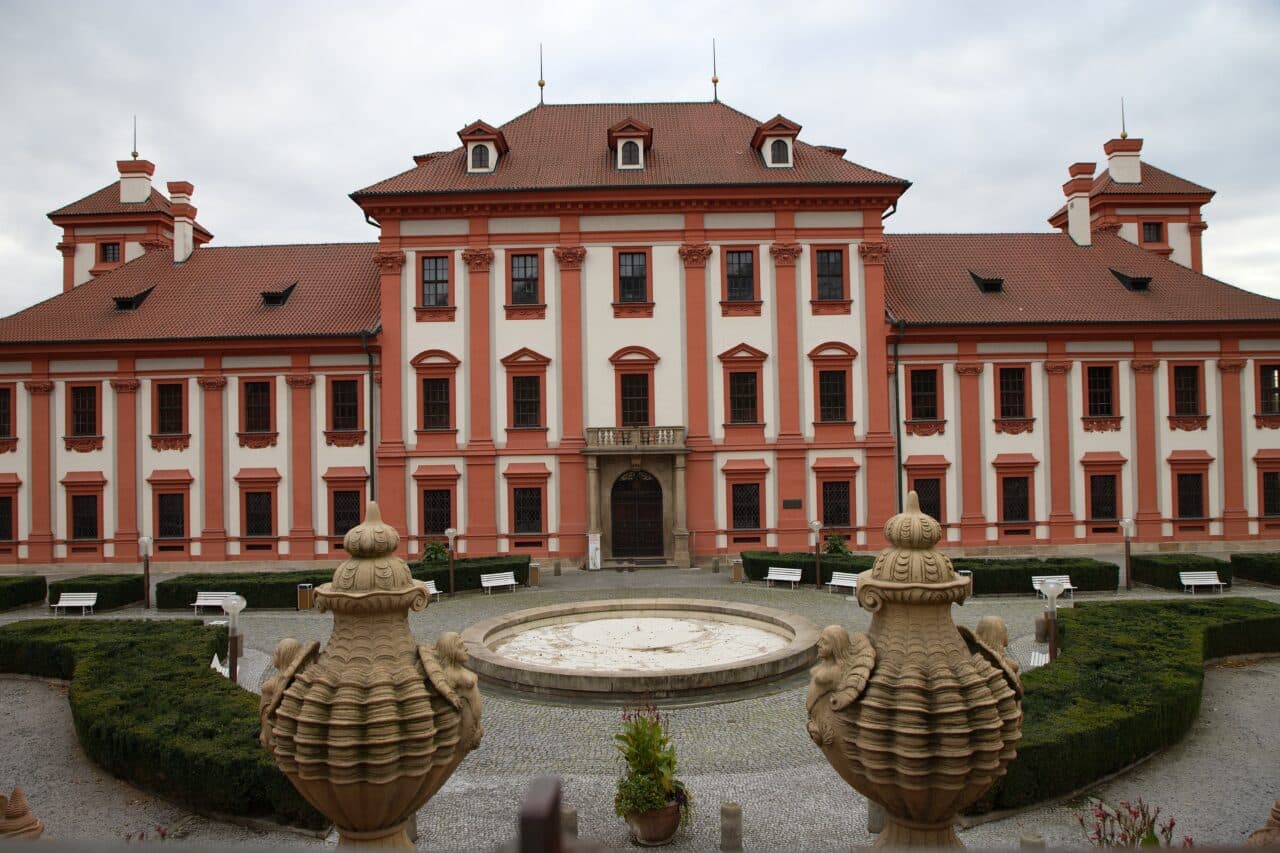
Now that the chateau is centered, we can start the color work. First, we can add a 3D LUT. I choose one of the default 3D LUTs—Vivid Colors. Then, we adjust the Exposure sliders and increase the Saturation and Vibrance sliders. We use the eyedropper to select gray from the tiles to adjust the White Balance. We use the Tone Curve to lighten the shadows and reduce highlights we’ve added elsewhere.

We’ve done a good job editing the chateau and it now looks more like how I remember. That was the goal of this transformation. Of course, the values I chose for the adjustments are only valid for this specific image, or one with very similar lighting conditions. The values for each adjustment can’t be considered universal.
The resulting photo still has parts of the gate, dividers on the pavement, and parts of the bush in the lower left and right corners. That’s okay, though, because these objects can easily be removed.
We select Retouching Tools (J) and choose the Healing Brush. We can leave the Seek source region automatically box checked, and set the desired Diameter for brush size, Opacity, and other parameters. We’re ready to get to work.
It’s best to zoom in on the image for retouching. This gives you the most control over your adjustments.

If we don’t want to Seek the source region automatically because it clones the wrong part of the image, that’s okay. Go back a step. Hold the Ctrl key and click to select the area you want to clone. In this case, we have a lot of mosaic tiles next to the area we want to cover which we can use to remove any unwanted objects.
We do the same to remove other unwanted objects. Just be careful, it’s often difficult. The remnants of the bush in the bottom right corner have two types of ground—pavement and gravel, separated by a curb. We want to preserve everything. So we have to proceed slowly and with care.

If this method doesn’t work, you can try playing around with the Clone Stamp or the Structure Cloning tool, which can sometimes give better results.
Once we are happy with the results, we are almost done. Finally, we add a Gradient Filter (G) to reduce the Exposure and darken and bring out the sky. We slightly increase Shadows to restore some light to the roof.

Export the final image and you’re done! You can compare what the photo looked like before and after editing. With some practice, you can usually make similar adjustments relatively quickly.
What’s next?
We demonstrated one example of how to improve an architecture photo. But you won’t just be taking photos of entire buildings in your attempt to get the best possible architecture photos. What else can you try? There are a number of different angles, views, moods, and objects to choose from. Here are some tips on what you can try. For example, focus on a detail in the foreground.

Or, take a complete, complex architecture picture.

You can include something on the edge of the photo to add atmosphere and emphasize space.

You can immerse yourself in different pathways and corridors, observing their geometric structure.

Let the viewer’s eye be guided by the lines until you lead their gaze to the desired spot.

Or, experiment with geometry and try to come up with different patterns.

I hope you found the advice and tips in this article useful. It’s not a one-size-fits-all guide, but inspiration for what is possible. In our next installment, we’ll take a look at what interesting things modern architecture brings to photography.
There are no comments yet.