How to Add Watermarks to Your Photos: 4 Ways to Protect Your Photos

Do you want to add your signature or logo to your photos and (at least partially) protect your images from unauthorized use? Watermarks are text or images that you add directly to your photos using Zoner Studio.
In this article, you learn:
- How to add watermarks with text or images to your photos using Zoner Studio.
- How to add watermarks to multiple photos at once.
- How to protect your photos when sharing on Zonerama.
You’ve likely seen watermarks on photos before. They’re most often used to mark photos with a copyright. They usually contain semi-transparent text or an image. You can add logos, the photographer’s name, or a combination of both to your photos.
There are several ways to create watermarks in Zoner Studio. Some are suitable to quickly label a single photo, while others allow you to add your logo or signature to multiple photos at once. You can also add watermarks in Zonerama. Let’s take a look at the four easiest methods.
Where you can add watermarks in Zoner Studio
- Manager / Editor modules: Edit → Text Overlay (Ctrl+T) or Image Overlay (Ctrl+Shift+T)
- Batch Filter (Manager module): Text or Overlay Image filters for multiple images at once
- Layers in the Editor module: Place Text (T) or Place Symbol (Shift+T)
- Zonerama: When uploading photos, select Watermark photos, add your text, and choose the size.

Caution! Most of the methods described (except for layers and Zonerama) are destructive. This means that adding a watermark irreversibly overwrites the original file. Always add watermarks to copies of the original files.
Adding watermarks with text in Zoner Studio
The standard way to add a watermark with text is using Text Overlay (Ctrl+T) in the Manager and Editor modules.
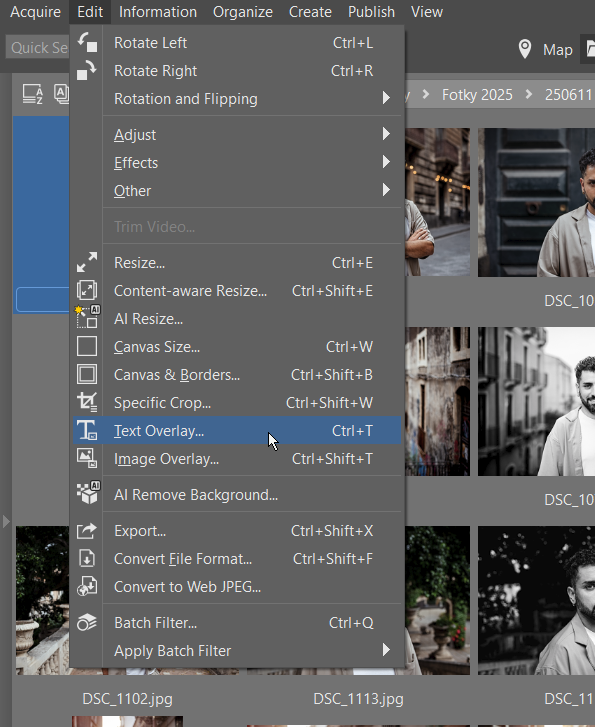
Enter the text for your watermark, usually the photographer’s name. Then, check Use as watermark at the bottom of the window and adjust its Opacity.
You can also adjust the transparency using the Transparency field.
You can also specify the text size, font, and placement. There are nine preset options to choose from. If you need to move the text, you can fine-tune its placement using Indentation.
If you add your watermark using the Manager module, you can select multiple images before opening Text Overlay or Image Overlay.
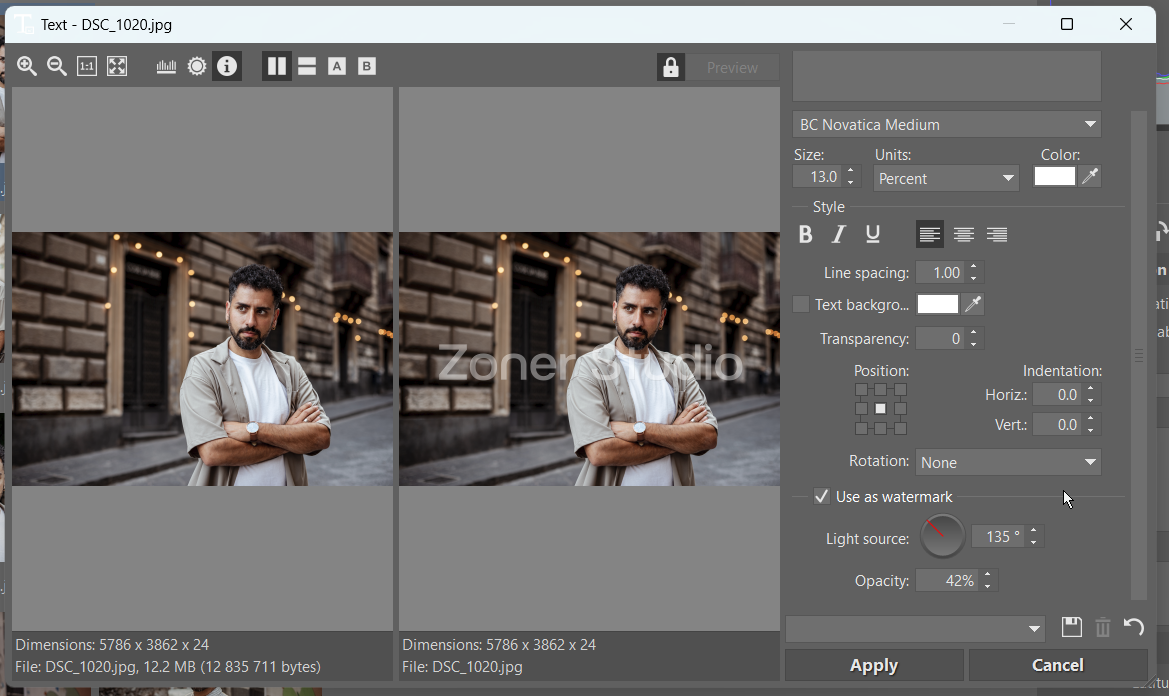
Adding logos as watermarks
Adding logos is just as easy as adding text. For example, you can add your logo or a client’s company logo.
In the Manager or Editor, select the desired image or images, choose Image Overlay, and check Use as watermark and Emboss for better watermark rendering. Adjust the watermark’s position using Position. You can then adjust the size of the image using Resample.
Batch adding watermarks
Adding a watermark to multiple photos at once is simple. We already described one way to do this—select multiple images before clicking Text Overlay or Image Overlay in the Manager module. Another option is the Batch filter (Ctrl+Q).
The Batch Filter lets you apply adjustments to a batch of photos. This includes Overlay Image and Text. Click Add Filter and select one of these options. The watermark settings work the same as when adding a watermark normally.

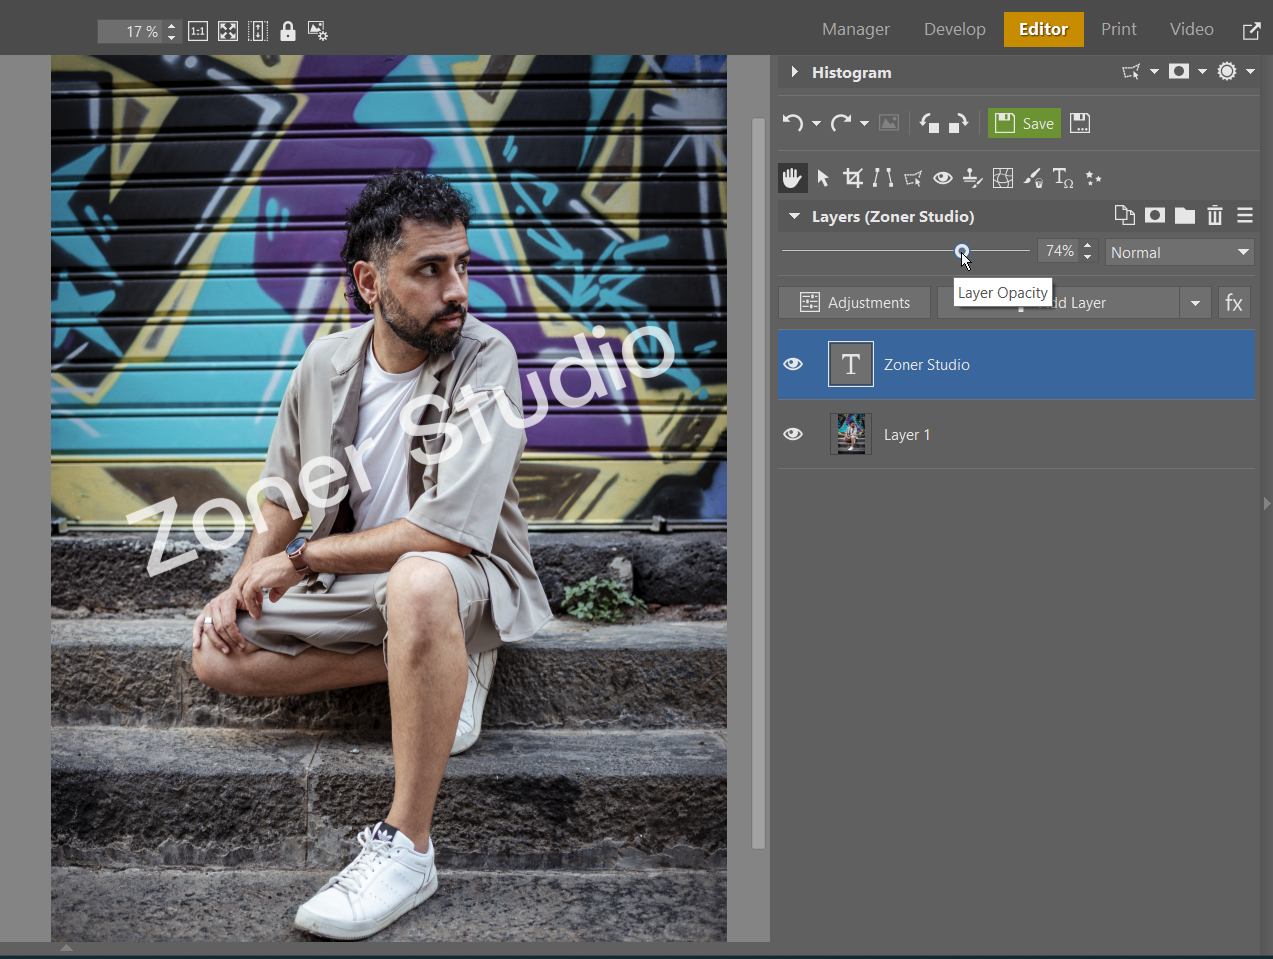
Add text or symbols in the Editor using layers
You can also add your signature using layers in the Editor module. It’s not a traditional watermark, but with the right settings, it works just as well.
The Place Text and Place Symbol functions are in the right panel under Placement Tools. Use them to add text or symbols from the menu to the image. Unlike a classic watermark, you decide the exact placement using your mouse. Once you choose the position and size, confirm the settings.
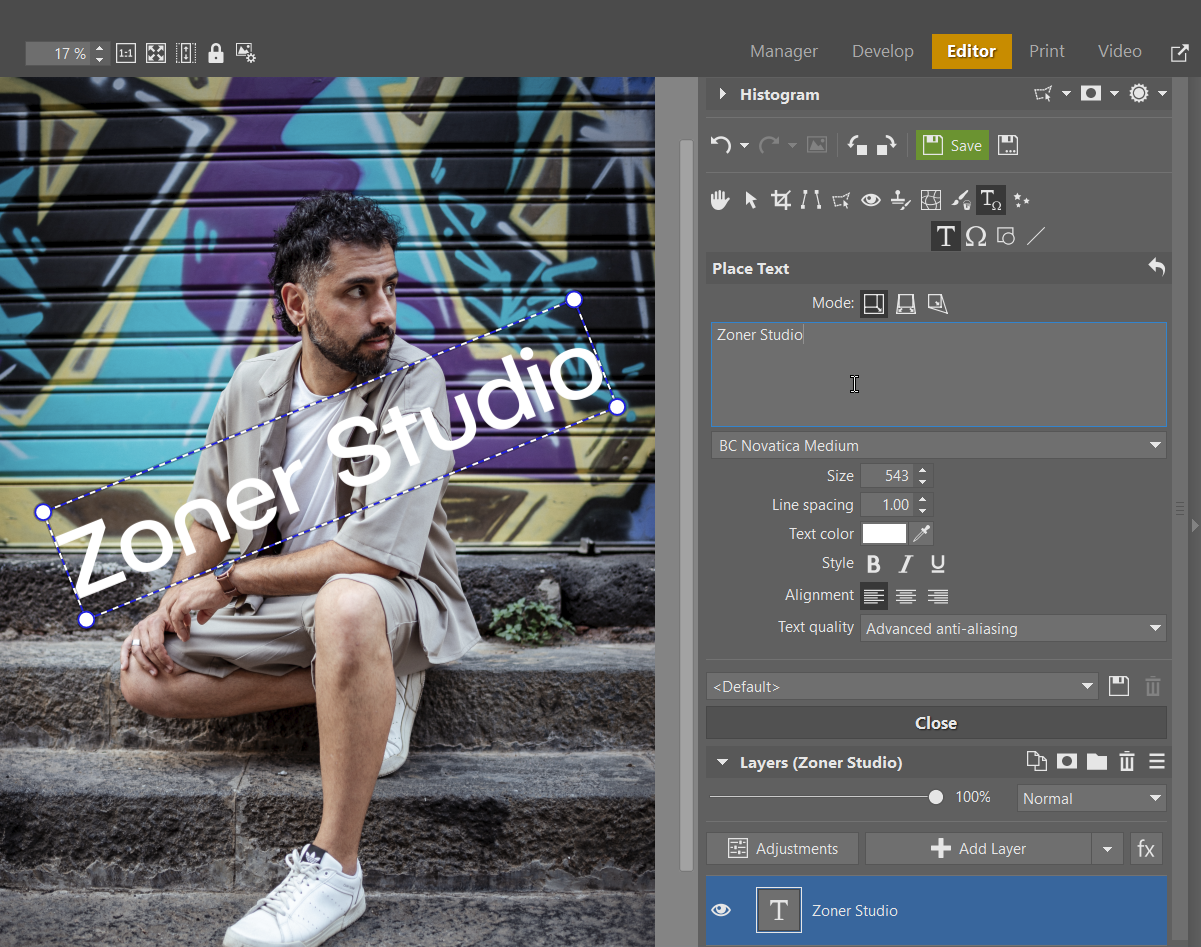
Unlike traditional watermarks, you can still edit everything afterward. The added text or symbol appears as a new layer, which you can adjust separately. Not only can you resize it, but you can also set its exact position using Move and Transform (V). You can also hide or delete it at any time.
To make the added text or image resemble a watermark, there’s one more step. Reduce the Opacity of the layer with the watermark so the image appears transparent and less distracting.
Then save the image as a JPEG or as a .zps file if you want to return to editing later. We recommend using Save As to avoid overwriting the original file. If you click Save, itoverwritestheoriginal file. As mentioned earlier, always use copies of files when adding watermarks.
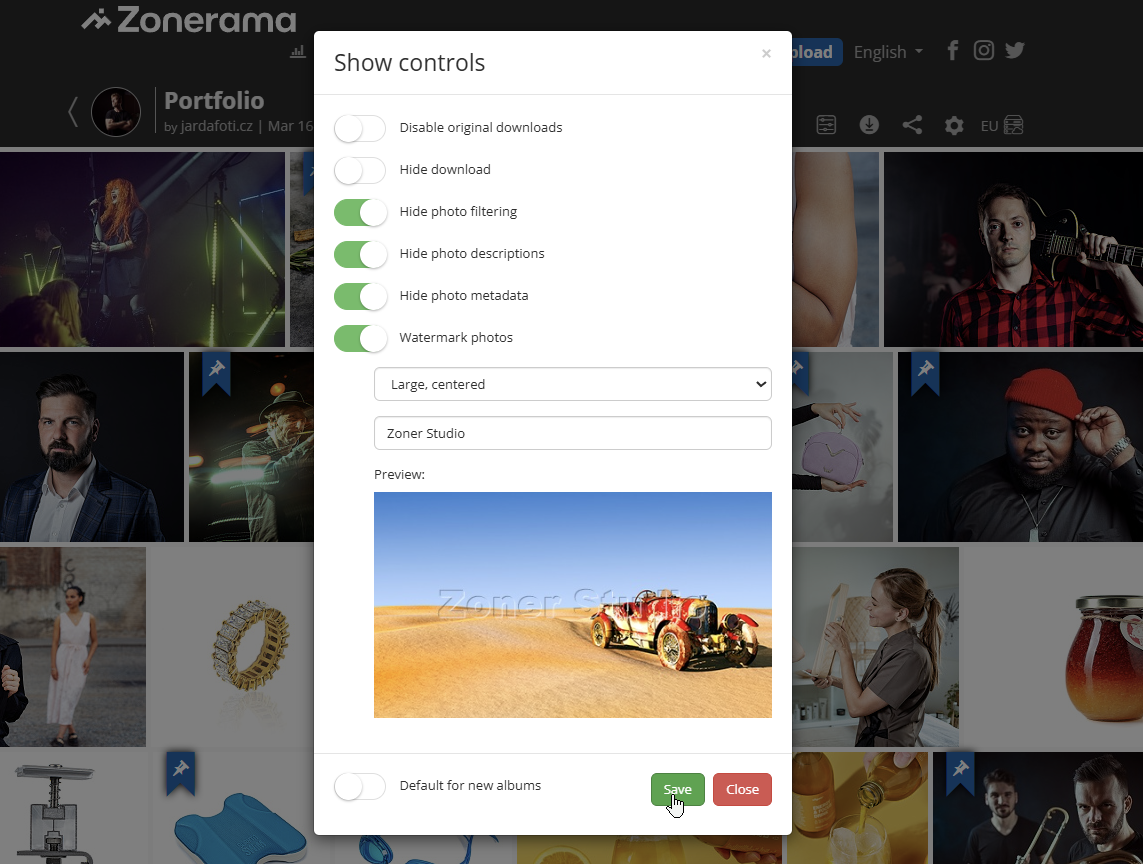
Adding watermarks in Zonerama
If you’re sending photo previews to clients, you’ll want to protect your images from unauthorized use. This is where Zonerama comes in handy. The biggest advantage is that watermarks appear only when sharing previews, while the original files remain untouched. You don’t have to add anything in Zoner Studio, and you can disable the watermark display at any time.
Adding watermarks is simple. You can do it in the upload dialog, or in existing albums using Show controls (gear icon). In both cases, enable Watermark photos, enter the text for the watermark, choose how the watermark should appear, and confirm. You can enable or disable this option for each album whenever needed.
FAQs
What is a watermark, and what is it for? A watermark is text or an image added to a photo to give the photographer credit and protect against unauthorized use.
How do I add watermarks with text in Zoner Studio? Use Text Overlay in the Manager or Editor modules. You can set the text, font, and transparency.
How do I add watermarks with an image or logo? In the Editor or Manager of Zoner Studio, select Image Overlay, then set the position, size, and opacity.
Can I add a watermark to multiple photos at once? Yes. Use the Batch Filter or select multiple images before adding the watermark in the Manager.
How do I add watermarks using layers? In the Editor, add a new layer with text or symbols. You can then move, resize, or hide the layer at any time.
What is the advantage of watermarks in Zonerama? Watermarks are displayed only when sharing previews. The original files remain untouched, and the watermark can be enabled or disabled at any time.
How do I make sure my watermark isn’t distracting? Lower the layer opacity or transparency in the watermark window so the watermark is subtle yet visible.
John Wachsmuth
Such “discovery” of information.
Been a “photographer a long time, with and without money.
Your articles are truly grand.
An “old” LEICA sufferer.
Zoner
Thank you!