Zoner Studio Step by Step. Part 2: How to Get Your Photos Organized
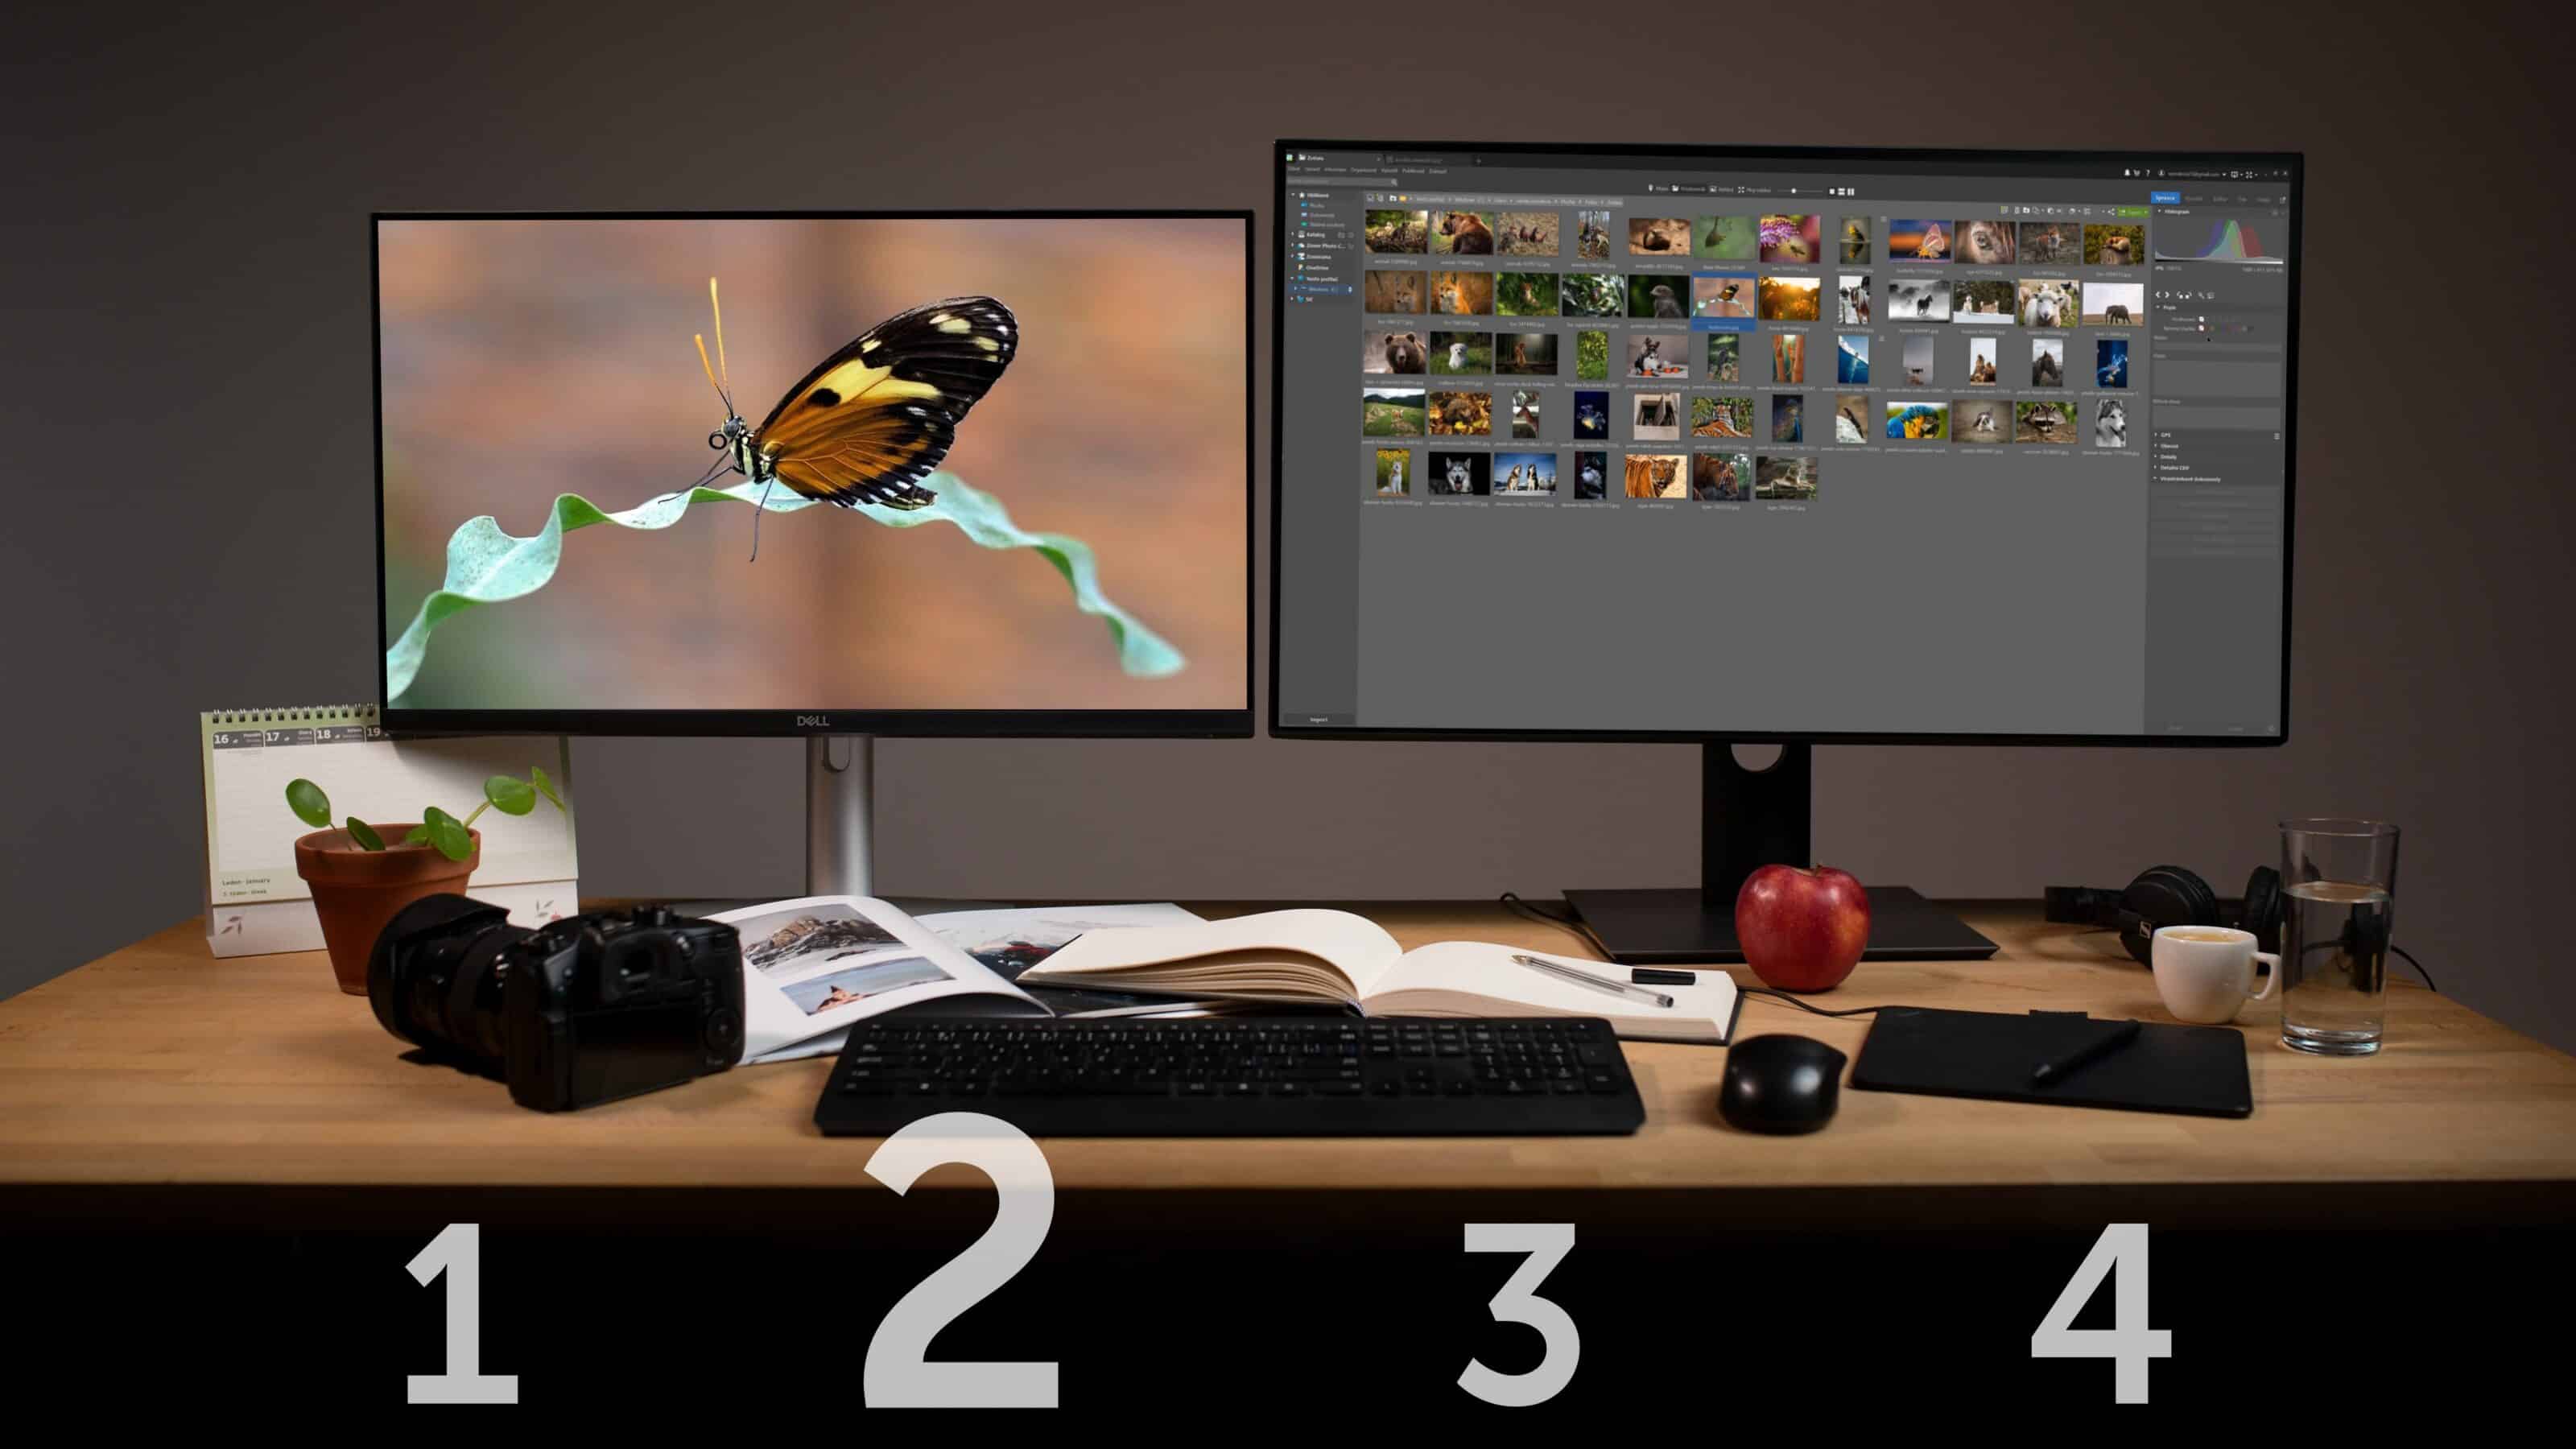
The delete button is sometimes a photographer’s best friend. In this article, we’ll show you that this doesn’t always have to be the case. We’ll teach you tricks to keep your photo organized. Did you know that you can sort your photos based on GPS coordinates or keywords? All you need to do is set it up and you’ll never waste time searching for pictures again.
In the first part of this series, we showed you how to import photos to your computer. In this article, you’ll learn what you can do with your photos before you start editing. First, how to decide which photos are worth editing and which ones belong in the trash. Learn how to use these functions and discover the benefits of organizing your photos.
Don’t delete your photos
You might delete photos that didn’t turn out as you go through them. This is one way to do it, but you’re wasting precious time, because every photo you delete means another click. It’s only a second, but if you have a thousand pictures in your folder, it adds up. That’s why it’s better to sort the photos first, and then delete the ones that didn’t turn out.
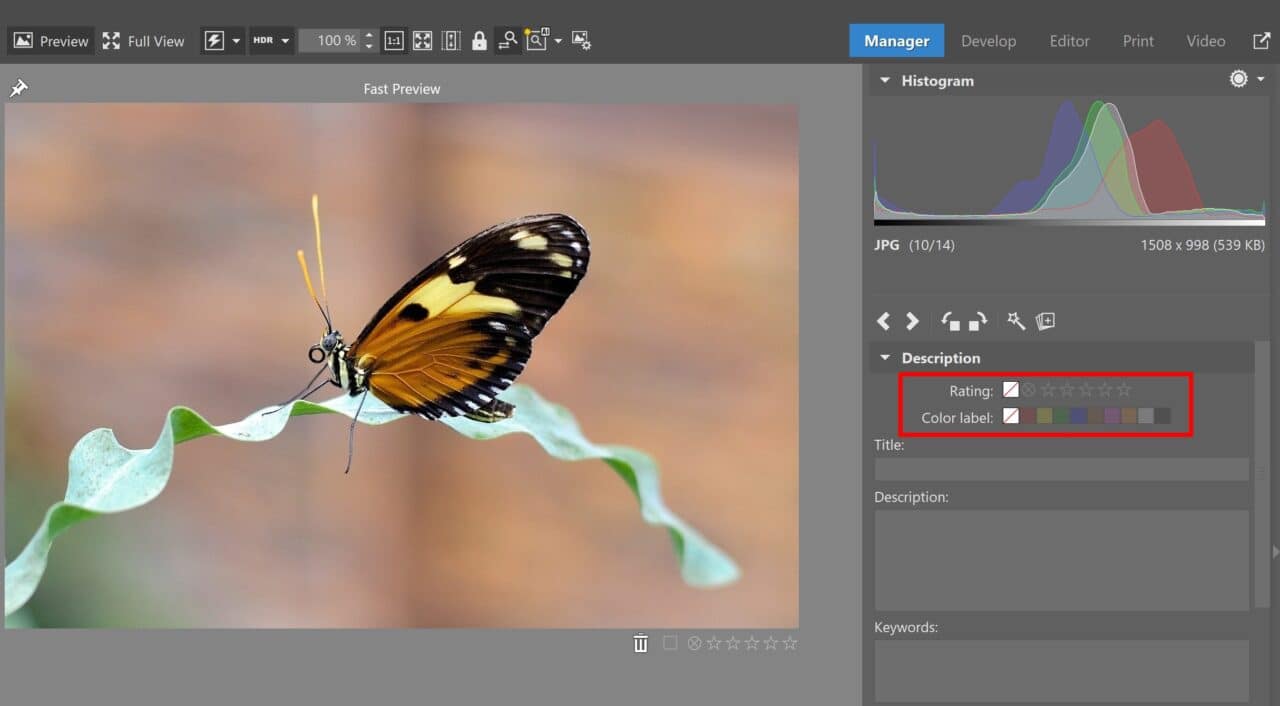
How’s it done? Open the Manager module of Zoner Studio. In the top middle, select Preview mode. Then, go through all your photos and assign star ratings or colored labels. You can choose from 9 colors, the Rejected icon, and 5 stars.

The system you choose for organizing your photos is up to you, but make sure you’re consistent.
I recommend trying the following system for organizing your photos:
- *** Good photos to share
- ***** Best selection
- Rejected—Photos to be deleted
- Color label photos that will be posted on Instagram
- Use a different color for photos that require more advanced editing in the Editor module (mark when editing in the Develop module).
Finally, delete the rejected photos. At the top left of the Manager module, click Information -> Rating -> Delete Rejected Files. All the photos in the folder that you marked as rejected are deleted.
Adding photos to the Catalog
You don’t have to use the Catalog, but it’s good to know what benefits it offers. In addition to loading images and videos faster, you can search for keywords, ratings, and other information in the Catalog, not just in the folder. You can also view photos by location or date if you have them sorted differently in folders.
Adding photos to the Catalog is worth it if your photos are in RAW. You can have them preloaded as Smart RAWs and Fast 1:1 Previews, which creates previews with the same resolution and colors as the original photo. And since the previews are preloaded in Zoner Studio, it makes scrolling through your photos that much faster.

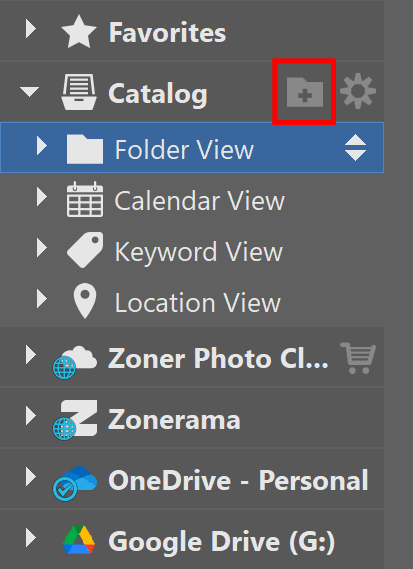
Add your Pictures folder to the catalog using the folder icon with the + symbol to the right of Catalog.
Real-life examples
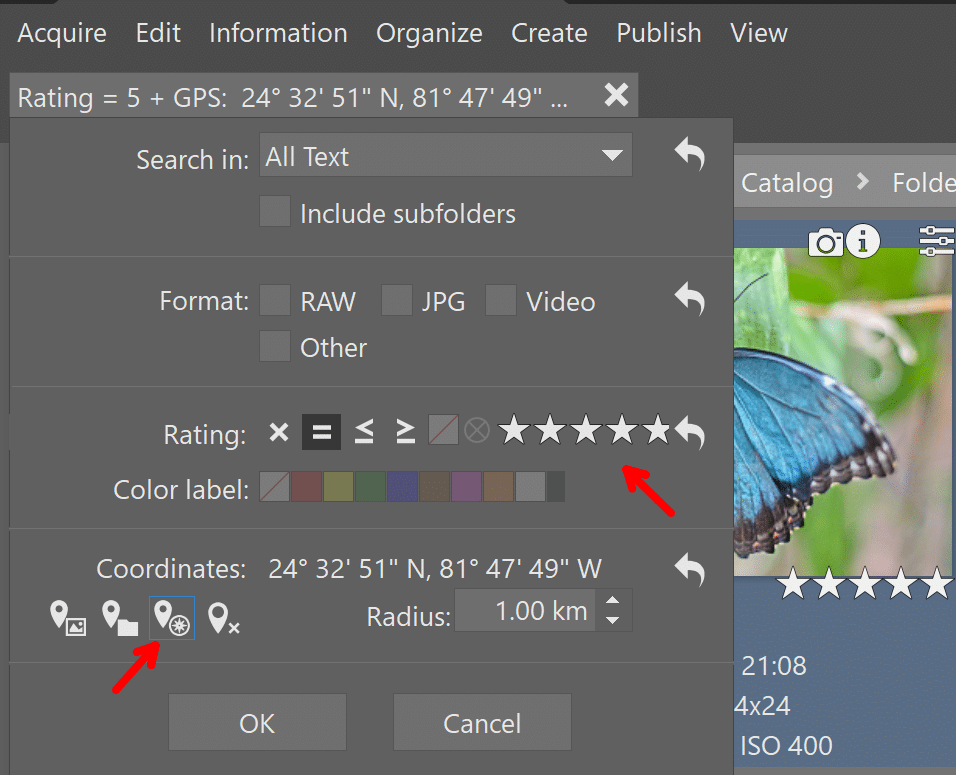
If you are a wedding photographer in your area and need to choose the best photos to add to your portfolio, click Quick Search (Ctrl+F), select = ***** under ratings. Then, under coordinates, click the Get Position from Map icon to find the location. Keep All Text in the Search in field to see the best photos from local weddings without needing to browse through each folder separately.

You don’t always have to add photos to the Catalog again. Have a top folder of photos added where you can archive everything. Additional images will be loaded automatically.
Checking the Histogram
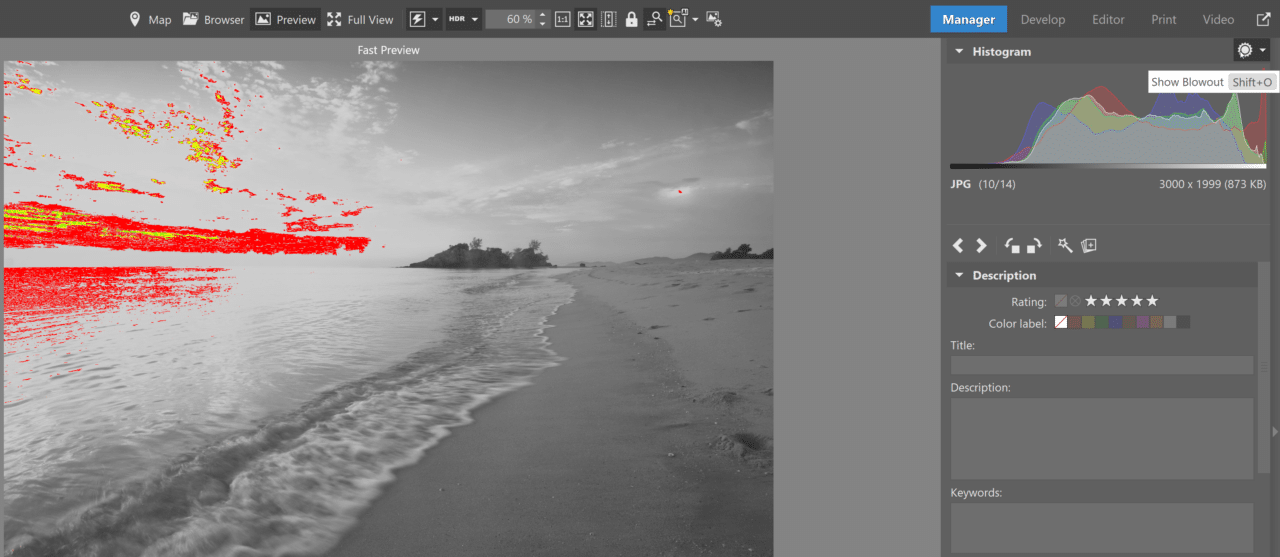
The Histogram can help you decide which photos to choose. Especially when you enable Show Blowout (Shift+O). This lets you see if there are any blowouts or overexposed areas in your photo.
Below the Histogram, you can see basic EXIF data for your photo. Sometimes it’s useful to see what shutter speed you used for a blurry photo so you can avoid blurry photos next time or what ISO is acceptable or too high for certain situations.
Correct incorrect dates or times
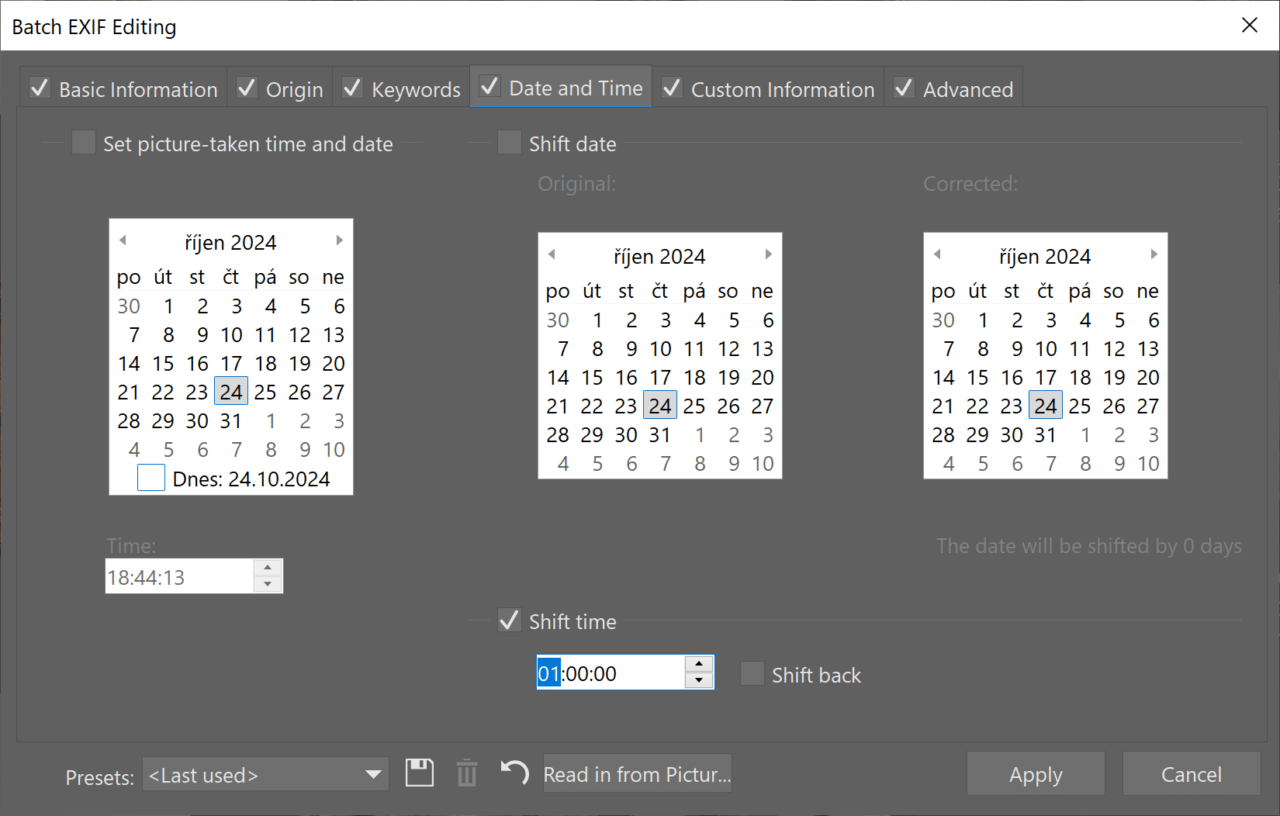
Sometimes you forget to switch to Daylight Savings Time, or maybe you’re shooting on two cameras and one is a few minutes faster than the other. This doesn’t look good in a photo series. Fortunately, this can be easily corrected in Zoner Studio.
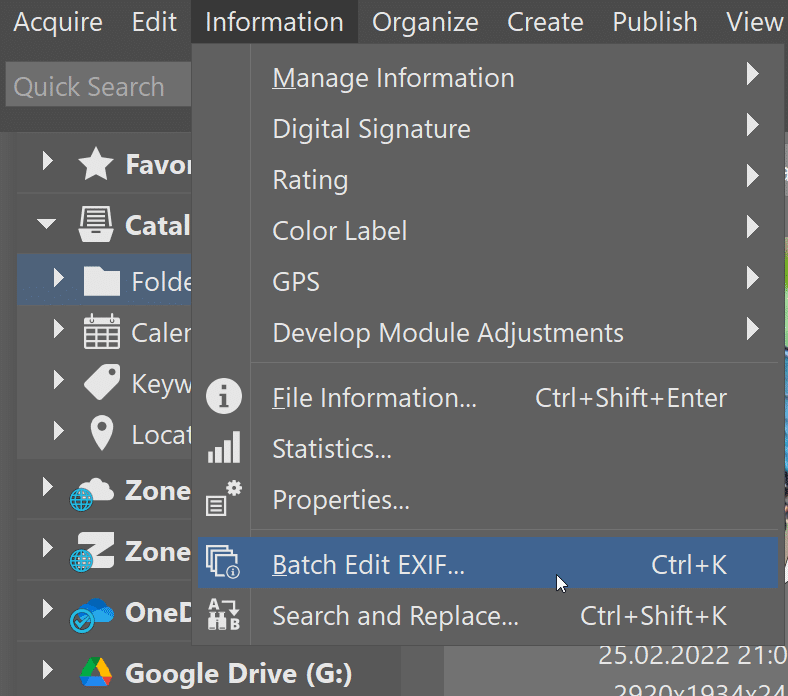
Select the photos you want to correct the time for and select Information -> Batch Edit EXIF.
Click Date and Time in the top bar and choose the number of hours, minutes, and seconds you want to shift the time by. If the date is incorrect, use the calendars in the middle section to change it.
Adding keywords and GPS coordinates
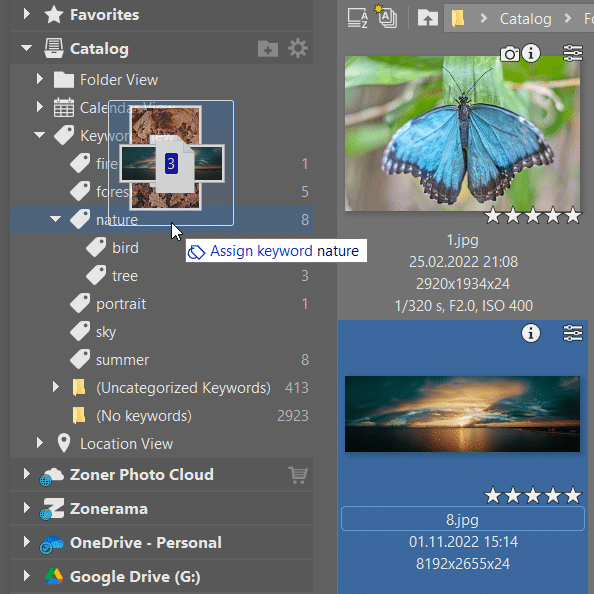
By using keywords, the photos are searchable not only by time or location, but also by content. You can add keywords manually, but doing so would be time-consuming. Fortunately, you can just select the photos and drag them to the left panel to a keyword to assign it to all photos.
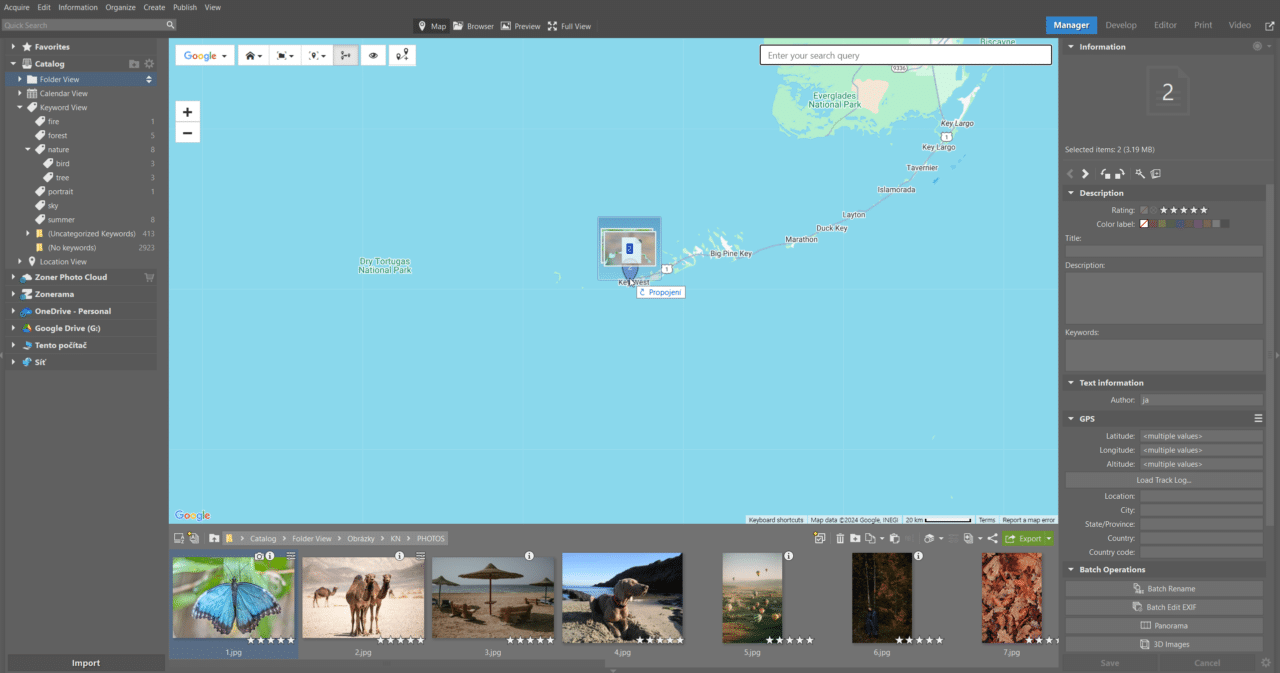
The easiest way to add a location manually, if it is not recorded by the camera, is to open Map mode in the Manager module. Use search to find your photos’ location and, just like with keywords, drag them directly to the map.

Read more about assigning GPS coordinates in our article Organize Your Photos: Assign GPS Coordinates.
Download Zoner Studio free for 7 days limit-free and get your photos organized today!

There are no comments yet.