Zoner Studio Editing School III: Make Cinematic Edits to Your Photos
The article is over 5 years old. The information in it may be outdated.
![]()
We are working on its update. In the meantime, you can read some more recent articles.
We’re back with yet another step-by-step editing example. This time you’ll be learning the steps to take for a cinematic edit to a photo. We’re also giving you the source RAW so that you can try out the whole process on it for yourself. Once again we’ll be covering work in the Develop module. You’ll learn how to enhance a dark evening photo and highlight its atmosphere by adjusting its colors.
For our example here, we’ve chosen a photo from our article on taking a picture with a cinematic atmosphere. Although lighting and composition are the foundation, it just won’t be “it” without some edits on a PC. So let’s go through them step by step.
Download the RAW and You Can Begin!
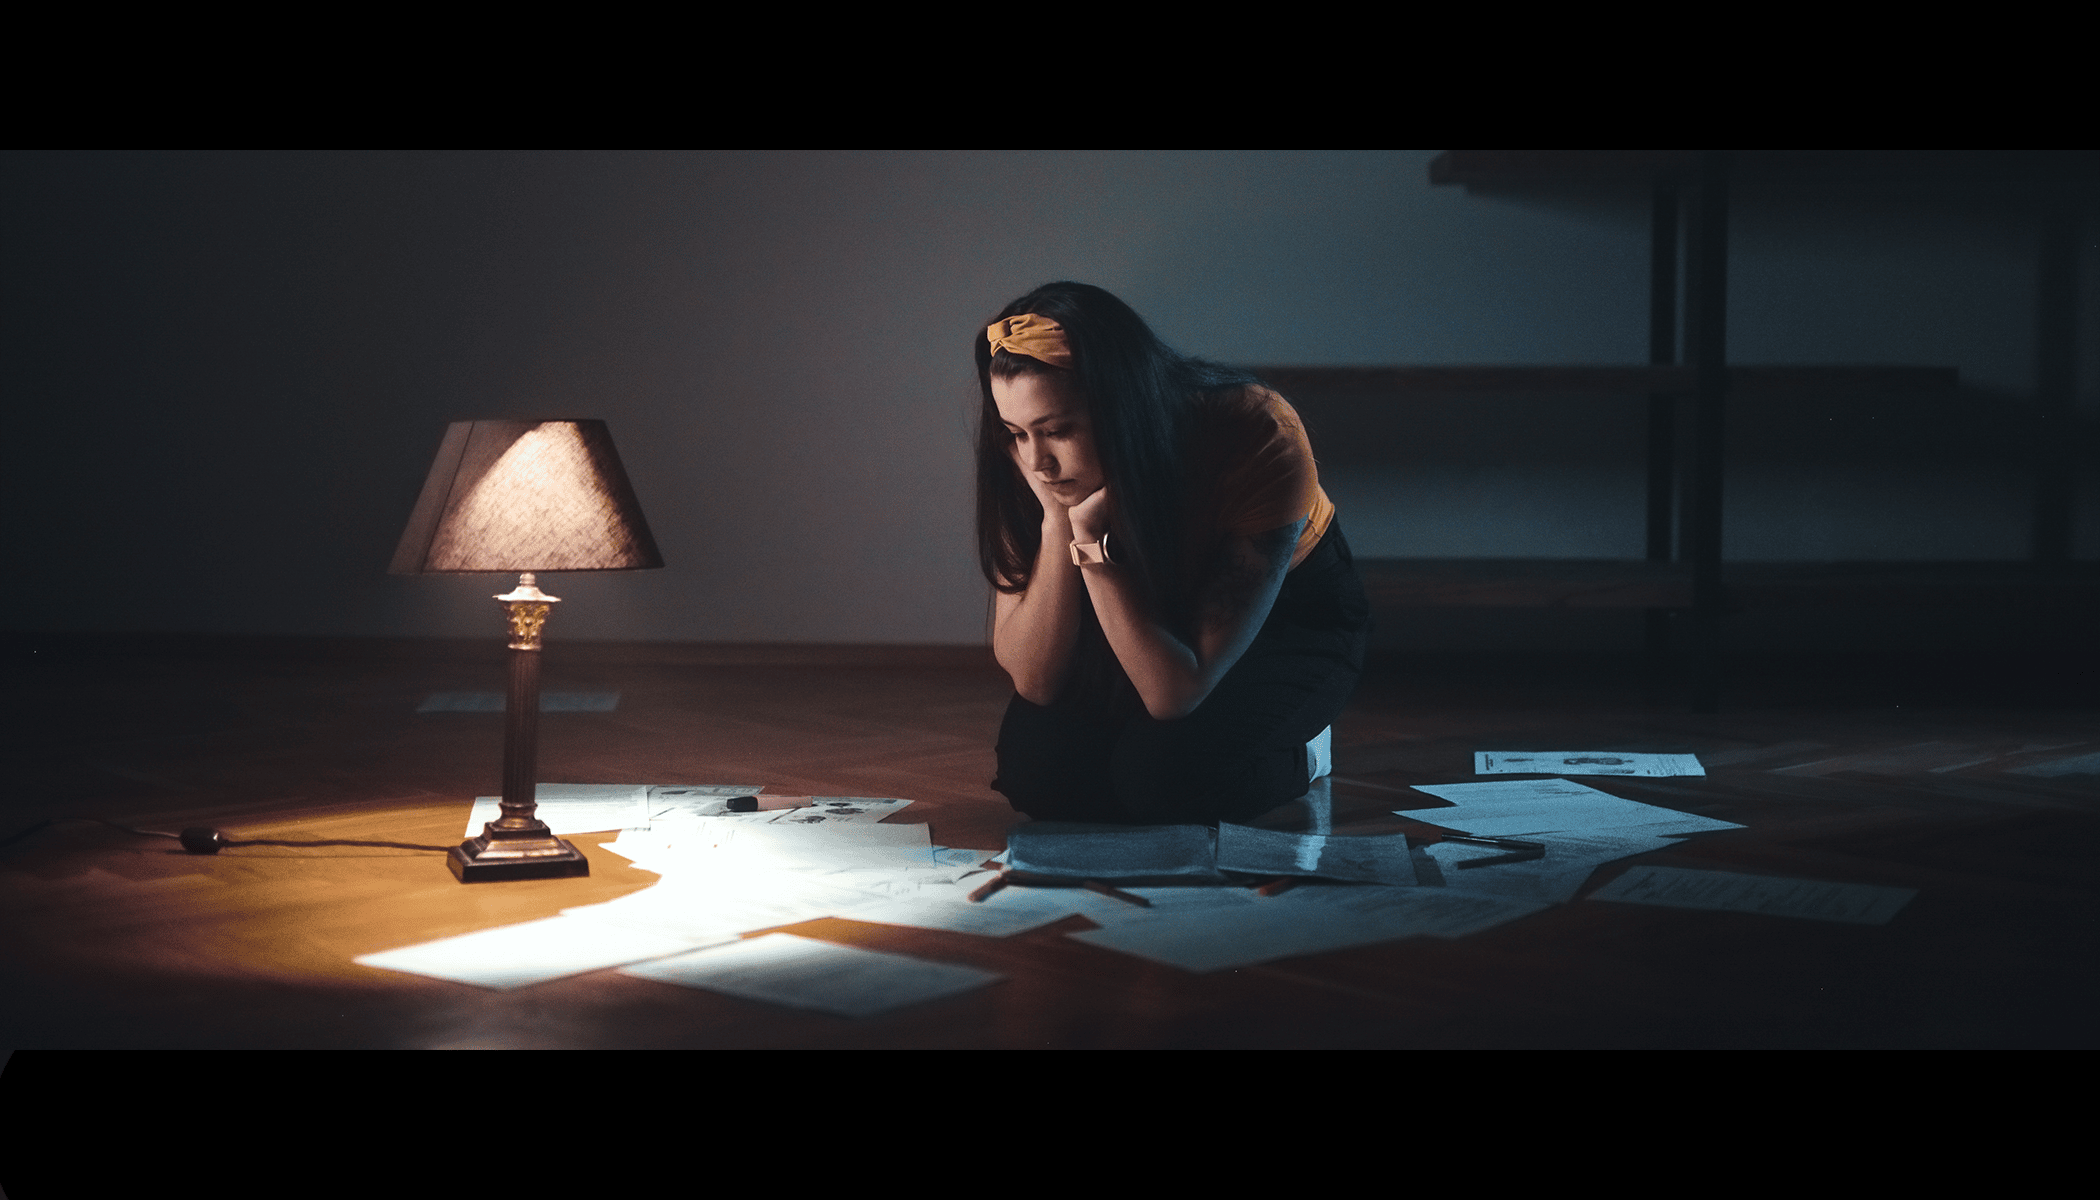
The original photo is deliberately underexposed to prevent blowout (overexposed spots) in its brightest areas. Also, the photo is meant to have a gloomy atmosphere. The original very dark shot is uninteresting, of course. But as you’ll see, you can use Zoner Studio to pull out everything you need from it.
Open It up in the Develop Module
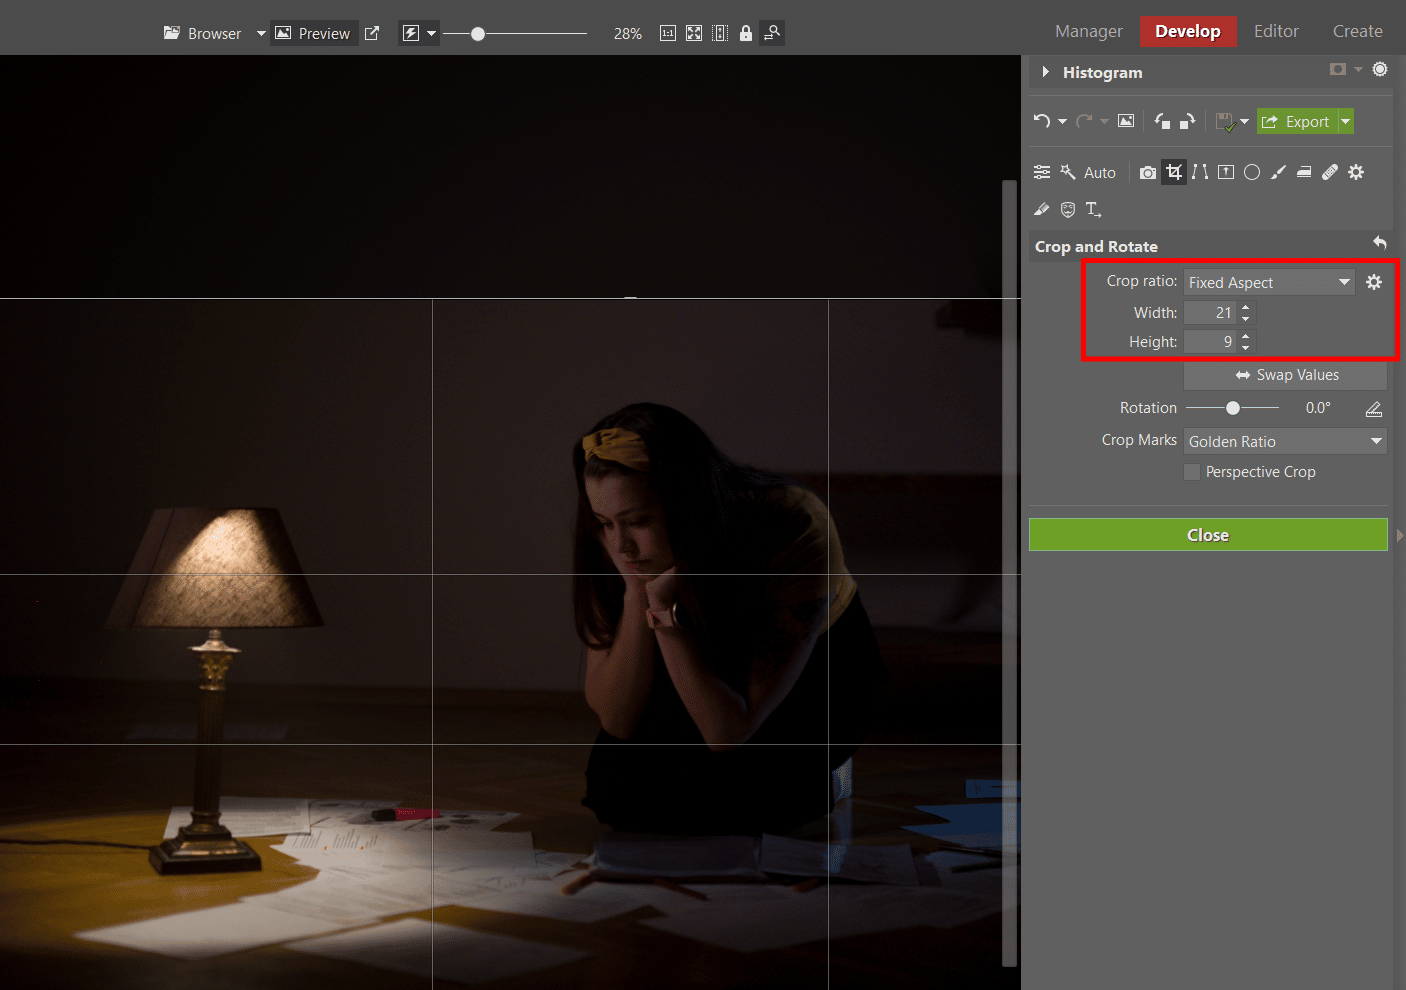
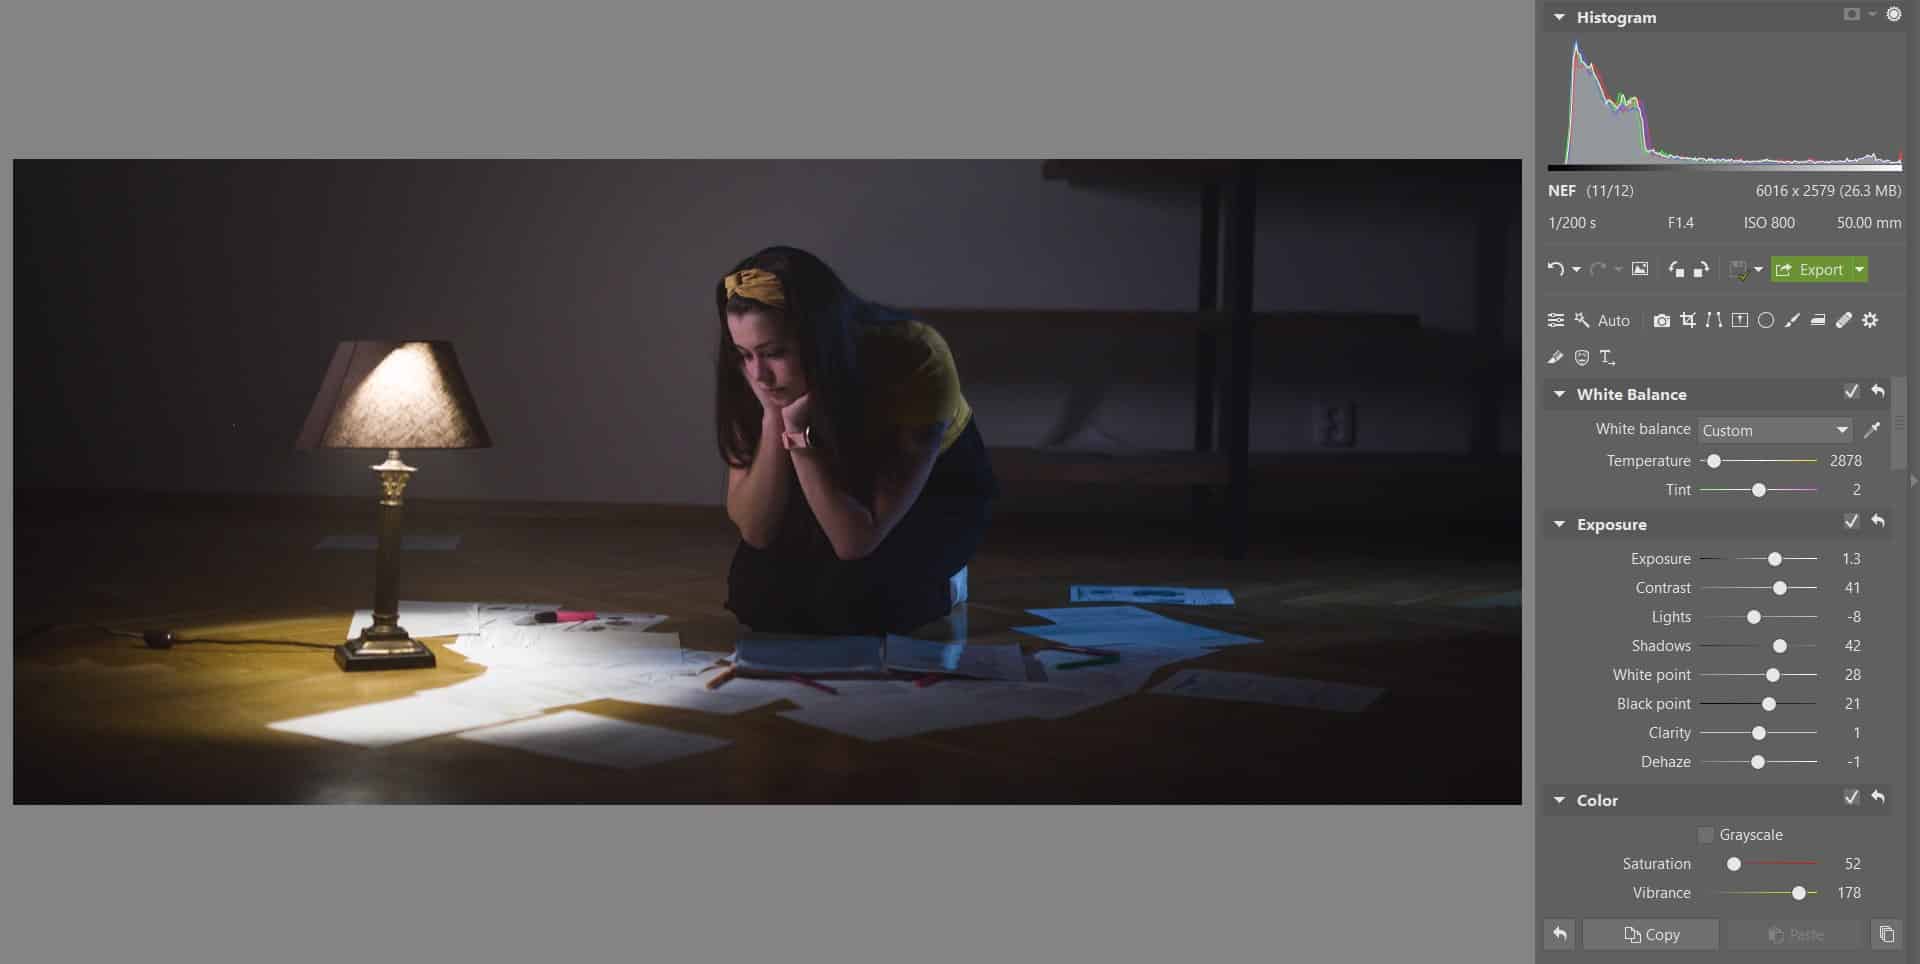
You’ll be working in the Develop module within Zoner Studio. You’ll need to crop the photo right at the start. To do that, use Crop and Rotate (C). We chose a 21:9 ratio of sides to get a wide-angle cinematic look. You won’t find this atypical ratio in the default cropping options, but that’s OK—Zoner Studio lets you manually set any ratio you want. Just enter your desired values in the appropriate boxes.
It’s clear from the histogram that this photo will need brightening. Your post-cropping edits in Develop should always start with white balancing. There are no clear-cut rules here, but we recommend using whatever settings give you the most natural skin tones. Due to the two different light sources used here, two different shadows are mixing on our model, but you’ll be resolving that later on by tinting the photo further. Now go on and raise Exposure, Shadows, and the Black Point in the exposure settings. The Lights setting, on the other hand, will need to go downwards. This will give you more dynamic range.
Continue on to Color and Tone Curve
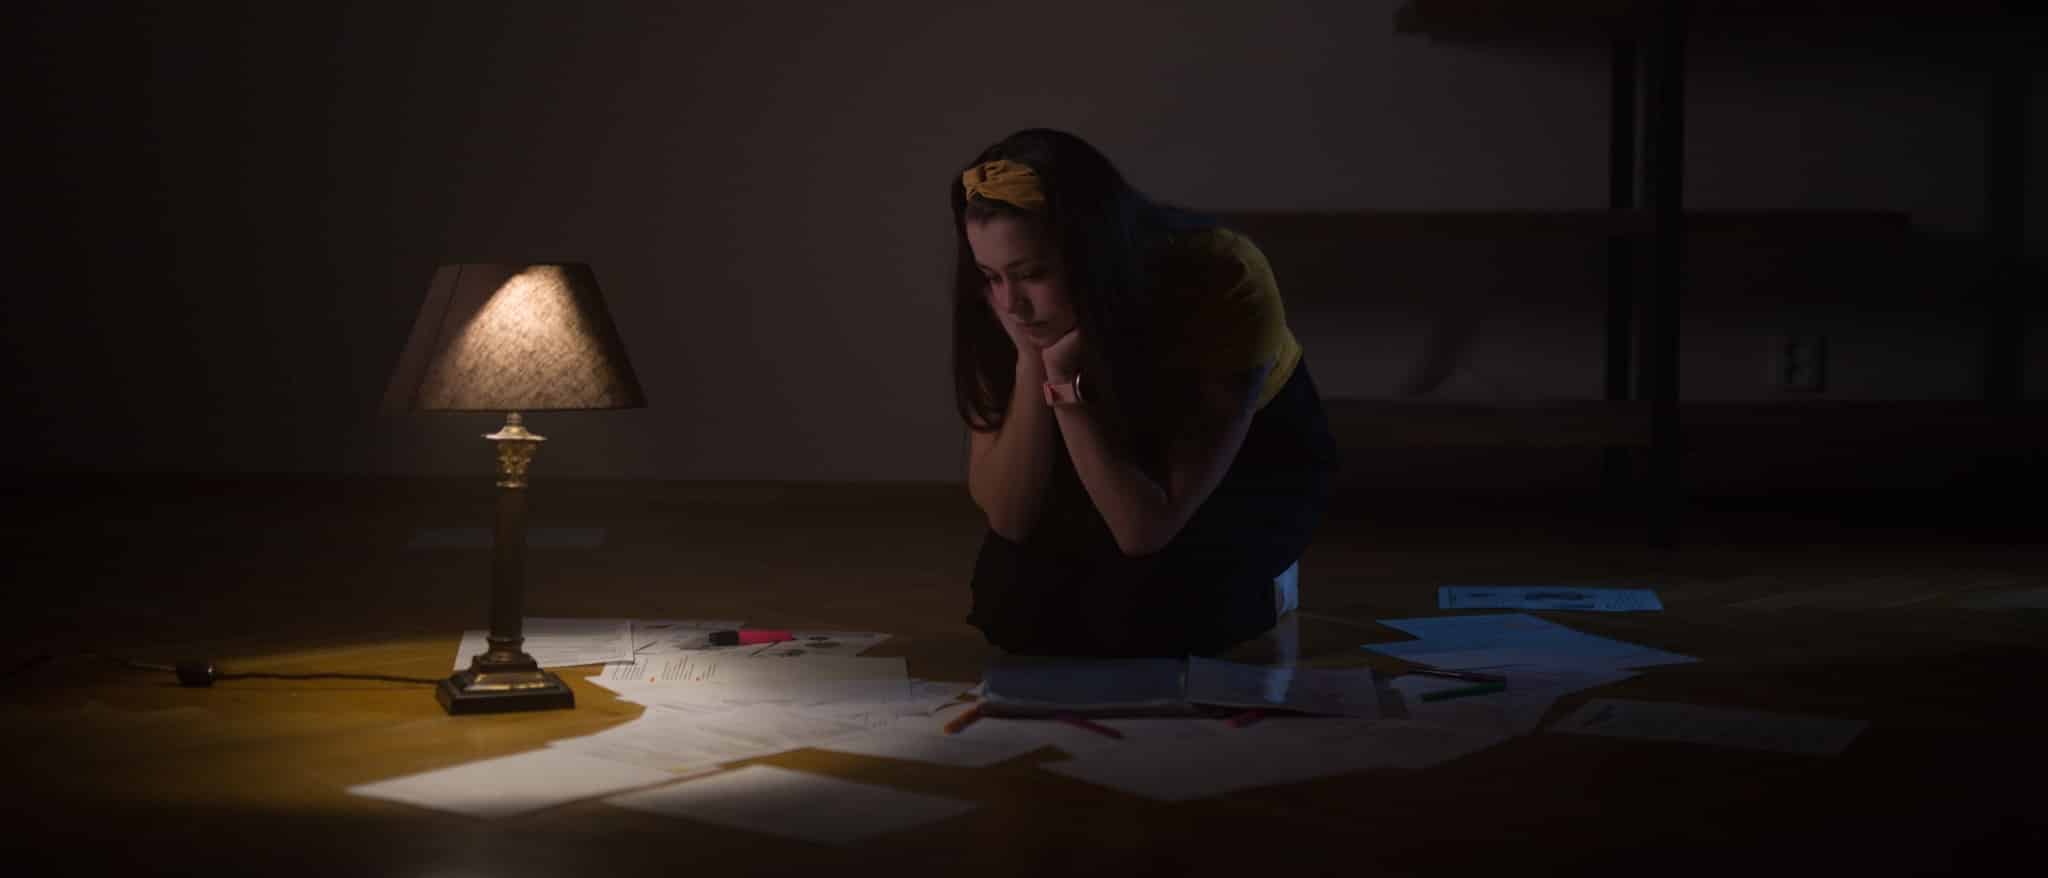
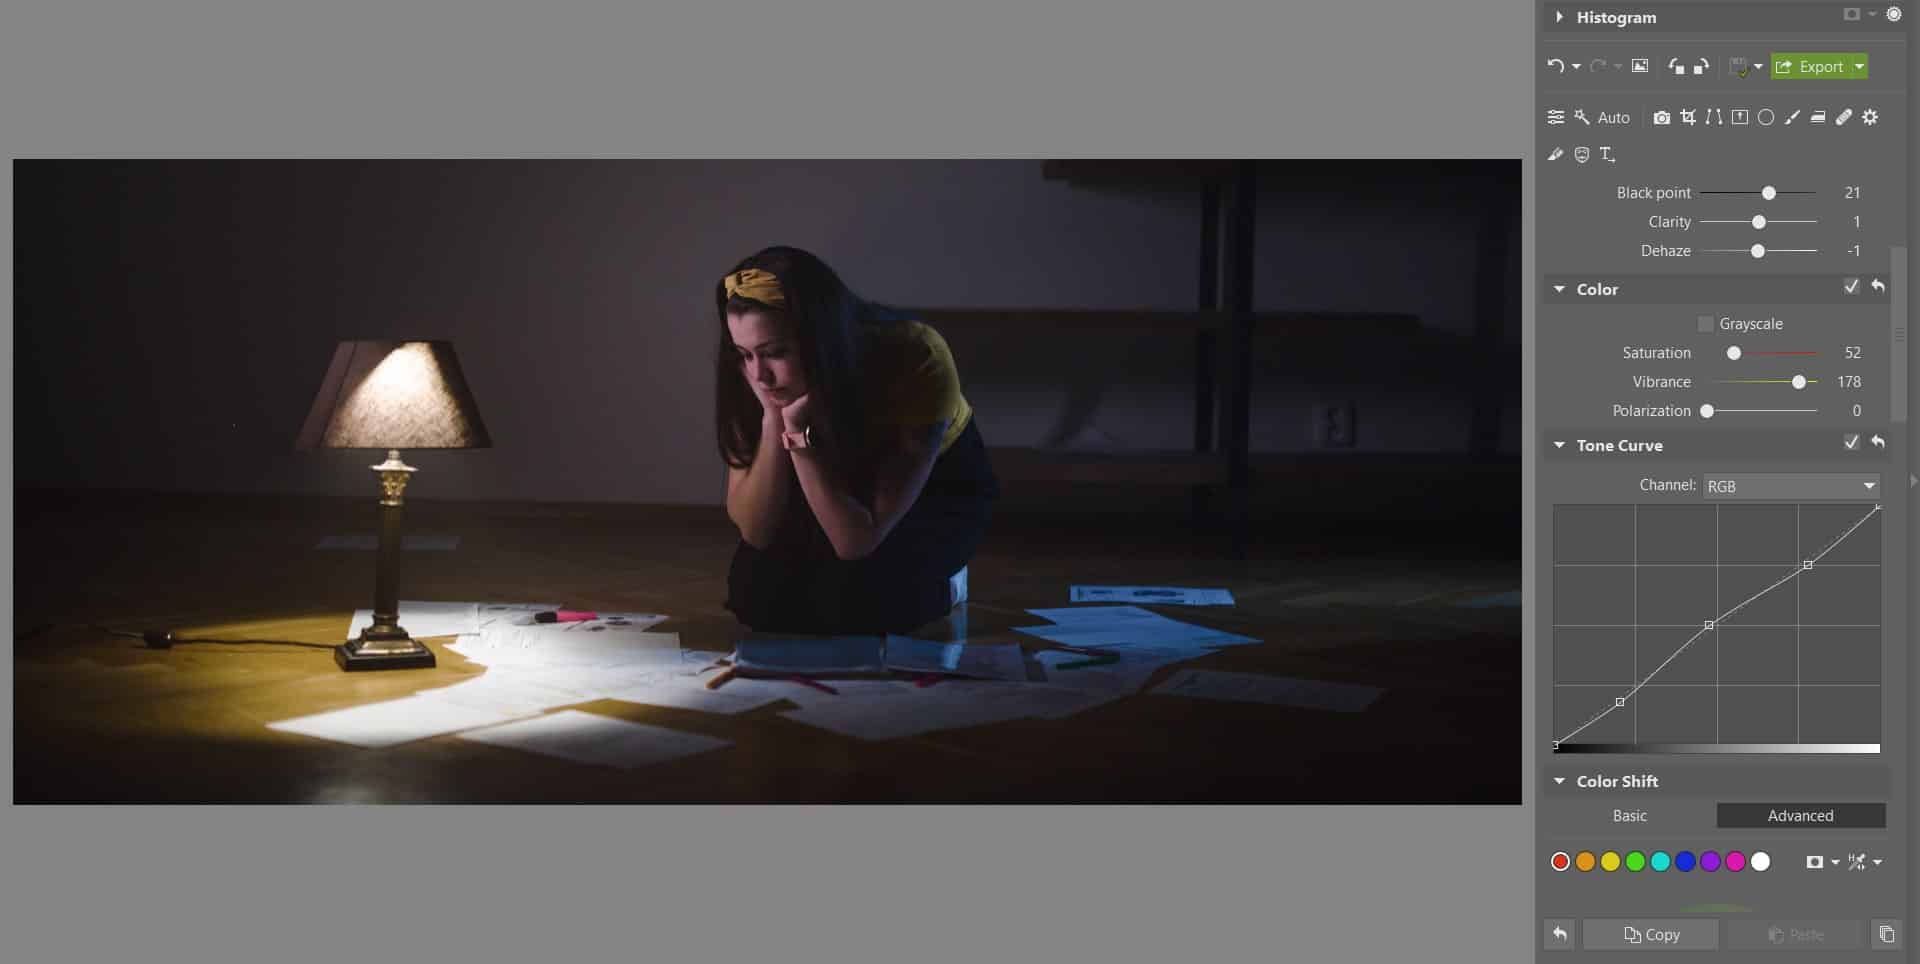
It’s generally good to add Vibrance while subtracting Saturation. But here you’ll do best to make the photo a bit saturated. You’ll immediately see that a few of the colors are too striking, but there are other tools to deal with that. It’s more practical to first express the colors and then suppress them individually.
Use the Tone Curve as just a supplement to the exposure tools. Be careful, because the Tone Curve is a very sensitive tool.
Shift the Picture’s Primary Colors
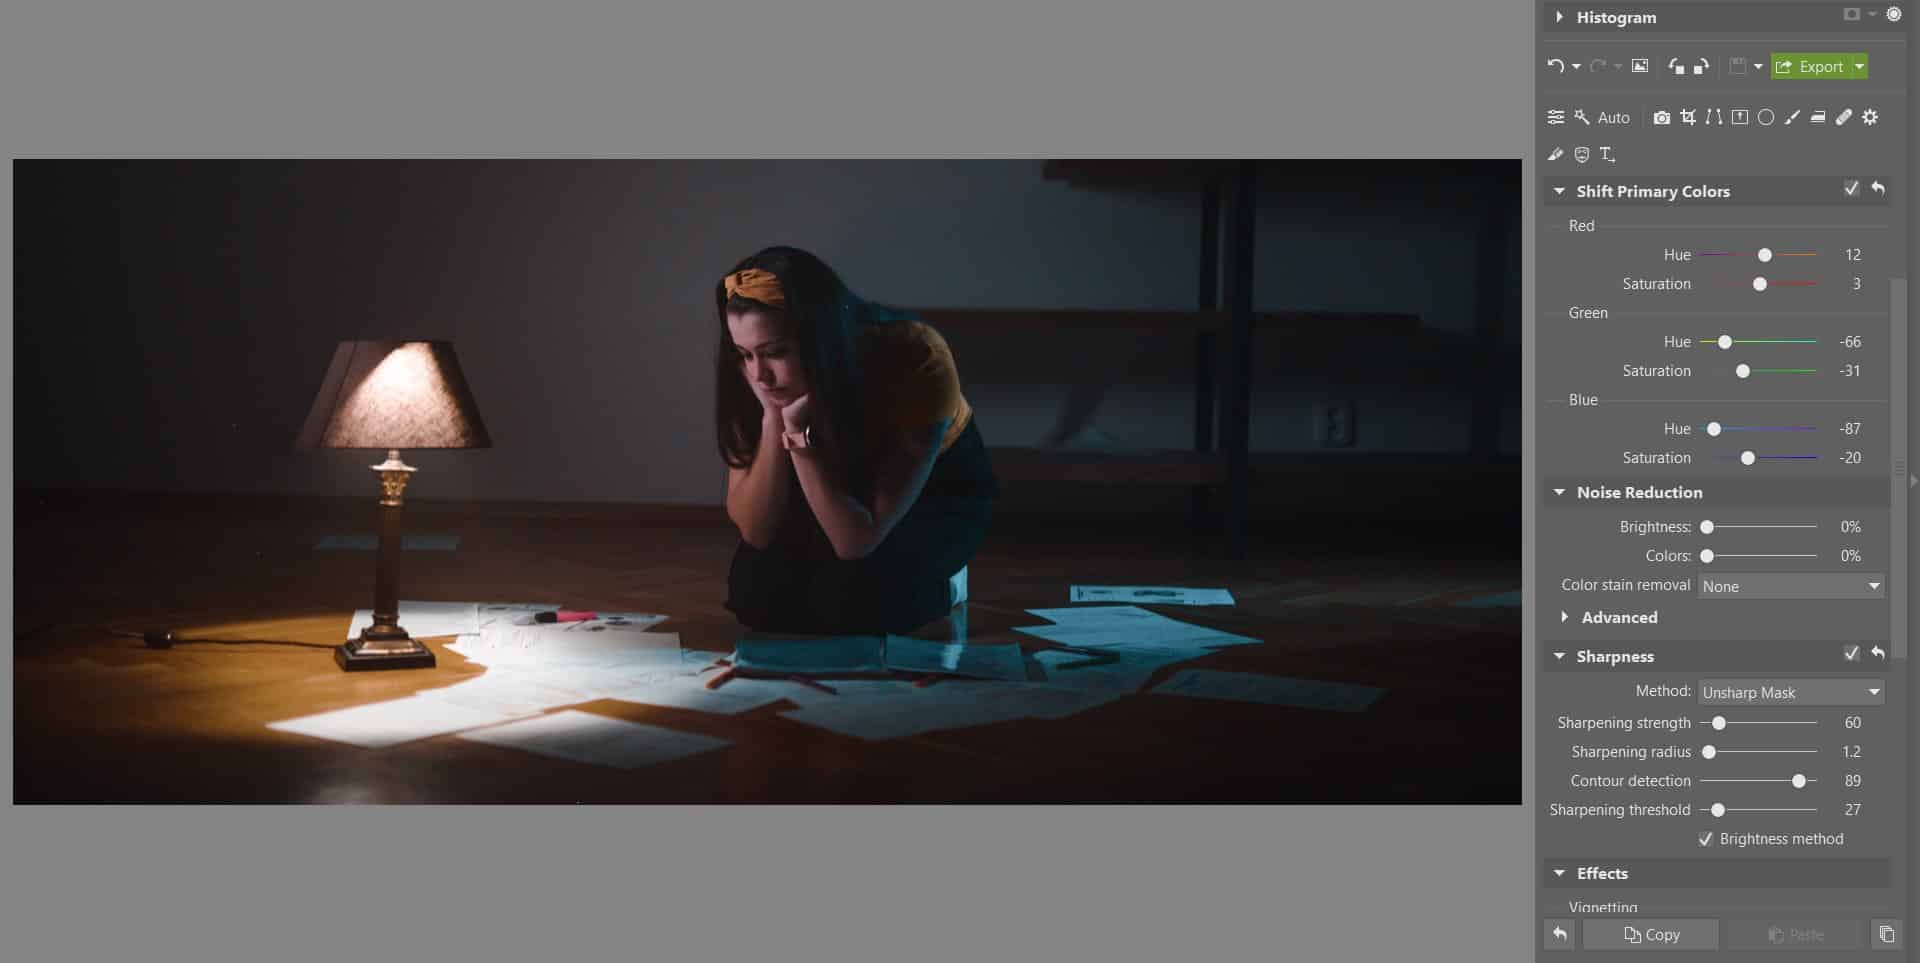
Skip past Color Shift and Split Toning; we’ll come back to these in the next step. Shift Primary Colors works with a wider spectrum than they do, and so using it after them could throw off your corrections. Here you’ll be slightly flattening the differences you created during white balancing—to do this, shift the red tones slightly rightwards. Correct the lamp’s unnatural color by shifting green tones to the left.
Tinting the Photo Towards Interesting Colors
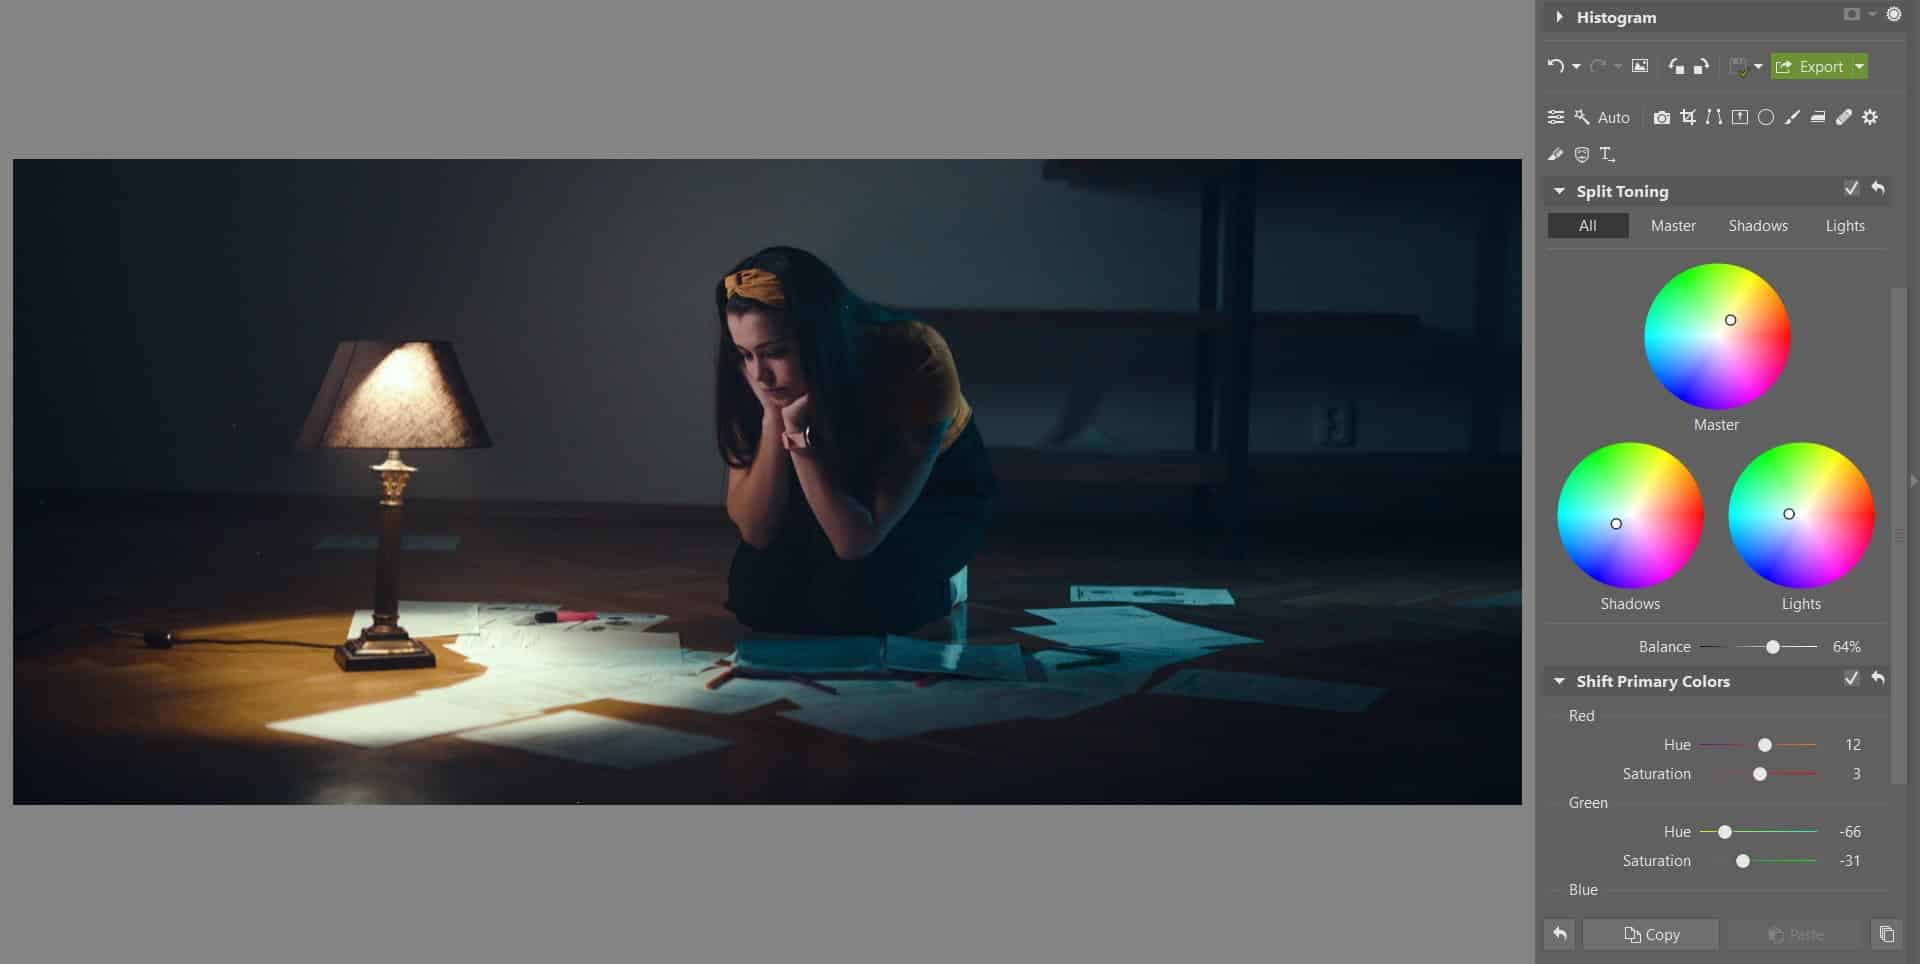
You’ve already performed your basic tinting by shifting primary colors; now “continue back” to Split Toning for your next edits. Adapt your overall tinting to match your picture’s subject. Here that subject is a lamp-lighted student—and that means orange. But to keep the result from being too orange and monotonous, add a little blue to the shadows. Wrap up by adding just a little turquoise to the lights; that will soften the overall orangeness a little more.
The Final Color Edits
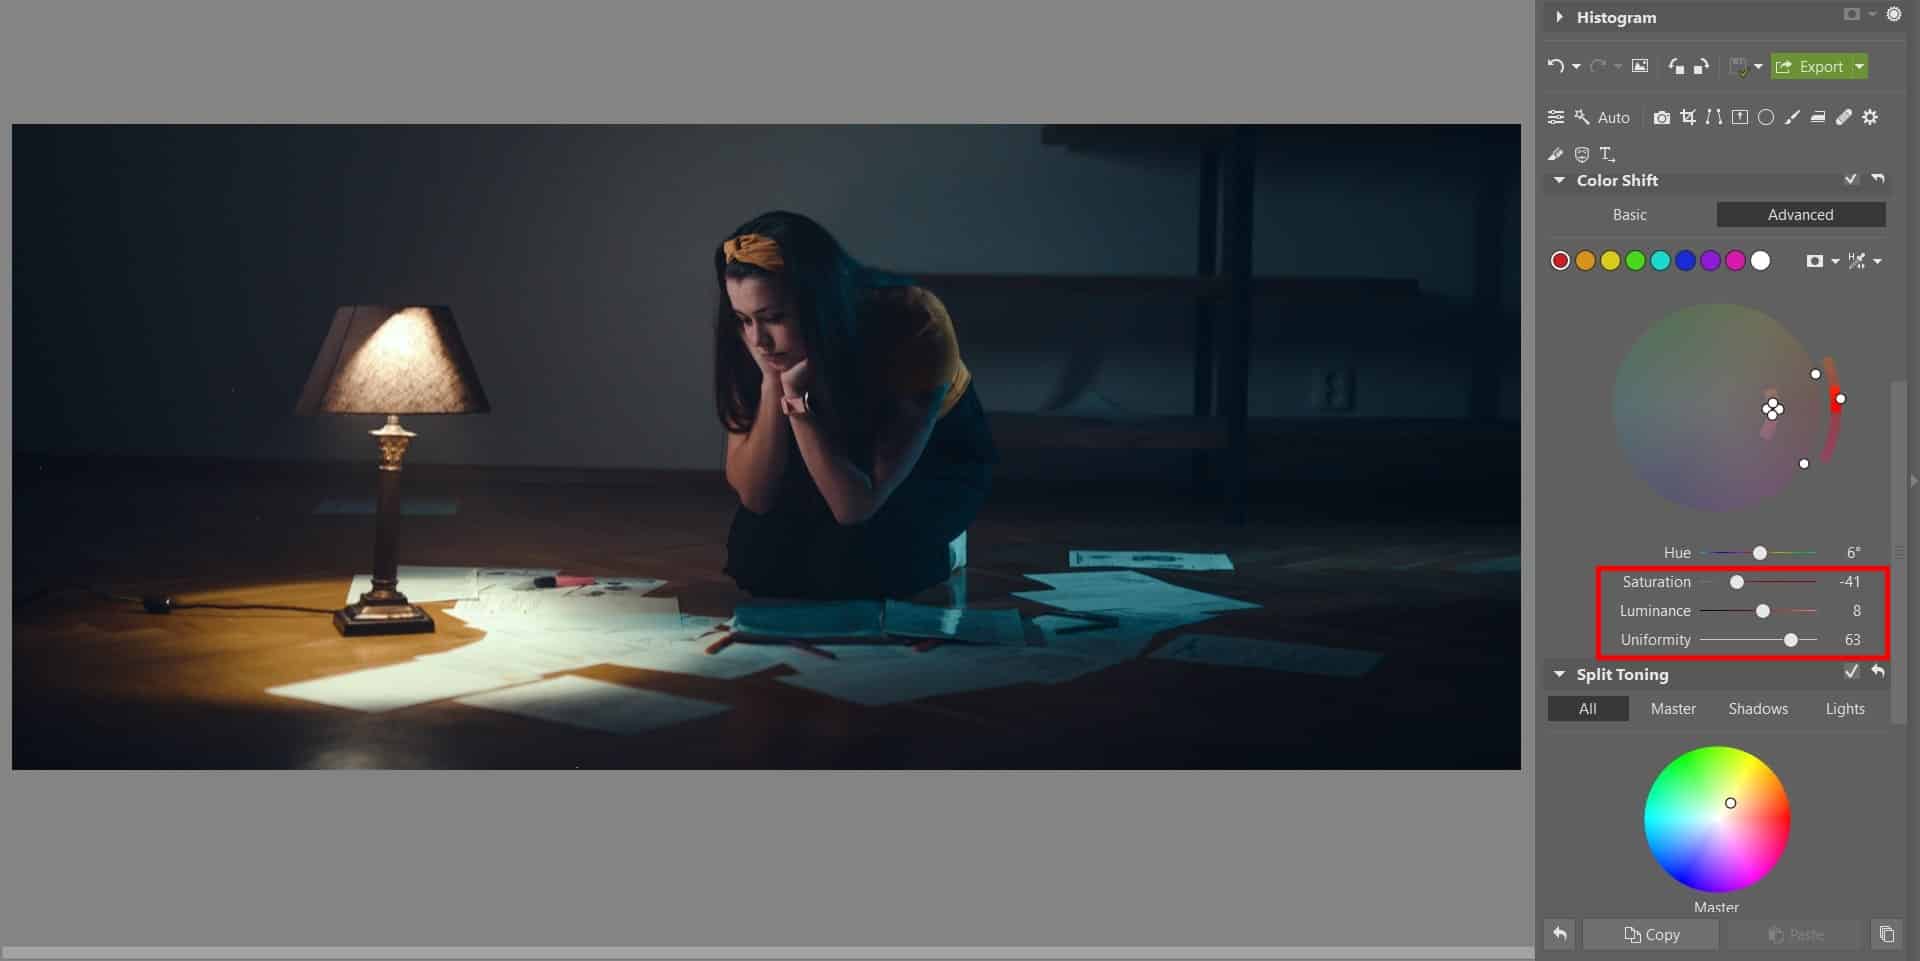
And now all that’s left is to adjust a few selected colors using Color Shift. Here you should try to suppress, for example, any colors that stick out from the overall tinting. In this particular picture the pink highlighter, while important, grabs too much attention.
Use the eyedropper and the mask to select precisely its shade of pink. The dark dot displayed in the color wheel while you’re using the eyedropper can really help you out here.
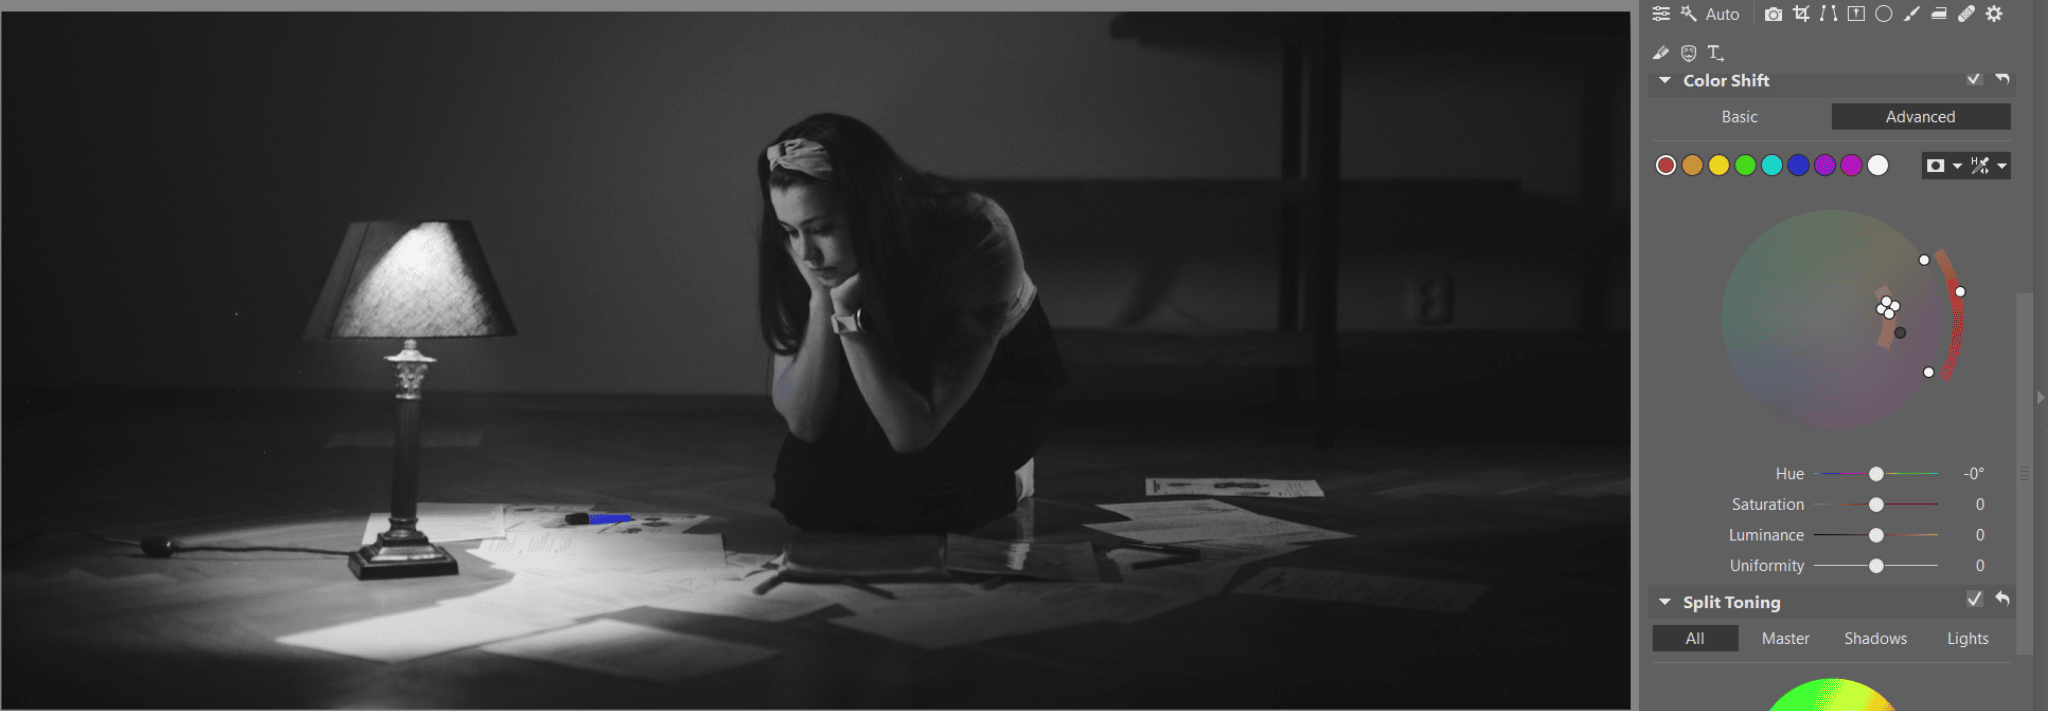
Then turn off the mask and reduce the pink shade’s Saturation to make it less distracting. It can also be good to raise the Uniformity.
Use the Radial Filter
The picture’s colors look OK now, but the subject isn’t very striking and doesn’t really stand out. By turning on the Radial Filter (R) and using it to slightly increase the lights and exposure, you can easily draw attention to a specific spot in a photo.
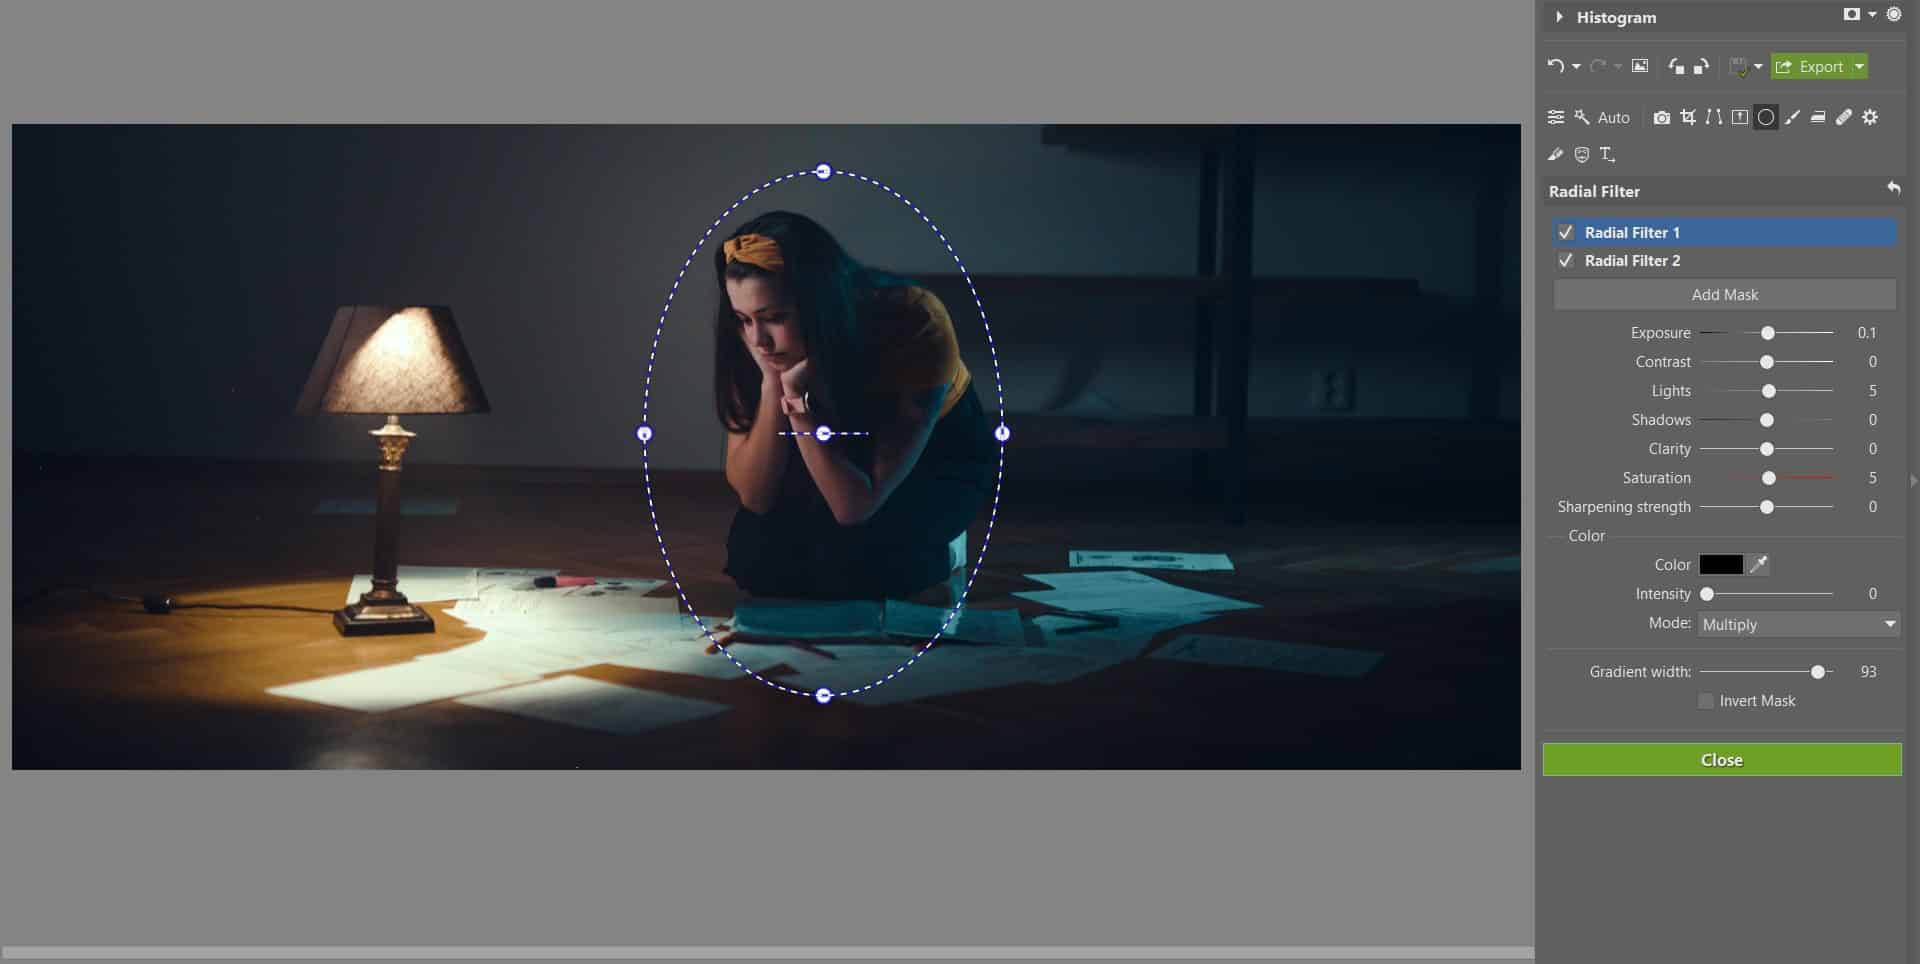
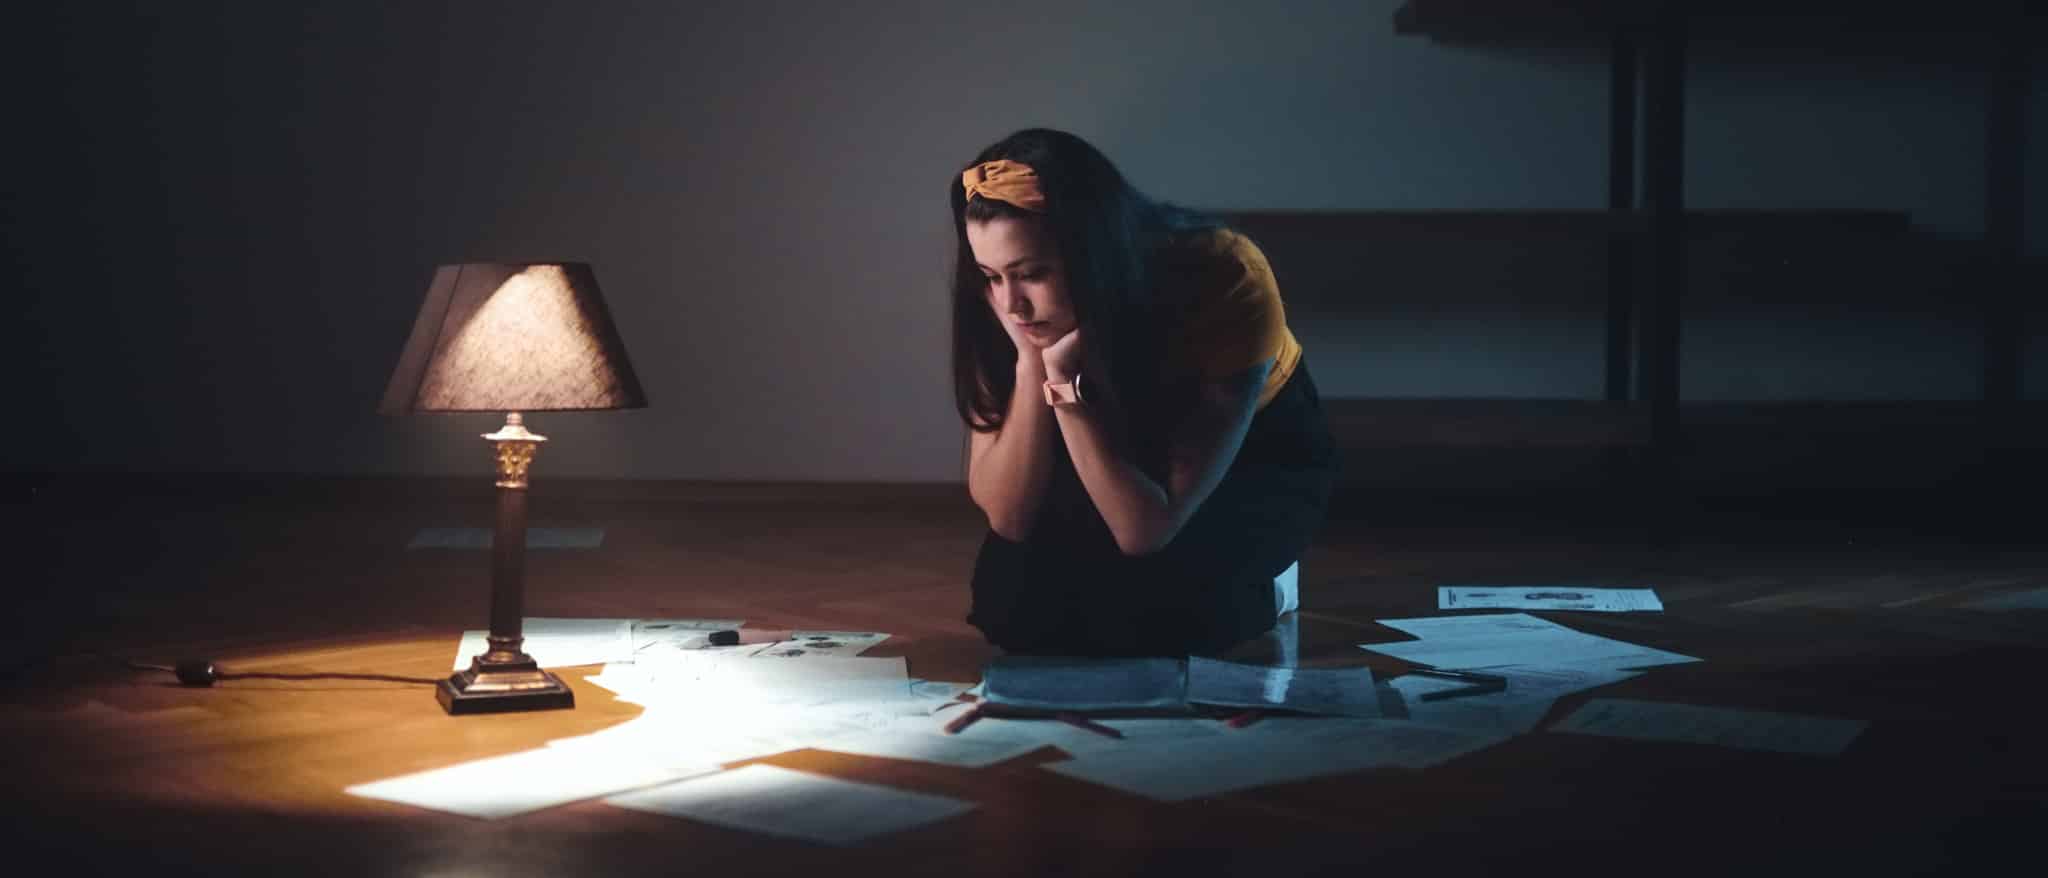
Now just a little retouching to the socket, and there are no distractions left in the photo—you can now export it.

Like the results? You can have this style at hand nonstop! Just download the preset we’ve created from the edits in this guide.
Try Out This Edit on Your Own Photos
We’ve revealed our approach for you completely, step by step. And it will definitely work well on other photos too. Download Zoner Studio, try it free for 7 days, and experiment with this edit and many more besides!
There are no comments yet.