5 Editing Styles for Portraits: Discover Your Favorite
With the overload of options for editing your photos in Zoner Studio, a beginner may feel overwhelmed. In this article, we share several basic editing styles for portraits to help get you inspired.
Every photo requires a slightly different editing style. For instance, you won’t get a high-contrast photo out of a bright photo that doesn’t have dark shadows you can work with. Similarly, it’s difficult to experiment with color in a photo that has only shades of gray and white. It’s a good idea to have a clear vision of the editing style you want before shooting and crafting your image based on it.
Clean and simple editing
We will be working in the Develop module for all of these photos. We start with the simplest editing style, which for many portraits is also the best. If a clean, natural-looking portrait is what you’re after, Zoner Studio makes this simple. All you need to do is straighten your image, crop, and make some basic exposure adjustments. No matter what your plans are for your portrait, knowing how to create a clean and simple portrait photo is essential.
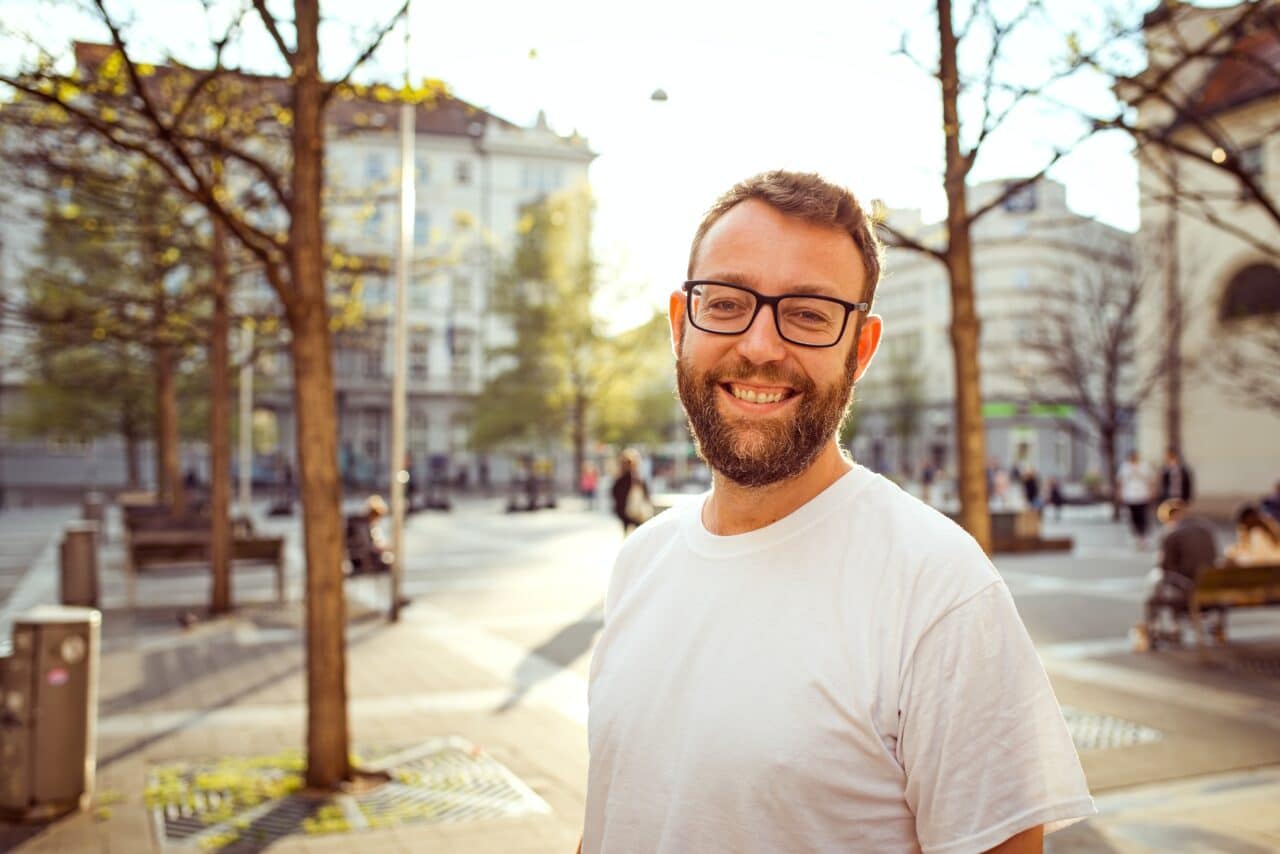
Main editing technique: In the right side panel of the Develop module, pay particular attention to proper exposure, White Balance, and cropping to get the composition just right. If you have a well-taken portrait, you won’t need much else.
High-contrast editing
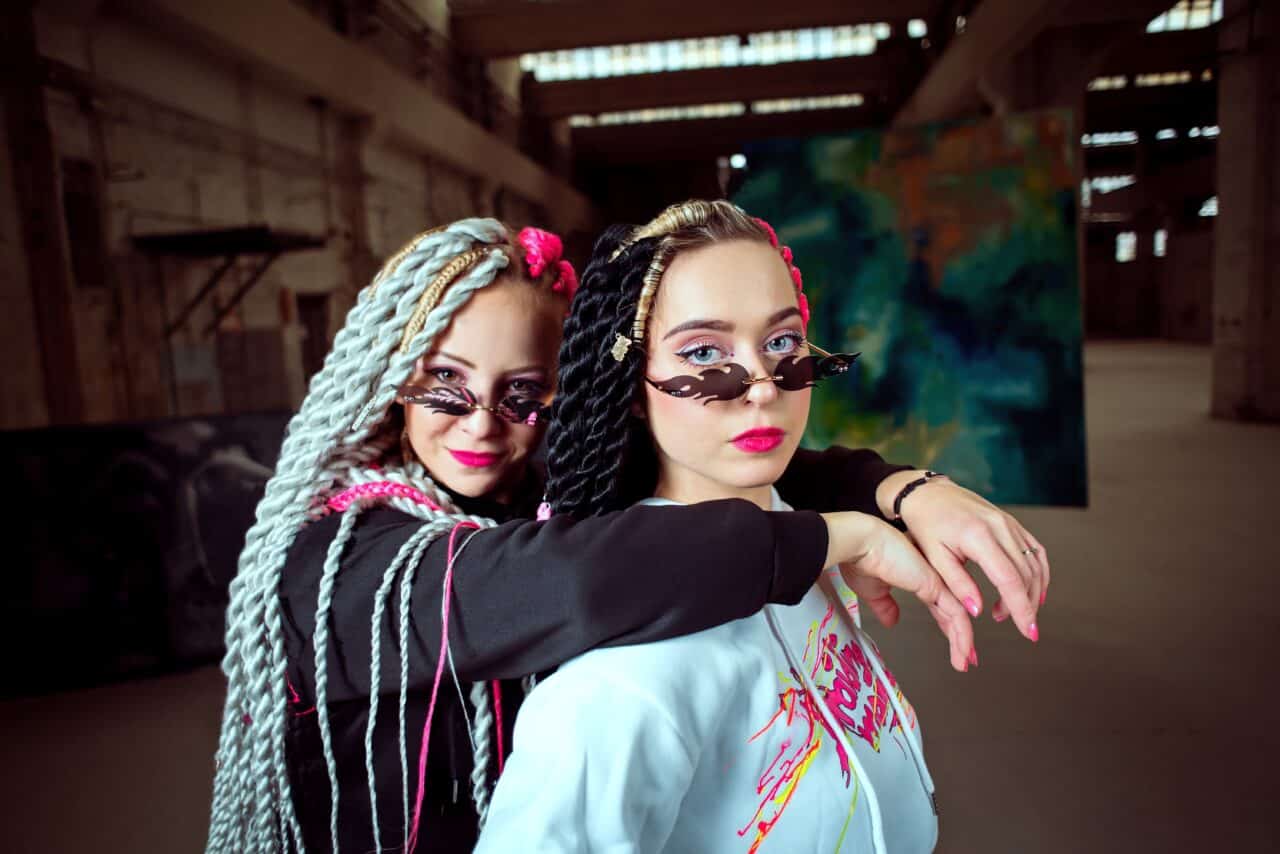
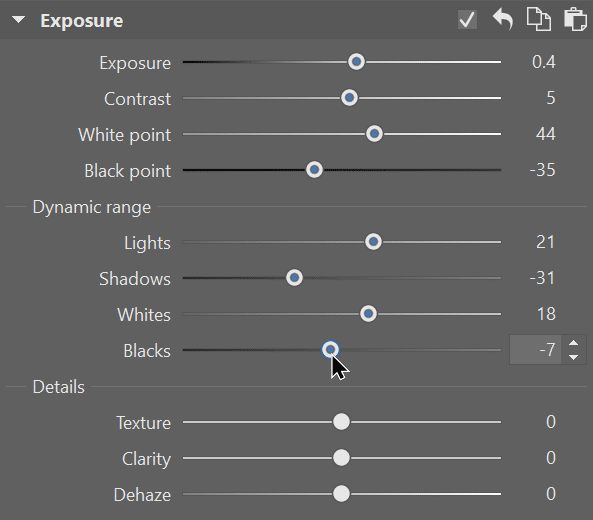
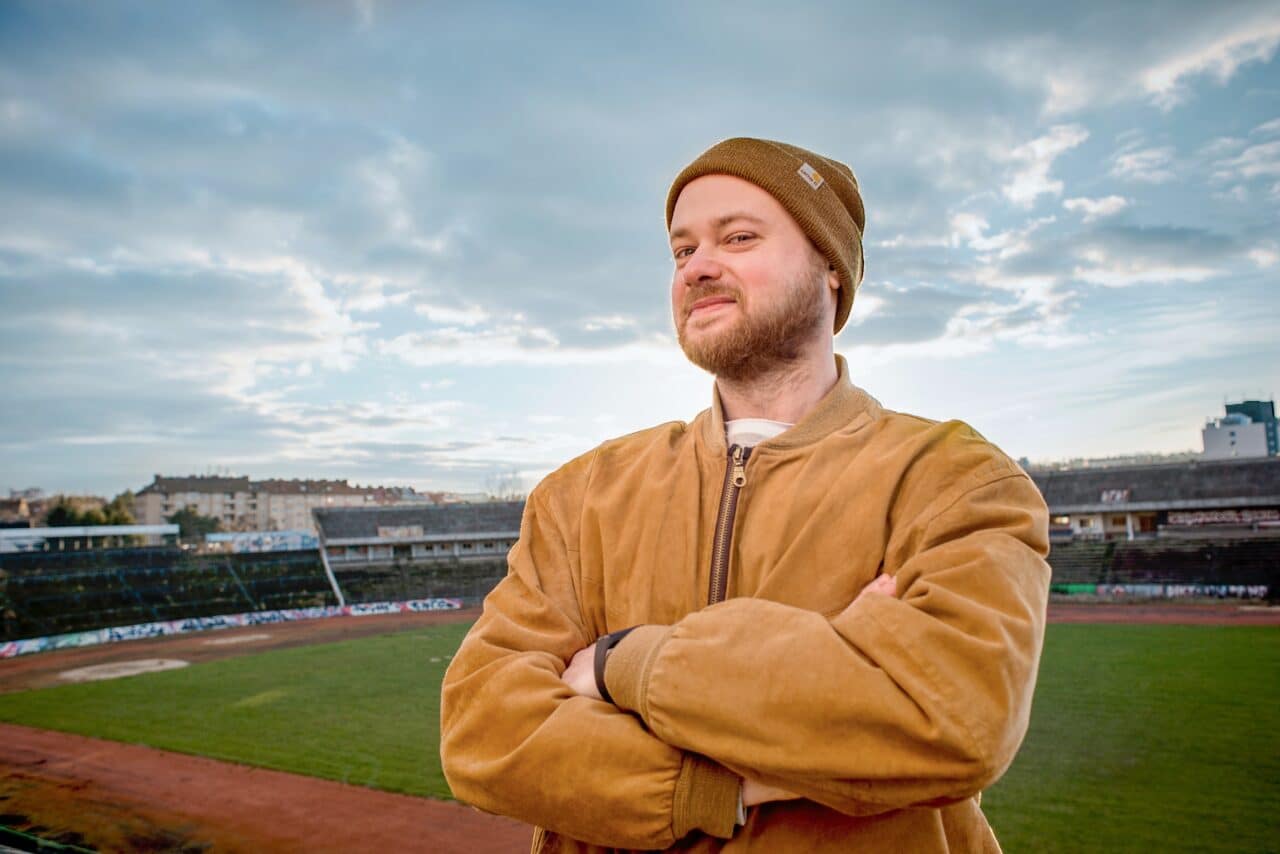
High-contrast portraits are dramatic and a great way to bring out the main subject. Contrast works great for portraits taken indoors, for instance when you have a subject that has natural light coming through the window, but a dark background behind them.
The example photo uses additional lighting in the form of an external flash with attached umbrella. This gave a high-contrast image where the faces are illuminated with bright light, but the background is almost completely dark. This is the perfect starting point for high-contrast editing.
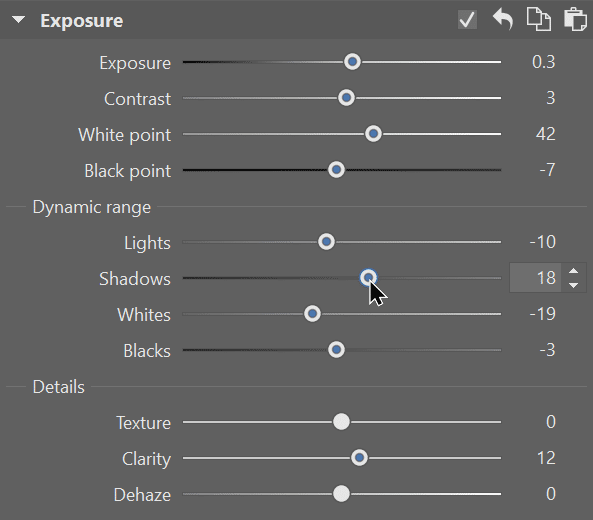
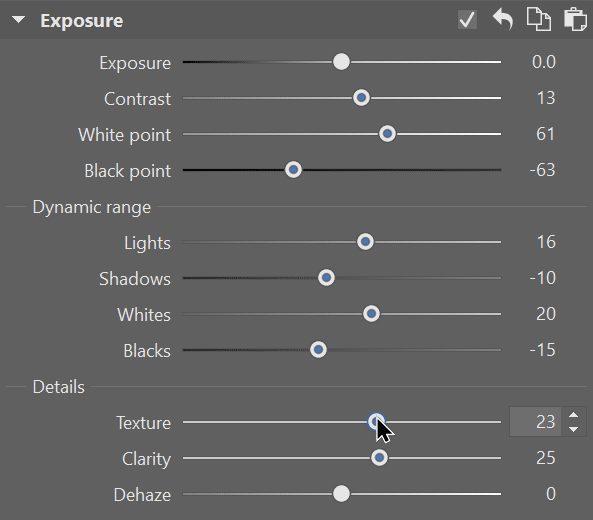
Main editing technique: Most importantly, highlight the difference between the light and dark areas of the photo. In the right panel of the Develop module, you will work with the Lights, Shadows, White point, Black point, Blacks, and Whites sliders. Lighten up the highlights (drag to the right) and darken the shadows (drag to the left).
Be extra careful with the Contrast slider—overdoing it can impact the colors of the photo.
HDR portrait
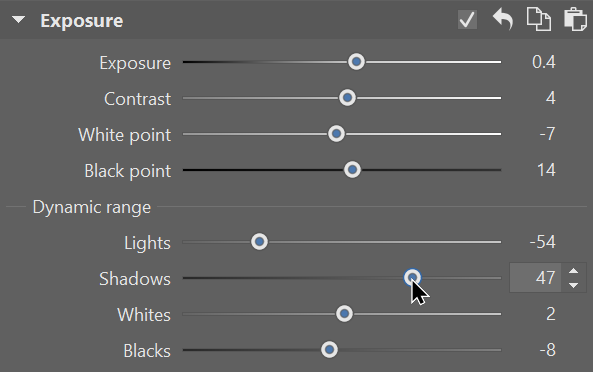
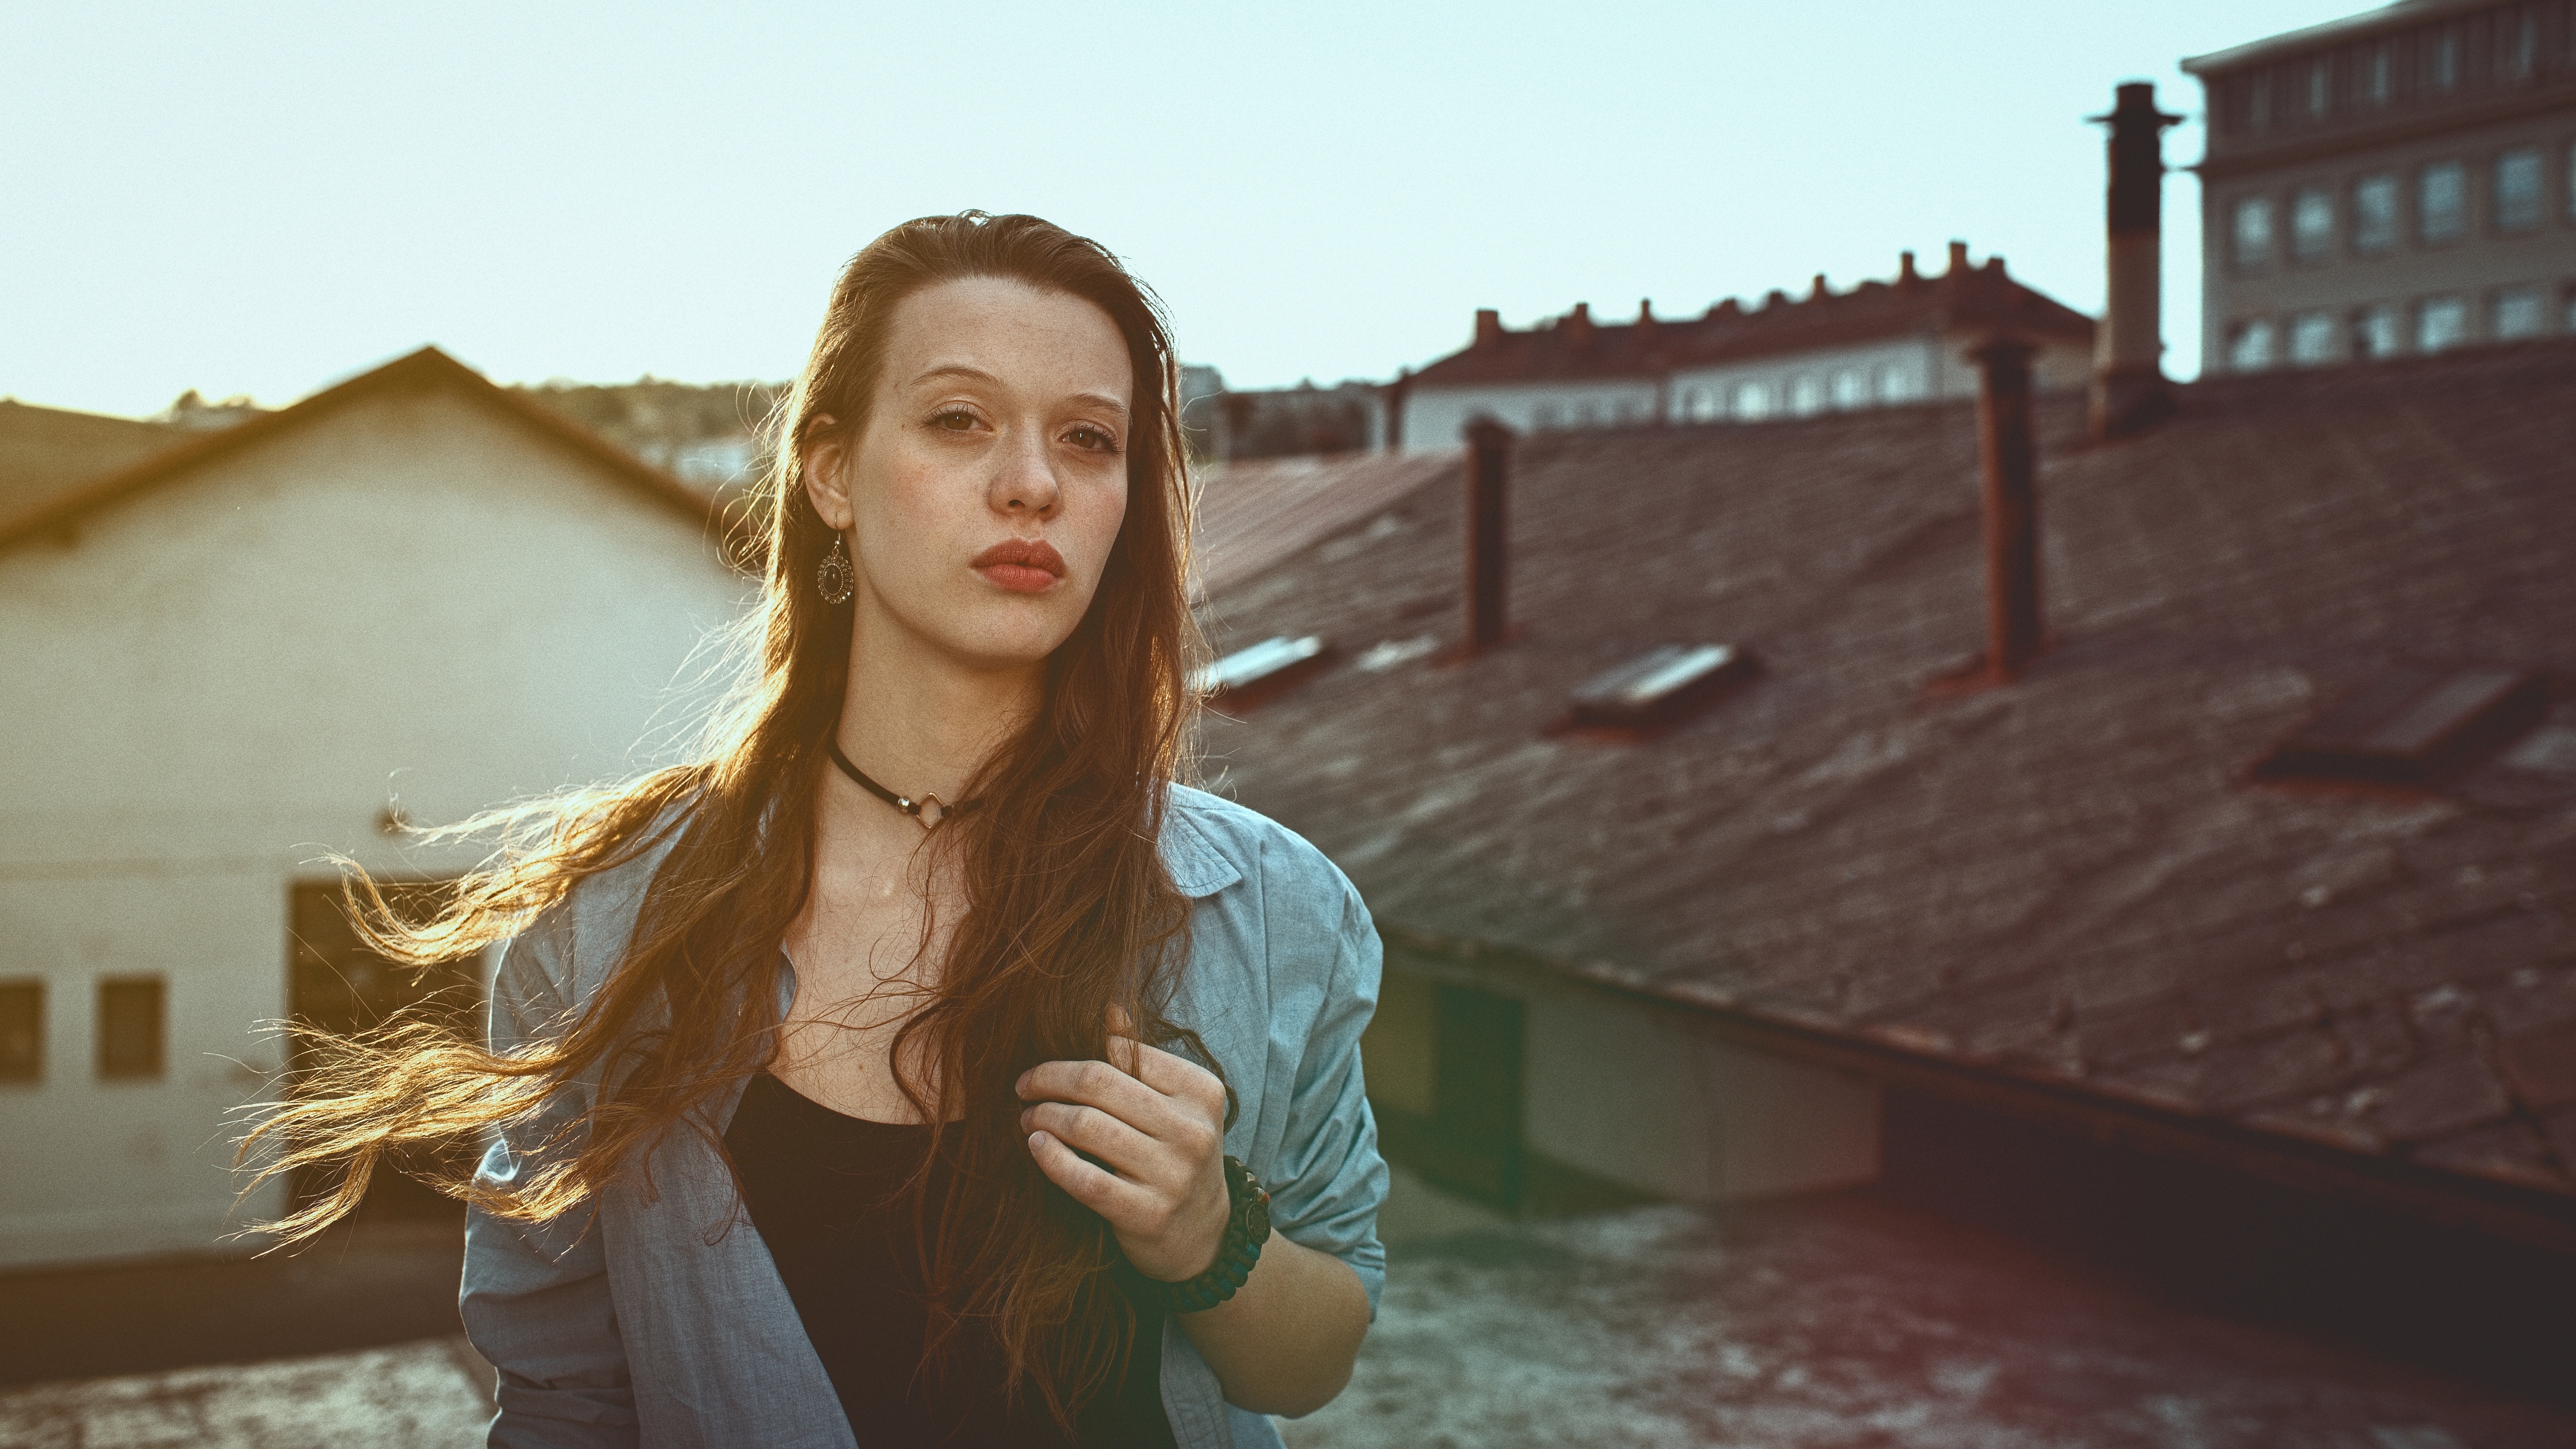
This editing style is the opposite of high-contrast editing. With high-contrast editing you want bright highlights and dark shadows, with HDR portraits, or portraits with high dynamic range, we want the highlights and shadows to be balanced.
The HDR (high dynamic range) technique means that the photo contains both nicely rendered shadows and highlights. We see not only the edges of the clouds in the bright sky, but also the ground below. Cameras typically aren’t capable of capturing this level dynamic range. Either the shadows are too dark, or the highlights are too bright. So we help our photo by editing.
Main editing technique: With this editing style, you brighten up the very dark and/or darken the very bright areas of the photo. The Lights and Shadows sliders will help you. This time, however, you move them in the opposite direction than you did previously. Find more detailed instructions for how it’s done in the article How to Adjust Exposure and Dynamic Range.
Another tip for HDR portraits is to shoot in RAW format. RAW contains more image data in the highlights and shadows, making it much easier to achieve the desired result.
Matte effect
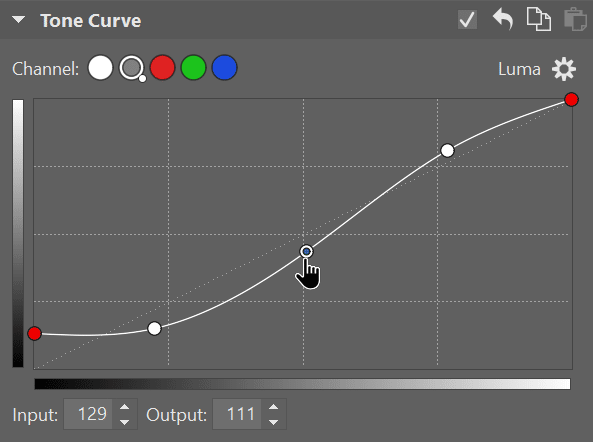
A matte effect means you give the photo a faded look, like that of an old paper photo. The matte effect is a popular part of any type of “vintage” editing. It consists of lowering contrast and covering the photo with a matte effect. You use curves to get the matte effect.
Main editing technique: The main tool for getting a matte effect for your photo is Curves. You want to use the RGB curve or the Luma curve (which doesn’t affect colors) for brightness. Bend the curve to brighten up the shadows and darken the highlights. There is no perfect shape for the curve—It depends on the photo you are editing. However, for these types of vintage adjustments, you will get an S-shaped curve. Why is that? Check out: VIDEO: Tone Curve—3 Practical Tips | Learn Photography.
Black and white photos
Contrast is optional for color photos, but a must for black and white photos. A black and white photo cannot use color to communicate. It communicates through highlights, shadows, and lines. That’s why these features must be more pronounced. Simply converting a photo to black and white is not enough. You need to play around with adjustments that bring out these features.
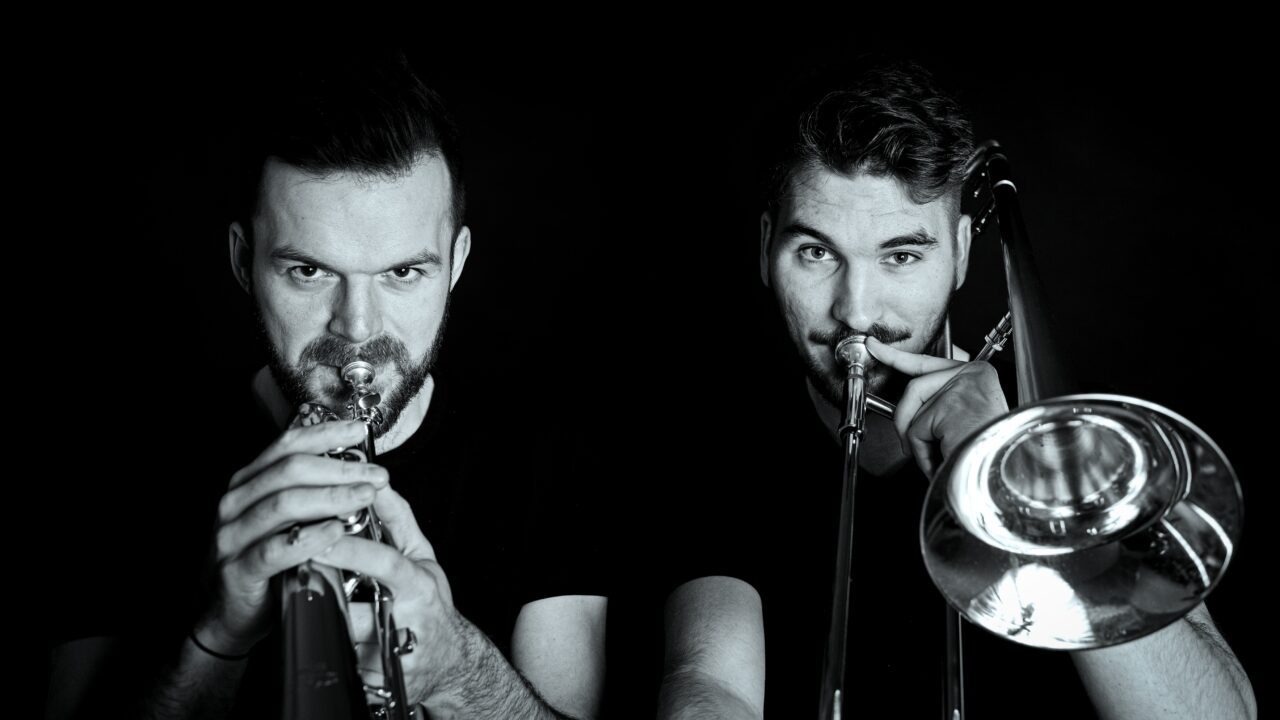
Main editing technique: After you click Grayscale, the magic button that converts the photo to black and white, go back to the right panel in Develop and go up a bit. Make sure you brighten the lights and darken the shadows even more.
Don’t be afraid to overdo it a bit with black and white photos. Just keep an eye out for overexposure in areas where you don’t want it, such as the face or other important objects. Then, increase the Clarity and Texture sliders by moving them to the right. Both sliders work well with black and white photos and help them stand out even more.
Don’t be afraid to experiment
These are just a few of the many options for portrait editing. Don’t be afraid to experiment and try different techniques to get a wide variety of editing styles. Download Zoner Studio free for 7 days and start discovering your own unique editing style!
There are no comments yet.