6 Basic Tips for Photographing Water
There are different ways to look at water. As a fascinating backdrop from Hollywood movies, a dreamy forest brook… or maybe as an element full of motion. Discover the ways to photograph water and how to work with them. Let our six tips for photographing water help you on your way.
Water photography has the advantage that there are watery scenes all around us. And practically every form of water looks good in pictures. Meanwhile, you can even find great spots right by your home. And if those are missing “something,” then you can head out further for water.
Photographing “Big” Water
Large water surfaces like ponds, lakes, and seas can look very impressive. Join them with a sunset, and they can work wonders.

It depends a lot on what exposure length you use. The first example here had a length of 1/3 s, but the scene changes dramatically with a longer exposure. In this case I like the first, sharper variant, but in another case the opposite might be true. So if you have a tripod available and you set a high f-stop or use an ND filter, you can shoot with an exposure of e.g. 2.5 seconds like I did below, where the motions of the water are lost and the picture takes on a dreamy feeling:

Water photography isn’t just for sunsets. You can shoot just as well during the day. And use the sea instead of a reservoir. But to keep your picture from being boring, you’ll want to also include the nearby shoreline in the scene.

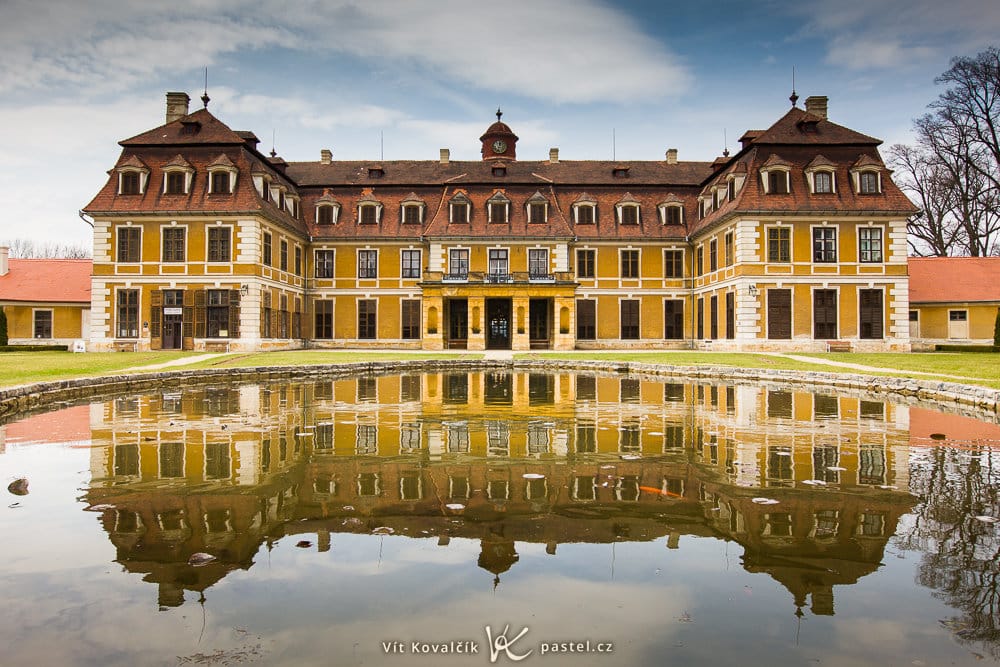
How to Photograph Surface Reflections
Reflections of the surroundings on a water surface are also welcome, like for example in this view of the Matterhorn.

However, you can only get pictures like these on very calm water. In this specific case only early in the morning, because after that the wind starts blowing and for the rest of the day the Matterhorn is only visible once.
So it’s simpler to photograph reflections on closer objects and on small water surfaces where there’s no risk of large waves. So the best candidates for this kind of water photography are little garden pools at palaces.

While for landscape photographs in general it’s good to place the horizon quite high or low, for reflection photos, a horizon placed in the middle is best. That way the whole photo’s majesty and symmetry really shine. But you don’t have to stick to this recommendation at all costs; with a calm enough water surface, you can even take various playful shots like the one below.

If you found this set of pictures interesting, read our article that’s all about reflections.
How to Shoot Water Against the Light
Pictures shot facing the sun require special handling. If you’re lucky, the light won’t be too intense, and your camera will be able to capture the scene in its full dynamic range. But in the extreme case, the sun will be very “fiery” in the picture. And because it is also being reflected off a frolicking surface, large parts of the picture will be too bright.
If this problem stands out too much, there are two basic solutions. One is to take a very dark photo and brighten everything but the sun and its reflection on your computer. That way you avoid overexposure.
The other is to take several shots with different exposure settings, that is, with different brightnesses. Cameras tend to have a function for this, found under the name Exposure bracketing (or similar), and when you activate it, pressing your camera’s trigger will automatically take a series of differently exposed shots. Join the result into a single photo on your computer.

Photographing Water with a Polarizing Filter
You can also use another trick for reflections—you can use a polarizing filter. Twist it to the right angle, and the reflections will disappear, letting you look below the surface. To get an idea of the difference a polarizing filter makes here, look at the pair of pictures below.


Unfortunately the reduced reflections only come at certain angles (around 45 degrees below the horizon). In the picture above, reflections are almost absent from the bottom half, while they come back towards the horizon.
Meanwhile, there’s no need to always get rid of reflections completely. After all, they make water… water. So you can also rotate the filter to an angle that leaves a part of them showing.
How to Photograph Water in Fountains
Water in the city is quite photogenic too. Since fountains are small, you can also easily walk around them and photograph them from different angles. You can take a lot of different pictures in just a few seconds this way.


If a fountain is decorated with sculptures and you can find an angle where you can catch their reflections, that gives you some more composition options.

Various close-ups on a water jet are another option. But as you can see, even with a speed of 1/640 seconds, the spraying drops are still blurred by motion. So if you really want to stop the flow, you need to use an even shorter time.

Fountains photographed at night are a special case all their own. With a tripod and a long exposure, you can blur the water’s motion and capture its essence instead of its motion. This is also a good way to get a picture without tourists. The long exposure will blur them all away.

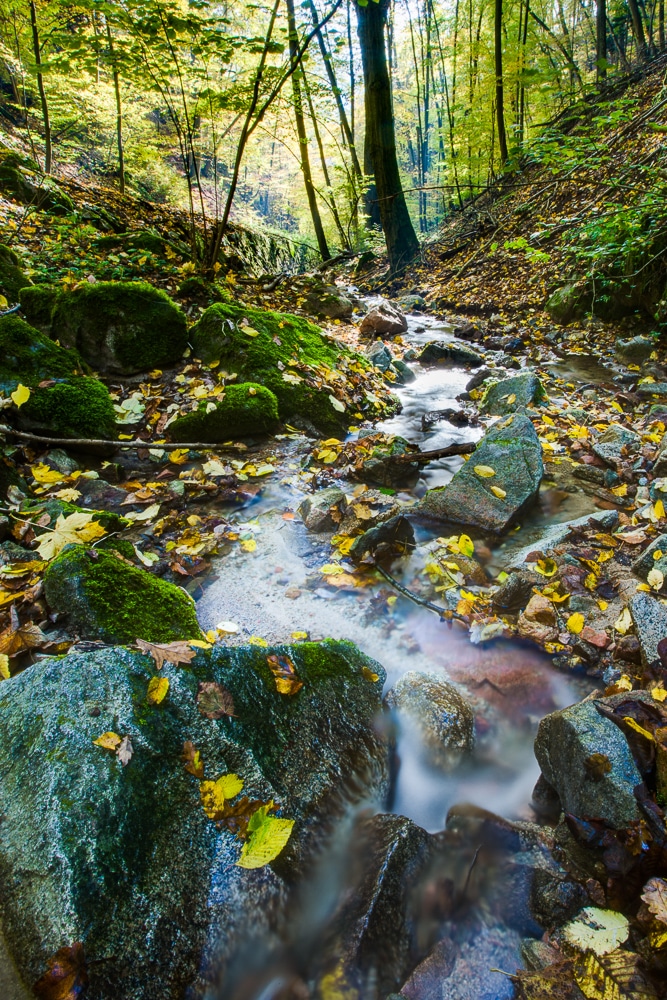
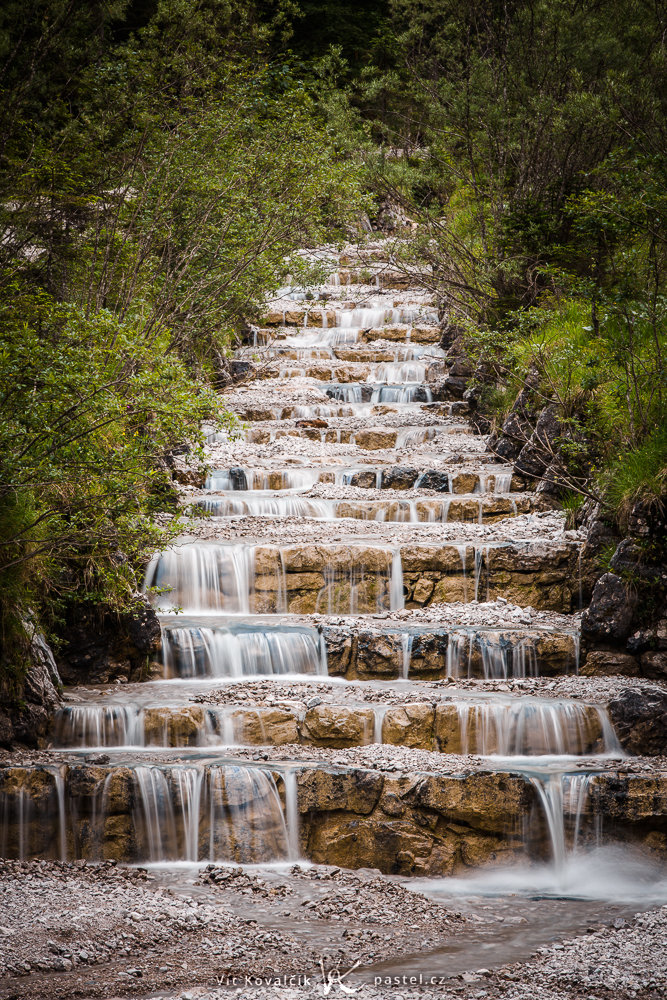
Photographing Water in Streams and Rivers
Naturally flowing water is another common theme. When photographing small streams, it’s mainly their surroundings that are important, because they occupy a large part of the picture.
The shape of the watercourse is also important for an interesting photo. When it’s just a straight line, you may get a good picture, but it won’t really be eye-catching. It’s better to seek out striking changes in direction and capture these. Forest streams that form an S-curve are one common example.
Vertical shifts in direction are even more interesting. You’ll find these whenever you’re in the hills or mountains. And when you do, you can take unusual pictures. Here we have an artificial cascade on a small river in the German Alps.
Give It a Try
Take the pictures in this article as a dash of inspiration. The range of water pictures you can take is truly enormous, and there’s plenty to enjoy no matter whether you love grand landscapes or close-ups. You just have to head out to the closest body of water and get started taking pictures.
You can photograph water as majestic scenery, an unbridled element, or a source of romantic reflections. Take a look at what it has to offer and how to work with it.
There are no comments yet.