Brighten. Darken. Highlight Your Subject in 5 Easy Steps
The article is over 5 years old. The information in it may be outdated.
![]()
We are working on its update. In the meantime, you can read some more recent articles.
Sometimes you need to highlight your subject to make sure they’re attention-getting and that it’s immediately clear what’s important in the photo. In today’s article, we’ll show you how you can make a photo’s subject shine using local brightening and darkening. After all, photographs are about light. And today’s edit will be about light too.
If you mainly shoot using natural light, then sooner or later you’ll definitely run into a subject that lacks light. And you might also have too much light in places where you don’t need it.
What’s the answer? We’ll show how to fix the photos that come from these situations: you simply brighten and darken problem areas to retouch them.
A Selection Is the Foundation
Work with selections (and the mask display mode) is the foundation for any kind of retouching in Zoner Studio. To learn about work with selections and how they’re displayed in Zoner Studio, read Become a Smarter Editor—Master Masks.
You’ll be using selections to get light into the parts of your photo that were too dark before. It’s relatively simple and effective. But just as with any other retouching, you’ll need to work carefully so you don’t overshoot.
First step: Analyze the Photo
The first thing you’ll need to do, is to analyze the photo. Think about which parts of it should stand out. And what, meanwhile, should be suppressed.
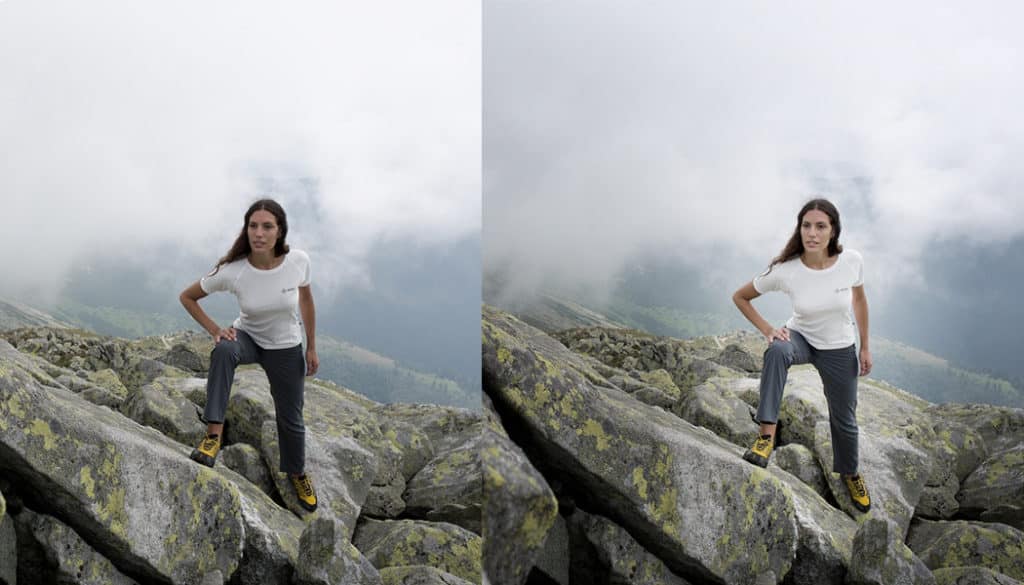
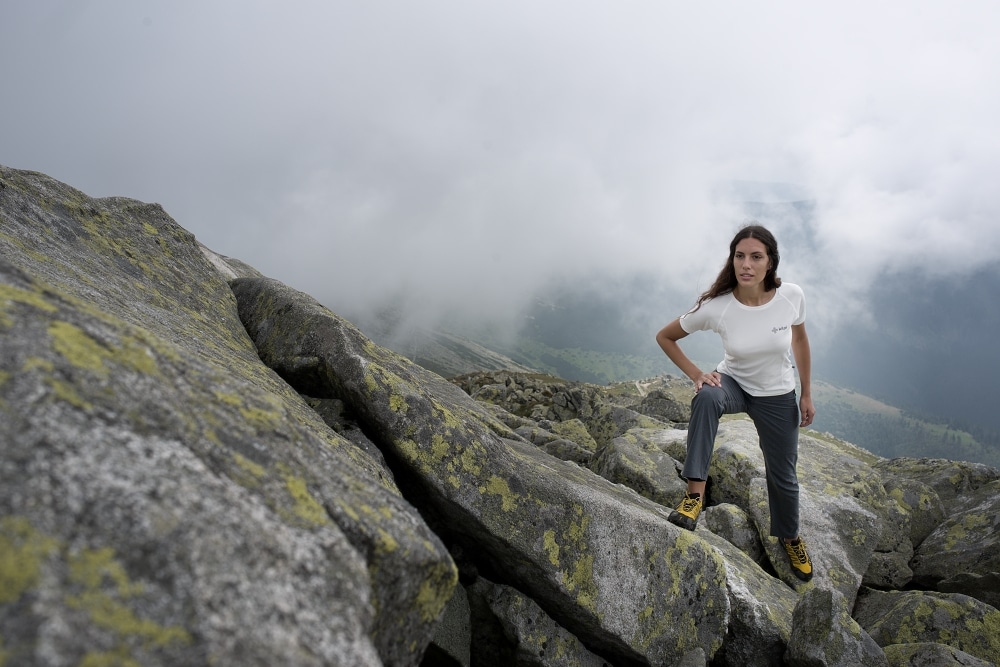
We’ll be exploring brighten-and-darken retouching through the example of this photograph converted from RAW:
In the starting photo you can see right away that the model is poorly visible and the background is quite bright due to the light. Illuminating the model using a flash+softbox combo would have solved this problem during the shoot. But on the other hand, this could make the photo look less natural, which in my opinion would be much worse for this particular photo. The whole photo is built on naturalness, so artificial lighting has no place in it. (But it would be fine for a similar photo in an urban environment.)
So let’s brighten the model and darken her surroundings so that she stands out.
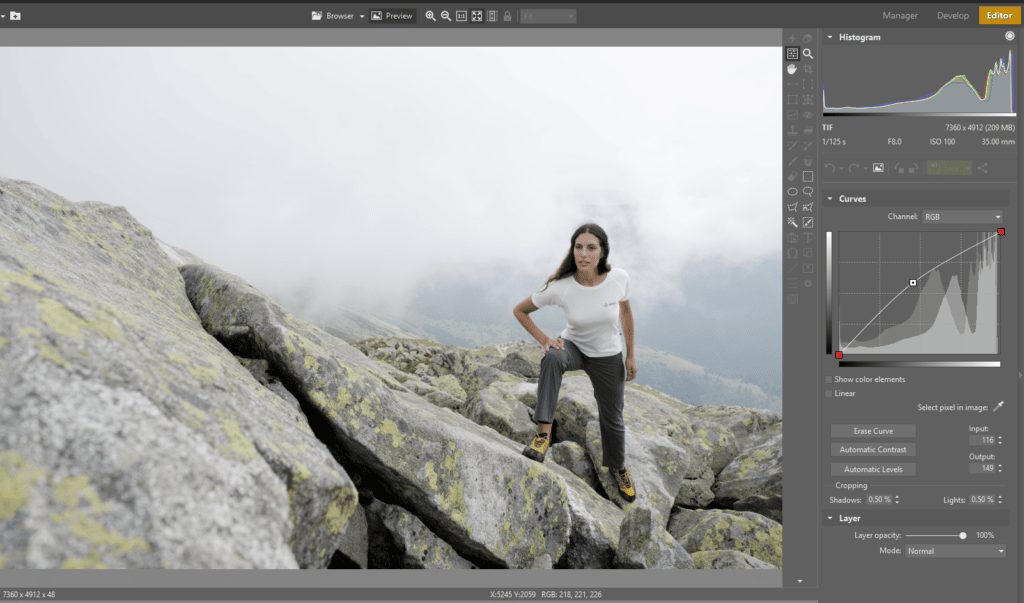
Step Two: Raise the Curve
So there’s the analysis. Now let’s start with the adjustments.
Open Zoner Studio, go to the Editor and brighten the photo using Curves (Menu > Adjust > Curves). “Raise” the curve to brighten the photo.
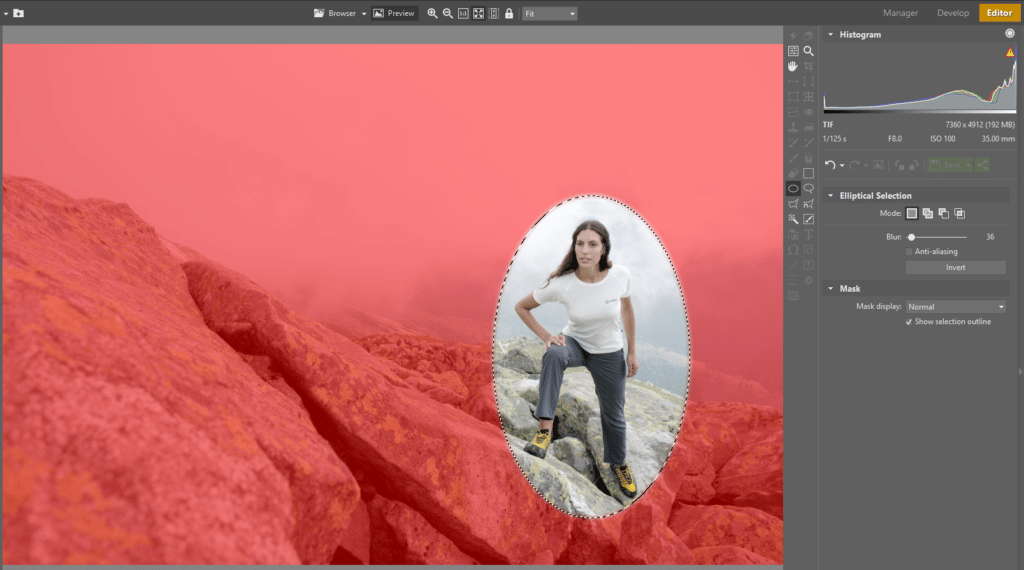
Step three: Select just a part of the photo and brighten that part
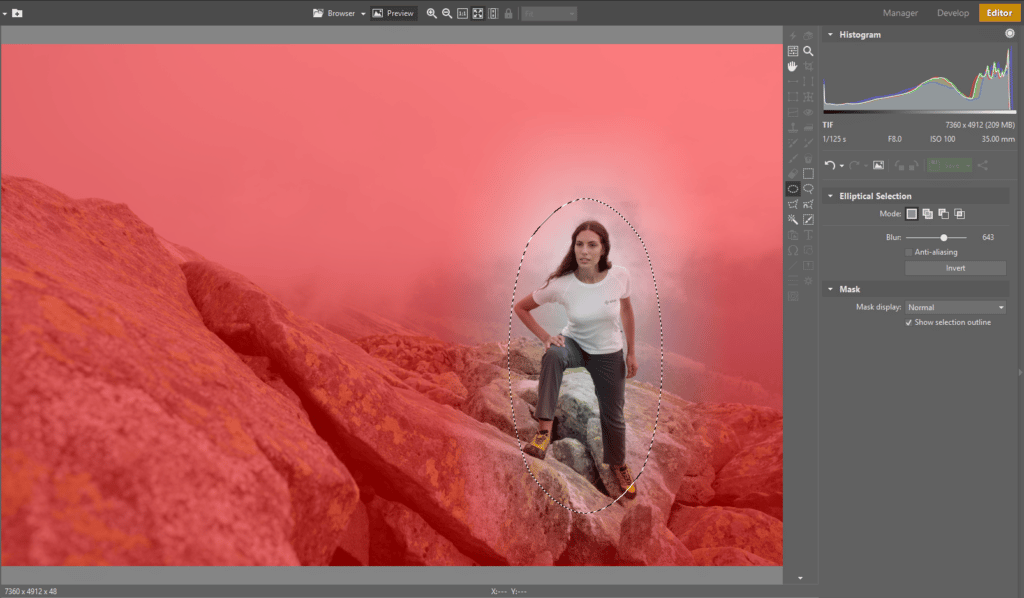
As soon as you have the brightening set up, you need to make that brightening affect just your subject. Do this using a selection, that is, by marking out just one area of the photo to be affected by the brightening. In our example, we’ll use the Elliptical Selection tool for this.
>> Don’t know how to work with selections? Learn how: read Learn to Use Selections—Your Key to Precision Edits.
Here a complication comes in. I don’t want the edges of my selection to be noticeable in the final picture. So I set up my selection tool to give the smoothest possible fade-in between the completely-unselected and completely-selected dots.
Specifically, I use the Blur setting to get this smooth transition. The best Blur level to use will depend on the size in pixels of your photo. In my case, the picture has a size of 7360×4912 pixels, and so I’ll need a rather high Blur. So I’ve set it to 643 pixels, which means that the transition into the selection, from “0” strength to “100” strength, will take place gradually over a “radius” of 643 pixels.
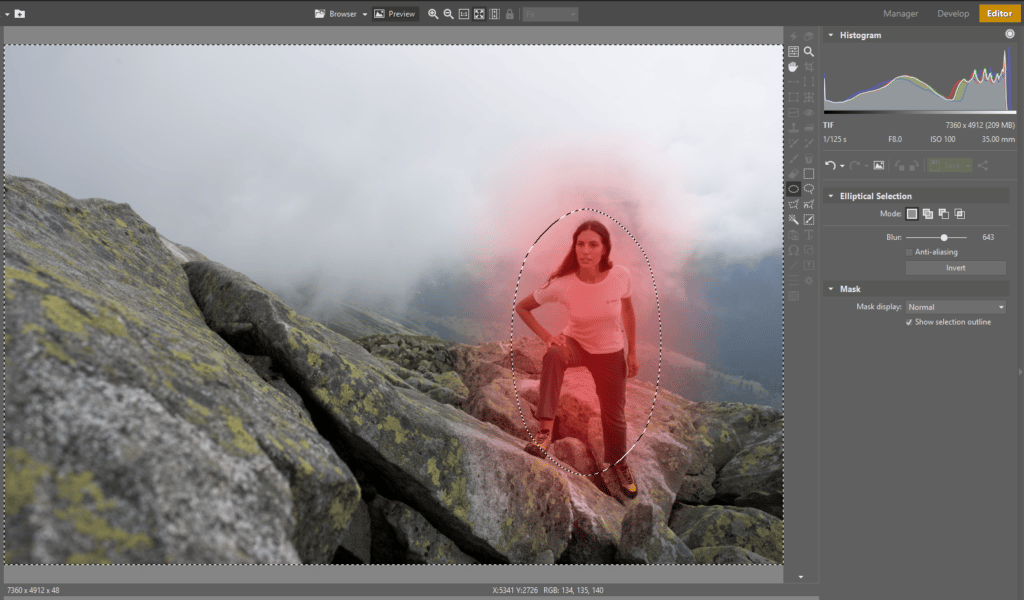
For a selection of this size, that will be enough. If I had set a lower Blur, the transition into the selection would have been smaller and thus less graceful—in short, the selection’s outline would have been easily visible in the final result, as in the screenshot below, which is definitely not what I want.
The best Blur values to use for various picture and selection sizes are something you’ll learn with experience. Just don’t be afraid to experiment, and you’ll learn the ropes naturally. In short, keep trying until you’re satisfied. Click the Apply button for every adjustment like this, or press Esc to cancel the selection.
Step three: Select again and invert the selection
In the next step, alter the photo again using Curves—but this time, darken it instead of brightening. Use the same basic approach—just vice-versa. Make an Elliptical Selection around the model again. Use a strong Blur again. But this time follow up by clicking the Invert button. This inverts the selection so it covers everything except for what was selected before.
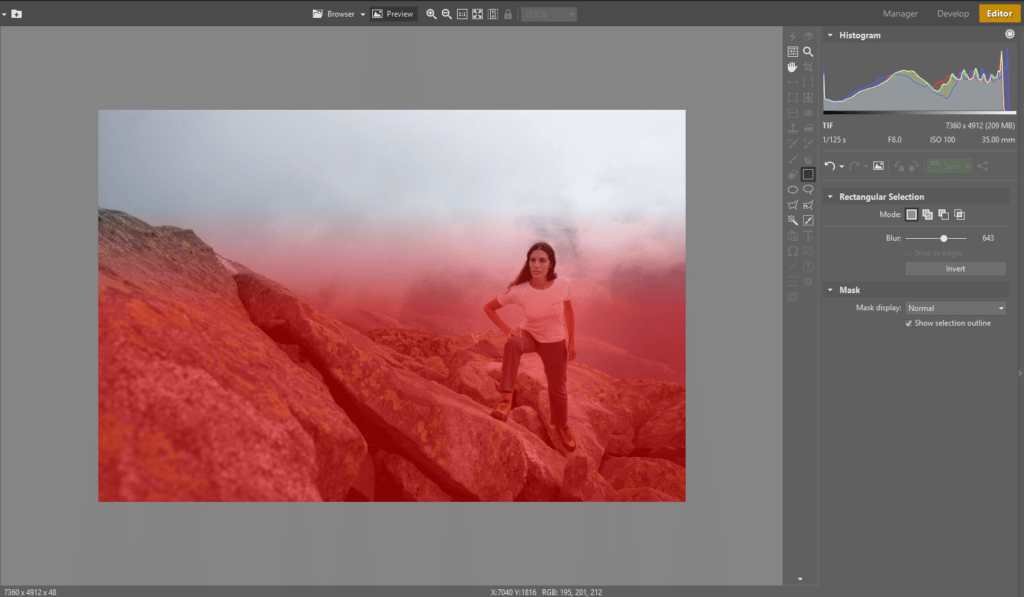
Step five: Darken the sky
As the last step, darken the sky—once again using Curves. The steps are the same, except that instead of the Elliptical Selection you use a Rectangular Selection, which is a better fit for selecting the “shape” of the sky.
Done. Next the Eyes and Lips
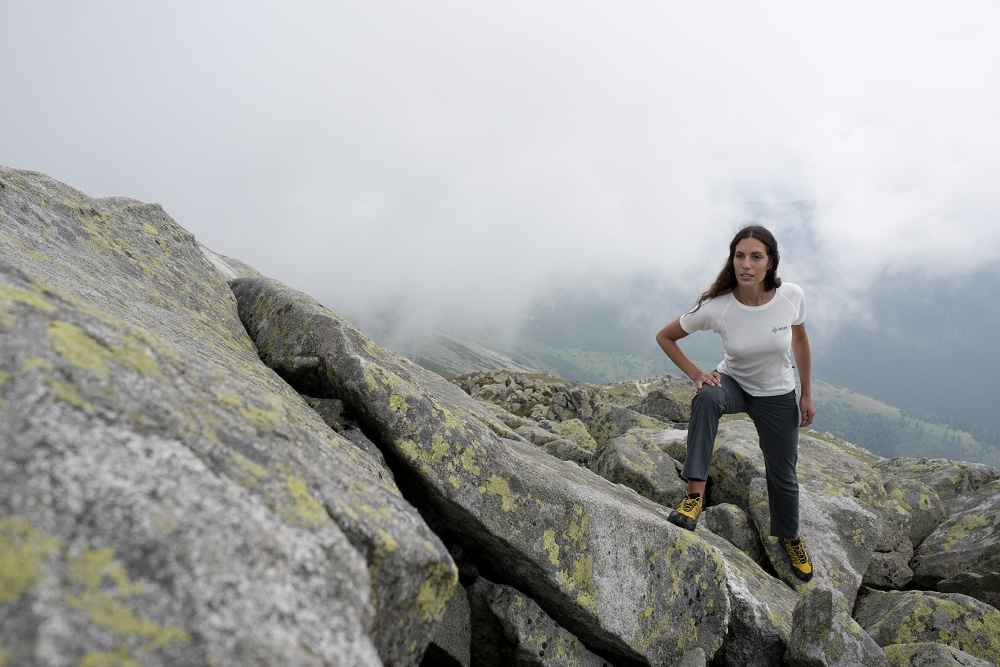
Using these five quick steps, we’ve shown the practical usefulness of selections and of the Blur setting in Zoner Studio. This edit is very simple and effective. Judge the results for yourself.
In a future article in this series we’ll take a look at how to also use this combo to adjust eyes and lips.
Follow the Rules
Take inspiration from our example and emphasize the subject in one of your photos in the same way. Here are a few tips and principles before you start:
Try to make sure nobody can tell your photo was edited. To achieve that, set a good Blur before making your selection.
Use only very mild brightening or darkening. Otherwise it will be obvious that you edited the photo.
Divide up your edits into smaller steps, that is, brighten or darken by only a small amount, but do it several times. This lets you soften and mask your edit even more.
And our last advice: above all, go easy!
Got photos in your collection that could benefit from an edit like this? Download Zoner Studio 7 days for free for this and much more.
Ghadir Chegini
Unfortunately I did not manage to apply these steps to edit a photo. I wanted to darken a very bright sun in my “Sunset photo”. So the sun did not get dark just a little bit of its surrounding. And the the elliptical selection did not disappear So the steps are not for dummys :) any one who can share just short, the steps.
Zoner
The part of the picture with the sun might be blown-out. That means you can’t actually fix it, because the pixels in that part of the picture contain no color information, they’re just white. Isn’t that your case? In that case no darkening would work.
If you need help with anything particular, please write us to support@zoner.com, we’ll be happy to help you.
Ghadir Chegini
thanx for reply. Yes it is.