Capture Night Roads Better With This Short-Exposure Trick
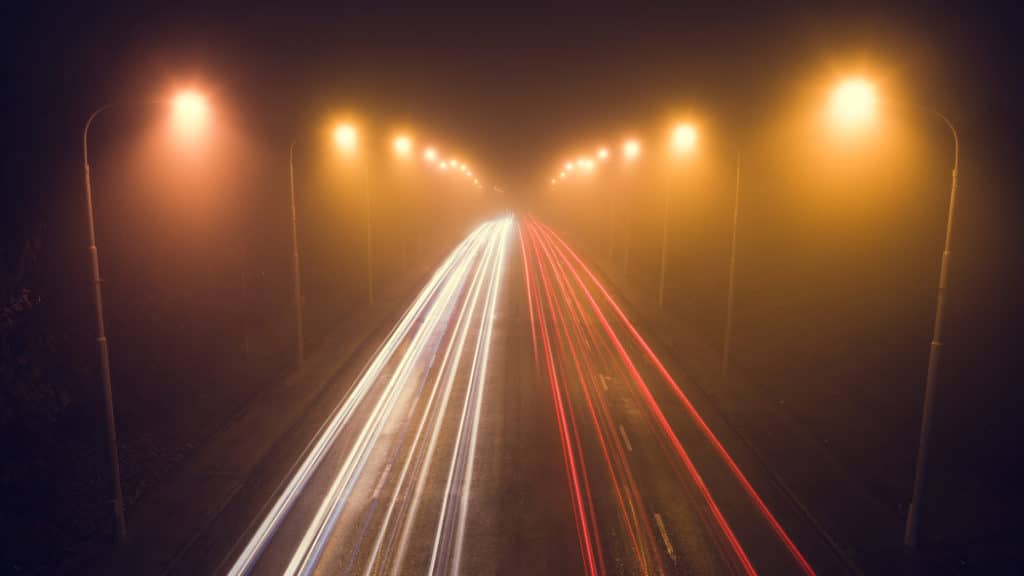
Surely you’ve seen a photo like this before—a night view of a big road in the city, full of light trails from passing cars. It looks like a very long exposure was used. But was it? There’s an alternative approach you can take that gives better control over the results.
In this article I’ll be showing you how to use this alternative, together with recommendations that might simplify your work.
For these light trails to stand out, you need to get a dark background by shooting at night. But there are fewer cars at night, and so it takes a while to “collect” enough cars. That’s unavoidable, but the following trick will make it less painful. The trick is: instead of one long exposure, use multiple short exposures that you then join together.
Here’s how the source pictures looked:

First things first: My “short” exposures were actually rather long—from 10 to 30 seconds. But this is still more convenient than one 15-minute exposure.
There are several reasons for going this route instead of a single exposure:
- It’s easy to find the scene’s overall brightness. You can just take a sample half-minute photo and quickly adjust the aperture if needed based on it. Adjusting a 15-minute exposure is harder.
- Depending on the level of traffic, you may even be able to capture individual cars individually. And then use only the ones that “fit.” In my case I excluded cars that changed lanes during the shot, forming dashed lines of blinkers weaving from lane to lane.
- Even when a car can’t be separated out, there’s still the option of deleting unwanted parts of a source picture. As for how, I’ll discuss that below.
Stationary Shooting
For the shoot itself, you’ll want to follow the usual rules for long-exposure shots. Above all, place the camera on a good tripod and keep it motionless between shots. So ideally you’ll want a remote trigger. If you’re using a DSLR, you’ll want to turn on mirror lock-up to minimize tremors.
Then just start photographing cars and fine-tuning exposure lengths. Nothing’s forcing you to keep the same exposure length each time; each shot can have a different one. But you’ll want to compensate for exposure changes by adjusting the aperture, to keep each shot around the same brightness. All the same if some shots are a little darker or brighter, it doesn’t matter. The final picture will simply be as bright as the brightest of your source photos. The darker ones are still useful for filling in cars.
The exposure times you need depend on the terrain and on visibility. Ideally you want exposures each long enough to capture the whole motion of one car, and short enough that when the next car comes, that will a new shot. Of course if cars aren’t coming one by one, then these two needs clash, and so you’ll have to make compromises. But you can work with these compromises later.
Editing Back Home
You’ve got the source images, and now it’s time to process them. If you have a lot of them, you can choose only the ones that meet your needs and forget the rest. Here’s how to do the editing itself:
Start by opening the first of the pictures in Zoner Studio’s Editor.

Add a photo atop this one by clicking the Add Layer button in the right panel’s Layers section and then clicking Paste From File.
The photo then appears—completely covering the last one, which isn’t what you want. One seeming option is to set the Opacity to 50%, but it’s a poor option, because even though the background remains perfect, each new layer suppresses the light trails in the layers below it, eventually hiding them completely.

It’s much better to leave the Opacity at 100% and set the layer-blending Mode to Lighten. This mode compares the layer with what’s below it and keeps only the brightest pixels.

That way the background will match your brightest source picture, while the light trail from each blended picture will be kept at its full intensity:

Once you’re ready with one source shot, you can go on and add the others one by one until you’re satisfied with your work.
Using Just Part of a Picture
What if one of the pictures contains a incomplete light trail, or blinkers, or other things that won’t look good in your final picture? Take this example here:

The sharply cut-off headlights would be distracting in the final picture, as you can see below:

For better results, use the same approach as usual when pasting in a source-shot layer, but before moving on to the next one, select unwanted spots with the Selection Brush and delete them by pressing the Delete key. (To activate this brush, press Shift+Q, or visit Selection Tools in the right panel and then click Selection Brush.)
Naturally just erasing the end of a trail fully would only create a new end, so instead use the brush very carefully to create a gradual transition from a full trail to a fully deleted trail. Ideally in your brush parameters you’ll have a high diameter and blurring, and a low density.

This gives you a much better look:

This isn’t an ideal example—with long enough exposures, you can avoid this problem right in your sources. But it’s a good example of how to fix any similar problems you find in your source photos.
The Grand Finale
After blending the source photos, you’ll get a road with a number of cars driving down it:

This doesn’t have to be the end. If you want to be thorough, use the Healing Brush (J) and the Clone Stamp (S) to remove distracting elements such as wires above the road and advertisements in the surroundings. Here I also tried to soften the yellow tone at the last minute and make some minor color edits, so my final result was like this:

I could have been more careful; looking back, I see some mistakes in my creation. I’m sure you’ll do a better job! And these tips might inspire you to try something similar in a completely different project of your own.

There are no comments yet.