Choose Your Depth of Field Wisely
Even with an extremely fast lens, the smallest possible aperture isn’t always the best choice. There are so many special cases out there in the real world—each one with its own optimum aperture.
We’ve covered depth of field in portrait photography in a previous article. Today we’ll look at aperture and depth of field for several other genres—landscape, product, and macro.
Landscape
Landscape photography is among the most common genres, perhaps second only to portraits. Landscapes need large depth of field. Generally speaking, the smaller the focal length you use, the larger the depth of field. For landscapes, wide and ultra-wide lenses are generally used. With such small focal lengths, you might think that aperture plays almost no role:
Canon 5D Mark II, Canon EF 16–35/2.8 II, 1/1600 s, f/2.8, ISO 100, focus 16 mm
This is an extremely wide lens, and so practically everything is sharp even with a minimal f number. And yet even still, it’s beneficial to go higher. First, this is the lens’s optimum setup (since at smaller values, lens defects appear), and it makes the picture even sharper. Second, to make the picture more interesting, it can be good to include an object in the foreground, and to do that, your depth of field needs to be truly huge:
Canon 5D Mark II, Canon EF 16–35/2.8 II, 1/320 s, f/9.0, ISO 100, focus 16 mm
Despite the fairly high f/9 aperture, the background is still slightly blurred. But you could easily use e.g. an f/16 aperture here.
For comparison, when focusing on something so nearby, an f/2.8 aperture gives a significantly different (though still interesting) picture:
Canon 5D Mark II, Canon EF 16–35/2.8 II, 1/3200 s, f/2.8, ISO 100, focus 16 mm
Nevertheless, for a classical landscape photo, you want it as sharp as it can be. Connoisseurs will want to learn the “hyperfocal distance” for their lenses and their precise (or at least approximate) focal length, to get the largest depth of field possible.
Achieving Blurring with Small Sensors
For full-frame-sensor cameras, getting deliberately blurred backgrounds is easy. But most cameras’ sensors aren’t that large. If you want to make photographed objects pop out from their backgrounds as if you had a full-frame, there are two ways that you can at least roughly achieve it: using a larger focal length (e.g. a telephoto lens) or moving closer towards the photographed object without changing the focal length.
When you’re standing far back from a landscape, blurring is hard to achieve (about all you can do is stitch together a lot of photos taken using the Brenizer method), but for closer objects, background blurring is quite possible.
Canon 40D, Canon EF-S 55–250/4–5.6, 1/1000 s, f/4.5, ISO 800, focus 149 mm
Even when you’re blurring the background, you should take your surroundings into account and incorporate them into the picture in a way that makes it clear where the main subject resides and what role it plays there. The blurring itself can help you highlight a specific detail in a scene:
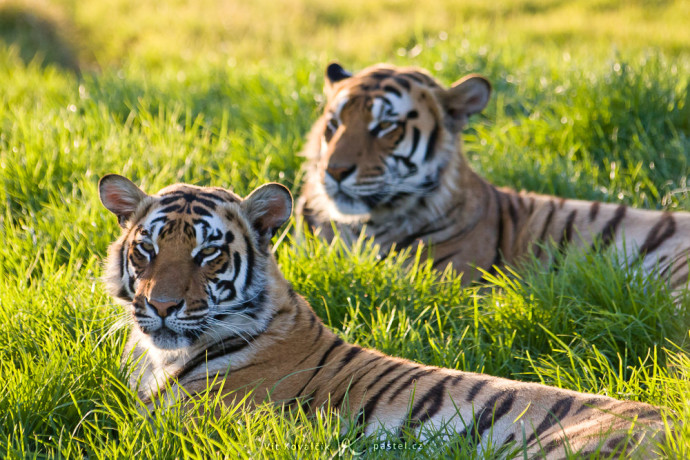
Canon 7D, Canon EF 50/1.8, 1/320 s, f/3.2, ISO 100, focus 50 mm
This is one possible look you can use for travel photographs and reportage photos from events—often you want to capture a specific object and put it “subtly” in the context of its surroundings.
Product Photography
Towards the opposite end of the scale is product photography. You want photos in e.g. an e-shop to be as sharp as possible. Here people reach for f/8, f/16, and even higher. Even despite this, occasionally not all of a product is completely sharp. This problem is especially evident for small products, because small focal lengths mean small depth of field:
Canon 40D, Canon EF-S 55–250/4–5.6, 1/200 s, f/16, ISO 100, focus 194 mm
The solution for this problem is “focus stacking,” that is, taking multiple pictures from a tripod, with each of them being focused a few centimeters or millimeters apart. Certain specialized software (such as Helicon Focus) can then precisely align the photographs and pick the sharpest areas out of the individual photos and join those into one picture.
Of course even for products you can do compositions that deliberately use a smaller depth of field—but these are rather special cases.

Macro
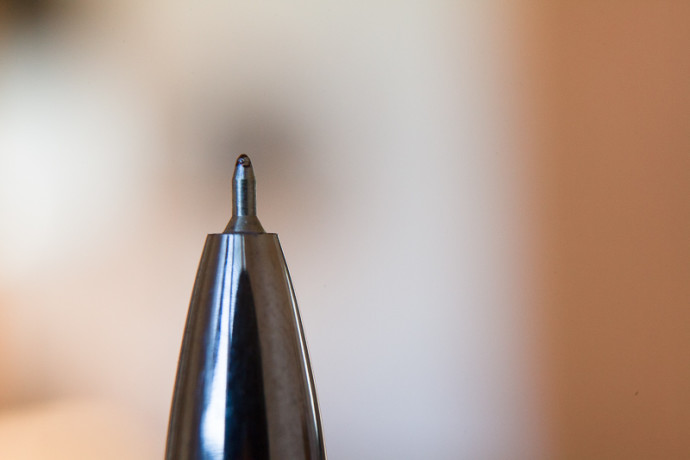
Macro photography puts us at the absolute extreme. Here the depth of field is minimal—often only one millimeter!
But you can still work with higher f numbers, or focus stacking. Even with these, a blurry background is practically inevitable. But that’s not really a negative; it’s just something that you need to take into account.
In the picture below, the tip of the pen is sharp, while the rest of the room in the background is (inevitably) very blurry.
A Creative Approach
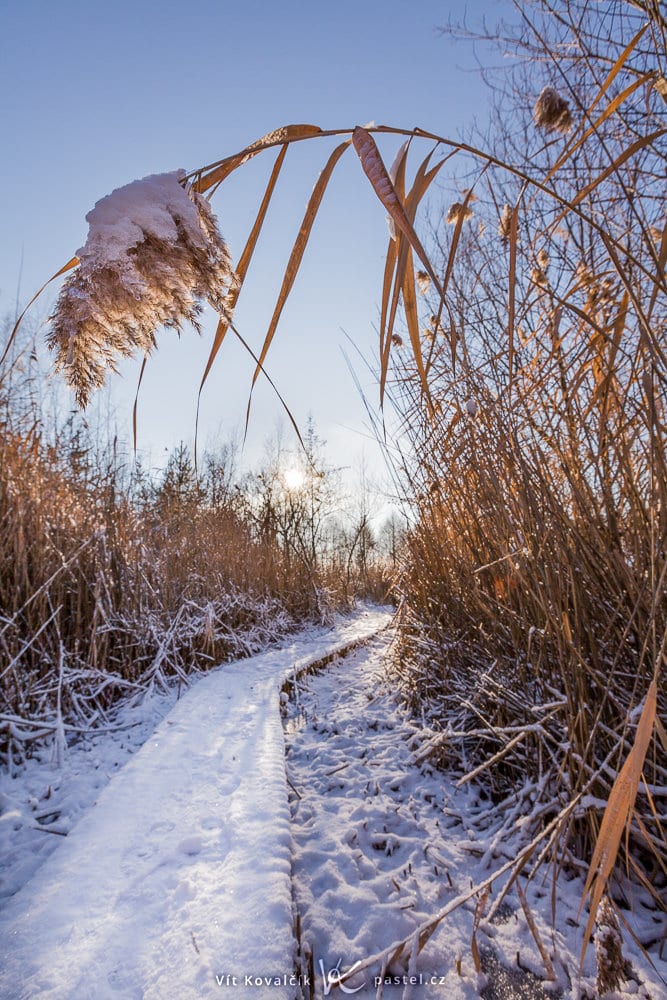
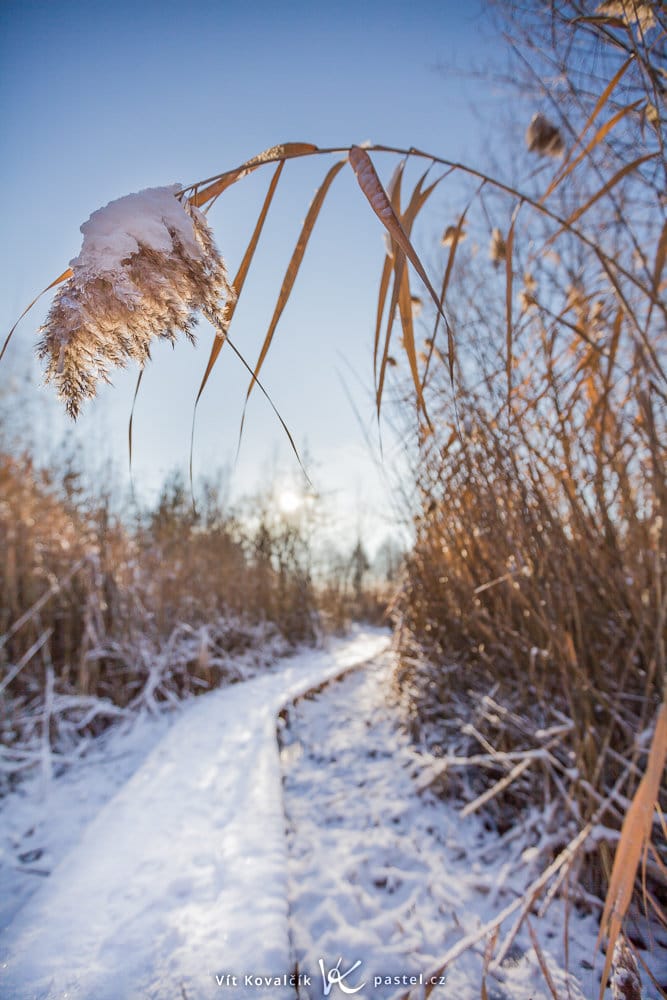
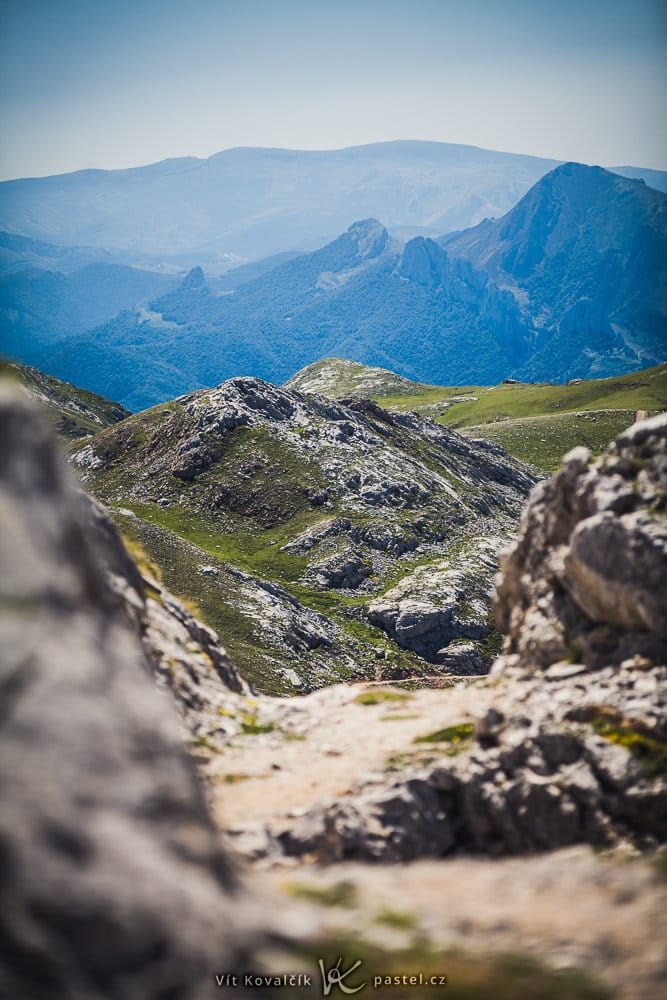
Although the examples above show what’s typical for this photographic genre, there’s always room for your own approach and for experiments that flaunt established rules. Even though, for example, we tend to imagine a mountain photo as sharp through-and-through, you can put a deliberately blurred area into the foreground of such a picture to give it depth:
So take this article as a start, not the end. Whenever a creative solution occurs to you, definitely explore it. Experiments can sometimes fail, but in our digital age, creative photo experiments are practically free.
hfgr
Excellent article concise and to the point.
Zoner
Thank you very much!
Kadir Muhtar
Are you a Canon Seller? İsn’t there any other camera in this world but Canon! Are they paying you wor this oiling works!?
Zoner
Hello Kadir, there are sure many cameras. But since author of this article uses Canon, we mention Canon in the EXIF data.