Discover the 3 Keys to Good Exposure: The Exposure Triangle
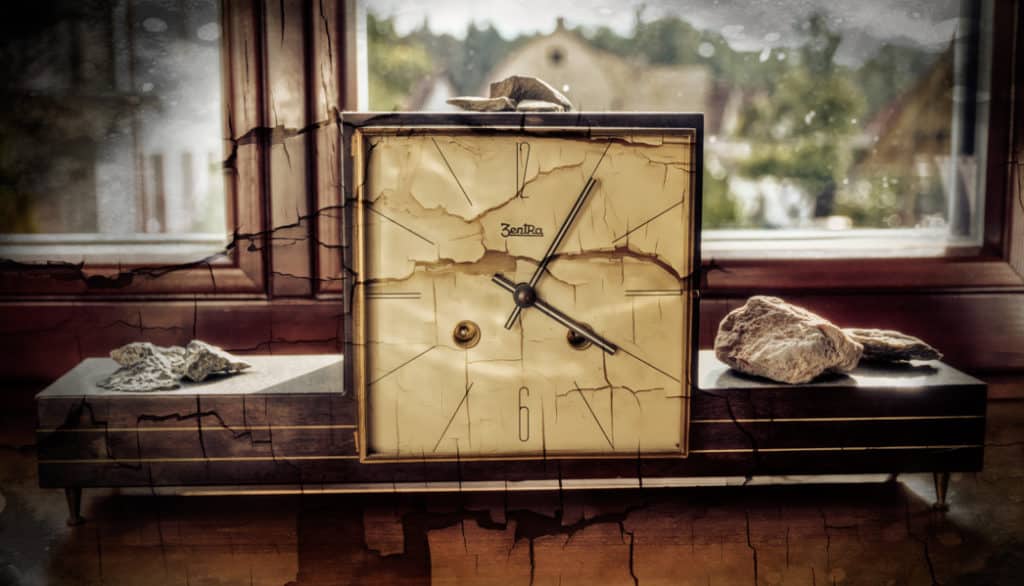
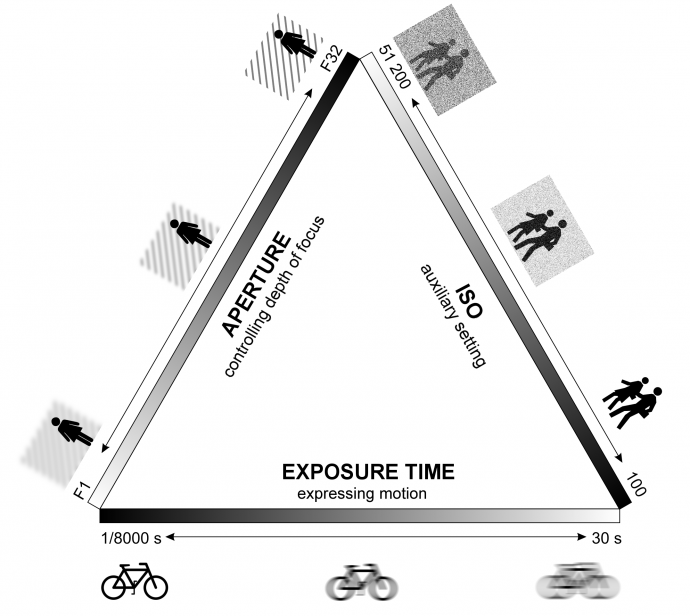
In our previous article on exposure settings, we introduced the two most basic exposure settings—aperture size and shutter speed. They directly affect how much light falls onto the camera’s digital sensor. There are always multiple ways to combine shutter speed and aperture size to get the correct exposure. Which combination you should choose depends on your creative goals. The relationship between time, aperture, and also the third exposure parameter, ISO, is often called the “exposure triangle.”
The “Sunny 16”: A Basic Exposure Guideline
Imagine you’re exposing an outdoor scene at high noon on a sunny day. Under these light conditions, the basic exposure guideline called Sunny 16 applies. The Sunny 16 says that on a sunny day at high noon, you should set the aperture to f/16, and the shutter speed to one over the ISO. In other words, with ISO at 100 for example, you’d use 1/100 s. Although, since the basic range of exposure times doesn’t contain a 1/100 s speed, you’d actually use the closest available value—1/125 s.
If you decide for some reason to change one exposure setting, then to keep the correct exposure, you also need to change one or both of the other exposure settings. Set your chosen exposure as the default with a value of 0 EV, and then read on for a look at the basic values for the exposure parameters you can work with.
Aperture
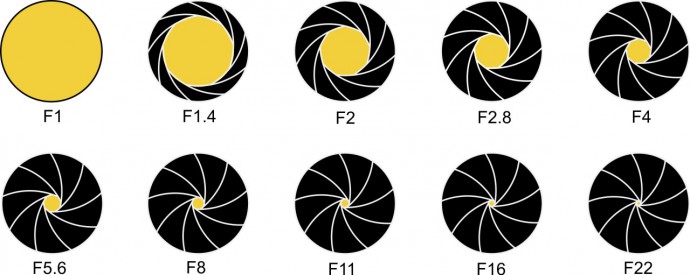
The f-stop scale on the lens describes the relationship between the real focal length and the diameter of the aperture that the light flows through. That’s also the reason why a larger f-stop means a smaller aperture. The larger the f-stop, the less light the lens lets through. The basic set of f-stop values is:
| EV | +8 EV | +7 EV | +6 EV | +5 EV | +4 EV | +3 EV |
| aperture | 1 | 1.4 | 2 | 2.8 | 4 | 5.6 |
| EV | +2 EV | +1 EV | 0 EV | -1 EV | -2 EV | |
| aperture | 8 | 11 | 16 | 22 | 32 |
With every 1 EV increase to the f-number (reducing the exposure by 1 EV), the surface area of the hole that light flows through is halved.
Time
The exposure time (the shutter speed) is the amount of time during which the digital sensor is exposed to the effects of light coming through the lens. The basic set of exposure times is:
| EV | -5 EV | -4 EV | -3 EV | -2 EV | -1 EV | 0 EV |
| time | 1/4000 s | 1/2000 s | 1/1000 s | 1/500 s | 1/250 s | 1/125 s |
| EV | +1 EV | +2 EV | +3 EV | +4 EV | +5 EV | +6 EV |
| time | 1/60 s | 1/30 s | 1/15 s | 1/8 s | 1/4 s | 1/2 s |
| EV | +7 EV | +8 EV | +9 EV | +10 EV | +11 EV | +12 EV |
| time | 1 s | 2 s | 4 s | 8 s | 16 s | 30 s |
To reduce exposure by 1 EV, halve the exposure time.
ISO (Sensitivity)
The ISO value sets how strongly the light-sensitive cells in the camera’s digital sensor react to light. The basic set of ISO values is:
| EV | 0 EV | +1 EV | +2 EV | +3 EV | +4 EV |
| ISO | 100 | 200 | 400 | 800 | 1,600 |
| EV | +5 EV | +6 EV | +7 EV | +8 EV | +9 EV |
| ISO | 3,200 | 6,400 | 12,800 | 25,600 | 51,200 |
To reduce exposure by 1 EV, halve the ISO.
Changing one exposure setting demands changing the others
When you want to use a short exposure time like 1/500 s, this on its own means underexposing by 2 EV. To set the correct exposure you’ll need to either change the aperture by +2 EV or change the ISO by +2 EV, or perhaps change the aperture and ISO by +1 each. The following table shows how to choose the correct settings.
| Time | Aperture | ISO | EV | |||
| 1/125 s | 0 EV | F16 | 0 EV | 100 | 0 EV | 0 EV |
| 1/500 s | -2 EV | F8 | +2 EV | 100 | 0 EV | 0 EV |
| 1/500 s | -2 EV | F16 | 0 EV | 400 | 2 EV | 0 EV |
| 1/500 s | -2 EV | F11 | +1 EV | 200 | +1 EV | 0 EV |
Keeping the analogy we mentioned in our earlier article, where the lens and the shutter are like a water tap and the sensor’s light-sensitive cells are like glasses you’re filling with water, in the first situation (the second line of the table), you’ve reduced the time spent filling the glass with water down to 1/4. That’s why the “water speed” had to be quadrupled to fill the whole glass. In the second case (the third row of the table), you left the water speed the same, and only filled up the glass one-quarter of the way. After that, you multiplied the amount of water in the glass by four. In the third case (the fourth row of the table), you doubled the water speed, filling the glass halfway, and then multiplied the amount of water in the glass by two.
All of the combinations above lead to correct exposure. All of the photos have the same brightness distribution (the photos have identical histograms). The first photograph, taken with a speed of 1/500s, will have a smaller depth of focus than the one with the basic exposure, due to the smaller aperture used. The second photograph will have more noise due to the higher ISO used. The third will be a compromise between these two.
The “in-between” exposure settings
Most modern cameras let you work both with the basic set of f-stops/ exposure time/ISOs and with intermediate values in between them. Most commonly these are the thirds in between; sometimes they are the halves. For the sake of learning exposure basics and mastering exposure more quickly, you should skip these and work with the basic values only. Those are easier to calculate in your head.
How aperture and time settings affect your photos
While aperture and time directly affect how your photo looks (they are your creative tools), ISO can give you more breathing room in your work with aperture and time.
The aperture used affects the depth of focus, that is, what range is sharp in the photo, and what is too close or far away to still be sharp. Through careful use of depth of focus, you can make the subject stand out from the background, so you can avoid the need to crop out the background just to get it out of the way.
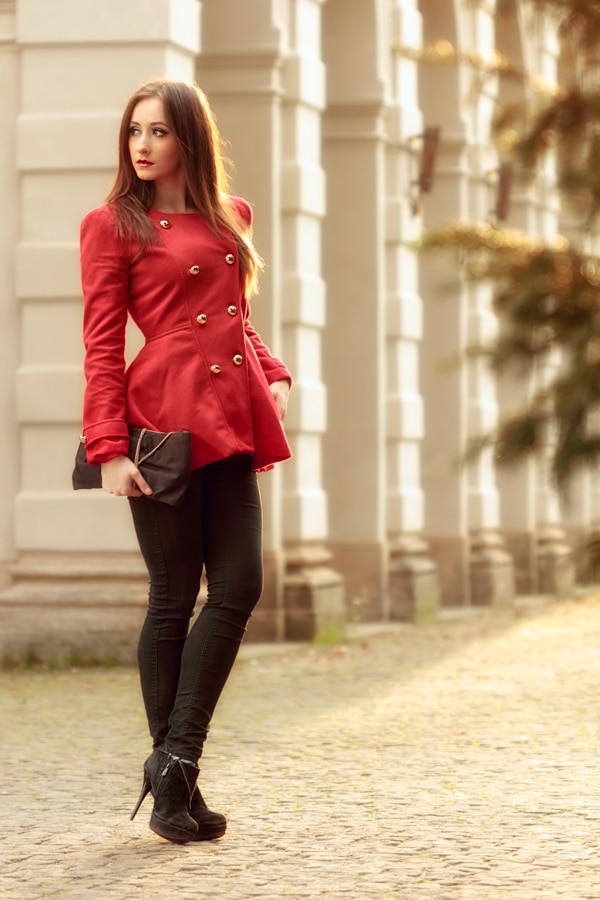
By using a large aperture and a long focal length, you can get a small depth of focus. In this photo, the model is clearly separated from the background, but the background is still recognizable.
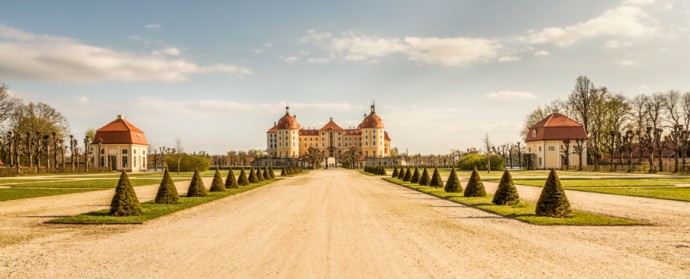
The wide-angle lens and short focal length used here, along with the tight aperture, leave this picture sharp from front to back.
With a suitable choice of exposure speed, you can express motion in a photo. If you want to freeze all motion in a photo, use a very short exposure time (1/125 s or shorter). To emphasize motion, on the other hand, use a long exposure time. That will make the motion turn into a blur. The subject can be moving against a static backdrop (a blurry stream of water, lines of light from car headlights in night photos, etc.), or you can use panning to get a relatively sharp subject against a blurry background. In our example, during the exposure, the lens smoothly copied the motion of the car.
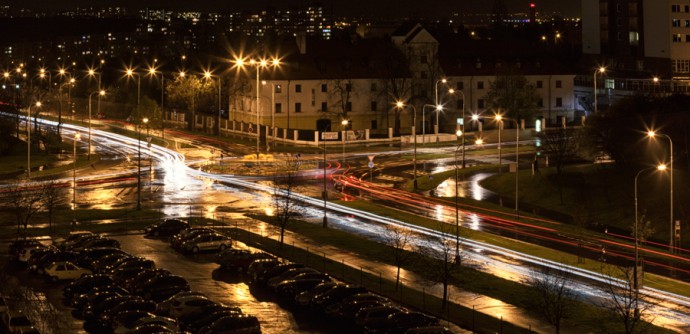
By setting a long exposure time, the cars driving by can be turned into a stream of light, emphasizing the traffic at this crossroad.
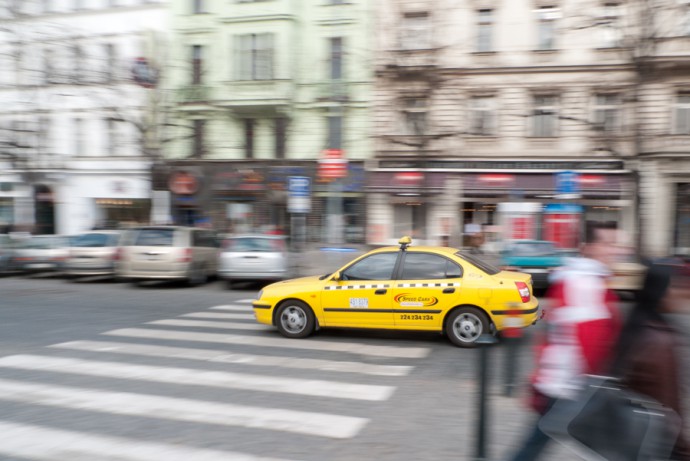
Expressing motion through panning. The lens actively follows the car’s motion during the exposure. That leaves the car sharp relative to its surroundings.
Usually, ISO only comes into play when you want to use a shorter time than you can achieve even with a fully open aperture. The classic example is photographing a static object in dim light without a tripod. If you use long exposure times when shooting by hand, you’ll get blurred pictures due to the camera moving during the shot. Another common reason for using a high ISO is because you want to freeze motion in a photo, and so you need to use a shorter exposure time than even the widest aperture could give you.
Using a high ISO does have its price. Your pictures will have reduced quality from a technical standpoint. They will have digital noise and reduced dynamic range.
Exposure bracketing
There’s one feature in advanced cameras that we should mention here since we’re talking about exposure. That feature is exposure bracketing. It makes the camera expose the same picture multiple times, with the exposure shifted by a set amount each time. Typically these are three shots at 0 EV, -1 EV, and +1 EV. Some cameras let you create a long series of shots and let you choose by how many EV the shots will differ. In the era of shooting to film, this function was very useful for even just the goal of getting one good shot. In situations where it was hard to get good exposure, the photographer created multiple exposure variants, and when developing the film, they could choose the best one.
In our digital age, where we can check a picture’s histogram to make sure it was correctly exposed before we even press the trigger, exposure bracketing is mainly used to get good pictures even when a scene has a high dynamic range. The multiple shots from the bracketing are joined together in a digital darkroom into one final picture.
Conclusion
To get full control over your exposure, work with all three exposure parameters: aperture, time, and ISO.
- Use your choice of aperture and time to achieve your creative goals.
- By changing the ISO you can help yourself out in situations where due to poor light, you wouldn’t normally be able to use the aperture or time you want.
In every situation, there is more than one combination of exposure settings that gives correct exposure. If you change one setting to help achieve your creative goals, you have to change one or both of the other settings to maintain correct exposure. When you are using your camera’s semi-automatic modes, the camera is choosing some of these settings for you. When you are using its automatic mode, the camera is choosing all of them.
Want to Learn More About Exposure? Read our other articles on this topic:
Learn What Exposure Is and How It Shapes Your Photos
Discover the Three Keys to Good Exposure: ISO
Mastering Colors in Photography: White Balance
Jerome H Horwitz
I haven’t read this entirely and thoroughly, but I noticed one significant difference between the article and my lenses, my cameral and lens documentation (Canon), and my lens knowledge: The article refers to lens apertures as being F1, F1.4, F2, F2.8, etc.
I have always seen them referred to as f/1, f/1.4, f/2, f/2.8, etc. Note that the “f” is always lower case and is always followed by the “/”. This correctly provides the relationship that indicates this is a fraction with “f” (the focal length) in the numerator and the indicated divisor in the denominator.