Use AI Close-ups and Autostacking To Help You Choose the Best Photo
Being able to snap as many pictures as you want is great. But then you have to choose the best photo from hundreds of very similar ones. Autostacking and AI Close-ups make choosing the best photo easier.
Sorting through photos from an entire shoot can be very time-consuming. That’s why you’ll love the new features that make sorting your photos easier and can save you time.

Autostack similar photos
The Autostacking function groups similar photos together. Autostack also groups photos taken in continuous mode, using exposure bracketing, or panoramas.
You can find Autostacking in the Navigation toolbar next to Display and Sorting. Click the Autostacking icon to open Autostack options. This is where you choose which photos you want to stack.
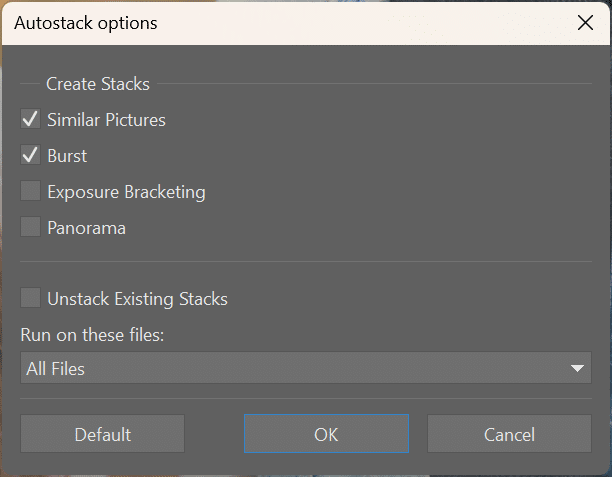
You can autostack the files in the folder you are in, or you can select All Files Including Subfolders.

If you want to expand a stack to see the photos it contains, click the number in the left corner of the stack.

Select multiple files
Once your photos are stacked, it’s time to choose the best photo.

Many ZPS X users use the Ctrl key to select photos in the Browser or Filmstrip and then accidentally let go of the Ctrl key, click somewhere else, and lose their selection. With the new Multiselect function, you won’t lose your selection again.
Enable the Multiselect function on the right side of the Navigation toolbar, next to delete. Once enabled, click the photos in the Filmstrip that you want to select, even without holding the Ctrl key.

You can also enable Multiselect by clicking the square in the top left corner of the photo in the Filmstrip.

You can also add photos to your selection using the spacebar. Use Esc to deselect.
Use AI to choose the best photo
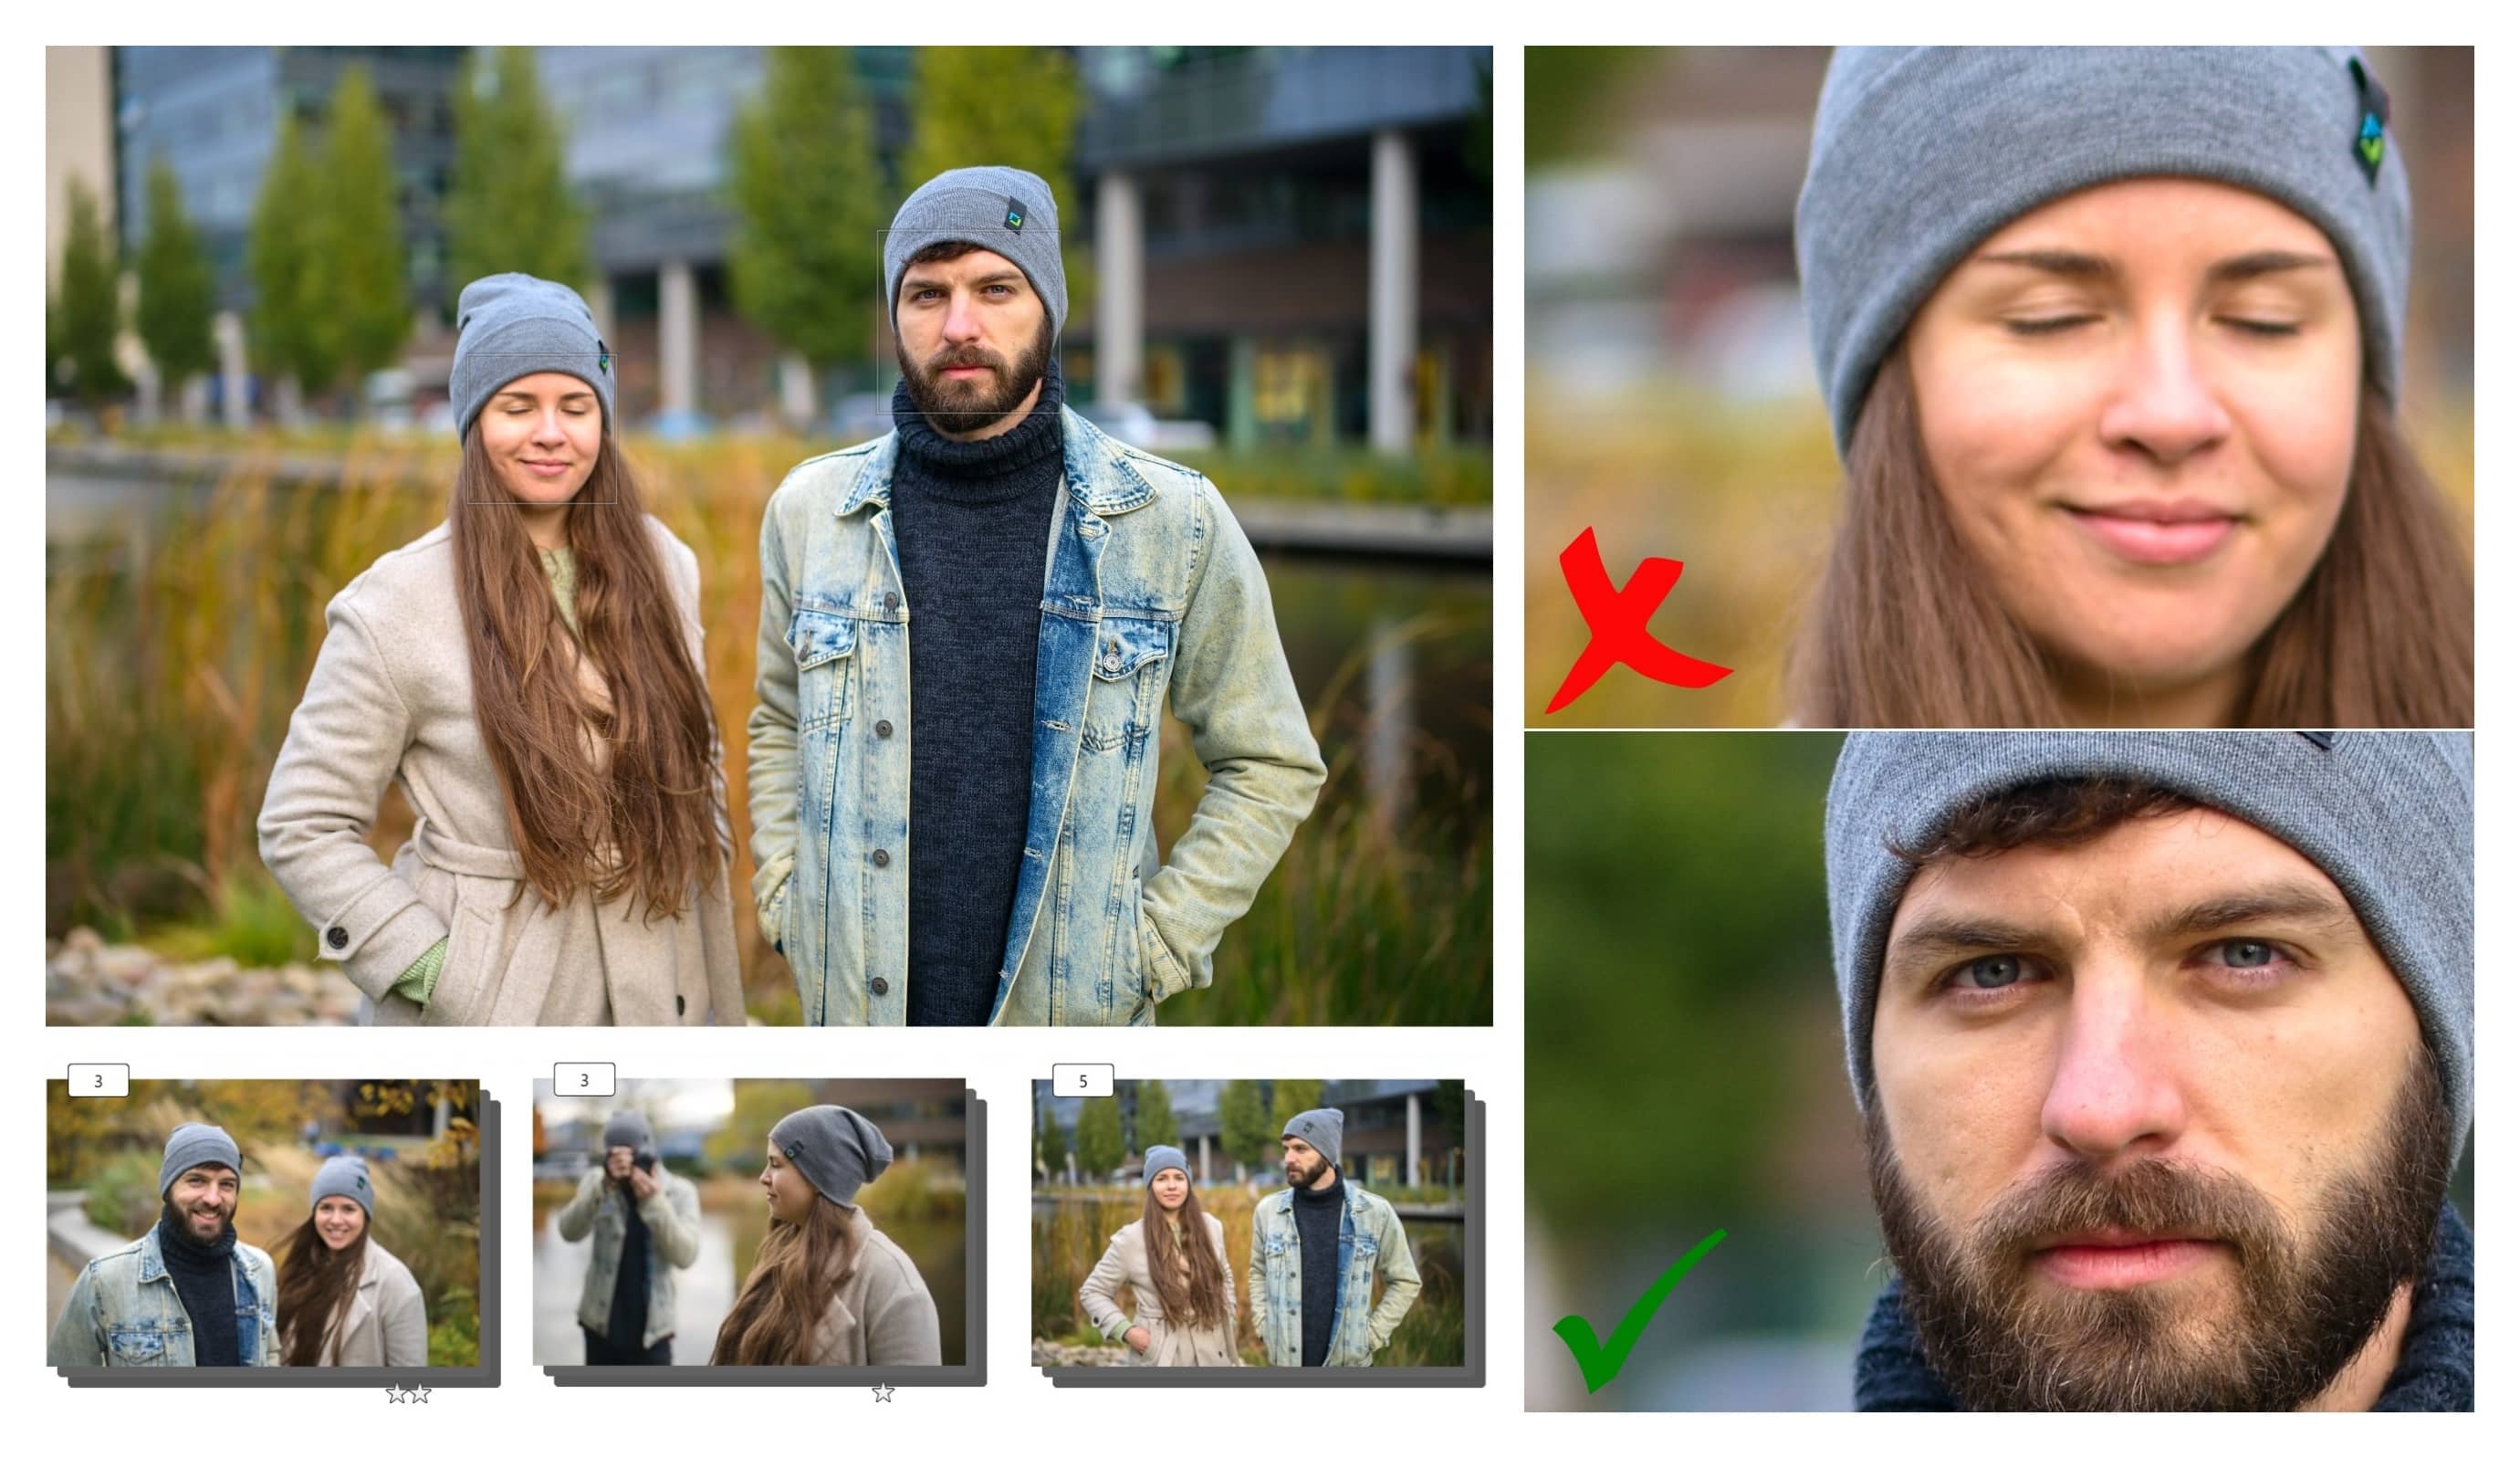
Your photos are stacked and you’ve selected photos in the Filmstrip that you want to look at more closely. AI Close-ups can help by detecting faces, animals, landscapes, and other important details. You can then view them close up. Click AI Close-ups in the top middle bar to enable this feature.
After enabling AI Close-ups, all the faces in your photos will be zoomed in. The faces from one photo appear next to each other.

If you click a specific object, you see the photo previews of that object. This way, you can see all the faces or other details of your photos and choose the best one.

Don’t forget to use stars to rate the best photo. This makes it easier to find it in the series. Once you’ve chosen your photo, you can start editing. For example, you can use AI Presets designed for editing faces.

Download Zoner Photo Studio X free for 7 days and get your photos organized using Autostacking and AI Close-ups.
There are no comments yet.