Edit My Photo: Fine-Tuning Night Photography
A great photo can still have issues due to camera equipment limitations. In this article, we’ll learn how to fine-tune these types of shots to perfection. Sometimes, all you need to do is remove digital noise or issues caused by a longer shutter speed or wide-open aperture. Or, do adjustments that put your own unique stamp on the photo. Even subtle adjustments can make a big difference.
In this article, you’ll learn how you can enhance nighttime cityscape photography. This particular photo doesn’t have any serious issues that require major editing, but needs some fine-tuning to make it even better.
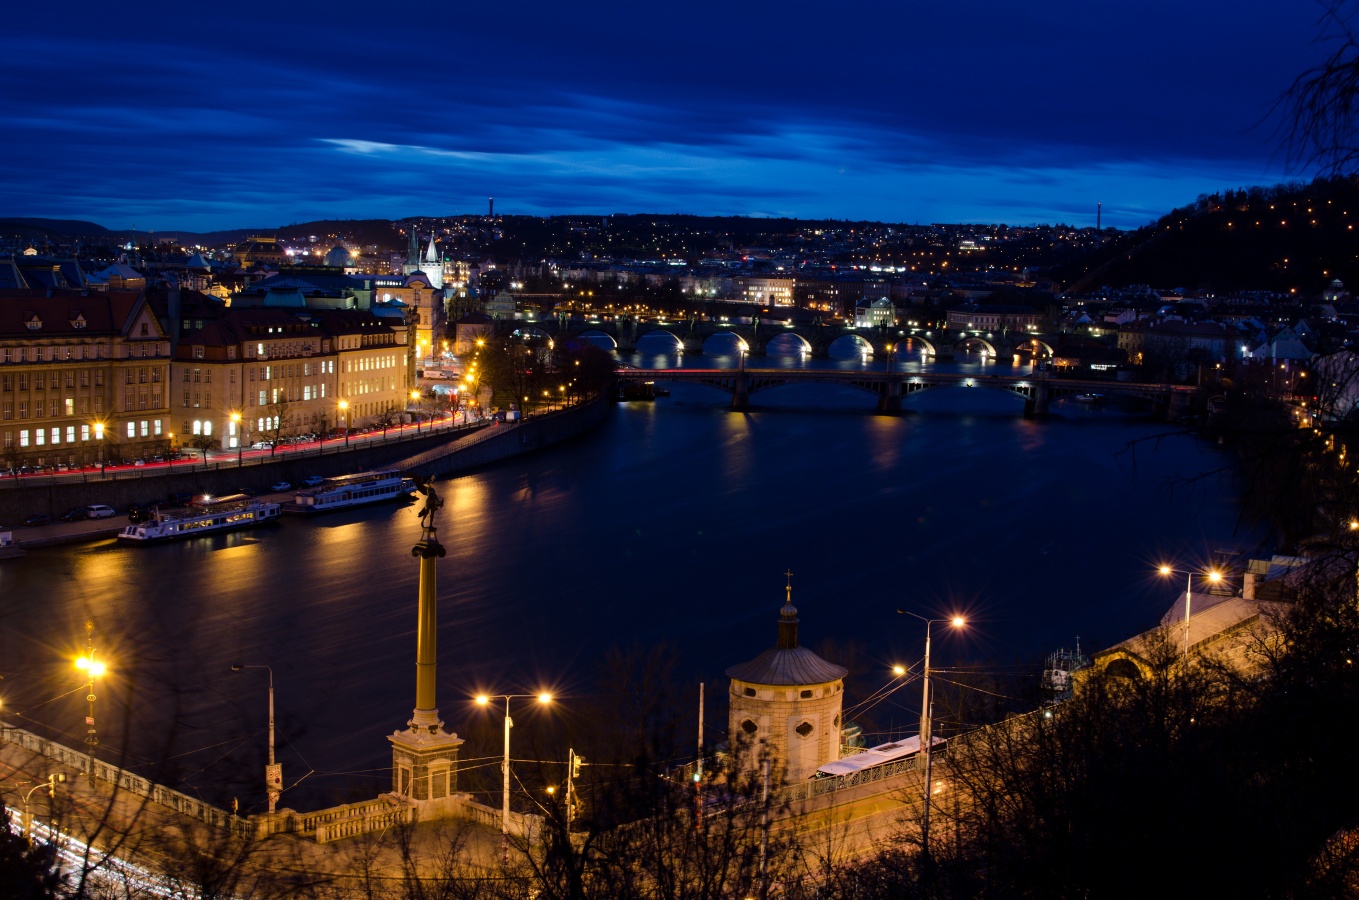
Picture overview
This photograph is well-exposed. The photographer used a relatively long shutter speed of 20s to blur the river and sky. A slightly high f-number of f/9.5 helped sharpen the scene and give the highlights a “starry” effect. I would probably choose an even higher f-number—both longer shutter speeds and higher f-numbers are desirable for this type of photography.
This is a good picture, technically speaking. There are only a few minor issues due to the longer shutter speed and relatively high f-number. Then, it just needs a few additional adjustments to give the photo a unique style.
Generally speaking, this is how photo editing should be. Photo editing software is not meant to fix pictures that were poorly taken, but rather to put the finishing touches on good pictures.

You will need the following Zoner Studio tools for editing: Adjustments—Crop (C), Healing brush (J), Clone Stamp (S), Selection—Select all (Ctrl+A), Effects—Grayscale (Ctrl+G)
First step: Camera and lens profiles
The Develop module is primarily used for processing RAW images and non-destructive editing of JPEG images. You can also add specific profiles for your camera and lenses in the Develop module. This allows you to more accurately set the color and tone profiles of your RAW photos and eliminate some optical lens defects.
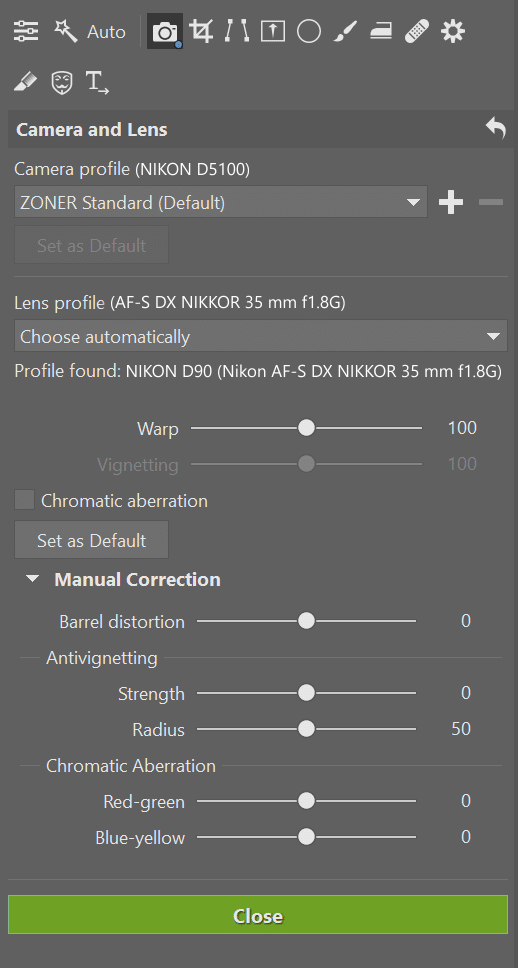

Selecting a profile automatically corrects distortion, chromatic aberration, and vignetting.
Step two: Editing in the Develop module
Once the camera and lens profiles are added, you may notice decreased barrel distortion caused by using a wide-angle lens.
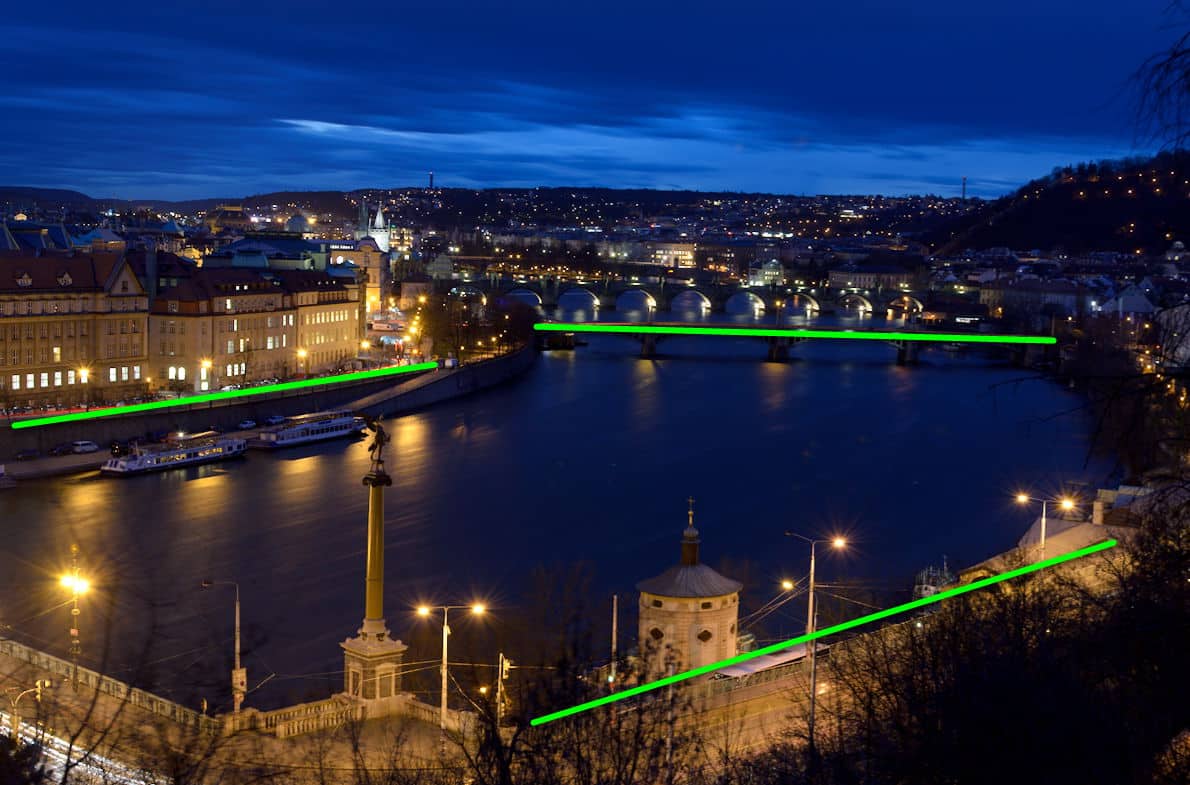
Go to Manual Correction and move the Barrel distortion slider to -30. This will reduce any further barrel distortion. Next, go to the Crop and Rotate (C) tool and change Crop Marks to Grid. Crop marks give you visual control over the vertical and horizontal lines in your photograph. Set Rotation to −1.0 to straighten the photo’s horizon.
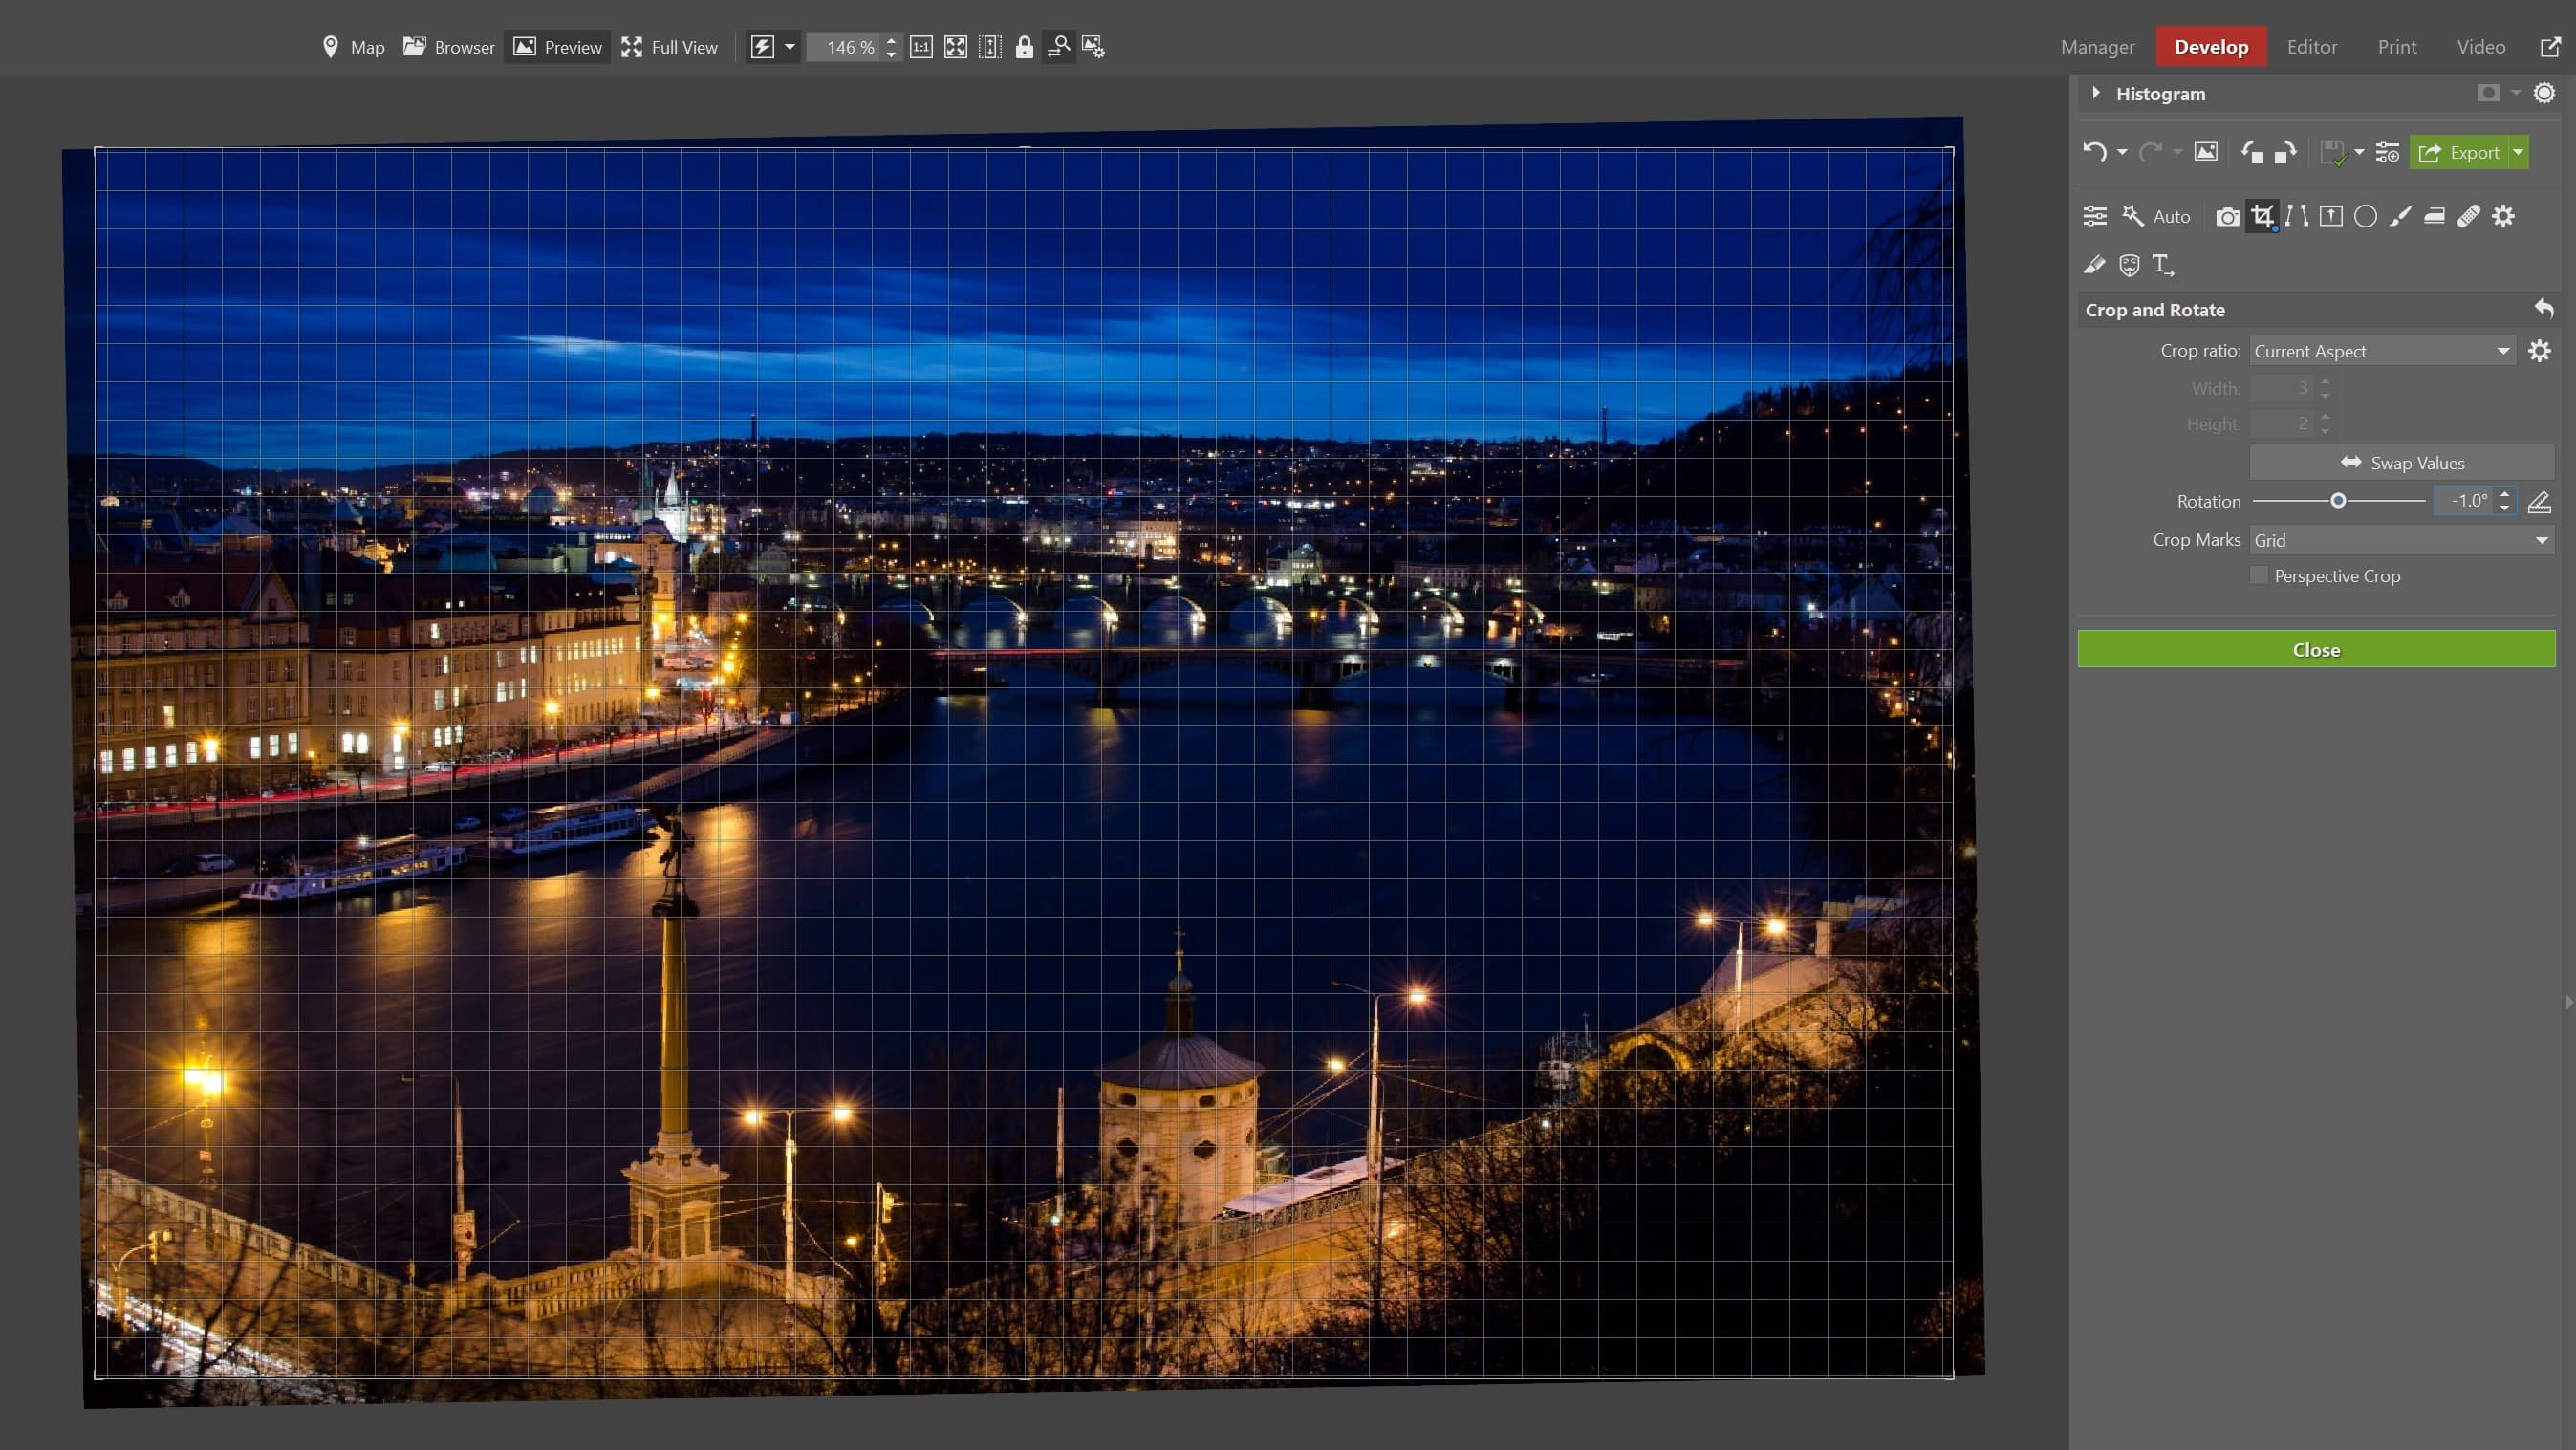
Correcting optical distortion results in a relatively significant loss of image data at the edges of the image. For this reason, keep an eye on the effect of the settings you use to avoid losing important parts of the image.
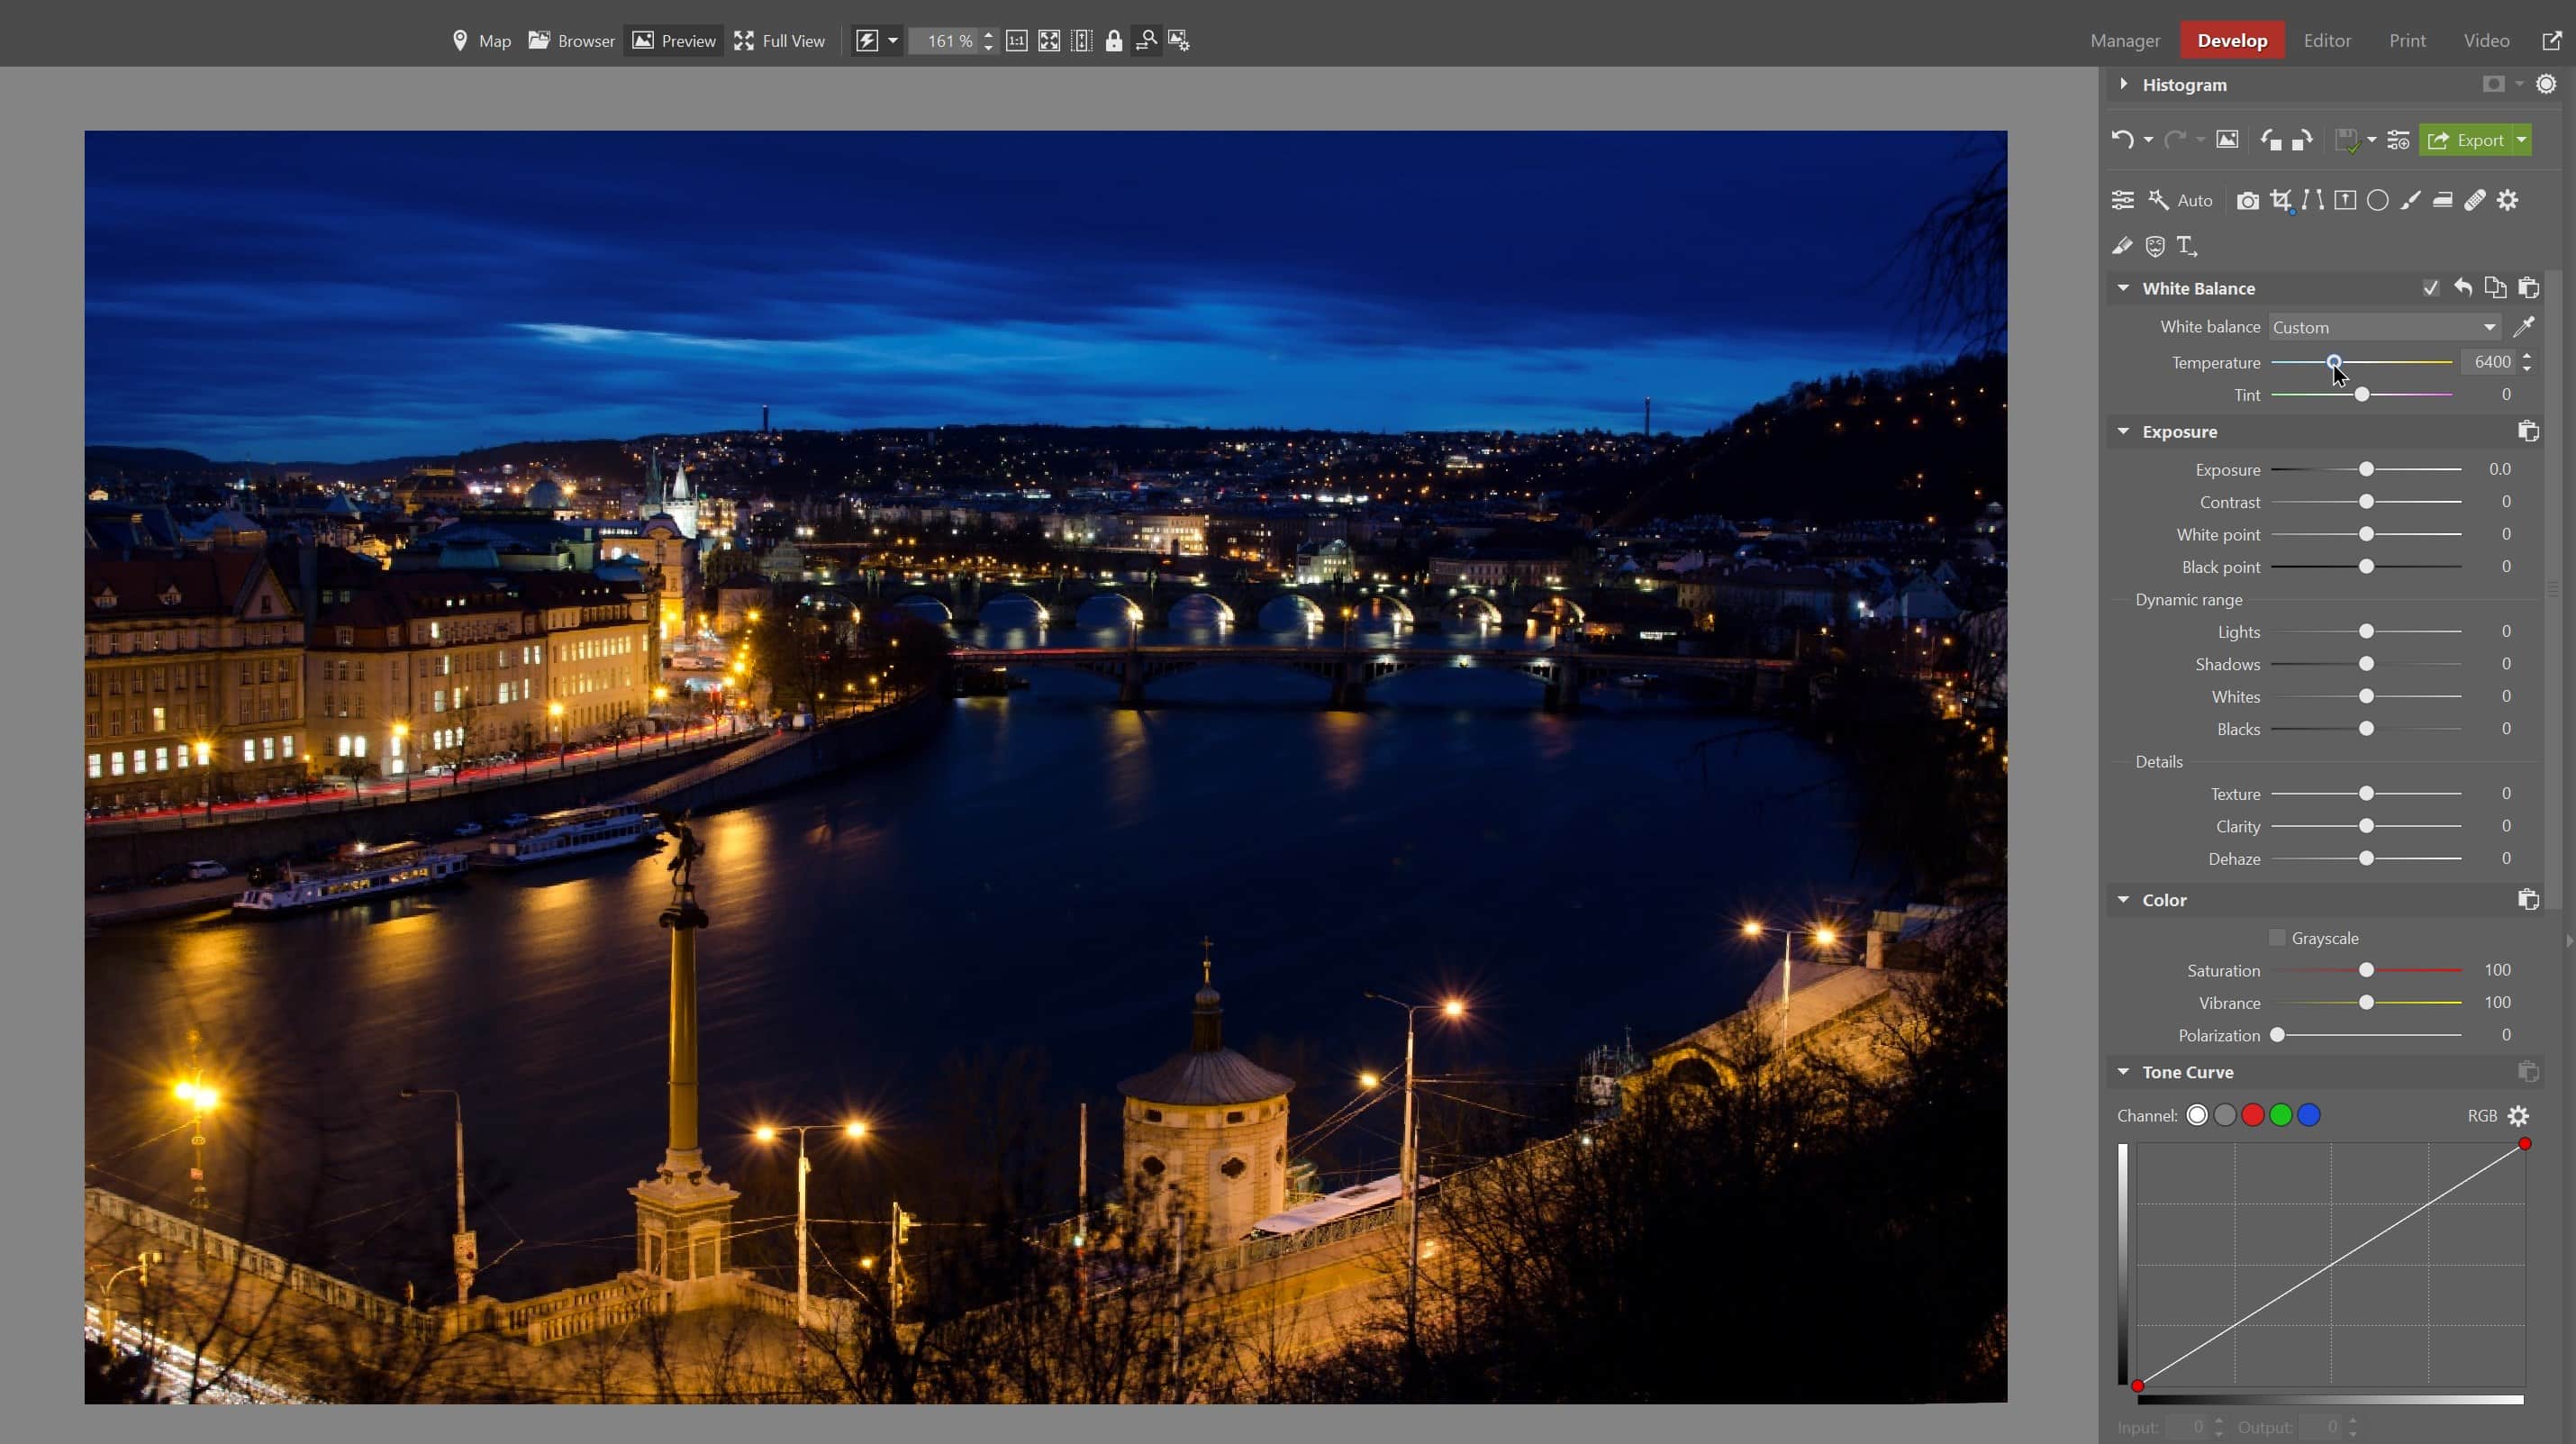
The original photo has many subdued warm tones. These need to be adjusted using White Balance. Increasing Temperature to 6400 gives the image more attractive warm tones while preserving the sky’s blue color.
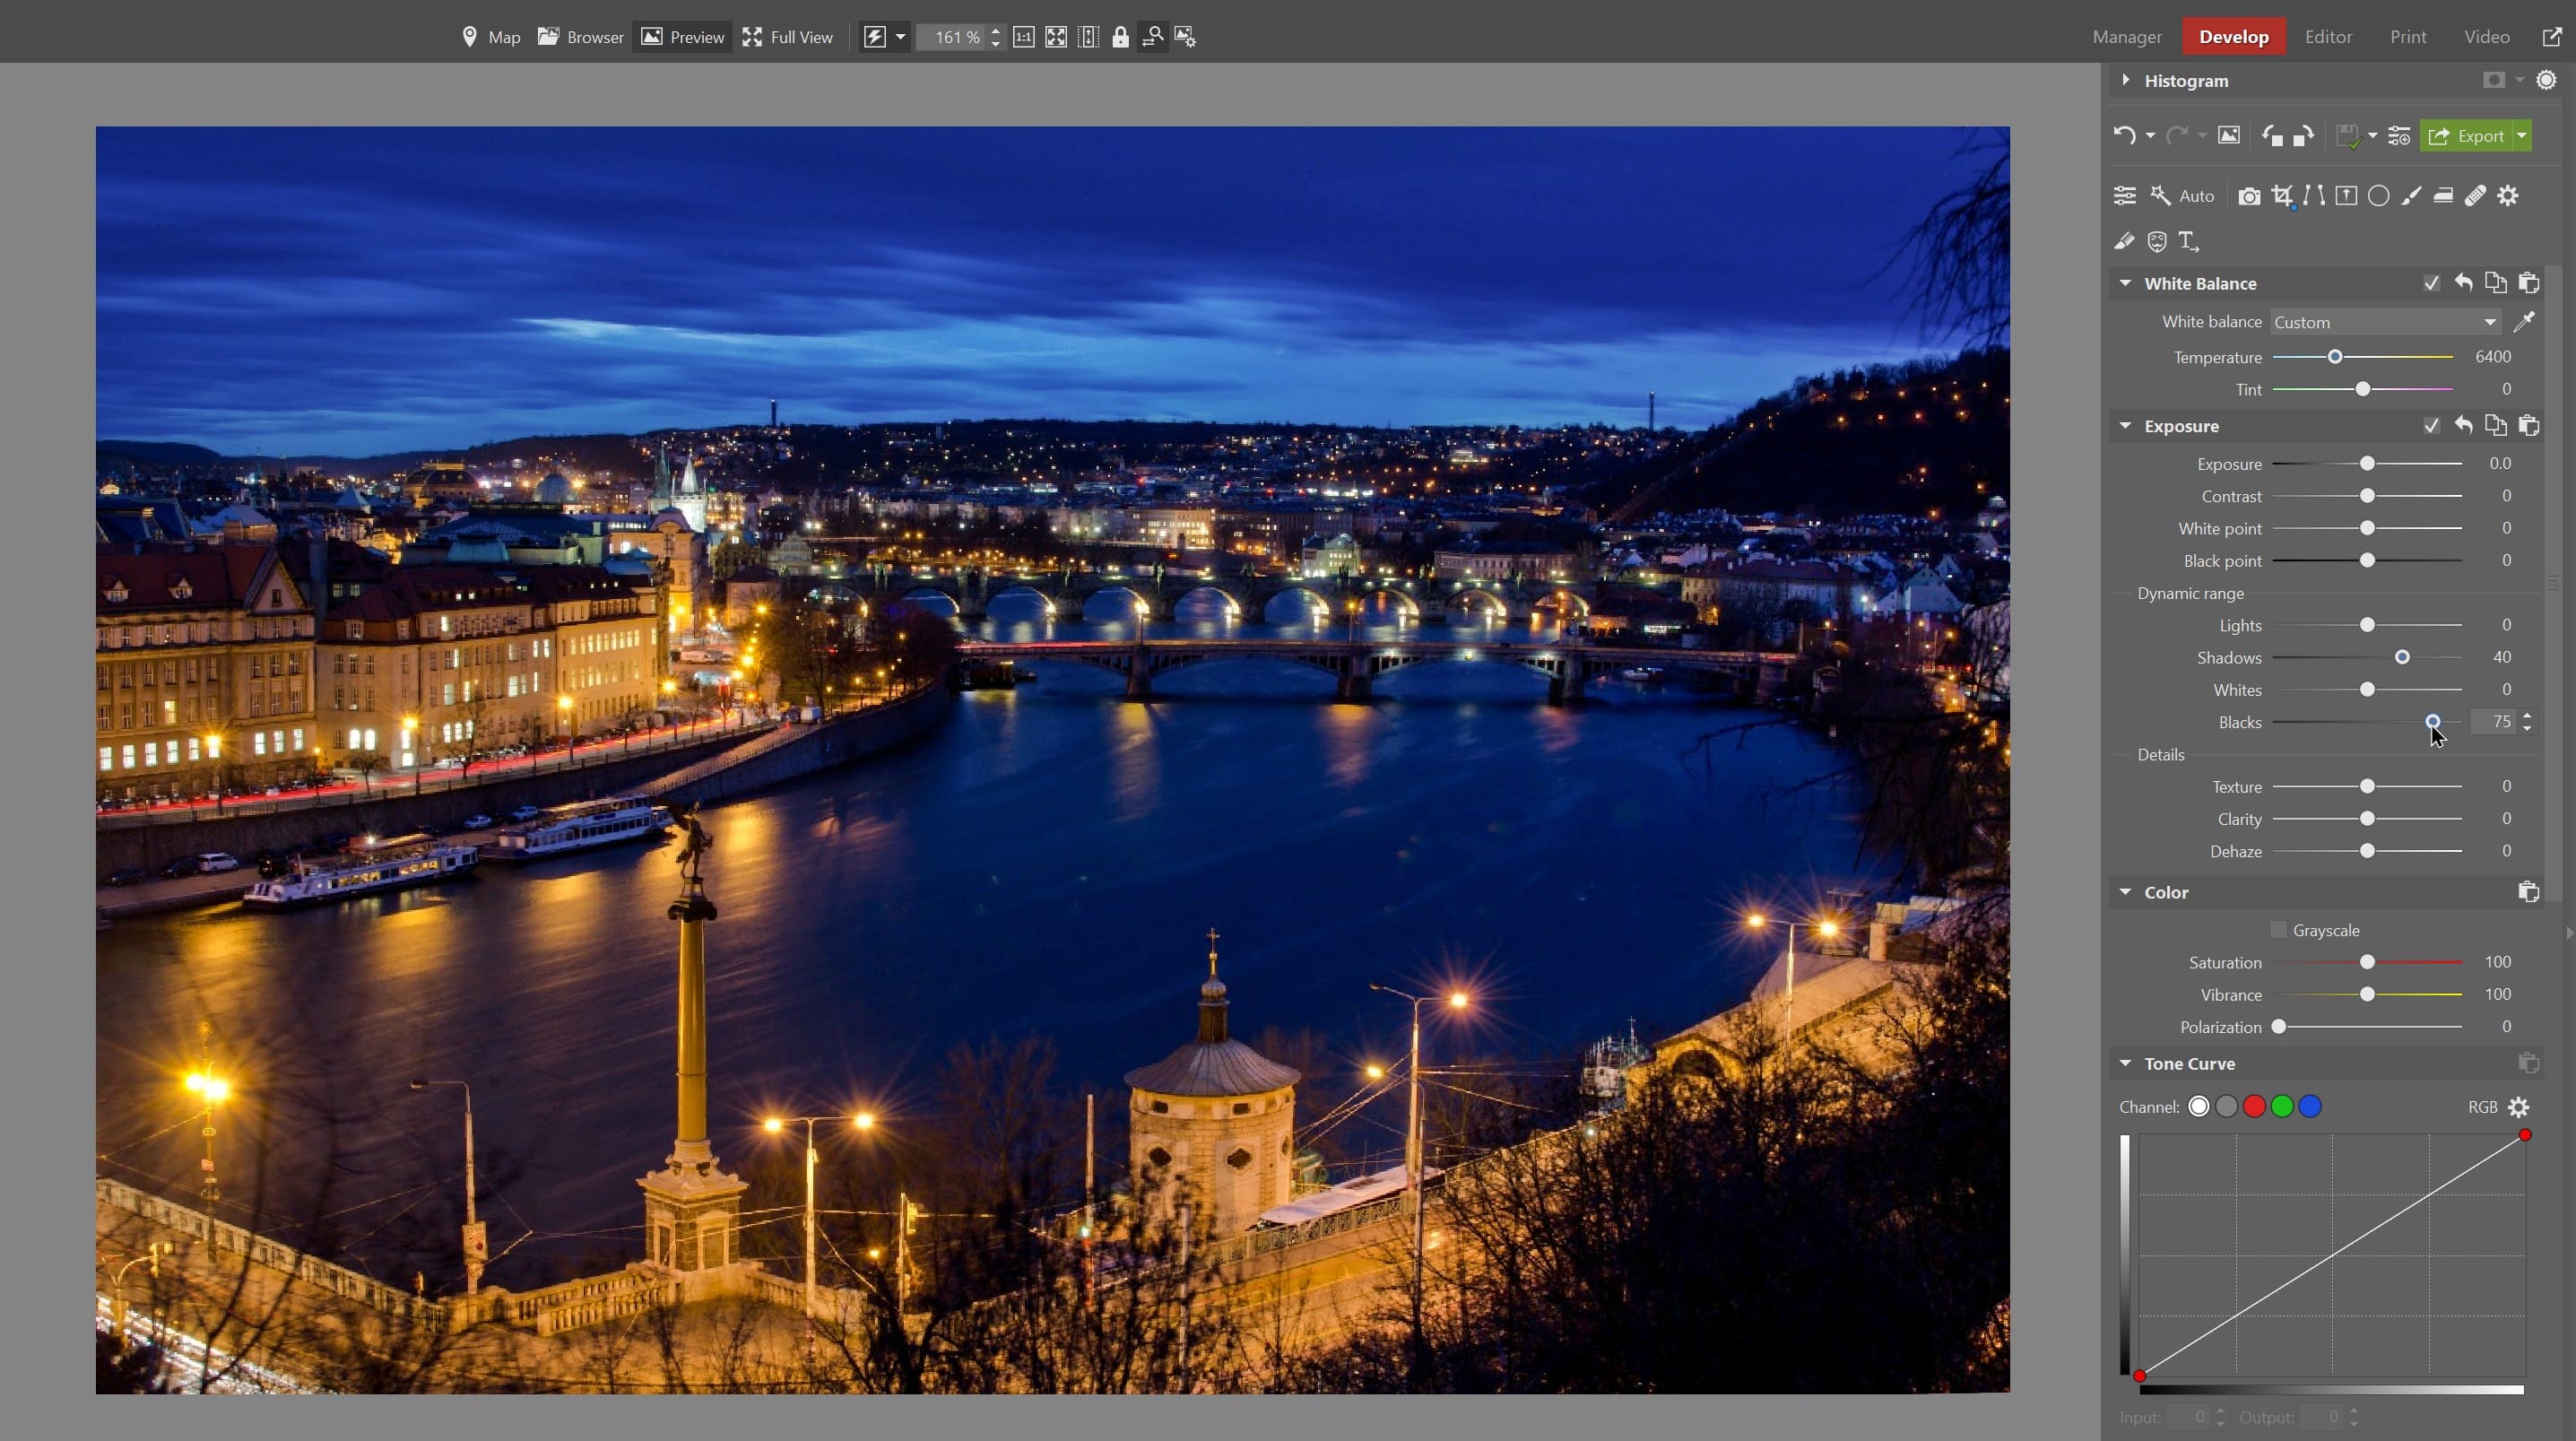
We’ll wrap up adjustments in the Develop module by adjusting the exposure settings. First, bring out details from the shadows using Dynamic Range. Set the value for Shadows to 40 and Blacks to 75. Next, bring out details in the entire photo by increasing Clarity to 35.
After finishing adjustments in the Develop module, we move to the Editor module.
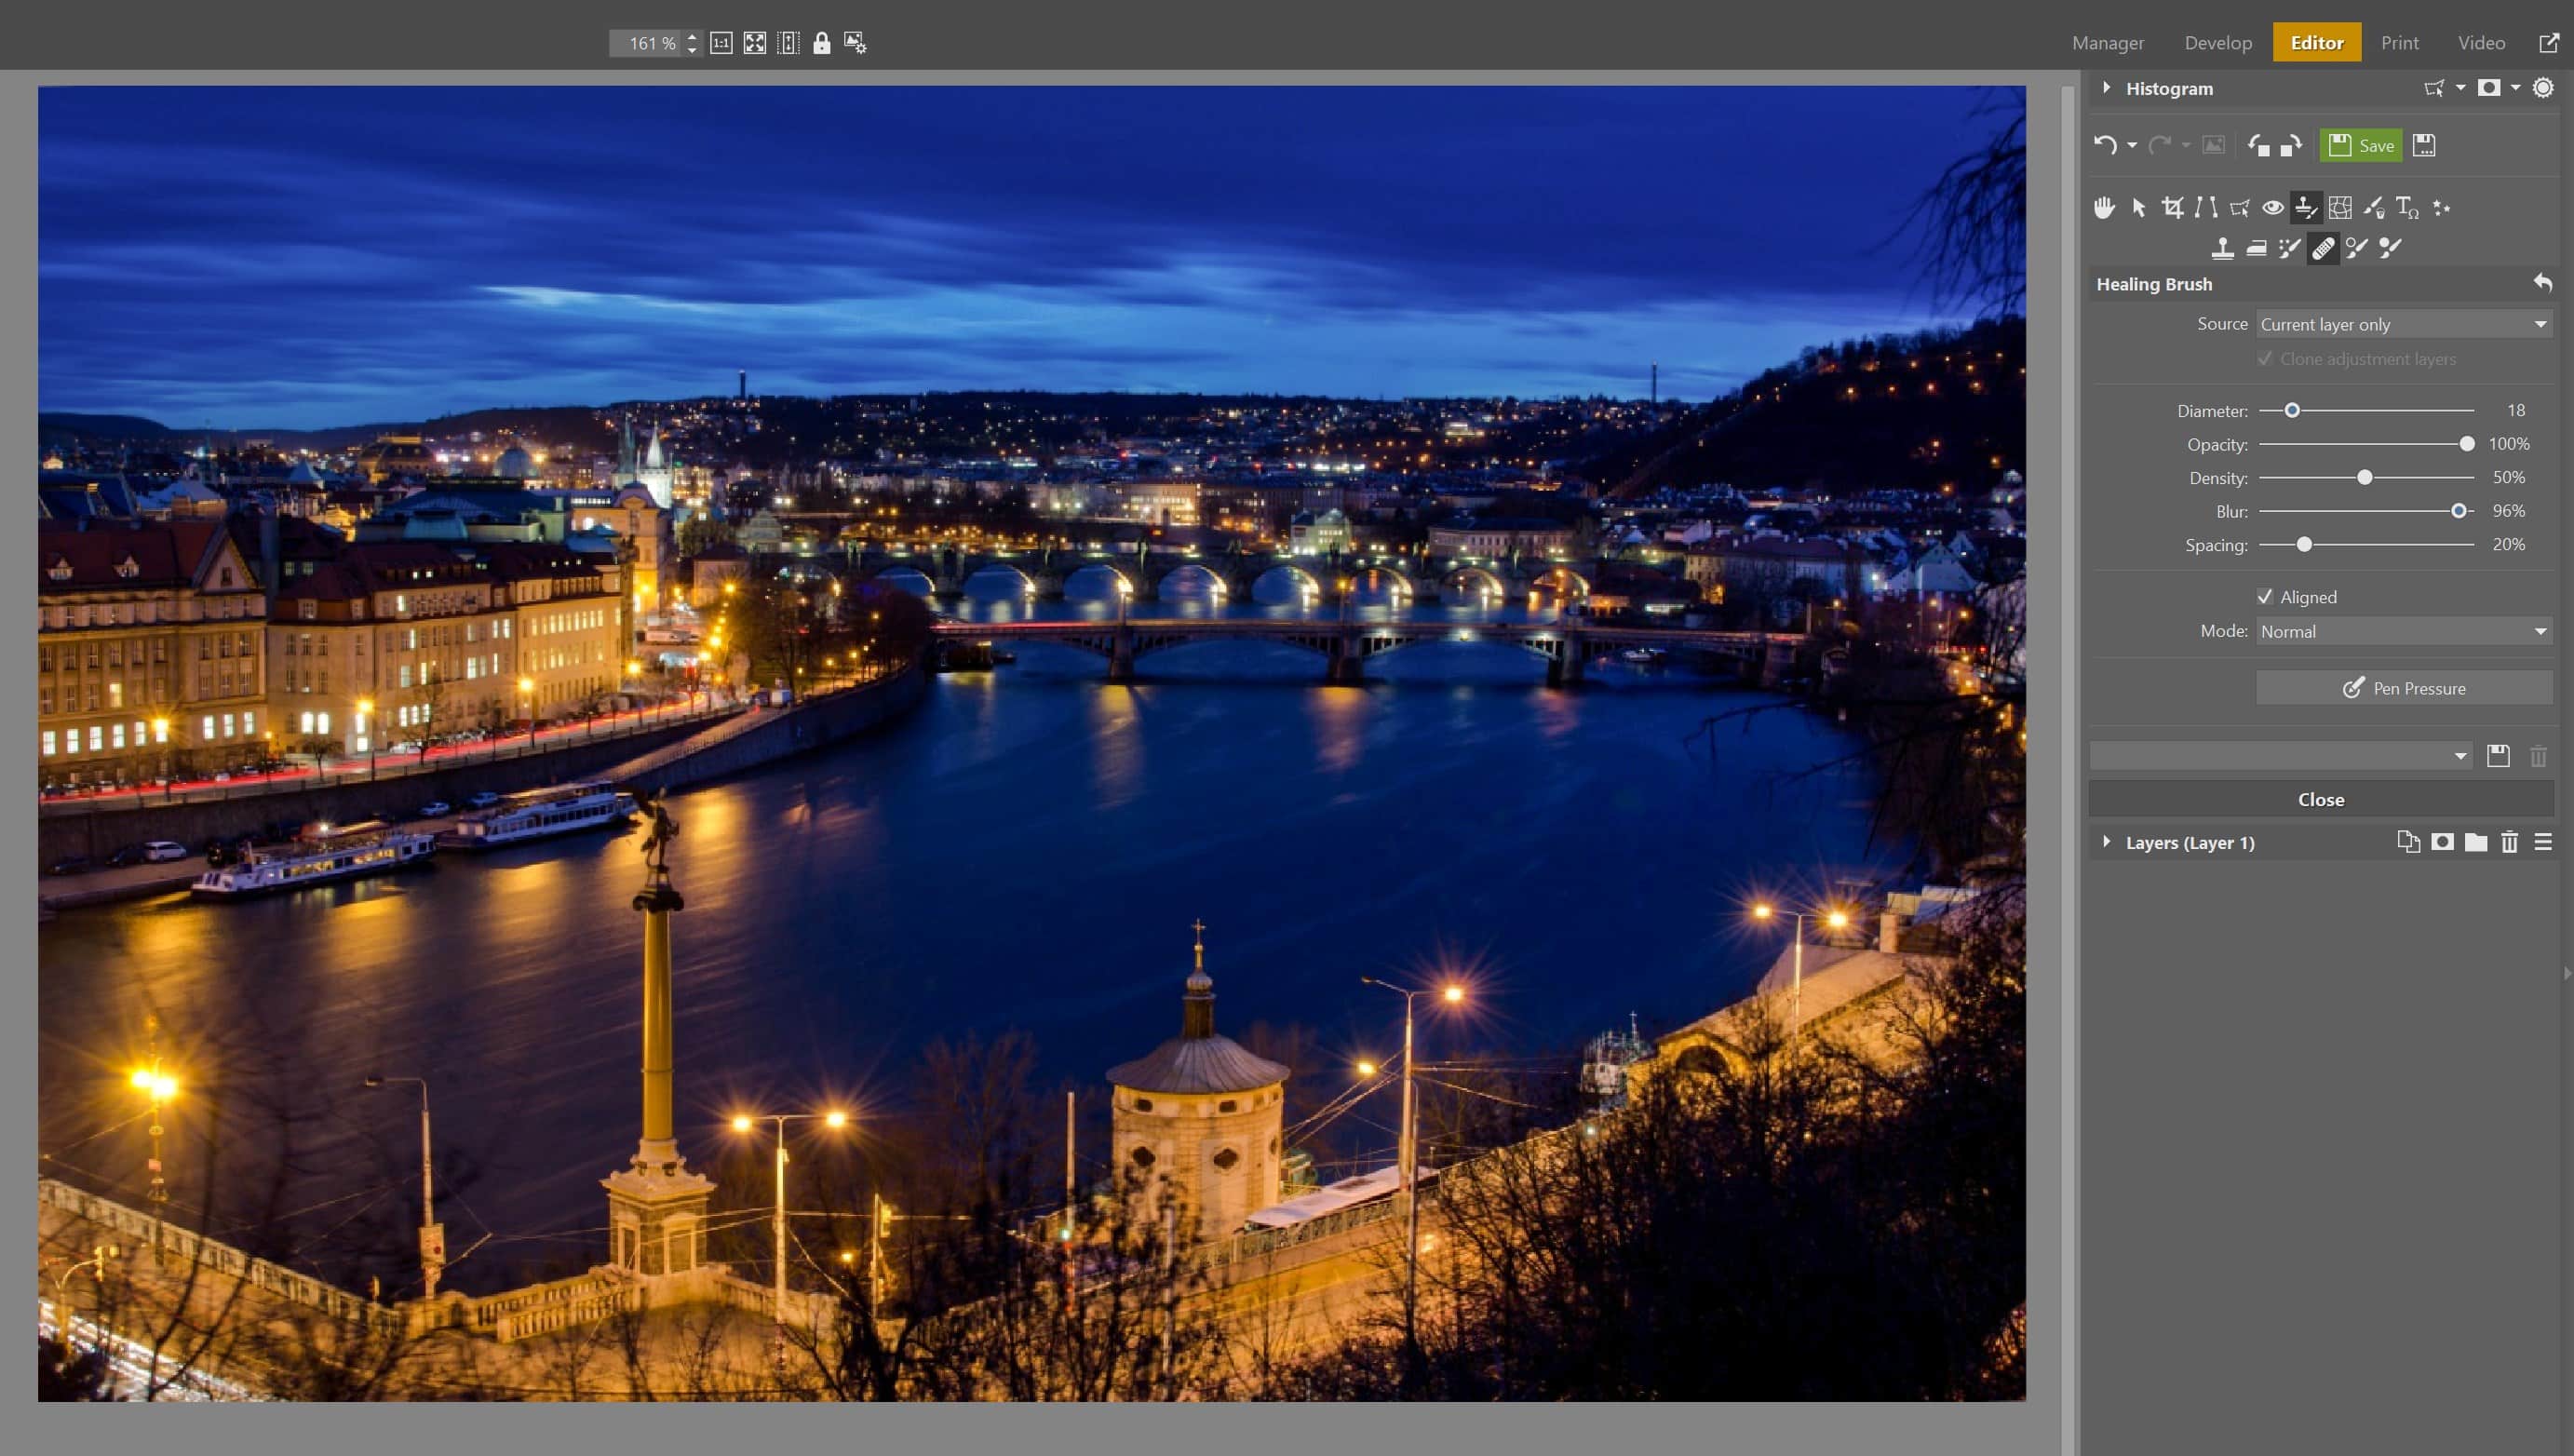
Step three: Cleaning up the image
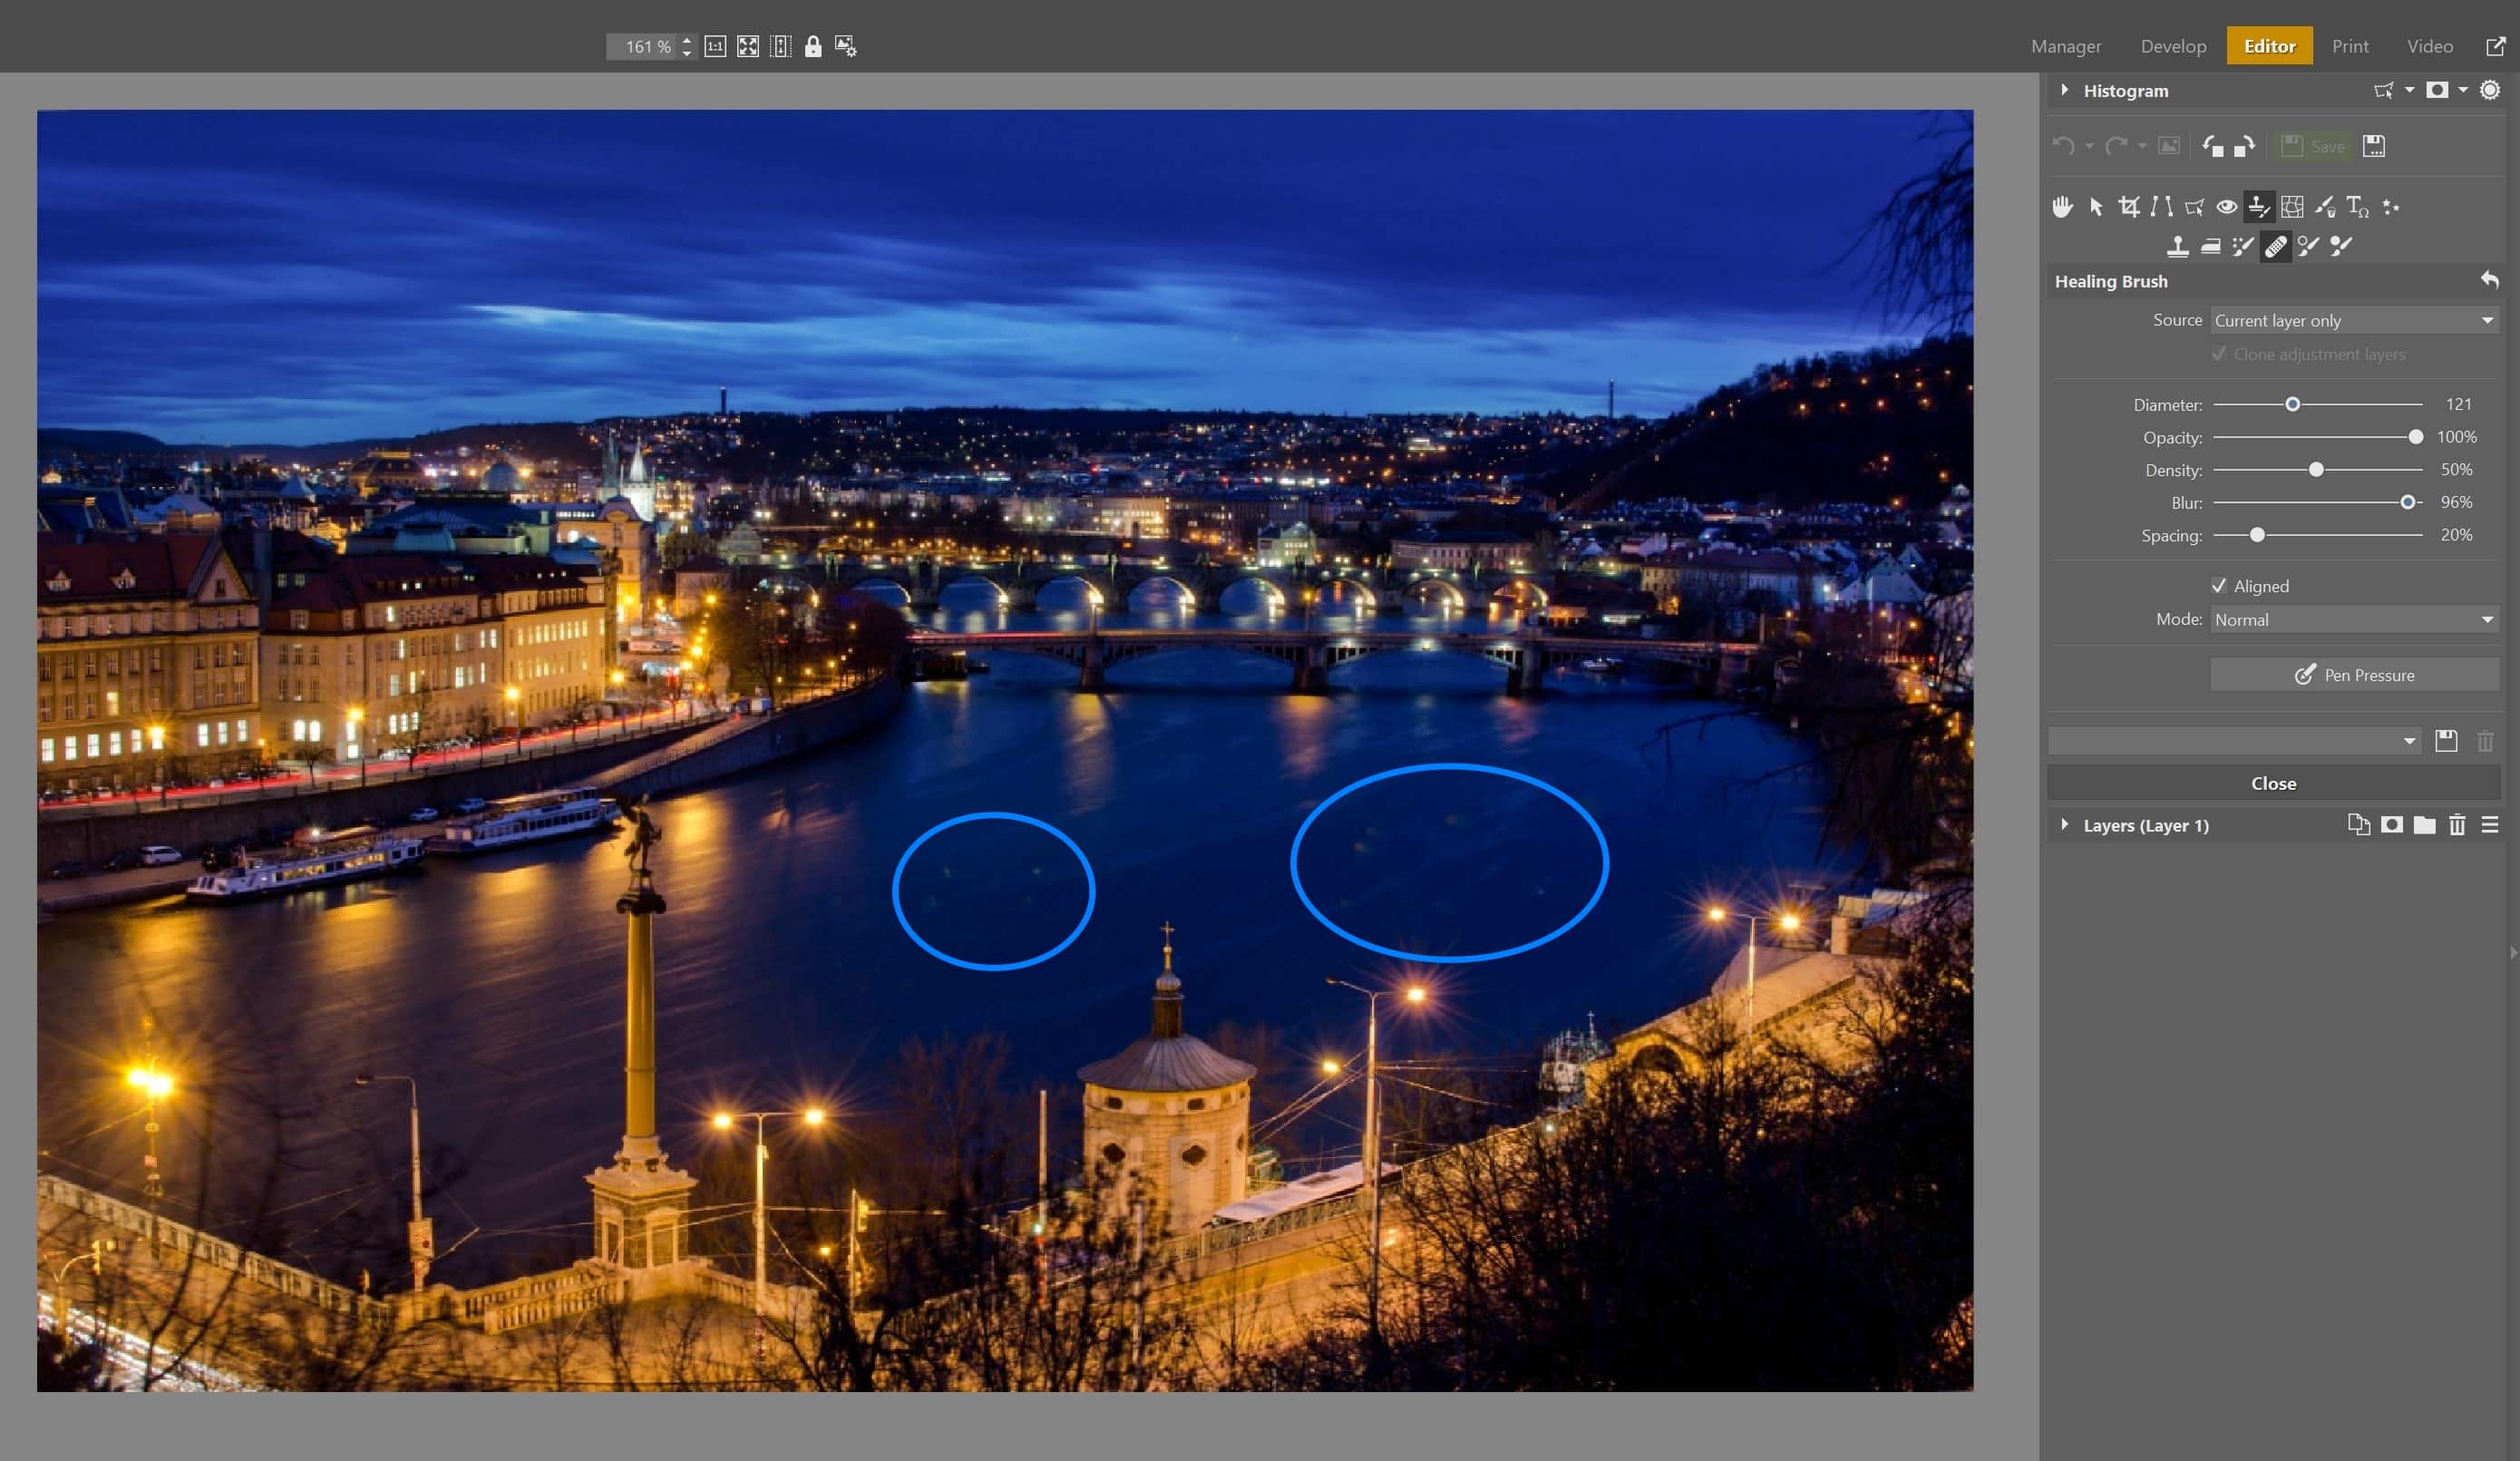
To rid the image of minor lens flare and some digital noise caused by a longer shutter speed, you need to apply local adjustments in the Editor module.
Instructions for local editing can be found in the article Learn to Use Selections—Your Key to Precision Edits.
Use the Healing Brush (J) to clean up these local issues. Alternatively, you can use the Clone Stamp (S).
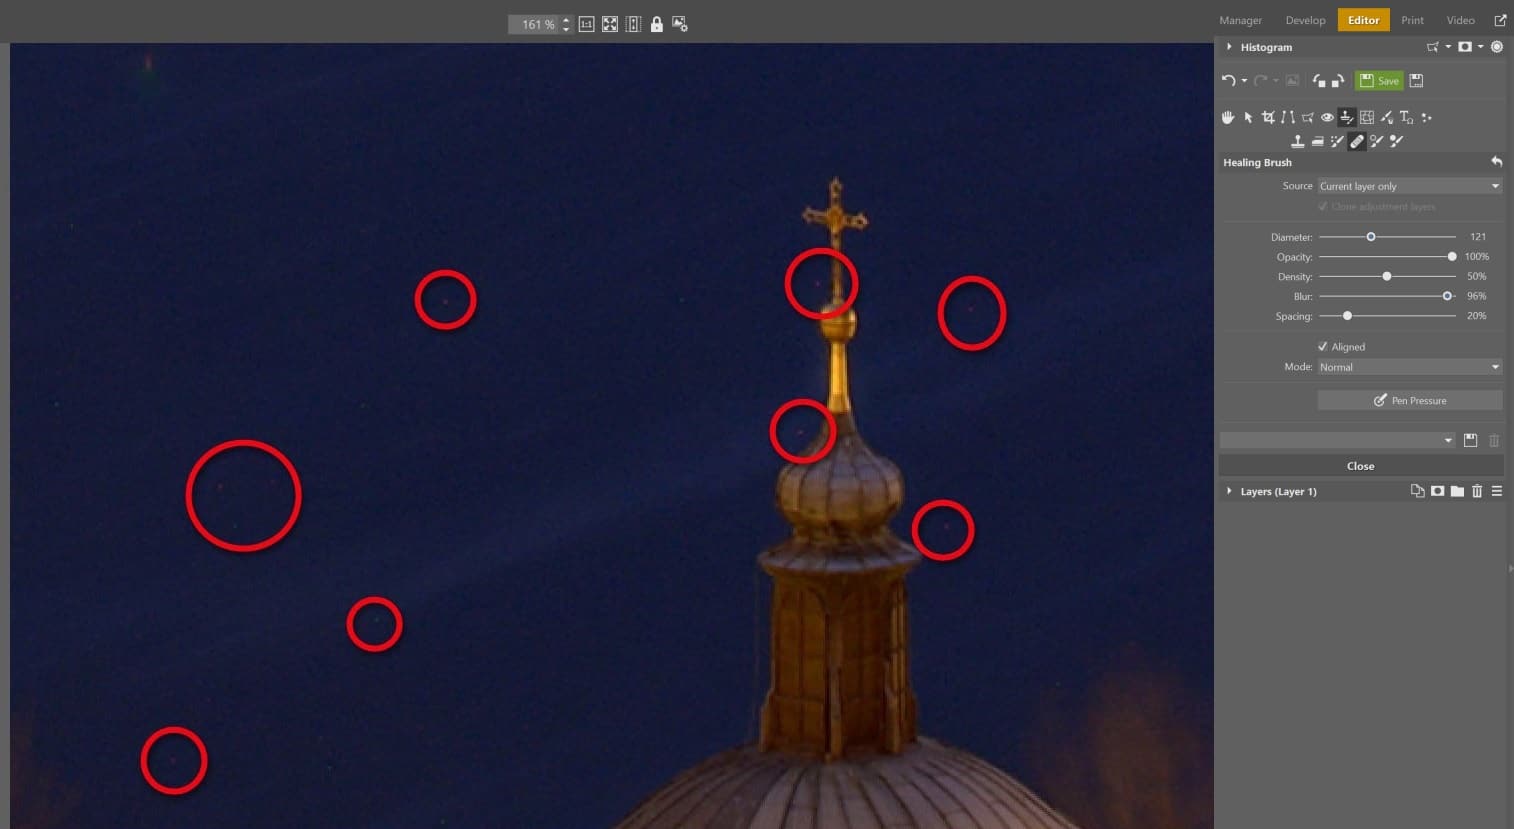

Manually removing noise caused by longer shutter speeds can be time-consuming. The majority of cameras let you enable a noise-reducing function for longer exposure times. After exposing the image, the camera captures an additional, second exposure with the shutter closed. This is of the noise itself. The camera’s software can then use this second image to automatically remove the noise.
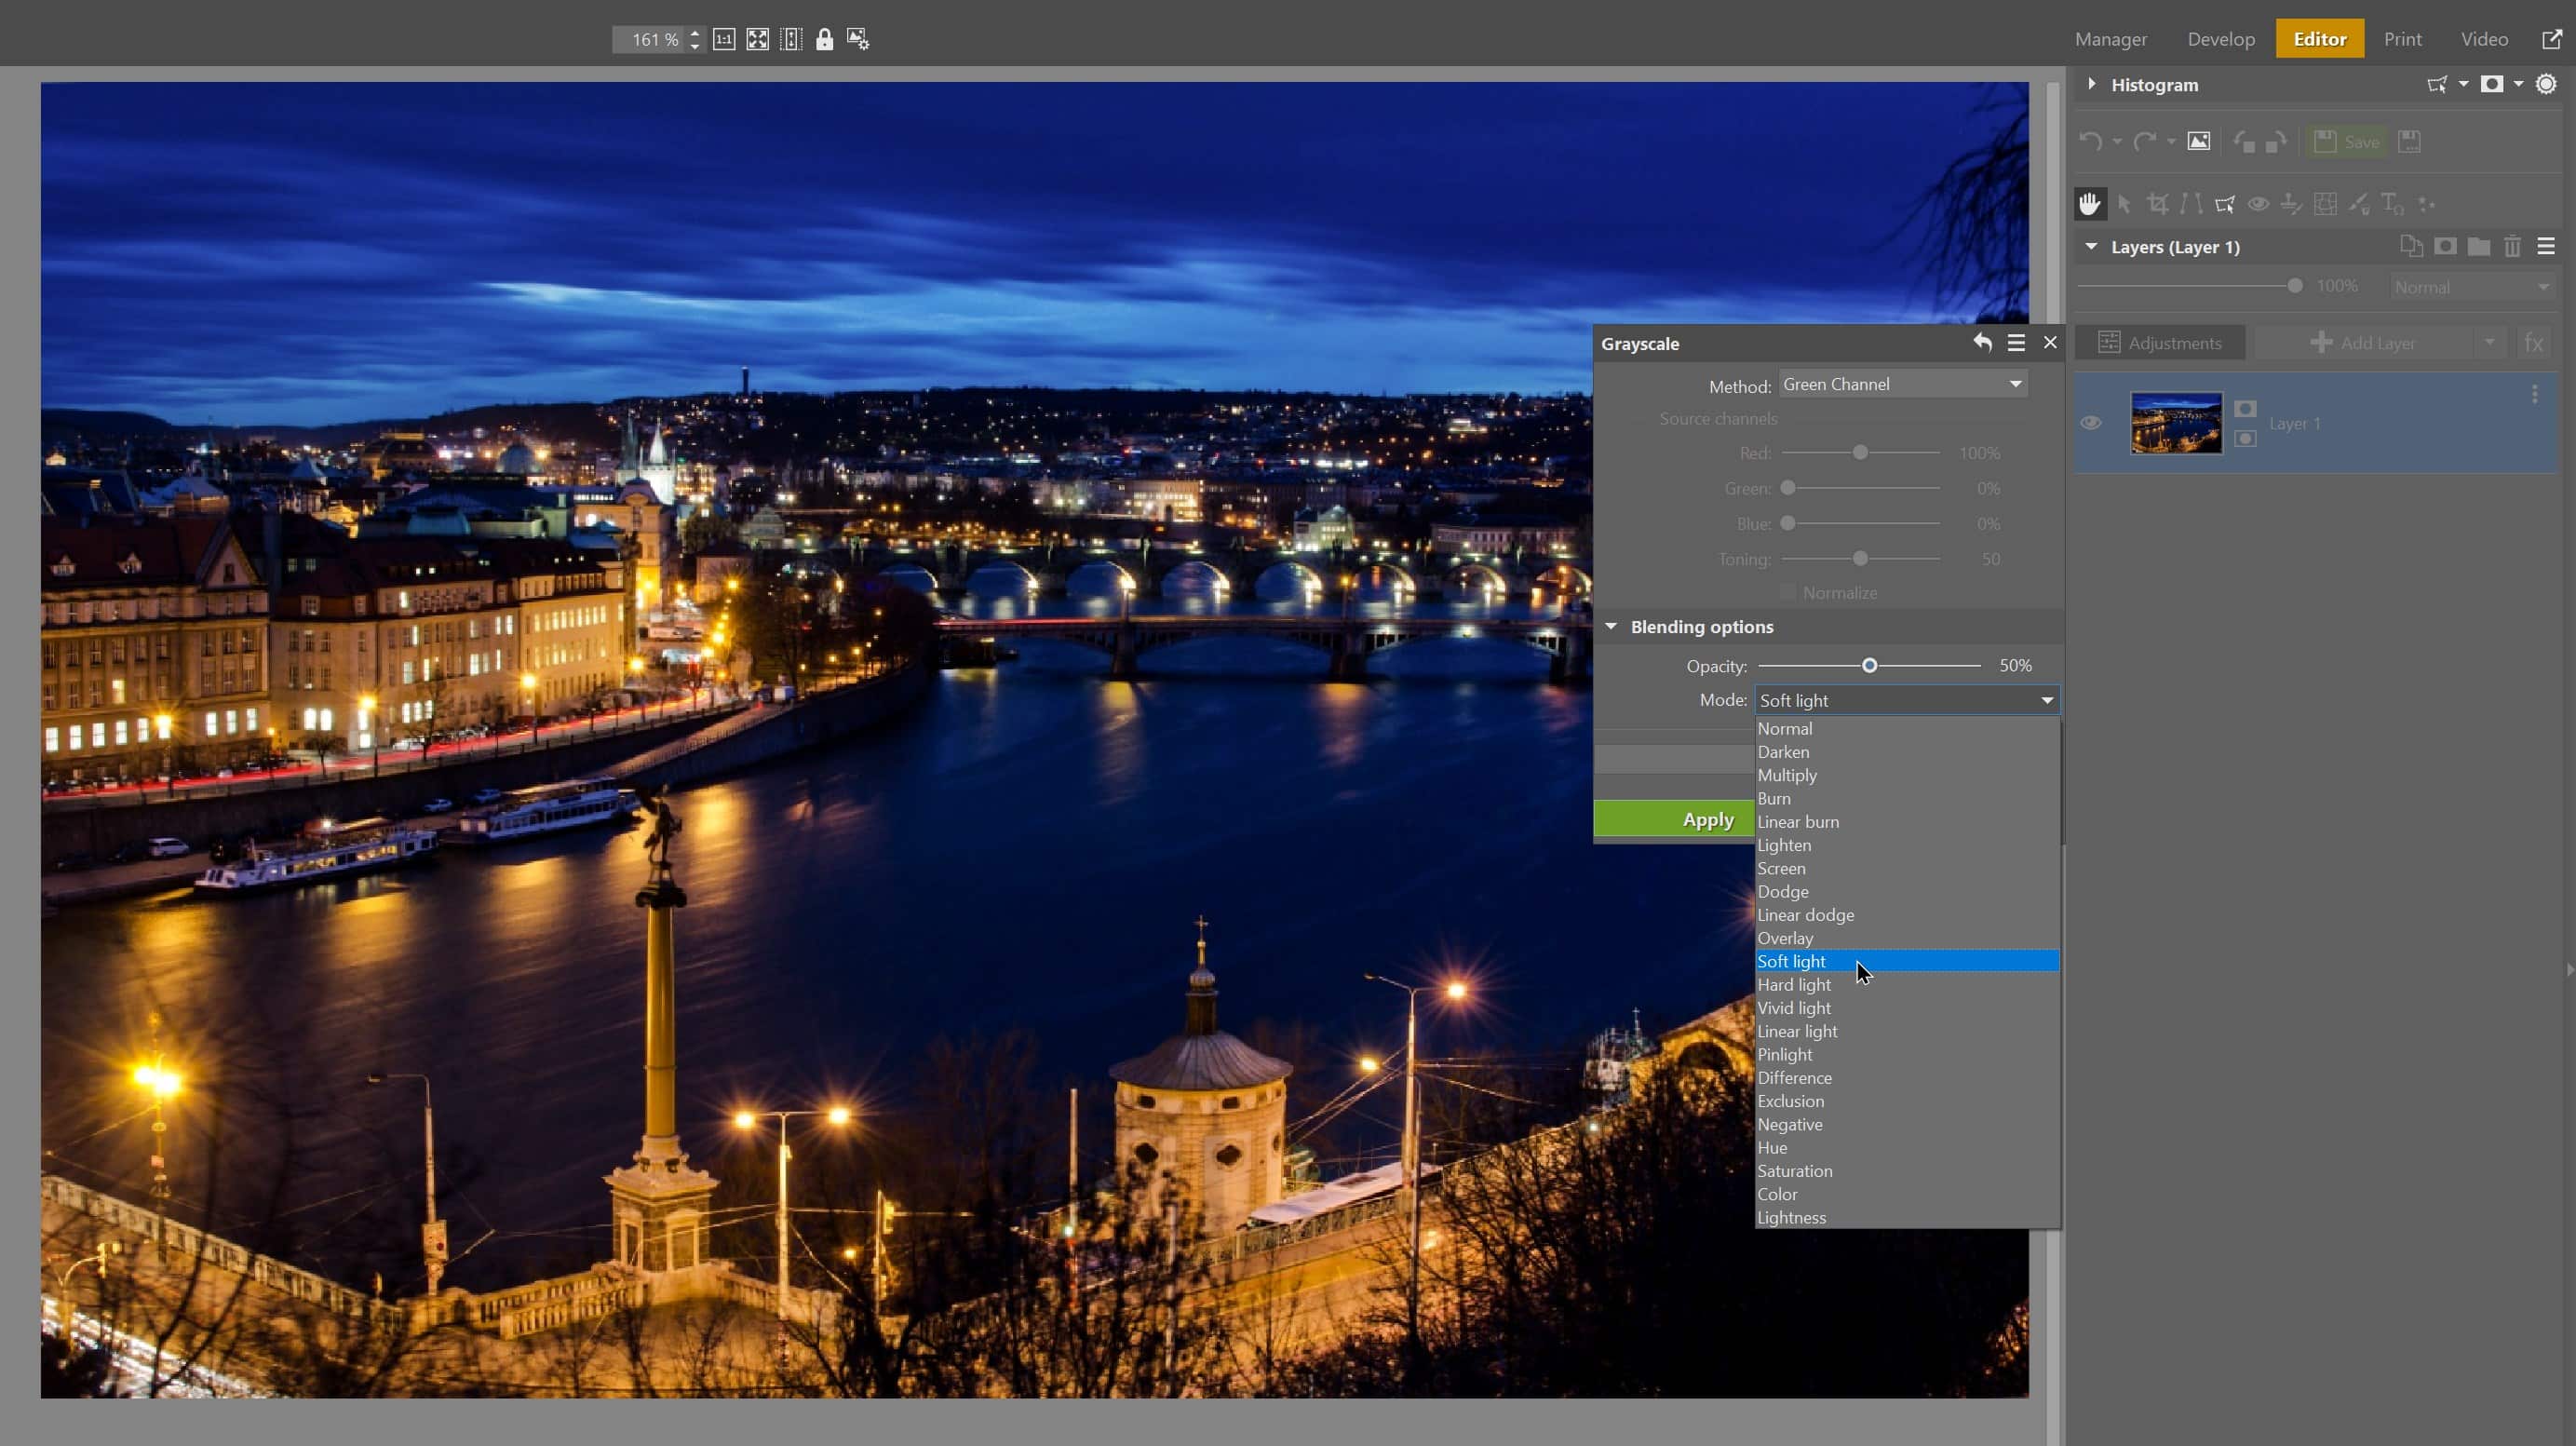
Step four: Final styling
Finally, we increase contrast using Grayscale and blending options. Click Adjustments and select Grayscale (Ctrl+G). For this specific photograph, we use Green Channel for Method.

Next, set the Layer Blending Mode to Soft light and lower Layer Opacity to 50%.
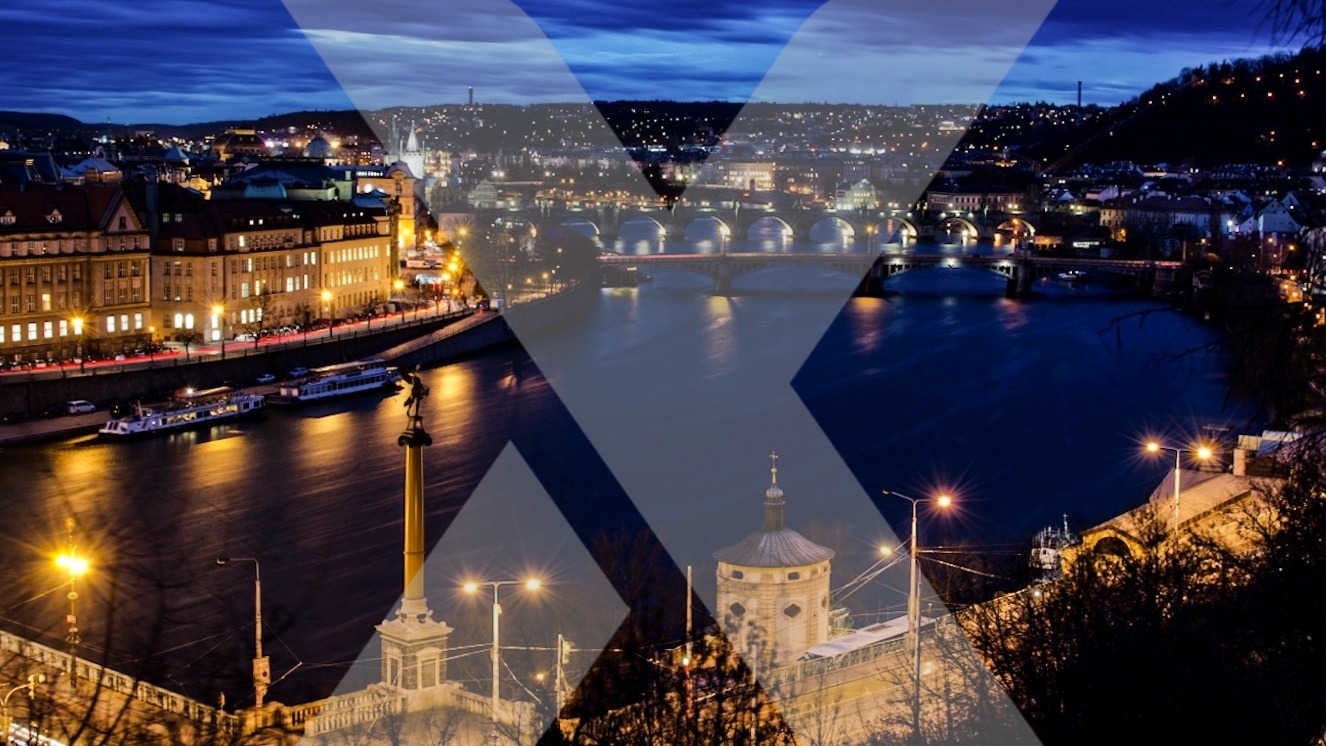
The editing for this photograph is now complete. Let’s compare the two photographs before and after:

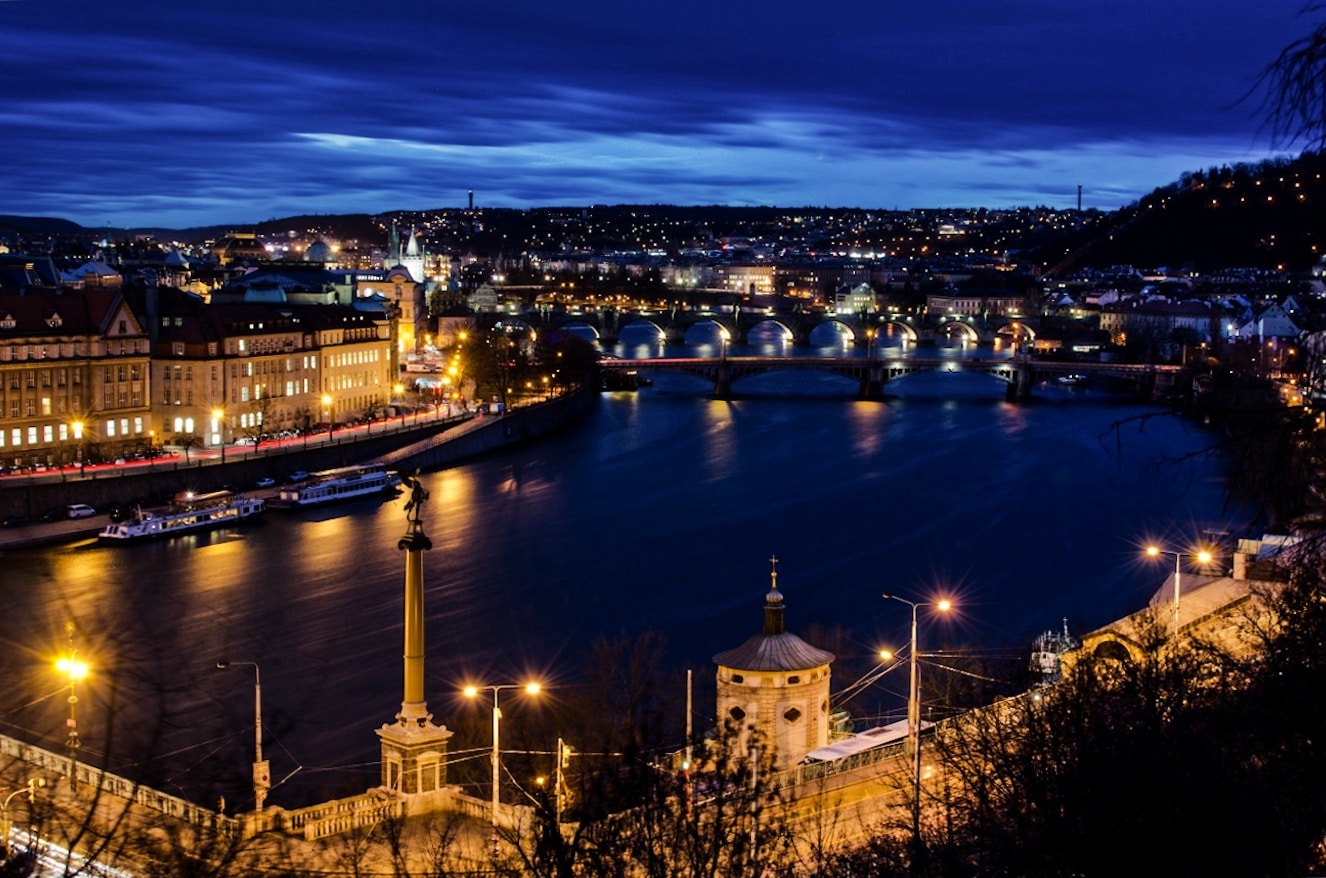
The original and final image. Move the divider between to show the changes.
Download Zoner Studio free for 7 days and test out these adjustments on your photos today!
There are no comments yet.