Editing Springtime Portraits II: Doing Advanced Retouching in the Editor

The article is over 5 years old. The information in it may be outdated.
![]()
We are working on its update. In the meantime, you can read some more recent articles.
Last time around, we looked at developing a springtime portrait; this time we’ll look at more advanced edits in the Editor module. It provides lots of great tools that will help you bring a portrait to perfection. Zdeňka Vrátná will be showing you the steps she has taken when editing a colorful springtime portrait. In this article you’ll find inspiration, practical advice, and also a guide to using the individual retouching tools.
In the first part of the article, we covered basic edits to springtime portraits in Develop. This time we’ll be focusing on more advanced edits in the Editor module. We’ll look at how to mildly clean up skin, how to deal with circles under the subject’s eyes, how to highlight their eyes, and how to remove unwanted objects from a photo.
In the introduction we’ll also show how the individual retouching tools in Zoner Studio work. We’ll illustrate the whole approach using the photo that we already developed in the first part of this article. Its RAW file can be downloaded there.
The Retouching Tools and How to Use Them

You’ll find six tools in the retouching section; here’s a brief rundown:
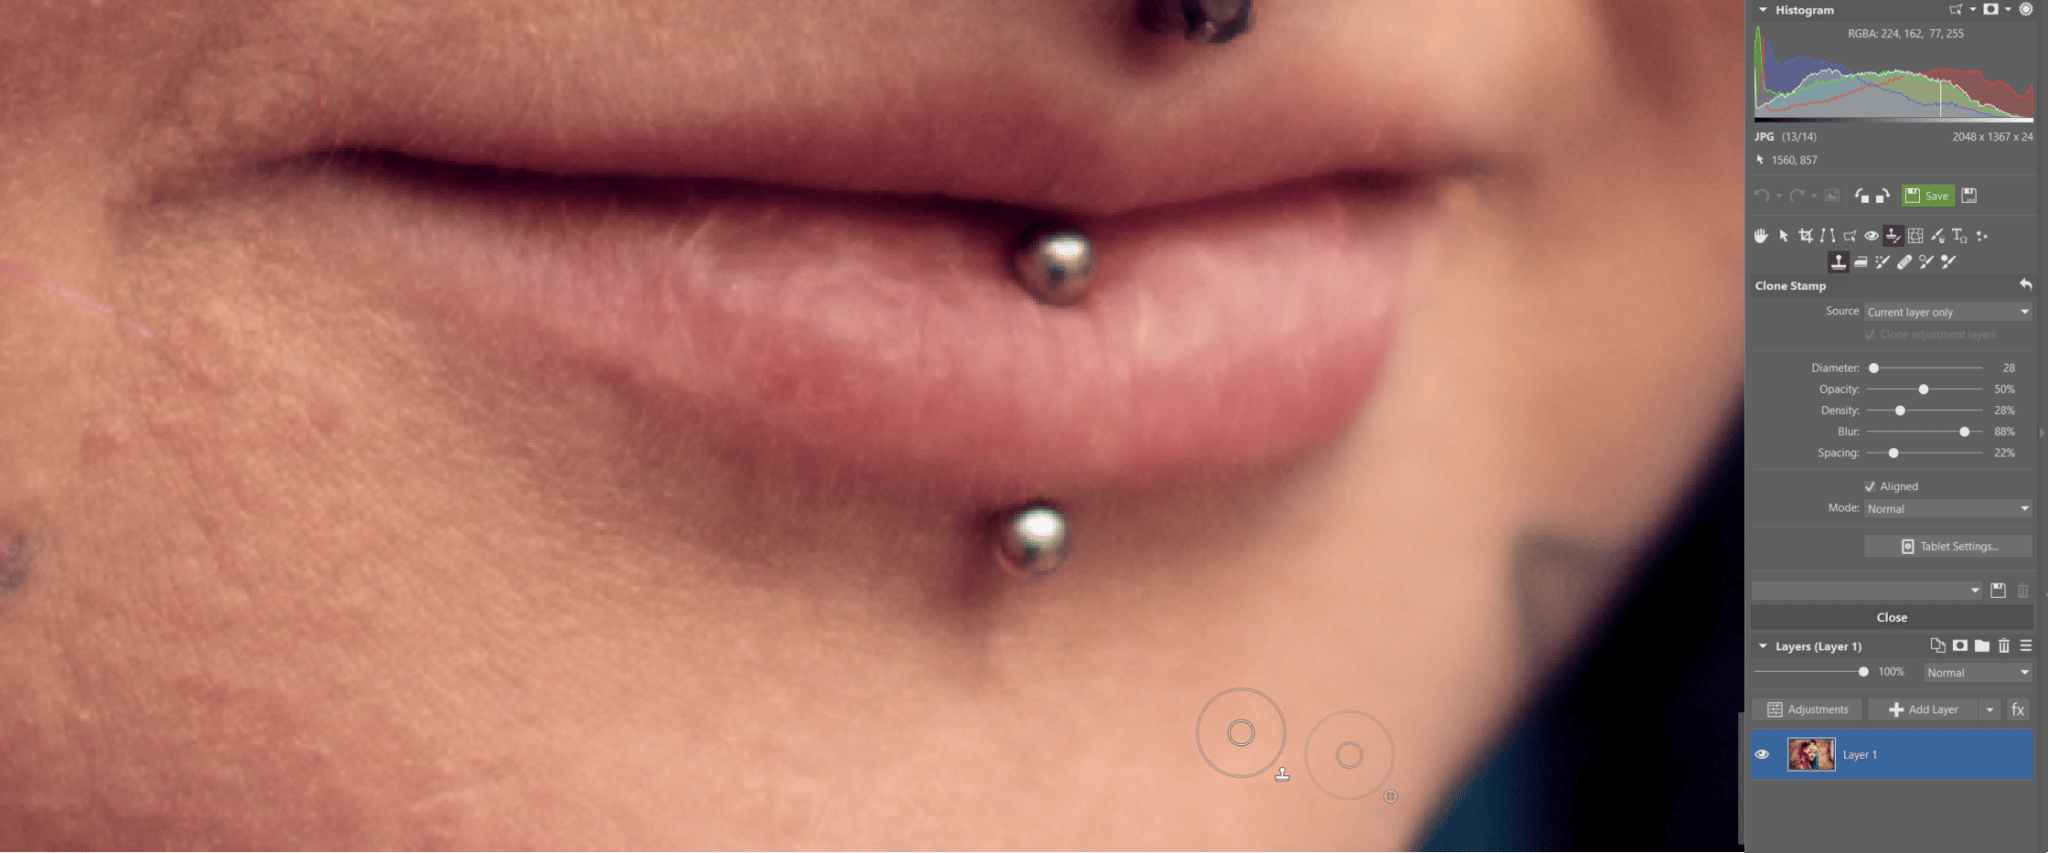
The Clone Stamp (S) copies a region that you first select by pressing Ctrl and left-clicking. It copies it precisely, and unlike the Healing Brush, it’s not “smart,” that is, it doesn’t seek out a source region automatically. It’s used for example to remove unwanted objects from a photo such as trash, telephone poles, people other than your subject, and signs. You can also use it when retouching faces, but watch out and use it with care!
The Iron (U) smooths things out and, as the name suggests, really does “iron” them. It’s useful for example for skin retouching, but I personally hardly use it at all.
The Effect Brush (E) has several modes, which can change sharpness, saturation, gamma, contrast, or brightness in the places it touches. You can add to or subtract from the mentioned parameters with this brush.
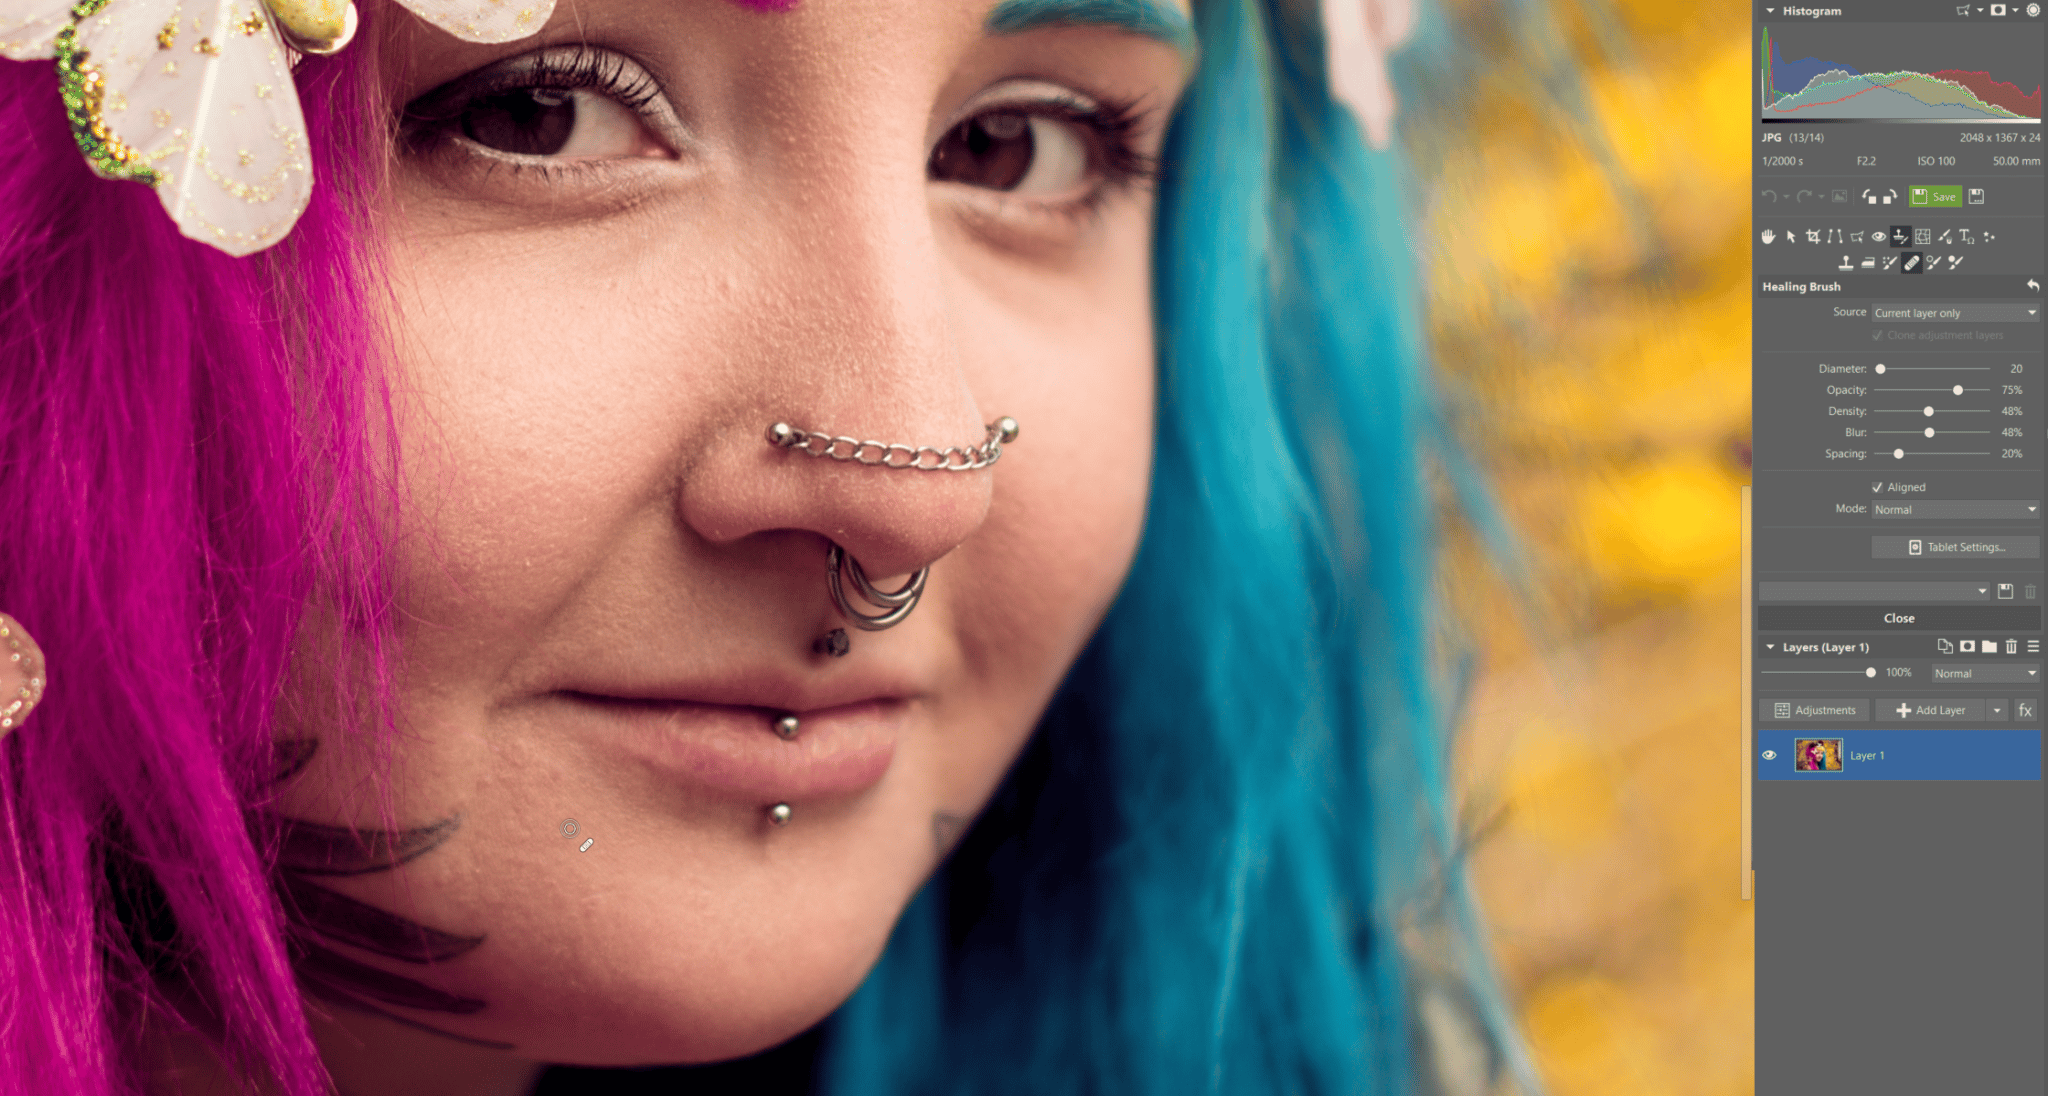
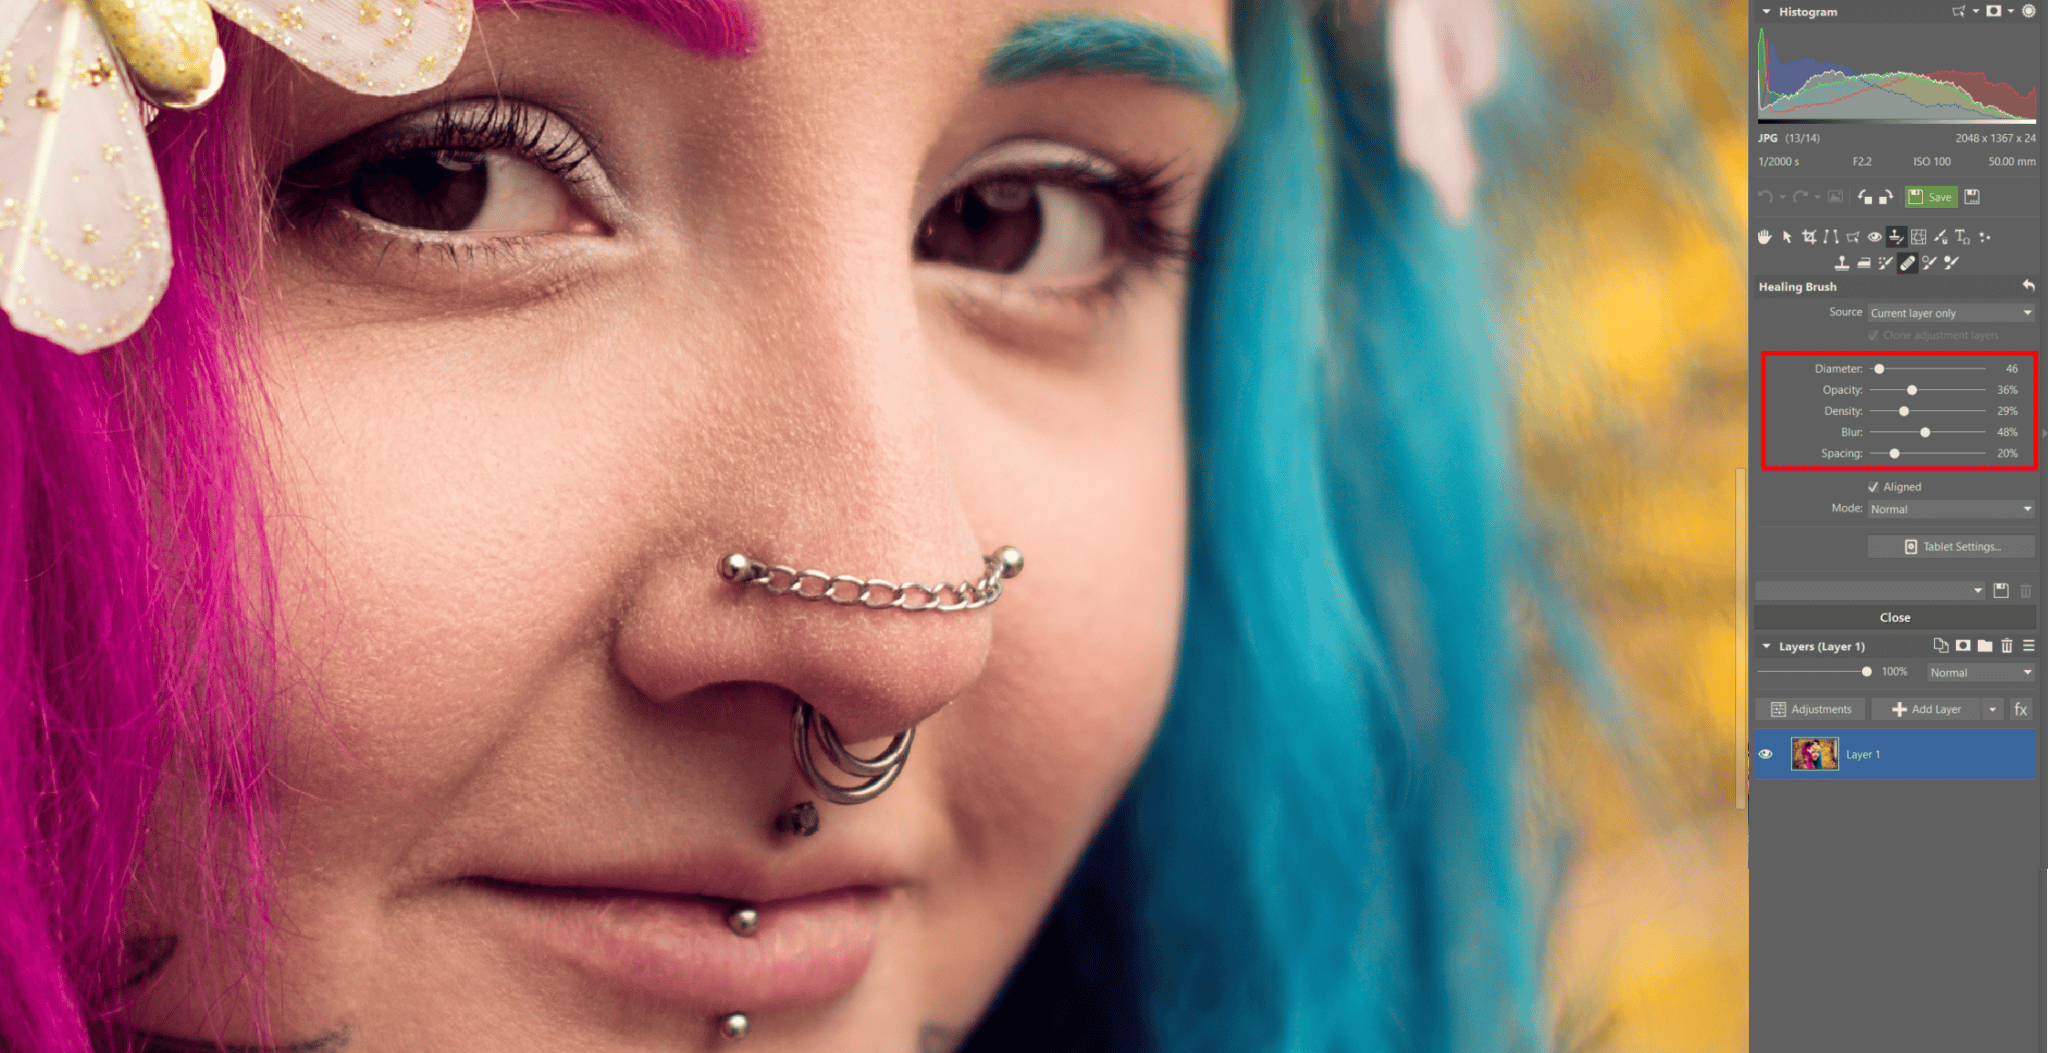
The Healing Brush (J) is a slightly smarter Clone Stamp, because it takes into account the surroundings of the place to where you’re cloning. So it’s not as invasive, but at the same time it can produce unwanted effects if it’s used in a spot with sharp color or light transitions. The area of the photo to where you’re copying with the healing brush should be fairly unified in color. It’s mainly used for healing skin, for example for pimples and acne.
Dodge (I) is used for lightening a given area. It’s good for highlighting eyes or lightening dark areas under the eyes.
Burn (Shift+I), meanwhile, darkens the selected area. You can use it to emphasize, for example, makeup or a beard.
So that’s a very brief overview of the retouching tools, and now we’ll use most of them in an actual photo edit. For any kind of editing, we recommend working with layers. It’s not essential, but it will definitely improve your work.
Cleaning up Skin
We’ll be using the Clone Stamp (S) around the subject’s mouth, eyes, eyebrows, and other areas that contain multiple lights and colors, to remove pores, acne, crumbled makeup, and similar problems. We’ll keep both the opacity and the density more towards the minimum, to keep our edits unnoticeable.
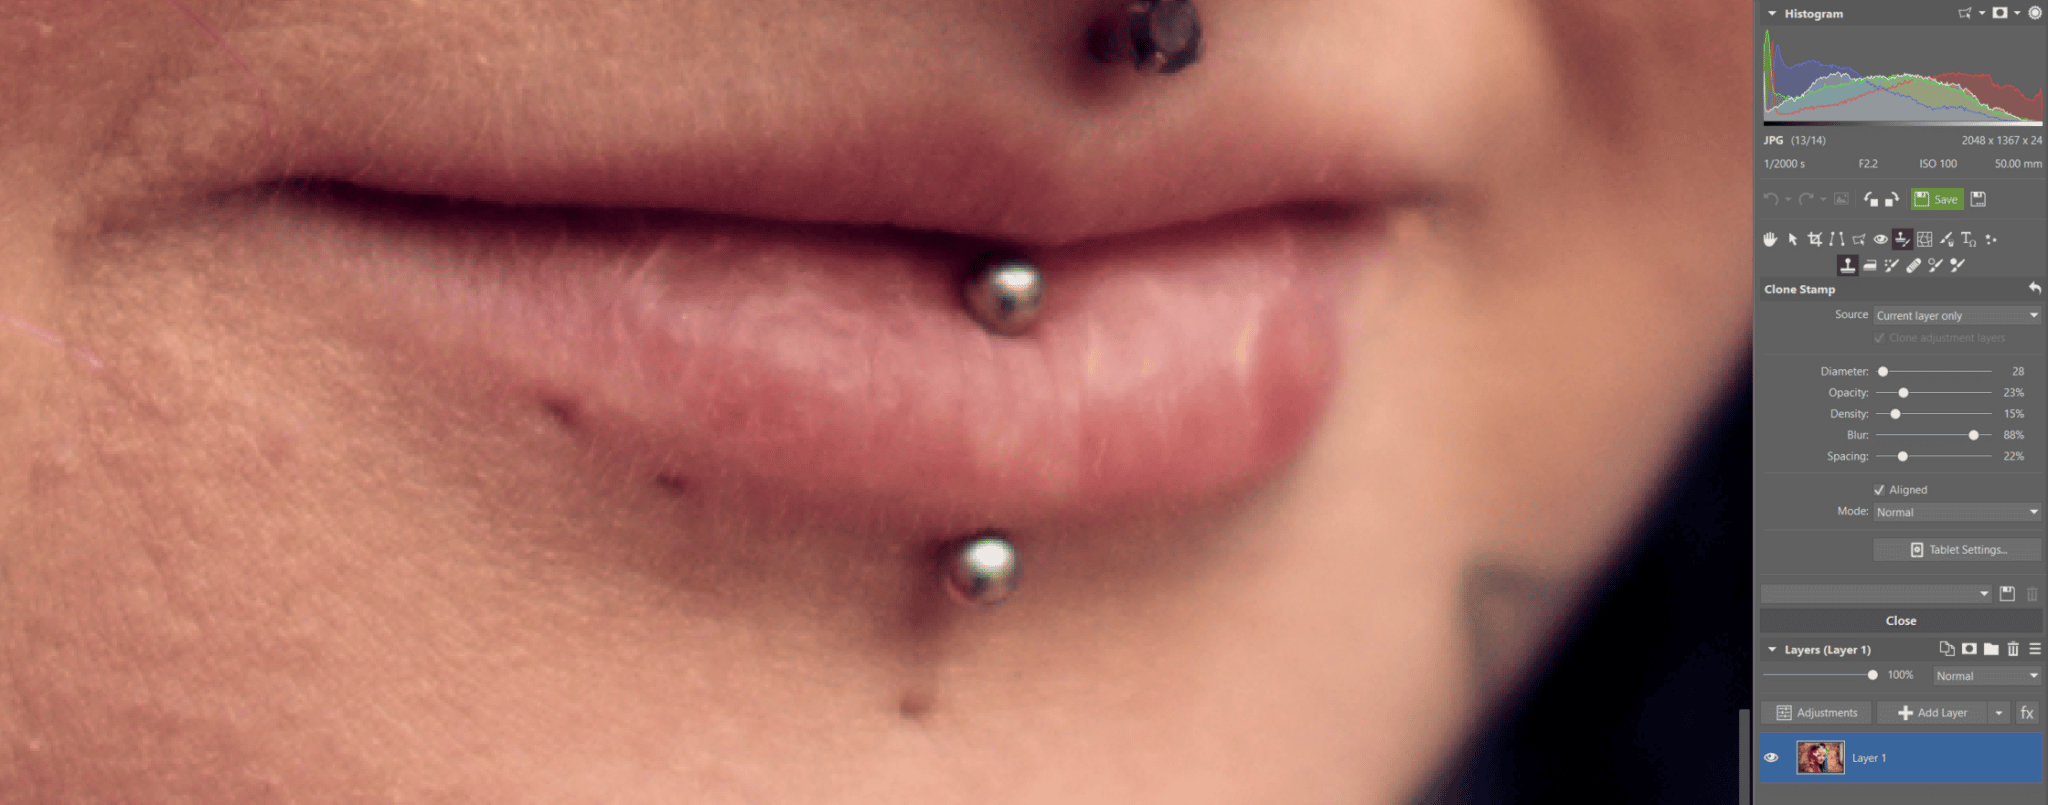
Then we fine-tune any imperfections on the model’s face using the Healing Brush (J), which we can also set to a slightly higher intensity than the Clone Stamp before it. If it happens to produce dark spots, that’s because we’ve come close to a patch of another color, and the brush is now counting it into its smart “blend” and copying it as well.
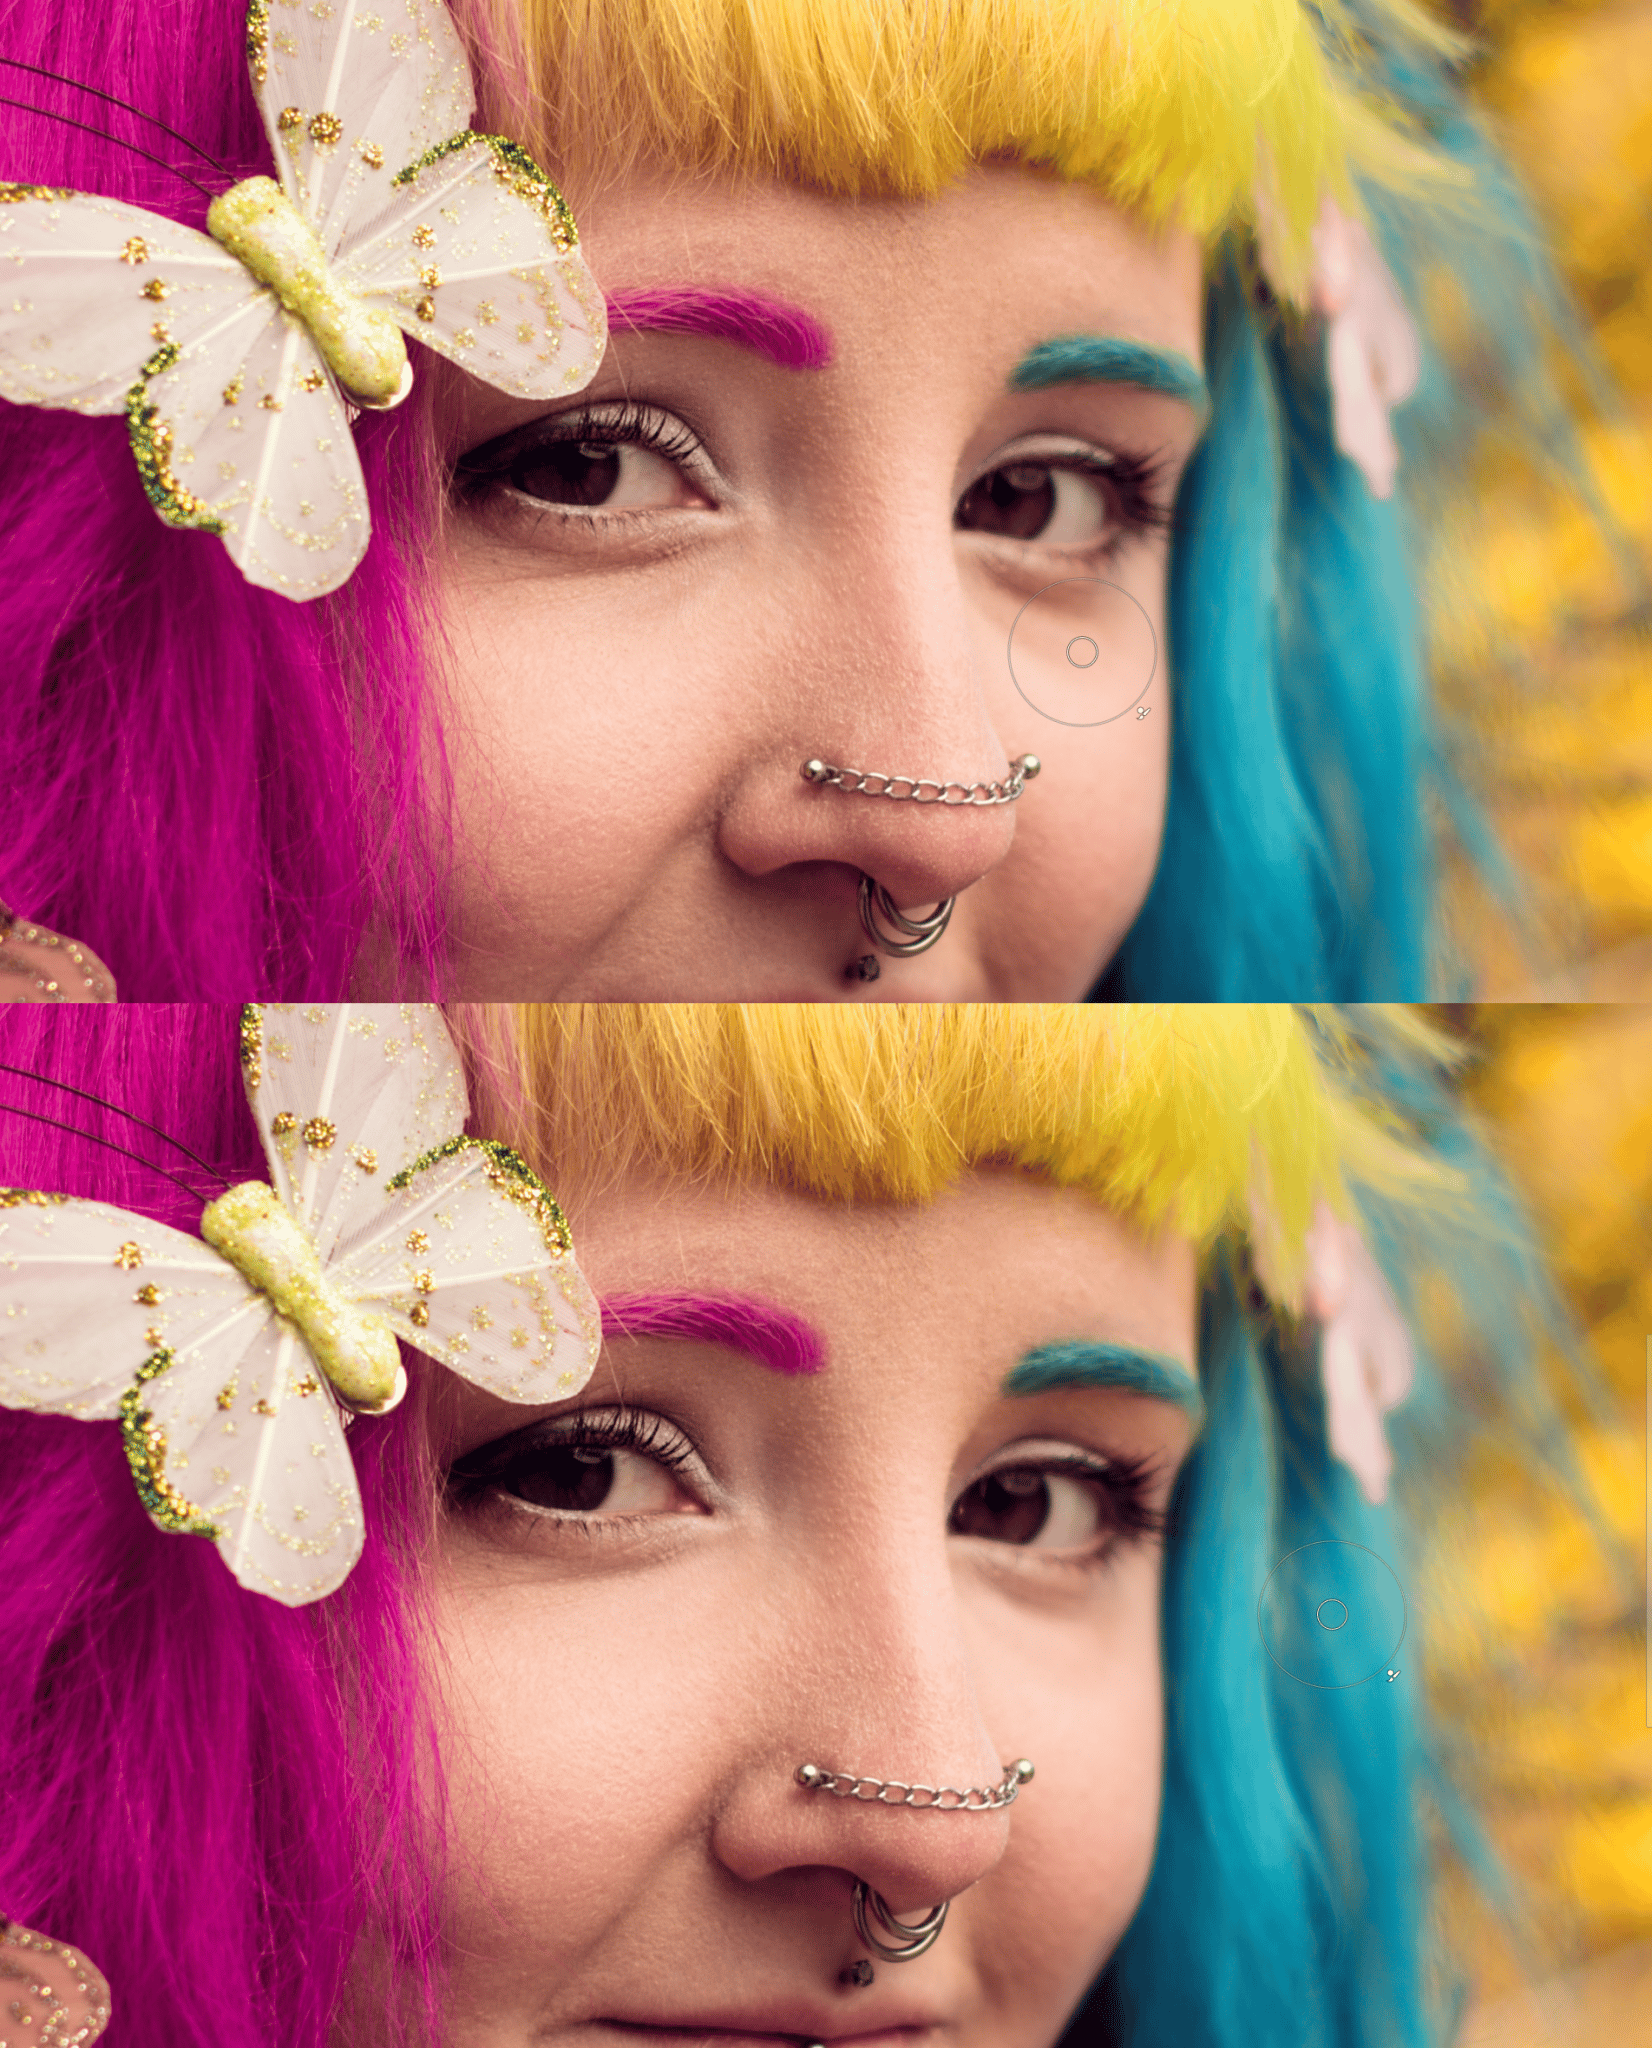
For circles under the eyes, you’ll tend more towards the Clone Stamp (S), and you’ll be removing only large exterior circles under the eyes. Wrinkles and mild darkness directly under the eyes have to stay in the photo, because removing them gives an extremely unnatural look. However, you can Dodge (I) a little if your set this tool’s Range to Shadows.
Slightly emphasize the makeup around the eyes, that is, darken mascara and shadows using the Burn tool (Shift +I), setting its Range to Shadows.
Emphasizing the Eyes
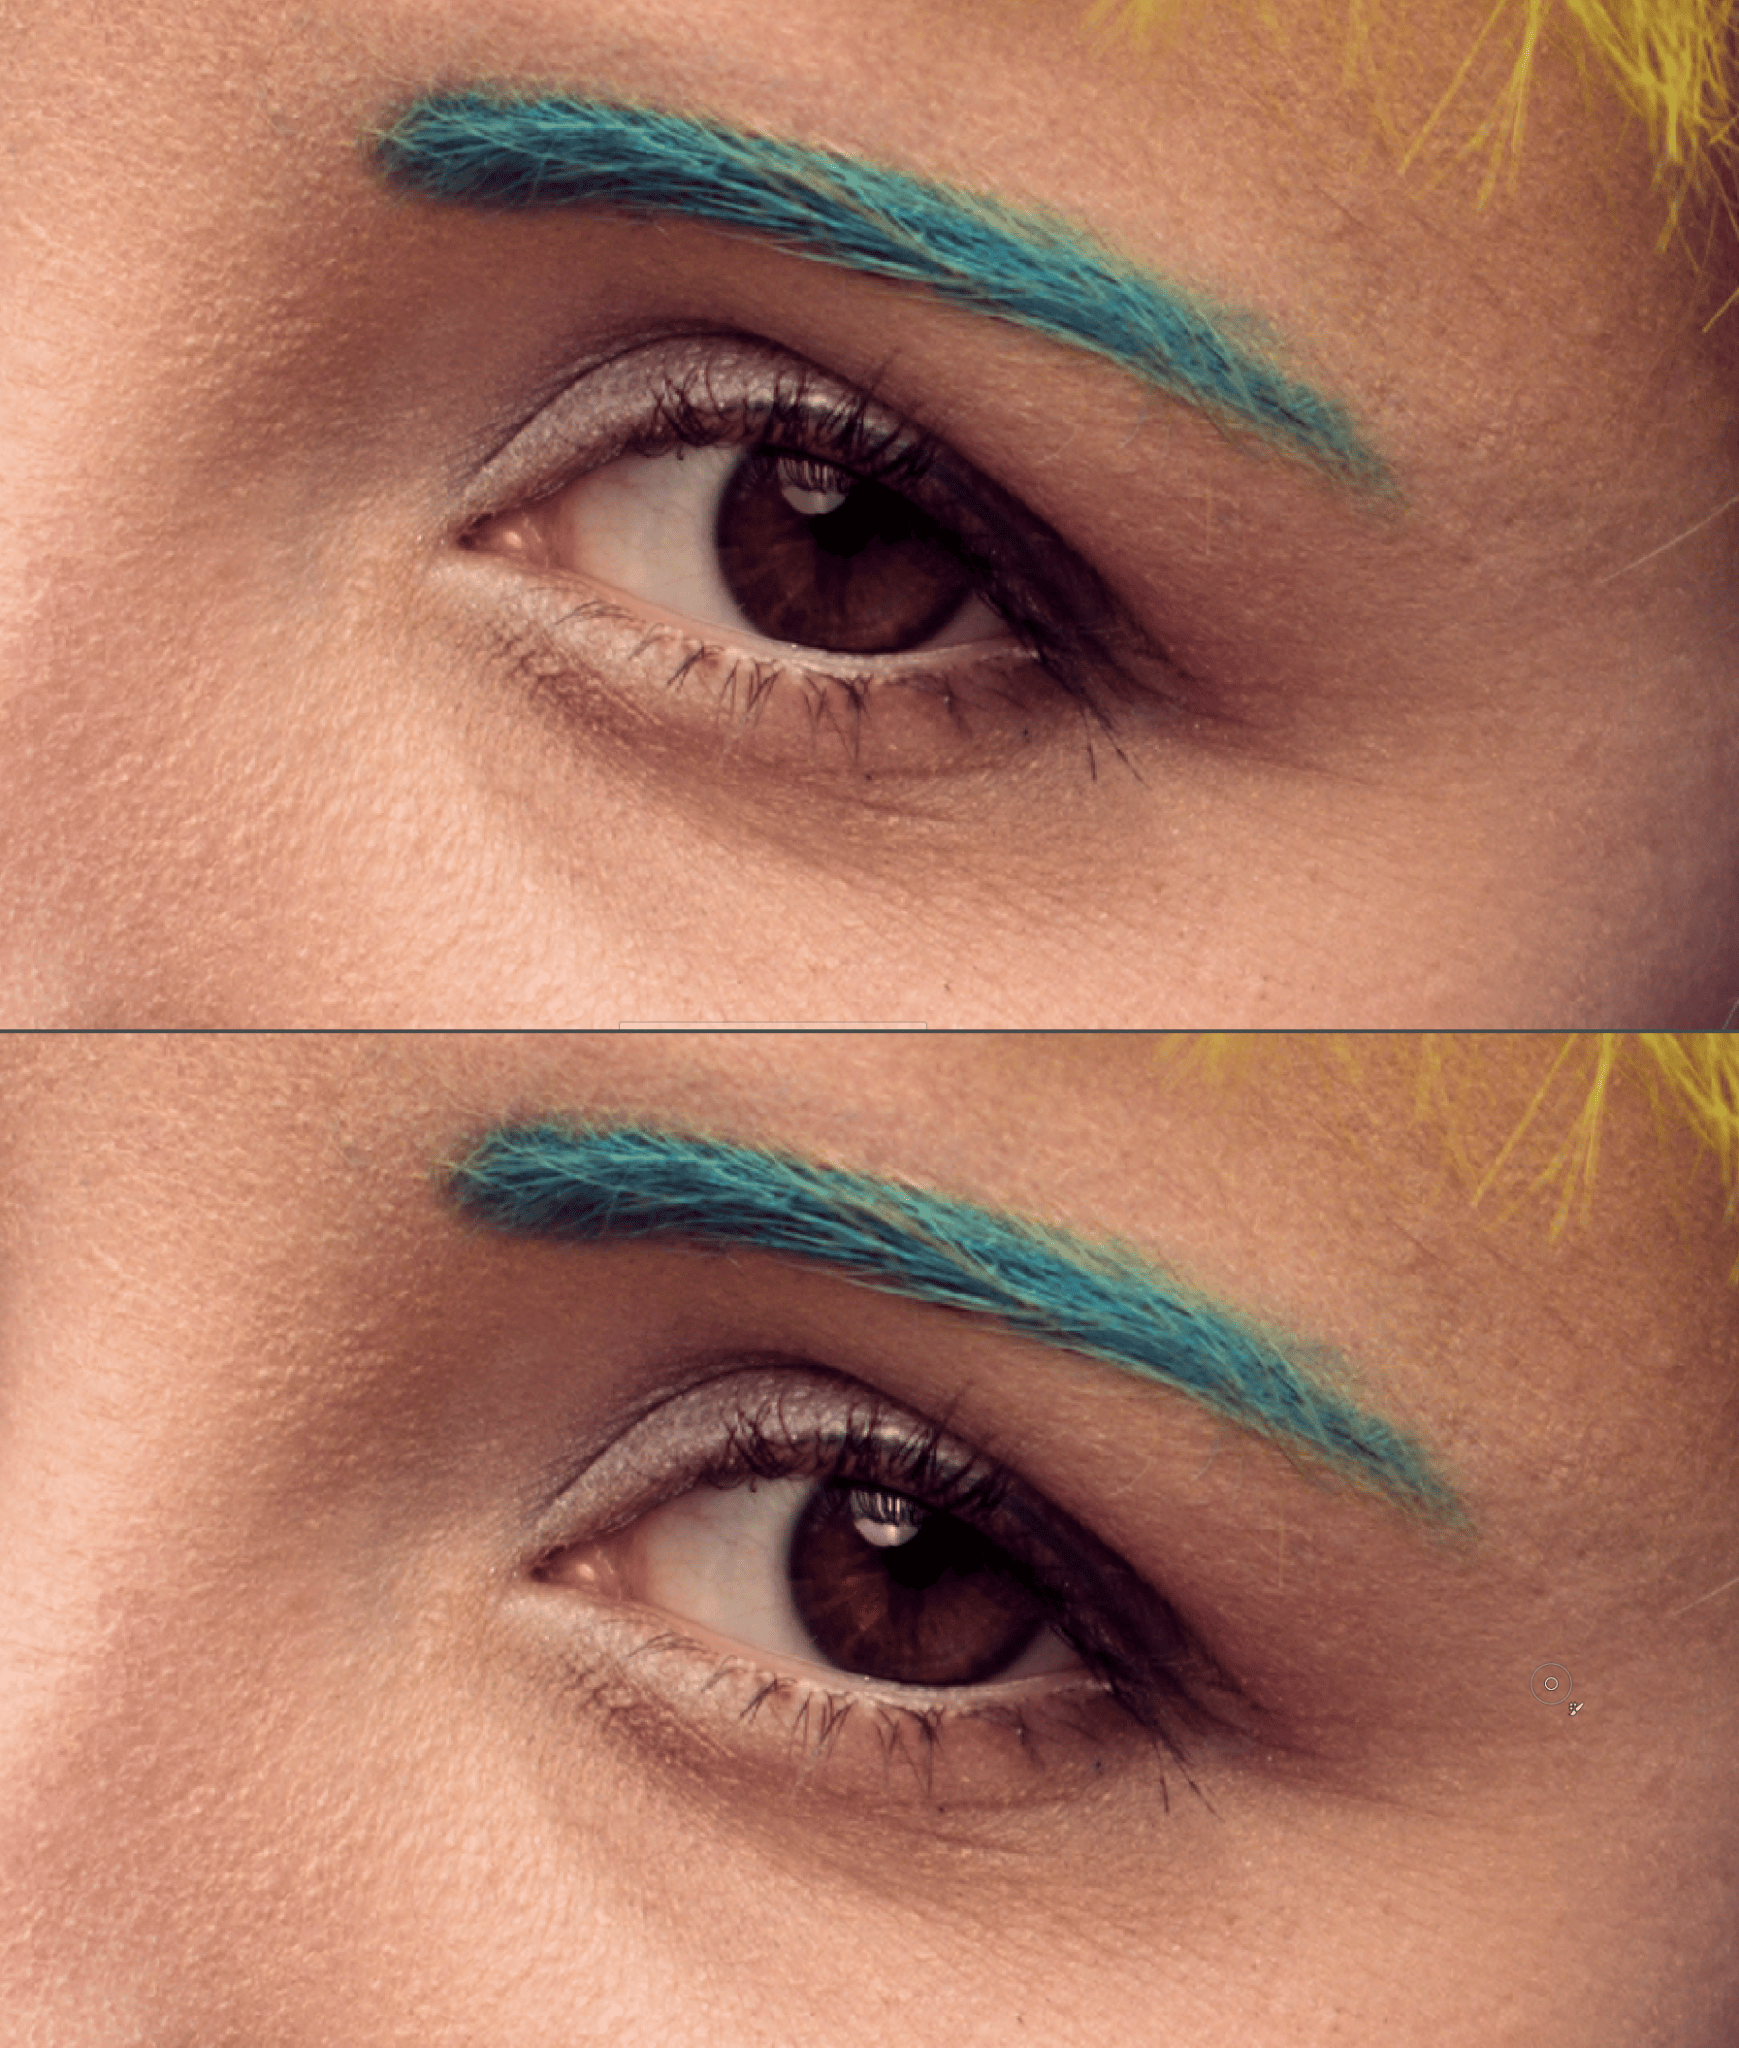
You can emphasize the subject’s eyes further by using Dodge again, this time setting the Range to Midtones. Brighten the irises and any light reflections within them. And if you see a distinctly bloodshot spot, you can carefully remove it with the clone stamp. If you do want to play with the subject’s eyes a lot, then I recommend brightening the inside of their irises (not the pupils) and slightly darkening the borders of their irises. This trick mainly works for fairly bright eyes. Brightening and emphasizing glimmers, however, works for all eyes.
Your Final Facial Edits
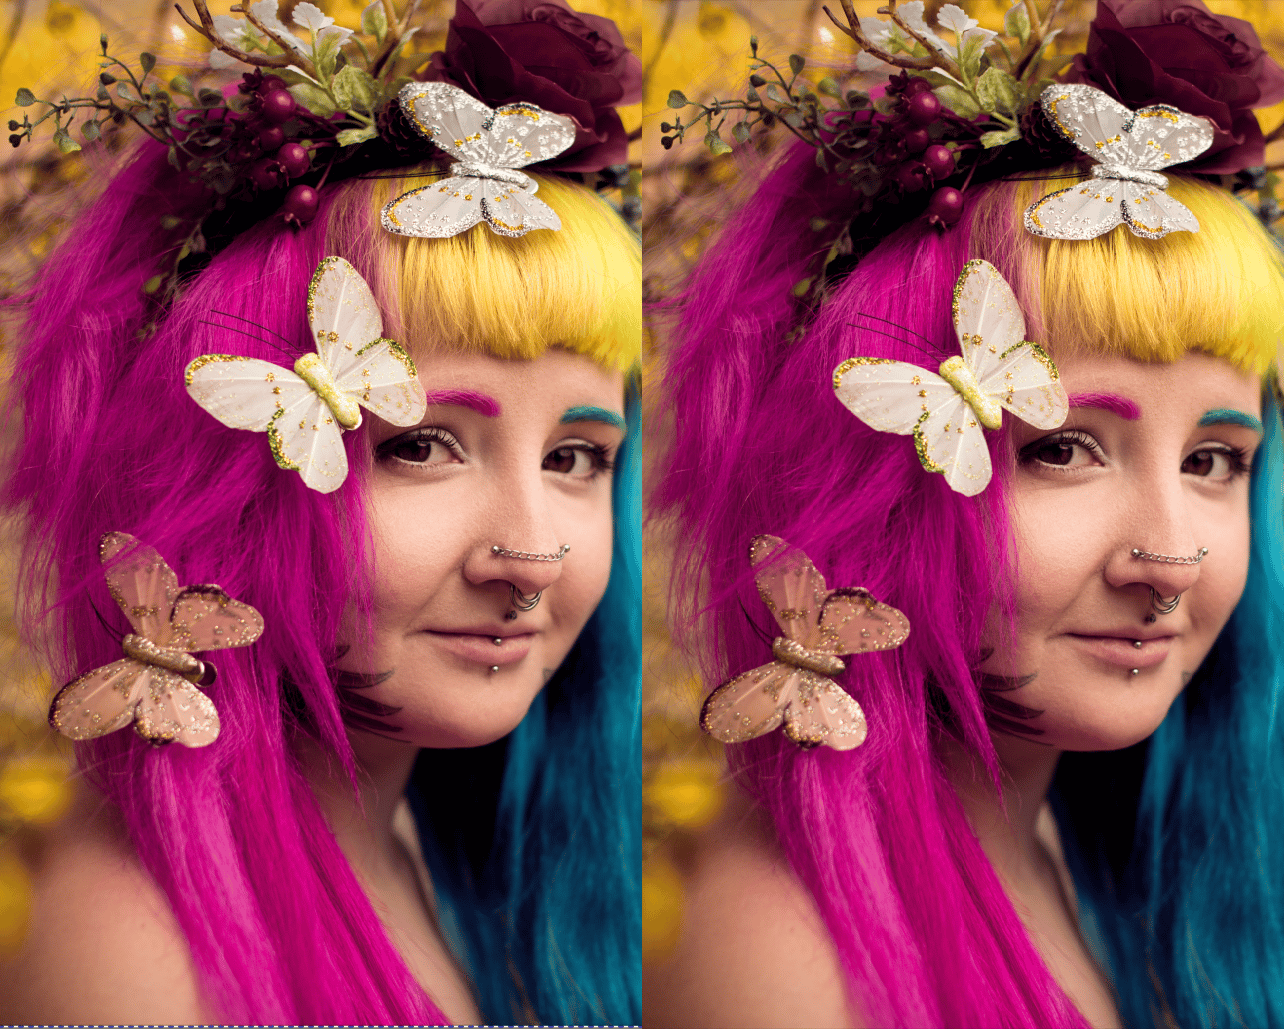
And our last little stroke on the face will require the tool named Liquify (found next to the retouching tools). You’ll notice that our model had a cold sore on her bottom lip, and when we cleaned it up using the Clone Stamp, that lip remained puffed-up. So we’ll need to shrink it a bit.
To shrink that lip, we’ll take the quite intuitive path of Liquify: Shrink, and before confirming our changes, we’ll also go and use Liquify: Smoothing in the lip’s surroundings, once again to keep our edit unnoticeable. You can also use Liquify to shrink someone’s nose, enlarge their eyes, slim their figure, and more. It’s all up to you how much of the model’s real look you want to leave, and how strongly you want to bring them towards perfection.

Removing Unwanted Objects From a Photo
Use the Clone Stamp (S) when you want to remove unwanted objects and people from a photo. You can remove almost anything; in our sample photo, we’ll be removing the clips for the butterflies in the model’s hair. The clone stamp is fantastic at copying surroundings and covering up anything you want to remove from a photo.
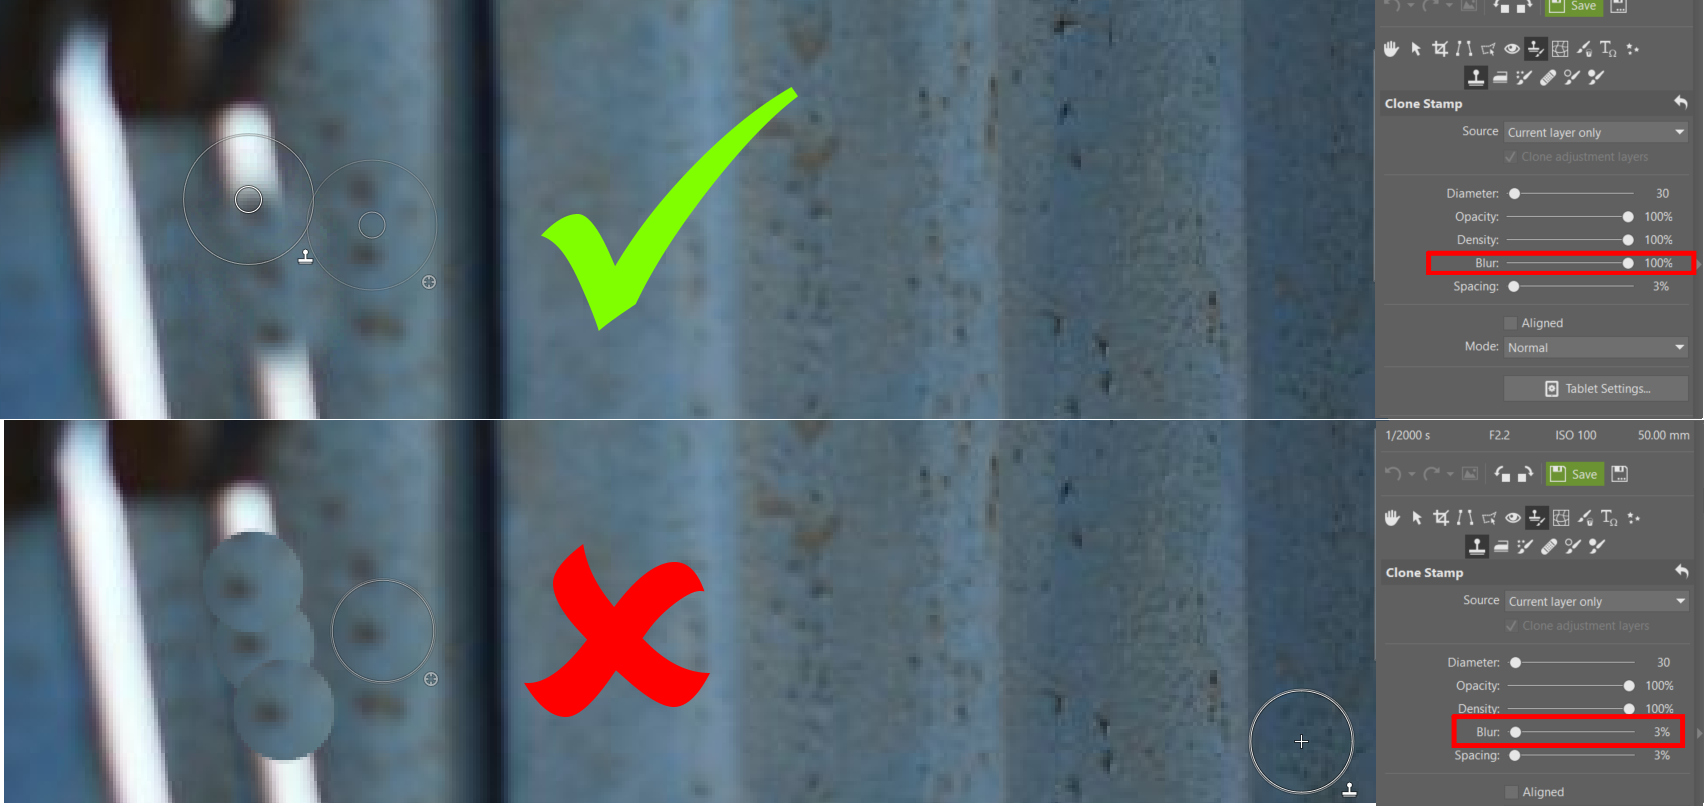
It’s important to be careful and precise during this work. Here are the three most common mistakes made during cloning:
Frequently repeating textures
When you’re copying an especially distinct element, you can end up “imprinting” it onto the photo many times. A branch, a pebble, or something similar. You have to make sure to keep the same object from appearing right next to itself in the picture.
Erasing shadows and bad work with shadows
You need to maintain lights and shadows meticulously. If you copy from illuminated areas into shadow, that will definitely be noticeable. And when there’s no way around it, we recommend darkening or brightening a given spot as needed. Preserving the right light is fundamental.
Overly Sharp Transitions
You should set relatively strong Blur—blurring for the boundaries of the copied material—in the Clone Stamp (S) settings. Any sharp boundaries will form a trail along where the stamp was used, which is not something that should be visible.
And You’re Done!
Your photo is done! Naturally you can also use the Editor for an endless variety of other edits; we’ve only gone through a few basic ones. You could also for example add vignetting to a photo, creating an automatic mask. You could play with barrel distortion, colors, add noise, sharpen, blur, and so on. Not every photo needs major edits, and precisely the edits that are undemanding and important for every photo should be manageable using this guide.
There are no comments yet.