The Best Way to Fix Skin Color in Photos: Layers!
The article is over 5 years old. The information in it may be outdated.
![]()
We are working on its update. In the meantime, you can read some more recent articles.
I want to continue reading the article.
SIMILAR NEWER ARTICLES...…
Natural-looking skin is the foundation of a good color portrait. The problem here is that differing light sources in one picture and light reflections off of grass or clothing can cause unnatural color spots. Fortunately you can repair skin color on your PC.
Unfortunately we can’t just say that the best skin color is XY. That would be too simple. Everyone’s basic skin color is different. And even that changes with the light.
But some shades definitely do look unhealthy or unnatural in photos. And you should get rid of precisely these shades.
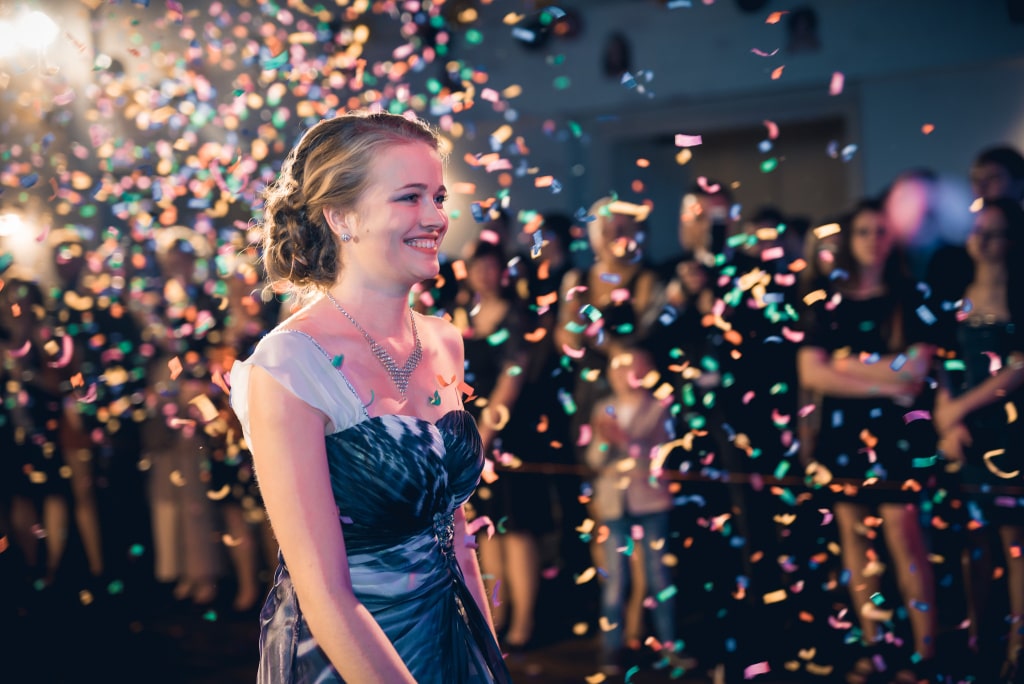
This photo from a dance is lighted by warm halogens from the left and purple floodlights from the right, and to top it all off, it’s also lighted by an external flash. Because of this, the skin isn’t all the same color.
This kind of effect occurs e.g. when light is reflected off of brightly colored clothing, a wall, or green grass. The basics of resolving these situations are always the same.
Groups Will Help You Organize Your Edits
Layers and the paintbrush will help you out with fixing pictures that have miscolored skin. You can find these tools in the Editor inside Zoner Studio. Use them to adjust the skin color, and then fine-tune the picture using the Editor’s other features.
It’s good to divide your editing layers into groups for your work. That makes it easier to find your way around in your edits. Meanwhile, creating a group doesn’t have to be your very first step. You can group layers at any time. But there’s no harm in getting your layers well-organized and naming your layers and layer groups right away.
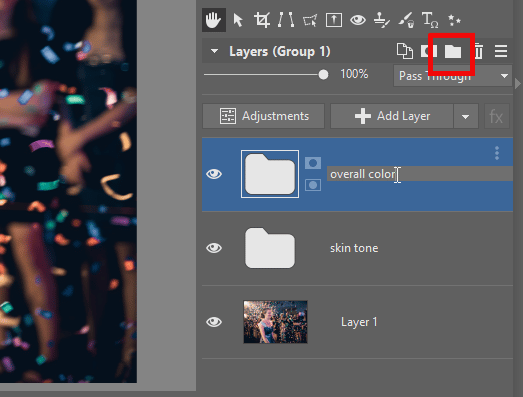
Just click the folder icon on the Layers line. This creates a new layer group; double-click its name to rename it.
Group your layers logically so that you can work with them well. In this case I’m creating one group for local edits and a second one for overall tuning of the colors.
Not only does this make them better organized—it also lets you hide the whole group at once at any time. Then you can instantly see a before-and-after.
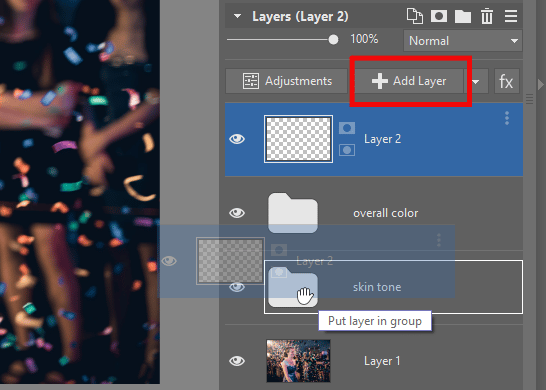
Now add an empty layer by clicking the +Add Layer button and move it into a group.
The Paintbrush Is the Foundation
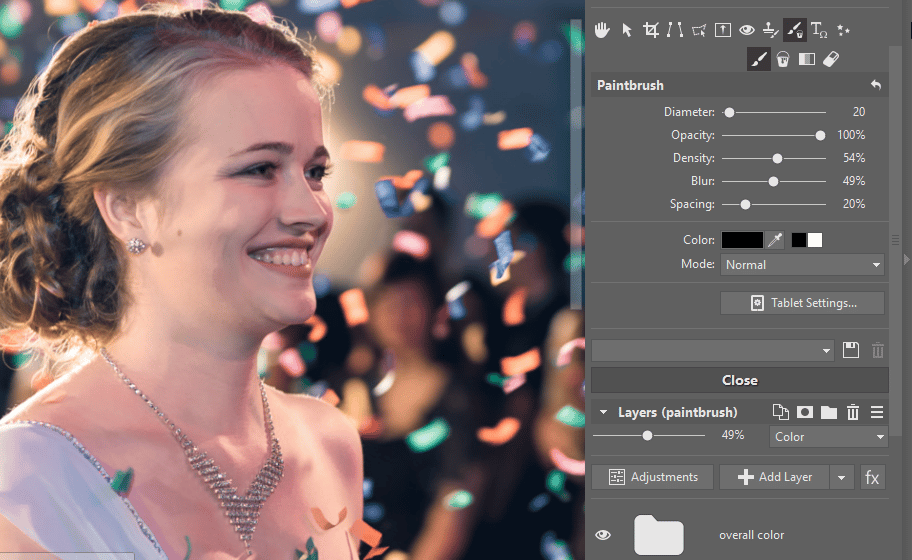
On your blank layer, activate the Drawing Tools by clicking their button in the right panel, and then click Brush (B). Hold down the Ctrl key to activate the Eyedropper, and then click with it in the picture to select the skin color that looks the most natural to you—the color that you want to apply to the rest of the skin.
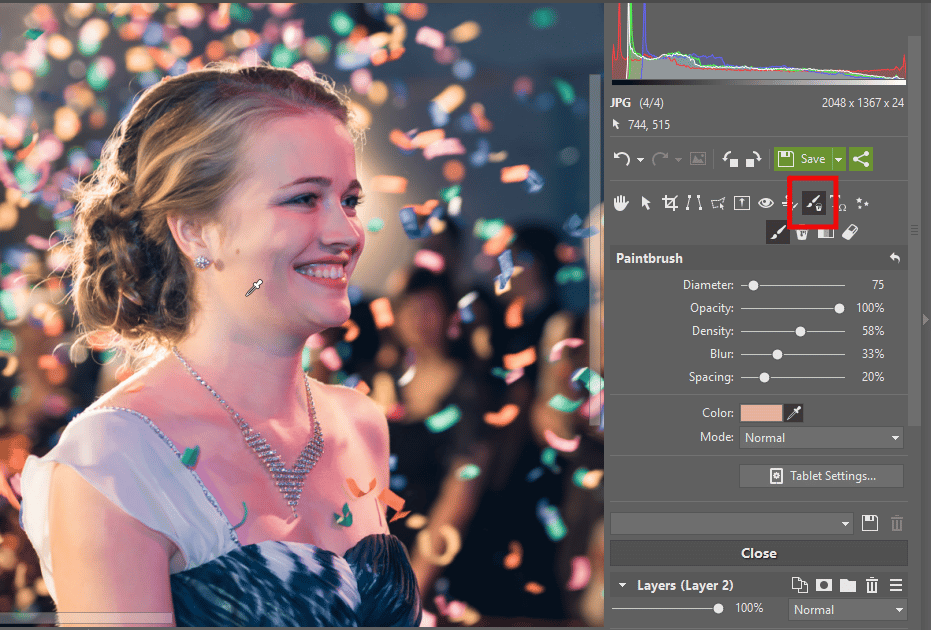
Then draw with this color onto all of the person’s skin.
Use a high Blur value for the brush, and err towards drawing outside the lines rather than carefully staying within them. You’ll use a mask later to handle the places where you “drew outside the lines.”
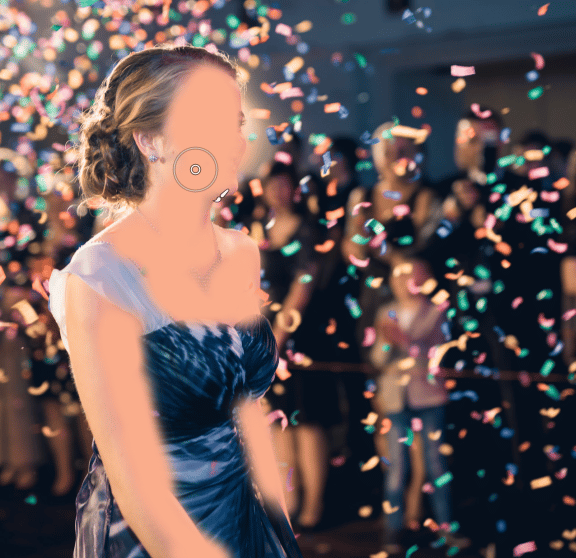
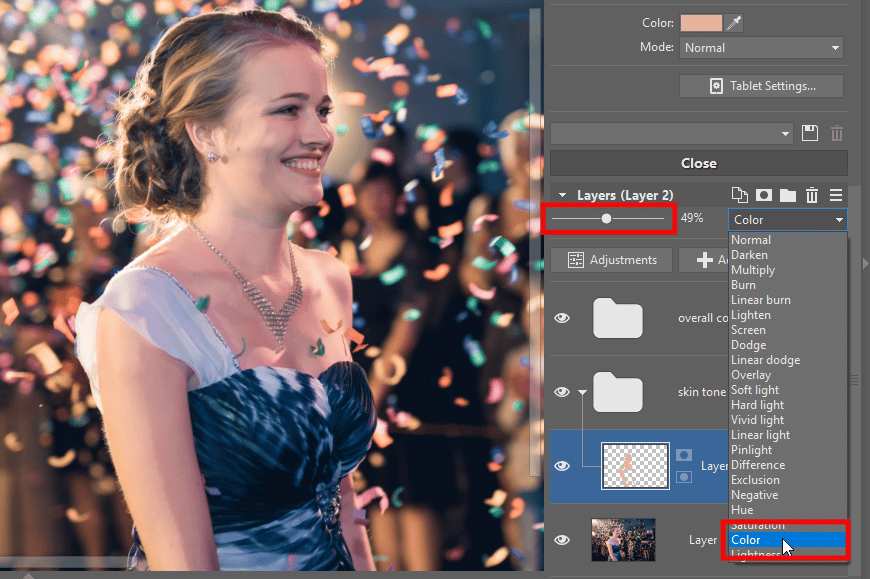
Now for the biggest magic of all. Set the layer’s Blending Mode to Color and decrease the Opacity to 50% at most. The picture will start looking better.
Mask Away Eyes, Teeth, and Mistakes
Add a mask to the color layer by clicking Reveal All.
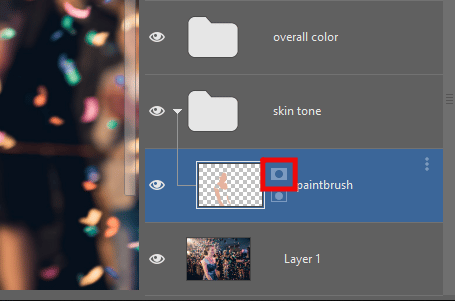
Click in the mask and draw with a black Paintbrush to mask away the areas that shouldn’t be visible. Like the person’s eyes and teeth. After all, if they were covered with your skin-color strokes, that would turn them yellowish.
Also mask away any places where you drew outside of the person’s skin.
Fine-tune the New Skin Color
If your color layer feels a bit off, improve it by adding an adjustment layer.
Click the +Add Layer button and use White Balance. Then drag this adjustment layer into the left part of the color layer. Your white balance adjustments will then affect that layer only, rather than all of them.
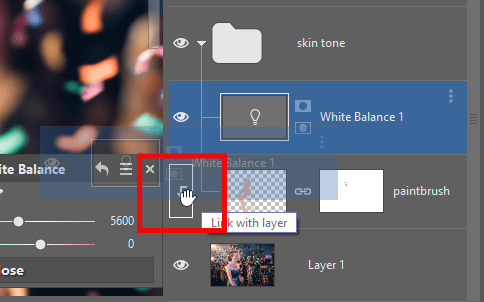
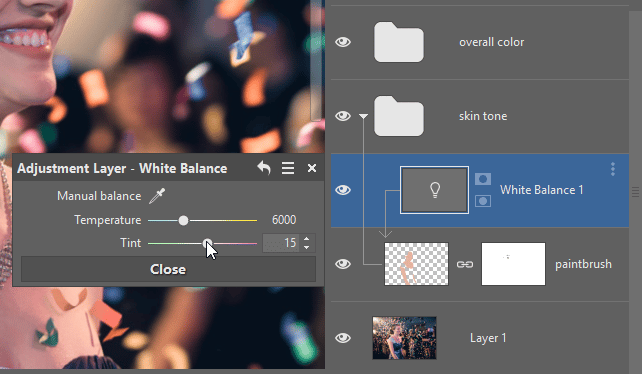
In our example, the new skin color still feels a bit unhealthy. It’s the greenness of it that’s doing this. In this kind of situation, just shift the white balance gently towards purple. And the skin color you applied will immediately look more natural.
Adjusting the Photo’s Overall Colors
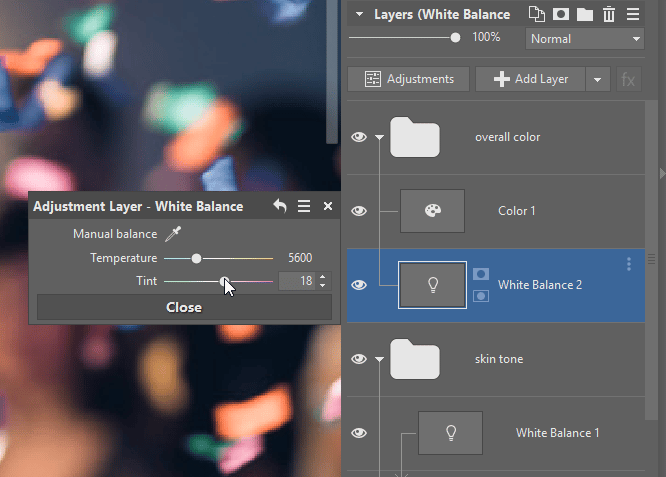
The edits above only affected your skin-color adjustments. Now start working in a second layer group, which you’ve created for edits to the photo overall. Once again add an adjustment layer to this group.
Start with white balance. In the example photo, for example, shifting it towards a cooler color will help.
But this leaves it feeling a little short on color overall. So I’ll also add a Color layer and raise the Vibrance. And now the photo looks a lot better!

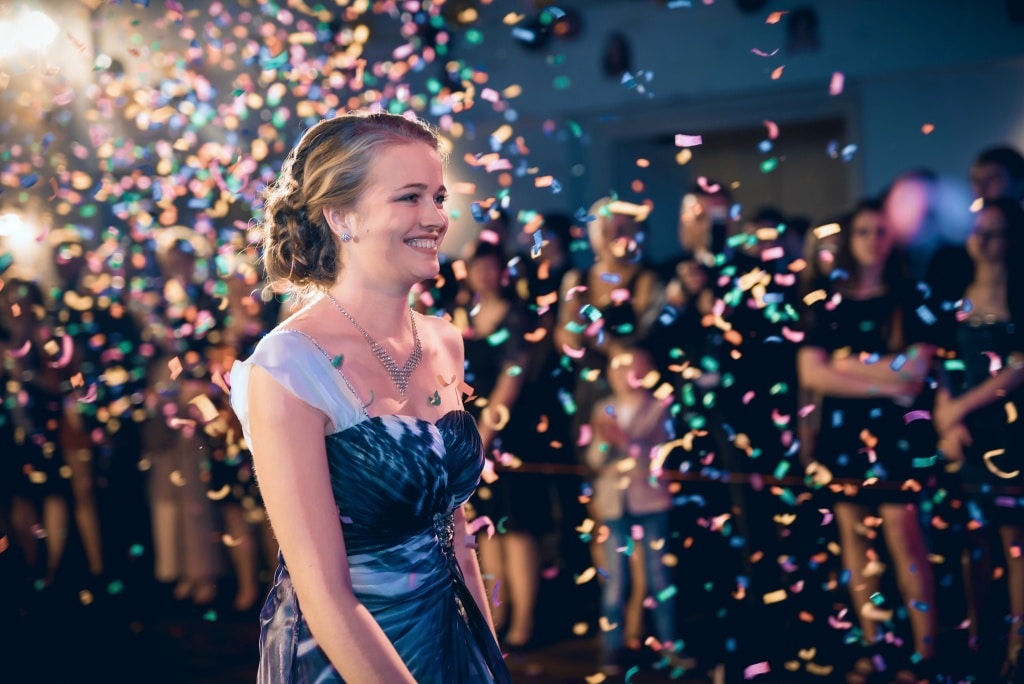
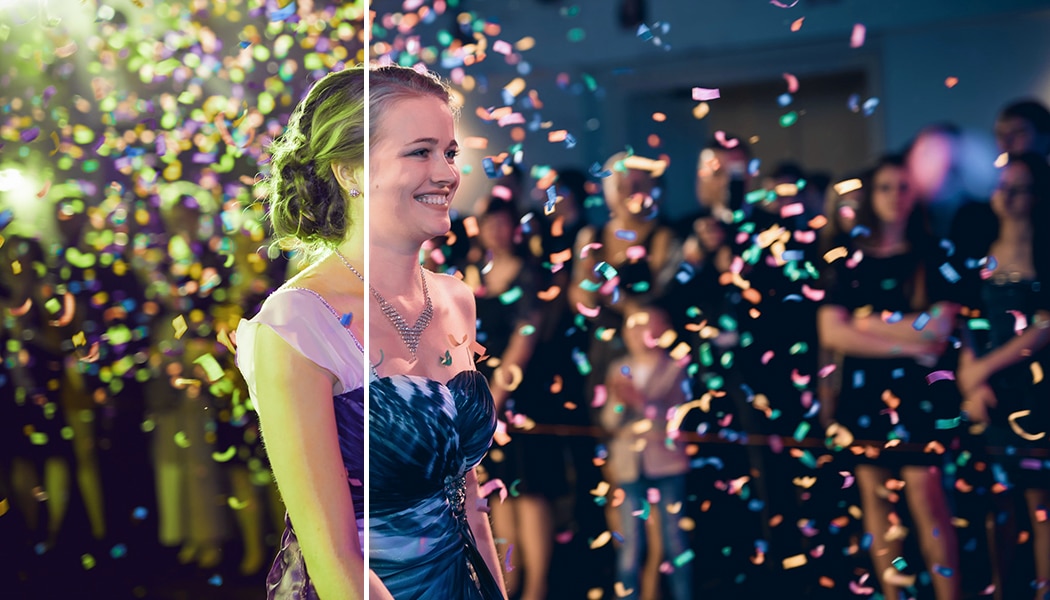
The resulting photo before and after the skin color is unified.
Different Colors, Same Approach
Skin colors and their defects will be different every time. That’s why I haven’t recommended any specific settings in this article. But the general approach with the paintbrush, layers, and white-balance and saturation adjustments will come in handy every time.
It’s time to get some skin in the game of better photos. Download Zoner Studio, try it free for 7 days, open the photo you want to improve, and get to work. You’ll be done in just minutes.

There are no comments yet.