Use Batch Rename To Organize Your Pictures Folder

Finding a specific photo in all your folders can be tricky. Especially when they have generic names like DSC_9273. You can solve this problem using one simple function. Batch Rename in ZPS X helps get your Pictures folder organized.
Cameras assign image names that are made up of a fixed set of letters and number sequences. It works, but it doesn’t make managing your photos any easier. It’s better to give photos names that immediately tell you which album it belongs to.
Renaming images one by one can be time-consuming. Luckily there’s a better solution—Batch Rename in Zoner Photo Studio X.
Renaming photos one by one vs. all at once
You can rename your photos one by one in Zoner Photo Studio by pressing the F2 key or double-clicking the image name. But if you have a lot of files you want to rename, this can be a very laborious task.
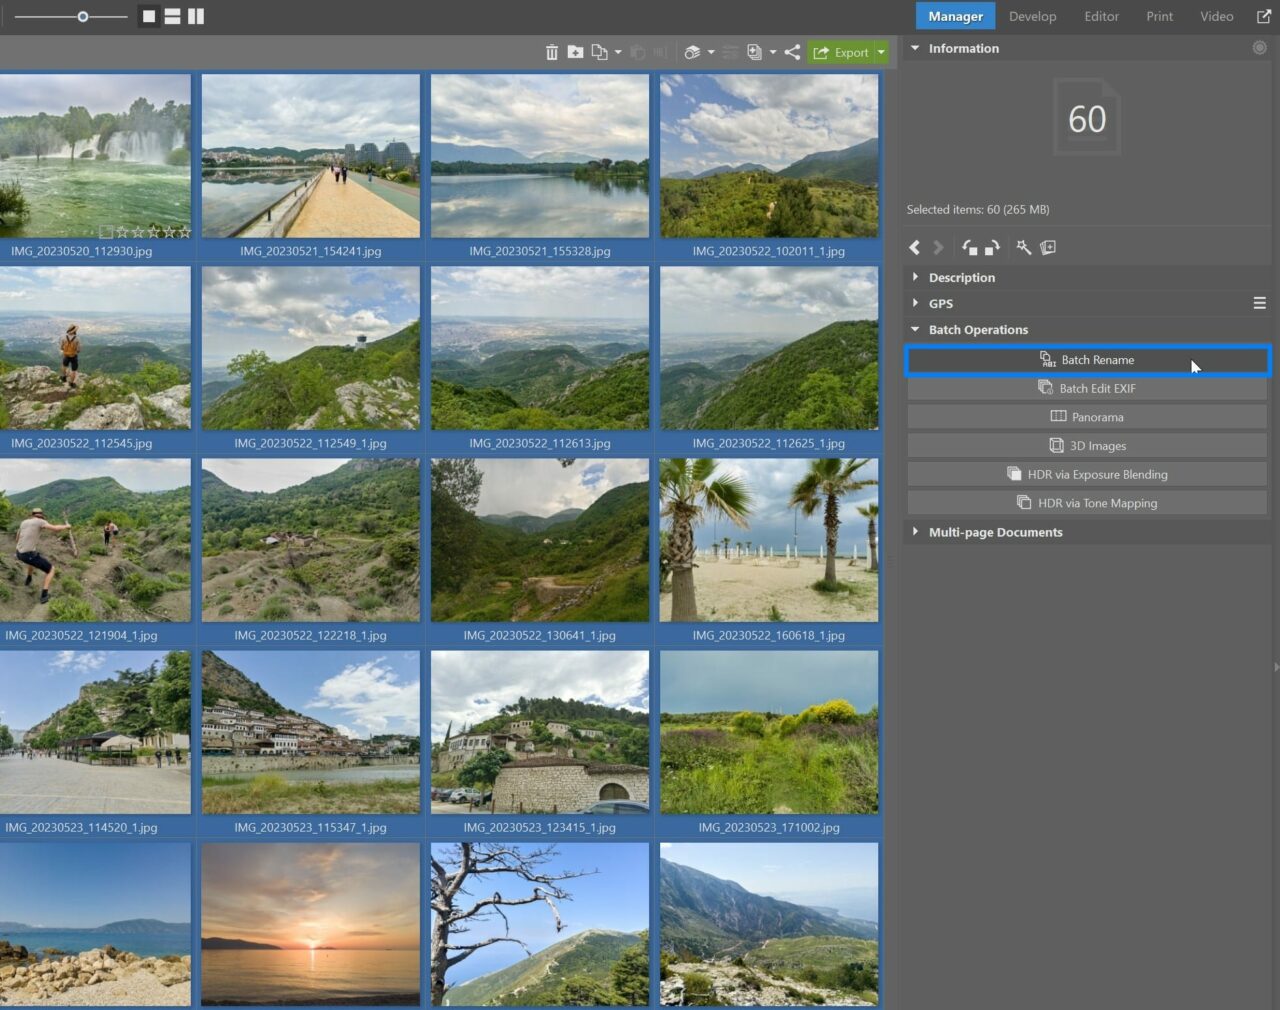
That’s why it’s better to use Batch Rename. You can find Batch Rename in the Manager module. Once you’ve selected multiple files, the Batch Rename button shows at the bottom of the right panel under Batch Operations.

Open Batch Rename using the keyboard shortcut Ctrl + Shift + Q.
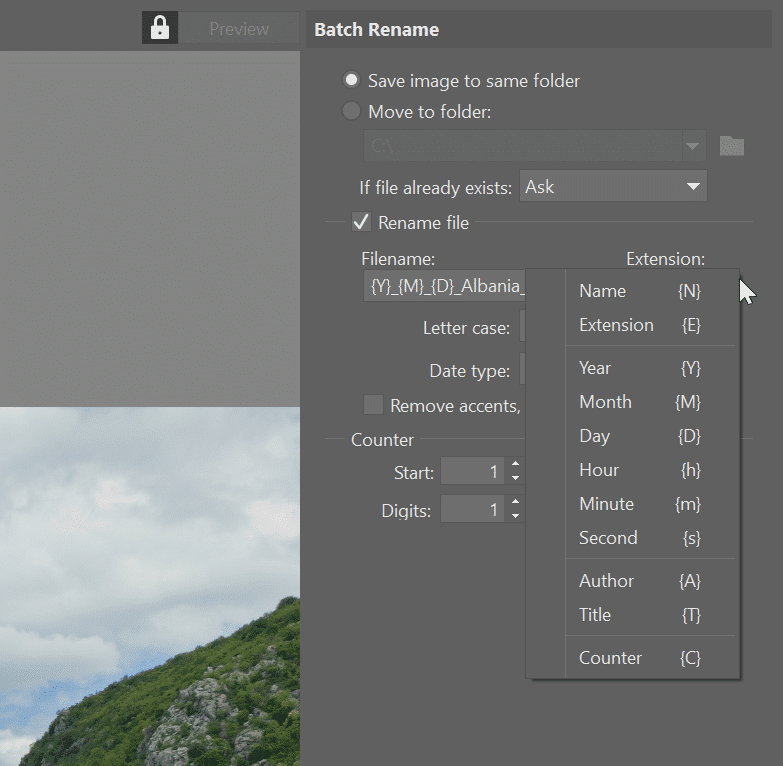
First, choose whether you want to save the renamed files to a new folder or leave them in the current one. If you just want to rename the original files, choose Save image to same folder. For the If file already exists option, select Overwrite.
Give your photos names that make sense
Check the box next to Rename file and you can start renaming the files. The method you choose is up to you, but be sure to think it through and be consistent with whatever system you use. As time goes on, you’ll be glad you did.
Zoner Photo Studio X can also make use of your photos‘ EXIF data when renaming files. Just use the right format string in the name.
You don’t need to remember each character of the format string. Open the drop-down menu next to the field for entering the new name and choose the characters you want.
Choose a Name so that each photo can be arranged chronologically and you can tell at first glance when and where it was taken. We recommend putting the year, month, and perhaps even the date the photo was taken. Then, add a description that describes the occasion. Finally, don’t forget the counter!

Your resulting filename will look something like this: {Y}_{M}_{D}_description_{C}
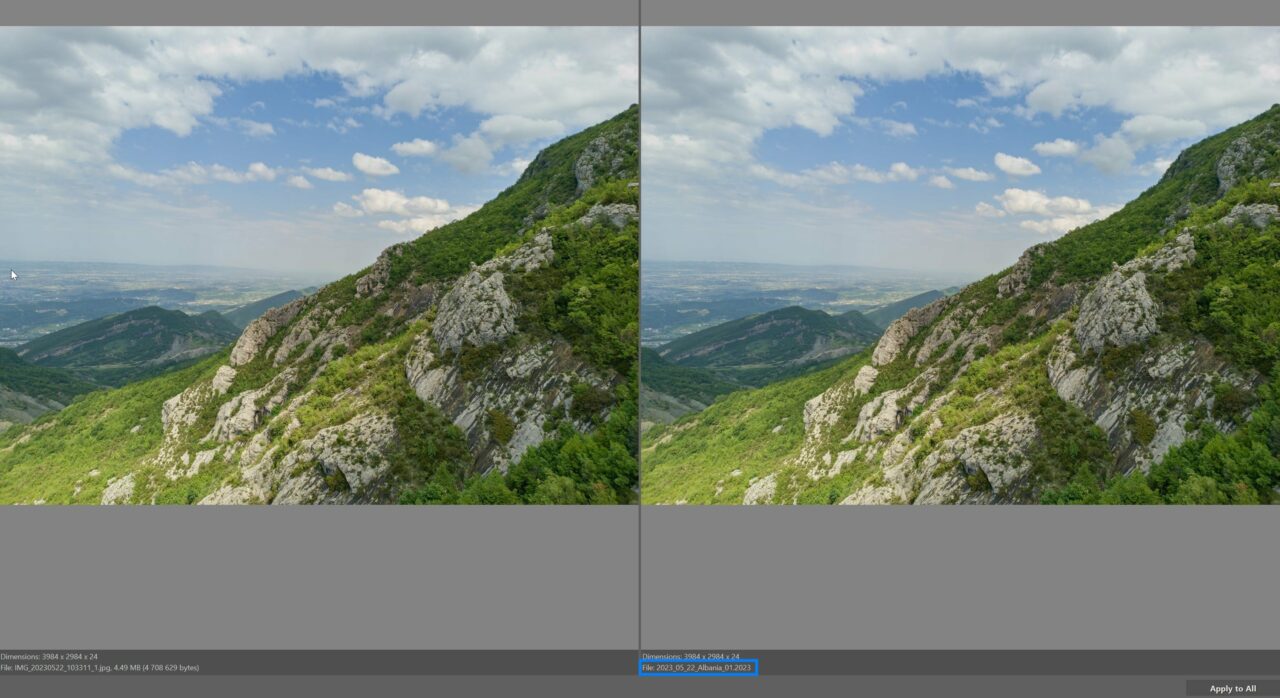
When entering the name, you can check how the filename looks. You can see this right below the photo preview.
The most common mistake when batch renaming is leaving out the counter or filename extension. In this case, renaming doesn’t make sense because without a counter, all images have the same name. The extension sets the image format for the photo. If you leave it out, certain software may not know how to read the file.
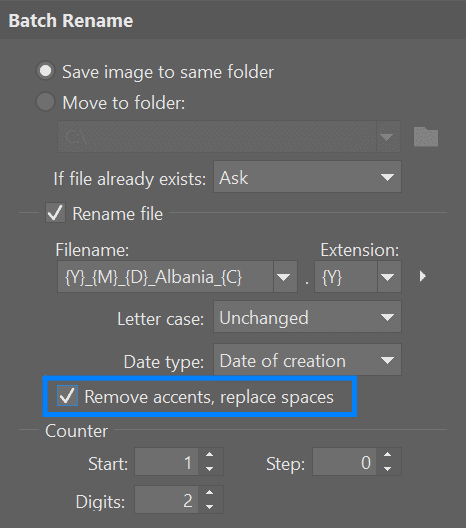
Also check the Remove accents, replace spaces checkbox. Some software can have trouble with these in filenames.
Set the number of digits for the counter based on the number of photos in your series. A four-digit counter is enough for most cases. You probably won’t have more than 9999 photos in a single folder.
When to rename images
Another common question is when to rename photos. You have two options:
- Rename photos during import. The right panel has the same options as Batch Rename so you can make sure your files have the right name from the very beginning.
- Use Batch Rename when organizing and sorting your photos.
Both options have their pros and cons:
- Renaming during import means that both RAW and JPG images have the same name. Everything is organized right from the start and you don’t have to go back to it.
- Renaming photos after editing and processing them gives you the advantage of being able to change the order of the photos and move the best ones to the beginning. This comes in handy when sharing albums on social media because most people won’t view the entire album.
Think about what works best for you and start getting your photos organized. And if you’re really serious about organizing your photos, read our series on getting organized:
Get Rid of Duplicate Files with ZPS X
Assign GPS Coordinates to Your Photos
Organize Your Photos Using Labels and Ratings
Get started today. Download Zoner Photo Studio X free for 7 days and say goodbye to long searches for your photos.


Grzegorz
Although I still use Zoner version 18 I didn’t find in your article as well as in the manual of Zoner 18 how the input stream is sorted. Let say – I have in the folder files as follows:
Mode LastWriteTime Length Name
—- ————- —— —-
-a—- 05.01.2024 18:15 0 a.jpg
-a—- 04.01.2024 18:16 0 aa.jpg
-a—- 03.01.2024 18:16 0 aaa.jpg
-a—- 02.01.2024 18:16 0 b.jpg
-a—- 01.01.2024 18:16 0 c.jpg
I want to use only {C}{E} rule. In Zoner files are “Sort By” -> Name. The result should be:
a.jpg -> 1.jpg
aa.jpg -> 2.jpg
aaa.jpg -> 3.jpg
b.jpg -> 4.jpg
c.jpg -> 5.jpg
But what happens if Zoner uses “Sort By” -> Date Modified? In that case the order is as follows:
-a—- 01.01.2024 18:16 0 c.jpg
-a—- 02.01.2024 18:16 0 b.jpg
-a—- 03.01.2024 18:16 0 aaa.jpg
-a—- 04.01.2024 18:16 0 aa.jpg
-a—- 05.01.2024 18:15 0 a.jpg
Will be the result:
a.jpg -> 5.jpg
aa.jpg -> 4.jpg
aaa.jpg -> 3.jpg
b.jpg -> 2.jpg
c.jpg -> 1.jpg
?
Eva Krusoftova
Hello Grzegorz,
Thank you for your inquiry, and we are pleased to know that you are a loyal user of Zoner Photo Studio. Unfortunately, this is not the place for full technical support, so please direct your query to our support team, who will be happy to help you with setting up the program and explain everything.
We wish you much success in editing your photos.
Eva | Learn Photography by Zoner Photo Studio